Transcripts
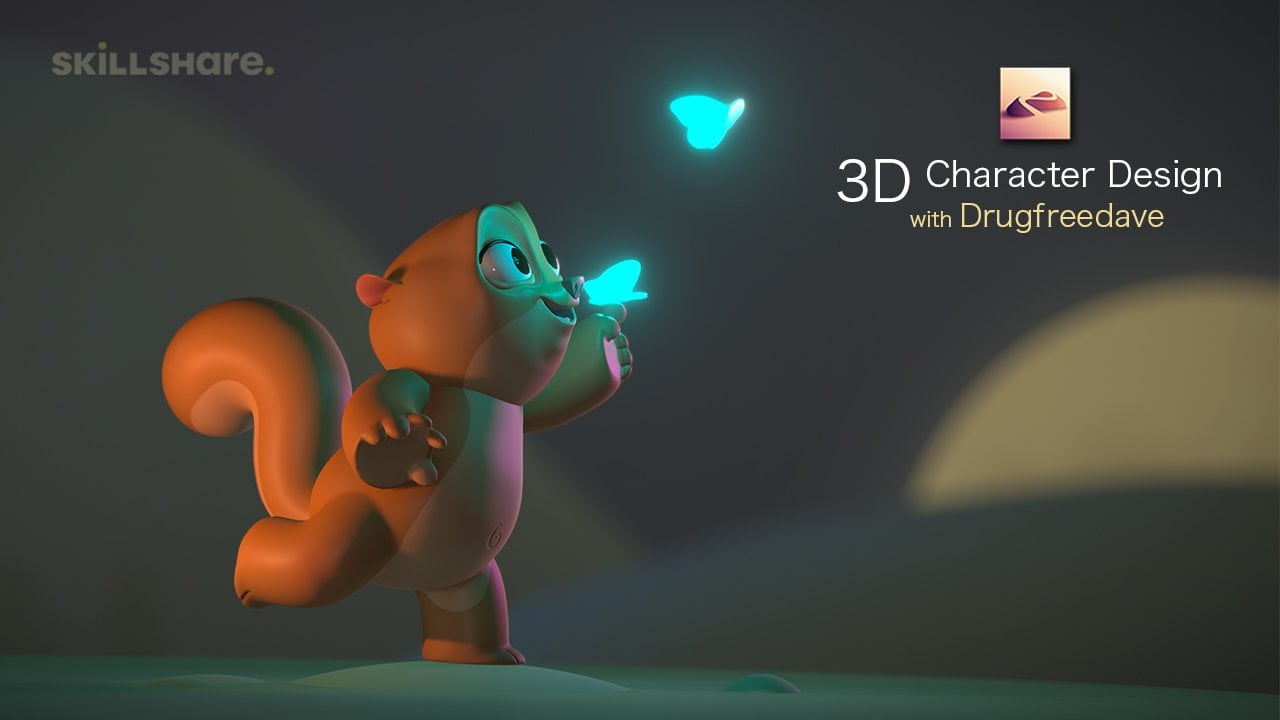
1. 3D Character Design for Beginners! : What's up, guys, Welcome back to another Skillshare class
with me, drug-free, Dave. So today is gonna be
a beginners class. And this class is
going to be based around character design. So as you know,
there's been a lot of changes to Nomad sculpt. So this class will sort of
go over some of the changes. Not everything, because there's a lot and it gets really,
really confusing. And the best way
to go about it is just to take baby steps. So this character design
is gonna be pretty simple, but we're going to learn a lot. And I'll walk you through
everything slowly, concisely with no stress because that's just
my teaching style. That's what I, that's
what I love to do. So anyone who's just getting
into the application should be able to follow
along with No problem. Okay, So with that being said, let's jump to the next
video, the class project.
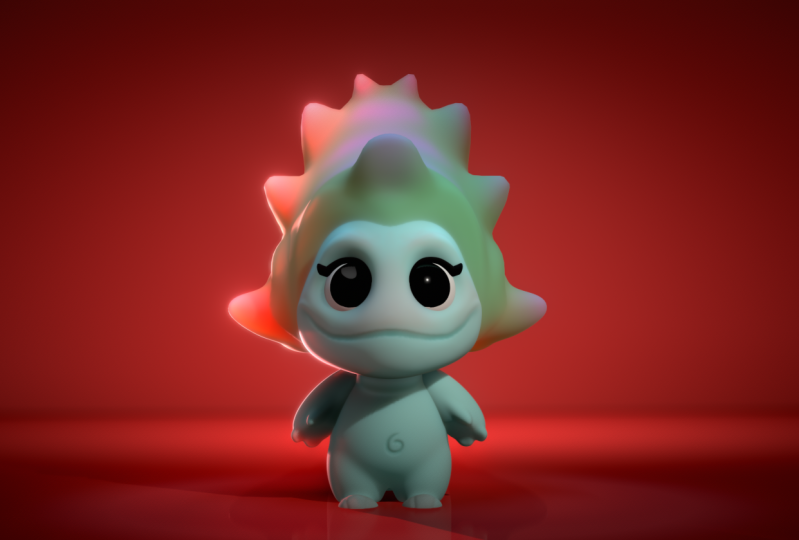
2. Class Project: What's up, guys, welcome
to the class project. So we're just gonna make this really cute little character. Don't feel stressed. If you're just getting
into the application, I'm gonna walk you
through everything. What's really important
is that you learn and that you play and remember
that you can change things, you can alter things. You don't have to
follow exactly to the t. It's fine if you want
to do that at first, but don't be afraid to make
this character your own. That's when you really,
when you really learn, and that's when the
real fun begins, when you take what I teach you and then you bring
it to the next level. Can you really make it yours? One thing I want to note is that I'll be using
an environment. And I don't want to
get too technical or too confusing about this when you're modeling by default, there's an environment. It's just like ambient light. And I use a specific environment that I made in Procreate. So I'm going to include
that in this class. I'm gonna show you
a quick tutorial on how to bring that
environment in. So we're not going
to use it at first. So don't worry about
it. Because we're going to use something
else called a Metcalf. I know it's all very confusing. So we're gonna start with
a Metcalf, but later on, when we do start coloring and lighting are little creature. Then we want to have
this environment, so it's just easy
just to bring it in now so you don't have to
worry about it later. Alright, So I think
that's about it. We can get started. So let's jump to the next video. Getting Started.
3. Getting Started: What's up, guys, welcome to my super simple nomad
sculpt tutorial. So when you open
up No, my sculpt, you'll see something like
this with a sphere here. And you have this grid
and this gray background. So first things first, I don't usually like the grid
so you can leave it or not. If you want to get rid of
it, just tap this little cog here and then just tap grid
and the grid will go away. Okay, so another thing
that I'd like to do when I sculpt white is
the default color, but I don't really like that. And because there's
things that we're seeing that will make
it harder to sculpt. So one little trick
that you can do is go here to the light panel. That's this little sun
icon and just hit my cat. I like to use this MCAT. You can tap here and there's
a bunch of other ones, but I think this one is just
the easiest to work with. You don't really need to
know what a mat cap is. But essentially a
disregards lights in the scenes and
the environment. And it just has a
built-in light so you can see everything clearly, more clearly than just white. The last thing when
I start to sculpt, I like to use orthographic. Now, you probably ever heard that word before,
but essentially, just go to this little
camera window and it will probably be an orthographic
automatically. And all that is is
without perspective. So when you're doing
things with boxes and shapes and things like that, when you're using perspective, sometimes they can look
a little different because it's going
back in space. But when you're
sculpting sometimes that can be misleading. So just sculpt in orthographic
and it's a lot easier. Alright, so also you see
this validate window here. So you tap here
the scene window. We're going to use this a lot. So the scene window is, this is where you add a shape. So you just hit Add and
you have all these shapes here that you can
add to your scene. And essentially what
we're gonna do today in this class is we're
going to use the sphere. Mostly we might use
some other shapes, but we'll use the sphere
because I want to show you how simple it is to make really cool things with just a sphere and
a few other tools. Okay, so e.g. let's say we wanted to
add another sphere. Then we'll add it
here. And now you see just the same thing. You see the original sphere, but you also see this
little gizmo here. This is what this call to Gizmo. So I'm going to tap up here. You see is has settings gizmo. So essentially I'm going
to make mine a little bit thicker so you can
see it more clearly. And all this is is a way
to move your 3D object. And really we're going to
concentrate on the orange ring. I'll make it really small so you can see that orange ring. So there's an orange ring. And this deals with size. Of course you can double-tap to undo, which is really great. Then it has all these
other little shapes that once you play around with
them, It's really simple. Obviously the green
is up and down. Blue is back-and-forth. And it, depending on
where you are in space, it just helps move
everything around. And then you have these
rings that turn it. But obviously you
can't really see it turn because it's a sphere. But I'm pretty simple. All of these things do
like this stretches it. But you really just have
to play around with those and we'll kind of
get into those later. So when we go into
our scene window, we see both of our spheres here. We see two of them, so you can tap on each one. And that's your mesh. So if you tap on this one, you're working with a mesh. A mesh is just whatever the, whatever you're
working with. So we'll move this mesh
up, this sphere mesh. Now we have two sphere
meshes in our project. Let's save, because
save is very important. So we just go here. Save. Yes. I don't have autosave
on. You can leave it on. I find it annoying, but now our project is saved. Okay, so let's make
this top sphere bigger by using this orange ring and just making it
bigger like this. And let's make the bottom
ring a little bit smaller. And let's stretch
it a little bit. Let's move it up a little bit. So maybe something like this. And you notice there's
not very many tools here. So we want to use some
other tools with our, with our 3D objects. So you know how you're moving it all around in space and it's really easy to get
lost and you're like, well, which way is forward? So if you want to go back
to the exact front view, you can use this little
cube right here. Here you can look at the top. You can tap on it and be back at the front of the right,
things like that. So just keep that in mind. I used that often because
I like to tap front. Because when we're doing things, you just want to
see the front of what you're doing so you can stay focused and not get
lost in the 3D space. So validate, validate
is a bit confusing. Anytime you bring a shaping, you'll see this validation. So there's, there's
lots of things you can do before you validate a shape. You can go into
this little window in which you don't really have
to don't worry about this. This is a little confusing, but it has all these other
things that you can do to a shape before you get into sculpting
and stuff like that. But don't worry about that. Once you have your shape, if you want to get the regular
tools, just have validate. And now you have
all of these tools. And you can do a lot
more to the sphere. So let's go to this
one, the bottom sphere. Let's hit validate as well. So now you'll see
they're both white. And that just means that
they're ready for you to work with the program. They're ready for you
to sculpt on them. So you bring in a new shape. It asks you to validate. You can move it around
and do a few things, but you have to validate it. So then it's officially
bonafide part of your projects and
you can use your tools. Okay, so now we have these
two spheres here and it kinda looks like Towards
tool type thing. I'll tap front. So let's tap on this bottom one, and let's manipulate
it a little bit. So let's use the move tool will make it a
little bit bigger. So over here, this is
the size of the tool. Obviously really
small, really big. And this is something once
you play around with it, you'll get used to how it works. This is the intensity. So this is like kinda
how hard or how soft the tool will
affect the mesh. I usually leave it
pretty high for a move. And let's say we wanted to make this like
the head or face, or just make it a
little bit rounder, or we just want
to manipulate it. So we'll use the Move
tool and you can drag and see how we're
dragging in one direction. That's because we don't
have symmetry on. So one thing that's very
important is symmetry when I make all my
characters and things like that, use symmetry. That way you don't have
to do everything twice. So if we're making
character with two eyes, we're going to use,
we're going to use symmetry and we're
going to use mirror. That way when we do one. The other will just
happen automatically. Same thing here. So
all of these tools, there's always gonna be this
little symmetry thing here. Make sure you tap that. Symmetry is very important. Make sure you tap symmetry. And a. Now you see there's
two dots here. So we're using the Move
tool, but there's two dots. So now everything is going
to happen to both sides. And also notice, even though
I'm touching this fear, the program knows
that I'm engaged with this fear and not this one. So therefore, as long as
I have that one, I can, I can drag it even though it's kinda within
this other sphere. Because that the program knows that this is the
one I'm engaged with. Now if you tap this one, then
of course it's going to, it's going to start
messing with that one. If you want, you can
also lock the layer. So if you just want
to work on this and you don't want to
accidentally touch this, you can lock it. And if this isn't down here, this little lock thing,
then you can go up. Let's see which one
is it? This one? No. There we go. You go to this these
little three lines here. You just tap Lock and see
it'll show up down here. So I leave that on. So if I
just wanna do something here, I can lock it and then I don't have to
worry about accidentally touching the other mesh
because it'll just, it'll be locked on this one. Okay, cool, cool, cool. So now we have, let's, let's tap on this sphere
and let's rename it. So we're back in the scene. Let's rename it to
face. This fear. Will rename it to head. Fast. Everything is in
these three little dots. Instance cyclone name. We might use clone, but we won't get into
instancing and all that stuff. So we might use clone. It just makes a clone of
whatever you're doing. See two heads. Delete. Alright, so now we can sort of get into sculpting
lists really quick. Let's add a cylinder. And now we will shrink it
with these little dots. If those little
dots are annoying, you can press Edit and
those little dots go away. And you can shrink it with this. And basically just, we just want to make a little platform. So let's make it bigger
using the orange ring. Shrink it again,
move it down some. And let's validate it. And now that we validate it, we want to voxel. Remember, it's, yeah,
it's kinda ugly. It doesn't really
look like a sphere. So we're gonna do
a voxel Ramesh. And without getting too
deep into it, a voxel, voxel remeshing is basically reorganizes the,
the, the vertices. So a mesh is made up
of like polygons. Polygons have vertices. It's all very confusing, so don't worry too
much about it. But essentially it's
all little shapes that make up one big shape. So a lot of, a lot of the times
what we do in 3D is you just have to
reorganize them, add more. Take some away. The more you have,
the more details. Because it's just, it's denser. I like to think of it as clay. And the more vertices, the more polygons,
the denser it is, you can add more detail. So let's go to this little
cube, cube ish thing. Sees his voxel, Ramesh and 326 scroll that
down to like 200. Because we don't need that much. 200 is fine. Re mesh and see it looks
more like a cylinder now. So I think that's fine. For now. It's a good start.
4. Simple Shape Sculpting: Okay, so let's make, let's give him a little body. So again, we're gonna go Add, and we're going to go the
little plus and sphere. Now we'll drag this down. Let's make it a little smaller. Let's move it back a little bit so you see how I turn
it to the right? And I'll move it
back a little bit. So it's sort of underneath his face a little bit,
a little bit back. We'll kinda skinny
him up a little bit. And maybe we'll make this
a little bit smaller. So something like this. Let's move it up a little bit. So something like that. Now let's go back to the ad. And first off, let's
just validate this. So validate this and
call it body this. Let's call it floor. It's always good to
keep all of these labeled because you will forget. So now we'll add and
we'll add another sphere, will drag it down, shrink it. We're going to tap mirror. So before we validate, we're going to tap mirror. Now, make sure you hit your front so we know we're
looking at the front. See now it's mirrored.
So everything that we do when we tap mirror, this is the center
line of our project. So it's just mirroring
one side to the other. And that makes everything
so much easier. So when I sculpt, I tried to keep everything
on that central line. I don't really move
things left and right. The only time I do is if I
mirror or something and then I move it left and right because there's two of them and that's
what I that's what I want. Let's move it back. And these you're gonna be his
little pudgy little legs. So let's stretch them
out a little bit. And maybe we'll
use this blue ring to rotate them a little bit. I kinda I kinda wanted to
do kinda want his legs to go a little bit
higher up into his body. Okay. So maybe something like that. So I made them a
little bit bigger. I'm going to stretch them out
this way a little bit too. So I think there's his little
legs look good like that. So the only thing now is
the cylinders a little low. So I'm going to tap on the cylinder and I'm
going to bring it up. And I want them to I want the bottom of his
legs to be flat. So I'm going to use
the cylinder to really make it look like he's
like they're flat, like he's standing on the ground now might be a little too high. Here we go, something like
that. That looks okay. So now we're looking
at is little backside. Let's take, Let's tap on
his body, will use move. And again, we have to make
sure that we tapped symmetry. I'm gonna make it a
little bit smaller. So we're using move,
we tapped symmetry. So now you see the two dots. Let's bring his body
up a little bit more and let's bring
cern them around. I'm just going to
bring this a little bit closer together like that. In the bottom part you
can sort of, you know, will give them like a
nice little tear shape, teardrop shaped body. The back you can sort of
pull out a little bit. We'll give them a
little backside, stretch it out the back there. You can also push
with the move tool. See I'm pushing up,
pull, push, pull. So you can just give them
like a little shape. I see him I gave him like this
little sort of duck shape. Maybe I want to tuck his chin area and maybe I want to poke
a little belly out. So there's a lot you can do. It really helps to shape
your, your character. Okay, so before we
move forward there, Let's trim the
bottom of the feet. Because even though
the cylinders here, we still want this to be flat. We want as his feet to
be flat on the surface. So let's validate them. And let's make sure
that we call them legs. So here now we get
into the mirror. Because remember we hit mirror. So now we have the mirror here, and this is the sphere. So it just means
that it's mirrored. So it's underneath this mirror. So that just means
that it's mirrored. So anything we did two, this one will happen to the other one. But we're just going to go
ahead and validate them. So see how I have
them both selected, validate, and just
join children. That means we're just going
to join them together. So now we have mirror, but
let's change that to legs. That way we know
what we're doing. Now his legs are official. And let's turn to the left. So I'm going to tap this
little left so I know I'm looking perfectly left
and we'll use trim. Now when you use Trim, go up here and makes sure that this is turned down
and this is turned down, and this is a five. So let's use this rectangle. Make sure there were
tapped on the legs. Now you can just make a box and it'll trim everything
in that box. But notice I'm not going
up too high because you don't want to go up here
because then it looks weird. So when you do it, you just want to be right below like I almost go to the edge of the cylinder and just trim like that so you can't see
any the cuts down there. Okay. So now let's, let's take the legs and we're
just going to voxel rematch them because anytime
you really make a cut, it's nice to reorganize
the polygons and that shape because it will reorganize them better
than they were before. Whenever you like
trim something. So we made a trim in the legs. So now we're just going
to voxel re-emission. Again, we're gonna go here. Notice that sometimes
this can be confusing because if you
accidentally go to one of these, this changes, but just remember it's right
after this scene, window and voxel and
voxel remeshing. We can do 200 again. Ramesh. Okay, So now we're okay. Let's give him some little arms. So for this, again, we're going to use the sphere. Will bring it down,
make it small. Let's tap mirror. Let's move them over there. A little big still. Let's shrink them down
a little bit lower, maybe in, suck them in a
little bit to the body. So now we can validate them. Of course, we can
still make them smaller and all that stuff, but now we have access to our, all of our other tools. So let's take a move and will make it a
little bit smaller. And my radius is
about 01:50 years. So you might have
to adjust that, that kind of thing, but as long as it's a
little bit smaller. Now I want to drag it drag it up to like a
shoulder area like this. Let's make it bigger
and we just want to make it like it's
an arm coming off. It looks kinda funny now. It's not really in
the right shape. So I made my move tool
bigger so I can push it. You can pull and push until you get like
arms that you like. I think those are pretty cute. You can stretch
them out further. So there's a lot you can
do with the Move Tool. Shrink them into the
body a little bit more. If you think they're too big, just go back to your Gizmo and you still have this
functionality you can, you can use like
I'm going to make them smaller like this. So you can do all of
that with the gizmo. Okay, it looks
pretty cute so far. Alright, so what
else do we want to do with our little guy? Let's make them a
little bit thinner. So let's use move. And make sure you
attempt on the body. Let's squeeze this together,
together a little bit. Squeeze his body together. And of course this
is all you can. You can make them as big
or as small as you want. I think that's a little
bit better. I like that. Okay, Let's move this around a little bit and maybe
we want to move it a little bit further back. You can make it bigger and
then you can flatten it out. If you want. Lots of
things that you can do. Do it like this. That's kinda funny.
I kinda like that. That's kinda cute. So feel free to kind of play
around with your tools. You know how to use move. You can do something like drag. Drag is very similar to move. The only difference with
drag is with the move tool. It's sort of tries to move the whole thing and tries to move a lot of
the things around it. Drag is a little more focused. So with drag, if I pull it, it's a little smaller of
a place that it pulls. If I use move, it's much bigger. Pulls a much bigger area. So I use them I use them both depending on depending
on what I'm doing. But let's use,
let's try out drag. Maybe we'll make like, let me get a little bit bigger. Now if you tap symmetry, then you can start kinda
making a shape like say you drag out
something like this. Then he has like a little hat on or a little balloon pair. You can do it smaller. Maybe something like this. So that's kind of
another way that you can just get sort of shapes. If you wanted to do like some
weird hat or something like that. You can do a lot. You can make it really, really
crazy using the drag tool. Alright, so what else do
I want to put down here? Maybe I'll put two more spheres. So let's add another sphere. Let's move it up. Make it smaller even
though it's hidden. Tap mirror. And then maybe I'll
move them to the back of his little hat thing. Maybe I'll do
something like that. That's kinda funny.
I kinda like that. So yeah, this is where
you can go crazy, go ham. Same thing with the phase two. If there's something
you want to add, then this is a place where you can just feel free
to have fun with it. But I think this is
a pretty good start.
5. Face Details: Okay, so now let's
use the Move tool. And we'll just kinda bring
out the face a little bit, give them a little
bit of a lower face. So I'm gonna make it small
radius about 01:50 or so. We'll just pull this
out a little bit. You can move to the front and just I just wanted to
make it a little bit of a little bit of a face and a different
video I might add like a mouth or something. I'm not too sure just yet. But there we go. So at least now he has
like a little bit of a face, something like that. So now let's use clay. And clay tool is
just like it sounds. There's a sub here
that takes away. If Sub is not checked,
then it adds. So e.g. with ADD, see it's adding clay. And with sub is
taking clay away. Okay. But when I want to
work on the face, I want to make it a
little more dense. That way we can get a
little bit more detail when we're using our clay and
doing our sculpting. So let's go to voxel and
let's remission at 200. And you notice these little, these little things here.
That's actually okay. You can just take
your smooth tool. You can make it big and
you can just smooth those out by just going like this. Now let's go back to our clay. Make sure that we tapped sub. Right now we're
just going to make some eye sockets for his eyes. So essentially, I just
like to make a circle, but not like a perfect circle, like it kinda goes up. You know, you have the
bridge of the nose here, maybe kinda goes up and then it is round and the bottom
is a little bit flat. But this isn't really
like a exact science. It's just, that's how I
like to make my eyes. You'll notice that
the top sphere is sort of bleeding
into our shape here. But that's okay. We'll have to deal
with that in a second. So you just want
to make some sort of eye sockets like this. And I know this might
be a little bit annoying, but it's doing that. So you can just take move, tap it, and then we'll just make this
a little bit bigger. And then you can just slide
this up. There you go. You can slide that up as much
or as little as you want. I think that's fine.
Now we go back to this and just met you
can use your clay and just try to just try to make it
like I like to carve it out. So it's sort of even
remember symmetries on. So at least we don't have
to worry about the other. Like imagine having
to do this and then having to do it
on the other side, it would never match. So that's the beauty in
using the symmetry button. So something like
that is pretty good. So let's use our Smooth tool. Doesn't have to be that big. And we'll just go around in circles and just smooth this
up and you'll get a nice, clean, nice, clean eye sockets. If you really want
to make a change, you can take mover drag. I usually use drag. And you can just sort of
like adjusted a little bit. However you like,
you can just adjust it. I think that's pretty good. So let's add some eyes. Now that we have
the eye sockets, we can add some eyes in there. So we'll go to scene. And I'll actually
before we do that, let's just not get
ahead of ourselves. Let's take this mirror
and that's validated. Join children. And let's
just call this ears. I don't know what it is,
but we'll just call them ears because they're on their head and they're
kind of on the side. And this, these are arms. So let's validate
this, rename it arms. That's how easy it is to
get lost because you just keep making shapes and then you have to figure
out what they are. It's annoying. So we'll add another sphere, shrink it up, mirror. Then we have to bring
it to the front. Separate. And just
use your Gizmo. And then the gizmo can
be tricky sometimes, but you just have to
maneuver them so they go into the spheres, are into the eye sockets. So something like this. You can adjust the size. You can adjust how deep they are in there,
things like that. I tend to like
something like this. I don't like it when the spheres
are protruding too much. So I like to really
get him back in there. And the eye socket,
something like this. I'm actually going to lift
this part of his face up. So I'm gonna go
back to that move. I'm just going to lift
it up here a little bit. With ME. His eyes
look weird though. So I might have to
I'll just use drag. I might have to just suggest it. Because now his eyes look funny. That's a little bit better. Okay. And it looks it
looks a little bit better. Go back to the eyes. It's also used to, you can adjust them
here like this, go left and right and just make sure that they're not like too far apart or make
it how you like them. I think that looks fine. Bigger. Yes. I like a nice big guy. Okay, so let's voxel merge
some of these things together, like maybe the body. Let's go ahead and VAX
and Vauxhall. Actually. What's due? Feet? 2 ft. I want to give
them a tail. I do. Then well, then we can get
to the voxel remeshing. So let's turn them to the left. What is this? This is 0, these are the eyes, so
let me just get it. I'm going to rename
this mirror eyes. Okay? So I'm going to do plus sphere. Let's give him
some little fy dy. So now we're just bringing
this fear to the bottom, shrink it, and bring it down
into that cylinder mirror. And now I've just moved it. Move them apart. A
little bit smaller, maybe a little bit further down, and a little bit further back. I know it looks weird now, so there's a couple of
ways that you can do feat. Sometimes you can just, I'm just using this fear to
make them a little flatter. You can really move
them into the leg. Like if you want to
make them small, you can just do it like this. That actually looks fine. Or you can pull them
out a little bit. Validate. Then you can use
move or drag. I'll use move. Let's see, I'll move does. Now I'm going to drag this
bottom part to the leg. And that gives him like
a like a longer foot. But I'm going to take the gizmo and you can still adjust it. So he's not like
standing all funny. You might have to put it
lower into the ground. You can use the
Move tool and you can now I want to I want
to shrink them together. I don't want to
shrink it. So this is another thing that's
kinda confusing. So right now the
feet are mirrored. So whatever I do here, it's going to happen here. But there's still like
a local symmetry. So that's why we don't have
symmetry checked here. Because if you check
it, then it's, it's more of a local symmetry. So now when I pull the legs in, it's pulling each one. So it's working this side
and this side of this foot. That's a little confusing, but just turned
symmetry on and now you can sort of bring the feet
together a little bit. Let's say I want to, I want
to just move this side. Well, I don't want
to have symmetry. I just want to move this
one side in like that. I'm going to use the gizmo
and I'm going to shrink the whole thing and
just give them like little feet like a I don't know, like a little mouse
or something. But I might actually
have to spread them out. I don't know. Maybe I'll
push them back a little bit further, something like that. It pull them a little
bit like that. So I kinda just pull
them and push them. And eventually I just get
to something that I like. I'll just use move again. I feel like the front part needs to be up a little higher. So I'll just pull that up, push this down, pull that
up, something like that. Now let's just turn
it to the left. And we're gonna do
the trim thing again. So we're going to
use trim rectangle. Make sure that
we're on the feet. Will just trim the feet. So now they're trimmed, now
they're trimmed underneath. Okay, And really quick,
let's do a tail. So seen plus sphere, I just noticed something else actually will move
this fear back, shrink it, and we don't
want it to be a mirror. So there's one thing that I noticed before when
we did the feet. So when we made the shapes
and we were on the eyes, they went into the eye mirror. So this can get
really confusing. So we made the eyes and
we have the AI sphere. But then we accidentally
put all this other stuff in there too. It happens. So just take your mirror
and move it down and move it out of that selection. So now we have this as
separate feet of the tail. So let's take the tail out
just long hold, long press. And now everything is separate. And you just have to be careful because when you make shapes, sometimes they go into a mirror. So that can be a
little confusing, so just bring them
out if that happens. So this is the tail. I'm gonna rename it tail. What do we want to do with
this tail? Let's shrink it. Move it forward, let's
move it down a little bit. Let's continue in
the next video. We'll work on this at
all because it'll take.
6. More Details: Alright, so you can kinda
make the tail like you want. I like to make
Beaver type tails. So I just kinda flatten it. I make it a little bit longer, stretch it out, and use this red ring to just
like tilted a little bit. I like to, let's validate it. I like to use a move. I like to bend things that
you can just bend it. But I just made a mistake
because symmetry wasn't on. And when I bend, I want symmetry to beyond because
I want it to be even. So now it's bending
evenly on both sides. So now that I moved it down, I need to sort of
adjusted again like this. Now if this angle is, you can see that it's
fairly thick here. So I'll just use move and
just again symmetries on. And you can just move it
until it's how you like. Maybe I'll push it
down a little bit further because I want it to look like it's resting
on the ground. So that's why I have
this cylinder here. Because then I can sort of see
where the ground would be. And it just makes a
little more sense. Again, you can make
a table like this. You can make a
different kind of tail. You can make it a
little puff tail. Now it's up to you. Make
this a little bit there. But really just pushing and
pulling your heart's content. There we go. Adjust
this a little bit. Okay. All right. So let's pardon me pardon
me as issues with the eyes, I'm going to smooth
this out a bit more. Figured out what I can
do to make myself happy. And this is an, this
is an important thing. When you're making
your 3D model. You constantly have to be, constantly had to be looking to see what you don't like or
what you want to change. Because eventually
it's going to be hard to change things. So you just have to kinda
keep an eye out for that. Okay, So let's give them
some sort of mouth. Why not? What does have
a little fun with it? I was just practicing to
see what I wanted to do. I want to use crease. I want to tap on the head. I'm going to start back here. Let me use crease pretty small and I'm just
gonna go like this. I'll do something like that. And you can see I
have my crease tool really, really small. And then I'm going to take move. And I just feel like I want
to move the head to make us, make us face a little wider. Reminds me of like a
really cute chameleon or something. But I like it. I like it. I like it. If feel free to make something
like that if you want, you can do another
type of mouth. Of course you don't
have to do follow everything to the t, but for the hands, we could just leave
them like it is. But here's another
quick thing that I like to do to make the poem. I just use flatten, make sure that
we're on the hands. And let's say I just
flatten out a part here that can pretty much
work for like a palm. And then I'll just take smooth and just kinda smooth it out. Then you can take in
a fleet pretty small. You can just inflate some
lovely little fingers. I just use a little
round motion. Just makes his little
fingers acute. Ally, cute little fingers. Of course, you do have
to go very lightly because the arms are very soft, so you just have to
go very lightly. So you can do
something like that. And then of course, if you
think that they're pointing, the palms are facing
out too much. Let's see. I think we might be
able to use the gizmo. So I chose the gizmo. And you see how
the arms are here, but the pivot is up here. If that happens, just go pivot. We set pivot. And most of the time
it will reset to the middle of whatever
the shapes are. In this case it's the arms, so the middle is
directly in the middle. So let's see if I was
to turn them like this. You know, you can always
do something like this and you can adjust them. I kinda like that. Remember you can
always move them to like if you want a little
bit more of a bend, you can adjust them
lots of different ways. I think that's kinda
cute actually. Also don't forget that you can use like drag like if you'd like the thumb but you want to like pull it out a
little bit more. You can use the tools, lots of different ways to get to where you
get to what you need. Maybe I'll even
flattened the inside of his little fingers. Sometimes that just adds
another little element. Just smooth everything
out a little bit. Just to keep everything
nice and soft and smooth. I love this little chubby arms. And another thing I like to do, I really, I really enjoy
using the inflate. Inflate tools,
really, really great. So we can, I'd like to
inflate around arms, arms. But before we do that, let's go ahead and
join the body, the legs and the feet. We're going to merge all
these things together. So there's two sorts of
joining meshes together. So the body right here. So this is the body,
this is the tail. And these are the legs. So we have the body here, we checked it, the legs, we checked C and we can
check both of them. And then we want the feet to. But where are the feet?
So the feet are here. Before I add them, I need to
go here and just validate. These are the feet. Now we have body, feet, legs. I'm not sure if I want
to join the tail. You know what Let's
do in the tail too. So where is the tail? Here we go. Tail. So I'm going to save really quick because I haven't
saved in a while. And I want to voxel 3D mesh. So voxel will
remeasure like to 50. Hit 3D mesh. So now everything
is voxel Ramesh together. So you can take
your smooth tool, make sure that you have
symmetry on and on. You can just smooth and it's
all one shape. So, sorry. Sorry. I just noticed that
symmetry wasn't on. So I'm going to undo. Symmetry is very, very
sneaky like that. I thought it was
on, but it wasn't. So it's just something
you have to check for. I wish there was a way
I could keep it on, but if there is, I don t know it because it loves to just
randomly turn off on me. So now it's on symmetry. So as I'm smoothing one side, the other side is
becoming smooth as well. And now we have one
just 11 body shape. Okay, so the body is
looking pretty good. The arms to me, they
look a little bit to like sucked into his body. So if this happens
and you've already, the symmetry isn't working, you can't move
them individually, starts doing weird stuff. This is what you do.
So go to the arms. Go here. Go to separate. Now you have two arms. But here's, here's
the real trick. So you take one arm,
you take it out. You take the other one and
you can just get rid of it. You go to this arm. Add mirror. Now you have your mirror again. You have your mirror back. So now you can
adjust these arms. So just make sure that you go to arms because if you're on
mirror it'll be different. Because you want to
make sure that you're underneath your mirror. And then you tap arms. And now we can have a
little bit more leeway. So I think maybe they
were just up too high. I just want to adjust
them a little bit. Maybe I'll kinda like that. I'll just take move. Maybe I'll just kinda make them a little bit
bigger up here. Maybe something like that. Maybe I want them going
in the body like that. No. I think I like
them better like that.
7. Even More Details: Okay, So I think that's pretty good for our little character. Feel free to use inflate. If you want to add some,
you can do it on the body. You can sort of add some, some little skinfold, just make sure you have symmetry on. You can add some little like skin folds and things like that. Maybe one in the front
and one in the back. You know, things like
that and smooth it out. You can sort of add a lot of details and fun stuff like that. But I like, I like like
little skin folds like that. You can also on the top of the head you can push
the hip back a little bit, maybe up there, and
then you can take here and you can use inflate again. You can make some, can use it around the eyes. It gives the eyes and
nice gives the eye, eye socket some definition. And just smooth it out. Always smooth everything out. Another cool thing you can do
is use crease in the feces. You can just kinda make
some lines like this. I like to do that. Give the feet a
little definition. And last but not least,
you can take your crease, make it really, really small. Turn off symmetry. And I like to make
a little squiggle, better belly button squiggle, but that doesn't
look really good. I can make it better than that. So let's zoom in closer. Let's tap front. So in other words, very close. Maybe we can get it
a little bit better. Much better. Now he has a
little a little belly button. Okay, Cool, Cool. See there's anything
else I want to do? I like that. Okay, good. So now
let's turn him. I'm going to save. So
let's change it back. I'll go to this light menu
from Mecca to let PBR. And one thing or another
thing I really like to do is I like to take everything
except for the eyes. So I'll just get
rid of the eyes. Then I like to go here
to the Paint Window. White, roughness to maybe
a little bit over half. And then tap penal. Now everything is a matte
color except for the eyes. So we'll come back
and we'll do some, will do some lighting
and we'll do some painting and finish
this little rascal.
8. Lighting: Okay, So, so he's
looking pretty good. Now we want to we want to sort of give
him an environment. So an easy way to do
that is we're going to add two planes will use one for the floor and
one for the back. So we'll do add and plane. Now we'll make it bigger. I'll drop it down. We want to do it right
over the cylinder. We just see the feet. That's perfect. So now we can just tap on the cylinder and we
can get rid of it. So now let's tap on this. And this is, you don't
really need to do this, but I'm going to
show you anyway, we haven't validated, just
go to this little box. Division X, just turn it down, leave it at like five, and then we'll validate. So now we'll just use clone. So we're on our gizmo. We can use clone. Then we'll just push it back. We can turn it, but here's a trick. So just press undo, press snap, and it's
probably at 90. So that will, that will restrict this to only
moving in 90 degrees. So now when we tilted, it's 90 degrees like this. So let's just shrink it
up with the green sphere. And we'll just put it at
the end of our sort of like that and go to this
little camera. And now it's an orthographic, let's put it on perspective. Now let's just scroll in on him. Put him right
in the middle. This. So once you have them framed up in
the middle like this, go back to the camera view, and then go to the
little pencil. And I just like to put one because we want to
add more views. I'll just put like 1234, et cetera, et cetera,
et cetera. Okay. Good. So now if you move
them around or you accidentally go like this, then you can just tap the
camera and go back to one. So let me save. This is
how I color my characters. We're just going to turn
off all the lights. So we go here. Environment
will turn that off. Now we're at a light. There we go. Looking good. We have the one light there. But let's add another light. I'm just going to
move it over and up. It doesn't matter
where this light is. There's three kinds of lights. And there's also this
little secret so you can get to the light panel.
It's a bit hard to see. There it is right here. So anywhere you move it. Anywhere you move it, that
little shortcut is there. When you tap it, there's
three kind of lights, directional, spotlight,
point light. Those are very bright. Right now we're just using a directional coming down here. Let's add another light. Will add a spotlight over here
to lighten up this shadow. So we'll go here.
Let's name this one. Number one will add light, and we'll name it two. And then we'll tap this icon and we'll change
it to a spotlight. So now it's just a spotlight. So we want to aim it to
this half of his body. So let's just maneuver
it around here. Spin it. You can take it off, snap so that it moves freely. Might take some
time to just kinda be able to get it aimed
where you want that. I want something like this. As you can see, this
is very bright. Put her like right there, so it's really hitting
him on the side. But I'm gonna go into the
menu and I'm going to lower the intensity
because it's at 04:04, 95 or four or five. But it needs to be a lot lower because we don't want
to make it that bright. So that's pretty good. So let's go back
into this light. This raises a, raise
the intensity. We go. So we have two more
lights that we'll use. One will make an edge light. So we'll add another light. Will label it three. We probably should label
it edge, but that's okay. Then we'll tap it, will make it another spotlight
will move it back. And we just want it off to the, off to one side. So back in off to one
side, we'll spin it. Will put it on his back. Now let's go back
to our camera view. So here I tap here
and I go to one. That's all we can look at. The good view of our
little character. Let's tap the light again. Now we can adjust the light. So something like this
looks really good. See it just gives
that nice edge here. That's what we're looking for. And I tilted it up so
it's not on the floor. But that reminds me. You can also change the floor, see how this has really,
really bright on the floor. If you tap the floor, you tap the color and
you raise the roughness, it makes that it lessens that. So just remember that
when things are rougher, they don't have such a
glare on the floor anymore, so I'll pay it all into the same with the background panel. You can also change the color
of the floor and stuff too. If you want. Now we have a nice edge. And the less light, we just want to have top-down. So touch light ad and we'll
name this one top down. You know what number
three, I'm going to change to edge. Lipid easier. So top-down. Tap this icon, spotlight. We raise it straight up. And then we have to just get it straight down on our
little character here. Makes sure to look at it
from different angles. C, I thought it
was straight down, but it's definitely not. Here we go. It's a
little bit better. Now. I want this to be
a cooler light. I tap on a light
options tab here. Now I can move the
color to a blue, maybe a little deeper
blue, like so. And it's very, very intense. So let's lower the intensity. Here we go. You can make it a
little softer if you want or a little harder. Cone angle just means
it's like the spread. And the only other things
that I want to change. And this is a little
bit technical, but certain lights
they all give out, give off these shadows. So I'm going to
take this light tap and then hit softness. Actually want to make it softer. I see a shadow here too. So that's from this light. I want to take that
light to happen. Softness and I'll raise the
softness. And the rest. I'm okay. I'm okay with the rest of
the shadows I'm okay with. Which is this one? That one has a shadow and then this one also has a shadow. Let's see what happens
if I do this softness. Okay, we making that
soft as well, maybe. Okay with that. So now let's go ahead and
hit our camera angle. And now he's lit very well. And now we can
start to color him. I always wanted to do
a nice view without the gizmo. There we go.
9. Coloring & Eyes: So the lighting is usually more of the more difficult part. Now all we have to do is color. So we just have to figure
out what color we want him. So we tap on each part
that we want to color. And you can also join
different parts together, e.g. if we go in here, we have
all these different parts. We have ears, head, the ears. Maybe, maybe that's
part of the head, so we'll drag that
underneath face. We have arms here for the arms. Let's go ahead and validate
those and change it to arms. Then we have Face Arms, we put that underneath a tail. The tail is now the body. So we'll rename it body. And then we have the planes. So this is the floor
and this is the back. And I'll just put these
connect those two. And then we have the eyes and then we have the lights too. Sometimes I just
like to put them close to each other
so we don't get lost. Okay, so now you can tap this and they will
all be selected. And then you can tap this
little circle down here. And you can sort of
figure out what color you want your character to be. Feel like I might
want him like a blue, like a bluish color. Maybe. We'll do that for now. And maybe for the head. I don't even know if
it's a hat are here. Sometimes it's just
nice to kind of move around and see what
speaks to you. I kinda like the green, like he's like some sort of
like vegetable or something. I kinda like that. Of course you can do
whatever color you'd like. For the eyes. Let's see. You want to do like dark eyes. You can do black eyes. Maybe you want them to
be glossy, like this. You can paint them glossy. One thing I'd like
to do with the body. So let's go to the
scene and this tap, so all of them gets selected, will go here and
then subsurface. So this will really look cool with the
lights we have on them. So let's bring the depth down so it's not that see-through. Just somewhat see-through. Here we go. Now the arms are a little bit, they have a little
bit of subsurface. We can do the same
with the head. Let's go in the scene and
make sure we tap them both. And then we go to the
materials subsurface. Turn it down, turn the depth
down a little bit. Okay. Okay. So you might not want to have the black eyes that might
look a little creepy. So if you want to change that, There's a few really cool things you can do with the eyes, especially because we
didn't validate them yet. So here we have the eyes. And I'm gonna change this to, let's call it P1 for pupil. So let's clone it. We'll name this one clear. Let's clone that. Will name this one white. And let's clone it again just as a backup and this one wide. So now we have P1,
clear and white, right now they're all black. They're all the same, this same black sphere. If we want to make it
white with a black pupil. Let's do that first. So let's hide P1 and clear. We just have white.
Let's change it white. Let's validate that. So we validate the white. Let's take flatten this, just flatten a part of the
eye by going in a circle. Now the eyes are flat. And we'll just take
smooth and we'll just give it a
nice quick smooth. So now it's, now it's
nice and smooth. Now let's go back
and bring back P1. So P1, we're just
going to shrink. I don't think I was on P1. So we have to make sure we're on P1. We can validate it. And then I'll shrink it. Here we go. Now you can sort of move
it to where you'd like it. So maybe something like that. I think it looks pretty good. The only difference now though, is you want to make the
white glossy as well. So we'll paint that
glossy as well. So that looks a
little bit better. Let's change the color of
the background a little bit. And let's actually lower the
color of them a little bit. Make them a little darker. We go so you can adjust the lights until you
have something you like. But I think he
looks pretty good. So then you would
just let me save. Then if you want to export, you just go here
to post-process. This is where it starts to really take everything
into account. I'd like to turn
all of these up, but they will slow
down your system. So just be very careful, make sure you save
often. Turn this up. And you just have to really play around with these settings, obviously, depth of field. And a lot of this stuff really affects like shadows
and things like that. Once you have him. Nice, nice view and you have
the colors that you want, you would just go here. And then you would export
to whatever size you want. E.g. is just to 720, then you would just
save it to your system. Okay, so I think
that's pretty much it. But that's always
encouraged to just play and just kinda see
what you can come up with. Let's see what we can do here. I'll just experiment a little bit and then I'll
let you guys go. Well, let's turn this off. This is when I really get the most fun things is when
I'm just like playing around. That's when I get
the most fun ideas, is just from playing around. And as you see, I
pretty much just use the tools that
I've told you about. You know, there's no real like
there's nothing too fancy. There are certain
things like e.g. I'm going to use the flattened
tool and flatten this out. So there's certain
things that you can do to kinda get cool effects. But you'll learn that as you go. I mean, like there's
no way you can really know that all at once. But to learn it as you go. But I use all the same tools and I just kinda
have fun with them. I have no idea what's
up with his hat. He has his head, he has on. But it's kinda fun. And actually wish I would
have mean that like a little like Dragon tail instead
of a beaver tail. But that's okay. Subsurface, make this a
little more see-through. How many use crease. But I'm going to
tap the color and I'm gonna change it to I'm going to use the
eyedropper here. And I'll make it darker. Oops. And then I'll use the crease where we already
have the mouth crease. That will make it darker. So that will give the
impression of depth. You can do the same thing
with the belly button too.
10. Lastly, Eyelashes: Last but not least, I
was going to end it, but I always do my eyelashes. The tube is a very useful tool. I love it, it's one
of my favorites. So we'll use the tube tool
will hit path over here. And let's uncheck
spline for now. We're unchecking spline. What's happening. Okay. So now we're in close and we're going to
use the tube tool. So we'll start at one side and we'll start in the crevice. And you kinda have to
slide your it's very, very, I don't want to, I want to show you that again. So to use the path, you have to start by tapping on the screen and sliding and then the first little
node will show up. So then you get to a point, you lift up, then you
move to another point, and then you start
sliding again. So down, slide, up, down, slide, up, down, slide, up, slide like that. And then we wanted it
to one that comes off. And this one I'll tap
that way, it's black. And you can adjust these nodes just to fit in the
round part of the eye. You want to make sure you
have snap-on as well. And then you just
tap the little eye or the little green dot. You get something like this. So now we're going to turn on Edit and you see
all the little nodes. We want to drag this one. So it's not so much into
his skin. Like that. A little bit tricky. Is it to make sure
that you don't touch them together
or they'll go away. Okay, so we can mirror this. So there's one on the
other side as well. Now let's tap radius. So with radius now you
have these orange nodes. The orange nodes
are independent. So if I make this big, this is big and then it goes
to a little bit smaller. This one I can make smaller. So I want to do
something like that. I want to drag this
into the skin. See this little white node. I want to drag that. I want to drag it
into the skin like this so that it
looks really clean. See how it looks really clean like it's just going in there. And you can add another node. You want to get that nice curve. Now we tap spline and now it's really
curvy, really pretty. Move this over like that. And we'll just drag
it down a little bit. And essentially I'm just making the rounds sort of
like eyelash area. So that's all I kind of want, something like
that. So validate. I'll take smooth I'll
just smooth out this end. And we can paint the whole
thing black, rough black. I'd like to take flatten
and I like to flatten up the side so that the front
has sort of a curve to it. Sort of like that. I always
do it with all my characters. I almost forgot on this one. We want to change
any other colors. I think I like them now is I
do have a little more time. So since we have a
little more time, let's jazz him up a little bit. Let's take paint.
So I want his face. Make sure you're on the face. Let's go here to the
layers, panel, head layer. And let's name this reddish. Because we're going
to add a little red, reddish, little red to his face. So we're in paint. Go here, will go to red and
we'll just lighten it up, maybe something like that. We don't wanna do pain all. We want to take the brush and
bring it down to about 30%. We make the size a bit bigger. Then softly, I just
want to add some of this red color to his
little nose area. I want to add some
to the cheek area. You can add a little bit. She can add a
little bit up here. Somehow I was on a
different layer. All of a sudden. Just a little bit. But mostly you want it on
his cheeks and nose area. You can put a little bit
on his little hands. Maybe someone has little feet. Okay. Now you can take your smooth brush and this lower the intensity all the way. So just take smooth but lower
the intensity all the way. You Can Save, you can
clone and save the brush. I'm not gonna go into that, but that's essentially what this is. I just tapped it
and made a clone, and then I just load
it and then you just save it if you want. If you don't want to have to
keep going back-and-forth. So let's see if we can smooth, smooth this out a little bit. Smooth as little cheeks. So this will just move the
color as much as possible. If it still looks messy, then sometimes you
have to take smudge. You might just have
to like smudge things around a little bit to get a nice even tone. And once you have that, you can go back to the
layer and then you can see you can
adjust the layer. So I might just put a
little bit of that, written this in like this. I'll go to the body and
I'll do the same thing. I'll just smooth that
color out a little bit. I want to change the color of the background
again. Feels better. So I changed the
background to like a pinkish color like that. And I want to change
this edge light to reflect this reddish color. That's the one we
named the edge. So we'll tap here color. I'm going to go to red. It's kinda hard to see how
to move this over yet, but as you can see, just change
this to a reddish color. We might want to know that actually lights
it up pretty well. Looks really cool, actually. Slowly intensity of this. It looks really good there. I like the top-down light too. So I I wish I wish I had more
lights that I could play with because I think they're all they're
all adding something. The only thing that I
wish I had was a light shining down on the
back, on the backdrop. But maybe in the future.
Alright, I think that's it. I had a lot of fun
making this guy. As you can see, things
always go through changes. Don't ever be afraid
to change your artwork and make adjustments
and make changes. That's the, that's
the nature of it. You have to go with the flow and make it work with how you want to make it work. Constantly, make
adjustments, make it better when you can and do it. Because that's the,
that's the fun and you'd have to find out, find what works, and adjust. And so you get something
you really like. Alright, keep drawing,
keep sculpting. I will see you all
in the next video.
11. Thank You!!!: Alright, so thank you so much
guys for hanging with me. I'm really glad that
you decided to spend your time with me
and learn from me. I hope that you liked
your characters. One of the more
important things to do is play, continue this. Play with the character. Experiment. Change the color
has changed the shapes. Make your own characters use everything that I've
taught you to just bring your character that the neck to the next level and make it
yours, make it your own. That's what I love to see. Of course, upload
your projects to the projects and resources
tab so I can see them, so everyone can see them. And also, it's
really important to rate and review. It
really helps me. It really supports my business, my channel, these classes, and it's really big help. So I'd appreciate if you
take a moment to rate and just leave a few sentences
about me, about the class. Something you liked,
something you didn't like, but hopefully you enjoyed it and you don't have any issues. Of course, if you do have
questions and discussions, just leave them in
the discussion tab. And I will get back to you. And I hope you get through
whatever issues you have so that we can
keep moving forward. Of course, I'm on social media, YouTube, youtube.com
slash drug-free. Dave, I usually
extend these classes. I'll take the class and
then I'll keep working on the character because I
always do when I finish, just like I'm telling you
to do, I always do that. So be sure to go and check out my YouTube for a continuation. You can see how I
changed the character, enhance the character, and just change a lot
of things with it. And it's kinda fun. And if you go, please leave me a note so I know
that you came from Skillshare because I just like seeing who's there and who's
checking out my videos. Of course, Instagram,
TikTok, both drug-free. Dave, hope to see you
guys there as well. Keep going, Just
keep, keep pushing. There's a lot with
this application. But if you just spend the
time and you're just patient, then you'll just continue
to grow and get better, and get better and get better. Keep drawing, keep sculpting. And I'll see you all
in the next video.
 Dave Reed, 2D & 3D Illustrator - Brooklyn, NY