Transcripts
1. Class Introduction: Hello everyone. I am saying CB,
watercolor artist and graphic designer
based in Vietnam. I started my watercolor painting
journey three years ago. But default that I spent most
of my childhood painting and drawing using some cheap
clients or color pencils. I haven't been spending
almost everything bad. My main focus is flowers, especially roses and Lotus is my star is somewhere between
realism and loose ties. I have some realisms, some religious fighters
in my painting. If you look at it, you can still realize it is not a photo, it is a painting. In my first Skillshare class, I went to teach you Trial Photoshop techniques
of watercolor painting. If you are an absolute beginner, I think this glass is very
helpful because you learn almost every technique which is the foundation of the
watercolor painting post-test. If you have been learning watercolor painting for a while, maybe Microsoft's
been happy with two, brush up some of your
knowledge and you may learn something from the
way I use watercolor. This class is divided
into two sections. The first one is very basic,
very Photoshop techniques, and the second part is more advanced, more
complicated techniques. If you have learn watercolor, you may skip the first part and goes **** into the second part. And thus phone for
the introduction. Let's get started.
2. Part 1 - Basic Techniques: In this first part, we will learn the
very basic technique of watercolor painting. If you have been learning
with a kind of y, you can keep this spot and those shed into the second part, I will introduce some
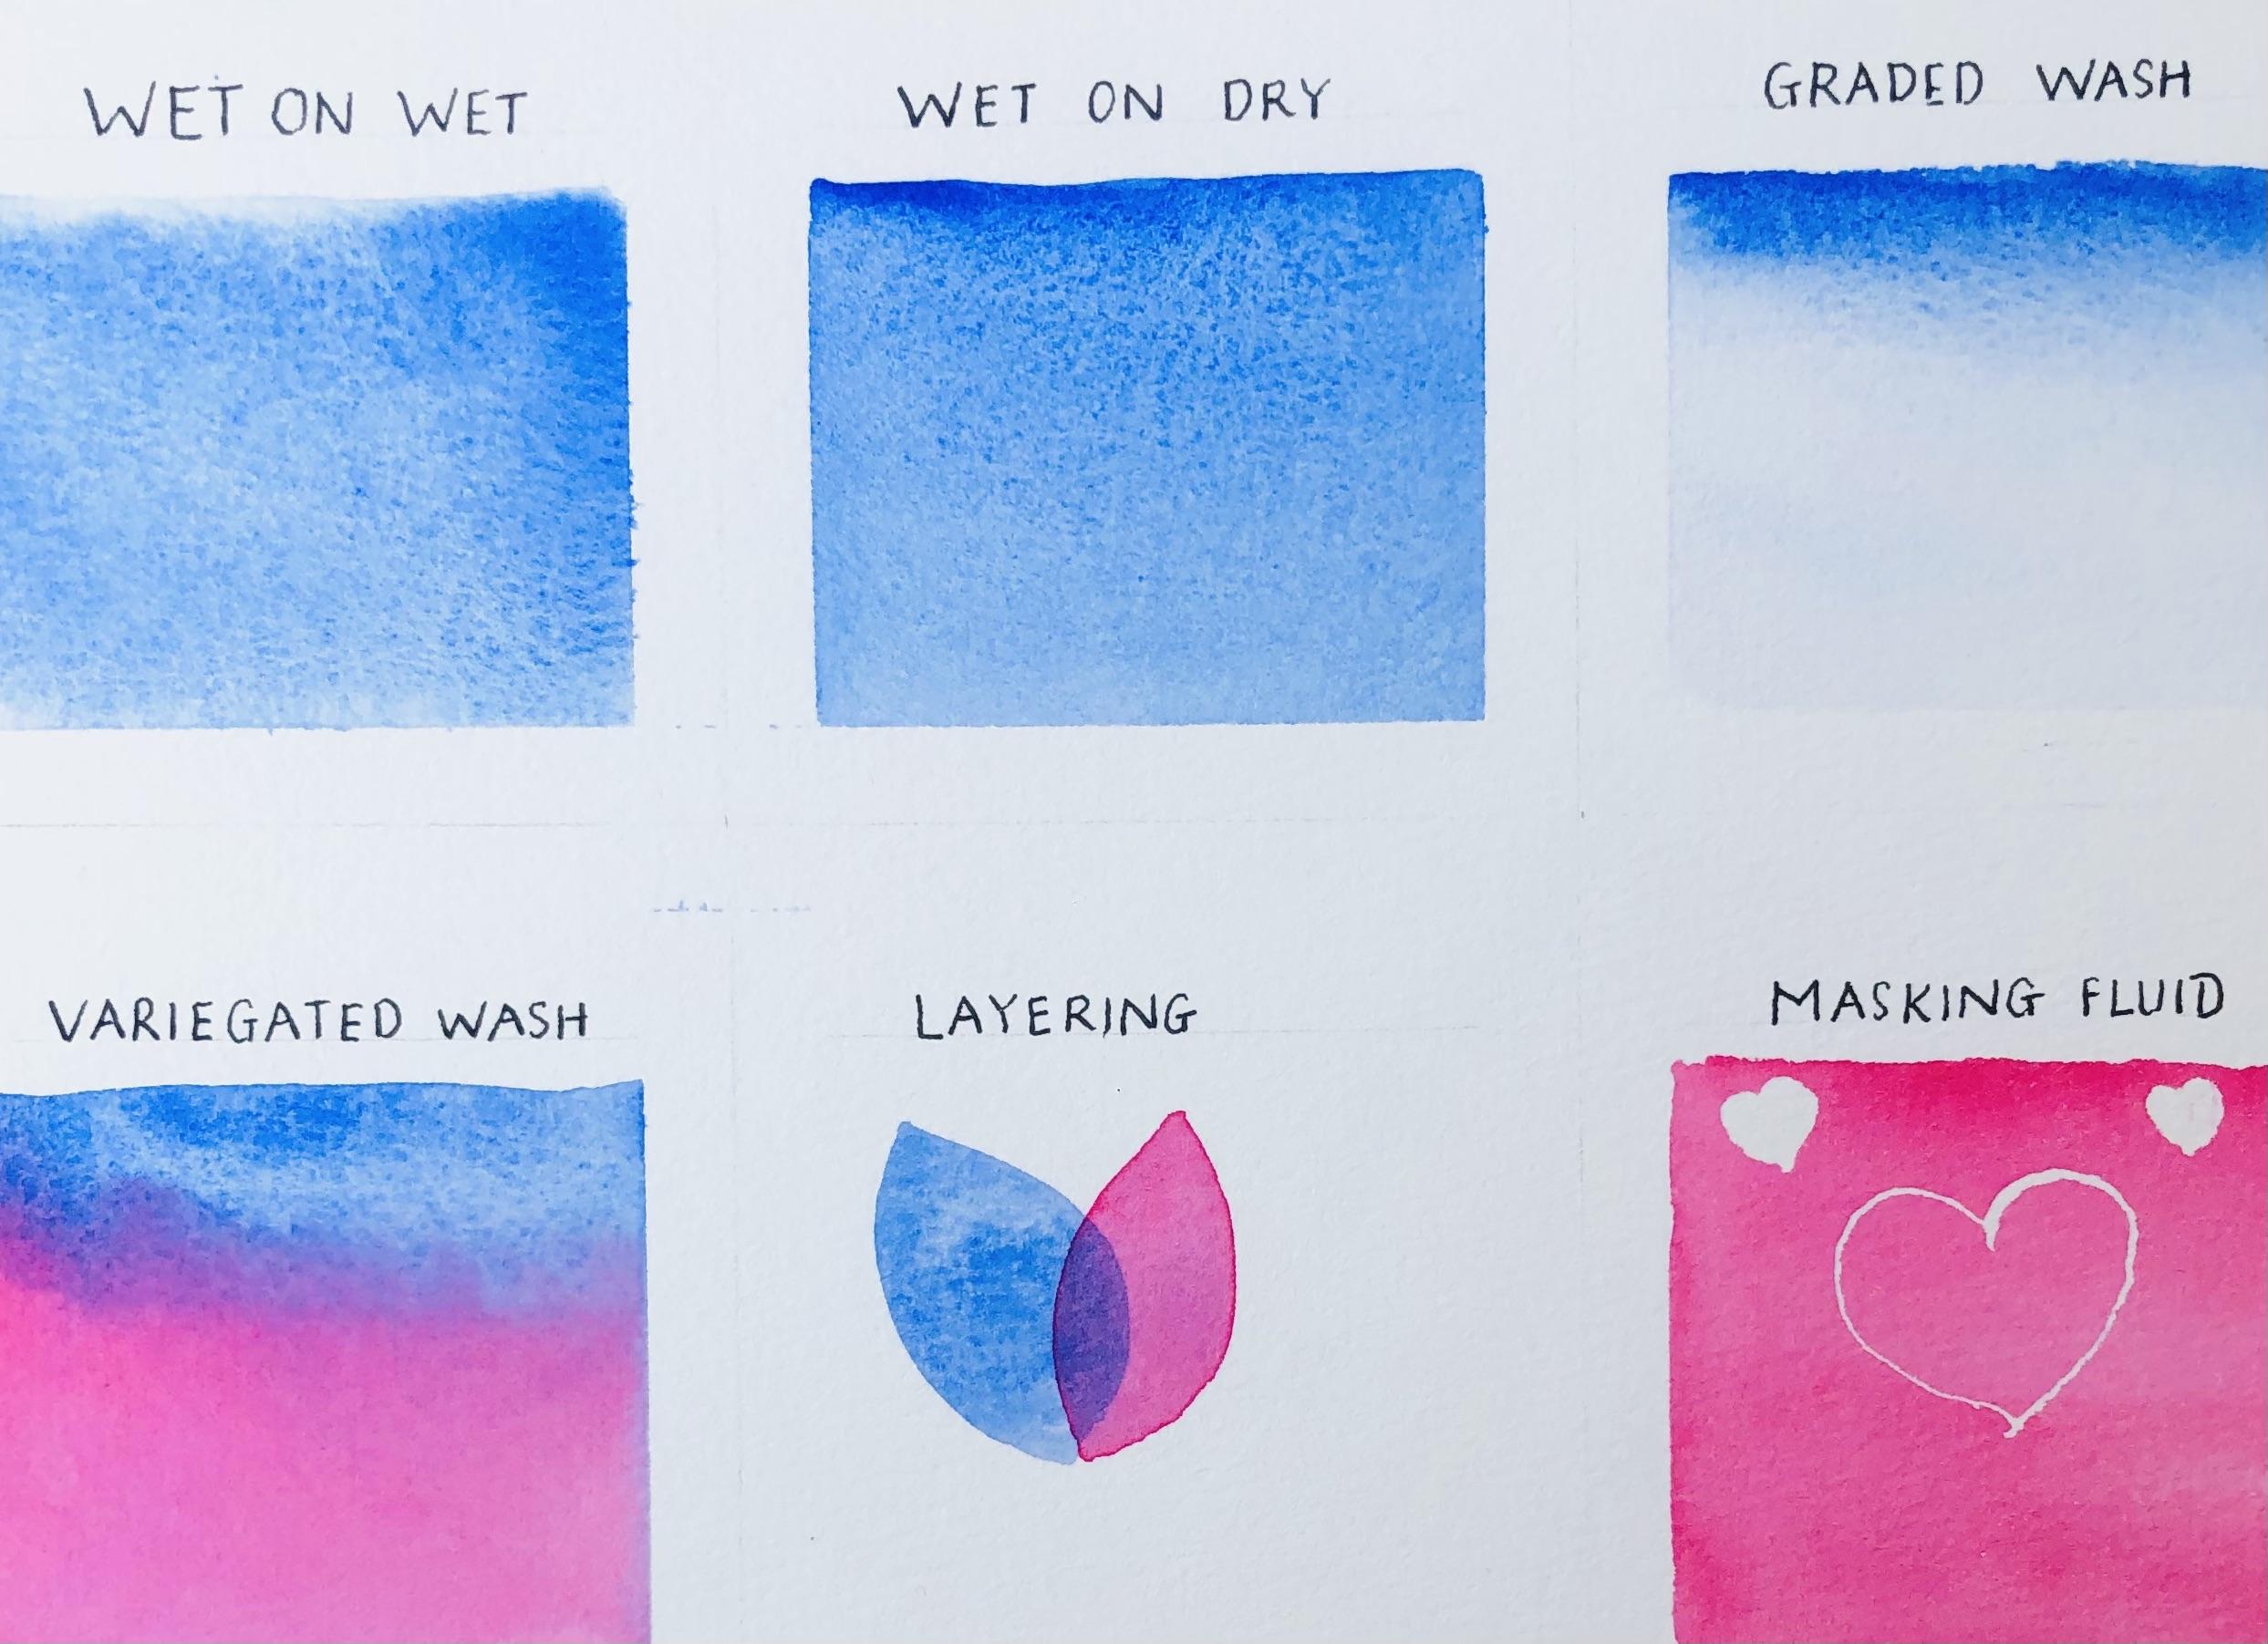
more advanced techniques. As you can see here, the first technique
is wet on dry. Very simple. You just need
to wet the brush with water color and then put
it down on dry paper. The second technique
here is wet on wet. You can see here I'm
wetting the paper first. And then I have imposed
some Carlos on a, on top. As you can see, it, create a special effect, the blooming effect, which
you can only see what the color the paper is wet. It easy to control
without color, as you can see here, it is a flat brush. This technique is
great at gouache, as you can see here, the color, we'll start with this chunk tone and then gradually fitting. Just need to clean
the brush to make this effect is very good. As you can see here. I make the fill color
change gradually from cerulean blue into roads. Big is how I am doing it. A blue color and then clean
the brush at Rhodes Scholar. And then continue with gouache mesure to do everything when your
paper is still wet. The layering technique
is very similar to very good at Rush is dead. A new color into the previous scholar
when the paper is read, word for it to dry before
adding a new way up. If you can see here, the part between the
two better is purple, which is a mix of blue and rows. Nice technique is to
use masking fluid. As you can see here. Right now, I'm using what is called a ruling pen to
apply masking fluid. I have a bonus lesson on
video in this class to review different toys
applying masking flow so you can check it
out after this lesson. As you can see here, I am
using is the warning pen to apply masking fluid on paper. And then you will need
to wait for it to dry. Now, I'm using another term
which is a scenic own brush. The brush is more suitable
to apply a large area. The ruling pen is more
suitable to apply very finalize Up to applying masking fluid, mainly to wait for it to dry before painting on top of it. Up to a painting on top of it. We we need to read
again for the carlo to try before removing
the masking fluid? I'm he was saying eraser. To remove masking fluid. You can use to hand that. I think is more effective. That's all for this lesson. Let's check Mu2 for monitoring. It makes
3. Part 2 - Advanced Techniques: The second part of this class, we've been learn some
more advanced technique. Is not really advanced. Bad, maybe it is a
bit less common. So some of you may have heard
about this thick mixed, yet the first technique
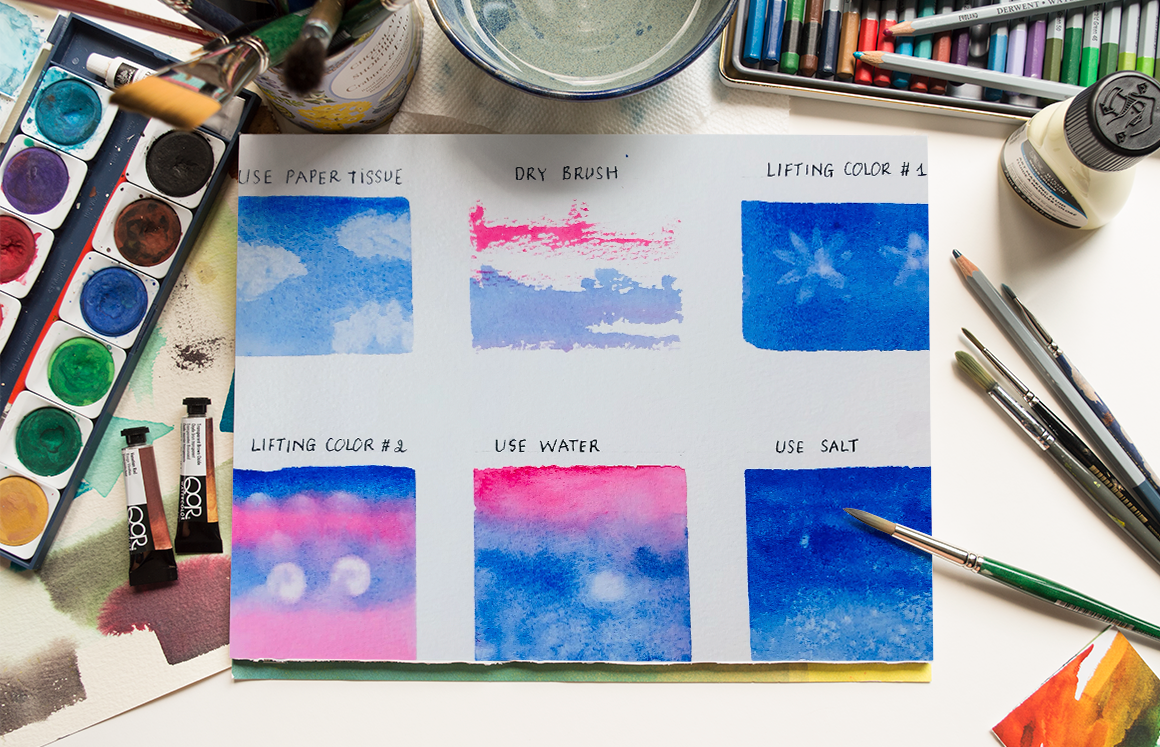
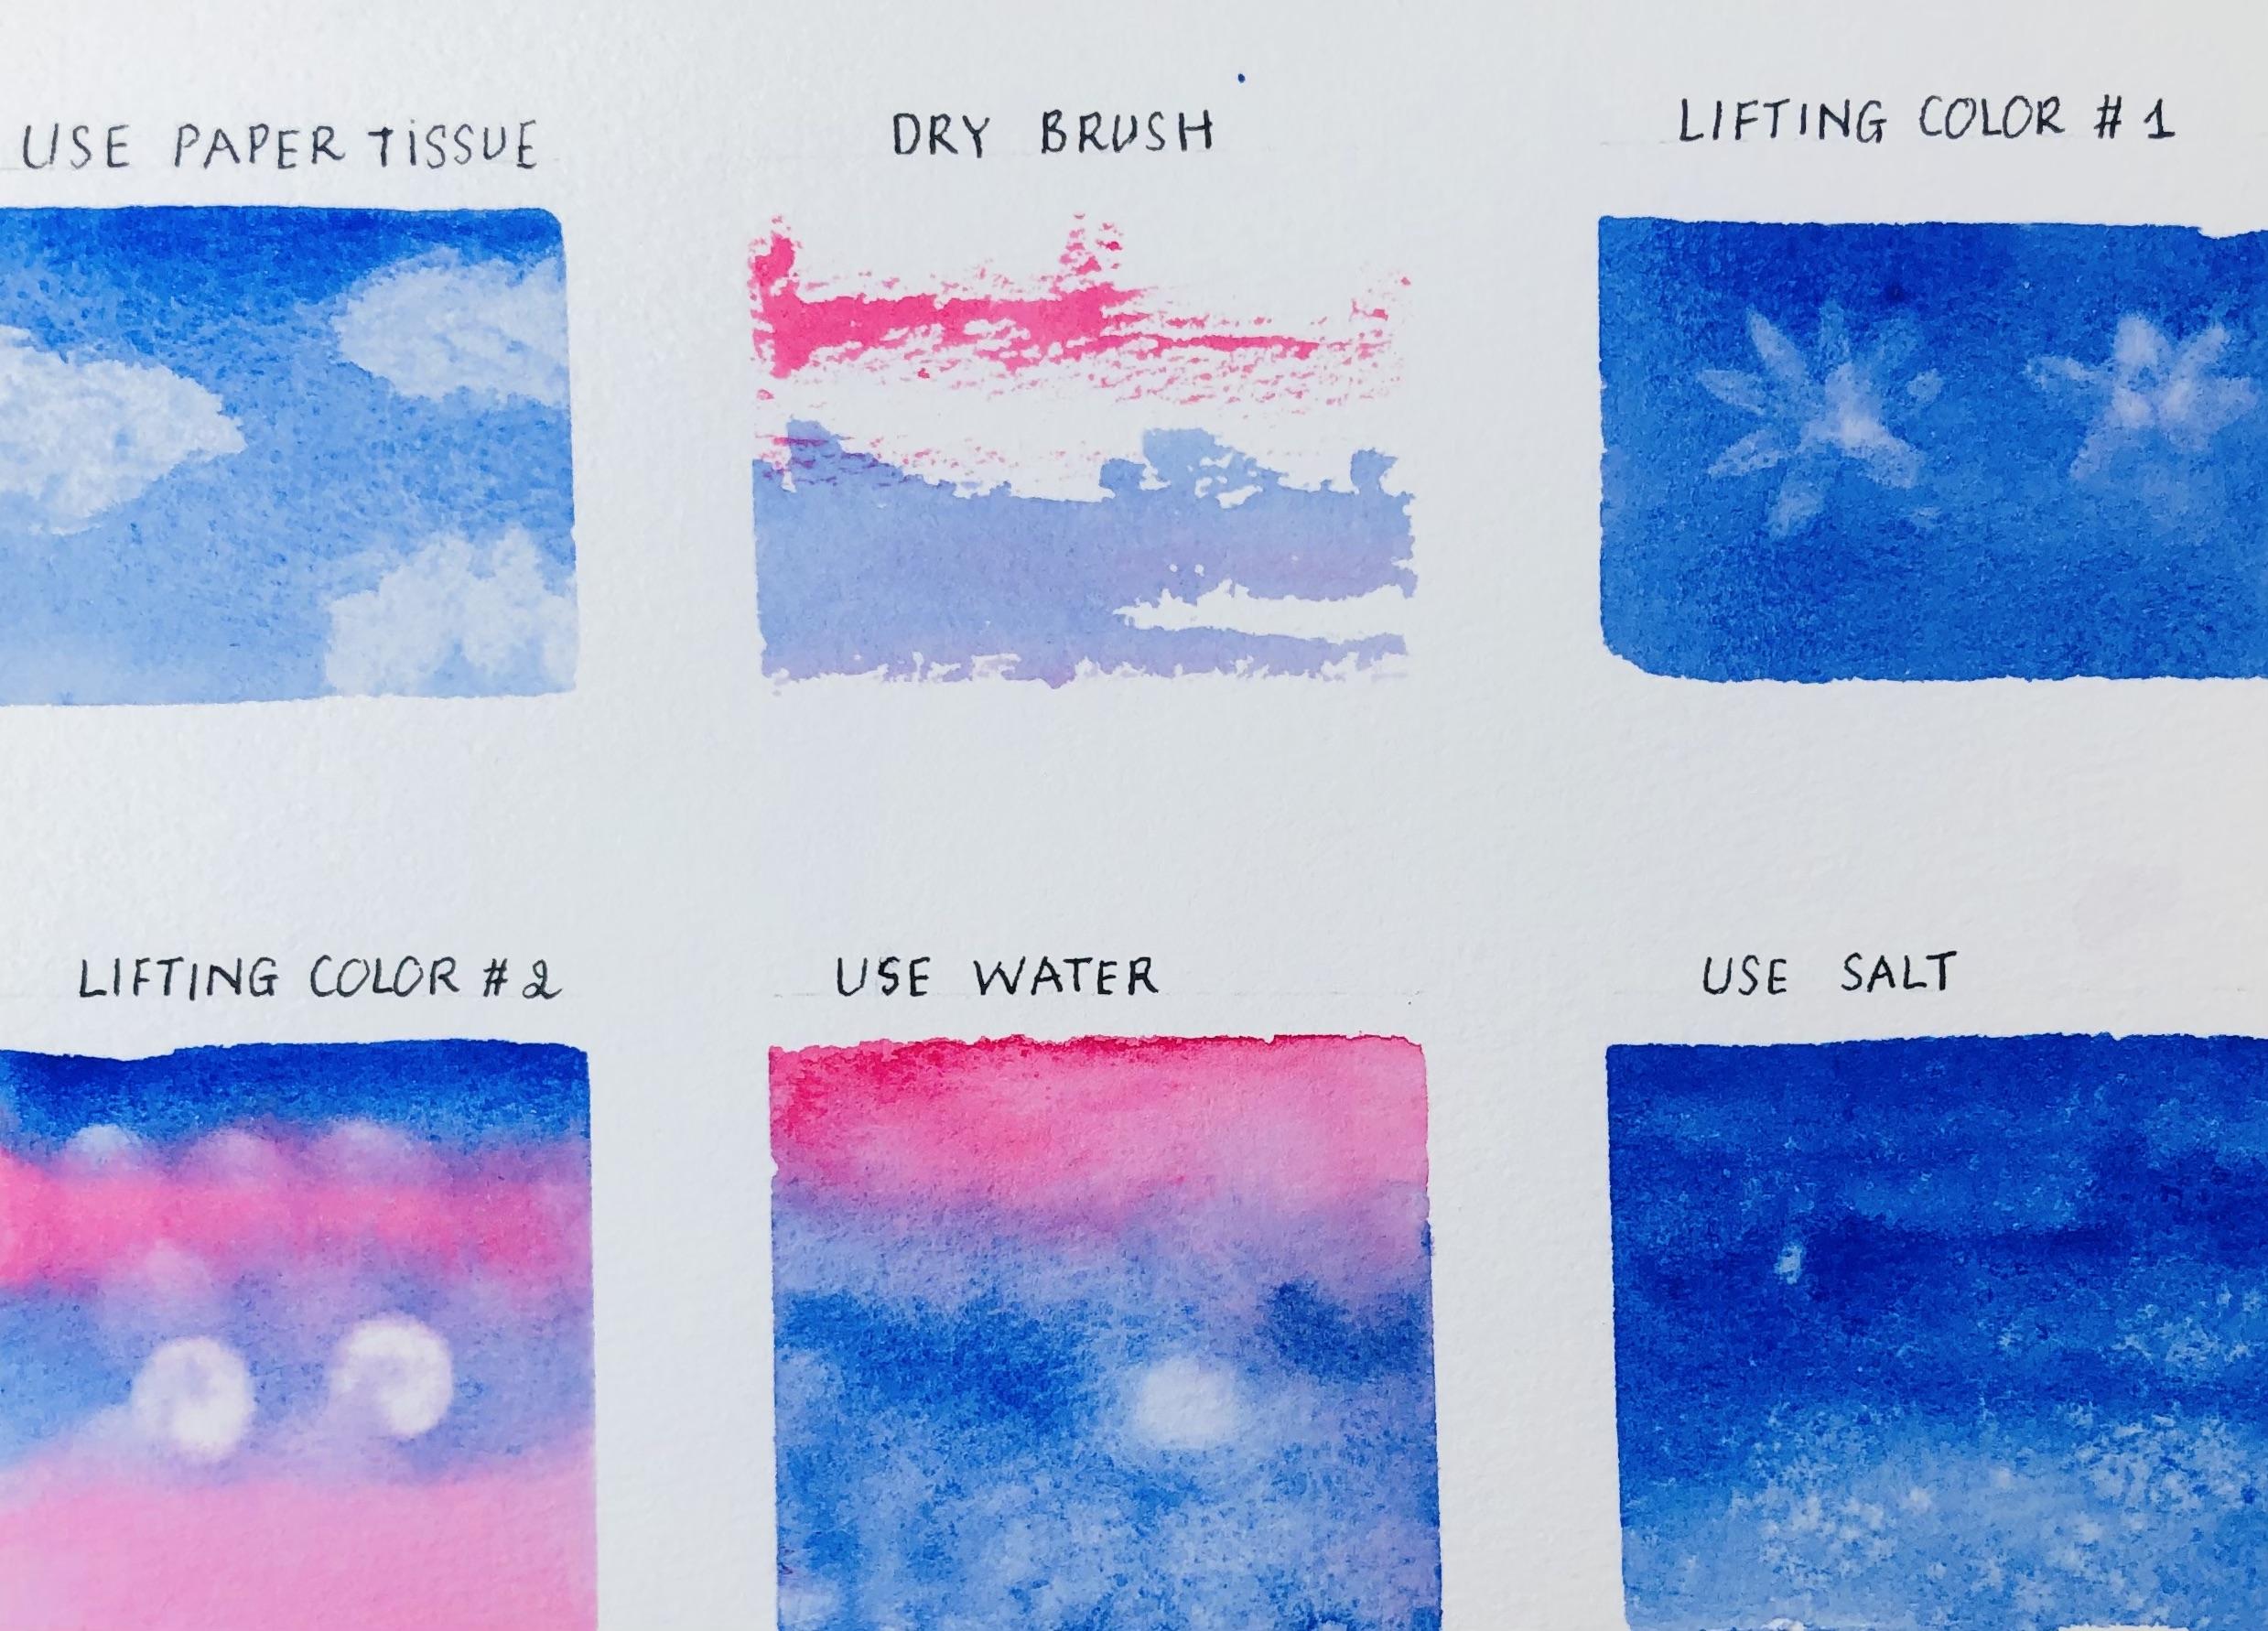
is using paper. Does shoes, as you can see here, just put color on paper and then use some lipid
issue to lift it. It looked at this, you can see, you can use this simple
technique to make something which is very
similar to a sky with clouds. Next technique is
called dry brush. My brush can be dry up vet. And the way to do it is you make your brush flat like this. Instead of Stand Up. Link creates the effect which
is very similar to the sea. The next technique is lifting color when the paper is wet, is cone rent paper is wet up the painting should wait
to be maybe 15 seconds before inserting a clean brush with water to lift the cartel. Which is similar to you can use this technique to make white
for how was the background. For example, sometimes
bend the paper is too dry. For example, you cannot
lift Carlo this way. Because of that we have with our next technique which is how to live to color brands
of paper is dry. Seminar to the previous
technique that up to painting the background until the
color is completely dry. Maybe ten or 15 minutes, depending on wherever condition. And after that, you use a clean, wet brush to do
something like this. But sometimes depending
on the kind of paper. The Carla, maybe it means
be very difficult to lift color when it is
already dry using a brush. So one way to fix this is we use a household item which is
going messy, clean piece. Like what I am doing here. I am using mesocolon. With mesocolon, you can be sure that you can live whatever
color you have a painted. Next technique is on wet color. It is very simple, but surprisingly, not
everyone know it. So as you can see here, be pain, the Baker while and then it
was glean what to put on it when the water fun tau from a height incorrect the effect
which is very suitable to, then you want to pin some
background for your appending. Finally, we can also use sound
to some special effects on the background because
sound can track colors. So I think the effect is quite similar to
water on the surface. It just slightly
difference mixture to put sand and the paper is wet until completely HBI
before removing the sont. And that's all that far. This lesson.
4. Bonus Lesson: Different Tools for Applying Masking Fluid: Hello everyone. This is Sean CB, and today I will review different tones of
applying masking food. Cluster. One is ruling pen, the second one is
a silicone brush. Next is a normal
brush. What a brush. And finally, bottle. Now, let's get started
with a ruling pen. This ruling pen is my favorite application turn
because as you can see here, it can hold a lot
of masking fluid. So it can heal is to apply masking fluid for why
it can not get here. I purchase this ruling pen. The price up around
ten US dollars. Before I run, I wanted to
save some money by purchase. A very cheap ruling pens, which is already one
or two US dollars. And it turned out
that I couldn't use mesure to purchase the high
quality ruling pen quality is also important here. Now, let's check out
this semicolon brush. A lot of people recommend
using it because similar to a ruling pen wouldn't
be very easy to clean them after using. However, I personally don't like this brush because it cannot
hold a lot of masking fluid. You'll need to rewet
eight quite regularly. However, it may be better than
a ruling pen AP1 to apply. Large area of a
simple flower petal. Ruling pen is most
suitable for finalize. Now, let's check out this water brush is quite
similar to a normal brush. You can use a normal
brush to apply. Masking fluid. Problem is, it will be very
difficult to clean it after using ruin it after
several tons. One way to solve
Biotech, it is wet. It, you clean it with water
very often with a water brush because it has within the brush. So you don't have to
rewet it manually. But anyway, you can run
it up to Salford hands, but I can purchase any of them. Advice, a cheap price
shouldn't be a problem, but it is quite convenient
to apply masking fluid. Both fire eyes are large
areas such as a flower petal. Finally, I have a chess, which is this bottle. Morning. As you can see, I have already posted
some masking fluid inside and it comes
with some tapes. And right now I'm using, I am installing 0.5
millimeter tip. And it is surprising, surprisingly good for me
because you can use it to pin, event finalize best, best. Thin, finalized, even
thinner than a ruling pen, is still not convenient
when you want to apply some large areas such as petal. That's all for today. Thanks for watching. If you have any question, feel free to comment
below and let us by more. Pooja is See you later.
5. Final Thought: Thank you for
watching this glass. This glass have phone and want to know more about
my future purchases. Let's click Follow button. In this Skillshare, it can
also follow me on Instagram. My name is TB labs
purple. This is me. I went so post some free with a color painting to 12 years
on my YouTube channel. You can obviously my Skillshare
profile to fight them. One. Thank you. Goodbye and see you later.
 Trang Chibi ❤️, Watercolor and Gouache Artist