Transcripts
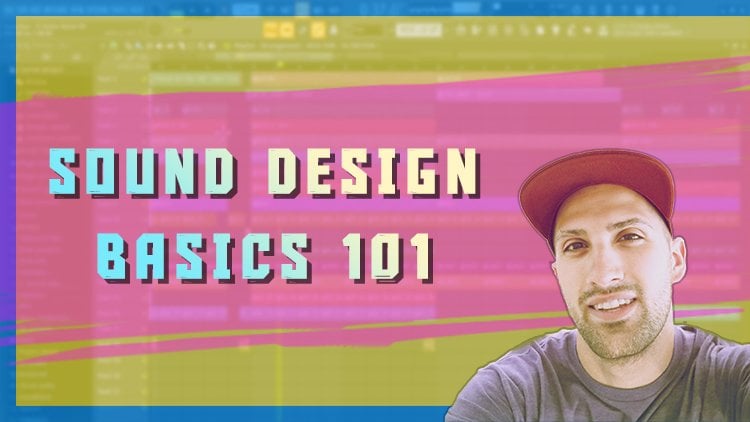
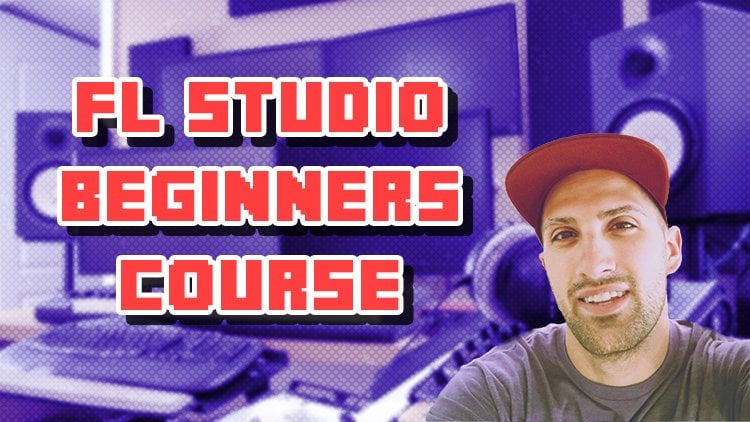
1. [INTRO] 10 Steps to Become an FL Studio Pro: Hey, what's up? I'm gratuitous and welcome to my course called 10 Steps to become an FL Studio Pro. This course is by far my highest quality course. I now have a nice green screen. Is UCB behind me? I got a new camera which allows you to see me in a stand clear. In addition, I've also got a Wacom tablet which allows me to draw on the screen like Siri here fl Studio . I've broken it down into 10 sections which are fundamental to know off how to use fo studio . So we start each section with a pen and paper. So, as you can see, you know, it's gonna draw just like a little smiley face for you or something like that. I break it down like the theory behind of You know what you re doing. I kind of do some diagrams drawing for you and stuff like that, and then we get into actually, you know, going into fl Studio. So a little careful studio here and we actually talk about fl Studio. We explain that the different windows So this is what we actually cover in this court. So I first talked to you you know what is your mind? Set as a music producer. And as you see me right now, this is exactly how it looks like in the course I break down how music production works. We get into some music theory. Okay, So I talked to you about how to count beats, and I do. I always like the drawing first, and then we actually get into with NFL studio with a real examples. And then it also explain to you about, like, chords and stuff, too. So this is gonna be a really awesome course for someone who is newer to production. Like in all honesty, you would probably want to be producing for about a month or two already, so that you kind of have a general idea. But this course does start from a real super beginner level. Okay, we get into, like, programming notes with the step sequencer. I introduce you to something a term that I coined called safe spots. I've even written a book about this on Amazon. It teaches you how to create awesome drum loops. We talk about, like, the piano role as again cords, keys and scales and all that kind of stuff. Okay. We talked about the playlist. How to arrange the song. We talk about the mixer, I go in depth with drawing and you know what to be aware of with a mixer talked about, like signal flow and how professional mixing engineers how they're able to achieve the mix is that they are able to achieve through, like, always, their signal roading, whether it be like Syria's processing, parallel processing, all that different type of stuff we get into mastering, I explain to you know what is mastering? What's the goal of mastering going further? We talk about like, your sounds what kind of sounds you want to buy. And then I actually talked to you about, like, digital audio and how it works. So if you go back to the drawing here, I can select like a different color. So, for example, I talked to you about, like, a sine wave and how, like, you know, you can have, like, plus plus three up here and then you have, like, minus three down here on. Do you know, depending on if you're layering sounds, you could be getting phase cancellation on These are all just things just to be aware of so that you can achieve the highest quality mix master and beat that you could possibly create . So, like I'm saying, I've just acquired all this new gear. We're gonna be getting really nice, high quality videos in this course and courses in the future with me as well. So I'm gratuitous. I worked there Grammy nominated artist on the host of the podcast called Music Production Made Simple. I've written three books on Amazon at the moment as well as have created over 18 music production courses based on FL Studio, and this one is going to be by far the highest quality in terms of all this new year. So if you're excited about that, because I am, you know, like I'm saying all this gear has made just the creation process a lot easier. You guys can enroll and I'll talk to you guys mawr inside the course. So I hope you guys learn a lot in this one
2. 1-1 What It Takes To Become A Music Producer: all right. Hey, what's everybody? I'm gratuitous. Welcome to 10 steps to become an FL studio pro, and I will be your host in this course. Now, this video is going to be for someone mawr wanting to pursue this as a career someone warning to hopefully maybe make some money off their music and everything like that. So if you're just wanting to learn FL studio and how to make beats, you guys even skipped in the next video and I'm gonna break down. You know how to use fo studio? Um, you don't get up and running, but I want to talk to you about your producer mindset being in this industry because when you're first starting up, you know, for the most part you're pretty unaware of your actions. How they can, you know, stay with you forever. Ah, if you're not wise with your actions, okay? Because now, if you are trying to sell your music, if you're getting placements, if you're working with artists Ah, your brand and your name now matter. Okay, So the things that you say behind that Brandon name again, they can follow you in a positive or negative way. Okay, so I just have Ah, a little pencil here, which I'm gonna be ableto right on screen. Ah, this just kind of walk through. Ah, just some kind of mind set. Things that I truly believe that you should have going forward. Okay, Because again, like I'm saying, if you're just doing this for fun, um, you know, that's one thing. But if you're doing this, Jack should pursue it as a career. You want to make sure that you represent your brand professionally, someone, something that someone has always said. To me, it was like, It's like your persona. So it's like, you know, when you're in elementary school and stuff like that, typically you're always around, you know, the same kids growing up. Whatever. Right. So it's like these people already know who you are, but when you get out into the real world, like, for example, like if this is the first time you have you ever seen me ever talk to me, it's like this is the first impression that you're getting from me, right? So that's like your persona that, you know, when you meet somebody, you know the impression that they get from you So it's really important that you established this per, you know, the sense of professionalism in my case. You know, hopefully, you know, you feel that I have some knowledge to give you. I've been in this industry for over 10 years now. Um, but okay, so that's kind of the mindset. I'm trying to get across to you that, you know, you have to stay professional because, you know, things can kind of bite you in the butt later on if you're not wise. Okay. So, again, this just kind of run on the screen here, so I just want to talk about your producer mindset. Okay, So your producer mindset and I just have some different colors here. Okay? So the first thing I want to talk about is your actions. Okay, So your actions now matter. So by this, I mean, you know, if you are going to share something on social media like your music or if you're going to state your opinion on a certain topic that is currently out there, you know, for example, right now it's like a anti vaccinations and stuff like that, just, for example, like one of making this video Those are the things that are being talked to boat. So you know, you as a producer, if you want to chime in, if you want to give your opinion, you know people are going to look at you as such. You know, there's gonna be two people, right? So, you know, here's the fence. You're gonna have people who are for it. There's going to be people who are against it. So if you state your opinion one way or the other, you know so again these are things that you just have to think about. So, you know, maybe you just don't want to state your opinion at all. You know, avoid all that drama and just focus on your music. Okay? So again, you know, it was just These are just things to think about because as you start to grow as a producer , if you start getting a following, if you start, you know, getting fans, people start looking up to you in a way that maybe you're not really used to people looking at you for right. You know, if you've always, you know, hung out with your friends and stuff like that, you know, you've maybe openly shared everything, and you always stated your opinion. But when you get into the business world, you've got to be careful about what you're sharing and what you're saying. OK, okay. So now that's our next point. So you have to be careful what you say. Okay, as well as you have to be careful what you are sharing. Okay? So again, you know, on social media, whether there's Blake, your music or your opinion on things that are going on now in terms of what you say, Ah, you have to be careful because the things that you say they can follow you like forever. Okay, so it's just important that you know what you're going to share. What you're going to say, you know, is it doesn't relate to you and your brand. Okay, because this also goes down to your morals. Ah, this is also you know, the words that are being said in your music. For example, let's say you're just the producer, right? But now you work with an artist and let's say the things that they're talking about, you know, maybe right now in life, you don't care, because it's just all about the money and, you know, realistically, for the most part, that it is what it is like. You know, if you want to make money, you got to make money, right? But let's say, 10 years from now, you've made lots of money, right? You're fully established. Now, looking back, you know you the songs are out there, right? So the thing is, once you release a song with these lyrics, you could never take it back. It's always gonna be on somebody's hard drive somewhere, right? So this is what I'm trying to say. It's like, you know, I truly believe that your morals or more more important than the money. Ah, because again, if you get established, well, now you can't really go back and change the actions of what it took to get to where you at today? Okay, again, I'm only saying this because with music production, it's really important that you do. Think ahead. Because again, these choices, the things you say, the things you share, they can follow you forever in your music production career. Okay, So, again, just be really, really careful what you say. Okay, so now another really important thing to talk about is before actually releasing your music . Okay, so again, when you just start up, it's totally fun, you know, making your music, sharing it with friends on social media with the Facebook or whatever the new Facebook is when you're watching this video, Um, but again, it all comes down to your brand, and you know how professional you want to be. So in my opinion, in my experience over the years, it's better to take the approach of you want to truly become, you know, really good at what you're doing. You want toe, you know, create a nice logo. You want to establish a solid brand before you actually release your music. Because here's an example you just downloaded FL Studio, for example. You know, you made a little beat. He started sharing it on social media. Now, this is what happens for a lot of people. You're going to catch them by surprise. They're gonna be like, Oh, wow, like I didn't know you made music, but they're going to listen to this beat that you just created maybe on, like, the demo version of FL Studio, right? And they're gonna listen to that song. They're gonna be like, man, you're just another bedroom producer Just trying to have fun with it. You know, maybe you're not going to stay with it. Um, you know. So these are the things that people will think about your your music, right? And then you let's say you release your second beat your third beat. You know, you keep sharing it. You know, for everyone to see people are gonna start to become kind of immune to it. So, in other words, you know, the first time you released it, people are probably always commenting liking. They're really excited for you, you know, 3rd 5th 7th be in. You know, you're not getting much. Um, you know, feedback from thes potential fans. Even if they their friends from your life from a long time ago. Right? So what I'm trying to say is, before you release your music, you want to really know what you're doing before you release it. Okay, so, you know, make sure you understand. You know the basics of music production in a sense of, like, compression e que. How to mix your music. How do you know? Making your beats if you compare them to? You know, these industry, you know, the industry music, dessert music, actually kind of, you know, compete with it. And, you know, in my opinion, I would probably kind of keep this stuff kind of quiet, like, Don't get me wrong. You can share it with friends and stuff like that. Ah, but just maybe keep it on the down low until you really know that you are becoming, like, really good at this craft. Okay, so here's some things which I want to share with you to kind of prepare you for before you actually released your music. I feel that this will give you a better jump start, and it might help create mawr kind of Ah, mo mentum behind your brand. Okay, because that's the thing with his music industry, it's all about momentum. Once you start going, you got to kind of keep flowing with it. You've got to kind of keep people entertained a little bit. Always keep them updated for the most part. So when you release your music, the first things which I recommend to you is a nice logo. Okay, let's just say a good logo and it's really, really important that you have an awesome logo, because again, people will establish this with your brand. Uh, what goes into a good logo? Many times you can use your logo in many different areas and within many different sizes and shapes and stuff like that. So, for example, you know, sometimes you can have a logo, which is you no longer and with, so I'll just read it here. So sometimes you can have a logo that is like, you know, has a has width, right with this way. But, you know, it's like a small height, But then a long time that you have, like, a little local here, besides, like you know, your little producer name, right? So sometimes, you know, now you want, like, a square of that logo. So, like, you know, from here to hear, you know, they're like this. It's the same size, right? But a good logo kind of ah. Allows you to be really flexible in your branding in addition to your logo. You know, I would say that you want, like, a website. Okay. Um, you know, you want away for someone to listen to your music for them to kind of, you know, for you to have a home base. In addition, it's really important for you guys to have a newsletter. Okay, so a newsletter is like an email lists mail. Chimp is an awesome platform. Uh, for this it allows you to get, you know, 2000 free subscribers. At the moment, their business bottles kind of always changing. But what an email list allows you to do is these are the people that want to stay up to date with you, right? So when they come to your website, you know, maybe you can offer them or if you sign up, you can get, like, my beat tape for free or again, It all depends on the industry you're trying to reach. Are you trying to reach listeners or you trying to reach artists where you're selling your music to them? Okay, so you kind of got to think that way. But by establishing on email list, it's really powerful, because then you can send an email off to these people and you know, either market to them, reach up to them, share with them some stuff like that. Okay, So, by establishing kind of like a base like this, it's going to allow you to be more professional and again kind of keep that momentum going . Now, the last thing I want to talk about before we wrap up this video is before you actually release your music. Here's some things which you can do to kind of give you an idea if you feel that you're ready to release your music. Okay, So the 1st 1 I have here is you want to compare your music to music that you like from favorite artists. Just listen to it, you know, in a sense of the master. So we're gonna be covering a little bit of mastering in this course if you don't want mastering is. But if you do know what mastering is, it's just like the last process in music production. It's kind of like we're like, you bring up the levels, you kind of polish three overall track, like if the track needs some compression for some balance or some kind of geek, you adjustments to kind of balance the music. But what I mean by compare the tracks is like, you know, like listen to their song, listen to your song is their song. Does it sound more polished and stuff like that? If it sounds more polished, it's like maybe you have to learn more about, like, the mixing and mastering before you start getting your music out there. Okay, on, by doing this is just gonna let you know where you're at and then also what you have to work on. If your music is close to these releases like, you know, if you're listening and you're just kind of like Oh, you know, maybe they're mix is just a little bit better Then you're doing good right now. You just have to know, you know, what do you have to work on to improve where you know, What do you have to read about? What do you have to practice? And as a music producer, that's that's what you have to do. Okay, you kind of have to listen to other people's music and then compare it to your own Now for myself. I'm really big on being yourself and not following the trends I'm were talking about. How does it sound? Okay, if someone's song sounds great, right? And then they listen to yours, and that years of Super Quiet or your e que balance Sounds really weird, right? Like that doesn't really, Um I'm not really talking about, like, your how they play their notes or what sounds they've used. I'm talking about how it actually sounds in a sense of when someone has play. Does it sound good? Okay. You know, like, uh, again is an e que balance all weird in your song. So if your track is getting really close to the professionals, you're doing good again. Now you're just gonna have to know what you have to work on, which is awesome. You know, that gives you a goal, a goal to achieve toe work towards so that you can become better and hopefully become the best in this music production kind of world. Okay, so again, this video was more just kind of preparing you before you before you actually become a music producer. The biggest thing to realize is is this is just gonna be a hobby for you. Is it just gonna be for fun? And if it is, that's totally cool. But if you're trying to, you know, establish your brand trying to sell your music, trying to get it on the radio and stuff like that. Your mindset is gonna be totally different than somebody just doing this for fun. And it's really important that you now think of yourself as a professional, even if you're not. But that doesn't mean that you can't treat yourself as a professional. And you know, when you talk to people that the things you say, the things that you may not say, stuff like that Okay, so I hope that kind of gets your mindset prepared going into this career. Being a music producer, it's a really fun industry. Ah, in all honesty, it's a really, really rewarding industry, like if you think about it. So you made this song, and even when you listen to your own music, there's just something that kind of happens, like, even to yourself. You know, it's just it's really impressive to be able to listen to your own music, you know what I mean? And now if you have gotten your music out there for other people to listen to, you know again, music helps people in many different areas of their lifes, like whether it's be like a legal wedding or if they're sad or if they're happy or anything , right? It's like music is such a powerful thing in life. And you, as the music producer, have the opportunity to control these people's emotions, you know, not fully control. And what kind of influence? These emotions. Right. Okay, so let's get into the course. Okay? You guys get a little FL studio how to get up and running on? Let's get into it.
3. 2-1 How Music Production Works: Okay, So in this video, we're gonna be talking about how music production actually works in a sense of just like the flow of music production. It doesn't really matter what music production program you use. And we call these Dawes digital audio workstations. You create patterns, you add these patterns into the playlist, and then you can wrote these sounds to the mixer. Um and that's pretty much the flow off music production in general. OK, so I'm gonna be quitting two videos to break down this process. This video we're just gonna be doing, you know, just like some drawing here. And I'm gonna share with you the flow of music production. You know, this is just for more like the beginner if you're kind of brand new. But again, if you're a little bit more seasoned, you can kind of jump into the videos where we start talking about, you know, more of the me of music production. So here's how music production works. So in fl Studio, you have something called the step Sequencer. Okay. And it looks like this, and you have always a little X squares, okay? And they actually kind of change colors So, for example, if we go from here now, each one of these is what you call a step, and then you're able to click in your sounds. I'm just gonna kind of cut of this in here. So imagine. You know, you just kind of put, like a kick drum on, like these ones or something like that. And so what's gonna happen is your pattern is literally just kind of kind of loop over, over and over and over again. Okay, so right now we will call this just pattern one. Okay, so pattern one. And again, this is what you call the step. Ah, sequencer. You could read that. Okay, So Okay, so this is called the step sequencer. You create patterns, and you can add in all your sounds. Okay, if this could be one shot, sounds such as, like kicks collapse, high hats. You know, like your percussion elements to kind of create, like, that drum loop. Or you can actually adding instruments here to like, your piano, your instruments and stuff like that. So imagine this is like a kick. Okay? And then we also have let's say, a piano here when you're dealing with a piano NFO studio. Anyways, it'll be like a little box. Um, and then you'll actually see, like, midi notes being play like this, and you can control it the length of them on stuff like that. Okay, so, again, this is called the step sequencer on. I'll do this. And red. So this is the step sequencer. Okay, Okay. So again, how music production works is you create patterns, thes patterns. You add into what's called the playlist, which I will do right here. So this is the playlist. So these patterns get added into the actual playlist and you will create many patterns. So you, you know, like for convenience. Typically, what you want to do is you want to break apart your patterns into as many different patterns as possible. And the reason for that is so that come arrangement time, you actually have total flexibility on what to add or remove in your song. This is how you make an intro. How you make a chorus averse, right? Typically for the most part, of course, is all your instruments. Is the business part of your song? It goes to the verse, you know, you take away some instruments allow those vocals to kind of cut through, and then you can kind of start building up the song. Okay, So, again, this is the step sequencer. You build your patterns, and we will just add And let's just say this, and I'm just gonna write p one for pattern one. Okay, so this is a P one. Now, let's just say we had another pattern. So let's just say it's our collapse or something like that. Okay, so almost a p two, Okay, Because we know this is like our kicks and our collapse. So, like, kick, clap, kick, clap, just for example. Okay. Now, as the song actually progresses, maybe what you can do is you know, the pattern one will continue. And again, it's a loop. So we played the kick drum here, here and here. Right. So what's gonna happen is you are actually gonna have this little playlist marker. Okay, So goes like this Is this little, like arrow and this arrow actually will play the song. Okay, So when you hit play, this marker will cross over all the patterns and whatever is clicked into these patterns, it will play the patterns which create, you know, which make your actual music eso as this line. Let's say it gets over here now, right? So it's arrow, so it's no longer playing the clap anymore. But it is playing, uh, pattern one, for example, Right? Like this pattern one would would play. Okay, so that's kind of how the flow goes of music production. So we create patterns, we add them into the playlist and you get Teoh, you know, choose where and when these patterns place. You can kind of start building up that song. Now we have what's called the mixer, okay? And I just kind of bring down the window a little bit. So the mixer is where the rial meet happens in your music production. This is where you can adjust volumes where you can add effects such such a Z Q compression and reverb delay. No tons of effects that you have available to you, and I'll just give you this a little drawing of what it looks like. So in fl studio is just a nice big window, so I typically have it so that my step sequencer playlist and mixer actually look like this and if I want to make one bigger, I would simply just click on the city. The mixer I enter it would go it full screen and you enter again to make it go back to the same spot. So this right here, this is the mixer. OK, so how the mixer works is you have what's called like the master. Okay, so I was gonna write em. So it's what's called like the master track. And it's also called, like your ah to bus. And the reason for this is because you actually have a left and right channel. That's why it's called it the to Bus. And that's like your stereo content. Okay, so just let you know what stereo is is. It's the difference between the left and right speaker. So right now I'm talking to you through this microphone, you can't see it, but this is what you call a mono source. Okay? It's just one microphone. It just records my voice, and it comes out of the left and right speaker evenly. That's why if you're listening on headphones or whatever, I sound like I'm coming from dead center. Okay. Whereas if you listen to ah you know, a recording in stereo. It kind of sounds like, you know, kind of like stereo. Like it's around you. And the difference is is that the left and right speaker are you know, they have different information, so, you know, they may have the same information in some frequencies, but in other frequencies, there's a difference. And the reason why I'm saying that, you know, it might be a little bit too early To explain this to you is just because of, you know, this to bus that I mentioned right here from the actual master. Right? So the two buses, your left and right and how it works is so you know, you have insert one was Do this insert to this into three. Do this. Okay, so all of these are going into the master, okay? And inside a fl studio, they make it really, really easy. Because if you if you actually come here at the mouse, and if I would click on an insert, you'll actually see, has a little circle. And it has the cable, and it goes right to the master the same thing with two as a cable, and it would go right to the master. Same with three. Like that scan. And then in addition, you can also turn up or down this, um and this even allows for even further processing. Okay, so if I go back to actually go a different color, Okay, so let's say you know, not to go to advanced yet, but inside the mixer you can be getting what's called like subgroups or sends. And this is more intermediate, advanced level of the mixer. Ah, but you could be routing your audio of round with, you know, a signal flow. And you could be getting really, really advanced things going on. Such as, like, parallel compression, or, like, parallel distortion and all these different things. It's really, really powerful, so I'll just kind of draw just to give you an example. So, for example, if I write for here, Okay. So, again, each one of these is an insert, and each insert would have, like, a little like volume knob. Okay. So you can turn this up and down, okay? You can also add effects. So is that a FL studio? You'll have a little like a side thing here. Let's just do a different color, so each insert. If I click this one or click this one or this one, each one will have all these different effects you can add. It has little arrow. So you just click the little arrow and then you can add in like e que or ah compressor fiscal comp. A compressor is a very, very powerful tool, which you will eventually want to learn. Uh, this is what you can use to kind of balance out your volume or shape and mold. It sound really, really powerful stuff again, like reverb. Okay, Or like delay. You know so again, each insert you can add on effects, and that's what you can do. Each one has a volume knob. It even has, like, a phase flipping and stuff like that. It allows you to remove stereo or add, uh, or just keep like the mono content. Um, it also has, like, a master kind of button here, and it allows you to turn off all these effects all at once. I'll explain to you later on, but it's really important as you're mixing your music that you have a fair of comparison. So, for example, if you turn the effects often on. You typically wanna have the volume at the same level, but you just want to hear it that the effects are on or that they're off. And that way you can always make a fair volume comparison. Okay, so let's just go back to the fore here where it's a different color. Okay, so this is you know, for example, I'm just going to create what's called Ascend. So imagine four. Here. We added some reverb on. Okay, so he added reverb on 24 And so let's say, uh, three here. Let's say this is a piano. Okay, so three is a piano. So what you can do is right now, three is going to the master, so you're able to hear it. Okay, if I Ned, click on three and then I come here and I come down here to look a little like arrow like this. Ah, these two different color begin, there would be, like, a little arrow like this down here. Okay, So if I click on three first and then I come here and click the arrow, what's gonna happen is it's going to give me a little circle right here. Okay, Um and then now you're going to see that three is now going to four. But it's also going to the master. But then now what happens if we click on four? You're going to see that four is going to the master. Now, again, this is getting a little bit over your head because we knew. But what you can do now is you can add a river, and, uh, these effects have what you call dry and wet. Okay, So dry is the original signal. So imagine you know, your piano is going into three here, so three and then it's going right into the master. So let's call like your dry signal. OK? You're what signal is if you are adding like reverb and delay, it's like you're effect. Okay, so that dries the original signal. The wet is the affected signal. And so if we click on three and we wrote it to four, we click on four. When we see that four is going rate to the master. I'm sorry. I will Right this in yellow. Okay. So, again, this is really hard to see without seeing it inside of fl Studio when we get to that is gonna be in our later videos, everything will make sense. And you're really gonna make sense of how this all works again. It's the difference. It allows you to make your music at a really professional level and get the sound you want . But what I'm trying to say is this is called a send. Okay? So you can send the piano to your reverb. Okay, What is right reverb in here. And then you can blend in the amount of effect that you want. Um, and again on the river, you're gonna have a dry and wet. What you do is the dry you put all the way to zero. You're going to keep the wet. And why this is really powerful is because once we start getting into mawr inserts So, for example, that say, you know, we had insert five year let's say we had ah, guitar. Okay, so we can also come here to this guitar. We can click on it. We're gonna come here, we're going to route it to the reverb and then so largely the circle. So it's going to go, So I know there's a lot of lines going on, right? And it is a little confusing when you haven't seen it before. But this guitar, it goes to the master with that dry signal. Okay, so again, dry right, the dries, the original signal, they're not affected. Signal. We can also send the guitar to this reverb, and then we can blend in with this knob how much we want. So let's go back up. And, um, so again, so we have our step sequencer, okay, on a step sequencer. This is where we create patterns. We at her sounds into step sequencer. We add our, you know, we actually click on her inner sounds, whatever. Uh, and as you can see, I have the piano and the kick here. Typically this piano I would put to like you, Let's say pattern to, for example now, So imagine. You know, this kick is powder in one, let's say, and then the piano, let's say that's pattern to OK, so as you can see pianos playing right here. But the piano isn't playing right here. So again you create patterns. You want to break them apart so that you can actually arrange the song you can add sounds and instruments in and you do that within the playlist. And, you know, this is this is how you actually arrange and build up a song. Then what you do is your individual sounds whether it be a kick drum piano or, you know, the guitar, whatever sounded is could be a symbol. You wrote these to the mixer, OK? And I'm going to share that with you and fo studio. There's a certain way how I like to do it because if you color code and label accordingly, all the colors follow you into the mixer. And so what happens is again if you ah, color and label beforehand in the step sequencer that's gonna follow you into like the playlist is gonna follow you into the mixer. And the thing is, you know, if your song is only, um, you know, just like a couple instruments, you know, coloring and labelling is in too big of a night of too big of a concern. But as soon as your your song starts to grow like I'm talking 30 40 50 60 instruments, having things color coded was going to save you time later on because you know that. Say that symbol's a little bit too loud. You look, you're like, Oh, that's symbols yellow. You're gonna come here to the mixer Chaos yellow. Now you can either, you know, on the mixer it here, you can just simply maybe, just like, turn down the volume or something like that. Okay, so again, we created patterns in the step sequencer. We add them to the playlist and then we can wrote our sounds in the step sequencer to the mixer weaken, Totally process. These sounds exactly how we want in a sense of volume e Q. And if you know these various effects to get that overall sound again, all of these sounds are Ricky being routed to the master. And when you we hear the word mastering, this is where it happens. It happens on your two bus. Ah, and you want to be very, very subtle in your effects. So, for example, if you're adding compression and eq you onto this master track again, you wanted to making sure that using that, you know, subtle amounts of ratio or subtle, you know, cuts or boosts within e que. And I'm talking like 0.5 decibels Okay, So, again, in audio, we measure things like decibel. So if we boosted at 2000 hertz under e que, which all you know share with you as we go, you're going to see e que and stuff like that. Um, you know, if you boosted 2000 hertz, if you're mixing, typically you could be more aggressive. You know, you sometimes you can get away with, like, four decibels a boost in a certain area. Um, and it still sounds natural in this song. But when you get into the mastering stage, you got to be more careful because you are now affecting all the instruments you're affecting the overall song. So, you know, if you did a four db for decibel boost around, let's say two or four K or something. Now your music might sound too bright. Okay, again, with a music production, there's all this terminology when it comes to describing frequencies. You know, like the high end. It could be like, you know, it sounds too bright, or if it wasn't bright enough, sometimes people would say it sounds dull. And then when you export your music, this is, you know, on this master This is what your actual music is going to sound like when you exported to you other your MP three or your wave. I will describe these audio formats later on in this course as well. Um, And on this master, you know, what you want to do is you have, like, a limiter and the whole goal, this limiter, is just to prevent distortion. Okay? And then the final last effect that you have is a meter, okay? And this meter tells you exactly what's going on with your audio after all your effects. You know, typically on a master, you know, you might want want to start with maybe a six e que, for example, and then, like some compression and then you'll like, let's say, goes into their limiter. Uh, we typically set this at minus one db At the moment. I will describe that later on. It's just to do when it goes to MP three, there could be a conversion air, and sometimes your export can become a little bit louder than what you exported it at. But I'll break that down for you when we get into, uh, you know, lossless and lost Lee cortex and then yes, your meters is really, really important. There's also a free meter. It's by you. Lean, totally free. Very, very powerful. Ah, there's a new standard out nowadays when it comes Teoh mastering and stuff like that is called L U F s. And that meter is by you lean. Okay, it's called the You lean Loudest meter. There's a free and a paid version At the moment. I'm just using the free version. It does everything I needed to do, but just let you know. You know, you could even download that now to get prepared for later lessons in this course. Okay, so again, that's just a little overview of how music production works. Every single music program is the same when it comes to this stuff. Um, so if you're using able to in our Ethel studio, you know, all this stuff kind of translates. Okay, so let's get into an overview of FL Studio. How FL Studio works. We're gonna go through over the menus. That video will be a little bit long, but I'm gonna go over how fl studio works, and then we're gonna break it down and get into the meat of each kind of area and further describe a lot of the main tools that we use in music production, Okay?
4. 2-2 Walkthrough Of Fl Studio: Okay, so this is FL Studio. Um, So for myself, when I purchased FL Studio, I first started with the demo version. I wanted to see, you know, if I liked it and I eventually chose Ethel Studio for my dog of choice. It is the only doll that I use. The reason why I tell you that is because is just starting up. A lot of people feel that. You know, they need one doll for this on $1 for their mixing and the $1 for their mastering. In my opinion, it's best just to learn one music program. It's more affordable. You only have to buy one product efforts. Did you offers lifetime free updates? Um, and then also, you don't have to be wasting time learning the program. You can actually now focus on creating your music. Okay, So I actually purchased the producer edition of FL Studio just to give you an idea of you know, what version you should purchase. They also like the signature, but in my opinion, I think it's just a little bit of expensive with all the extras they give you. The producer edition, I believe, is a nice kind of in between the middle, but again, lifetime free updates. Okay, So as you can see, this FL studio, so is gonna work my way through the top, work our way through You know what all the buttons do and you know how to kind of maybe just built, like, a little quick beat just again to get you up and running, and then we're going to get into more of the meat of, you know, the specific tools that we use in music production as a whole. Okay, so let's start with the menu. So in file, this is where you can create a new project. You can create your own templates. Templates are awesome. Just, you know, searching toe YouTube. You know how to create NFL studio Temperley? Uh, it's all about speed. As you can see whenever I open up fo studio, I already have these things already made their called sends on. And as I was showing you before, you know, if we had an insert, I can just simply is a click onto, like, let's say some distortion and now I can have some distortion added in. You'll see why that's important. Later on, that's to do with parallel processing. Really, really powerful stuff. So continuing on, you know, you can save you can save a new version of it and stuff like that. Ah, here is how you actually export the song. Okay, So wave is what's called lossless is your high quality. This is what you would upload to the say, a distributor. If you want to get your music on Spotify or iTunes or even like Soundcloud and stuff like that, MP three is more. If you just wanted, wanted to send, like, aversion to a friend and I can email or something. It's what's called lossy. It actually removes data information from the file. I'll explain more about file types later on, and then these are just recent projects. If you are working on other projects, you know, you could just quickly access them like this in the edit. I never use this. I use so for me, I'm really big on the keyboard shortcuts. So when it comes to control Z to undo control X to cut control, see, to copy and control V to paste, just like how we always do in windows. If you want a copy text copy paste all that stuff. That stuff all works in FL Studio here, too. So, for example, if I just take some bungle hits here, okay? And let's say this I click a whole bunch of different things in you can actually highlight multiple. Uh, sounds just holding on shift. You can select d select where you can, right Click them instead. Okay? And if I hold down control X, you can see I can cut. And I can also paste them because now it's all make your clipboard. So there you go. OK, so let's just cut those. Okay? So to continue on here is add. So this is how you can kind of add and instruments for myself. I never really use the menus up here. I only use it for very, very specific things. If I'm gonna add in sounds, I'm personally gonna actually click and drag a sound. And that's how I would do it. In addition, um, if I'm working on instruments, sometimes I'll go into, like, the plug in database here. And as you can see, it gives you all like you're different now that I'm in effects went generators. So effects are your accuse compressors. Reverb delays. The's air effects, which affect the audio generators, is what fl studio describes instruments. Okay, so you know pianos since So, for example, here's my generators. I have it in a folder called Instruments. Now, I've just organized this my own way. You guys can organize it your own way, but anyway, so three times oscillator is like like a synth that comes with FL Studio. So, for example, for this place sound Okay, so there's that way toe Add in instruments or I many times, right. Click one of these sounds and you insert, And as you can see, you know, if we have instruments, drums, creativity, you can see I have instruments, drums and creativity. So ah, lot of things NFL studio are you confined them in different areas. OK, so just to give you an idea like there's multiple ways to achieve the same thing. Ah, this is kind of nice. You have, like your you know, your image. But for the most part, I just find that this is the quickest way by right clicking, going insert And let's say we want to add in, Um, let's say FL keys so this is like a piano, OK? And then if you do go to play these keys and you find it really, really you know, it's like you have to hit the key really hard. You can adjust the sensitivity, and now it's gonna be more consistent. Okay, so now it's too sensitive story with the wrong way. Okay, So, for example Okay, so there you go. Just just to give you an idea how to add instruments in to get you up and running that way . Okay, so for my sounds, uh, FL studio. So this is the browser will cover this in a second. Okay, But just to give you an idea, so you have a thing called packs. And if you don't have sounds yet, you can just click packs. And here's just a bunch of sounds to get you going, Uh, you know, kick drums. You know, you have ah, snares can you could just simply just drag them in. And if I take it kick, Okay, so let's just go kick, snare, kick, snare. And I mean, it's just it play. Okay? You have, like, your temple and stuff to turn it down. Um, but just to give you an idea. Did you just get you up and running? Okay, but to admit instruments in I right click insert. Easiest way. Okay, so that's pretty much the ad. Okay, so I don't really use these top menus, but I'm just gonna walk you through them just so you're aware of them. But I'm gonna show you how I would actually use the stuff for myself now, Patterns, this has kind of changed over the years with Fo studio, so I don't know what version of FL studio you're on. Ah, but again, if you purchased fl Studio, always get the newest version, you know, because it's for it's free updates. So but patterns has kind of changed over the years. A lot of times, you're able to actually access it from the step sequencer. Now they've actually moved it up into here. OK, so you could see this pattern right here. And like I just said, you can find things in efforts to do in many areas. OK, so for example, here's pattern right here. Here's pattern here. So it's the exact same thing, you know, So it's just kind of redundant, right? Anyways, so pattern is right here. I typically would access the pattern from here. If you ever want to, like, clone a pattern or delete a pattern, you can also like, move a pattern up and down. I think you can collect my move up, move down. And so, for example, if I just click right here, and if I click this again, you can see that we can rename. Okay, So I'm gonna be sharing with you all like the keyboard shortcuts that I like to use. So, for example, F two is the keyboard shortcut. OK, so if I have to, I could label the pattern just for example. So if I don't kick, you can see that now we have kick. But now what you can do is you can click like the plus to go to a new pattern, or you can use the shortcuts. So, for example, it finds, like, the next empty pattern for myself. I like to use the number pad. So on your keyboard, You know, if you don't have a number pad, you guys get getting contest, access it through this way and stuff like that. But the number pad I find is just like the fastest way. So I hit the plus and the minus, and it allows me to go up and down and patterns as you can see him on kick pattern to powder three. And you can also hit from 1 to 9. Okay, +8753 So, you know, if you want to access patterns kind of quick, but I like to use the number pads. So right now, on one kick, I'm gonna hit, plus, to go to pattern to. And let's just say now we have our snare, for example. So I have to just say snare. You can even just give it, like, a color and stuff to or a little shortcut is two F two to get a random color. Um, so just to give you an idea, But what I'm trying to say is, so if you click this, I have a kick in a snare. So let's say we want to move this snare up one click snare. You can also just, like, move it up. Now it's gonna happen. Is the snare is above the kick. Okay, just just to fill you in on stuff. Okay, so that's this. The patterns you know, all this stuff for the most part, Um, I mostly would just use that clone or split by channel, which I'll share with you later. It's a really, really powerful trick, and that's pretty much it for the patterns. As you start to build your patterns, you will start to see that they're all in here, and then you start adding these into the playlist. Okay? You can also access your patterns from here is Well, okay. So for example, let's say we had a kick drum in here, and then we're gonna add our snare in here. Okay? So now we have, like, a kick in a snare, just like I was sharing with you. Before we create patterns, we add these patterns into the playlist. And then this is what builds our arrangement. So, for example, if I want to get the kick again, you could just simply click it and you can just click and hold to, like, drag many. You can remove it here. And if I click the snare now using click and drag. Okay. So one thing I want to share before we continue is you also have, like, a pattern and a song mode. Now this this can confuse you a lot. Because if you hit space Bar to play the you know the song, what's gonna happen is on in pattern mode. So these are your patterns. So if you build, you know what it's like a little like Lupin here. Like this, right? Ah, what's gonna happen is it's just gonna play in here, so this will loop over and over, but we're not going to hear the whole song. If you want to hear the song, you can either click, Uh, play here, okay? Or you can click the pattern. And as you can see, it changes for you appear OK, so pattern, if I hit space is gonna play this pattern right here. And as you can see, you can follow it right now. If I go to song mode and his hit space bar, you're gonna see that the cursor becomes enabled. Sorry. Now it's gone. Now is enabled. Now, if I hit space bar, you're gonna see that it's going to play the song. Okay, so that's a very, very confusing thing. Sometimes when you're first starting out with FL Studio, you've got to make sure, if you want. Listen to the song here in Psalm mode. So let's go to view. So these are all the keyboard shortcuts? And I used them actually a lot. Okay, so, for example, F nine is that the mixer F six? They call this the channel rack right here. I like to call it like the step sequencer. It just kind of makes sense, You know, it allows you to go program your no steps like your your notes into you here to create a pattern to create a loop, Uh, five is like your playlist, your piano rolls f seven. So if we go back to view, you know, like I'm sharing with you all these keyboard shortcuts thes air, huge, they speed you up a lot. But as you can see, all these things right here, for the most part, are the same as all these. Okay, So, like, you know, one of these is like the playlist. One of them's like the China Iraq ones. The mixer, once the browser, which is on the left Here. Okay, So, for example, if I hover it here, one thing I want to share with you is in the top left. It's called the Hint panel. It's absolutely amazing for you to learn what things are. NFL studio, for example, if I highly on the seven or seven kick and if I turn it down, you can see the actual volume. Okay, so it always gives you information about what you're doing. So, for example, if I help over this, this is view the playlist so I can click this to, you know, get rid of the playlist or bring it back. I can hit a five to do that as well, or you could do that from view. So again, there's lots of different ways of how you can approach things in fo studio. But again, I'm just filling you in on how to do it. You do want to learn these short these. That keyboard shortcuts is pretty much, for the most part, just like the F keys. But as you start to use FL studio, you'll know that like F seven is like the piano role in the FBI's The Mixer. Um, okay, you can also close all your windows and stuff like that. So, for example, if think they're all like this, you have 12 and closes everything but watch. So five to bring back the playlist F nine to bring up the mixer. Ok, um, for myself, I actually Leo fl studio like this and you can see they have sticky windows on what that means is right now I'm dragging like this and you're going to see as I bring it closer to the mixer, it's going to actually lock into place. So right there, locked right right there. So I like it like this. And then, like, I was mentioning to you before, If I want to scream bigger, you just simply enter, okay, You gotta make sure highlighted on it. And it just makes it easy, like for the mixer. For the most part, I always just leave it as it is. But if I do want a full screen, I could enter. Okay, so it just makes it really, really minimal. Um, one thing I do suggest is to have Ethel studio in, like, two or more monitors. It really helps just with screen, real estate and workflow. But as I do these courses and stuff, it just makes it really simple and minimalistic that I'm all on one screen, you know? So just to share with you how I flow, Um, so that's pretty much like the view tab here. Options? We will cover options in a separate video I'll share with you. You know how to get good performances, stuff at a FL studio. Um, and the all these settings right here, These are all just this area. Okay, so, again, I don't know these keyboard shortcuts. I barely ever used them. Um, and even these things like, uh, I use them sometimes I don't explain toe to you what they are. Okay, so that's pretty much just the options. We will cover this in a moment. And if you do select any of these So, for example, like many settings or audio settings, general settings, it's always gonna bring you to the same settings window. And then you can select the different tabs. Okay, So, for example, if you have the committee keyboard, you can enable it here. Ah, you an audio interface or you always want to select an as your driver. I'll explain this in a separate video settings. It is important to go over just more clearly. Ah, you have, like the General just for some other kind of fine tuning of fl studio you can add in folders. For example. As you can see, I have, like, my drum kits folder or I have, like, a music production folder. So I simply just drag this folder in and you can drop it in there. Or you can add it in by clicking the folder here, a window pops up and you can add in the folder. Okay, We'll cover that in another video. Um, so yeah, so you know, in options thes like your settings up here. Um and then here, when it comes like the typing, all this stuff, this is all appear. OK, we'll cover that in a moment. Uh, let's go to tools. So, um, there's nothing to specific in here, which I want to share with you, except one thing. So if you are working with third party v ST's so obvious t is an effect. Okay, So for example, there is like, native plug ins that come with fo studio. So if I go e que you'll see the food and parametric EQ you too. So it's actually comes with fl Studio. It's been integrated, and you know it comes with studio. So, um but where? As you can get third party v ST's Okay, so if I click Q and press, you know, fat filter pro que Okay, So this is by the third party company that creates an e que They do the exact same thing. It's just for workflow. So for example, if I open up like pro que here and I, you know, I could just click to create a band I could make it nice and narrow. I can actually solo out frequent sees like that I want Ah, the reason why I'm sharing this with you is because over the years, V S T has started to change a little bit. So there's different standards. There was V S t two that was around for a very, very long time. Nowadays there's V S t three coming out and V s t three integrates a lot better with FL Studio. But if you are on a V s t to plug in, you'll find that you're not able to right click these knobs and be creative with them. OK, so there's things called automation clips and stuff which will cover when we get like the playlist. So automation clips allow you to do things automatically. So, for example, if I you know, I would highlight this area and are so let's do that again. So I'm holding down control and highlighting the area, okay? And if I come here and this is the frequency, so I just got a right Click it and go create automation clip, OK, And if I increase this So what you'll see is that as the song plays this e que is going to increase, okay? And this is an automation clip, and it just allows your music to be really, really dynamic and creative. But what I'm trying to share with you is this If I click the gear and click this one, you'll see I am actually on a V s t three version of this plug in. Therefore, I'm ableto you know, if I click this, um, it was a right click on these knobs and, you know, creating animation clip. I can also called me the value That's really, really powerful if you want to, For example Uh, let's say I was listening to this week. You and I was like, Oh, I like it right here. Well, how can I bring this setting into the playlist? So you could just simply right click copy the value and right click and paste that same value. So which means that as at the end of you know, this automation clip this this Ah, I guess bell curve will be exactly where it waas when you copied. Okay, So what I'm trying to say is, if you're on a V s t two version, you're not able to right click on these plug ins, which is kind of annoying. So what you have to do is you know, you kind of have to tweak the knob. First, you can go to tools and now they're saying something called Last Tweaked. Okay, so it's your last tweet parameter, and they're able to create an automation clip and treat it as if you're just able to right click on it. But if you have the choice, try the VSC three version. Sometimes they could be a little buggy sometimes, But if they're not used, the VSC three version Uh, just integrate better with Ethel studio. You can be more creative with them. Okay, again, the Nikkei with their fruity, fruity parametric eq you to it comes with fo studios. So it's integrated. It works well, you know, you can right click and you could do stuff like that. Okay, so I just want to fill you in on that because, you know, since you may be using third party v STs, which you know, typically you will find yourself doing because, you know, sometimes these third party tools have different creative touches on them. Or sometimes you know, for workflow or, you know, it's cool. Just adventurer and be creative with different stuff like that. So again, you just go tools last week and you can treat it as such. Okay, um, that's pretty much everything I use in the tools tab in the help. I don't use this that all one thing I will share with you, though, is you can hit f one for anything in fo studio, and it's always gonna help you. So for example, if you are on the step sequencer and you you have a question about any of these things up here, simply hit F one and it's gonna pop up a window distracted over here. So as you can see this is everything to do with the step sequencer Now, In addition, many times these images you can actually click on an area, and it's gonna bring you to more information on it, which is a really, really cool feature. So, for example, let's say we want to learn more about all here, so I click three. And as you can see, it's loading and it's gonna bring us two more information on it can. So here it is. Um, so let's try one more one more of those. So, for example, if they were on the playlist, you have some questions about the playlist or even the for new Parametric EQ key to. If you click on this and F one boom, it pops up. It's all about it, and not all of the images you can click. But if you do want to learn something about, maybe let's go back to the step. Sequencer will screw up to the top. If you want to learn something a little bit more, you know, let's say a volume or something that so I would hit control F. It brings a little pop up to find something on your page and I just start typing like, let's say volume. Okay, so now I just enter until I find, you know, the area of where I'm looking or the key word, right? So those are things to help you learn faster and fo studio because you're gonna have lots of reading on lots of questions. And the best way to answer your questions is honestly, is directly rate from the manual. Um, you know, especially if you're going to get into plug ins like the stereo enhancer or something. This is to do with, like, wide nous to create, to make your music sounded a bit wider. Yet to be very, very careful, these tools could be very, very dangerous when it comes to face cancellation, which will cover a little bit later when we talk about digital audio. But again, you could just simply come here F one. It's gonna explain to you about the plug in super super cool. Okay, okay. So let's continue on. That's just like the menu up there. So again, I explained to you like the pattern and the song mode, um, right here is like the master volume. So this master volume is pretty much the same as this master volume. If you do want to fade a song. So, for example, imagine this is like the end of the song now, right? So if you want to fade it out, you could just highlight here and you come to the master Fader and you're just gonna right click create automation clip And this song will fado. So all that you hear that? And many times I'll also extend one of the patterns which don't have notes afterwards. Um, and this. So when you export this song, this is going to be how long the song is. Um So, for example, if efforts do you come stock like this 801 So what that saying is you're like, the eighth bar and stuff like that. So I don't like that. I like to put a jack full time. You know, if I was gonna export the song I want to see, you know, is that minute three minutes or so? Is that song three minutes or is that song you know? 3.5 minutes. Whatever. So if right now in 14 So at the end of the song were like 18. So the song is going to be a boat and about 20 seconds. OK, so as you can see, I highlighted the area. I came to the Master Fader right here. Reckless created animation clip on the actual fader. Right. And then now we enter. Or so you want Space bar? We're gonna listen. You're gonna hear it fade out. And then this is how long the song actually is. Okay, if aids Oh, and you could actually see that fader go down. Okay. And the reason why I shared that with you is because if you are going to be making many beats, for example, let's say you want to put together like a beat tape or an album. You know, that's how you can get a fatal and get your timing right in between songs. Okay, this is the master pitch. So in the same way, if you want to be creative with that, uh, for example, as the song is fading out, let's say we take the pitch right click, create Imation clip. Let's say we just pitch it up. I'm assuring this just to be kind of creative and share how to use stuff so we'll listen. Okay, So the pitch was going up as the song was fading out. Okay, so that's all those two dogs are the pattern in the song mode. The place stop record if you want to record recording for the most part in FL Studio is just a matter of hit record hit play. And then, you know, if you're on that your keys eso right now See, it's not going to play because the volumes at zero. So if I click here now, the fader went back up. OK, so the fader is back up here on the master if I just play some keys. Okay. So, for example will go, I will just go to a new pattern Artist can hit the plus in my number pad plus in my number pad again cause I'm on kick. I want a new pattern because again, you usually want all your instruments and sounds on their own pattern. That way, when you build the song you can take, you can add and remove what you want or don't want. Okay, So for example, I'm on record. I'm gonna hit play 234 Okay. And then now, as you see it recorded it. We're in the actual. We have a pattern now, and and as you can see right now, this is pattern three. So it makes it kind of tricky. So typically had hit like F two. I usually write in capitals. So piano you didn't have to do to give it a color. And it also come here pushing in my middle scroll wheel piano. And then here's the trick you f three the color stores at NFL studio. So the color that you just used, it's stored into F three. So if they f three f three k, I'll share all this with you later as we proceed, I just, you know, just to kind of share with you. Just if you're you know, if you just want to kind of have fun with this stuff at the moment and then so right now, my notes would kind of be off. So a double click that and you can kind of edit them. Ah, little cool trick is just to Kwan ties, and then and then kind of nudge them. Many people are kind of against that in the industry. Uh, and this is what you call Quanta izing. Many people like that really human flavor of how you played it. I personally find if you Kwan ties, it locks everything to grid, which means everything's in time. And then it's just a matter of, you know, just drag things to where they are actually in time now and again. This is just for an example. So I'm not even gonna play this or anything with you. I'm still walking through how FL studio kind of works like the menu. Okay, So appears at your temple. Okay, If you want, adjust it. Now, we're going to get into the menu stuff here from options. So typing keeper to piano and stuff like that. So this is like your Metrodome. So the Metro Room is just useful. If you're going to, like, record, you know, your notes, whatever. And you want to have, like, kind of a click track to follow against. It just allows you to keep your music and sink a little bit better, and then you always go, and you can edit it afterwards. Okay, so that's just the Metrodome right there. Um, this is that the wait for input to start playing so this is like if you're gonna record, I typically leave that off. However, I do like this countdown before recording. So, for example, if you hit record and take off the Metrodome and if I hit space bar, you know, now I can just record, But it doesn't give you enough time because if I hit, you know, if I hit my space bar, it doesn't give me enough time to get to my piano. So is too rushed, Right? So typically, I like to leave the countdown on. And if I were to hit space Bar to count me in 1234 Now eso however, however you want to play, and now it will actually record those notes. So the countdown is kind of nice that way. Uh, this is to do like, if you want, like, notes to kind of overlap. So, for example, if I just recorded those notes and then now I go to record again, uh, it can either, you know, kind of add more instruments to it, or you can kind of just overwrite what you originally did on this is also to do it like that. Looping as well. I believe that will just kind of keep going over and over again. So you can kind of keep adding notes into your loop. So this feature right here is again. It took a look in the top left there, says typing keyboard to piano keyboard. Okay, so this is your typing keyboard. Your quality. Keep word the one you use to, you know, write emails or whatever. Right? So I actually used this keyboard when I first started up using FL Studio as, like my piano a little bit, you know, just, you know, for the most part, for example, many times all used like you. Uh, if I'm wanting to kind of test the sound out in the actual step sequence or here, You know, for example, let's say we had the sound and I was trying to find it on like the mixer. So, for example, we just wrote this to seven for, except for a second. You can see you know it now it's on seven. So sometimes you know, it might click a sound or from trying to apply effects onto a sound. I might just q a couple times. But if we go to like the piano roll. And if I just hit some notes on my taping keyboard case. So this is like my taping keyboard. Okay, so, you know, like when you're starting up, if you don't want to buying the committee keyword right away, you could be using your actual typing keyboard just to kind of get you going to kind of, you know, learn the program creates a melodies and stuff like that. So if you want to be able to use as a piano, just have that enabled, you can use it. If it's not enabled, then you can start using, like, the shortcuts, as you can see right here. So you know, we have, like T and D and B and stuff like that. Um, I'll share with you the piano or sort of the playlist later. It's also the piano roll to You can also use it, called the Shortcuts if it's disabled. But I typically leave that enabled, Um, this is pretty cool. So if I enable this, what's gonna happen? I'll make it full screen, okay? And we're going to zoom in a bit. And if we hit play here on the playlist, you're going to see that the I guess they call it the time marker is going to It's gonna follow what you have, so let's just listen. Records on and see. Right now, I'm in pattern mode. So for me, the easiest way to know that I want to play the playlist right now, I would simply just hit the speaker it here. Okay. So as you can see what's gonna happen So it's following us, right? This is really, really nice. You can also right click and go and disable continuous scrolling. And as it gets to the end, it's gonna shift over. Okay, so it'll keep shifting over like that. And our master pitch is going up and you can actually see the knob right here do that too. Okay. Our next option here is called step editing mode. I never use this, but I'll share with you what it is. But again, if you ever want to learn about it, you could just simply click here, Hef. One is going to take you to you know, your manual. I wasn't able to get directly to it, so I'll share with you what I did. I actually clicked. Introduction to fo studio okay, And I just click the user interface. And then I clicked the toolbar because that's where all these options are. And then I knew it was called step editing. So by hovering over it again, look at the top left. So step editing mode as control and F And I just typed step and then has to start. I just started typing head. OK, so I was gonna write editing, but it brings it up for you. And, um, you know, it said, see the link for details. So ended up clicking this and it explained to me what it was again. I I don't use this option ever NFL studio, but it's one explain to you what it does so if you enable it. What happens is if you go to the piano roll and if I actually just play a note,
5. 2-3 Best Performance Settings in FL Studio: Okay, So in this video, we're gonna be checking out the best settings for FL studio. Okay, so you guys can compare to tools and our story options. And here's your options. I always like to use the keyboard shortcuts, so I'm gonna f 10. Okay, so here on MIDI, this is where if I were to turn on my midi keyboard, you will see it. But you're also here, like the desktop noise. Okay, so this is my my midi keyboard. It's a bit of an older midi keyboard, but it works great. Okay. All you have to do is click on your actual midi keyboard, enable it now, for your type, you do want to select a template that they've created. So, for example, they have created tons of templates for a lot of different products out there that you can use. Ah, in my case, even though mine is an axiom, it's by the same company, m audio. And if we come down here to the oxygen so m audio oxygen. So it works the same way. So you may have to find one that works for your hardware if you can't find yours in here, okay? and what it does is it just allows you to automatically use at the stop the play, the record and stuff like that. It just makes it really, really easy for you. Okay. Ah, and that's everything I have set up on this page. We goto audio. So what you can do, It's kind of a little cool trick before we get into. This stuff is down here at the mixer. So let's go play kick drum and you could see that my preview mixer track is on 12. And if I put 2 13 so I play again. So now it's on 13. Okay, so this is kind of useful if you don't want your sounds to be as loud or if you want to put you know, let's say on 13 you want to put some effects on, you can do that. And then as you go through your sounds, you can run it through those effects Always. It's kind of a cool thing. Okay, a lot of people don't know about that now. The most important thing that you can do in FL Studio is using as Eo driver. This is going to give you significant performance increase over pretty much anything you can possibly do for your computer in general. OK? And as your driver, So if I show you show you my the ones I have. So fl Studio has recently come out with FL Studio ASIO. Before that, I was always always using, like the ASIO for all driver. Ah, but again, I have a focus, right? Scarlett to I two is the second generation. That's my audio interface. If you don't have an audio interface, you're gonna be using either that force to do as you or the ASIO for all V two. Okay? So always try your actual audio interfaces drivers first. And if you're not able to get good performance than try another one, okay. And as a driver just gives you significant performance, it's actually amazing. Okay, so now since you have selected as your driver in this case, I'm just using the FL studio as you. The reason why I'm using that is because it allows you to actually hear Ah, the desktop audio. Like if I'm gonna play sounds the stuff for you. Okay. Ah, If I were to use the focus, right. Ah, it's just the way how the actual hardware and you know, the driver and everything that Fosco isn't able. Think I'm not able to record the desktop. Audio is kind of more flex these courses. Okay, so if I had a choice, I would actually do the focus, right? Okay, But since I'm doing this course, I'm on the efforts to do as you so you can hear actual my desktop audio. Now, depending on the performance of your computer, like how powerful it is, you may have to adjust this depending on where you are in your production stage. Okay? I'm not talking about how good you are producing. I mean that when you go to make a beat. So there's different stages. You know, there's at the actual beat creation, there's the mixing. And then there's a kind of the mastering as well as you know, when you're making the beat, your you know, playing your midi keyboard or you are actually recording vocals. Okay, all this comes into play because, uh, depending on your buffer setting, you can actually get late and see. And this is a huge problem within the industry. Even still, uh, audio interfaces have become better, but So let me just kind of break this down for you. Okay? So in the very, very beginning of a song, you know, you don't have many instruments, Therefore your computer isn't running as hard. Okay? If so, in other words, you know there's not much happening, so you can set this at a lower buffer size. For example, I probably wouldn't go lower than 5 12 Now you'll notice when you play at 5 12 your midi keyboard. Or if you were to record your voice into, you know, when you're making a song, it's very, very responsive. Okay, so there's not much latent. See going on now, for example, let's say you had about 20 instruments going on and your computer isn't ableto handle it. OK, so and how you'll know is your computer will start doing glitches and pops in the musical sound all weird. Okay, so what you have to do is open up the buffer, you know, window here and just increase your buffer size. Now what's gonna happen is when you go to, you know, record with your meeting keyboard or try to record vocals. You're gonna get this audio late NC, and it's just the delay. So, for example, if I talk into the microphone, it delays, you know, depending on your studying here. So depending on the power of your computer, you're gonna have to play around with this in the very early stages of the beat, you're gonna, you know, put like, 5 12 you'll be able to have a really responsive midi keyboard when you press your keys as the beat starts to grow in order for your computer to handle it again, depending on how powerful your computer is, computers nowadays are becoming a lot more powerful. Ah, but you always want to making sure that you have, like, an I seven. That's the CPU and stuff like that. Um, but yeah. So, depending on the stage in the very, very early stages, you'll be on 5 12 As the song starts to get more intense, more instruments, you know you're gonna have to increase your buffer size. Okay, now, if your computer can't even handle that, so, for example, imagine he had tons of instruments going on. You may want to try tripled off buffer, and that's just gonna help get some more juice out of your computer. But if you constantly keep getting these under runs, even with, you know, fully maxed out buffer size and the triple buffer on you know is really time for you to get a new computer, you're kind of capping out. Uh, your skills, like you know, you will not be able to progress. You will not be able to be creative because you keep getting capped because of the power of your computer. Okay, All the settings you see on here this is how I have it set up on the mixer. I just have it at six point you can go more. Ah, this is just to do when you actually, like having a sound on. If I go right, click piano roll. I noticed moves over here. This re sampling, I believe, is just like if I which played the sound and it goes up in pitch it just kind of the example quality, I believe, is this better? So having it at No. Six is not a big deal. When I actually export the song, I have it at 5 12 Okay. And again to export, you just go file export, and then just select it. Okay? So let's keep moving on. Also, you can adjust your sample right here in FL Studio. So, for example, if you want like that 48 k you'll notice that when we get later on into this course, when we talk about digital audio stuff like that I mentioned to you about 24 bit 48 killer . It's OK, so let's go to the general tab. So on here, I really don't do much. If you want to kind of zoom in a little bit, you can adjust your main gooey scaling So graphical user interface you can adjust like this if you've actually adjusted your window settings to be a little bit more zoomed up. Uh, if you just go system, it will just reflect what you've done in the window settings, everything you see here. This is this pretty much how I have it set up. Um, one thing I want to talk about is the undue history. So I have this set to 100. It's really important to enable the undue knobbed weeks if we come here so you'll see in history if I move the knob Boom, boom. Okay, so you can see that it's recognizing the volume changes. If this was disabled, it does not recognize these types of changes, which is I find is really, really important. Because you know what? Let's say you increase the volume like, Oh, I want to go back with control Z or whatever. Um, so 100 under knob tweaks. Okay. Ah, well, keep going down here. So, um, have it the forest high performance power plan. In addition, they have now recently come out with, like, the theme here. So you sound startup, but yes, you can see I'm using, like, a template. So again, check on YouTube to learn how to create a template. The biggest suggestion I could give you about a template is you want it simple. You do not wanna have tons of plug ins opening and every single project. Because let's say you don't end up using all those plug ins, But you are. You know, every time you open up that project, you're gonna have to keep loading. Those plug ins is kind of annoying. OK, so you kind of got to think ahead. You want it really, really minimal. Ah, here in the file tab. So on the back up on the auto save. I have this for five minutes and then they've recently added this to this allows, like the maximum amount of backups. As you can see when I'm on here, this is everything to do with the browser. There's a backup tablet here, and as you see, it saves up every five minutes. One important thing to know about this one case, so you have different options, but the frequently backs up. Even even with when the music's playing, I believe. Okay, you can. You can hit F one and read more about that. That's just how I have it set up. And then here is like your browser extra extra search folders. If you've added a folder in and you don't know how to delete it, all you have to do is just double click here, press backspace and just click on. You actually click away, Um, and it will actually remove it from the browser. Okay, Um and then yes. So here's what the project you can actually assign, um, a folder for this project. It will look through this and the project may load a little bit faster. Ah, you can also put some info here. And as you can see, you go show info on opening. So if you ever open up one of like, the demo projects that come with FL Studio or if you've update fl studio another like the little window pops up and it explains who that producer is and etcetera, etcetera. This is how they do it. It's but their title author name, you know, whatever they want to say a link and that. Okay, and that's pretty much it for the settings. Okay, so the biggest thing really is just an as your driver, Um, you know, this isn't like something like like, let's say, if you doing video editing, you know, let's say you purchase like a better video card, you know that's gonna help you. Whatever. Ah, this is more of like music production, in a sense of your CPU is the most important with music production to get a nice, high quality computer to run fast, Um, and then you want as your driver. Okay. And then again, you know, depending on where you are in that project in the early stages, you're gonna be like a smaller buffer size. It's going to be what much more responsive as your tracks for us to grow, start getting delay. Ah, you're gonna have to bump it up again, depending on the power of your computer. Um, one thing to mention is I've had the first version of the focus, right? Que So focused. Right? I would recommend it for an audio interface. I say that just from over my years of having different audio interfaces. They're a great company. Um, you know. So the first generation, it was decent. I wasn't able to handle large projects. That was because of my computer as well as the actual audio interface at the time. And then he upgraded to the second generation. And what they said was they promised lower latency times. And it was, you know, it really did. I was able to Right now, that's what I'm using. And I'm able to handle pretty large projects even at like, you know, I usually leave my around 10. 24 that way. Don't always have to kind of open it up and move it around. But I'm able to handle pretty large projects and you know so there is also the third generation out now okay, just let you know The reason why I say that is because a lot of these companies over the years they've talked about, you know, zero late Insee or near zero Leyton C. And the thing is, computers are not powerful enough to reach the zero late INSEE yet, like, I do believe that eventually computers will be able to because, you know, computers are becoming more powerful all the time. But I've been producing for about 10 years now, and audio articulated C is still a problem. So if any of these companies are telling you, you know, zero late in C, I wouldn't believe it. Okay, There's always gonna be some late NC. But nowadays, like I'm saying, the second generation has definitely given a lot better performance compared to the first generation. So that's kind of proof that the industry is continuing to grow advance even now, with, like, USB 3.0, audio interfaces coming out. You know, it's pretty cool to see that stuff so hopeful that hopes you guys and you don't healthy as enjoy making beats with some better performance
6. 3-1 Counting Beats Drawing: All right. So in these section of videos, we're gonna be learning, you know, some basics of music theory, and we're gonna first start with learning how to count beats. Now, you may think, you know, Old County beats isn't that hard. Well, it isn't, but it is important that you know how to do it so that you can keep your music and rhythm, you know, in time and in sync and everything as well as you also know how to be creative when it comes to programming your drum loops or programming or many notes where you can place your sounds for them to sound good no matter what. Okay, so let's first start with, you know, just some basics of music theory. So, for example, you know, in our Western culture thing is what you call a time signature, okay? And we are in 44 time. It's actually written like this. So 4/4. Ah, and it's, um the 1st 1 tells us how many of these beats are in a bar. Okay, so So how many beats scare, and then we have this tells us what type of beat it is. Okay, so in this case is actually 1/4 beat. So in other words, we need four quarter beats to make one bar. Okay, do that, kid. So in other words, there's actually four beats in one bar, and we will cover that later on in fl Studio. Okay, so this is what you call common time. And it's so common of again in our western culture this 44 time right here. Okay, This music theory, it's important to know, to an extent, as a producer, but at the same time, like Okay, you know, 44 time, you know? So you know, there's four beats in one bar, and each beat is actually a 1/4 note. Okay? And it's like, Okay, well, cool, but is a beat maker. You just need to know where you can place your notes where you can stay in time. And that's pretty much really all you need to know is a beat maker. I'm just kind of showing you some basics. Okay, So for example, let's just go and pretend that we're in FL Studio, okay? So f else do you has its step sequencer. OK, it's like this, and I'm just going to draw in. Ah, just stick the squares, just like they have here, can so only draw for in here. And then we're gonna change color because they're full studios changes color. Okay, so now this whole thing here is a bar. Okay, so just continue this to here and here. Okay? So how this works is to go one we go to, we go three, and then we go four. Okay, So in other words, we need 1/4 beat for for a beat. Okay, so we need 1234 to make 1/4 beat. So all this stuff is kind of do it like fractions and stuff, but to keep it really simple, each one of these squares is what you call it. A step is actually 1/16 note. Okay, so for you do fractions. So 1/16 plus the 16th is 1/8 and eighth plus an eighth is 1/4. Okay, so that's kind of how this works. Okay, so each one of these is 1/16. Um, and I'll explain to you later on, but I have a term which I call safe spots. Okay. I've actually written a book on this on Amazon. And it's just a term that I have coined over the years that just describes, uh, you know where we can place her sounds within a drum loop for them to sound good, no matter what ended time. Okay. Just kind of understanding where you can place your sounds and the impact that each of these places have within your beat. So, for example, um, you know, if you place a kick drum right here, okay? And then a kick German here, You know, this is really, really standard, right? So this is this would be like your of 12341234 Okay, super super simple. So I'll just write that right here. So we have one to three for super basic right now, you can get a little bit more creative. Okay. So, for example, is just change up the color. I will put it read. So now we have one and two and three and for end, Okay. And where this comes in handy is you can start, you know, placing a sound right here. Typically, it's really, really powerful to put, like an open high hat here. Very, very common in like dance music. It really creates like that groove. And so if I were to write that so one and to and 34 and I'll fix that. And OK, so that is this kind of one way to do it now, just to spice it up, it's a little bit more, you know. So now we have, like, one and two and three and four. You know, you've may have heard people talk and, you know, count like this over the years. So just for example, you know, just for clarity. So if I put this in here, you know, it's kind of like the one and ah, two and three and four. So again, one and oh, to And, uh, okay, I'm not gonna continue, but you guys got to get the point. So one and a two and a three and four end up and it just repeats over and over and again. As we start to program our notes, this is where we can kind of start placing our sounds. Now, you may be looking at, you know, uh, the green here. So, you know, right here and right here and right here and right here right. So if you look at these is that well, we haven't colored those in yet. So what's going on there? So to keep this simple, uh, the blue. Okay, this is what you call on being okay, sir. Still trying to learn how to write with this tablet here. Okay, so this is what you call on B. Okay, Now, the red is what you call huff. Be okay. These are the terms that I use to describe safe spots. K. So we have the blue, which is on beat. I'm so we don't need to ask for off beats we deceit off beat and then Ah, the orange. Um, I actually call this a so this is a and this is B A and B and then a and B and as you can see, it repeats for every single beat. Right? So this these are what I call ah, the in betweens. Okay. And you could still see here. Okay, So a is tricky and then be it is easier. Okay, So you're a I I have finished found over the years to be a little bit trickier as I start to program my drum loop and then the B It's a little bit easier. And to give your music just a little bit of a different sound the B Over the years I've found it gives my drum loops a little bit of like a late and loose and rocky feeling. Especially once you start adding in, Ah, swing. So swing. What it does is it nudges over your eighth notes. Okay, so again, each one of these is 1/16. Right? So 16th 16th 16th 16th. And we need 4/16 to create 1/4 which is one beat. Okay, so, you know, let's just give this a different color. So this is one beat. Okay? From here to here, this is to this is another beat. Okay, three and then four. OK, so these are all a beat. So 1234 But inside of that beat, we can get a little bit more creative when we could start placing sounds within our 16th notes to be more creative. Right? So, with swing, swing automatically nudges notes to give your music a little bit of a more organic feel, okay? And it actually nudges Ah, your eighth notes. Okay. So let's just give us a nice pink K. So your eighth notes would be like this one. And this one, OK, because each one's 1/16. So its 16th pluses. 16th is an eighth. This is in 8th 1/16 16th 8th Okay, so swing, uh, effects your eighth notes. Okay. And the reason why I'm saying that is because thes air you're in betweens. OK, so it was right that I get up here in betweens. Uh, sorry. One second. Undo and undo. So betweens, which is a and B case. Okay. And be again A, B, A, B a, b, A and B. Okay, so when we are programming or drum loops, which will share with you later on, we have a section about our drum loop about programming. Him. Uh, I explain to you about swing and swing. Just an automatic way to ***. Eighth notes. And it gives your musical loose and rocky feeling. And as you can see, you're in betweens, thes air, the notes, that swing effects. Okay, so I think that's a little good overview for you with, like, some music theory. Once we get into fo studio, I really think it's gonna be a little more clear now, but to keep it simple. Common music. Our music is in common time. Call the time signature for four. The top one tells you how many quarter notes you need. Okay, so let's just go back up here, okay? So the top number tells us how many beats are in that bar. The bottom one tells us what type of note it is. Okay. In our cases, 1/4 note eso, Which means we need 1/16 on each of these Now again. You know, it's like, does this stuff really help you? Oh, do you really need to know it as a beat maker? No, you don't. All you need to know is this. This is all you need to know. You need to know how to count beats. 12341 end to entry and four. And one attitude and a three just to give you an idea. So when we go to program our drum loops, this is where you can get more creative, make your drum loops sound fuller, have mawr, you know, rhythm going on and just, you know, making music again. Some fuller. Ah, that's pretty much all you need to know. But it's just nice to know, just kind of a little bit of the background story, so to speak. You know, like the music theory of what's going on with this Western culture for four common time on That's pretty much as basic as it is. Okay, a zoo. We get further on. You know, you're gonna learn about bars and stuff like that when rappers say, Oh, you know, I rapper I spit 15 Earth's or 16 bars. It's really, really common for, you know, a lot of rap songs toe have, like a 16 bar verse scored like an ape. Our core 16 bar verse mean like a four bar course and stuff like that. But as we get into FL studio, I'm gonna break it down. It's gonna make it really, really easy for you to understand. OK,
7. 3-2 Counting Beats Fl Studio Walkthrough: Okay, So in this video, we're gonna be talking about how to count beats. So since I already went over, you know, counting beats by drawing. Now, I'm going to share that with you with inside FL Studio and kind of join those two ideas together. It's gonna make it really easy for you to understand. OK, so the first thing I'm gonna do is I'm just going to get, you know, a kick drum, a snare and a high hat, and that's gonna share with you. You know how we can kind of place are sounds and how to count beats with the sounds. OK, so let's just get a couple kick drums. I typically like toe have, you know, two or three kick drums every tracks, a little bit different, but I just find that more kick drums gives my drum loops a little bit more variation. Um, you know, not to say that some tracks are super simple. That might only have one, but when you have to, sometimes you could have good layering or you could even have certain drums is like a filler kind of drum hitting every once in a while to okay, so Let's just listen to a couple of drums here. I'll take this one. I'll go with this one. Sometimes I just use my arrow keys on fl Studio. So, um, actual keyboard. So, actually, to click on the sound first, then I can use the arrow keys. I'm kind of looking for more like a really nice low end to kick drum. That sounds pretty cool. Kind of like that. Okay, so we'll go with this one. So so far are kick drums like this. So, as you can hear, they give us a lot of flexibility. So what is a really low end kick? One is just kind of a nice kick in general. And then one sounds a little bit light on the low end, and that could be used for a good layer. Okay, this one right here is kind of light. Okay, this one hits a little harder, and then we have a race low ed. Okay, so let's get a snare snare slash clap. This typically goes on like the two and the four. Now, the thing is, when you go to actually make, like, your drum loop like I'm just talking to you in terms of basic terms just to get you up and running, but want to get more advanced than understand how things work. You can always break the rules. Okay, but for the most part, your snare is gonna be on the two and the four. Okay, so I'm gonna get the stair here. Okay? Um, and the reason I get multiple stairs again is just for layering purposes. It just makes your sounds sound fuller, As you know, being played me to get like that. And I'm also just gonna get a high hat here. Okay? So, case, let's just get too high hats. Kind of like these. Okay, so now the first thing I think about before actually go to program a drum loop is I First of all, think about you know what style of beat him I wanted to create. And I wanted to create a dance track or kind of more of a hip hop ish track. A dance track is gonna have a faster tempo. Hip hop fish typically is gonna be a little bit of a slower tempo, so I'm going to start with the temple here. Let's just dial this down. Just go to like God, 97. And now I'm going to actually place, um, sounds in the step sequencer. Now, in our western culture, as I already mentioned, we typically work in 44 time. So that means that we have four beats in one bar and then to even break it down further. So there's 1/4 beat, which is like, your beat in 44 time, and then you need 4/16 to create that 1/4 beat. Okay, So again, it can kind of sound really confusing and everything, but the thing is, being a beat maker, this is as technical is you really need to get with music theory. You really don't need to go any deeper than what I'm going to share with you right here. Because to make a beat, you know, this is pretty much all it is. Okay, so let's just click some sounds in here. I'm gonna break it down for you. OK, so I'm gonna click in just the 123 and four. So it's 123 and four. Okay. So, again, in 44 time, this is our quarter beat. So we need 4/4 beats to make one bar can. And now we have these which are 16th. So 4 16 is 1/4. Okay, It's all to do just with, like, fractions and stuff like that. So each of these is 1/16. We need four of these to make one B, which is 1/4 beat. And we have no need four beats to make one bar, and that's honestly as it intense is, it gets. And the thing is, you really don't even need to know or understand it at this level. You just need to know where you can place your sounds for them to sound good in your beats , you know? And I teach you that in the next section of this course, and it's called safe spots. Okay, So safe spots is a term that I coined over the years, and it teaches you where you can place your sounds within your drum loop for them to sound good, no matter what. And in all honesty, it's just that simple. Okay, so let me explain to you what safe spots are. I'm gonna explain to you even further in the next section. Ah, but so we have her on B. Okay? says there. 123 and four and that's on B. Okay, then we have her off. Be okay. So the off B is typically really popular for, like, an open high hat or something. Let's say we're talking about dance music and it's just a really good filler. Okay, so let's take your off B. And now you have what's called like the in betweens and I call this the A and the B I find the A is trickier to work with. The B is a little bit easier to work with. And these are the sounds that get affected by swing case. This is swing right here again. Swing just nudges over your eighth notes, K because if each of these is 1/16 right, that means that two of whom, equal and eighth. So this is your 8th 8th 8th 8th And the thing is, this stuff just repeats over and over. Okay, so if you understand how these 4/16 work again, it just repeats for the second beat. It repeats for the third beat it repeats for the fourth beat, and that's really how simple it is. Okay, so we have our on B we have off B, we have in betweens. This is there A and this is their be a B A b and A and B. Okay, So if I press control of X, it cuts what's on this sound right here in this one. So again, swing is nudging over these ones, and you can even manually note nudge notes to, for example, if you want to nudge this. And the reason for that is because computer music is a perfect time. So in other words, if we've clicked, are sounds in here, it's always gonna play like this over and over and over. And if you haven't chosen like the right sounds or whatever, sometimes it can sound really robotic, really rigid, right? Doesn't sound musical. So that's where things like swing or no nudging come into play to add some more. I guess you know a term is called organic into your drum loops or into your music to make it kind of flow. OK, so again, let's just talk about how to count beats just kind of quickly, and then we'll move on. So we have 1234 or we have one and two and three and four. Or like one and a two. And a three and a four. And when you go, the more advanced wrote, For example, the one and two and a on the end and the Ah, this is where you could be placing even additional sounds, form or fullness within your melodies or in your drum loops and stuff like that. Okay, so again, 1234 This is just what it sounds like. 1234 Okay, so, again, I'm not gonna programs too much of a drum loop in this video. But these 1st 3 RR kick drums. Okay, lets just place a snare on here for that two and four. So 1234 Okay, um, this kick drum kind of sounds annoying to be played like that, You know, it would be more of kind of like a layer or something. And now we have, like, our high hat. Okay, so this high hat, this one are here. I'm gonna play this moral like the off beat, So I'm gonna hold on Ault and the up arrow key. I'm just gonna move it up one. And now I completely on, like the off beat. Okay, so I'll just click them in here. So again, this is one and two and three and for and and if I just move it up, make a little bit easier for you guys to see. Okay. Okay. So this is one and two and three and four end, and that's it. So let's listen to that. Okay? So again, it's just kind of a little filler, and our temple is a little bit slower, but in dance music, now that you listen, you know, if you go to listen to one of your favorite dance tracks, especially trance music and stuff like that, this open hat is very, very popular in this section. Now, for our high hat, Uh, this one. So I'll bring it up here just with Ault. So again, now this high hat is It's kind like a filler sound. It's all about rhythm. Ah, high is actually a really, really powerful sound, even though it's such a short sound. Okay, this is it adds tons of emotion and fullness and energy to your music. Um, just a little side note. If you do at a high hat into your arrangement many times it's hard to remove that high hat without, you know, kind of removing the energy and emotion in your music. Okay, So always keep that in mind that when you add a high hat in, you kind of got to be strategic with it, because again, if you want to kind of start slowing down the song, whatever. When you take away that high hat, it can actually make your music kind of kind of feel weird. So, for example, let's just put it on like the 123 and four will just to this case or just using it as like a layer. Okay, we can also play on the off beat just like this. Okay, so I'm not really hearing a difference. And the reason for that is just because we're just layering over top of other sounds. So now we can play all that the in betweens. Okay, so I'm just gonna literally just click and holding drag like that, OK, but what I was trying to get across to you in this video is just know the counting beats. So we have 1234 We also have the one and two and three and four, and and then to get more advanced English one and two and a three and four end. Uh, and then this, uh, guess, eighth note right here. Like I'm saying that you can kind of start adding sounds in here as well, But like I'm saying so it's your A is trickier than your be when it comes to these in betweens like I mentioned to you. Okay, you'll find that, as you know, further on, as we go into this course as well as when your programming your drum loops again, you'll discover that this a This is the tricky one. Okay, so it really is that simple, You know, um, I don't want to spend tons of time on it because it is just that simple. Now, some people do have troubles, you know, accounting in time and kind of staying in rhythm. So this is something that you do want to learn and be able to count. For example, even if you are gonna listen to, like, when your favorite tracks, you want to be able to, you know, kind of listen and be like, OK, 1234 And just try to find a spot within that song that you can count in rhythm and kind of follow with this song. Like I'm saying, many people do struggle with, you know, staying and rhythm. But as a beat maker, it's crucial you have to know how to stay in rhythm, how to count beats and what I showed you here again. The 12341 and two and three and four or one and a two and a three and a four. By understanding just that kind of concept, you'll be able to make your music sound folder again. This works for both melodies as well as within the step sequencer when your programming your drum loops okay?
8. 4-1 Safe Spots In The Step Sequencer: Okay, So in this video, I'm gonna be talking to you about a term that I've coined over the years called safe spots . I've even written a book on this concept on Amazon. If you'd like to check it. Oh, it's called safe spots creating amazing drum loops. Um, and by my author named Riley Weller. You know, if you just like to check that out, but pretty much all the concepts are going to be covered here. You? No, but if you like a nice little light read, you know that's available to you. Okay, so this is just like the step sequencer inside of fl Studio. So again, like I said, if we're in 44 time, which, you know, for the most part, you're always gonna be okay, So your first step here, this one right here. This is actually your on B. Okay, so I'll do this, and I'll click this down here too. Okay, So this is our on be pretty much everything is always going to sound good, because on beat now, this doesn't mean that you should always place a sound here, but I'm just letting you know when you go to places sound. It's on beat, and it's always gonna flow. Okay. And so now you have your off be okay, And I will do this. And your offbeat is just really, really powerful for fullness. Okay, So, like, already mentioned to you, if you want to put, like, an open hat here or something like that, So this is your off beat. And again, you know, it doesn't have to be an open hat. You can put like a symbol here. Bongos, high hat. You know, whatever. I'm just letting you be aware that you know this right here. These are your on beats. So 12 Okay, so be one and two. Okay, so if we actually count, beats would be 12 okay? And then if you you know, this one would pretty much be like, and and this one here too. Okay, so this is also gonna be and okay, so again, it's just really, really powerful for fullness. OK, so we're going to get a different color here, go with a red, and now we're gonna talk about the in betweens. OK, so these are your eighth notes, so come down here. Okay. So all these are your is what I call your in betweens K thes air. The trickier was to work with, and I risked her right here. So in, uh, betweens. Okay, so now you have a and let's just get to different colors for this. So we have a okay, and this is gonna be a story here. A and then a and then we have Ah, well, green. OK, that we have be okay, so b and B and B. Okay, so be is easy. I like to work with be super, super easy to work with. Um, you know, there's no, you know, everything's just you kind of flows with it now. It could be easily overdone. But many times, if you put like a kick drum here, it could just have a nice, loose and kind of late kind of feeling to that drum loop, especially would start playing with swing on the A r. Straight down here is I'd say it's tricky. Okay, cancel. That's trickier. Here. Okay, so let's just, you know, for you to be aware of when you're actually programming your sounds within your drum loop. Uh, well, for them to kind of sound good, just to be aware off, and that's really the biggest thing. Being a beat maker is just knowing where you place your sounds for them to sound good and that's it. Then it's up to you to be creative. So again you have your on beat, you have your offbeat. Then you have your in between. So in between in between, uh, a and be okay. And so actually programming your sounds Is this one part of making an awesome drum loop? Okay, so in addition to the safe spots theory, like I'm saying so programming, your drum loop is just one part of making awesome drum loop. Then you also have these additional tools, and I actually called them organic tools. The reason why I call them organic is because they're free instead of any music program. These are things that just like velocity layering, panning, note nudging on these types of tools. Because this is what is going to give your drone loops that that real sound that you're going for and the really awesome thing is they're free, right? You don't need no V s t know plug in. No, not to pay extra money for it. And It's really awesome. And the thing is, many people overlook it. They overlook these organic tools and really there, like the most powerful tools, like the thing is with pretty much everything in life. But since we're talking about music, production is as soon as you understand the basics and the fundamentals, this is going to make you a better producer because, as you know, when you want to get creative, you can always fall back to the basics to the fundamentals. And then you can advance from there. Okay, So when you understand that, you know, playing with velocity is going to give you, you know, a little bit more of a human flavor. Or you can kind of get different sounds out of that drum loop like, for example, if we're here and that say, You know, we actually program our, you know, our drum here and then we program like a drum. Here's and like that. And the thing is, if we keep playing our drums like this and they're the same volume, it can sound really, really may be kind of weird. So if you start playing with, like, things like velocity, you can really start making your drum loop have more bounce or Maura groove and stuff like that. Now, if you're working with a good dance track, well, you always want that kick drum hitting nice and hard on the 1234 Right. But I'm talking more. Let's say percussion elements. If you're working with bongos or hi hats, you don't always want that high hat playing the same volume. You wanna have some bounce and you could do this through. You know, like I'm going to explain to you in a second here in this video with these organic tools. Or you can be you can even be a little more creative by using things such as excited chain compression. So, for example, whenever the kick drum plays, it reduces the volume of the high hats, and you can kind of approach it like that. Okay, so I'm going to talk to you about ah, these organic tools quickly, okay? And we'll cover them or in depth as we actually program are drum loops kit. So I call them organic tools. So the 1st 1 like I already told you, is Velocity Velocity is just to do with, like, kind of your volume, but velocity is a little bit different than volume. Okay, so velocity inside of music production can actually be used to trigger different sounds. So, for example, if you have, let's say ah v S t, which is like a drum set. Many times these developers inside the V S t the whole allow you to play a different drum sound, depending on how fast you press that key. Okay, so when you press A, you know, a key on a midi keyboard philosophy isn't how hard you push it, it's how fast you push it. So, for example, in midi, anyways, it goes from 0 to 1 27 So this is gonna be a number that you see a lot 1 27 Okay, this is the maximum value you can get out of mini. And so, for example, the stipulate, the fastest you can hit it. This would be like the slowest. So let's say from like, zero to like, let's say 47. That's if the developer gave you, like, you know, drum one. And then let's just say, like from like 48 to let's say like no one of five. You get like a drum to just to give you an idea and you know you can carry on so not to get to advance. But what I'm trying to say is certain via sties allow you to adjust, you know, different sounds or different Tambor's Tambor's kind of a different sound, um, to that hit, depending on how fast you press a key. So the reason why I explained that to you is because velocity is different than volume. Okay, so volume is simply just turning down the volume. But you're not changing that the sound except for just how loud it is velocity. You can actually get creative with it. But inside of FL Studio, for example, if you just have let's say you bought a drum, you know a sample pack, a sound kit from ah, a website. You load it in and you have, like your drum sample, right? So if that's a recorded wave file, then you don't get the benefits of being ableto have different Tambor's and stuff like your velocity. So you know, essentially your velocity is your volume. If you're working with just like an individual wave sample, this is Mauritz you're dealing with think of E s t Such as? Like, let's say, a piano V S t or guitar V S t. Or even like a drum kit and stuff like that again, it's just something for you to be aware of. Uh, as you are, you know, progressing in the music industry. Okay, so the next one is panning. Okay, so panning is just adjusting. Do you want a sound to b'more left or more, Right. Okay, but panning is just a really powerful tool for drum loops, K so it can kind of create, you know, difference in your drum loop, for example. Let's say you had your kick and a snare, but then you had a little bongo hits going on. So these bongo hits every once in a while. Maybe you can pad a little bit to the left, a little bit to the right, and it just gives a little bit of sense of space in your drum loop, Just kind of mixes it up and just gives your music a little bit more dynamic to work with. And I don't mean dynamic as in, like, compression of stuff like that. I just mean, you know, just kind of freshen up the listener's ears, so that's to do with panning. Okay. Ah, the next one was We're gonna talk about layering, so layering is amazing. Okay, so layering is when you take one sound and you take another sound and you play him at the same time, and that's as simple as it is. And you could do this with, like, a guitar and a piano at the same time. Or you can you do it with, like, a kick drum and a high hat. That's very, very common. The reason for that is because if you're kick, drum is played in a song and let's just say you can't hear that kick drum very well. Many times the low end on your kick drum is actually there, and it's hitting hard. But what's happening is he may not have the high end on your kick drum. So sometimes what people will do is the layer, the kick drum with a high hat and the obviously, you know, turn down the volume of that high hat. Just so it's just not so aggressive. But whenever that kick drum plays, it plays with the high hat, and it's a layer and many times that click is what you're missing. And many times they call it like a click or like the beater sound. For example, if you look at like a real kick drum. So, for example, it see if I can draw So you know, you have, like, your kick drum here and that it has, like the little like little beat her head. And as that hits, you know, like the drum that actually that's like your high end is right So many times that could be lacking in some of these kick drums. So you can layer high hat, reduce the volume a little bit. And you could just give that kick drum a little bit more presence because many times that low end is there. You're just missing the high end just for an example. But, for example, if we talk about like, stairs and claps many times, you can use panning. Okay, so you can use panning in addition with Larry. So, for example, let's say we had, um you know, I'm just gonna draw these just like the fl studio step sequencer. Okay, so let's say we had five different stairs and collapse. So this one, let's say that we pan it left. Or maybe these two will pan them them left Kim. And then these two week, unlike pan. Right? Um and then this one will keep dead center. And the benefit of this is now if you're getting a really, really wide sound. So what is Stereo? Stereo was just like the difference between the left and right channels. So if we have, you know, imagine these air all different sounds, OK? So because they're different, if we pan one to the left and one to the right, that means that, you know, there's gonna be some similarity in the middle on that again. That's like, that's what makes it sound like in the middle. But this is where you're going to get a nice, natural wide sound to that snare hit. Really, really powerful stuff. Okay, um, the other thing I'm gonna talk to you. A boat is just no nudging, and this goes hand in hand with swing case. So there's no nudging, and I'm just gonna go plus swing. Okay, so swing is automatic, but note nudging is manual. Okay? And like I already mentioned to you so no nudging allows you to get um, or organic flavor into your drum loop. Um, for example, let's say you had some kick drums or even like the snares. Even if we go back up to like these ones, I you know, I just talked to you about what you can pan some left pants and right, and also keep some dead center that's going to make it sound wide, but you can also note nudge. So, for example, you can kind of nudge it a little bit early or even late either or And this is going to make it sound really loose and really organic feeling. And that's it has to do with a note nudging. Now The last thing I'm going to talk to you a boat is your sound placement and already talked to you about that, right? So that's just it was like, say, spots. So sound placement. And again, that's like you're on, Be it your offbeat you're in betweens. That's that's where you actually placing your sounds. This is a huge part to understand where you can place your sounds. But as I already talked to you now, about all these different organic tools. Uh, you know, they all have a part in this. Now, you also have sounds selection. Okay, so sound selection is your selecting different sounds that relate to your actual song. Some sounds may not suit your song. And some sounds may actually help further push the emotion that you're wanting to achieve. For example, that's just talk about, like, an eighties kind of retro song. It's just a really good example because, you know, they're kind of known for, like that kind of cheesy since and stuff like that. So if you program those melodies, you know, that melody might sound kind of cheesy already, but by selecting, you know, certain sounds is going to give your music, you know, either a different feel, a different vibe. And, you know, So what I'm trying to tell you is, um OK, so let's just cover what we've already talked to boat. So we had safe spots. This is where you could actually you know, um, this is like your sound placement right on. And then, you know, to go further, we have these organic tools, things like velocity panning, layering, note nudging, your sound placement, which is like the safe spots and then you're sounds selection. And by using these altogether and again, they're free, right? So that's the biggest kind of kicker behind this kind of stuff. But by using them all together, you're going to create really, really awesome drum loops, which I'm going to reveal to you in our next video as we program a little drum loop and I share with you how you can actually use these types of tools with NFL studio to get, you know, a better drum loop, OK?
9. 4-2 Programming Notes In The Step Sequencer: Okay, So in this video, we're going to be building a little drum loop and will be covering safe spots as well is focusing on the step sequence here. Okay, so with FL Studio, you know, like I already covered, we have the step sequencer. We have the playlist, we have the mixer, and then you have you have seven. That's the shortcut for the piano roll again. Everything is up here as well. So the step sequencer is really, really important to understand how it works. And you could literally just click sounds and just like this, or if you right click, you go to the piano roll and you can actually, you know, change pitch, go lower, go higher. And I do suggest you guys have headphones on that way. You guys can actually hear, like, the low end of the kick drums. And, you know, once we get into further on this course headphones or earbuds, they're really gonna help you out. So before we get into actually programming the drum loop, I just want to talk a little bit about my set up here. So, as you could see, my layout is just like this. It makes it really, really easy that way. Nothing's overlapping. Nothing's kind of annoying. And what I mean by that is like the steps Secret Service right here. The playlist is right here. If I want a bigger again and enter and on the step sequence of what I do is I hit the arrow up here. I go down to auto resize and actually turn it off, and then I'll just adjust this to you know where I want. You know, your screen might look a little bit different and, you know, do whatever you want, but I've just found that this is a nice, minimal way toe work in FL Studio to make it really, really simple. So now let's get into actually little programming a little drum loop and explaining the safe spots concept a little further, where we will actually place sounds in, and then even to take it further. Talk about those organic tools such as, like velocity panning, layering and stuff like that. Okay, so if you do want more information on programming drum loops, I do actually have a specific course. It's called safe spots create amazing drum loops. You guys can just Google it. Check it out if you want more information, you know mawr in depth information on each of these points. Okay, so let's add in just a few percussion elements that way, once you actually build a drug loop, we already have the sounds ready, and we can kind of just keep progressing. Okay, so it's got a percussion here. And one thing just to mention is about sounds. I don't want to go too much into it, but the whole goal that I have found over my years of purchasing sounds is you want variety , so you don't need tons and tons of sounds. You don't need to be spending thousands and thousands of dollars. You know, each kits around 20 to 40 maybe $50 kind of thing. But the whole goal is yes. You want high quality, you know, high quality sounds is gonna make making beats way easier, but you won't variety. So, for example, you want, like short tailed kicks. You want long tailed kicks. You want eight awaits in terms of like snares. You want snares, claps, percussion elements for percussion like, you know, sky's the limit that you could have like like the actual triangle little sound bungles. Just, for example, exclusive audio is one of my favorite. Some vendors often go to organic drum kit. You'll see him percussion like you have hand drums like Cajun box metallic shakers. Wouldn't. As you can see, it's like the variety. So as a producer, it's that I am able to have such versatility in my sounds case. That's actually at a time reading here. But two different variations of those tampering you add this into now this doesn't mean I'm gonna use all these sounds. It just means that I'm just kind of set up. OK, so let's start with our kick drum. Let's see what we want as the kind of prominent drum can. So I kind of like this Trump. You know, it's a little dirty, but it is still a pretty clean hit. And what I mean by that is see this sound right here? It just I don't like. I like the tail, but I don't think I like it so consistent. For example, if it was a 1234 like, I just kind of find that tail a little bit of knowing. But if we were to just play it like once in a while. I think it might sound fine. OK, And then we have this drummer here just nice and nice and low, right? So there's just add in our drums here, so maybe I'll just kind of click it around like this. And I usually just click this drum in just kind of randomly and then I'm gonna add the clapping here. So we have right here. So it's a snare and world use the whole of control and see And I know that these three are my collapse just to confirms clap snare ish in another club. Okay, so I you set it up like this. So I have my kick drum and my clap So have my clap on the two in the four and that I have a kick drum which kind of bounces around that clap. It's not very often where I play the kick drum on the two in the four. So in other words, I don't really play the drum with the clap at the same time, but you can issues something that I just really never do in its sense of like hip hop. But in dance music. Obvious seed all your kick drums like the 123 and four. So that's a little different. But again, the sky's the limit. I'm just kind of sharing what I would do. So let's just listen to this. Our temples. 97 beats per minute. What is this? Into the kick and a clap that we have so far. Okay, Sounds all right. Maybe we'll add some Blair in here. Okay, so we'll let it right here and then maybe at the end. Okay. So introduce you to something called Cut itself. So cut itself allows U s. So when a sound plays and then it plays again, it immediately cuts off the original sound. And then the new version of that sound will continue to play. Okay, uh, this is a really, really popular technique with sampling. For example, if you have, like, one sample that plays and then you have another sample that plays immediately, it cuts off the other sound, and it just gives a nice, clean sound. Nothing's overlapping and just typically makes your mix is really clean sounding so especially with, like, low end eight awaits and stuff like that, you want to make sure you have cut itself on. Otherwise, the tail overlaps and you can kind of get like, a wobble sound. And what's happening is they're getting, like, cancellation on that sounds absolutely horrible. You always want your low end seven nice and tight. Um, this tale is more bolt like that. Kind of, uh, for example, for Listen to the detail on this drum again. It is not so much low end on it. It's just kind of like that kind of reverb ish kind of tale that I don't like. So I enabled. Cut itself so that when it plays here and then it comes back around that it just has a nice , clean hit. Okay, let's add in this drummer here, okay? Just a nice little low end. Maybe we'll just kind of added in a little filler. Here. Let's turn on this temple just a little bit. Maybe 94 remove this drum. We will put it here. Okay, so, you know, pretty nice group. Okay, so we have our kicks and her collapse pretty basic. So far. Right? So now I work my way into, like, the high hat, so, for example, Okay, So It's as, um hi hats in here. Um, now I'm just kind of clicking these in just randomly high hats. It's all about just kind of finding the rhythm for that loop at the moment and I'll click them in will hit play. I'll listen and, like, who? I don't really like it there. And it's just really easy to adjust when sounds are kind of already clicked in. So let's just listen, Okay? So I don't really don't like the flow. So maybe we will ah, put it like her. Me Like this. Okay, so the first, uh, I guess organic tool I want to introduce you to is velocity. Okay, So to adjust velocity, you can either come up here and you can adjust it this way. I typically avoid this in the step sequencer on. The reason is because it's not really as versatile, like don't get me wrong. You could do pretty much everything in the piano role as you can right here. But I kind of forget if I do stuff this way. So I like to always just bring stuff to the piano roll. It's the easiest way. So I'm gonna right click Go to piano roll and the benefits with the piano roll is again. You can adjust pitch. So, for example, if you want to move on up or down, you can do that. Depending on the type of sound, you can extend the length. But if you do extend the length, you have to make sure to enable the envelope. Otherwise, the whole sound would is played by itself. So velocity and various other tools are down here. Okay, so, you know, velocity panning you can even a just like the pitch and stuff like that as well. Instead of changing the note, you can actually just change the pitch through this as well. Um, so right now we have velocity. Okay, so I'm gonna hold on control and right click and hold, and there will zoom in the whole area, making it just easier to see. And to just velocity. You literally just could just left, click and just kind of give some bounce to some of these sounds. Um, now, if I was actually building this drum loop on my own, you know, I'd would be actually having this playing the whole time, and then I come in here and, you know, I'm kind of listening for just what can I do for creativity? What can I do for groove and stuff like that when I'm doing this course with you? I kind of have to keep stopping and starting a little bit. But again, in real world practice, this would be something where I'm actually listening as I'm doing so to adjust this type of stuff is you can see you can just simply left click. You know, like wherever you want, you can left, click and hold. Ah, cool trick is actually you can, like, right click and you can, like, drag and hold. So this is pretty cool sometimes if you want to create, like, a little bit riser sound or something. Uh, and another way is to actually hold on fault and the scroll wheel. So holding ultimate school well, on a sound, you could do that. And this is really beneficial. So imagine we had, like, a piano, so lots of different notes, chords and everything. So imagine that they're all over the place like this, right? So you can actually highlight You know, certain sounds if you want, and I'm gonna hold down control and shift, and you could just individually click individual ones or de select them just by clicking on them to. And if you hover over any of them now and hold on Ault in the scroll wheel, you can reduce or increase certain notes velocity. And again, this is with panning and stuff, too. So, for example, hold on Olt scroll wheel. As you can see the three go up or they go down. Guess so. It's just all about knowing how to flow so that you can be creative. Let's just listen to this as it is. I don't know how it's gonna sound, but this is listless into the drum. Yeah, so we're going to leave those and as you can see Ah, the velocity was a little too low. I just wanted just a little bit. It's a little bit of bounce. Um, but, you know, again, I'm just kind of sharing with you what you can do. OK, so that's just one high hat. Let's add in another high hat here, middle play only the off beat something like this. Okay, so let's try some panning case. We're gonna right click come into here right click go pan. So to pan, it's just a matter of 21 on the left speaker or the right speaker. You could be aggressive with it. And the biggest thing with FL Studio is you always want to look in the top left. This is always gonna be your indicators. The hint panel. Okay, so I'm gonna hold my left click, drag down, so as you can see and bring it to the left So this sounds gonna be all the way to the left and all the way to the right. It might be a little bit aggressive. Maybe we'll go like, 50%. But let's just listen to what it sounds like an estimated 50%. Okay, maybe even this hat right here on a couple of the notes maybe will, like, put this one up a little bit. This went down. So again, this is right. And this is left. Let's listen. Listen. Yes, that one kind of got lost and manual. Adjust it this way. Okay. So the reason why I ended up choosing this sound over here was the one over here was getting lost. In other words, it was kind of being hit at the same time is another sound. And therefore, we weren't really hearing the effect of, like, that left and right. Same thing here, you know, it was kind of being masked, and this one it was clear. So in other words, no other sounds were being layered at that time. And if we listen more time, you can audibly here, uh, this sound on the left and the sound on the right for certain other way around. But you get what I'm saying We can actually hear the panning going on. So again, this is just this just adds more variety and flavor into, um, you know, like your drum loop for your listeners sake and this for, you know, just for creativity. Um, now, so there's velocity panning. Let's talk a little bit about swing. Okay? This is no nudging. So to do the note nudging, we can actually come up here. Okay? And let's just take this one right here and now how you can note not just by holding on shift and the scroll wheel. Okay, so either up or down. So when you note nudge, you can either go late so late would be, um this way. Okay, Because you know, if the beats here now, it's playing late or you can make it play early, Um, and what you could do So let's say Okay, this is on beat now. We're playing early, so let's just make it two notches. Now you'll discover that you can only push note nudging so far until that actually sounds off. Be in this, like in a bad way. Um, but, you know, when you adjust it, you'll notice that you can You would make your your hit some. It's a little bit looser, a little bit more organic feeling. OK, so we'll make this one early. Then we'll make this one is a little bit late. Okay? And again, you can only push it so far until it kind of sounds weird and all, you know, let's just push it a little far just so you can hear it. So it sounds weird, right care. So this brings back Okay, so let's let's leave it, that one right there. Now, another thing for you to be aware of when you are working, you know, with different sounds. Instead of closing the piano roll going to the other sound opening up the piano roll. You can actually come here and you can select your different sounds. So as you can see, I want to go, Let's say to ah, snare uh, one. Okay, so right now it's on beat and on beat, so let's just make it a little bit late and will make its a little bit early. Okay, so we'll try that. Okay, so I'll cover the piano roll later. But right now I have something going called Ghost. Don't. Her ghost channels, I think, is what we call him. It's in helpers, as goes channels. It just allows you to see other sounds and other notes from other sounds inside that same pattern. So since from the same pattern and these sounds are still being played, we can still see, like where they're being played. So, for example, if we were playing with different notes, chords and melodies, it makes it really nice, because you know what note you can kind of play with if you're gonna layer and stuff. Um, but as you can see this sound right here, it's it's a little too late. So if I double right click on it now, we can come back to it. I'm just gonna hold on shifting. Let's bring this one back. We'll keep like this. So Okay, we'll keep those on, and I just quickly want to cover just panning a little bit more. And this is just a cool trick when it comes to your actual snare hit. Uh, you know, I already showed you that if you had, like, uh, you know, let's say three stairs, you pan one left and one right, and keep one dead center that you're going to be able to achieve a nice wide sound, and I just want to cover that with you. So what is go snares here. Okay, so I'll put this in between. You gotta be careful. If I were to actually drop this on a sound, it overwrites it, and you can't undo it. So right now, if I drop it in or good and we'll get another one. So I'm looking for another similar sound. That's kind of similar, but the reason why I didn't choose this sound actually, this is this is a good one here. But So for example, we have this sound right here and now we have this. Um Okay, so what I'm trying to say is the other snare had way more low end to it, so it would kind of make it feel unbalanced. Now, in terms of mixing, like, you know, I might just if I like this if electable snares, I wouldn't then just fix that by, you know, adjusting the e que and kind of cutting out the low end. That way I can cut it a nice balance in between them. But I'm just gonna keep this simple for right now. And I'm just looking for two snares which have a kind of similar frequency response in a sense of, you know, yes, they sound different, but ones not super low and Bumi And because again, that's just gonna make kind of your balance kind of skewed. So right now, if I have a snare here, um, and here we will just copy and paste it into here. Now, this there were gonna pan it left, and this there were gonna pan it. Right? Okay. So, again, this is you with, like, layering. So what we're doing, we're here. We're doing panning to get like a nice you know, just a little bit more variety. So in terms of the hi hats, that's more of a creative thing. Now, in terms of the stairs, this is more for wide nous, so Well, listen to this again. Okay? With seldom kisses, you can hear just I was dead center. Right? Okay. So just turn down the volume a little bit on those. And a cool thing. I just turned that down by this much. If you right click, go copy, you can right click and paste the value. Now you've turned it down by the same amount. So listen again, kids. So we turn off and on case of dead center now why? Okay, so again, these air just those little subtle things And they helped so much in terms of you know, when you listen to your be versus someone else's thes the cool little tricks that you can add into your drum loops to make himself Fuller make himself bigger. Okay, so we will carry on just a little bit more here on the drum loop. I'm probably not gonna add in all of these sounds. I'll just add in this a little bit more for percussion just to share with, You know, maybe how I would approach that, But I do want to cover swing a little bit more, and we'll cover layering just a little bit more here, too. Because the thing with you know, your drum loop is the more sounds you're adding in, the more layering you're getting them or, you know, fullness you're getting you do going to be a little bit careful with drums. So, for example, when you layer drums, you can get what's called phase cancellation, and this is just to do with audio. Near the end of this course, I'm gonna break down digital audio for you. We'll do a little drawing and to share with you like the sine wave and stuff. And if you have one sine wave and then you have another sign way but it's flipped you, you know, you will actually cancel out frequencies. And this is what can happen depending on how microphones recorded sounds and stuff like that. So what I'm trying to say is, if you have a kick drum, So in this case, we have three kick drums and and if you're layering them, you want to make sure that you reverse the polarity just to kind of test to see what sounds better. And obviously, you're gonna choose the one that sounds better. And by better, I mean what one hits you harder. Because again, the low end, if it's weak, you know that's not gonna make your music sound good. So you want to make sure that you're testing the polarity of the drums, and I'll just let you listen to this. I'm just gonna hit space bar a couple of times, so, you know, if it sounds annoying story, But just listen to this, okay? Now with the clarity. So my headphones I hear that this hits just a little bit harder. Okay, So I just added in this drum here to it just in my opinion, it gave that drum live just a little bit of a folder sound When the drum this drummer here just played by itself. It just sounded a little bit like it was lacking. Um, then they get I didn't want to overplay this sound. I like the tales. Fine. But again, I don't want to play over and over and over. Okay, so let's get into some layering here, and then we'll also play with swing. Now, swing is something that you have to train your ear to hear. In my opinion, is just kind of compression. If you haven't learned a boat compression or tried compression yet, Ah, compression takes a long time to train your ear to what you're really doing toe a sound and a sense of your threshold ratio, attack and release and just kind of dialing them in. Um, but I also found swing to kind of be similar to that. It kind of took me a while to learn, You know, what is the difference between, you know, swing and no having swing and stuff like that? So let's style in some percussion here. Let's just listen to what we have. Okay, so we just have this tambourines. So we will play on offer something like that, the off beat. Okay, We'll play it there. You play this will layer it with have to clap way. Would you like this? And, um, now, in terms of mixing and stuff like that, when I'm actually building my drum loop, I may actually just kind of adjust the volumes and here just a little bit just to kind of get like that. Nice little balance. But at the end of the day, I always bring my sounds into the mixer because this is going to give you the most flexibility in a sense of adjusting your volumes, adjusting your panning If you want to add effects on fir e que and stuff like that, this is just more of like a quick and dirty kind of approach. Okay, so let's just add some more sounds in here, Okay? So we'll put this on, like, the in between solicit the B and the B, and we'll play that there. And, uh, Steven, So this sound you hear, it would be a little bit aggressive, which are down. Trim this down too. Okay, so it sounds a little bit a little rushed, so I'm gonna go to my piano roll, and we're going to nudge this a little bit late. Let's see, for one or two more sounds in Well, maybe do something like this. Okay, so this sound right here to be creative weaken right click or the piano roll. And another cool thing is, if you hold on, you highlight a sound you hold on Control. Left, click And if you hold on shift and the up arrow key, you can change the note district from the keyboard. Sometimes it's nice rather than just dragging the sound or you can actually hold on control and up and down and it actually goes up the whole octave. So I'm just gonna right click Sorry, Hold on Control and right click and it zooms everything into screen. SoGen Controlling down is a conductive, so I don't want to do that. I'm just one of maybe do something like this may bring it down and no so can we leave like that? So now let's play with swing, Okay, so swing is something again. You have to train your ear to I am going to dial in quite drastic effects, you know. So again, swing is just right here, typically on a track kind of have it may be from like, let's say, sixties to around like, 10 ish something like that. You know, you typically find that all my tracks do benefit from swing. Ah, but each track is a little bit different. So, you know, sometimes you want to live it more groove, and sometimes you want a little bit less. Every track is different. But I do find that just a little bit of swing typically helps that. You know, I thought that all the instruments that sounds kind of as a whole just kind of gel a little bit better. Now again, swing, adjust your eighth notes. So any note that is an eighth note. So again, I call these the in betweens. So this is the A B a b and e gonna just repeats, right? So swing Onley adjust these notes. So if we're on the on B or the off beat swing does not adjust these notes, Okay, So if you want to adjust these notes, you'll have to manually adjust them with no nudging like I showed you. Okay, so let's just play around with some swing, hear how it sounds. I'll dial and really, really intense effects, you know, to the point where it's like, OK, it's way too much on that will dial back. So here we go. Okay. So I'm gonna copy that value. We're gonna reset it, pace it in just feeling how it kind of has a more group. It's kind of like a late, but it kind of rocks. Okay on to increase it. Tons, kids, you know, So this is really honorable, but it sounds kind of weird, right? So, like saying each track, it's usually around 60 to 10. So I was back a little bit. So this is zero will increase it and well, paced in the value I had it so and this sound right here just a little bit loud. Well, dollars back to Okay, so that's just a little walk through of the step sequencer had a program. Your notes, you know, kind of still with that counting beats, you guys learnt about safe spots again. That's my own term. I've coined, so you won't hear about that anywhere else. But I just find it's really easy to understand where you can place your sounds again. We have the on beat, we have the off beat and we have the in between. So the A and the B and again that just repeats for every single beat. So since we're in 44 time, uh, you know, each of these is 1/16. We need four of them to create 1/4 beat, which is a beat in 44 time And then we need 4/4 beats to make one bar. Okay? And you can see these air. These are bars. So each one of these is one. So, actually, if I zoom in here and I'll explain this later on. Ah, but you could see 1234 And now it just repeats. Okay, Now, this is the same thing. So one right here is one literally right here. Uh, this be right here is literally this beer here. Uh, no. This one. Or here is this one. And then we have the four, which is right here. Okay? And then it will go to the second bar. So whenever you hear rappers say, Oh, if they spent 16 bars, that's pretty much what it is again. I'll cover that a little bit more once we get into actually arranging the track a little bit further on into this course. Okay, so that's programming notes in the step sequencer. Again. If you want to access the piano roll, you just right click on piano roll and stuff like that. But we'll be covering that in our following videos.
10. 5-1 Piano Roll How Chords And Scales Work: Okay, So in this video, we're gonna be talking about the piano role as well as how cords work. Okay, Now, if you want more information on how to play the piano as a beat maker have actually created a course has been my best seller over all the years of doing these courses. And it's called Learn Piano for beat makers and producers. And by the end of that course, you guys will learn how to improvise on the piano from a beat makers perspective, you guys will learn to put both the right and left hand. Okay, Now, in these section of videos, I'm gonna break down how cords work notes, chords, scales to get you up and running. So at least you'll kind of have an idea of where to look and how to get started. Programming melodies. And you know how the piano roll kind of works. Okay, so this right here is just like the piano roll, you know? So NFL studio here, you just gonna have all these all your different notes. Okay, On a piano is just a B c d e f g. And then it just repeats over and over again. now you also have sharps in between. So, for example, would be like a h r b c c sharp d d sharp e f f sharp g t shirt A. And again it just repeats over and over again. Okay, so how a piano works is you have 12 notes and those 12 notes repeat over and over, and every time they repeat, it's called an octave. So, for example, you can have in a four and then you can have in a five. And the only difference between those notes is that it's literally double infrequency. Okay, so, for example, a four is actually 440 hertz, a 5 880 hertz and the same thing. If you want a three, it would be 220 hurts. So it's just half of 440 hertz. Okay, at a basic level, that's just kind of how it works. Now, when you want to make a beat and you want to program your you know, your notes, your melodies and all that kind of stuff, you have to know what notes are allowed to play. You can't just go and pick any no on the piano to make a beat and by you understanding that that's going to differentiate your knowledge and how you can actually start flowing and improvising with your productions. And again with that piano. Of course. That's what I teach you. I actually teach you. You know, when you're looking at a piano, what are you looking at? You know your keys and then what notes were locked to play. Okay, so the first step is you actually have to choose. Ah kee. Okay. You also have to choose a scale que eso a scale. There's actually seven notes that you're allowed to play and each no is different. So each scale is different and the best place to start is actually ah, the C major Kate's usually written like that, but I local major scale calf. So the C major scale is the best scale toe learn. And I say that because it's only white notes. So if you go to try and hit your notes on the piano and you know you're always just like, why can't I play these other notes? For example, the black notes. The reason is because you're playing in the scale of C major or a minor. So every single major scale actually has an opposite minor. A little confusing, but pretty cool to understand once that's been revealed to you. So, for example, if you go to see Major, you'll see it's only white notes. And if you go to a minor, you'll see that it's also white notes to So you can kind of ask the question is, Are you actually playing in C Major or you're playing in a minor? Okay, so kind of confusing, but it's good again. Good to know. So that's the biggest thing to understand when it comes to playing the piano. OK, is first of all, you can you have to pick a key and you have to pick a scale. Okay, this is gonna dictate what notes you want to play. It's also going to dictate what chords you're allowed to play because accord depends on the scale. Okay, because so, uh, accord has three or more notes. So in the piano roll, you know, So right here, you know how it would work is you know, you have your different chords. So, for example, you could might play the sub notes longer shorter, you could extend the length you could do whatever right? Um and so Accord is typically so little Court is out of three or more notes or more? No, it's OK, so 1/4 is three or more notes. So if I were to play a chord, it's three or more notes and you know, that's the cords are nice and full sounding. You know, I typically play really basic chords, even in my own productions. Some people get into what's called, like seven since stuff like that, and you know you can once you start advancing. But it's important for you to understand the basics. Okay, now, accord can also have a major. Actually, let's just do a different color for that so a court can have a major or a minor now the same thing So a court can have a major or a minor or, um, a scale can have a major or a minor. Okay, so, you know, again, So, ah, court can have a major minor chord, or you can have a major a minor scale. Now, again, you know, this is getting a little bit confusing because I haven't really showed you how music theory works in a sense of picking a key in a scale. You know, Aiken, say that to you. But what does that really mean? Right, So let's go into, ah, little tool that I like to use to teach this. It's really, really powerful. So here we go. This is what it looks like. Okay, so right now you can see that we have a court, right? So accord is three or more notes, typically. Okay, that's seriously common within the industry. Now, if we go to a scale, so a c major scale. Okay, so see, Major and we're under scale, so you can see it's on Lee White notes. There's no black notes. For example, if we want to see minor, you can see that the black no is being added in and the E is not being played. Okay, so let's just talk about the notes here again one more time. So we have C c sharp, d d sharp, e f f sharp G G shirt, a a shirt, be And then, as you can see, this a c and this c So this is now one octave up. So, for example, if this was C five. This is now C six. One thing to talk about just kind of quickly. Some people call these flats instead of sharps, but just to keep it simple. I'm just gonna call them sharp skate not to confuse you or anything like that. So let's cover the C major scale. It's gonna kind of open your eyes to what notes you're allowed to play and what chords were allowed to play. Okay, so when we hear about a major or a minor chord, so right now we're in C major scale. This is telling us all the notes we were allowed to play, which means that our cords have toe have these notes in. Okay, so if we talked about a major or a minor chord, it doesn't matter if its major a minor, it has to have only white notes in it. In order for that court to be in C major. Pretty simple, right? So we'll repeat that one more time in order to play chords and see Major. They have toe have only white notes. And so if you were to actually play on the piano and you know you actually start playing all the white notes. And typically, you know, if you play three or more notes at a time, just up and down many times it sounds pretty good and you're like, Oh, I can play chords But again, a senior sister adding, in those black notes, that's where the confusion comes in because nobody really reveals the stuff to you. And this is where you have to pick a key and a scale. So right now, the KIIS C and the scale is major. So now let's talk about again on Lee White notes. So we're going to start at sea. Okay, So with in the scale of C Major, do we have a major C? You know, see major court or a C minor chord? And it's going to be a major court because we're in the scale of C major presidency. See, Major on Lee has white notes, so C, e and G really, really simple, right? So we'll go back to the scale. Let's go to D now if I go to D major chord now, the difference between a major and a minor chord is between your third. So if I just hold up my hand here So how it works is your thumb is your one. Your index is your to your middle fingers or three. Your ring finger is your four and then your pinky is your five. And that is how uh, numbering works on a piano. OK, so like on your hands So 1234 and five and that's it. Super, Super simple, right? So the difference between a major and a minor chord is between your first and your third. Okay, if we look at this court here, OK, so it's a C major chord. Now again, our thumb is there. One sore thumb is playing. See? No. In between our first and our third, we actually have three notes 12 and three. This means it's a major chord, so three notes in between your first and your third is a major court. Now, if it's a minor chord, all we do is to bring the third back one case and others actually, two notes between our first, which is a thumb and middle finger, which is our three. Okay, so to to repeat that one more time, so a major court has three notes in between. The first and the Third Miner Court only has two. Okay, So, for example, here's a major court. So 12 and three were going a minor one and two. So is it a C C one to this T shirt? So that is a C minor chord. Okay, so now that you know that the difference doing a major and a minor chord is how many notes are in between the first and the third. Okay, again, your first, your thumb, your third, your middle finger. I don't want to keep repeating that, but in the beginning, it's really important for you to kind of understand that concept. Okay, so we're in C Major. We have three notes between the first in the third. It's a major chord has only white notes. Then we're good to go. It's in the scale of C major. So let's move on to D. Okay, So before we actually check out the d chord, let's cover that theory again. Okay, so the difference between a major and a minor chord is just how many notes are in between the first and 1/3 a majors. Three notes in between. A minor is two notes, so Let's count. So from D, we have 12 and three. So that means if we play this f sharp, okay, cause there's gonna be 12 and three notes in between For this to be a major d OK, and we don't have any black notes, so we have to have a d minor chord. So again, that's 12 That means that our third is playing the F. Okay, so watch this. If we go to, uh D Major, you can see that replaying the D, the f sharp and the A well, we can't have a deem major court in the scale of C Major. And the reason is because there's no black notes. Okay, again, it's that simple. So that's why I like to always teach c major at the very, very beginning because, you know, drawing a lot of white notes. So if you've a black note in there, you know that cord cannot be in the scale of C major. So which means that we actually have a D minor chord. Okay, so one to self. So for our first, our thumb is playing there on the d. We have one to our middle finger. Our third is playing on the F. We have a minor or a D minor chord on a scale of C major. Okay, so we will do Ah, one or two more, Uh, just to kind of, you know, break this in for you. But again, my piano course breaks, You know, more chords, more scales down even further. I also teach you a song that I've created of commercially released. I share with you how to play that with both your left and right hand, you know, kind of really teaching you how to play the piano from a beat makers perspective. Okay, so let's break down E here now. Okay. So again, to go back to the theory who are only allowed white notes in a C major scale. So let's count. So from e 123 notes in between. So that means that our major will be playing on the G sharp, which means that we actually have an e minor chord. So if you go to E minor, you're going to see that we have our thumb are one is playing on E 12 which means that our third is playing on the G here. So which means there's only two notes in between. It's a e minor chord, only white notes. We're good to go. It's in the scale of C major. So let's do one more just to help really solidify this. Okay, so now we're going toe f Let's just count again. So 123 There's three notes of between. That means that our middle finger is playing on the A. This is telling us that F major is in the scale of C major. Okay, so again, F 123 are our third are middle fingers playing on the A. So we're going to go to F. We're going to go to minor. So our thumb is playing on the f R one. So 12 Okay, so our third is playing here. So again, we want a major f chord. So in f major chord. So f 123 is playing on the A. Good to go. Okay, um, now your pinky is you know, it always plays in the same spot. Okay, It's just, uh, the third, which is going to change in these major and minor courts. And that's really how simple it is to understand what notes you're allowed to play in what scale. So just to confirm, OK, so you always have to pick a key. So it is gonna get just get a different color here, so you always have to pick a key. Okay, so you know, whether that b, c a. F whatever the reason why there's these different keys and scales of many times. If someone's going to sing, Ah, lot of times they will choose a key and a scale that kind of goes with that person's voice . That way they can stay in two and a little bit better. Another cool production tip. This is kind of a pro tip. Certain keys and scales allow you to hit nice baselines. Okay, so some keys and scales, the low end is a little bit too low. I but some keys and scales allow you to hit a really, really nice tight baseline without it sounding too low. But it's not too high. It's just right in the sweet spot. So that's a really, really cool thing to know about. I think it might be like a um a scale may be either the major or the minor or something like that. I forget. I remember doing some research on this before. It was just like, Oh, that's kind of a cool little protest. Okay, so you want to make sure you choose a key and a scale, and again there's seven notes we go to see major scale. Um, sorry, C major scale. So let's discount. So we're not gonna count this. See? Okay, because this is an octave higher. We're just gonna count the other notes. So 123456 and seven and that's it. So really, really powerful. Right? Um so again, you want to pick a key, a scale that's gonna tell you what notes were allowed to play. Now again, if you were to pick like a c minor or a major and a minor again, this is gonna tell you what notes are allowed to play. And then you have to figure out what chord what chords are in that scale. Okay, because again, you have to only choose the notes which are in that scale. And if we talk about C major again, this is why I like teaching. This scale is because it's so simple. It's only white notes, which means that your cores can only have white notes. But for myself, when I actually played the piano for improvisation purposes, I typically like to have some black notes in there, and the reason for that is because it's really easy to feel where your hands are on the keys, whereas if you only pay the white notes, you know, for example, if you have a mini keep, we're trying only play in the white notes. It's just, you know, it's kind of like I don't know where I am on the piano. You always have to look down, whereas when you have some black notes and it's really easy to feel where you are, you can improvise. You can look away. You can, you know, really, really powerful stuff. Okay, so in this video we talked about, you know, just like, you know, like your little piano roll. This is kind of what it looks like you have, like, you know, it's on the side. Then you have your notes, which you can click and on program. Our next video is going to be about the piano roll. It's gonna be a boat clicking course in how to edit the notes, how to, uh, you know, record and kind of get up and running with the piano roll. But now that you know the key, a scale and what notes you like to play now it's gonna make this melody process way easier instead of just kind of guessing and hitting notes. Now, you know that the notes were allowed to play, and now it's just a matter of finding a rhythm and a melody which actually suits what you're going for. And in all honesty, that's probably the hardest part. But now that this is, you know, this has been revealed to you. This is also is also a huge game changer for you to. OK, so let's get into the piano roll inside of FL Studio, gonna break it down for you and get you up and running
11. 5-2 Piano Roll FL Studio Walkthrough Recording: Okay, So in this video, we're actually going to program so many notes, understand? A record, A little loop. I'm gonna show you how to edit them. How to, you know, pretty much how to use the piano roll. Okay, again, I just wanted to let you know that that piano course is there, you know, not to, you know, keep trying to sell you, But, you know, I'm gonna play some piano here for you. I'm gonna share with you. You know how far I've come with learning the piano. I never knew the piano really well until I really started making beats. Probably about 4 to 5 years in. And I just kind of realized it was like, If I want to make beautiful melodies in my beats, I need to learn the piano. I need to learn to improvise. I need to learn, you know, just really how to sit here, how to play the piano and then also learned from a beat makers perspective. Because what I have discovered over the years is that as a beat maker, we're really focused on catchy loops, you know, repetition on knowing how to improvise. That's you know, that's what we're trying to learn as a beat maker, right? If you're trying to learn as a classical piano player, you'll find that you can only come so far with beat making learning the piano, uh, begin as a beat maker. All about loops and stuff like that again that courses cold learned piano for beat makers and producers by me. Gratuitous. Okay, so the first thing I'm going to do to keep this simple, I'm gonna put the drum loop in the actual playlist. Okay? This is probably the best way to actually record. Because if I were to record this guitar and now let's say my guitar went longer than what this loop is. The sleep is only four beats and typically my Qatar loops or at least 1 to 2 bars, so that would be eight beats. Okay, 8 to 16 beats. Um, So what I'm gonna do is I use my number pad a lot to switch in between. Step the step sequence there. Okay, So in between my patterns, So, uh, in order to go to a new pattern, you can simply just click here. You can, you know, have four, or you can hit the only shift f four, or you could just simply click the plus right here. In addition, on the playlists, you can also hit the asterisk. So the multiplier button and that allows you to go a full bar ahead. And this is just really nice ones. Your project starts to grow. You can just quickly kind of go forward and back a little bit. So that's, uh, multiply and the divide sign. And that's mainly mostly what I use on the number pad. But it's just good to know, because a lot of people don't really talk about that much. If you don't have a number pad, like on your laptop or something, you know, it kind of sucks. You can always buy the USB number pad, but that's typically what I use. But if you don't have the number pad again to access your patterns, you can come here or you could just hit a for stuff like that. So I'm just going to hit the plus in my number pad to go to a new pattern, and now we can simply, you know, play this guitar. Okay, so, behind the scenes, I added this guitar in I wrote it to the mixer. As you can see, it's on insert seven. In the night. It's routed it to some sends, which we will cover later. Okay, don't worry if it feels over your head or whatever, this has allowed me to get effects on really, really quickly. And then it also applied some EQ compression just to get the sound standing high. Want So this, for example, this is what a guitar sounds like. So So that is our guitar sound. So what I'm gonna do is I'm gonna hit play. We're going to kind of listen to the drum loop, listen to like the groove on. Then eventually I will record a loop. We will open it up in the piano roll. We'll edit it up and let's walk you through some kind of, you know, kind of shortcuts keyboard shortcuts that I like to use in the piano roll to speed up my editing so that you guys could get up and running and you know you'll know how to edit. So I'm just walking you through a natural process of how I make a beat were just kind of covering them just more in depth a little bit, so here we go. Right now, we are in song mode. Okay, So there's pattern mode. If I were to hit space bar right now, it's only gonna play in this pattern. And there's nothing in the pattern, so we won't hear anything. If I were to play in this pattern, we'd only hear the drum loop. Um, and you can either click up here and then hit play, or you can always hit like the player it here. I typically always hit these. I just find it easier, because just one click instead of, like, two clicks. You know, that's just messes my own flow. Okay? I'm always just gonna kind of fill you in what I do, but you do whatever you want, so I'm gonna hit the speaker on the playlist. We're gonna listen to the drum loop, go over and over now. Pattern one is, uh, this pattern right here. Eventually, I would break it apart. Okay, so, for myself, when I'm actually, you know, making my beats and stuff many times I build my drill, move all in one pattern, and then I break it apart later. Because as you break apart, the patterns, then you can actually arrange a song. Right? So you have your drums or clap. You can remove sounds whenever you want. This just gives you the ultimate flexibility. Come arrangement time. Okay, but for creative purposes, when I'm actually making the beat because that takes time. That's more like the editing stage my drum loops made. It's time to actually know figure out some melodies, so I just quickly added into the playlist I go to a new pattern. I would hit play here. We're gonna listen to the drum loop, and I'm just gonna try to improvise a little bit, you know, See what we can kind of come up with so again. So here we go. OK, Now, if you know, if you have been making beats for a little bit and also Oh, I really like that, you know, I wish I could Could go back and save that or something like that. So I did this on purpose without recording or anything like that. So I will share with you how I would actually record. For example. Let's say I played something. It was like that. I'm gonna hit record. But let's say you played something and you didn't know you didn't record it. So what you can do is right now I'm making sure I'm on a new pattern. Because sometimes if you played lots of different sounds, it's gonna bring them all back. So I go to a new pattern just to be safe, and I'm going to go tools we are going to go. Ah, Dump score, log to selected pattern for the last two minutes, K. So I'll do that. And as you can see, you know, I was playing behind the scenes a little bit, just as I was actually kind of configuring this guitar a little bit. And so what I'm gonna do is I'm gonna click on that hold down control and right click is gonna zoom everything in. And now I can see kind of where I was playing, and I think I'm going to be playing from around here. Okay, so let's just kind of listen. So I clicked right here and hit playing in the pattern. So this is that this will only play the pattern, not the drum loop. So not the actual playlist. Okay, so let's come to around here and I'm just kind of looking just for kind of a starting point of where I played. Okay, so I first started on. See? Okay. So you could see that this is a guy like the beginning of where I played. I know that. Um so let's take this. Okay? So since I have this highlighted, I see that Caesar it here. And I'm going to say that maybe I started around here. I'm not sure, but since I have all that highlighted, I'm gonna hold on control and shift. Now, you can add more to the selection. I'm gonna press control and exits to cut that we're going to press delete, and it's just gonna delete everything. Okay, So since nothing was highlighted, it deletes the whole thing. I'm gonna hit control and right click. And that brings it all the way back to the very beginning. I'm gonna press control and v k. And then now I'm just gonna bring this all the way here. Okay, so this may be what I'm wanting. I'm not sure. Now I'm gonna talk to you about kwon ties ng OK, so quanta izing is when you snap everything to grid. Okay, so if you come up here into the playlist, you have all these different grid sizes. Okay, so resume in here. You can see that we can get really, really fine, right? If we even go more fine. Okay. So you can zoom in and you so just the greatest health. Fine it is. Now when it's super fine, Sometimes it's hard to program. It's hard to edit. So if you go like to step, you can see that I was only four places to place your sound. So sometimes you know doesn't give you as much flexibility. But in terms of editing, you know, for example, if I already played my notes, I kind of have a general idea of what notes I want to play going to something like a step, or even like 1/2 step on. Then what I'll do is a Kwan ties and its control and Q. So if you come up here to the arrow, you can see that there is the seat tools so quick, Kwan ties okay and its control and cute. So that is the short cut. So you're going to see that I first adjusted my grid. So if I made it really, really fine. And if a quant ties, it's not gonna, you know the quantities isn't going to snap it to crazily. If I were to go to, like, let's say, like half a beat, you can see that there's only like, you know, there's not much for me to click a sound difficult beat. You can see that if I were to Kwan ties, everything's going really, really weird. Okay, so it's like, Well, that's not what we really played. So what I'm trying to say is, You know, let's say we go to, like, let's say a step just to keep it simple. Okay? I'm gonna press control, Thank you. And it quantifies it. So for the most part, it sinks things up. There's gonna be some notes which are off B, and that's fine. I'll just simply just click and drag them over once a hit play and listen. I'll typically listen to this with the drum loop. Um, and so the argument behind Kwan ties ing in the industry is there's some people who hate quanta izing. They're like, No, you You can't Kwan ties because it's not gonna sound like humanistic because you know that was like me playing. So I want to know belong. People want to capture that for myself. I find that if I Kwan ties and then you know, if I want to note nudge, I find that's way easier and faster for editing. So again, you know, like my grid isn't like super wide right? So you know it's not super intense. Mike want izing, but again, just let you know. That's kind of like one of the arguments out there. I find if you Kwan ties and edit, it's way easier. So let's just listen to what we have. I know it's going to be weird. Um, so let's just hit escape. We're gonna add this guitar into the actual playlist here. Um and I'm pretty sure you know. So for the time being, I am going to highlight this press control. B is involved. It's a little short cut. It's just gonna duplicate it. Uhm, I'm pretty sure I have notes, which I didn't play like in a sense of like for like that loop that I wanted. But we'll hit play. We'll listen to the notes and that I could always delete and stuff like that. So I'm just gonna click here. Should open up the piano roll hit play. Let's listen to what we got. Okay, so I know that knows they're gonna be off time and everything, so that's okay. That's good. And the reason is because I can actually show you how I would do this. So let's Let's go. Okay, so this is actually workable with I think I like it the way it is. Obviously, you know, we're gonna just note So So maybe I'll do something. This so right now is you can see the so velocity, it gets brighter. So if you look at D sharp six year so as you see the brighter by turning down, you could see his darker. Okay, so that's also a little indicator. So I I just heard that that note was too quiet. So right now this notes off and move this over keeping all these over. Same here. Um and I'm just looking right now to see Is there multiple notes that are off? And if there are, which I see, I'm gonna hold on Control left, click and hold. And I'm just gonna highlight. So as you can see all these knows air off. So you know, this is just a short cut, but we have to do is just drag him all over one. And I think, for the most part, that fixed it. So that was a really, you know, fast way. So case I want a little space in between here. We're also going to turn up the velocity of this a little bit. And if some notes are too loud, So, for example, if I were to play a chord, OK, so as you can see, uh, no, these notes were here. Sometimes the cords. It sounds fine, but there might just make that one note that is too loud in the cord. And it's just a matter of holding out Ault school just like I showed you before. So let's continue. Came into play from the very beginning way. OK, so as you can see in the first part of the loop, a sharp is playing. So this is actually, uh So if we go like 123 K so it's not playing on the three, it's actually play just a little bit early, and this is actually playing on the three, so we're gonna put this a little early as well. On I'm also just gonna hold on, Ault. Okay, so if you hold on, Ault, you can kind of break free from the snap. So, for example, if I, um, I want to move this note to the right, I have to follow the snap. Okay, But if you want to be a little bit creative and get today that note nudging, you can either hold on shift and the scroll wheel. Um, or you could hold on all the left, click and drag us. Well, okay, um so what I was trying to say there is right here, so I just want to just kind of give it a little bit of space that way. It's just gonna make thes notes, articulate a little bit better. Whereas sometimes if it's like this, you don't really hear this new sound play eso holding on all just getting a little bit of space on again. Let's listen again. Okay. So, again, this is kind of weird in here, but this over and over. So if you click right here, it actually puts the curses, So I'm gonna enter, make the piano roll smaller. So as you can see, if I click anywhere in here, it's actually gonna move it in the playlist because I'm in psalm mode. So, for example, if I click here, you can see that this this is moving the cursor or here. Okay. So as I'm actually editing my notes, you know, I know that up to this point. So everything before and highlight you just hold on control and left, click and hold, or you can actually just right click and right clicking actually adds on to the loop, which is kind of a cool thing to know. So I'm just right clicking. Or you could just hold down left, click and highly like that. Okay, so right. Click is, honestly, probably the easiest way to approach it. And then to get rid of it, you just double left. Click. Ok, so I know everything beforehand was good. So I'm gonna continue from boat here, I think. Let's just listen to the beginning since I've been talking about for so in here is a little bit weird. So again, I'm gonna play from here. Kiss So we'll do something like this. Something sounds it's a little bit weird here. Um, I may have to add a note in So again, again. What? I'm doing this. I listen, you know, I repeat over and over and over and over again, and you know, whether I'm adding a note in or moving a no extending its length, increasing its velocity or anything like that. Okay, so I just hear something that we someone's gonna be added in here. So So? So I played here. He was shot at Norden noted here, and maybe we will go way will continue on way this and maybe we will go. Okay. So, as you can see, I want this a sharp to play the same way. Okay, So let's actually just remove this just to keep this simple. And I'll just say this is gonna be our loop, OK? In our playlists hunger to remove this double click here and listen to this one more time and we're just kind of fine tune a little bit more and then I'll share with you just in things that I do inside the playlist are sorry. The piano roll just to make it a little bit easier for myself. Okay, So he Rio, let's make this a little bit shorter. Maybe concern on the volume of liquor. Okay, so we'll go with that. Okay, So now to bring our theory back into this in a sense of, you know, key scale what notes were allowed to play. Okay, so if I were to want to add, let's say a new melody on So I'm going to share with you later. You know, if you want to add in like, let's say V s teas and stuff like that. So, for example, if you do want to add in a V S t, you just right, click and instruments and, um, image line comes with their own stock wins and stuff like that. But eventually you probably will want to purchase some third party ones. Silence One is a really popular one. Serum is a really popular one would bring out Silence one. Now, I created this little melody with a guitar note that I actually recorded. I took a guitar. No, I recorded it. Actually created a course on this is called creating organic beats. In that course, I record a single guitar note with you, and then we create a whole composition of that single guitar? No, it's a pretty cool course, but right here, this is just a single guitar note, right? And I credibility out of it. Now, in order for me to create more melodies, I would actually have to right click clone this and then I can actually, you know, work on melodies. Now, if I were to try to add, like, let's say a V s t in. Um, it's not gonna be in pitch because this guitar No, I have no idea. If it was in tune, I just recorded. Okay, Uh, that's one thing to talk about quickly. Okay. Sylvia's teas, the really, really awesome because they're perfect pitch. So what that means is all computerized, You know, for example, if you're playing in a four, it's like you're playing in a four. And if you were to open up a different V s t from a different vendor or whatever, everything works in a sense of, you know, being in tune, it's really, really simple right by me taking this approach, it actually makes music production a lot harder when you actually take a guitar, no recorded and then try to make more melodies out of it. And the reason why I duplicated the same sound is because I want to keep that same sound. It's the same pitch and everything. And now I could just kind of play up higher or lower, and it's gonna still be in tune right now. For example, let's say I do want to add a melody onto this guitar sound, so if I right click, go to the piano roll, you can see that I have all my ghost notes on. Okay, so again you can appear to the arrow, you go helpers and we have ghost channels. This is a super super powerful one. There's also one other one I want to share with you. If you go to edit, there's also allow re sizing from left. Make sure you enable this and what the benefit of it is. If I just click a sound in here, it allows you to edit a note from the left or the right by default. I don't think FL Studio comes with that. They may now, but I do recall when I've first start with Devil Studio, it wasn't so. That's just an option you want enable. Okay, now let's just talk about, like, the music theory a little bit in a sense of again key scale cores of stuff like that. So right here I played in this scale of C minor, okay. And so, you know, if I want to look plate the baseline, for the most part, I could just play, like, you know, the the root note of, like, the court, okay, And it's going to sound fine. Like, you know, this is really, really simple. I can just extend these notes, but in terms of being created with your music, you know, this kind of, ah, you know, hinders you a little bit because, you know, being a musician and producer and stuff like that, it's all about being creative and, you know, kind of adding notes in to find what suits the song. But again, to go back to the theory, you know, the notes that you're lots of play are in that key and scale. Okay, that dictate what know what you want to play. But when you have these ghost dotes on, you know, for example, let's say we're creating a different melody. All you have to do is to kind of like reference what you've already played. And if you want to, like, lay or something or if you want to play something different. So, for example, you can see that up hires. I played here. Ah, but I start to play a little bit lower here on you know, the other sound. Now, maybe I want to continue this melody maybe up here or something like that, You know? So from here to here, I have kind of space where I can kind of play up higher. Okay, Um, right here. You know, we started play higher again like that may be here again. We can kind of fill in some notes, whatever. Or again, you could just layer if you want to Kind of do stuff like that for the baseline again. So this is a pretty cool trick if you hold on shift, Okay. And left click, You can actually duplicate duplicated. No, it was gonna put it here. I'm going Teoh. In this case, I want a highly all the notes, some good press control in a how it's everything. And I'm just going to extend them. Um, I'm going to remove this sound now. Um, and That's it. I'm gonna keep extending. And then as soon as it starts getting or sorry, I could have stopped this one as well. Um, I'm going to stop this one. And it just the reason why I'm doing this is just because it allows me to save myself from editing the other notes to, you know, just less clicks. So do that. Okay, Now, I will just kind of go manually and do this and this and then this sounder here, I will turn it back. Okay, So what's really, really cool about this is right now, if I play, you can hear that this this sounder here, it's up pretty high, But let's say we got a little lower. Okay, Low, lower. So that's pretty low. So let's just bring it down an octave. So I'm just gonna hold down control and the down arrow. And now if we listen to our melody, we have a baseline. Uh, okay. So in this case, if I was, you wanted to start kind of mixing the track. Whatever. I would actually preach like a new mixture insert. I would hate control l for that. I'll break this down for you. as we proceed. But you know, you can also right click coach our roading and stuff like that too. And if you listen to this, let's try one word. Lower case leads to low. Okay, So again, this is the problem. When you're using a single guitar note, I just find sometimes it gives you really, really cool melody. But there's a lot that goes into taking this approach, so I don't really suggest it. If you're new, you know, I would stick to something like Silence one. So, for example, if I just kind of cut this put into silence one and we will just choose bank here, I have a lot of free banks online. Just so you're aware, just search gratuitous silence. One break free banks. These are all the free ones, like endeavor and, er momentum to totally free. Just search into Google and you can download them. Um so just like momentum and we will just select like some like a lead sound. So, for example, that's the school. Let him know you're coming. So it sounds like this. So I'll turn it down a little bit little loud and well, since, like the melody so that this way, with way. So I'm gonna right click. I'm just gonna close Silence one. And this is a really cool, you know, a little fast way that I You know, if I want to keep working with science one, I'll just clone it, and then I'll just, you know, if I want to change a preset the civic face and I'm just gonna cut this and paces in here, so let's just listen to this, okay? We're gonna go lower with the drum loop. It's a little out, so, you know, quite a difference from the V S. T to the guitar sound. So again, in order for me to make that guitar sound sound better, I would have to know quite heavy processing in a sense of e que compression and Maurin the mixing stage. Where's thes V is teas. They're extremely high quality, as you can hear. Just the difference. It sounds way fuller way bigger and just wait Cleaner. Right. Um, so now I just want to share with you how to actually record. So for example, if you want to, you know, let's say you're playing Melody and you want to record into like step sequence there into a pattern and stuff like that. Okay, so again, how I approach it is I always just go to a new pattern. Now you can hit at four. It's really nice if you just want to organize and label and stuff like that. As of actually making that be, I'm not really concerned with that stuff, because again, when you're beat making mode, urine beat, making mode, you want to actually just you don't make the beat. When you kind of go off track with, like, make organizing and colorizing stuff like that, I find that distracts the flow of making the beat. However, once that you know what's the beat, making is done or like the most part of the meat beat making is done. Then once I start to actually kind of arranged the track building out, then I'm going to get into some organization. You're labeling coloring, and then I bring all that stuff to the mixer and walk you through all this. I have a very fast workflow with that full studio, very clean workflow, and the benefit of it is that as your track starts to grow, let's say you had, you know, 10 15 instruments and stuff going on tons of different sounds. As you can see already. It just makes it really easy to see on the playlists. Because imagine you imagine this thing is like this what it's like, bring this down and we'll bring this down like this. So imagine it's like this, and then I'm just gonna going Teoh do is a bunch of times. So imagine like your projects like this. Like, you know, you have a bunch of things going on. Um, if everything is just this color, it's like you don't know where anything is, and it's just it was very, very distracting. So I'm gonna come here, we're gonna go history. Um, let's just find where duplicate clip and stuff like that. So we'll go back a little bit more. And there were you. Ok, so all I'm saying is right now in making the beep. This is You know, I don't worry about color or anything that Okay, so now I have a melody and make a baseline? No. So, for example, pushing the metal scroll wheel, Let's just say melody and then hit a to to give it a color. And the reason why I'm doing this is just so that you can see this. Okay. So base and then have to Okay, make it easy to kind of follow. So I'm gonna right click and clone, okay? And I'm going to hit the plus because I want to record. Sometimes when you record in a pattern that already has notes, it can kind of get cut off. If you know, imagine like you found a melody. That sounds really good. You want to keep kind of going with it? Um, it can kind of get cut off. So I always just kind of go through a new pattern. In this case, even worse is based to we can change it to whatever we want. So let's say cleaner than can be. So let's just hit play. So it sounds OK now, this is to do with the sound selection stuff I was talking to you about when we're talking about safe spots, right? You know, there's no nudging sound placement sounds selections very, very important here. Like that sound. It sounded fine, but it kind of sounded pretty similar to the sound we already had. So being a producer. He's that things you kind of gotta think about. It's like I think I would rather just choose a different sound. That sounds different. Therefore, when it comes to mixing and stuff like that, it's like I've already chosen pretty good sounds in a sense of like, they all sound good. They're already kind of standing out and now in the mixing stage with e que compression of stuff like that, I'm or just kind of enhancing the song. I'm not really fixing the song, OK, it's kind of a different mindset. So it's just kind of go through some different sounds. Kind of some Sylar gets my some cool. So okay, so again, although I didn't record, but that's OK, so I'm going to hit record here. Okay, so in fl Studio, many times when you hit record for the first time, many times little pop up will appear. You guys can also right click in. That same menu is also available, but I typically will hit everything. Okay, So when it says you know what do you want? A record hit everything. Um And now, um, I make sure I had a 3 to 1 in case So when I hit play, it's gonna go. One, 23 actually. Really? And then you know that you're able to record. I like I like it to count in. So right now I'm on a new pattern. I am making sure I'm highlighted on this sound, even though its base, it's actually, um called protected by the blood. Okay, so this is the sound of on, um, as you can see when I play it. Okay. So, again, before hit record, I'm just kind of double checking all these things, because now when I hit play, it's gonna count me in, and I can play it. Okay, so here we go. Okay. So let's just say I like that, right? So that's the way it is about to turn off record. I'm going to go to the piano roll, and I'm gonna hit control and right click again. Just brings everything into screen. Now the first thing I do is again Kwan ties. It's the simplest way to edit. Okay, now it's like what notes are kind of already. I can kind of see which are off, like, for example, right here. I didn't play two notes that once I know that. So I'm gonna measured over. I just kind of look at this kind of quickly, and this will be over here, so let's just listen, soldier hit. Stop making sure that everything goes to the front. Okay, so by that, I mean, sometimes, like this cursor. As you can see, it's not all the way here and again if I make it small if I'm over here, you know, if I hit play, it's always gonna be weird, right? So just, ah, thing I always do is always hit. Stop. Okay? Always hit a couple of times, and I know that one hit play. Now I'm starting from the beginning and I'm just gonna watch my cursor. I'm gonna listen. Is anything sound? Weird? Case? Okay, so this is late. Okay, so it sounds a little bit weird, you know what I mean? Like, I think I'd want to change up notes and everything like that, but that's my process. That's why I use the piano roll. That's high flow with it. Um, if you have any questions, always feel free to reach out. But I think that covers the piano roll pretty good. You guys learned about chords, scales, keys, You know what notes allowed to play and then even broke down some kind of sound selection and mindset when it comes to editing again. You know, the biggest thing is, you know, if you highlight sounds and stuff like that, you can kind of hold on Ault and adjust your velocity. Um, some v is teas don't allow you to do panning and stuff like that. Some do. And, uh, yeah, if you want to take note, nudge, you can hold on, shift in the scroll wheel or hold on all to go up and down to highlight multiple sounds. You hold on shift and control. You could highlight multiple or de selected and stuff like that. Um, so, yeah, hopefully helps you out, will move forward, okay?
12. 6-1 Playlist Walkthrough Color Coding: Okay, So in this video, we're gonna be talking about the playlist, which is right here. Now, again, I like to set it up like this. And then if I want a bigger I will just hit, enter on the screen, you can hold on control, right Click. And it makes everything bigger. Okay. Uh, now, if you want to focus into certain areas, you can again hold down control, right click and kind of zoom to certain areas if you want to kind of focus in and stuff like that. Ah, but so, like, I'm saying we're gonna be covering the playlist. Uh, this is a beat where it stopped. Finished. But as you can see, you know, the track is kind of being start. It's started to being built, but it's not Color quoted. We don't You know, it's hard to kind of see everything. So, in a sense of we look here again, you know, so appear with pattern six who have had a pattern. Nine. Uh, we have all these sounds down here now, in terms of arrangement, it's really hard to build a song when you don't have colors when you don't have labels. So in this video, I'm going to show you how to color code, how to label how to organize everything. Will also wrote that stuff to the mixer quickly will cover the mixer in another section of this course. And then we just kind of talk about some things about the playlist here. Workflow kind of shortcuts and stuff like that. Okay, so the first thing is, the playlist is where we actually build our song. Okay, so, you know, we have our patterns. And as you can see, you know, this song has 10 patterns. This is different from the one in the previous video has a different melody. Only listen to it is kind of quickly just to kind of hear what we're working with. Okay? So just for me, hearing once we add that you know, all these sounds to the mixer will be able to kind of balance out the sounds a little bit better and kind of get a better flow. Ah, but for the time being, that's what we're working with. I'll also walk through the arrangement a little bit with you in a separate video, sharing with you just kind of mindset just to kind of get you going with arrangement. So the first thing I want to do is color code, okay? And I have a certain process on how I do this NFL studio. Um, it's just a matter of using the keyboard shortcuts, hitting F two to bring up like the label. So, for example, if we click the arrow up here, you can see that the shortcut is rename and color. You just have to. Okay, So I make sure to color and label before I add this stuff into the mixer. Because if you do, all the colors will follow. For example, if I just give cords here, and if you have to, you can get a random color, or you can actually just select, um, you know, something like this. So, for example, for this individual sound, uh, let's just give it just this random color. And the reason why I'm doing this is I just want to show you that the color and label follows. So the shortcut is controlling l just for an individual sound. If you want to wrote multiple sounds, you could just push in like you're middle scroll wheel, or like you can right Click all these right click and hold. Now, if I were to right click good channel roading and wrote selected channels starting from this track it's gonna add the sounds starting from cords and then it's gonna work its way, like so melody would be next. Space would be next kick. SFX would be next. And I'm just following the list here. Okay, you'll see that as we go on. Ah, but I just wanted to share that with you so that you can see that as we label and as we color coat and get you pretty much get this track prepared that everything is just easy. You don't be able to see it here on the mixer. Be able to see it here on my step sequencer, and there will also be able to see in the playlist. And like I'm saying, once the track starts to grow starts to build, You know, this process probably takes about 10 minutes. Every track it is a little bit of, you know, a tedious task, but in the long run, it really does help you. Okay? And again, I do this after my beats kind of built after my arrangement. You know, it kind of built it or a little bit too. And then once I'm ready to get into, like, more than mixing stage, I will. Then, actually, you know, do all this editing, okay. And then same thing in the mixer. Now, if you want this same color to be on eight, a little shortcut is first of all, you go to an insert of the color that you want. Click on it F two, then just to enter. And what happens is FL Studio saves that color. And so what I have to now you can f three F three stores that color state or if you just click the drop down here. FL Studio always saved the color that you just saved as the very, very 1st 1 But the shortcut again is F three. OK, It's just a nice little work. Full thing. So what I'm gonna do is this one or here. I originally had it called cords. We're also gonna put it so that right now is being routed to insert number eight. We're not gonna wrote anything right now. Okay? So let's just keep this simple. I always write in capitals when I'm label into it makes it really, really nice and easy to read in FL Studio. So I'm just gonna write chords. We're gonna have to just kind of give it around in color. That's good. So now I've labeled the sound, but we have to label the actual pattern. Okay? And I guess I should start on the very, very first sound right now on pattern six. So let's go to the first sound and we will work our way down right here. These are the drums. As you can hear, you now have three drums going on again. This is a really common technique. I do just for variety and variation within my songs. So this is drums will have to type. And here it is, right here. It's just gonna type in capitals of drums f to a couple of times. Give it that color. So now how you concolor multiple sounds as I'm gonna right click and hold So no of how it all these Click the arrow You're gonna go color selected and you go, Grady. And now what you have to do here is you just have to select the same color twice So we will select this color and just like that same color. Okay, so these sounds as you can see right here. Zoom into this. So we have drums, which I've labeled Okay. Just by hitting f two, we labeled the pattern drums we gave it this color we also colored are sounds and everything is simple. Now, right now, we are gonna add them into the mixer. But I do that all at once. So I just organized all my labels and colors first. And then we added to the mixer after you'll see that when you wrote it all at once is just all just super simple. All your colors and labels follow. So I said, the plus in my number pad goes, meat takes me to the next pattern. You can also click up here and go to the next pattern. But again, the number of patterns just really, really good for workflow. So hit the plus, uh, these these are snares. And just to confirm so so again, I did the same thing I panned one left Penn one, right. Just to get that nice little wide sound, make that snare hit a little bit bigger I don't do this on every track. And sometimes I may even take these. Okay, I might cut them and put them into a different pattern. And I may only bring those wide snares in intellect, the chorus or only into certain spots of the song That way, you know, in the versus stuff it allows me but the chorus to sound bigger with those wide snares. You know, these are all just things just to think about for arrangement. So as you see right here, that's the label. So my so snares have two. That's a good color. We will just left click and hold or you can right click and hold I'm gonna come here, Go Color selected Radiant like that Purple and the purple. Now, you know, I'm just explaining to as I'm doing it, but as I'm actually doing this myself, the process is pretty fast. So these air high hats care So high hats I have to, uh, and I just held on shift and left click or you There's multiple ways to do things in FL studio. Okay, So to highlight this stuff, if you could left click. So if you left click, you could see he don't do once at a time. If you left, click and hold, you can highlight down, and I typically will just right click and hold or ah, hold on shift and the left click. It's the same thing as the right click. Or you can also use your middle scroll wheel as well. So I just want to highlight these two computer ago color selected, radiant and select that brown color Go down. Let's see what this is. It's all those symbols symbols, and we'll have to give it just a different color. You know, if sometimes if I can't find, like, the color that I always look for colors that are really different from each other makes it , you know, kind of pleasing to look and really easy to find. So in this case, let's give us like an orange hair, and then I will highly these and we will do the same thing. So color selected ingredient and one more time, okay, And then our last sound must be some high has to something again. Okay, so sometimes I do have different heights. Now I'm just going to go high hat to have to give it a color that's gonna get red Now, I don't have to go to the arrow and color selected Grady int for an individual sound for an individual sound. You could just pushing your middle school wheel and then now f three. Because it saved that red when I entered the last time. Or again, it's re Here is the first color. Okay, so list of three enter. Um, this is put a hold on control and right click. So as you can see, we're really, really close Now. We're just on two. Are our instruments here? Uh, this is cords. I like this color. I'm gonna push from a middle scroll wheel. I'm gonna save that color just by hitting. Enter. Have to type chords again on half three. Okay, come down here. So this is kick SFX. So here's a cool little shortcut. I'm gonna push it in the middle. Scroll wheel. I'm gonna press control and see toe. Highlight the text this way. I don't have to paste it into the pattern, uh, have to just to give it around the color. That's pretty different from everything else. Have to again because this is going to label it. Okay, so when I have to Before it changed the color f to now I'm going to relabel this. So I already copied the text. So just control v Super simple f three. Because it saved that yellow color. Okay, now, as you can see, it just colored it right there. So I had the plus in my number pad. We have the melody. So pushing the middle scroll wheel hit control C to copy it half to just to give it a different color. Uh, let's just give it, like a light blue or something. Go with this. Now I enter. I'm gonna have to now, because now we want to label the actual pattern. So as you can see, we're on pattern eight. Here's pattern eight right here. Right. So right now we want a label pattern. Eight. So it's just a matter of clicking list up sequence er Hef to control V to paste that text f three. Because that's the blue and we're done. So it plus again the base metal scroll wheel control C f to just looking for just just for a different color. That's fine. Have to again in F three. Okay, maybe we'll I think we'll just leave it for now. But, you know, I usually does it have, like, this different colors that, you know, just a lot of kind of different contrast. I guess you know, from the colors Makes it easy to see, so hit the plus one more time. So here's the kick buildup Have to Are you guys gonna also give these, like icons? I don't. I just find it takes way too much time. But if you go to the right of a sound, you can select an icon on the you know, anywhere else. It's gonna pop up the label menu where you can select an icon just from the left here. Or you can select your color hit control C on. Let's just give this Ah, purple enough to paste it at three. And we're done. Okay, so we have now color coded our song. Super, Super simple. Okay, so now on the playlist. Here's how I flow with it. Okay, so right now I already have this some kind of built I'm going to use, uh, hold on control and scroll down. Gonna highlighted all Holy no control left, click And I'm highlighting everything. I'm going to just drag this out is just for now. We'll bring it back later. But here is how I would work with Fo Studio. Okay, so hold on. Control and right click. This is just gonna zoom everything into screen. Now I hit one on my number pad, okay? Or it's just a matter of going to the first pattern, Um, of her patterns. Okay, because now we're going to do is go to start adding in my patterns, into my playlist, actually start building this song. Okay, So imagine you've you know, you've created the always patterns. You're ready to add it into your song to build your arrangement again. When you break apart, I'll make this small again. When you break apart your patterns into individual sounds. For example, this is just drums case. This is just stares. Scroll down one more time. You know, this is like the hi hats, K, this is are the symbols. Okay, So what I'm trying to say is when everything's broken apart into its own pattern, it gives you a lot more flexibility. Come arrangement time. So for the drums here, I typically like to have my melodies at the top and my percussion elements down below. So I know I only have, like, three or four instruments in this track. Eso I'm just going to start my drums kind of just down here. Okay, So I'm just going to literally just click some drums and here, like this thing, this looks kind of small, so I'm just gonna zoom in here, okay? So I'm just going to put eight bars again. There's four beats in one bar in 44 time. So that's one, 234 I'm just following their like the lines, right? So, for example, like these lines right here, I'm just counting the line. So 1234 That is one bar 1234 as two bars. Okay, so if you again, if you hear a rapper stay like 16 bars, it's literally just 16 of these. So from here, this would be 16 bars, okay? Many times in, like a verse 16 bars. And then a course would be like either four or eight bars. Sometimes you can be creative and kind of tease the listener with only four bars in your course later on in the song you let them enjoy more of the course with eight bars? Um, every song is different, but these are just different things you can do. So now what I do is I hit the plus in a number pad. I will just paste all these and again hit the plus in a number pad, paste him in. Okay, you guys can also put your most over this. You guys can use a scroll wheel to go down instead of, like, the number path again. I'm just showing you different ways of how you can approach things. I've just found the number pad to be really awesome over the years. Um, warmer time s. So now I'm in court, someone of the melody, so I'm gonna pay set up here. Okay, So I am going to actually delete thes because I just wanted to be the same length as my chords, and I'll share with you. Why do that? Here to second. And I'm really don't control it. Right? Clicking just a zoom in the area. Uh, plus my number pad. So how usually do this is? My left hand will go into the number pad and then my right hand is actually clicking this in. Okay, so here's the kick. SFX. So, um, I'll share these sounds with you in a moment just to kind of hear them individually hears the melody. Okay, so in this case, you can see that actually did have, um, a four bar loop. And this is only a two bar loop. Eso had the plus basis also afford bar, loop, kick buildup. Um, so I probably used these later with him morning to build up and took a chorus. We'll explain that later and then. So pattern 11 enter a C C. We have no more patterns. Okay, so that's it for our patterns. So what I'm gonna do is highlight this holding down control and shift highlighting these and I get press control and be as involved. Okay, as you can see now, we have our patterns just like this. Uh, these sounds right here. I'm going to just put them near the end. Um, and so the reason why I did this is because what I like to do when I'm actually building the arrangement of my song is it like to have all my patterns all being, you know, a place like this so we can even bring them up just a little bit. So for example, we'll bring this one up and then we'll highlight these. And I usually just like to have one space in between my melodies to my drum loops, percussion elements. So what I'm trying to say is I usually like to do it like this because now if I highlight all the sounds and then you press control and B B as in Bob K so impressing control and be And as you can see, it's duplicating this and why I find this beneficial is because I find it a lot easier to remove sounds. And it is to add the sounds back in. Okay, So, for example, if I'm warning Teoh, you know, think of an intro. So, for example, food is hit play here. So we're in song mode now. If I hit, play is gonna start playing. OK, so that's our chorus. It's like That's a little bit too full. So let's say we're looking for an intro. So let's remove the melody. Maybe we will remove the base. Maybe we're gonna remove some like these high hats to OK, so let's say this is our intro. You will remove like the hi hats. Okay, So for example, you know what? I was actually building this song. I probably did something like this. So we listen from here. Okay, So I'm pulling on control, right clicking. I'm just going to delete this, okay? And we're gonna bring back our my previous arrangement, and I'll walk you through this arrangement just again in another video. Um, you know, just seeking kind of getting understanding of arrangement. And I'll talk to you a little bit about what I call audio painting. Audio painting, just like safe spots, is another term of coined, and the whole goal behind audio painting is just preparing the listener for what's next in your song. So in other words, when you're building your arrangement many times, you don't just want to add a sound in It can sound rushed. Many times you have to have some type of transition and communicate with that listener beforehand before you add the instrument in before you add those high hats in or if you take them away, high hats are very, very powerful. I'll break that down for you in a separate video. Okay, so let's just talk about some things here on the playlist. Okay? So many times, if I want to work in a certain area Ah, highlight soul just to hold on right click and just highlight an area. And if hit play, it's just gonna loop over and over again. So many times, if I'm mixing the song sometimes we'll just go right to the chorus all trying to balance all the instruments and then all kind of listen to, you know, like the verse and stuff and just see is something lacking and then I'll kind of, you know, kind of tweak it from there. So that's a really, really popular thing. Another thing I do in this playlist is it has now come with, like, this little panel picker, so you might have your place may look like this. I personally found that the panel picker was a little bit redundant. It's more of a new feature and the FL Studio 20 plus I believe so. You know, in other words, it's like use your drums, but at the same time, it's like, Well, here's your drums. So, um, in my opinion, when you only have a single screen. I believe it's more important to have, you know, to be able to see more on your screen because this takes up quite a bit of space, right? So if I click, the arrow will panel picker disable it. You know, I just feel that I get more space and I'm still and I'm still able to access all my patterns. If you do want to move a pattern upper down, it's just a matter of going move up or move down. Okay, that's it. Now, when it comes to actually building your song again if we come up here to the grid So when I build a song on the playlist, I many times use beat or bar. Okay, Anything finer is if I show you that as an example. So it's going quarter step here, okay? And if I take let's say, Ah, this kick SFX and is bringing over one. OK, so as you can see like, Yes, this is not lined up, which is bad, because in music it's you need your patterns tow line up. If you want a note nudge, that's fine, but you want to do it within the actual patterns. So, for example, you know, if you want to know tonight, she would go into the piano roll. You can. You can? No, no individual notes. But in terms of your actual pattern, you always wanted to be, you know, perfectly on time. And then again, if you want to be creative, you will, you know, just the notes, but not the pattern. And so what I'm trying to say is, when you're on such a fine grid on, like, 1/4 step, for example, and if I hold on control and right click. So if you're this far zoomed out, you know, I cannot tell that this is off. Beat me? No, what I'm saying. So it's really important that when I'm zoomed out and let's just say, you know, we start building our song and it starts getting bigger and bigger and bigger. Right. Um, I want to know that when I drag something like this, for example, that is perfectly on beat. Case will go to history, and we will go, uh, don't here and we will do this one. Okay, so let's go back to here. And as you can see it, Z not on time, right? So I find that really, really annoying. And that's the reason why I have it on, like, a beat or bar. So before actually select that, let's zoom in here and you guys can look at the actual grid. So as you can see all of the different lines, right? So I'm going to click the magnet. We're gonna go beat Kay. And as you can see, it's this. Made it so that things have to lock in. You know, if you do want to break free from the lock in, like many times on these symbols or something, if I want to be creative like yeah, sometimes I might hold on. Ault and Aiken break free. Okay, But on the actual patterns, I don't again. If I left click and hold, you'll see that I actually have to follow the grid. Okay. If you want to break free from it, you can just hold on ALTs and do that. Um, And to undo, I just press control Z and then control all NZ. So, for example, if I did this on, then we went down and then over something. So I press control Z and controls you can see. It just keeps going back and forth. So to keep going back even further, you have to hold on. Control is old and see now the reason why I was explaining that to use Because again, if I'm zoomed out like this, I know that if I click and drag a sound that it has to be on grid. And if it's not, I can literally no see that it's off. Okay, So again, it's just a work, full thing, something I've discovered over the years that you know, in order to make sure everything's on in sync and in order to arrange really, really easily. Um, you know, I always have it on like that beat or bar again. I could hold on all to remove the snap. If you want to remove this snap, you can also go like none. But again, that takes a while because they got a computer click, go to none, and then you can move freely. But if you hold on Ault, it already goes to none and then letting go of all won't go back to the staff you have now at the end of a song. Imagine you want it to be like an outro or something. How you would approach like a tale. A longer tail is how I approach it is. I will actually have, you know, a pattern like this. And then what I'll do is I'll just extend it. OK? So as you can see No, no, no sounds air playing. So, for example, if we listen to the end of the song, you'll see that it counts us out. Okay? Okay, So we're able to hear, like, the delay on, you know, that's the tail. So whether you want to be this a little bit longer or whatever, Um, now I'll introduce you to automation clips here quickly in fl studio. So automation clips allow you to, uh, you know, was set a parameter to automatically move depending on how you set it up beforehand. Ok, so for example, to fate Oh, a song. You want to use the mixer, Master Fader. Okay, so let's say we want a fatal this song, so I'm gonna right click and hold. Just highlight to here, OK? And here's the Master Fader. I'm gonna right click it. I'm gonna create automation clip. OK, so automation clips again you can adjust this point however you want. You can right click. You can adjust like the tension in between. You can even right, click on the point and you can select different points. For example, if we go like stairs on our zoom in on it I mean, do you like this? You could say the stairs kind of start to happen. I'm just going to delete this, though, and we'll keep it on just like a single. Um, let's just kind of focus in there again. So if I want to fade out the song, it's literally just a matter of going like this, Okay? And as you can see, when I actually move my cursor to the end, if you actually follow the slider right here, it moves. OK, so if you could see it actually fades all the song. And that's an automation clip. OK, so for example, let's say we had, um listen, like this kick sound effect, just for example, we're just gonna write it to eight by holding on control and l uh for example, if I had, like, a, uh, any Q here we highlight this area. Actually, maybe we'll just highlight it right here. K causes the kick sound effect. So right now for this it plays. Okay. So you could be created with us all. Make the queue of those tighter Moelis. Okay, So if you want to do something like that, how you would approach it is I'm just going to right Click, go create automation clip. And then I'm gonna right click the Frequency Band and also create automation clip. Now, I'm just gonna put this down here and this one down here. Now, if I want to get creative with this eq you, for example, I typically think about where do I want this band to end up? And what I mean by that is, you know, let's say we added over here. Okay, So what I'll do is all right. Click copy the value, and this is the game. Okay, so I'm gonna pace it into the game. You'll see that it moves up just a little bit. And then all I also copied the frequency. And if you wanted to adjust the Q, you can also do that too. It would just be a matter off. Um, you know, creating another automation clip. Okay, so we'll do it like this now. In between, you could do anything you want. Like you're here. Here's what the stairs, you know, So we don't have to have the stairs. I'll zoom in on this little a little bit better so we can see it, kid, I will make a big screen. Okay, So for example, you know you can adjust it like like this. I don't want the stairs anymore. So right. Click and go, like, single curve. Do stuff like this view just that over. Now, again, when it comes to Ah, you know, kind of being creative on the playlist right now because I am on 1/4 be earth or I'm on beat. It doesn't give you much flexibility on where I can place my point. So this is where I may come mentally 1/4 beat, and now I can, you know, just more points, stuff like that. Okay. So, again, sometimes it's just a little bit finicky. But once you kind of learned the process of the flow, um, you know it eventually, you kind of find what works for you. Okay, so let's make it small screen. Um, and under playlist, we hold on Control and scroll wheel a horizontal zoom and holding on Ault is vertical zoom . Okay, so now we're gonna listen, Teoh, you know this kick sound effect, and we're gonna watch the actually que here. Okay, so you know, if that's even what you want. But I just want to share that that that's how you kind of do stuff with automation clips with FL Studio. Okay, so I'm just gonna walk through a few more things inside of the playlist just to get you up and running in a sense of, you know, the tools up here and kind of like the sounds you over here so many times If I am working on some of the same song and there's a certain instrument where I want to kind of solo it out, you can simply just right click on the track. And as you can see, you know, now I can only listen to the courts. For example, if you just want to add some more sounds in and you just left click And then if you want to bring all the sounds back instead of left clicking everything just right click again. It's gonna solo with sound right, Click One more time And it brings everything back now in terms of you know, the brush. So I simply just use this paintbrush here just to add my sounds in, Um, I really don't even don't even know the difference between draw and pain. You guys can again Hef one. It's gonna bring into the help manual, and it will explain it to you. I've always just used the brush K. There's also slice here, so I'm just gonna go full screen again. Eso slicing just allows you to slice up a pattern. So, for example, if we come here and we just slice right here, you can do this and then you come back here and you can delete. But the shortcut to slice is actually using the right shift. So the ship that's right underneath, enter no more like the middle of your keyboard. So if you hold on right shift, you can see that you can slice, but it locks you in, you know, to the grid. So right now, again, I'm on just on beat. So it kind of restricts where I can slice if you hold on the altar rate. Besides shift. You can see that now you can slice anywhere in between. But if I let go vault, you can see that I have to slice on on grid planned on all angle wherever. So, you know, many times I slice, you know, Let's say if it was, say, a vocal in here and there is kind of like a little click or a pop many times, you know, I may come here called on Ault and shifted the same time I'm a kind of slice and slice. And again, if this was kind of like the area, I was just kind of deleted or something. Now, one other thing I'll share with you is no controlling your patterns a little bit more. So as you could see right here, I've kind of chopped up my patterns and it was literally just a matter of, you know, just bringing over the pattern and to duplicate you. Hold on the left, shift and click. And as you can see, I just know I duplicated this base. So what I did there is these notes. I can see that they're right here. So I'm just gonna bring this back and I'll bring this forward. And as you can see, you know, I just kind of duplicated chopped up the sound, and I just kind of duplicated a couple times, So sometimes this is a kind of a little cool technique. So if we listen to this, sounds like this one more time. Okay? So, um, you know, that's just kind of a creative thing you can do many times. I do stuff like that. So, for example, if you just bring, like, the cords, um, right here and we're gonna solo it out because if it placed it over here, I'd have silence because the master volume goes to zero. Right? So many times that say, we have a car drums here to, um you know, if we take this and then we take this and if I had, like this and hide this press control, be control, be control, be we listen to them, and then now I'm a play it regular. Okay, so we will know. Extend it full again. Okay, so that's it right there. And then we will add, just like these time being, and then we'll add it back in. So you know, sometimes this is cool like the beginning of a song or something. And then it goes right into normal. So just to kind of share just these different techniques that I often do. OK, Okay, so that's just kind of the playlist. This is where we add our patterns, and it's really important to color code, you know, make it look easy to find and everything like that. Um, I talked to you about kind of automation clips, um, and just kind of like, you know how to actually build a song a little bit in our next video. I'm gonna talk to you a little bit more about arrangement will cover it kind of quickly. We'll also wrote our sounds to the mixer quickly. And then at the video. After that, we're going to start getting into the mixer, understanding what is the mixer signal flow and everything like that. Okay,
13. 6-2 Light Walkthrough Of Arrangement: Okay, So in this video, we're gonna be doing just a light overview of arrangement. Now, I just want, you know, I do have a course on this. Specifically for arrangement is called Song Structure. An arrangement music course. And I go way more in depth in terms of like, your intro, your verse, your chorus, pre chorus or bridge outro, all that kind of stuff, different approaches you can take. And as well as I explain to you, the concept of audio painting again audio painting is just communicating with the listener and preparing them for what's next in your song. Again, I've also written a book on this on Amazon. It's called audio painting, communicating with your listener and preparing them for what's next in your song by me, my author named Riley. Well, you know, again, if you would like a little read for more information. So again, the whole idea behind arrangement, in my opinion, is just always preparing that listener. And you know, when they hit play, when they listen to your song that it's just a nice fluid motion, K. So from the intro to the outro of your song that you know when sounds are added in or, you know, if if, like there's a change in the song and a sense of new instruments or different notes of being played or anything like that, it should always still be like a fluid motion. In a sense that, you know, it's actually building onto the emotion of the song. Okay, if it sounds rushed or if it sounds kind out of place, um, you may just need to add some type of transition and a transition is something like a symbol or like reverse symbol or ah, riser sounds. For example, I'll share with you. Ah, the reverse symbol technique Just right here. Okay. So as you can see these air symbols right here and, you know, they could be allowed so sorry. Okay, so you kind of hear how it's kind of build up. This is the reverse symbol. So remove this Celeste, the reverse symbol, and then we always see have our Ford symbols can. So I'll let you listen to that just from right here from right here. Okay, Now all that you listen to it with the reverse simple. And then without the reverse symbol, okay. Without the reversal Okay, so you'll just find that this reverse symbol is a really, really popular technique. But again, I'm just talking to, in a sense of preparing that listener, building them up, even this kick buildup, you know, it's building them up. It's letting them know that. Okay. You know, uh, something's gonna change in the song. It's gonna, you know, starting to build up. And then in this case, it actually was the course, right? So we just added in all our melodies and stuff. Now, let's just wrote our sounds. Sorry, I closed it. So I'm gonna have five to bring that back off. Enter. So let's just throw all their sounds into the mixer. We can kind of, you know, be able to control our sounds. And just in terms of, like, putting effects on itself like that, I want to share with you a little cool trick with this clap here. Um, because right now it's dry sounding dry, meaning that there's no effects on. When I was building this before, I had some reverb on it and I had a really nice tale. A tale. Is this really awesome? Because it overlaps so as you can see this? Collaborate here. It's this one here. So I want that to have a big tale of reverb on. Okay? And what that's gonna do is the tale is gonna overlap into ah, the course here. Okay, so this clap when it plays a place on the four of bar four. So we're in bar four. It goes 123 on the four. This clap plays and the tail is gonna overlap into the chorus. Okay, So in order to do that, I'm going to go all, and I'm just going to literally just highlight and drag all the way down, and we'll drag all of it to here. Now, as you could see, these are are are automation clips. And we can see that because of this little icon as well as this volume, gain and frequency. So that was just the automation clips with the e que and the master volume fate. Okay, I'm just gonna right click and go reset. Okay. So what I'm gonna do is I'm gonna click here, and if you right click, you go Channel roading, okay? And yes, you can see this wrote selected channel starting from this track and So what that means is , if we look here so from cores Rick here. Okay, so if you right click again. So it says starting from this track. So roots like the channel starting from this track. So if we select this one, what's gonna happen is all of these sounds are going to go to insert number eight, and that's not what we want. Just like breaking apart are patterns into their individual sounds for more flexibility in arrangement. We want all their individual sounds to have their own mixer inserts that we have full flexibility if we want to add e que compression, other effects and just have more control over the sound in general. OK, so I'm going to select this one. So wrote such a channel starting for this track. The shortcut is shift control and l okay, but in this case, I'm just going to actually click it. As you can see, all the actual colors followed. So this is why it's really, really important to color and label beforehand, because now courts is here. Cords is right here, right? And then courses right here. Same thing of melody, melody, melody and one cool thing you could do in the mixer. Now, is it a right click melody or Sharia courts? And I'm going to go. Ah, separator. Okay, so now we just put a little separator. These are what are called sends. Uh, I will explain these and another video once we get to the mixer. Okay, So what I want to do now is we're going to click on the clap here. It's gonna bring it up on the step sequencer, or you guys can also going to come up here and go toe audio, and there it is as well. But these are just kind of the shortcuts. Like, for example, if you want to work accords, you can literally just click cords once or like the clap. The clap will be right down here. You guys can also click like unsorted. So unsorted, just like your patterns on. Then they get If I click like clap, it will also appear there. Okay, so let's just play it says like what it sounds like. So what I'm gonna do is I'm just going to wrote that clap. So right now it's still highlighted. I'm just scrolling to go over. Ah, and I'm just going to run to some river case without the river Really dry with the river and then again on to here Cable. Bring that down. Now. I'm also gonna apply some reverb just on to the actual sound itself. I want this this clap to be really, really big sounding with a nice tail. Okay, so we'll cut some low end, make it bigger, increase it a little more tail. Okay, so let's listen from right here. Let's have a little bit longer tail. Okay? Okay. So if you listen to this clap, you hear how that clap just sounds really big. Really long tail to something really good. Like, it actually suits the song. Play it from right here. So without that river and with these two river herbs. Okay. So Okay, so they're clap. But we when we have that actual tail, Okay, so one more time, we'll enable it one time. Okay, So let's just talk a little bit of our arrangement here. We're gonna walk through again just lightly. But again, if you want more information on really how to arrange a song from, you know, beat makers perspective on how to really pull the full emotion out of your song again. Just check out the course. It's called song structure An arrangement music course. Okay, so let's hit. Enter here. Press control and right click. So let's start with our intro. You guys can also zoom in and stuff from up here, or you can, uh, hold on control and your scroll wheel. Um, okay. So very, very intro. I just have, you know, the one pattern and I played this a snare hi hat and the other high hat. It just kind of has a really light feel to the actual intro. And then, as you can see, I've start to build up this, you know, to the chorus, quite aggressively, in a sense of having the reverse symbol having this kick sound effect will listen to that. And if we double click on it at the piano roll, hold on controlling right click. And all I did for this was literally just play the kick like this. And that's all I did. And the reason why it kind of has, like, that dude instead of do, do, do do do do so. For example, I have swing. Okay, So, like I told you swing adjusts your eighth notes, which is what I call the in between. So right now, this is the A and this is the B. So imagine if this is a step sequencer. We have the on B, We have the offbeat We have the A, We have the b and it just repeats over and over again. OK, so swing is adjusting these notes, and that's how we're going like that. Do do, do, do do it kind of sounds like late and loose kind of feeling right for this one more time If I have zero swing, lots of swing Okay, so it's just like instead of like do, do, do do do its duty Oh, it is gonna sounds cool. Okay, so I'm gonna go to history, and I'm gonna put that swing back to the way it waas care. So, uh, we'll go right there, okay? And then we also have this kick buildup right here. It just sounds like this. I don't think it's anything special going on with it. It was just a matter of just playing the kick drum. And, you know, the later we got into the song, just the faster it started going and again that swing just kind of gives it that do do do do you just kind of sound, right? So I used to kick drums, um, on the actual step sequencer and many times where when I want to access these additional windows instead of, like, you know, making the playlist smaller, I will use the keyboard shortcuts. So f six is the step sequencer, which is this one right here. Okay, so if we go to, ah, the kick build up, it's like this one and I go to the kick sound effect, so I actually, you know, right clicked the kick drum, and I went clone. And then I just made two different versions of it. So I can, you know, again bring it to the mixer and affected differently. So that's that's kind of how the intro sounds. So let's listen to the intro, and then it will go into the course. Okay. So again, it's just nice and light sounding. This song is not mixed yet. Okay? And then we're gonna get into the verse, and this is our transition. Okay? This is a transition to bring in more sounds and then we're gonna use all these transitions again to build up into our chorus. Okay. And then what I did was I played the chorus twice. So previously. I mentioned to you that, you know, if a rapper's gonna wrap many times, you know the rap, like 16 bars or whatever this was on the eight bars, it was a quick verse. Uh, and the way how we designed this was just wanted it to be quick, so I can kind of break down kind of the theory, just kind of light for you. So the intro was just four bars. 1234 OK, And then the course here was only four bars. So one, 234 appear great. And then, you know, we played on an eight bar verse many times. Every every track is different sometimes at 16 bars or whatever the song is like. Ah, And then, in this case, I actually played eight bars for the chorus. This, you know, many times, is like what the listeners waiting for in the song, like the whole time, you know, like they're waiting for that chorus to play like twice us. They get like the most emotion out of the song. So right here it was kind of like we just teased them. So we kind of teased them right here and then right here. Uh, this is like kind of like you know what the listeners been waiting for, and then we kind of changed up our verse to If you want to call it, that s So here's the 1st 1 Now, instead of playing the courts, we now broke into a different part of the song is you can see I kind of slowed it down. Don't have, like, the high after symbols. We just kind of, you know, changed our melodies. So we're not playing the chords here When again, we just kind of slowed down. We also use the reverse symbol and forward symbol and the kick SFX This kick sound effect is played pretty much throw the whole song. But this reverse symbol eyes just again transitioning into this next part of the song. Okay, so I'll play with and without it. Hey, here, Transition. Right? Like it was just a nice, smooth transition. It kind of flowed. Now if I remove those, okay, so it didn't sound bad, but it didn't flow like it didn't prepare. The listener didn't communicate so well. It's a more more time with it. Get listen to that reverse and Ford symbol. Just kind of like it just lets the listener no. And then it just that continuation. Okay? And then right here. This is where it shared with you chopping up that pattern that clap again used here with that reverb tail. Okay, Pattern. Okay. The movie played. The chorus is gonna break out kind of into it. A little bit of an outro here, So I just removed the baseline for the outro. That's all. I did use the master volume again. If you watch the master volume right here, and it just fades Oh, okay. So you that's pretty much just like a little quick arrangement of You know, how I approach this song? Um, you know, we did our intro. We did like a chorus with Diverse with Universe Are did a longer course for mawr emotion out of your song many times for myself. What I find is, if you have Mawr instruments being played in your track, uh, it just gives you more options to mix and match So, for example, imagine it had seven instruments. Okay, so what you'll find out of those seven instruments is some instruments can hold their own in your song. And what I mean by that is you can just simply play like the cords, you know, with you know, your percussion elements. And typically, you know that instrument is gonna be able to hold its own. Okay. But you're also noticed that there's some instruments where they can't hold their own. They sound too weak. They sound thin. Their actual progression or melody just isn't strong enough to be by itself. So many times, you always need some type of supporting layer. So in other words, in order to play, you know that one melody you need to play it with always with a different pattern. So in other words, you always need to have two or three patterns going on with those certain sounds. And what I'm trying to say is, when you create a song with many melodies, you know many patterns, it gives you the flexibility to mix and match, and you'll create verse one a little different from verse to in hip hop. Many times, you know 1st 1 is the same as Verse two is the same as Verse three, but many times that she's because that's just the way the genre goes sometimes. But for myself, when I make my music, I really like to always have variation in my music. You know, from Verse one. Divers to I Was Just Want to kind of mix up a little bit. Now every track is different. Don't get me wrong. Some songs, you know I might do it the rinse and repeat for first under first, too. But what I'm trying to say is when you have many instruments, you can mix and match, creating awesome arrangement and just have a lot of variety for yours and your listeners. Ears. OK, so that's arrangement again, if you want way More information about arrange a song intro chorus verse, Gautreaux Pre Course Bridge. A swell as learn herbal audio painting. Just check out the course. Okay, it's called song structure, an arrangement music course by gratuitous K. So let's move forward
14. 7-1 Analog Vs Digital Mixer Debate: Okay, So in this video, we're gonna be talking about the mixer. So, uh, this mixer might look a little bit weird. And the reason is because there's green on the mixer and I'm also using a green screen, so it's going to take out the green on the mixer. So in case that kind of looks weird, for example, a great here, you kind of see it looks weird. So just saying don't worry about that. So I just want to share. This is a riel analog mixer. OK, the reason why I have one of these is because it allows you to avoid audio late insee. So when you use like an audio interface, you'll notice that as your project starts to grow, your project starts to get under runs. So what that means is, you know, as your project starts to grow, it requires more CPU power, you know, and it needs to calculate all this data faster. And in other words, it can't keep up. So you start to get these glitches and pops and and how to avoid that is you have to go into your settings. You go to your audio settings. You want you always want to make sure you're on an as your driver. Ah, and then you just want to increase the buffer size. So, for example, if you're just starting out in that beat, you may want to prove like, 512. But as the song starts to grow, you might put it to like 10 24 or 2056 for example. Okay, so anyway, so this audio mixer is honestly, pretty much the same as, ah, mixer inside of fo studio case. So if we just look here, for example So you know what you call one of these and insert or like, a channel. Okay, so you could just simply just like the volume. Uh, you know, you commute a sound, you can pan it to the right or to the left, depending on this setting of the mixer. So as you can see that there's a wide and stuff up here, some of them don't give all the features. So in other words, if you see it on here again, always look in the top left of FL Studio. It's always gonna tell you what everything is. You can see. You can swap the left and right channels. That's just literally putting the left to the right and the right to left. Um, you know, this is Mawr. Maybe if you're actually recording riel audio with microphones, for example, like a drum, a drum set or something, you can kind of play around with that stuff. You see stereo separation. So when it's merged all way to the right, this means that now you're making this signal mono. Uh, testing a mixed in mono is nice. It's really important, because again when I told you was mono is only a single source or it's kind of like the the similarities between the two channels. Selector left and right. It's It's the content that's the same. That's like your model content. Stereo is the difference between the left and right channel. So many times, if you are going to, you know, if your music's gonna play back on like, let's say, a cell phone speaker that only has one speaker or if it goes to, let's say, a club, you know, they say many times that these clubs, many times their music, is like mono s o. What I'm saying is, it's just really important that you test your mix in mono. We'll cover that mawr in a later video here. Once we go over, this makes her about FL studio. But so you can just adjust other mono or your cereal content. So in other words, wanna go so left, you're removing the middle pretty much like the motto content. And you're keeping more of like the difference is in between the left and right channels is gonna make your sound a little bit wider. You want to be careful with this stuff? I don't play around with it much on many times. If I'm gonna play with, it's more just to make a sound mono or on the master track is just to actually, uh, make the whole Mexico mono. And then you can always reference back and forth just to kind of test. Okay, continuing down, you can actually record right here. And then you can actually wrote audio around which I'll explain to you later on. Okay, so all I'm trying to say is this analog mixer right here. Uh, the reason why I have one is just to prevent audio late NC. I can just send my audio out of my audio interface into here. I can record if I was recording a song or something like that. Because once a project starts to grow again, you're gonna experience under runs and stuff, and it just a knowing this is a way to avoid it. Okay, but what I'm trying to say is so back in the day, this was like an analog mixer. You know, this is what people used to actually mix their music. But mixing and having an actual mixer actually has a lot of downfalls. So for example, back in the day, if they were going to actually mix their music on an analog console like this, you know, if they did just on, like, their knobs to always different levels, more advanced mixers have more features, for example, like each channel. So, for example, one of these would be like a channel, for example, right? And then again, if we go to fo studio, you can see right here on the far right. So you know, each one of these is called a channel and you know, a real mixing board would have, like, an e que section a compressor section Ah gate section has all these different sections on each channel. Okay, but the thing is, in the analog world, in order to row audio around. So, for example, you can see here on 31 right? So you have the reference back and forth between two screens, but you can see on 31 here like we can wrote 31 to go to 32 that quick. So in the real world, like, imagine it was like, you know what, Consul like this You would actually have to get audio cables stand up or if you're in chairs, kind of slide over and you have to roll all the stuff. So you know, it's expensive. You have to buy all these ideal cables. Audio cables can kind of fail. Over the years here, it was just a matter of one click. It's nice and easy now. I just want to also talk about recalling projects. So again, when people would mix their music, you know, they had they would have many channels, for example, that vocals kick drums collapse, you know, high hats, pianos, guitars so each one of these would go on its own, makes her insert on like the mixing board right now, they would actually adjust the knobs. You know, the volumes. Que all that kind of stuff until they get the mix where they're happy. You know, everyone imagine in this studio was like, Yeah, you know, we like this. We like this mix. Let's keep it. So what they would do is they'd print it to a disk and, you know, that would be, you know, the mix. So now what happens is let's say tomorrow, you know, another crew comes in and now they're working on another track. So they all go on and they actually change all the knobs, right? They change the volumes and everything. But now let's say you know, there, listening to that mix again and you know, someone just like you know what? I really don't like all this sounds. So what they would have to do is that have to go back to that mixing board and imagine, you know, imagine there was, like, 30 tracks. So you know, what they have to do is they have to write down all the nol placements on every single insert on that huge mixing console, and then they'd have to do you don't bring someone in and dial all the knobs back to where it was to get that mix pretty close to where it originally Woz, like, you know, you're never going to get it exactly the way it was because, you know, maybe someone wrote down something wrong or something. So I know it was kind of little long winded to explain that. But it's just really important to know that, you know, as cool is a mixture like this is, in all honesty, this right here using a digital audio workstation. Your daw is the future. It's super simple. You know, if I would bring this volume slider down like this and if I would save it and then let's say I come back in a month, I opened it up. It's exactly like that. So it's really, really awesome. Okay, so that was just a little introduction to a mixer. You know, the differences between, like, an analog mixer to like, you know, your nice digital one here, your digital one is awesome. Super simple. Um, now, in our next video, I'm gonna actually break down signal flow of your mixer in terms of Siri's and parallel processing we're gonna talk about subgroups and sends, and I just want to draw it for you and just kind of share with you. This signal flow just kind of kind of Open up your eyes. I'll break all this stuff down for you is gonna make it super simple. It's just really important to understand how it works and it's gonna make, you know, understanding the mixer a lot easier.
15. 7-2 Signal Flow Subgroups Sends: Okay, So in this video, I'm gonna break down the theory of a mixer in a sense of signal flow series and parallel processing subgroups and sends. Okay, So subgroups and sends is where you can get really advanced with your mixer. OK, so when you're first starting up, you know, you're just learning about the mixer at a basic level. Like for example, you're just trying to learn, like you know, what is it? Insert? You know, how does EQ you work with the compressor? You know, that's just kind of the basic stuff, but the more advanced stuff is being able to write your audio around. Ah, you're able Teoh, you know group inserts so that you can just have control over them, you know, so one insert can control like, let's say, four or five mixer inserts. Why you want to do that? Is this for speed or for convenience? Or, for example, let's say you had, like, three drums. Instead of mixing all three drums individually, you can just send it to one insert, apply like an e que and that e que effects all of them. OK, so as you can see, it's just a speed thing sends are pretty cool. I'll break that down for you. It's just a wave to wrote. Multiple insert tracks toe one insert to take advantage of like a river. Okay, so back in the day, more so. So nowadays, computers are becoming quite powerful. It's not so much of a concern, but back in the day Ah, river is pretty CPU hungry. OK, so in other words, it takes a lot of power to run a river. So instead of opening up like with, say, 10 re verbs, you can actually just use like one reverb wrote all your audio to that send. And you know, so all of these tracks are taking advantage. Advantage of this one reverb, and you can dial in the amount that you want for each, um, sound Okay, so you know it's just allows for more advanced, uh, techniques, and it's just convenience as well. Okay, so I first want to start this drawing here with explaining to about Siri's and parallel processing. Okay, so when we hear the word Siri's, it's also called like cereal. Being an electrician's. I'm an electrician's here in Canada, like fully certified Ah, but the reason why I'm telling you That is because a lot of the concepts to, like, really electricity to, like, audio. They all kind of translate. Okay, um, you know, there's a little few differences, but, uh, you know, when you hear the word Siri's or serial serial processing, you want to think of only one path. Okay, so one path for audio to flow okay, and that's that's it. So when you hear the word, Siri's just think there's only one path the audio to flow. So, for example, if we had Aneke you and so I guess we'll for first start with our actual audio coming in. So we have a vocal and it's coming in here. Okay, so we have our e que And now let's say we had a compressor. That was cool company. Okay. And then let's sound this week, you know, we boosted 300 hertz by Let's say, you know, to Devi, so two decibels kept. So what's happening is this Audio that's boosted is actually being sent into the compressor . So as you can see, there's only one path for that audio to flow, and the mawr it goes through each plug in the more it gets affected and affected. Okay, So for example, you know this compressor? Let's say you know, we had some gain reduction going on. Now let's say we come here and open up another e que So what's happening is your actual end result is the net some of all of your effects case? So, you know, your vocal up here just sounds the way it is. You know, it's just the recording, but at the end of all these effects, So 123 You know, this is the output of that processed audio. And as the audio goes through, it gets affected more and more and more again. There's only one path for your order to flow. So one path and this is called Siri's or serial processing. Now, one thing to always remember is this is just like, ah, mixer insert. So each mixer insert always has to go back to the master. Okay, so I'm just gonna right master here. So the master is what you call like your two bus. Okay? And your audio always has to go back to this to bus. Otherwise, you're not gonna be able to hear it. They call it your two bus because it's like your left and right channel. Okay, so let your left speaker right speaker kind of thing. So again, each insert has to go back to the master. So this is what you call Siri's one pathway all your to flow. Now we're gonna talk about parallel case. So when we hear the word parallel, you have to think abo multiple pass for audio to flow. OK, so All right. Parallel. And if we rate what parallel is so many pass. Okay, so many pass for audio to flow. I don't want to get that out. You know, it would be simpler just like this. Okay, So how this can work is let's go back up here just a little bit, and we will use this example. So again, this is Siri's. As your audio goes through, it gets affected more and more and more, depending on how many plug ins you have. And again, this is the net result of all these effects. And then it goes to the masters so you can actually hear it. Okay, so now when we talk about parallel, so what you can do is you can actually t tap so you can actually come off of here. And I'm just going to come up here. I'm gonna sneak in here, okay? And so now let's say we open up. Ah, goal. Dis dissed. But this is distortion. Okay, So imagine we put a distortion plug in on here, and then let's say, you know, be Wait, come here. And we put an e que as well. Okay, So what's happening is this is actually now its own mixer insert. So this is where you can get really, really creative with your music. And this is what the pros use. This is how they approach certain sounds and you don't make the music sound a certain way. Um, and the really cool thing with a parallel track is you can actually just kind of dial in, You know the amount you want on this. So again, each of these has its own, like volume fader. So to turn up and down the volume. So if I've tapped off of this and came to my own insert So what's happening is the affected audio. Okay, so we have our e que compressor and eq you. So this is the affected audio. Okay, so we've actually tapped, and this is what you call either pre or post fader. So pre fader is before the actual effects. Okay, so certain Dawes allow you to send your audio either pre or post fader. So if its pre fader, that means that it's actually being sent before the effects. If it's post fader, it means it's being sent after the effects. And that's it. That's so simple. It is okay now are affected. Audio right here. We're tapping off of it. We're going to another insert. And what we've essentially done is we have duplicated our audio, okay? Because again, every insert has to go to the master for us to hear it. So we'll come the comer here, and I'll drag this. So this is going to the master. You should. It's just your affected audio. So again are vocal comes in, we've acute, compressed it. This is what's called Siri's. There's only one path for your order to flow, and the net result is you know, all the effects. Okay, now what we've done is we've tapped off of it, went to a new insert, and now you can apply whatever affects you want. And the huge benefit of this is no matter what we do in this insert, it does not affect this insert. Okay, so we can tap off of here, do what ever we want. We could put a reverb here. We can put delay here and it's not going to affect this and the benefit off that is weakened again. Simply just dial in the volume of what we want. If we want to be more aggressive, less aggressive, really like the sky is the limit here It's super super powerful stuff. Now, in fl studio, you also have like a little like mixed knob and you can kind of dial in. You know where you want it. You could be like, let's say ah, you know, 30% just for example. Okay, so in other words, we're gonna send 30% of this signal over it Here. I'll explain that more once we get into FL Studio. But just to break this down simple. So we have serious. I mean, it's only one path we're already to flow. You know, we ever vocal the effects. This is the outcome of all those effects. Super simple. Now you can tap off of here and NFL Studio, it's literally just a matter of clicking on this. So you click on this insert, it highlights. And if you look at the very bottom in FL Studio, you'll see that there's a bunch of cables and stuff like that, right? And all you have to do is just click to one of the inserts that you want, and it's just a matter of clicking the arrow. And again. The biggest thing in FL Studio is just following the audio cables at the end of the day. Just remember what I told you. Every insert has to go to the master in order for you to hear it. If it doesn't go to the master, you're not gonna be able to hear it. And that's a simple as it is. For example, Distortion is a really powerful tool to add fullness toe a sound. But the thing is, if you put lots of distortion on this sound here, so imagine, you know, let's just say here instead of it, just be like this. Imagine we come here and we actually just put um, just in between here. Let's say we actually put a distortion in here. Cancel. This is dissed. So imagine this is distortion. So we've actually added in 1/4 plug in. So sometimes when you add a plug in in Siris, sometimes it could be too aggressive, and sometimes you don't have total control over it. So instead of actually putting it here and was going across the dope, so now we can actually be a little bit more aggressive on our settings. But if we dial down the volume, we can kind of get that little blend. And the benefit of this is we can kind of get like a folder vocal, for example. So you know, one of the problems of vocal is sometimes we hear certain words, but we don't hear other words. And when you use like parallel processing, you can be very aggressive. For example, you can put a compressor on here. This is what you call parallel processing. It's also known as like a New York compression and use different terminology for it. Um, also like, it's kind of like upwards compression as well. Um, so that's really, really powerful stuff. Okay, so that's this kind of the basics of Siri's and parallel. Now, one thing just to be aware of whatever you do on this is going to affect the parallel tracks. So, for example, in the EQ, you imagine you boosted some highs Well, again, since you're tapping off right here, right, The audio is going into the parallel tracks. So whatever you do on this track is gonna, you know, affect the parallel tracks. But once you've capped off, this is totally independent. You can treat it however you'd like. And it's not gonna effect this. You know, the original signal, like your Siris are serial of, you know, insert. Okay, so let's talk a boat subgroups and sends. So now imagine you had, you know, let's say piano and you had, ah, guitar. And let's just say we have also had a base care. So now, like I was already telling you, each one of these has, like a you know, a man insert. So just imagine this is like the slider. You know, we're just in a car value, right? So the baseless, their bases really loud. So have a piano guitar and our base case. So each one is on its own individual mixer insert now every track is different. Um, but for me, many times, let's say I'm working like with my clap. OK, so I shared with you that many times I like to use many collapse right for, like, that layer sound. But sometimes I find, you know, mixing all of these individual collapse can be a little bit tedious It in, you know, take a little bit extra long in that mix as well as you know, let's say I had five collapse. That means I need five accuse five compressors. I have to dow each one. So as you can see, it's a little bit meticulous. Now, um, the way I'm going to show you, You know, you have the option to still work on individual sounds for flexibility. But what we're gonna do is we're gonna wrote them to one insert, and that one insert can control all of them. OK, so if you want to put one e que, you can affect all five of those sounds. In our case, let's just say we have a piano guitar bass. Now, many times you would not send these to one subgroup, you know, because these instruments are so different. Many times. It's similar sounds. So, for example, let's say it was a vocal. But then we have, like, background vocals. And let's say we had, you know, three or four background vocals going on at the same time, I would probably put those background vocals into a subgroup. Therefore, I only need to adjust one volume slider. Ever want to apply compression? You know, I I'm actually compressing all four of those background vocals. That's probably good example. Okay, so now, like I shared with you. So each one of these has to go to the master, so I'm just going to write here. So right here is gonna say, Master. Yes. It wasn't a I guess that's the master desert. So again, each one of these has to go to the master in order for you to hear it. It doesn't go to the master. You can't hear it. So now what you can do is you can actually remove these. Okay, So, NFL studio, it's just a matter of clicking on this insert. You can see that there's a little arrow down here and you know, if all of the cable you can literally come to the Master So again, that's just a vehicle like this. NFL studios see a little circles, like a little arrow on it. All you have to do is click that arrow and it's going to remove the cable, you know, just like this can. So now what's happening is this. Insert your sending audio into it. You know, this is the piano, but it's not going anywhere, so you can't hear it. So what we're gonna do is we're actually going to create a subgroup, so remove the master here. Okay, So what we're gonna do is now again, imagine the master is here, and it was all going, so you'd have to click on each one. And then again, that audio cable that goes like this, right? With a little arrow, you have to click on it. You have to remove it, Okay? And you have to do that for each one of these. So, in other words, all of them are not going to the master anymore. So what you want to do now is you want to create a subgroup, okay? And NFL studio, a subgroup is any answer. You can make any insert a subgroup or ascend. Okay, or it could just be its own insert. And I'll show you how to do that in our next video when we actually go into FL studio. So right here, I'm just going to say sub group. Okay, so what we're gonna do is we're actually going to route each one of these into this subgroup can just like this, and you will give it its own little slider. So now on this subgroup, you know, so each of these, you know, if you really wanted to, you could eke, you hear, you know, So start Q And then again, you know, if it was like a comp compressor. So again, this is called Siri's. So we're going down and on this actually insert the more the audio goes through the markets affected, and then our net result. So again, like I already shared, you know, this is, uh, in Siris. And now each of these in Siris are going to the subgroup because again, this piano, it only has one path. They are your to flow. It goes to the subgroup. The guitar Onley one pathway harder to floats in with the base. So now, right here. Um, I'll come over here. So now we have our subgroup. Okay, so on this subgroup, if he really wanted to get creative now, you again. You can kind of keep t tap off of it just like this. So, you know, let's say, um so the same thing up here, So, you know, this could be getting confusing for you. And if it is, don't worry. Once we go into FL studio, it will make tons of sense and then come back and watch this video, and we'll even make more sense. OK, so again, you know, this is our individual mixer insert. We've capped off. Okay, so now we come back here. So we have our piano or guitar and our base, and they're all going into this subgroup. Okay, Now, this subgroup, you know, you can put you know, Iniki on here. And what's happening is this e que is actually affecting all of these instruments. Okay, Because again, if we follow here, they're all going to subgroups. So one week you can actually affect all all of whatever is being routed to this subgroup. Now, if you want to be creative with it, you know, we can actually come here and tap off. And now I'll just kind of do this again. OK, so we're going into, let's say a distortion. Okay? And then again, this distortion is also gonna have its own, like, little volume fader. And you can just simply dial that volume fader however you want. And this is what you call parallel processing. It's just a really, really powerful tool. But this is what you call a subgroup. So our pianos going into it on guitar bass, and we can use one e que toe affect all those sounds again. If we even turned down this volume slider right here, it's going to turn down the volume of all of them. Because again, these aren't going to the master anymore. They're going to the subgroup. And then what's going to the master? The subgroup is going to the master. Okay, that's how we're able to hear these sounds, because again, you're insert always has to go to the master in order for you to hear it. Okay, so now I'm going to explain to a boat sends. Okay, So sends are extremely powerful. So each of these approaches gives you pros and cons. Okay? so if we just go back up So Siri's is like this K So with Siri's, you know, as your audio goes through, you know, it gets processed more and more. But again, if we put like a distortion on here, it doesn't really give you tons of flexibility. It's like that distortion is on the sound, and you don't really have control over it like you would if you want. You topped off and went to a parallel track, okay? And then we have now parallel processing. So that is, with, you know, our net outcome again. You don't have to have effects on here. It can simply just be your vocal and then then you can send it to do parallel processing. But many times what I like to do because I like to put some e que or compression just to get that vocal sounding How I'd like you know what I mean. So once the vocals already kind of now sounding clean and you know, you know, sounding how you want it, then you can tap off to apply these other effects to help enhance even further. Okay? And then we also have what's called subgroups So you know, we can take multiple sounds, multiple inserts, send them to subgroup. And now we can have one insert to control multiple sounds. We don't want q one compressor and then also, like, already, like I already shared. So on these actual individual inserts, you still do have the flexibility to, you know, add like antique. You know, just like I already shared just straight here. Right? So you can add an e que a compressor. Like, you know, each of these is still a insert you can add effects on, but just the benefit of it is that you can just control one insert for multiple sounds. And then again, to be creative, you could just kind of tap off this. And, you know, if you want to put another plug in here, you know, another plug in here, etcetera, etcetera. And then again, this is going to the master, and this is going to the master. Okay, So you could be able to hear both the subgroup and your actual parallel track. Um, you know, because they're going to the master. Okay. So, again, if it's confusing, don't worry. NFL studio is gonna make sense, so Now we're gonna talk about sends, so just really here. So these air called Sands. Okay, I believe it also called auxiliary sends. Um, you know, they're very, very powerful. They allow you to, uh, wrote audio around with, you know, with tons and tons of flexibility. So, like I already shared with you, it's just pretty much, you know, tapping off the actual insert going to another track and then, you know, at the end of the day, they're all going to the master now with the send. The biggest thing you want to understand is you know you want the wet signal. OK, so the wet signal is the effect, and the dry signal is artist rate dry signal is you know, uh, I'm just gonna write original or I guess, no effect. So, in other words, the dry signal is, you know, the sound not being processed at all. That's just the original signal. The wet signal is the sound with effects on it now, like I shared with you when we are doing like Siri's processing. So when you have, you know, each process gets, you know, it affects to sound more and more and more many times you don't have tons of flexibility over what you're doing. So you know, you Let's see you put that reverb on. You know, you have river going that sound and it's just kind of the more you process it, you know, that river was always with you. But now when we're dealing with, like, Sands Okay, so let's just say, you know, we have, like, a different color here, So let's just say we have a piano, OK? And you know so again we're coming down here. Let's just say we haven't e que and what you'll notice is this is the exact same thing as I just shared with you above. So now let us go like compere for a compressor. Okay, so, you know, we have her actual audio coming here. This is the piano on the piano. We've put eq you. Now this is a serious processing goes to the compressor. Now we have this camp, and this is going to the master and right here on this rate in this blue, I was gonna write em right here. Okay? And this em again, you know, this is just gonna have, like, a volume fader And this is the master track and again, NFL studio. If you click on this piano, you'll actually see the audio cable. You'll see a little arrow right here, and you can just simply click it to remove it. But in this case, we're not gonna remove it. Okay, so just to share with you, that that ability is there. So now this all could actually do this. Send over here. Okay, so we're actually gonna write River. Okay, so this is reverb. And now again, on a reverb. Many times these plug ins give you a dry and they give you a wet. So what you want to do is the dry You want to put 20 Okay, So you want you want to put dry to zero, and you want the effect of 100%. Now, again, this is, like its own, like, you know, insert like that. And this is the river right here. So what I'm gonna do is I'm gonna tap off of this, and I'm going to send this to the river. Okay, so I guess I will just kind of put that right there. But now it has a little option to wrote to it. So first of all, you have to click on the piano and you can actually see the river. And we have to do is just click a little arrow right here and you'll be able to see that the piano is now going to the master in order for you to hear it. This is like I like the dry signal. And now it's going to the river, which is the wet signal. This is the effect. Now again, the biggest thing here is that this right here at all doing blue because blue is the master . This river is going to the master. Okay, so again, your piano is going to master so you can hear it. We've tapped off in parallel. Okay, We're going to ascend, are sends our reverb, and then, you know, however you want to affect a reverb, You know, if you want to make a really, really long tail or whatever you want to do here and now you can you can just kind of turn up and down the volume knob. You can also dial in this mix knob right here. There is a difference between this mixed up and turned on the volume will explain that to you once we would fl studio. And then this reverb just goes to the master. So now you can hear them both can. So, like I was explaining to you So the benefit of Ascend is that multiple instruments can use this reverb without putting a reverb. You know, in here. So imagine you know, we put a river been here, and then I we have our next sound, you know, at a reverb. So now we have one reverb to reverb three river. You know what I mean? So that is hard on your CPU again, computers were becoming more powerful, so it's not as big of a concern, but back in the day, it waas Okay, um, now it's not just a CPU thing. Like, in other words, be really hard on your computer. It was also really tedious, like it's a you have to do, um, you know, you have Teoh tweak each reverb you know to where you want it. And again, that's kind of annoying. So let's say we have a piano. OK, so we're gonna do the same thing here. We're gonna say we have Ah, guitar. Now, now, let's just say we do nothing with the guitar. We keep it simple. OK, we come down here and we have our little cable. Okay? We can actually see her cable. You literally just have to click on the actual guitar insert. Okay. All you have to do is look over at reverb. You'll see that again. There's like a little arrow. Just simply click it and what's gonna happen is you'll see an audio cable gets sent to the river. Now again, just follow the blue cable because this reverb is already going to the master. And that's as you know, that's what you can do. So when you click on the guitar and then you click the reverb, you're going to see a little circle and you're going to see, like, a little arrow, okay? And with your most you click and hold it. And you can simply just kind of dial it wherever you want anywhere in here. And you don't anyone anywhere from 0% all the way up to like 100%. I believe FL Studio even allows you to go more than 100%. However, that's even possible But you are so now what I'm trying to say is, So let's say we go Teoh piano. So again, if we click on the piano, you'll see that the cables wrote it, and you're gonna have your own mixed knobs. So, for example, let's say on the piano, we only want, let's say, 30% okay, 30% of this signal to go to reverb. So in other words, we don't want tons of re verbal, not piano. But let's stay on the guitar. Let's say we put that to 100%. Let's say we want lots and lots. The river, right? So let's to say it's here. So what we're doing is we're using the same reverb for two sounds, and you can dial in the amount you've won. It's super super powerful cat. So just one little recap of how this works. Okay, so we're talking about the mixer you have Siri's and parallel processing serious is only one path that audio to flow. So as you can see, we have a vocal going e que a compressor and eq you and the net result is the outcome of all those effects. That's a simple as it is now again, it has to go to the master Now we can actually use, like, parallel, so parallel as many past the order to flow. So we just simply t tap off of here. It goes to another mixer insert. You can apply whatever affects you want on and again. The effects on here do not affect the original insert. You can simply dial down the volume if you want. But also remember that whatever we do on this insert does affect your parallel tracks. So, you know, imagine we've tapped to another one here, right? So now we have, like, another insert, and then this also goes to the master so it can get really, really intense and really, really complex. For the most part, you know, you want things simple. Uh, you know, make it reasonable. But nowadays, with your digital audio workstation, it is literally just a matter of a click back in the day, you would need, you know, multiple compressors or multiple re verbs. And that's also another thing to mention. Since I just brought that up is back in the day. You know, a river was very, very expensive back in the day. So instead of having many expensive re verbs, they would just send all of these vocal one vocal to guitar piano. They would send this into the reverb unit and again we come back down to here. We have, like a like a little like mixed knobs, right? You can simply just kind of choose the amount you want to go into that reverb and you take advantage of you know, that send So right here we had ah subgroups kept. So instead of all these going to the master individually, we removed them from the master. We send them to the subgroup and then we have one subgroup to control multiple instruments . We can use one e que to affect all of them. Okay. And then to be creative, the subgroup, you can again t tap off of it and do whatever you want, OK, I'll break it down for you. It's a lot easier than maybe what this maybe feels like. Ah, and then we have sends, okay. And this is actually sense. So started writing in a different color. But this is sent now with a send with effects. You have a dry and a wet signal. So with sends the dry, You want this to be the dry? Okay, so let's just use the green here. So you want the dry to be this care, and you want the wet right here. You want this wet to be, um, this right here. So the dry is your original signal. The wet is the reverb. So on the river, for example, we're gonna pull up the fruity reverb to that comes with that full studio. You'll see that there's two sliders. There's a dry in a wet. You'll see that dry knob just bring it all the way down. And now you have just the wet effect, and that's what you want. And the same thing with, like, a delay you're going to see that has a dry and a wet knob that dry. You're gonna put it all the way to zero on, and then you're gonna have the wet affect right here. Now, one thing I want to mention just do not give you, you know, to not make you confused is some plug ins don't have a dry and a wet knob. Okay, so if it does put that dry all the way to zero. Keep the wet. It's a simple is that if we're talking about, like a distortion plug in, for example, many times thes don't have like a mixed knob or anything. That's in other words. You put a distortion plugging on. You have distortion. It is what it is, right? So in this case, if this was distortion, you just simply could just turn down the volume like that's That's all it is. Okay, so again, if you have a plug in that has you has dry and wet, put the dry to zero, and that's done. If you have a plug in that doesn't have dry and wet, you could just simply just turn down the volume so that the effect isn't as prominent can. So that's a little walk through drawing, hopefully hopes you out. You know, they didn't confuse you too much, but once we actually talk about it in FL studio, I hope it's gonna be a big game changer. I'm gonna break down, you know, just kind of phallic sends and no subgroups and ah, serial and parallel processing work like a real world practice. OK,
16. 7-3 FL Studio Signal Flow Walkthrough: Okay, so now we're actually gonna break this down inside a FL studio, sharing with you a really world practice of all that stuff. I talked to you about the mixer so that you can get up and running at more of an advanced level with the mixer here. Okay, so the first thing I want to talk about is right now, we're gonna be playing with cords here, Okay? I'm gonna be using it as the example as we're reading different sounds around. Okay, so right now, courts just sounds like this. I opened up the plug in, and I turned off the delay and river that I had within the plug in. So it just sounds like this. This is dry now, beforehand. This is like my template. Okay, so with FL Studio is really awesome to create a template. Now, one thing I'll share when creating attempt Lee is you wanted to be really, really minimal. In other words, don't go and create a template that has thousands and thousands of plug ins because every single project to work on whether it be a big or small project, you always have to open up all these plug ins. So when it comes to a template, make it simple case all for myself. I'll just quickly talk about it on like the master track. I always have, like, a compress drawn here having my limiter and they got meter on. And then I also have my sense, and that's all I have on my template. It makes it really easy because these are things I use all the time. And you know, is that why don't have to open them up all the time if I could just do it before head. So with the cords here I have set up, he sends within my template. And if you don't want to do a template, just check on YouTube. Super super Easy NFL Studio. Okay, so I told you that I have to do is click on, actually, insert followed the cable and in this case, So if I want to wrote it to, like, let say reverb one, that's it. And then you could just simply just dial it down If you want to do that, Okay, I'll break it down further as we proceed in this video. But I just want to share with you that when a hit play here, you're going to hear that again. It's the dry sound. And once they start adding in these different sends, you're gonna hear that we're gonna get river one river to a delay stereo separation, which is wide nous. We're gonna get distortion. Um, parallel compression. These are all just different tools that I would use within my mix. The biggest thing I want to stress to you with the sends is not to use them as a crutch. And what I mean by that is when you mix your music, you know, mix your music so that it sounds good. And then you could be using things that, just like sends and this parallel processing to help enhance your music. Okay, it's kind of the difference. So you want to make sure that your mixes sounding good and then you use this to enhance So here's some chords hit play and gonna add in the sense it's And it's a river More reverb way too much on the effects down back a bit Get some wide nous So again if your head falls as soon as I enable wide nous you're gonna hear it wide Okay. Ready, Phil, put it up. Kind of dialogue, More or less way have distortion. So we'll click here, as you can see, Just follow the cables, so just turn it down. And if you want, it has turned out here. Uh, let's go back to Cordes. You could have simply turned down here a little bit. Charles off. This is what it sounds like without the effects we added Back on. Okay, so, you know, sometimes applying it to certain sounds could give you a bigger, more dramatic effect can. So we're just gonna result all this stuff. So what I'm gonna do is ever hold on Ault and the right arrow Key, OK? And we're gonna bring this mixer insert all the way here and will make this just like this kid. So we're going to start from scratch. So now this is just a single insert. So lets talk about series and parallel processing. So on your actual insert, you have your effects. So again, let's follow through like I just shared with you. So we ever e que but say we boost around. That's a 300 hertz right here. Okay. And then we have, um let's say Ah, some compression. OK, so don't worry if these air third party plug ins, the concept still applies, can't so on. And then I'm also going to open up another e que because that is what I did in the drawing with you. Okay, so we actually have three e cues, so I'm just gonna close the ones so you can see the mixer. So we have our first e que we have our compressor. We have our second e que. And now what's happening is right here at the very, very end. Okay, this is the net outcome of our actual audio. This is a series. So as her audio goes through each effect, it gets processed more and more and more. So that's just that one path for your audio to flow. And again, if you come here to the insert, follow the cable, it goes right to the master. That's how we can hear it. So if I hit play, so right now we have our effects on. I'm gonna turn them off can now if I disable it from the master. Well, we don't hear the sound, so I'm going to click on 32. And now I can wrote this anywhere. So for the time being, I'm gonna write it back to the master so we can hear the original signal. Okay, let's add our effects back on. Okay. So, like I was explaining to you, the more we affect her audio. You know, the more it gets affected through each plug in. And this isn't Siri's now to go into parallel processing. So, like I explain to you, each of these inserts, it cannot be just a regular insert. It could be a subgroup or ascend. It just matters how you do your audio roading down here. I'll break it down for you in a second. OK, so for example, let's just say you know, we have ah, this distortion, actually, no list to School River. Okay, River result easier. Understand? Because it does have a wet and a dry knob. So I was gonna come here. Go select now, your effects might look a little bit different. I've organized them my own way. But, you know, you may have, like, a river here or something like that. I'm gonna select the fruity reverb to this Comes with FL Studio and as you can see I explained to you that you have a dry and a wet knob. Now what you want to do is the dry Bring it to zero because we want the wet gonna right click And there you go. So now all we have to do in order to actually hear this river is we actually have to route it. So, like I explain to you, you wanna always click on the sound that you want the effect on. So in this case, we want cords to have some reverb. So click on cords. Now, here's the arrows so we can route it to 33. We could run into 34 we can read it to 35 I could simply just dial it down. And that's as powerful as it is. You just have to set up each one if you want. And that's the reason why I have set up that template because of want reverb distortion Just a matter of a quick, quick click. So on 32 I have routed it to 33 I'm gonna put the full amount just so we could really hear it on the reverb. Let's just dial in tons of decay that just like the tail of it, pre delays pretty powerful. It just kind of delays the reverb, making it a little bit more audit audible. Eso we're gonna play here can trump the effects on the actual insert. You know, this is a Siri's, so as you can hear thons and tons of river so reverb could really clog up a mix, you want to be careful with it, so it's just dial it back a bit. And you know, this is like a high cut and a low cut, the low cut high cut. The same thing is coming here opening up in Q. Using the 30 pair much EQ. You, too. If you right click on here, you want to go like a high pass. I personally like to call this a low cut filter, and then the other was a high cut filter because, like the low cut, you're cutting the lows when it's a high pass. It's a little bit confusing, cause it's like you're cutting the lows, but you're allowing the highs to pass through. I just find it kind of it's kind of confusing with my brain anyways, anyways, So here's high pass, and then we're gonna come here and put a low pass. OK, so it's the same thing as adjusting either here or adjusting it on a plug in benefit of using, like, a plug in like this. E que is we can actually you know, if you want on this river, we can kind of gruesome highs now, like I was explaining, Teoh, if we come here on the actual insert So this is 32 right? So 32 is our original signal. Now, anything we do on 32 is going to go into 33. As you can see, you just follows the cable. So if we have, you know our compression on and are accused and stuff like that, it is going to affect it, right? And the affected audio is gonna go into 33. Now when we go to 33 would click on it, just follow the audio cable. So 33 all it's doing is going to the Masters, which means that we can come here and we can affect it however we want. And it's not affecting 32 that is the benefit and power of Ascend. Now again, let's just say we had, like, a piano to get ours. It's write in capitals. So piano have to to see if a random color there we go and was gonna hold on Ault and the left arrow key. Um, the reason why I do that as I like to kind of bulk my instruments and then I usually keep the send, um, with you with FL studio. You'll see that on the very, very far, right. Um, I think you're sends air there. I actually have just started just to put my stands at the very, very front. I was just find it easy because, like, they're always know they're always there. But anyways, so now we have courts. Now I want piano to have some of this reverb Just a matter of coming to piano clicking here , darling. And the amount you want and you're good to go. Okay, So one thing I want to talk about before we carry on is I mentioned to you the difference between the mixed knob and the volume novel care. So we will just focus on cords here. So the piano, we're gonna get it out of here for now, and we'll come back to just chords and the reverb. Okay, so for the mixed knob. So this is how it works. Okay, so our audio is being sent into 34 fully. Okay, So in other words, we are sending our audio into the river, and we're allowing the river to, you know, to play like more tail. Okay, So with a river, if you don't send much audio into it, well, you're not gonna get much reverb out of it. But if you send a lot, you know, allowed audio into that river that you're gonna get more of the effect. Okay, So in other words, this is determining how much of that reverb you want. Okay. And then this slider actually determines how loud you want that river to be. Case will explain that one more time. So with courts, this determines how much of the effect you want. So imagine, uh, this is actually really, really good example. I'll take this kick drum. Okay, so we have our kick drum. Let's just find it, okay? We're all over the place here. So here's a kick drum. So, like this k and this is actually a really powerful thing for you to know is on distortion. You can actually be roading. So right now we're on 12. So if a player Okay, so we can wrote this to distortion. Now, if you're kick drums aren't standing out very well in your track, you could be using a distortion send to help that drum stand out. Okay, So for example, that's saying we took 12 and we wrote it to here. Okay, now for listen again. Okay? So that's not too bad. Now, the biggest thing I always like to do with these senses, they like to have them make a fair volume comparison. Otherwise, it can kind of throw you off a little bit. Okay, so I'm just gonna turn it down, and I'm gonna be really, really aggressive on this distortion to the point where it sounds really bad. Okay, Let's, uh we're gonna go 1 to 1000 and turn it way down, though Caso, in my opinion, that sounds bad because it's like that's not even close to original drum. Now, what I'm trying to explain to you is that if we apply just the right amount of distortion, you could actually make that drum hit a lot harder. So in this case of 12 it's being routed to distortion. Now, if it is being, you know, too aggressive, we can simply dial down the amount we sent into the distortion. So, other words, we're not gonna be as aggressive on our distortion. And then we could just simply dial it down. Can. So look, all this play out first, just for an example. Okay, so we come here to 12. Let's turn it way down. Okay? As you can hear, the effect isn't as much. They increase more. Okay, so if gamma sounds like white noise or something, so it sounds really bad. But way down here and again, I have to set this way low because my settings on the distortion are way too aggressive. Okay, So if I turned the distortion often on, so as you can hear, it sounds a little bit brighter again. Make sure you listening on headphones and stuff like that. So these are just different things that you could be doing, you know, get mixing techniques. Very, very powerful stuff when you're dealing with sends. Okay, so now we're gonna talk about subgroups can. So I'm just gonna disable the river from here. And I'm also gonna bring over the other two instruments case. So I had the melody and the base, so I'm holding down control and shift to highlight many. And I just simply left click. You could left, click and hold as well. Okay. And when things air high related, you can also turn on like the volumes and Chernobyl sliders are gonna hold on Ault in the right arrow key, and we'll put it here. Um, I'm just gonna slide this over so you can see. Okay, so let's just get three everybody here as well. Okay, so we have our courts are melody and our base. And if we click on courts, you can see that 32 is going to the master. 33 is going to the master. 34 is going to the master, so we're able to hear all of them, and I will show you that. So I plan. I play Melody, You'll see it's playing on 33. So 33 33 will go base. OK, so based on playing up higher, but on my many keywords by lower so good on a doctor more. Okay, so as you can hear, we can hear him on. The reason for that is because each insert, no matter which one I select again. Just look at the cable and it's all going to the master. Right? So what I want to do here is there's a shortcut here in FL Studio. But if you don't want to use the shortcut, how you actually do it is, for example, in 32 all you have to do is just click the arrow at the top, just like I share with you in the last video. Click it now if I hit, you know, trying to play 32 we can see the audio, but we don't hear it. Okay, so you can see the audio in here, but this is like the selected channel. It's not playing in the master. If I now wrote it to the master, you're gonna see the audio is playing in the master, okay? And disable it. We don't here it, but if we go to 30 33 so Melody, you can see it's playing in the master. Okay, So that's what I was trying to say by, you know, disabling it from the master. Now, I want to share with you the shortcut. Uh, you know, just for workflow purposes. Okay, So what you want to do is any of these could be a subgroup. So what I do is, let's say, you know, imagine this was drums, for example, But I'm just going to select 37. I'm gonna f two. And let's just say it was drums. I would go drums sub. And then I hit F two and many times. Actually, this is what I would do. I'll show I'll show you. So imagine these were all the same color. Let's just right. Click this the separators on in between there, I'm gonna disable the separator. So imagine they were all the same color. So what I would do is out pushing my middle scroll wheel hit enter to save that color. Okay, I'll come here to the drum sub. Now, what I would do is I'd come here. I would select this sound. I'm going to go back to that sound, and what I do is I either make it a little bit brighter or just a little bit darker than the other colors and that will help me differentiate. What's the subgroup and that What are the actual individual sounds? OK, so in order to make it lighter or darker, you just click the plus now, and I can either just increase it or make a little bit darker. This is school a little bit darker, and I enter. And as you can see, it's just the tiniest bit darker. You know, you could see it like that. And if I hit F two here and just press enter, I'm going to select this one and then hold down control shift and left click. And it is gonna f two and F three. It'll be that same color. Okay? The reason why I'm doing this is just to make it simple for you to see. OK, so as you can see that subgroup, it just stands a little bit. Now, this is the short cattle case. So right now, again 35 is going to the master always just followed the cable always gonna help you. 03433 All go into the master. So hold down control shift and then left, click and hold. And you could highlight many. And now what you want to do is you can right click on these arrows. So you, if I were to left click it is gonna wrote all of these sounds to the subgroup. What's happening is, you know, 30. Um so let me click away. So 33 is going to the subgroup as well is going to the master. And then 32 is also going to the master. So it's like that's not what we want, right? We want it so that 33 34 35 are going to the subgroup, and then the subgroup is going to the master. And what that will allow us to do is one e Q one compressor will control all of these sounds. Same with the volume fader. It will control all three of these sounds can. So to do that again, I was gonna left click here. Hold on control and shifting. Highlight. We're gonna come here. We're gonna right click on the subgroup now you're gonna have these options here. Okay, So wrote to this track means that it's just gonna wrote to the track, but it's going to keep all its original routing. So, in other words, 33 is going to be going to 32. And it's gonna be go to the master, which is what we don't want because we want to remove 33 for the master. We want to send it on Lee to the subgroup. So this is where you're gonna select. Wrote to this track on Lee. OK, so I've highlighted all these. I've right clicked on the subgroup on the arrow and I'm gonna slice wrote to this truck on Lee is going to remove the roading to anywhere else. And it's only going to send these three sounds to the subgroup. Done. Okay, so I'm gonna click to 36. As you can see, this is going to the master record 35. It's not going to the master. It's going to the subgroup 34 to the subgroup 33 the subgroup. Now, if we go to 32 32 is going to the master again. And insert always has to go to the master in order for you to hear it now, Like I was explaining to you, if I put one on here or if I turn on the volume and I will share that with you. So just come here and we will just play the courts and the melody and the base case So if I hit play, we're going to hear the chorus, The melody in the base And if I turned down the subgroup, it turns them all down. We don't hear anything. I bring them all up. Now, let's say I wanted to buy some que I was gonna use this fab filter one. I just like the visuals. Nice to see. So I am queuing all three sounds at once. So I removed the baseline base. Okay, so again, it's just a flexibility thing. Now, this doesn't mean that I do this all the time. It just means that the options there, for example, if I was working on, you know, all of these collapse, for example, Uh, think the purple ones. Okay, so what I'm gonna do is I just come here. I grab a random insert f to that. I would write clap sub in this case, I want that purple sound, so I'm just gonna have to just to give it a random color, just so I know that this is the clap sub. Okay, I'm gonna come here pushing my middle scroll wheel to enter it Saves that same color, have two F three because F three pulls in that last color that you just saved. And then hold on Cult and the left arrow key Bring all the way over and again, I put this this right in front in this case is the same color. I'm gonna push him a middle scroll wheel, Select No, the color click the plus. Let's make a little bit brighter somewhere like this. Okay, that was probably a little bit too bright, but you kind of get the idea. And I'm just gonna highly all these gonna right click Go wrote to this track on Lee. Now, what I've done is all of these sounds. 1234 Okay, so, again, I click on to 17. It's going to 13. 13 is going to the master. And again if I want to compress and e que there was a whole Let's just kind of compress them just to kind of be creative. Open up the attack. Make that transient little plucky er, if you want more information on like e que and compression. I also have to individual courses. One's called How to Use eq you effectively in your songs. And the compression one is called Why do we producers use audio compression if you like to check those out, okay, gives you more information on how to use these tools and how to think when you're using them. OK, so I hope that helps you understand Siri's first parallel processing. So again, this is serious right here. So it's only one path three rd to flow. The more you affect the audio, you know? And then it just goes to the master so that Siri's each one of these, you know, it's in Siris, and then you're just sending it to the subgroup. And now on the subgroup. If you want to get creative with it again, you can send this to another incident or another insert, you know? And if you want to put distortion on their or whatever you wanted to, you could be created with that. Okay, um, so we talked about series and parallel processing. We talked about subgroups, which is right here. So 17 get Just follow the cable. 17 is not going to the master, but it's going to 13 again. 16 going to 13. 15 14. They're all going to 13 and 13 goes to the master so we can actually hear it. And then we just talked about sends. Okay. Eso for example. You know this kick drum? We can send it to like a river. You know, Click right here. So without it, you know, send it to a different room. Senate twosome, whiteness eso without it. Okay, so I'll just quickly cover each of these sends of this a little bit more in depth before we move on to the next video Eso River. You know, it just it's a plug in that allows you to create ambience in your song of within the free reverb. You can click here and kind of adjust the sound by going left to right or up and down Makes it bigger, smaller pre delays, something you want to play with. It just pushes that river over it delays it a little bit, which makes it a little bit more audible many times. If the river plays at the same times, the original sound, it can get masked. You know, you can kind of get hidden behind the sound. So if you delay it just by a little bit, I'm talking maybe 15 to, like, 40 milliseconds here. Uh, it does make a difference, especially when we're dealing with, like, a clap or something like that. Ah, the reason why I have to re verbs here is just for a different sound if I wanted. Okay, um, I usually set up just kind of a base template, in a sense of, you know, by river. Kind of all sounds the same from track to track. But if a particular track, I may just adjust it a little bit different for that track. And then again, if I want multiple sounds to use that reverb just a matter of clicking it, you know, clicking it and dialing in the amount I want of that effect. OK, so let's move on to delay. So this is the fruity delay three. Uh, this is like a newer plugging with fl studio. Now again, the biggest thing is the dry is at zero, and we have our wet and then I just set up just kind of like, you know, kind of Ah, a generic delay that I can use from track to track from project to project. And then if I want this to be a little more creative for that song, I'll adjust it, and then, you know, each sound can use it. Now, if I want to use delay in a certain way on an individual sound, I will actually go and create a new you know, send or a new parallel track for that individual sound to have more control and flavor over it. Um, this is just more of a generic kind of send. You know, if I want a certain sound house of delay, it's their stereo separation again. You guys can f one and f l studio F one. Is that the help manual? So, for example, you become here in F one it's gonna teach you all about, um, sorry. It's gonna teach you all about the fruity stereo enhancer. Okay, um, this is a really, really powerful tool. You want to be careful. Um, and I say, careful because e I explain to you about, um, stereo and mono earlier on. Now, when you're using a stereo tool something that makes things sound wider, you always want to make sure that you're testing and mono because you can actually it phase cancellation. So, in other words, in stereo, it might sound great. Might sound nice and wide, but it comes to mono, and what's happens is it It actually collapses. So in other words, you get face cancellation so different frequencies air kind of cancelling each other out, and you get a really weak and hollow sound. So it's really important that you read the manual because it also describes what settings you should kind of apply. Um, and you can kind of dial in settings to get wide nous and again whatever. Using whiteness, plug in on the actual master. Always test your mixing mono, and then you can kind of go back to stereo. Okay, The distortion. Eso I just used the 30 Blood Overdrive. This is a really, really powerful tool. I don't have the settings to extreme, but it you know, it's just one of those tools that allow you to add more frequencies and fullness to your music. So that's what distortion does. Okay, so what you're doing is you're literally distorting a sound in, you know, so distortions confusing. There's a good version of distortion and a bad version, and I don't really want to say good and bad. It's kind of more like intentional distortion, meaning you're you're actually meaning to do it versus distortion that you're not meaning to do. Okay, this is especially important in mastering. Ah, but with distortion. What you're doing is you're actually you're doing two things, mainly. So, first of all, you're actually kind of compressing that audio, you know, with audio dynamics. But very, very aggressive form of compression even passed limiting. Okay, eso What that's doing is it's making a really nice and consistent sound. So whether you want that or not, that is what's happening with distortion. You know, let's say you sent a vocal into this distortion, that vocals becoming very, very consistent on Ben. In addition, it's also adding frequencies, so fullness and that's what I mean by fullness. Is this more frequencies? So, you know, if we had, let's say, like, one note playing and there's only a couple frequencies playing, you apply distortion on it. Now you're gonna have lots of frequencies. More fullness can now, when it's in parallel. So, for example, we have our kick drum and it's in parallel. You can simply just kind of dial in the effect, you know, the amount that you want, or you can simply just dial it down so that the effect isn't as extreme. But this is what the pros do. So you know, they have these extreme effects and they just bring them way down, so you really can't hear them. But when you actually mute it and enable it, you really can hear a difference. Like it really helps. And the thing is, with mixing and mastering, it's all these subtle moves like that that really build up to, ah, super super powerful song. Okay, the last one I'll talk about is ah, parallel compression. So I just I just use the free limiter here, and I select the compression setting here. Now, these settings, you know, again, they're just generic for each song. But you know, each song I'm a kind of a just a certain weight. But the whole goal here is that you are wanting to squash that peak, and you're wanting to kind of have, like, a medium release here. Um, and what you're doing is you're just bringing up kind of the body of the song. Okay, So in other words, you're allowing the original signal, which is that the transience? Okay, if that's kind of confusing to you, um, talk to you more about that once we get with the mastering stage. But so the whole goal behind parallel compression is you're just thickening up a track. Something that you may want to research is something called upwards compression. When you are talks to, ah, a compressor. Many times it's what's called downwards compression case. So it's like the peaks. You always bring them down. But there's also different forms of compression, and one of them is called upwards compression. And it's a very unique way to look at a compressor. It actually brings the quiet parts up instead of bringing the loud parts down, and it can sound a lot more natural. So, in other words, you're keeping like those the spiky stuff, the transience, what they're called, but you just bring it like the body of the sound up. Okay, so that was just a little walk through of each send in our next video. I'm just gonna walk through the mixer here how we like to set it up just to get you up and running. Okay,
17. 7-4 Whats The Goal Of Mixing Pro Tips: Okay, So in this video, I'm gonna talk to you, You know, what's your goal for mixing? You know, what should you be trying to achieve? And I also want to explain how he set up the Dix or OK, so let's first start with how I set up the mixer. So when you open up your fo studio, you're going to see that this mixers all the way on the right and, you know, like your actual effects. The reason why I like them on the left is because I typically find that my mouse ISMM or on the left of FL Studio than it is on the right case. So if I'm up here that the playlist many times you'll enter make the play this full screen and it's pretty rare on way over here. Okay, So typically, you know, if I'm gonna be working out for a studio if I'm working with sounds or from working over here, it's like it's so close. And how you set that up is he Come here to the arrow. Ah, you're going to go to view and you're going to see track inspector on left side. That's how I have it set up Super super nice. Um and then I also have colorful mixer on medium. One other thing you want to make sure that you have enabled is your plug in DeLay. Compensation is on automatic. Now this comes default with a full studio, but it's important just to double check. What that does is certain early all plug ins. They all introduced something called Leighton. See, And when you have all these plug ins, you know, FL studio calculates how much latent see is involved, and then it makes sure that all of the inserts are in sync. Okay, that's, you know, at a very, very basic level. That's how it works. Case. So in other words, when it's an automatic, you don't have to worry about anything to start making music. Everything is in sync. You're good to go. That's all you have to worry about. Okay, um, now this is talk about what's like the goal of mixing. Okay, so your whole goal is, you know, achieving a balanced mix, and it's like, How do you do that? So on to share a couple of golden rules that I've discovered over the years that I find that really helped me. Okay, so the 1st 1 is volume matching. So what that means is, when you are using an e que or a compressor, anything like that, you want to make sure that you're turning the plug and often on, and when you do, you want to make sure that the level is very, very similar to when the plug is often on. If it isn't, uh, you're gonna be persuaded to the louder one. And it's true, right? So when we hear something louder, typically we think it sounds better. Um, and it's just it's crazy and, you know, it just it just has more impact and everything like that. But when you actually compare the volumes and a fair volume comparison, you can actually start to hear, you know, is your eq you actually benefiting your music? Or is your compression actually benefiting your music? Ah, one little cool little tip with compression is if you really don't know what you're listening for, just use extreme settings and then just kind of dial back. That's a good way to train your ear. But the biggest thing is, when you're turning up plugging often on that there's a fair volume comparison. Okay. For example, let's just say we have a kick drum right here. Okay? Make sure. So it really was going to distortion. Turn that off. Okay, so on, uh, this insert right here Let's just say we open up the fruity Parametric eq you to cast. This comes with a full studio. So let's just say, you know, we're like, Oh, we want to boost up some base right here, So let's just let's just listen to it. It's like, uh, let's go down a little lower floor. Yeah, So let's say around here. Okay. So ah, hit plate, we'll turn it off. It's like, Well, this sounds way better. It's with based here. But the thing is, you want to make sure that you're turning down the volume on this effect. So let's just say what do we boosted up by? So again, I'm hovering here. We boosted it by about eight. Let's just reduce it by, Let's say about 4.5. The reason why I'm choosing that is because I'm only boosting certain frequencies. I'm not boosting all the frequencies, so that might be, you know, the equivalent ish and the only way I'm going to know this is right. Now I'm gonna hit play and often on, okay? So I can actually turn up just a little bit. Okay? So over time. So that's just an example. Okay. And this goes for, like, you know, compression e que. Now you don't want to spend tons of time as you're doing it. Just a nice quick, you know, before and after kind of thing. At a fair volume comparison. Another cool thing that you could be doing is it's called a and B comparison. You have this on the fruity Parametric EQ. You too, as well as with the fruity limiter. Okay, I don't put this right here so you can see down here you have a compare. So, for example, if I press compare, you're going to see it goes to a different state. So, for example, let's say or we boosted some highs. Let's say we come here Maybe kind of duck, some mids. Okay, So high. Go before and after. So again, hit player. So it's just turned up just a little bit here, you know, just just for an example. Now, on the free Parametric eq, you to. Here's the comparison right here. So let's just say we're going to compressor. We're going to bring this all the way down this to say Are you know, around here, you know, with the compressor, your compressor won't kick in until audio goes over that threshold. You also have to have a ratio unable to again. I'm not gonna explain to you in this course. You know how these tools work. You can check out the courses I suggested earlier. Ah, but so right now, all you have to do is click Store the state case. What's gonna happen is if I click compare. It's going to go to just a default state where nothing is changed. Okay, So what I want to do isn't gonna keep it right here. I'm gonna store the state. I clicked on it, so I want to go back and forth. As you can hear, I'm clicking. Nothing's changing. So what I'm gonna do is on one of the state's let's just say I want to be a little bit more aggressive of my ratio because, for example, but I'm gonna open up this attack so it's not as aggressive. We're gonna come back to our previous state. And let's just say we clamp down a little bit on the attack. But, um, you know, a little bit less ratio, just for example. Now, the biggest thing is, you know, we control the volume here just for a very fair volume comparison. So when it's often on, right, and then when you switch in between, you also want to make sure those are affair volume comparison to now. I know it sounds tedious, but it's important that you really make this a habit because the thing is, you're actually testing in a real world practice, you know? Are you actually benefiting your music? Now the last thing I'll share with you is you want to be careful mixing and solo. So what that means is right now we're playing this kick drum for you. You know, this is a solo. I have no idea how this sounds in context of the mix, right? So what I mean by that is you want to be listening to, you know, the whole song like this, for example, And then now, with the effect, you can actually turn the effect often on as a whole. So when you disable it right here, it actually disables both of these two effects. And you just want to make sure that the volume before and after is the same, and you'll actually be able to hear the benefit. And then the last thing like I explained to you, but with sends, you know, went to get that kick drum sounding how you want. You already feel that it's improving. You could wrote that kick drum to some distortion and it's gonna be a game changer for you . It really helps your drum stand. Okay, so that's just a little quick video talking about your goal of mixing your mindset and some general golden rules, which have I have found that I've really helped me over the years. I hope they help you out too. Okay.
18. 8-1 What Is Mastering And Loudness: Okay, So in this video, we're gonna be talking about mastering you know what is mastering? What's the goal of mastering what tools are available to you? Where has mastering come over the years And, you know, stuff to do with that in our following videos in the section. OK, so mastering is kind of like a hidden art. Uh, within the music production industry, you'll notice that when you first start up producing your music, you know, first of all, you're gonna learn how to make a beat. You know, that's gonna be your basic, You know where you start. You're gonna start learning, you know, e que compression a little bit, maybe how to arrange the track. Then you're gonna start learning, you know, Mawr advanced concepts. And how do you start making you know those beats sound better? You know, you might purchase better sounds you might learn about, like, layering, which, you know, we've covered all that stuff. But if I didn't teach you it, you know, he may not be aware of that stuff, So that's kind of like the beginnings of producing like you're producing journey. Okay, then you know, you get into mixing you start learning about mixing Atmore in a that's level and a sense of again learning e que and compression, but actually learning how to dial it in to get, you know, a better sound to get a cleaner mix and all that stuff on. And then the final stage is mastering. Okay, so mastering is when your track is has been mixed and there's two ways you can approach mastering, so you can actually send it off to a mastering engineer. And this is in the industry. This is like the best practice, and the reason for that is, first of all, you know, these are professionals. They have trained ears. They know what they're listening for. Uh, you know, typically there on expensive gear there in a very, very well treated room. Okay, so when we talk about mixing, your room is just as important as your speakers. So some people may might think that old Imagine if you had $4000 speakers and the thing is , you know, if you had $500 speakers and an amazing room, you'll be able to get a really good mix. But if you had, like $4000 speakers in a horrible room. It's really hard for you to actually hear your mix accurately. Okay, so these mastering engineers like we pay for their service. But, you know, typically they have, you know, pretty good gear. Really, really good rooms as well as their ears, You know, they're trained. Okay, so, you know, online. You know, there's all these different, you know, mastering engineers. You can kind of send your music to them. But, master, it will send it back to you on that, like your official file. Ah, And are later videos will talk about, you know, export settings and in a sense of, like, your actual file and everything and then even later, we'll explain a little bit mawr in terms of like, the actual formats, for example, wave or an F l A C file or like, an MP three, you know, stuff like that. Okay, Now, the other way to do mastering is to do it yourself. OK, so you can You definitely can master your own music. Um and I do suggest that you always fiddle around with mastering, learn about it, learn about you know, what are the goals? What? You know you know? Yeah. So, like, you know what is mastering? What's the goal? What are you trying to achieve? What tools are available to you and that's it. I'm gonna cover with you in this video. I was gonna draw here, so I first want to talk to you about something called Loudness. So this has been So let me just write this first so I can talk. So loudness has been, um, the foundation toe where mastering has come over the years. OK, so back in the day, you know, mastering is probably more of just kind of, you know, preparing them the music in a sense of from one track to the next. Embedding like you don't, uh, meta data like IRS air sea codes. And, you know, maybe that kind of information I asked her. See, codes are just ways to track individual songs. So if they are put on the radio, it's just a way to track your music so that you get paid properly. Okay, But in recent years, um, mastering engineers have actually been pushing, uh, you know your music much louder. Ok, So in addition to loudness, we're also going to be covering a term called dynamics can. So, for example, imagine we had, you know, this audio away form, and it just looks like this, for example. Right? So, uh, let's just say right here. This is zero db. So in digital audio the loudest you can get zero db you cannot go higher if it if it does, go over. You know, imagine this is like our away form, right? But imagine it went over your actual output would look more kind of like this. So instead of it being rounded, you're actually kind of squaring off. So that's called clipping case. If it goes over zero db, that's where we're gonna be using, like, a limiter and stuff so that your audio does not go to zero. Um, and therefore you're not getting this like clipping sound now not to go off topic. But when we talk about like, a clipper and the distortion again, I told you that there's intentional distortion and unwanted distortion so unintentional, right, so intentional and unintentional. And it's really important to understand that when you're mastering and mixing your music cause you could still be using these tools, you can still be using distortion But you just have to be knowing why you are applying a certain sound and effect. OK, so like I'm saying so Over the years, music has become louder in a sense, of. People are starting to use compression and so compression effects. The dynamics k so compression now it's not just the compressor. It's also like things. You know, these air tools, like, you know, dynamic processors. So compressors, gates, limiters, um, you know those types of tools, even like distortion, right? So distortion is like a form of, like again that this compression and limiting. But again, it's this way more extreme. Um, so over the years, people have been pushing their music much louder, and therefore what it's doing is it's actually removing the dynamics. So another word we're going to talk about is called, uh, the transient. Can I Actually, because what? Transients? So the transient is the initial sound of a sound. So, for example, imagine we're talking about like a snare hit. So the snare head, the very, very beginning of that snare hit that is like the transient. And when we're dealing with like a compressor, you can actually manipulate the sound of this transient. Okay, um And now you have to be careful, because now, when you're mastering, you're now affecting the whole song. So you're not just affecting all these individual mixer inserts. So when you're in the mastering stage, your settings are typically subtle. Okay, So, for example, if you're mixing a vocal in the mixing stage, you know, you might be aggressive on the vocal with, like, a 4 to 1 ratio, or even like an 8 to 1 ratio, depending on how severe or you know, the the effect or sound you're trying to achieve. But in mastering you might go like, for example, you might go like 1.5 Or you may even go like 1.25 like that. Or, you know So, for example, like to s 02 to 1 and this is all just toe one, right? So it would be like 1.5 to 1. Okay, so these drawings ratios and I'm just gonna put lines in between them. So, for example, you know, in mastering this might be like your ratio, and then you might have a little bit of a lower threshold just to kind of control the dynamics of the song and again dynamics. What they are is it's your quiet parts and your loud part. So it's just like the difference between your music and, you know, when we would hear, like a real guitar in real life or a real piano. It's that it's the dynamics and like the transience, and it's all these different, I guess. Aspects of the sound which make it feel like it's a real like if you're listening, you know, out of it over your speakers. But when we're using tools like a compressor and like a limiter, we are affecting, like the transience you can also be affecting like the room sound. So depending on, like your release setting on a compressor and stuff you could breathe bringing up like the room, whether that's a good or bad thing, it all depends on what you're trying to achieve. Um, but over the years, you know, compressors and limiters. They've been abused and they've been used to increase loudness. And the, I guess like the story goes within the audio industry is, you know, the marketing people behind the music. They believe that you know, if they thought that the music was loud. It would sell better. But now we are in, you know, nowadays, and there's actually been something called a little different color. Here we'll go on orange. There's something called loudness Normalisation. So I'm not sure if that's what the Zetter within SK so regardless so with loudness normalisation. So this has become a new standard, and the whole idea behind it was, Let's just say we talk about, um, your TV, for example. So back in the day, you know you'd watch your TV show, it would be quiet and also the commercial. Come on, be super loud then you know, and what would be happening is the consumer. You know, the person actually watching this show would always be having to grab the TV remote and always turn up the volume or turn down the volume. And, you know, it kind of got really, really annoying, right? So over the years, they've actually come out with a standard, okay, and it's loudness normalisation, and I'll explain that in our next video once we get into learning about like a meter and stuff with mastering your music. But loudest normalization is actually kind of cancelling out of where the industry has come . Okay, so I'm gonna write one more thing for you guys, and it's called the Loudness Wars. Okay, so this is what's happened over the years. So because these engineers and mastering engineers and, um you know, again, this story goes that it was more like the people marketing the music. They wanted the music loud, so they would hire this mastering engineer there, Tell the mastering engineer I want it loud. Okay? So whether that mastering engineer truly wanted to do that, they thought that the louder the music, it would sell better. And so this is where this thing called. The loudness words came in. And I want you to google this k Google this. Watch a video on YouTube. It'll explain how music over the years has gotten louder. And what I mean by that is, you know, back in the day, you would have your music like this. You know, you have all these transients later on, maybe start to get kind of more like this. So there's a little bit of spikes on, and then eventually, you know, let's just say there are some songs and it's what people in the industry call like a sausage. It just looks like a fat sausage. And it's like your audio away form is literally like the same size throughout the whole song. So, for example, imagine like your intro. Imagine you only had like, a quiet piano, but it's the same volume as the chorus, and this is where the audio industry has kind of gotten, too. But now this new standard called Normalization Loudness Normalisation, has come out. So when we talk about like iTunes or Spotify, you'll notice in the settings that there's like a loudness normalisation option. And this what it does is it makes all the music the same volume. Now, when we actually go to master our music, if we're gonna master it, really, really allowed. What's gonna happen is Spotify is actually gonna turn down that music so that it's the same volume as the other songs. But here's the problem. If you were to master your music super super loud and now you have, like a big have a big sausage. So what you've done is your music is the same volume, you know. So right here. If this song is played on Spotify. You know, it has lots of dynamics, right? Uh, and then if we have our song and it has, like, no dynamics again, that's the quiet and loud parts, like a big sausage, these air playing at the same volume. But the thing is, this thing, this song right here will have more punch. You know, if that kick drum might have a little bit harder and the snare might have a little bit more bounce with that the vocals, in other words, it just has more breathing room. It sounds more natural now again. You know, I told you in the mixing section is all about kind of comparing before and after, right? Are you actually benefiting the music? And when you get a fair comparison to you know, this track, which has lots of dynamics to fat sausage um, you'll notice that it's like this this track right here, will it just sounds very, very you know, um, I guess just like aggressive, you know, it's just like it. Just many times you can even feel held back, OK? And what I'm trying to say is now, because of loudest normalization, this whole trying to get your master as loud as you can get it. It doesn't matter anymore. Okay, so it's all about mastering your music toe where it sounds good like, yes, you still want to get some loudness and you want to be a little bit competitive in your music because the thing is, when you are using compression and limiting and stuff on your master, you're actually balancing out the track. But what I'm trying to say is, typically your track can benefit from a little bit of compression and limiting, for the most part. And what that is doing is it's actually bringing energy into your track. It makes it more exciting as well, as it allows someone to actually hear all the elements that are going on inside the mix many times, you know, certain instruments, whatever they can kind of get lost in the mix. But when you apply like compression, so what you're doing, for example, this would be this is actually a really good example. So imagine this one is too dynamic case. So it's like, you know, to quiet and was too loud, so like, you know, in other words, the quiet and loud parts they're two dynamic. So you want to use some person compression? In theory, let's just say just to bring down these peaks just a little bit, you know, just to kind of keep it a little bit more consistent with the quieter parts care. And then this one here, this would be an example of what not to do. Okay, so your music is just totally squashed. It has no breathing room. It doesn't sound natural. Um, but now, let's just say right here, right here. Like, imagine this is just kind of like, you know, the nice balance of between. So, um, this is something that you have to practice over and over and over, play with the tools, understand what they do, even myself being young. 10 11 years producing. Now I'm still learning about all these different tools, like, for example, like a multi van compressor. And And when I say that, I mean actually learning how to use it. A top professional level, like understanding, You know, when I'm listening to that music, what frequencies can you kind of use that multiple and compressor on? How aggressive should I be? Um, and another thing you could be doing when you're mastering your music is using a reference track. So what that means is that you have your master and then you have a commercial release. You know, typically you want to choose like one of your favorite songs from one of your favorite artists kind of thing that you know has been mixed and mastered by you know, people who are professionals within the industry, and what you'll do is you'll bring that song into your project so that as you're mastering your song to, you can always compare back and forth so you'll be able to hear the loudness difference. You'll be over destroyed the e que balance you'll be able to hear you know, the dynamic difference. You know, in a sense of when it goes to a quiet part when it comes to allowed part. Mastering is something that is gonna take you years to understand. It's going take you years to read about learn, and as you progress, you're gonna learn about more tools and different techniques. And, um, you know, always comparing how you're mixed sounds to, you know, the releases that are within the industry. So this is just kind of a general overview of what mastering is Okay, so your overall goal of mastering is okay. So I think for myself, I creep beat tapes. That's just kind of what I've started to do in later years, and I just find it's really beneficial. Have also created a course on that is called How to release a Professional Beat tape on Break Down, Step by step. You know how I actually really subete tape Teoh, you know, release it to the world. I also created a real physical beat tape, which I actually got real copies made and hand them out to people in real life. But why I brought that up to you is because I typically think about if I am going to make a beat tape and let's just say that be Tape has 11 tracks K. So I typically think of it like an album or like a beat tape when I'm mastering this song. So what I'm trying to say is that from song to song, you want the volumes to be the same, you know, very, very close to the same. So in other words, when that listener is listening to your first track and then goes to the second track to the third track. You don't want the listener toe have to turn up and down the volume because each track is other loud or quiet. You want it so that if the person wants the music loud, then they're in control like they can turn up the volume. And then if they want a quiet, they can turn it down. But you don't want it so that they have to literally turn up or down because of your poor mastering job can. The next thing you want to think about is the spacing in between the songs. So what I mean by that is like the intro and the outro timings. So let's more talk about the Outro. So you know, the song comes to an end Now when it goes dead silent Holum of this space are you putting from the first song would say to the second song, and this is something that you really have to listen too closely because, you know, if it sounds too rushed, that could take away that. The emotion of the song. Now I know most people nowadays don't really listen to liken album from song like From the first song to the End song You know most the time people are listening to your music in like a playlist. For example, take a Spotify playlist or whatever. You know. There's music from all different types of genres, all different types of artists, all different, mixing engineers, mastering engineers, right, So in that regard, it's not really gonna translate right. But if you, you know, master your music in the sense that I'm telling you that if you are gonna release beat tape , for example or like an album ah, that you want to be thinking in terms of like the loudness consistency, you also want to be thinking in terms of the spacing in between the songs That way, you know, if someone does choose to listen to your album as a whole, it's good to go. And then when it's out there in the real world, it is what it is, you know. So that's kind of my mindset behind, like the mastering, um again, The loudest wars is something for you just to research. Watching YouTube videos on it, watch some older videos, you know, the newer videos, but breakdown you know what's going on. But there was this one specific video that was just really, really awesome with the loudness wars again to showing you how music has gotten louder over the years to the point where it became like a fat sausage. And this is Jewish, like the transients and the dynamics by using a compressor. Okay, so there's a thing called like the mastering chain. And just quickly. So, you know, just like I was showing you before if we had, like, an e que, like, you know, imagine this is Ethel studio. Then it goes into, like, a compressor. Right? So this is what you call like a chain, you know, you're plugging chain, and many people in the mastering stage call it like the mastering chains. So, um, you know, whether you have, like, an e que here a compressor right here. You may have, like, a clipper. And then ah, you know So I will write one more time here and just to give you an idea. Okay, So on your mastering chain, you always wanna have Ah, limiter. Sorry. Um, a limiter as your last plug in, But on your actual last last plug in is a meter, but I don't really consider your meter like a plug in because it doesn't affect the audio. It just allows you to read what that actual plug in, you know, is reading of that audio. Okay, so, again, this is kind of like the Siri's thing, you know, the series and parallel thing. So imagine, you know, we have that can eat you here. And let's just say we just hadn't e que okay, and it goes into the limiter. Now you're very, very last plug in is gonna be a meter. And one thing I want to mention is because, remember, I talked to you about the series and parallel processing, right? So because this series and parallel processing, um, the more you affect each plug in, So imagine we got another plug in here and another plug in here. Whatever. As your audio goes through, it gets affected more and more and more. Okay. So if you actually had this meter, like, you know, summer in here, you're actually going to read your audio in a different way. That's why it's very, very important to have your meter as the last because you're actually reading your music. Ah, for what it is. You know, when you export it, you're going to read, You know, the loudness, the peaks, everything. That's why it's very important. Have your meter last. One thing to mention is, for example, if you hadn't e que a compressor, just look over here. And if you switch these for example, you know you can get different results. Now, some plug ins you you won't really notice too much. But for example, if you had, like, a distortion here and then e que, you may notice quite a difference in the sound. That's kind of a cool thing to play around with sometimes. So that might make you question while should you seek you first or compress first. Ah, but in my opinion, I just They play around with them and, you know, see what you think Sounds best many times I'll e que, and it'll compress after, but this is something where there's a lot of arguments within the industry. But this is like the mastering chain, so the meter is always last and there's a free meter, which I like. It's by you Lean care. Ah, he has a free and a paid version. It's an amazing plug in again. We're with loudness. Normalisation. This is something called L U F s. Now, OK, it's loudness. Full scale. Um and the whole goal of it is nowadays, uh, audio is very, very hard to measure. And the reason for that is because you have a high frequencies, low frequencies, mid frequencies, and it's really hard to measure all these different frequencies and how loud they actually are. Like, for example, like base. You can typically go a little bit louder on the base because it's not as aggressive on your ears base. You more feel like in your chest where is at the higher end. You know, that could be really aggressive on your ears. So a DB So it's the decibel equals and l you allowed this unit. So what I'm trying to say is now this new L U F s standard, um, you're going to see, like a standard Call it the R r. 1 28 I'll show you on the you lean, loudest meter. There's always a condom, different standards. But anyways, this new loudness standard takes into account all the different levels of these frequencies , okay? And how aggressive they are to our ear. And it actually measures your audio very, very similar. I believed, like how we actually hear audio. Okay, so again based continuously be louder. And l u f s takes that into account. And, um, yeah, it's just really, really powerful. So not to say that this is like, you know, the perfect solution, but compared to how we used to mix and master music before, it's a big step in the right direction on nowadays, with this loudness normalisation coming into play, you know, now our music is more consistent. We're not squashing our masters. We're not worried about competing that way so much. We're now focused on creating awesome music, which, you know, we are trying to get some loudness out of it. But again, you're not just totally wrecking the dynamics and the transience which give your music, you know, emotion and life. Okay, so let's hop into Ethel studio. I'm gonna break down, you know, kind of what we talked about here. But Maurin, like a real world practice, and I will also walk you through, um, one of my own tracks that I've commercially released and to share with you. You know? Ah, mastering chain and the tools of used. And I kind of like the loudness and stuff like that, okay?
19. 8-2 Mastering Chain And Tools: Okay, So in this video, we're going to get into a real world example of, you know, mastering your tools and how it relates to your actual music production program. So, like I was explaining to you before each insert, you know, it has to somehow go to the master whether that be like the actual individual insert or if you create like a subgroup where you wrote multiple sounds like, let's say one insert on and then you wrote those you know, to the subgroup in that subgroup goes to the master, you know, again that one slider would affect multiple inserts. So at the end of the day, he sounds have to go to the master. And that's what you call your two bus. Okay? And as you can see on the master track, this is it. So again, when you're mixing, you can be way more aggressive on your e que and compression settings. But when you are actually mastering your music, let's say we open up like Aneke you here and again. I'm just using these third party plug ins. I like them for workflow. In terms of sound. It's not so much the sound like Nowadays with digital plug ins, you can be achieving, like, the same sound out of, you know, pretty much any. You know, um, compressor plug in. It's just for workflow. Like, for example, Like on here, I can create a band, and you can actually solo the frequencies. Now, fat filter is expensive, but, you know, it was a good purchase for myself. I've used these tools for so long now, and it's like the workflow. Now, what I was trying to say is, when we are gonna actually, you know, master our music And, um, you know, when you're actually mixing and mastering your own music, it's a little bit different than if you're going to send it off to a mastering engineer because of that person is gonna master your music. They've never heard your music before. Okay, you know, this is the first time they're hearing your mix, so when they listen to it right away, they may be like who is? You know, maybe it needs more brightness. So, you know, maybe we need to put like, a little high shelf in there or whatever, right? But when you've actually mixed your music when you mixed it. You thought it sounded good. So when it comes to the mastering stage, it's like, Do you even need to have e que on there? Or like, compression or or whatever, right, Because if you already mixed that, you thought it sounded good. Well, is the song not good now? And I'm just speaking that way because again, if you're sending it off to a mastering engineer and they listen to your music for the first time when they have, you know they're critical thinking towards your music, their mindset and decisions might be different than you. Who's mixture music. And that's why sending it off to a mastering engineer is typically common within the industry. Because again, it's just that fresh study years, Um, and you know, stuff like that. So again, when you're mastering your own music, let's say you are going to you don't apply Samy cure whatever. So you know again, we're talking, you know, subtle boosts like one DB can be getting aggressive. I'm gonna go to a more zoomed in scale because this kind of gives you a little bit of a better reference. In a sense of like maybe that's actually kind of a big boost. Whereas if it's on like a really zoomed out scale, it's like, Oh, it's on a big boost. It all right? But if we go to, like, three decibels, like OK, I could see so one decibel could be getting quite aggressive and mastering, you know, you're looking at, like point to 5.5, for example. So in other words, like half a decibel and many times you're also on, like, wide cues because wide cues can kind of sound natural. And then again, same with, I think the compression. Okay, so if open up like a compressor here, So you know again when we're actually gonna dial in our compressor settings, You know, again, as you can see right here, I'm at 1.15 to 1. That is my kind of starting point. And then again, it's really important that you're turning the plug and often on just for a fair volume comparison, because how do you know if you're benefiting your music if it's not a fair comparison? And in the case of like, fat filter is the matter of restraining plugging often on here, or if you're using the fruity Parametric EQ. You too. I'll bring that up for you guys, since this is about FL Studio. So this is a pretty parametric eq you two. You can also expand this if you want, like a bigger size, Whatever. Ah, so let's say you know, we boosted up here a little bit and you can use your scroll wheel to make the Q wider or narrower, so we make a little wider. So again, since I boosted, I may just kind of reduce the volume a little bit and then I'll make it smaller so I can actually see it this way. I like to always be able to see the my effects so I can turn it off and on. So again we boosted. We reduced a little bit. Now I would turn often onto sees it. Is that actually benefiting my music? In the case of like, let's say I felt I needed a little bit more highs, you know, kind of low mid mid highs. Okay, now another, uh, reason why I might use i e. Que is maybe like, let's say, to add some brightness into the song. So let's say I had a reference track going on. So I'm comparing my mix to, um, you know, one of my favorite tracks that say And you know, I go to play my mix, I play the reference track and instantly I hear it's like, Ooh, that reference tracks. Sounds way more balanced. Sounds brighter. You know, my mix this let's just say sound really dull. So in other words, not met, you know, the high ends could be boost could be boosted. So instead of going to each individual sound opening up in e que and using like a high shelf, this is where in mastering, you know, I might have a high shelf here and something you want to be careful of. Sorry, I'll delete that. Um, so click on it, Delete it. So something you want to be careful of is as you are boosting. So if I boost that, let's say 4000 hurts. You know, it's pretty close to 4000 hertz. You're also increasing frequencies below 4000 hertz to As you can see, it's almost going down to 1000 hertz, where we're getting some boost again. You know, it's just something to be aware of, and if you adjust like the Q. I can even go further back. So as you can see, it's going all the way back to 500. You know, again, you know, this is really, really subtle were on a really zoomed in scale. This is like, um, like, almost one decibel. But as you could see up here, it's upto one pretty much. And then down here, you know, it's quite little, but this is where I may use a high shelf if I wants more brightness out of the whole song, okay? Cause again in mastering your affecting all the instruments and everything that's going on . So you have to be very, very careful Careful in your compression and eq you kind of settings. Okay, so let's just delete this now. I just want to talk a boat as you're actually mixing your music. So sometimes what people do is on the actual master track. They will actually apply Ah, compressor K. And as they're mixing their music, they will actually have a compressor on the mix bus. Now, when you're dealing with a mastering engineer, many times they'll say, you know, like if you're gonna send your music to them, they'll say like I want you know, your export with no effects on the master track. And I wanted to be, like, minus six or like minus three for, like, your Max Peak. Um, we'll cover that later once we talk about, like, the exporting and stuff like that. Ah, but this is kind of a little hidden kind of secret within the industry is because a compressor is kind of like an automatic volume knob. So in other words, if something gets too loud, it will turn it down. And so when we're actually mixing our music, you can actually be mixing into this compressor because again, this is on the master track and every single insert has to go to the master again, whether that be the individual insert or like a subgroup or whatever. Even like the sends years, you can see they're all going to the master. So when we're sending all this audio into the master, we can kind of help glue that mix together by mixing into a compressor. And as you can see, you know, my setting is extremely light. So you know, my thresholds quite low, but my ratios pretty low, and I also have a pretty long attack. So, in other words, I'm still allowing all those kind of transients through. This is just kind of riding, you know, the way form, it's kind of just making It was a little bit more consistent. Um, and again, I just mix into this now, once you get into the mastering stage, I may tweak this totally different, but it's just, you know, as you're mixing your track, uh, it's just kind of nice to mix into something like this again. It's just kind of like a little hidden secret within the industry. And it just helps glue your mixed together in a sense of anal. Your loud Purtzer quiet parts. It kind of evens it out just a little bit for you. It's kind of like cheating a little bit, you know, instead of trying to achieve with the perfect mix between, you know, when you're adjusting all this stuff, um, you know, it kind of does a little bit of like the hard lifting for you. Just don't just suddenly right now, let's just talk about the mastering chain here and different tools you have available to you. Okay, so you have a compressor can, which is just the fact fell to proceed. That's what's called a single band compressor. Uh, there's a fruity band, multi band compressor. It just looks like this. And how it works is this is different bands. Okay, so the best way I can explain this to you is using the fat filter pro que So this is an e que. But I'm going to explain to you how, like a multi band compressor works. So I'm just going to create a band here, and I'm just going to go Belle Kim, I'll create another band and another bend. Okay, I would do this. So we actually have three bands here. I was kind of dipped, this one just so you can see them. OK, so how a multi band compressor works is it actually splits. Um, you know different sections of your song into different bands. OK, So as you can see, you know, uh, this low and would be from, like 00 all up to maybe let's say, around 200. And then there's what's called a crossover. So, for example, if I open up the foul filter pro MP and if I just you know, open one band, Another band you could see right here. This is what's called a crossover. Okay? And sometimes cross over. You know, if a even on speakers, for example. You like your high end that, like your high and speaker, for example, like your Tweeter and I mean high end by high frequencies. And then you have, like, your actual would for right and on these speakers, you know, there's what's called a crossover. And at that crossover point, if the speaker isn't designed very well, you could be missing frequencies. Or you could be having, you know, if it overlaps the wrong way, you can actually be having frequencies boosted at that crossover point. OK, so as you can see right here, So just the reference back to this. So if we're going to, let's say, add some compression onto our music and I'm just going to go just this is a good example. The A and B I'm gonna create one band here, okay? Expanded fully. So this is like a single band compressor. So as your actual audio goes over the threshold on a single band compressor and depending on like your settings like your ratio Attack release. What's gonna happen is is actually gonna produce the volume of the whole sound. And if you're using a single band compressor on a whole mix, and you can I'm not saying it's bad. But this is What can happen is if you're too aggressive, so many times that say, like that kick drum and the snare and the base these air typically like your loudest sounds when you're mixing and mastering your music, it's like your low end, which is like the loudest. For example, if it is hit, play here and we look at the frequency spectrum, you'll see that the low end is gonna be louder than, like the high end. Okay, so as you can see right now, I have all these effects on, so it kind of sounds weird, but I'm gonna put the EQ you first, so we'll listen at one time. She could see the low end is much higher. Okay, so now we're talking about the compressor. So as soon as something goes over that threshold, it's gonna reduce the volume so many times the kick the snare and make your base, they're going to be constantly triggering this single band compressors. So if you had vocals going on now, if you listen to Like a professional song, the vocal is just consistent like you know what I mean. Like, it's just the vocals there. It's consistent, It's not being pumped. And if you use a single bank compressor, and if that kick drum is constantly triggering the compressor and the vocals playing, what's happening is it's lowering the volume like this. So you know, the kitchen plays. Trump plays the bass plays, and it's reducing the volume of the whole song, which means that the vocal is kind of being It's riding down with it. And thats could sound really bad. Your vocal, you know it can actually that kind of pump with song in a bad way. So this is where the multi band compressor again if I go back to the A and B So, for example, like a vocalism or from like you say, you know to 50 and and you know upwards, right? So again, like I said, the low end is where that kick drum this their and the based typically are. You know, they're much louder than that, like the rest of the song. So this band right here, if it's compressing as you can see what's happening. This is moving, but the other bands aren't moving. So in other words, they're all independent of each other. So you can actually control the dynamics of your song with way more precision and keep that vocal sounding super consistent. And you can apply different settings on here if you like. So that's just a really cool thing to be aware of. I don't want to be going super in depth, you know, with this stuff in this course, this is just more kind of up and running in a sense of what is mastering and what do you want to cheap out of it, what to think about. So, uh, that's an e que That's a single band compressor. Okay, so I explained it on here. So a single bank compressor is just like a single band. This is really good, just for kind of balancing out like the overall song, many times very, very gentle on these settings. But on the multi bank compressor, you could be much more aggressive, okay? And I use the fat filter pro MBI from a multi bank oppressor. It's an amazing plug in really, really cool. Now here's another tool for you. It's called a Clipper. So if I go dynamics and, uh, I think clip shift clip shifter was free, but I like the T racks. Classic Clipper is the third party plug in, but in all honesty, it's been a tool that I have used for at least 78 years. Now it is an amazing tool. So how this Clipper works, is it similar to like a limiter? Now a limiter is like a compressor, Okay, except it's way more aggressive. So in other words, when your audio goes over, it's actually turning down the volume of your audio. Okay, so in other words, a limiter can sometimes soften the blow of like your kick drum. But a limiter sounds very, very clean. Okay, depending on your settings and what type of limiter you're using, you can kind of get different sounds out of that limiter. But typically, I've always just kind of found that a limiter gives my music a nice, clean balance sound, but it can reduce some of like that, like that punch. Now Ah clippers really, really cool because it doesn't have an attack and release. So in other words, it's like your attack and releases like zero. So in other words, when your audio goes over that threshold and you know what, you just dial it and, you know, right here kind of thing, or so your output is like your threshold. So in other words, if your audio goes over that threshold, it literally just chops it off. So, like I explained to you in our previous video when I was drawing when I shared, you know, if you had, like, a round way form, but it goes over zero, it's literally being clipped. In other words, you know you're actually kind of chopping off that peak, and then instead of being rounded, you're kind of squaring off, and that's what a Clipper here's doing. Okay, you have a new attack of like zero and like a release of zero. So, in other words, is immediate. And with the Clippers, you're able to get, you know, it's honestly so powerful. It's something that you want to play around around with with with yourself, but on the reason why I like this Clipper is because it has a soft knee and a hardening. So other words, this is more like an analog sound. It gives it more of a roundish kind of sound. Typically, you know you want to think about like old hip hop kind of flavor and then wait to the right . It's very, very aggressive. It's literally just chopping off that peak for myself. I usually find that, you know, a setting of around maybe like seven to a around here now, every tracks different, but I usually find around here I kind of get like the best settings out of this clipper. Now again, what it's doing is it's literally chopping off that peak, but it's not turning down the volume. So in other words, you're able to kind of turn up the volume of your master and make it sound louder. Make that kick drum hit hard, because again you are actually a clippers like a form of distortion. And when you clip off that peak, you can be making that kick drum sound like it's and feel like it's hitting harder. But again, the most important thing is just you want a fair volume comparison, so when you do, try often on or often on from here. That are you benefitting your music? So you guys did research a clipper in more depth, you know, play around with it. It's a very, very powerful tool. FL Studio does have a clipper, but it's a soft clipper. Um, I wish that they would have a hard clipper, maybe in the future. But, um, this has been my favorite clipper, and I use it in almost every single track of mine. OK, say a little. A little hidden trick. I I used care now, uh, are lost tool we're gonna talk about before the meter is, uh, a limiter can. So for you guys in fl Studio, you guys could be using the fruity limiter, which is right here. Now, this is both a limiter and a compressor again. Ah, compressor and limiter are protect the same thing. Except a limiter is like, you know, ah, ratio in theory is 10 toe one and again, I'm looking the top left here, right up here. In theory, it's like, 10 to 1 or more. Ok? No, that's like a limiter. Um, but they actually have, like, a limiter section here. So on a limiter What you want to be doing is you want to be putting the ceiling to minus one. Now, this has changed in the industry over the overtime. And I've only started to do this after reading, you know, from blog's and stuff like that. One person that you I should check out about mastering is someone called Ian Shepherd. Ah, he is, um, the creator of Dynamic Range Day. And he was a big advocate behind, like, this loudness words and kind of pushing some type of standard, you know, in a sense of, you know, be careful the loudest or loudness wars, you know, like you're damaging music. You could still get your music loud, but you doesn't have to push as loud as, like that sausage like I was sharing with you. Now, the reason why it's gone to minus one. So it wasn't like minus 0.1 So, for example, it was actually a minus 0.1. Okay. And then later on, I got to, like, minus three, and then eventually people to start a gold minus one. And the reason for this is because when you actually export your music into MP three, there could be a conversion process. It's called Inter Sample Peaks. Uh, that's getting a little bit intense for this course, but this can actually have certain parts of the song where they, you know, just really, really fast. And your audio would just kind of spike up only of this certain area. And you can actually get distortion because of that Onley in the MP three. But in like a wave, you wouldn't get that distortion. But it's only like in this conversion process where this can happen because of inter sample peaks and stuff like that. So that's where minus one has come into play. And then, um so that's like the fruity limiter. Okay, now, in terms of the attack and release, many times, it is kind of leave them where they are. You can player, you can play with them, you know, again, you could always hit F one to read more about it. So the attack just effects like the transient. That's what the initial sound. And then again, ah compressor still compresses your music even once it goes under like that threshold. Okay, So just to quickly talk about a compressor, So how a compressor works is you have that threshold when the audio goes over the threshold , depending on your ratios, you know, racial settings and stuff, it will start to compress. Now, once your audio actually goes underneath that threshold, the compressor actually still continues to compress, depending on the release. Cabe the release, how long it takes to go back to normal volume. And again, I told you that a limiter and a compressor are like the same thing. Except that a limiter, swimwear aggressive. So again, if your audio goes over the threshold, which is minus one Ah, and then it goes underneath. That means that, you know, the limiting is still happening. But it's just, you know, the release is how long it takes to go back to normal volume. One thing to also mention eyes. You don't want to set your release too fast because you can actually get distortion, but having too fast of a release. This is because, uh, this limiter or compressor will actually start to follow, like the single cycle way form of your audio. Okay, you want these limiters and compressors to kind of follow, like the overall general kind of mold of the whole sound. Okay? You don't want it to follow like the actual individual. Like, pretty much if you look at, like, a like frequencies and stuff like that, You don't want to get that fine. Ah, and if you're getting distortion because of that, you could just simply increase you release K. Okay, so I want to talk about, you know, just like pro l cause this is a tool I use, and it's just really easy to see. So again, as you can see, I have it at minus one. You can see has, like, the inter sample peak meter. So if I enable this, all that does is it will just share with me if inter sample peaks are occurring. And if they are, I could just be a little bit more aggressive. Let's say, like my compression or whatever to kind of reduce the peaks a little bit. Or I could just simply turn down my master. Okay, so the limiter is the last plug in its at minus one. And it's just protecting your music from, uh, hitting zero, which is clipping okay again. You can clip your music, but the difference is this is intentional versus unintentional kind of thing. So let's just talk about the meter. Okay? So this is the you lean, loudest meter. Um, I'm just going to disable that, so I'm actually on the free version. So he is a free and a paid version. Um, the free version offers everything that I need out of this plug in. But if you do want to support you lean, you know, the you can support him. So this has been an awesome meter, because nowadays the loudness and loudness normalisation has come. Oh, and this shares with you. You know how loud your actual music is. Um, and this number has kind of changed over the years. So, for example, if we talk about, like, YouTube or Spotify all these different kind of online platforms even like iTunes and stuff like that, if you listen to the music, um, you know, they have their own standards. So, for example, like YouTube, you know, could be, let's say, like minus 13 and then Spotify is like minus 14. And then, like so again, this is kind of like the early stages of this stuff, but minus 14 has become kind of like the standard at the moment. Okay, so how this works is that was going to go to a website here. So how this works is these lecture measurements. A case of the integrated loudness is like your whole track. Okay, so when you, um, you know, reset the meter and you play from the beginning to the end is going to give you the number of the overall loudness of, like, that whole song. Okay, the short term is like an audio block of three seconds. Okay. And then in the momentary, Is this very, very quick. Okay, so just to share that with you again, you guys can read more information. Ah, about Neil, this loudspeaker and stuff like that. But this integrated loudness is your goal. And minus 14 has kind of become like this standard. So, you know, from the beginning to the end of the song, you know that minus 14 is kind of what you're wanting. But, you know, again, you could be comparing to like these reference tracks. When you're mixing and mastering your music, you know, the whole goal is that you wanting like a balanced sound, you know, and again, when it goes to like Spotify and stuff like that. If you're too loud, it's gonna turn it down. Now, that doesn't mean that it's bad. If you go too loud, it just means that it is going to turn down the volume. So, um, again, if you're going very, very extreme now again, the smaller the number, the louder it is. So, for example, minus 14. And if we go like what's a minus? 10 minus 10 is allowed to the minus 14. Okay, so let's say you pushed it to minus eight, you know, and let's say, like, you know, you've totally wrecked the dynamics. Now again, if it goes to Spotify, what's gonna happen is it's going to turn down the volume to make it the same volume as other songs which have more dynamics. Now, let's just say you pushed it to minus 12 but you found that minus 12 was a good medium in a sense, of the actual music sounded good at minus 12 you know, for this master okay, again, if you're mastering a beat tape, you kind of got to keep all this into account that let's say that one track you mastered it A You know the minus 12 integrated. But then the other tracks, you know, maybe you weren't able to push them as loud. Or maybe you just felt that, um, no, they weren't. You know, you distant sound as good at that loudness. So sometimes you gotta maybe make a little bit of a compromise and kind of maybe come down a little bit. So instead of going to minus 12 maybe you want to put it to minus 13 and then your other tracks. You can put those, you know, you could bump him up one decibel or whatever, too. But again, this is kind of knew this al you fs stuff. It's kind of still being rolled out, and I personally believe that they're still just trying to find, uh, like that happy medium in a sense of trying to create a standard of loudness, which sounds good and, you know, isn't wrecking the music. Ah, one problem that they were having when this new loudness standard came out because there's different rules for, like, broadcast, which is like radio and stuff like that to like TV to like, you know, hear music. And there was problems of people like you know, on the plane putting a earbuds in. And you know, if there someone was talking, they weren't able to hear all like the words because you're on the plane. If you're sitting by like, you know, the actual engines, it's like it's pretty loud, right? So that was a problem that people were having with this new loudness standard, you know, it was too quiet. So at the moment, minus 14 is kind of like that standard, even if you type in Spotify value fs standard, Uh, they even have their own documentation explaining to you you know how you should you know what levels you should You should set it at, um, I will break this down for you in a separate video, will walk through ah, track, which I've commercially released. We walked to my mastering changes kind of quickly, and I'll share with you. Ah, like my loudness meter. Okay, so I'm that's kind of like, you know, the mastering chain, the mastering process, and then at the very end of it, you know, it's just actually exporting the song. And then again, if you're working on a beat tape, it's just from track to track are the volumes the same When you reference it to a commercial release? How does your music kind of hold up, you know, is a pretty close. If it is, you know, that's awesome, like you're doing good, right? So let's help into one of my commercially released tracks. We'll check out the mastering chain and then I'll talk to you about the export settings in the video after that.
20. 8-3 Walk Through A Commercially Released Master: Okay, So in this video, we're gonna be doing a little walk through of one of my tracks. It's called My Heart is Sold. So I already mentioned to you that I released beat tapes. Okay, they called free beats by gratuitous. And this one's off of my eighth beat tape. If you'd like to check it out, it's on Spotify. Ah, but we're gonna be covering, you know, like the mastering chain. We'll also be covering, you know, just a little bit of the arrangement walking through it just a little bit. Just let you see how I've kind of made this song on again. Just walking to it the mastering chain. So the first thing we are going to talk about is the loudness meter. Okay, Now, again, this is a new standard that's out. It's called Al you fs Loudness unit full scale. And again, it takes into account the different frequencies on how our ears actually hear them. And it will, you know, give you ah readout dependent on the loudness of your song. Okay, again, this is to do with the frequency content. Now, for example, if you boost in that the two k region you know, you make it more loud to sort of that track, or this is to even do with, like, dynamics. So, for example, if you're using a compressor and reducing like the peaks and everything that now you'll also notice I'm using the first version of the you Lian loudness meter in the last video is using the second version. The reason for that is because when I released this project, I only had the first version. Now I'm using the second version. So my new projects abusing the second just lets you know just for clarification. So again, your overall goal when you're mastering is your integrated loudness. Now, when we talk about, like, Spotify YouTube, you know, Spotify, what they say is, you know they want minus 14 and that doesn't mean you actually have to master your music to minus 14. It just means that if you're louder than minus 14 So, for example, if you master your track at minus 12 it's actually gonna turn down the volume of your music , and it doesn't mean that's bad. Okay, It just means that you decided that you wanted to push your master a little bit louder because maybe you felt that, you know, it sounded more balanced or had more punch. You were able to hear more clarity or again, you know, maybe you just decided that you liked it a little bit louder and again. You know, you got to be thinking in terms of the song as a whole, Like when you're mastering the track when you're using, you know, a multi band compressor or a single bank compressor e que you're you're thinking in terms of the overall clarity, the overall balance of the song. And, you know, you're you're trying to benefit this song. Okay, So that minus 14 You know, it's kind of like, um a rule of thumb on the reason why I'm saying that is because again, you have to be thinking in terms of your music. Now, when you go to actually master your beat tape, for example, you know I'm gonna be choosing, like, allowed this number and typically is it is gonna be like that minus 14 like that minus 12. And thing is, when you're mastering a beat tape, you have to be thinking in terms of from song to song. So if I master this track around that minus 14 to minus 12. You know, let's say let's say minus 13 you wanted to making sure that all your other tracks are relative to that same loudness. Okay, so you got you kind of got to think that way. And when you're mastering, let's say like a dance track, whatever, many times you may want to even push it a little bit louder. But again, you got to be thinking about that listener when they're listening to your beat tape when they go to the next track, eyes one way louder than the other is just something that always keep in the back of your mind. OK, so now I understand with mastering, you know, I've been talking a lot, have been showing much I'm not gonna show tons about mastering. I'm still learning mastering, you know, like the actual in depth stuff of mastering way bore. But how I mastered this track is what we're gonna be doing is we're gonna be watching the meter first I'm gonna hit play. And so the integrated loudness is the loudness of your whole song case. When I hit play, it takes into account the intro which is typically quieter than like the chorus and that the verse and stuff like that and for example, the chorus is typically louder than the versus well and, you know, then you have your outro, which is also kind of quiet. So, for example, if your actual chorus goes, you know loud and then you'll you go truly a quieter part like That's totally fine. It's just taking into account the overall song, and it takes like an average of that song. Okay, so as we are looking at the integrated loudness, which is the average of the overall song and you're really not going to see your you know your true integrated loudness and tell maybe 45 seconds one minute into that song until you know it's past that intro, it's past. That first course has passed that first or second verse already kind of thing. Ah, but I'm also gonna be referencing the short term, and I believe this is like the three second one again. You have the momentary the short term like the integrated. When I talked to you on that, the Steinberg website just kind of, you know, quickly talking to you about that. So what I'm trying to say is, yes, Our goal. Let's just say our goal is like that minus 14 or whatever. Okay, I'm gonna keep referencing my short term. Now, if my short term is going to like this a minus nine at certain times again, it's fine. But your overall goal is just seeking balance between song to song. It against Spotify is minus 14. So if you master loud of the minus 14 let's say minus 12 it is gonna turn it down. It doesn't mean it's bad. It just means that you chose to master your music a little bit louder cause maybe you found that it benefited Your album came to be your type of genre or whatever. Okay, so let's get into, uh, checking on some numbers. I'm gonna hit space bar. We're gonna play the song, and we're gonna check out the meter. Okay. So, again, this is the intro, you know? So we're quiet, which is totally fine. Once we go into the chorus, you'll see that our numbers are going to start getting louder. Okay? So again, you don't minus 11 ish. Bring this meter over here, watch the playlist Okay, so right now we're just in the verse, we're gonna work our way up into the chorus, okay? And then we'll stop. So I mastered this track around minus 12 ish. But if you listen, that the overall balance, you know, I find it's really clean really tight. Okay, we're gonna add an instrument, and then this is our chorus here. So, as you can see, it's getting louder. So minus 10. At this moment, integrated loudness is around. That minus 12. And now we're into our chorus. Okay, We'll play and tall. A bit of this kind of breakdown here. Let's watch the short term. The short term is gonna come down quite a bit, but are integrated is still kind of average. Again, it's gonna break down again. So, as you can see, you know, we're gonna song up quiet. There are numbers dropped quite a bit. We'll get back into the chorus, and I just brings back up that loudness again. Okay, Okay. So again, just to kind of share with you how to use this meter and how to look at it will come back to the meter and reference it at the end as Well, just to share, you know, the kind of final closing thoughts. But that's kind of how I would use, you know, allowed this meter. I'm just kind of referencing in terms of, like, the loudness of the track again. It's okay if your song goes louder at certain times. But if your overall goals that that minus 14 in this case, you know, I think I master this tractor, that kind of more like minus 12 ish. Ah, but again, it's whatever your goal is. Whatever you feel that at that time your overall album, what is your what do you feel? The loudness number is good for your track. Um, And again, this was kind of a dance track. I just found that it benefited from being just a little bit louder. So now let's just walk through our plug ins here, Okay? So the first plug in is this deep blue glitch. This is actually not a mastering plug in its a manipulation plugging. Okay, So you're able to do like, a tape stop and all these different things. This is actually a free plug in. He has a free and a paid version. The version one is actually free. The version two is paid. If you would like to check it out, it's called Deep Blue Glitch by ill formed dot warg. So now what I did for this and I'll show you just quickly. So if we go to the very intro of the song, she's right here and I'm holding on Control, right click and holding. It's this automation clipper here. So what I did was I actually automated the mixed knob, so I highlighted the area, but holding on control and left, click and holding. And then I came here to the mix knob. So what I did was actually turned it down first, right? Clicked. Create the automation clip and you'll see that it creates this. Ah, and because they created it when it was off. That means that the plug ins always gonna be off until they turn it on. And that's what I wanted. I only wanted this plug in to turn on when I want, because it's a very aggressive plug in be able to do, you know, manipulation two very, very extreme, you know, to an extreme. So let's just listen to a, you know, just one time here quickly. Maybe once or twice. I'll play it from here on, as you can see, you know, the mixed up. So right now it's off. And as it goes to eight, you'll see it turns on instantly. And so I play here and you'll see that we have seven, which is the Gator nine, which is the stretcher and then six, which is the crusher. Okay, so, you know, pretty cool. You guys can check out that plug in again. It's not a mastering plug in, but I put it on the master toe, manipulate the whole track. I found that was a pretty cool intro. I use it quite often. Like you know what? They'll be like the tapes stop or something like that. The next 1,000,000,000 we're gonna be talking about is the multi band compressor. Now, just load up the fruity a pair of the fruity multi bank compressor. Okay, so this is the one that comes with that full studio. So now just a comparison. You know, we have this multi ben compressor, which is fine. It will do the job, but again, when you do use third party plug ins like fat filter and stuff. It's just so visual. You're also able, for example, I can make it legal big screen. So no, this is This looks really, really cool. Have hit space bar. So the audio sounds really weird. And the reason for that was because I opened up this mostly banned compressor and it's compressing very, very hard, so I'd have to dial back the settings. So let's just turn off for a second. Just do that one time just for you guys is to see, you know, you just kind of able to see, like, the frequency spectrum. And it's just it's a very, very nice plug and, like found filter is expensive. But I am telling you, it is worth it. Like they're very, very nice. So I just want to talk about just the multi band compressor that comes with a full studio, the fruity multi bank oppressor. So what happens is when you have these different bands, you're able to control the different areas of your actual song. Okay, so, for example, you can compress the low end and keep it separate from the mids with highs again. You you know, you're not gonna get like that bad pumping sound. If you're working with a vocal, you know, if you can work with the low end differently than, like the vocal and stuff like that. So right here is what's called a crossover, and you have to be careful with it. Because, for example, if I bring it to the left, you know, So what's happening is you're actually you now have, like, a hole in your audio spectrum like you're actually losing these frequencies and then the other ways. Also, you have to be careful because now you can actually be duplicating frequencies, which you know is skewing your original frequency response. So, for example, if I bring to the right, you know, so now you're actually having the same frequencies in the low end as well as in the mid band. Um, but with this one, it has a thick sticky. So in other words, I'll be moving the most down and it actually locks in right there. Okay, so that's just something to be aware of. This is the same thing with, like, speakers and stuff, too. When you ever tweeter and your work for what's called a crossover and they have fine tuned it to get, you know, the the best response that they felt, I guess, you know, as they were designing the speakers. It's not something you really have to be, you know, that you have to know about. But it's just something to be aware of when you are using, you know, a multi band compressor. And you have these different bands that you're creating thes crossovers. OK, so as you can see, this is the crossover point right here and right here. And it actually says crossover right there, as you can see. So if we look at this multi bank compressor, so right now, Officer, I didn't want to leave it. So right now we actually have four bands and four bands is probably the most I would go with. I typically work with other 3 to 4 bands, and the reason for that is because when you have more bands, that means that you have more bands to tweak and fine tune and kind of look after and, you know, he can get really, really overwhelming Now a both even compressor is a very, very dangerous and powerful tool. Okay, Because when you have mixed your track, you know you've You've tried to achieve a nice balance in a sense of your low and your mids in your highs. And now, when you goto actually compress your song with a multi bank compressor, for example, if your low end is compressing much more than your high end, you could be actually skewing that frequency response. So now maybe your track doesn't have enough base. So when we are working with these individual bands when we are compressing So, for example, if I clicked like the low end, I have the option to turn off and on, for example, and it's the same thing with, like, the fruity of multi band compressor, you have the option to turn it off and on. So if you are gonna be compressing these individual bands again, you can even sold them out. So, for example, if we all do like up here, okay, so, like the mid high is just so you can hear it better. So we'll listen. For example, we'll click on it. So when I turned the band often on Okay, so it is a little bit louder when the compressors on, but not much. Okay, so when I what I'm dialing in. My compression is not like that again. Each band you want to make sure A and B in a sense of often on, is it a fair volume comparison? Therefore, you're not skewing that frequency response. In other words, you know you're not gonna have less based now just because you ran it through a multi band compressor. The goal of the multi van compressor is it is just to achieve a nice balance out of that song without it's sucking the life out of it. Because again, if it was just a single band compressor of your kick drum your snare your base, they're always gonna be triggering this compressor. And you have to be your own quite gentle in the mastering stage. Where is a multi bank compressor would be much more aggressive on your settings and you could really open up a song. So that's what I want you to listen for. Uh, what I'm gonna do is I'm gonna turn this multi bank impressive often on, and what I want you to listen for is the high end. The high end really, really opened up. OK, so in other words, were able to hear more clarity into the master were able to hear the high hat a lot better . But the biggest thing is it sounds brighter, but no aggressive or no harsh. The biggest thing I can say is it just really opened up the track. So when I hit play, we're gonna turn often on. So when it's on your going to see all of the frequency spectrum, Okay, when it's off, you don't see anything. OK, so here we go. Right now. It's on right now. It'd be off. So here we go. So listen to the high end and listen to, like the clarity and how much it opened it up. So it's enabled. Disable it. So what they enabled master immediately became more exciting. It's more brighter, so it sounds a little bit dull. It's almost like, lacking a little bit. We'll play this intel about the chorus. Okay, now it is a little bit quieter, which is also skewing our judgment, but with the instruments you can hear that summer louder summer quieter and it's just not balanced with it enabled. So we've opened it up with allowed the music to breathe, and it just sounds more energetic, more engaging. Okay, especially once we get, like, the quieter parts I hear turned off. So with that enabled. Okay, so, again, just that multi band compressor really helped the high end really opened it up and just gave it more brightness, allowed the other instruments to have clarity. And again, what we're doing with the multi van compressor is it's a compressor. Right? So we're reducing the peaks. In other words, we're reducing the loud parts. We're bringing them in more consistent volume with the quieter parts, and that's why we're able to achieve this kind of balance sound. Okay, so, again, you don't want to push it to the point where you have, like, that big sausage. But in this case, I feel that the multi bank compressor benefited the track. It brought out the instruments, gave clarity, it gave more energy. And it's something that you're gonna have to play around with a lot. Okay, multi bank compressor. You could really screw up a song. So let's just hop into the next plug in. So this is now a single band compressor. Okay, So, as you can see, you know, my settings aren't super aggressive my thresholds minus 15. Uh, my ratios 1.24 My attack. I've opened it up a little bit many times in mastering on a single band compressor, especially. You want to have a little bit of a longer attack. And the reason for this is you know, you're allowing, you know, the kind of dynamics and you know the transients through, But you're just having more control over the song as a whole, and then my releases, you know, it's it's a little bit faster, so licious. Listen to this compressor. We are going to just look for how much gain reductions going on. It's very, very little Okay again, the biggest thing with mastering is it's just subtle when you are on an actual individual insert, when you're mixing the track like it's not rare for you to be using 4 to 1 or 8 to 1 ratio on like a vocal, for example, like 8 to 1 is a bit aggressive. But again, it's not rare within the industry to be applying that like a vocal, you know, depending on the effect you're trying to achieve, or depending on the recording. If it was badly recorded you just want more consistency out of vocal or whatever, but within mastering, you know you're not gonna be able to get away with that extreme of compression. And if you do like, for example, let's say we did put it like 6 to 1 or something like that. You are gonna have to put your ratio quite hot or so you're thresholds quite high to compensate for that aggressive ratio. OK, but as you can see, you know, I have quite a low ratio. You know, quite, You know, my threshold isn't super aggressive, so let's hit play. You're going to see him on Lee getting like one decibel of gain reduction like Max K. So we listen from like the chorus here again in the chorus. They're going to get the most gain reduction because typically it's allowed is part of the song. Just watch this gain reduction meter so very, very subtle, right? But again, what I'm doing is I'm just lowering the loud parts. Keep yet more consistent with quieter parts so often on. Just listen to the balance of the song. It was a little quieter, a little bit fuller, so even though it's not compressing. I'm still bring it up a little bit. Loudness. Now we go back into the chorus, Cancel trend often on. So I'm just listening for the balance. Like, listen to the quiet. Sounds like the symbol. The hi hats when I enable it looks just like the balance. Okay, we'll go back to the chorus. Okay, So isn't it the hi hats? The symbols. Okay, so with it enabled the symbols just kind of floored more naturally. Like they came up in volume a little bit, but they weren't overpowering. It just made the song as a whole just kind of blend better, right? You know, all those quiet parts that we couldn't really hear super clear. He just brought it up a little bit more. And, like, really, only one decibel of gain reduction achieved that so super, super powerful when things shared is quickly. Now, you know, if you don't have, you know, these third party plug ins, I understand. But again, eventually, you know, for workflow for convenience. Um, they're just so awesome. Okay. Fat filter has been some plug ins that I've used for so long. I actually bought the first version of these plug ins and, you know, it was quite expensive. But I've used them for the past seven years, and I haven't even upgraded to like their newer versions. I think their own, like version three right now, like the e que and, like, version two of this compressor. But I didn't really see a need to upgrade because the original tools were so powerful. Okay, so if you were to purchase them now you're going to get like, they know the new features and stuff like that, but extremely powerful tools. But what I wanted I wanted to share with you is this actually has what's called a filter. OK, so in other words, what I'm telling this compressor the single band compressor again, it's like the kick drum. If it goes over, it's going to reduce, even like the high hat. Okay, that's how a single bank impressive works. Any audio that goes over that threshold is going to reduce the overall, the whole the whole song. Okay, So again, if the kick drum goes over, it reduces like the hi hats. K reduces all the audio. So what I've done is I've told the compressor, saying that anything under 350 hertz. I don't want you to listen to it. I want you to listen to, like, the mids to the highs. And the reason for that is because as I mentioned that, kick your base, your snare are typically your loudest sounds within your mix, and therefore they're going to constantly be triggering this compressor unnecessarily in the midst of the highs. Your dynamics aren't as extreme, Okay, So in other words, that, yes, you're gonna have some loud and quiet parts. But because of that, your compressor is gonna be able to react much were naturally. So in other words, I'll be able to dial in a little bit more extreme settings, but still get a very, very natural and transparent sound out of the single band compressor. Now, if you are using, like, let's say, the fruity limiter or something like that that comes with Devil Studio and you don't have this feature, you may just have to be quite subtle, uh, with your EQ U S air with your compressor. So, for example, like right now, I have at 1.24 you might have to put this to like 1.1 you know, or 1.7 or something like that. And maybe open up the attack a little bit to get a similar sound out of the compressor. But again, you know, just tools like this help tons on. I'm sorry if you don't have them, but this is how the master the track just to give you a real world perspective. Now, I just want to talk about e que here just quickly. Okay, So again, if you are mixing and mastering your own music, so when you mix the track, it's a huge try to achieve the balance. You know the frequency balance in a sense of your low end your mids in your highs and you know your overall volume balance. So when we're dealing with e que in mastering and you've mixed your own track, you have to ask yourself like why are you even using e que in the first place? Like do you even have a need to use eq you? Because really, it's like you've just makes the track. You've tried to achieve that perfect balance, and therefore you should be happy with it. So do you even need to use e que? Um, Now, the thing is, if you're sending off your mix to a mastering engineer, that's totally different. Like what's gonna happen is they're gonna listen to your track for the first time, and right away they may hear like, Oh, maybe your track needs and brightness or oh, maybe, ah, the basis too much whatever. So you know my big to bring on e que. Dial it back a little bit or boost to a little bit or whatever, right? So it's because they have fresh 30 years. They never heard your track before their minds. That's gonna be different. But you yourself, you've mixed it. You know, again, Do you have a need to use EQ you? And if you do, that's totally fine. But I'm just trying to get across to you. Why Air Using EQ You in mastering if you've just makes your own track Now here's an example . Let's say you have mixture Track. Now let's see. Brought in a reference track again. A reference track is a commercial track that you know that has been professionally mixed and mastered. You bring it into like, let's say, fl studio here and you play it um in comparison to your master. Okay, so you listen to their master, then you listen to what you're trying to achieve. And maybe right away, you hear? Oh, you know, they have more brightness in their song compared to mine. So instead of me coming to each individual, insert opening up in e Q. And you know, let's say we come here and, like, boost like a high shelf. So right now, let's just say we go like default setting, for example. So, you know, imagine we have to come to each insert and have a high shelf. So that would be really, really annoying, right? So to make our lives easier, you know, we could just go to the actual master opened up in e Q. And if I just get going default settings, you could just simply just come here have, like, a high shelf and just boost really, really gently. So, for example, if I zoom into a more soon in scale, let's say we go to like, let's say, three K and again, it's like the nice thing with these plug ins to like you can just like three K stuff like that. Um, so as you can see, you know, now we boosted all our whole song. You know, all the instruments instead of doing each one. So, for example, that's an example where I may use e que here. So let's go back to what I originally did. OK, so if we look closely at this So what I did was, you know, I kind of cut something like the low mids. Many times your track can become kind of muddy in here. They just found that. So I just kind of ducked a little bit. I kind of lowered this. Maybe I found was a little bit harsh just to kind of, you know, making me make the whole song a little bit smoother sounding. And then you can also see I was quite aggressive here. Um, I will play this for you on and off the just for you to hear it. But I rolled off the low end, so I must have thought that maybe the low end was a little bit too rumbly. I just wanted to kind of tighten it up. Now you'll notice I didn't use a low cut. Que eso a local actually filters out the low end really, really cuts, and I didn't want that. I just wanted to roll it off just to kind of control it. And so I just used a low shelf again, you know, minus no. So 2.75 decibels is quite a bit in mastering, but that's just what I went with. Now, if we listen to this master with the EQ you on and off, it still has base and stuff like that. Okay, It's just, you know, I just kind of controlled it a little bit more. So this is listen to the eq you on and off and let's just hear if you could even hear a difference. And okay, so with it off, I hear it's a little bit muddy like, you know, what the baseline and stuff with it enabled. I find that it's a little bit cleaner sounding Okay, so, you know, very, very subtle. But I do feel that it just kind of cleaned up the mix just a little bit, and it's just really, really subtle. So again, like half a decibel 0.35 you know, really, really subtle. And then again, I compensated for my reduction. Okay, really, really important. So now I want to talk to you about the Clipper. Okay, So again, a clipper is like a limiter, except that has zero attack and zero release. So in other words, it shaves off that peak rate away and you can't hear it. Obviously, if you push it too much, you know? Yeah, you're going to hear this distortion. But the power of a clipper is it literally clips off that peak and you're able to get more loudness. You know, it is a form of distortion. So many times you can actually get your kick, drums and stuff hitting harder. You can get more balance out of your music because you're literally shaving off these peaks . You're bringing up the quieter parts of the song and you're getting a nice balance again. If I play this for you, you're going to see my gain reduction is very, very subtle. I'm getting like, 1 to 2 decibels of gain reduction. In addition, you know why I like this Clippers so much is because you can dial in like more analog to a more digital kind of sound. Digital distortions really, really bad sounding. But analog has like a nice sound. But when it's to round, you know, sometimes you can kind of lose it that punch a little bit. So again you can kind of dial it in. You could also copy this to a different state. Let's typically be you can, you know, kind of adjust it differently. And you kind of switching between them and kind of here and again. You just want to compensate for that loudness, and it's just really be powerful. So when a hit play here, we're gonna be looking at the gain reduction. Okay, We're going to see you know what? We're actually reducing our peaks and just to see our gain reduction just to share with you , You know, I'm not doing tons of processing here, but as you can see, when I went from the multi band compressor, you know, we had a boat, you know, 1 to 2 decibels of gain reduction going on. You know, in all these different bands in the single bank compressor, we had one decibel of gain reduction. Okay, so we're using all these different kind of layers, and it's gonna end up to our final product. And now again, on the Clipper. We are again kind of chopping off those peaks, getting a more balanced, you know, and Mawr controlled master again. Kind of reducing that the dynamics in a sense of allowed to the quiet parts. But, you know, the end result is, you know, if you listen on here, Buzz, or if you listen and like, let's say, a car system, whatever again, You know, you don't have this kick drum, which is way lower than than like, the rest of the song. You just have this nice, tight, clean master. So it's it play here. Let's check out the gain reduction. Okay, again, this is the chorus. So is, like, allowed this part of the song once it goes into, like, verse two here again, we'll check it out. Okay, so it is a little bit less. It's mostly like that class and that kick, which is kind of triggering it. So again, you know, you may not be able to hear these. You know these tools, It does take time to acquire your ear to hear that even now, as I was listening to that, you know, I kind of heard like the clap the that kind of kind of suck the life of the clock a little bit. But as you listen to the song as a holy really don't notice it too much. Now, the biggest thing I want to share with you is if you look at the limiter, my limiter has no gain reduction going on at all. Okay, so this isn't again, actually, no gain reduction going on on the limiter at all. Now, this is the deceiving thing. So when you watched YouTube tutorials and stuff like that, they're always gonna be telling you all on your limiter. You wanna have, you know, typically about 2 to 3 decibels of gain reduction night. That's really, really common for these tutorials to tell you now, the thing is, it's really, really dangerous. And that's because it's all in reference to your actual song. And so what I mean by that is because we have already done times of processing toe our song . So, as you can see, you know, have actually mastered this song quite loud, okay? And because it's this loud, it's like, Why am I? Why do we need to limit it? Right? So the whole point of a limiter is to increase, You know the volume of your music. But if my music is already loud, then I don't need to have any gain reduction on this limiter. And now the thing is a clipper again. I told you, a clipper is like a limiter, except that has, like zero attack and zero released. So really, you know, maybe it could have dial this back just a little bit and it could have balanced my limiting and clipping kind of together. So in other word
21. 8-4 Exporting Audio For Mixing And Mastering: Okay, So in this video, I'm gonna be talking to you. You know, you're mixed levels as well as your mastery levels and as well as if you're gonna be working with the mastering engineer. So for myself, my first album, I actually got it professionally mastered. I just found that my skills at the moment we're not at that. You know that level. And this is, like, 10 years ago. You know, at the moment that I'm making this course, it was actually for my album. We've only just met. So I got that one professionally mastered. There is a cool experience. Ah, it was $75 a song. And I only had six songs on, um, my album. So you know, But anyways, you know, just to kind of give you a reference point. All nine mastering. You know, you build to find an online mastering engineer, probably for cheaper, but anyway, so when you go to mix your music, okay, so you're going to get different answers from different mastering engineers as well as different, like you don't different articles, different videos. But typically what you will find is that the mastering engineer is asking for a mix with a peak going no louder. Then minus three or minus six. I personally would just say go for minus six. That way, if it goes well, remind us six. You know, it's not that big of a deal. So the whole idea behind this is what's called headroom. Okay, So in other words, this mastering engineer does not want you to have a distorted signal being sent to them. And that's the reason why they say, you know, put it to minus six. That way, they have total playroom. Okay, so when you export it when you send it to them, there is no distorted audio again distortion is, you know, in music production or in digital audio it zero. Okay, so anything that goes over zero is clipping okay. Again, If you like that sine wave and it goes over zero, it starts to become more like a square wave, depending on how aggressive you've pushed it over zero. So that's why they say, let's say, minus six. Okay. So as you're actually mixing your track, okay, so what you would do in a really cool thing? NFL studios. You could hold on control and shift you could highly everything. And you could, like, you know, if I left click and hold, you could just turn him down if you hold down control, you confined to know a little bit more, So you can simply just, like, you know, turned out all the feeders, just for example. Okay. You know, in case you had maybe your audio going over minus six, whatever. But again, it doesn't matter for goes over minus six. The thing is, they just don't want to go over zero. Okay, So when you're mixing your music, you know your gold is your No, no, louder. You know, like your peak is no loud of the minus six. Okay, Another thing that also say to you is on your mastering chain. They don't want anything on here case. In other words, you could just turn it off here, Um, or you can just kind of turn off the plug ins. Now, let's say you you actually did mix into a single band compressor like like I suggested to you. And also one thing. Imagine you had you know, this plugging on here, you would want to keep this on because this is a part of like your actual mixes a part of how your song sounds they're talking more about, you know, no compression, no e que. And stuff like that. They wanna have control over that stuff. But like I told you, when you're mixing your music, if you're sending it into a compressor, you know, again this is gonna help you mix is gonna help you get, like, that balance sound. Now, the reason why they don't want you to have a compressor and stuff on your masters because they feel that, you know, maybe you don't really know what you're doing. You can be over compressing your actual music, and because of that, you know, they just don't want that. So what you can do is like, let's say you have mixed into your compressor and again on my settings or my settings are really, really subtle. Okay, so I'm just using it to help my volumes. So you know, one instruments a little too louder wants to quiet. It's just kind of balancing that for me. Just just gently like, Don't don't get me wrong. I still have to go and actually makes the song. It just makes it a little bit easier now. What you can do is you can actually export one version for the mastering engineer with and without your setting. So in other words, you can just kind of click this disabled all your effects exported, send them that one, and then you could also export it with your, you know, with your effects on here. And you could say this is kind of what I was going for. And, you know, they can kind of listen and kind of respect what you wanted, and they'll make their professional judgment. Okay, so that's pretty much it in a sense of levels when it comes to mixing case that minus six, if you do have a compressor on here, you know, you could just send them kind of both versions and they can play around with it. And now, in terms of mastering, if you're gonna master your own music again, you know this song I I think I pushed. It may be just a little too hot, but I did like how it sounded a lot. I thought it sounded, ah, very balanced, very energetic, especially for being a dance track. You know, it's just full of emotion. Very, very tight. You can hear all the instruments Very good. I don't feel I pushed it too hard. Maybe once it got to certain parts of the of the song like, you know what? It's building up to that course. Maybe got a little bit, maybe two over processed. But when you actually listen to the song without, like, looking at a visual, you don't really think that way too much because a lot of times like your eyes can lie to you, too, when you're actually just listening to a song. And just in general, you know, typically you enjoy it more and you don't really focus so much like these visual kind of stuff. But what I was going to say there is in certain parts of your song, you know, like So let's say in your verse, you know all your settings air good and then it goes into the chorus, and now it's like who may be in processing a little bit too heavy here. What you can do is you know, you can automate stuff so you could automate, you know, to have less ratio, or you could just automate your master volume. So, for example, in this case, you would have to open up a plug in. For example, you can use any plug in, and I typically would use, like, let's say, like the fruit I'd actually use. The fruity limiter can actually just use this as a gain plug in. So what I do that I make sure the ceiling is all the way up to the top? Okay. And then let's say in the chorus, you know, I would highlight the chorus area. I would right click the gain knob, go create animation clip, and then maybe only in the chorus. I would reduce it by maybe one decibel or something. Okay? And what that's going to do is it's actually going to reduce the audio signal by one decibel. So, in other words, you all your compression settings, you know, it's not gonna be compressing as hard. Um, you know, So it's kind of cool, like by thinking this way, like you have total flexibility of Would you? You know, when you're in like the drivers, see okay, but in terms of mastering, you know, so like Spotify and stuff. Currently it's like minus 14. This number can always change later on. But if you do choose to master Lau to the minus 14 again, it's not a problem. But you just have to make a conscious decision that, um, you know, by going louder do you feel that the actual music is more balanced to feel it has more punch? Or do you feel that when it's at minus 14 that your overall you know, master actually sounds really, really good? OK, and then again, you know, if it if you did, master the same minus 12 and then it goes to Spotify, yes, they are going to turn it down. But the reason why they turn it down is just so that from one track from a different artist to your track, is it. It's a consistent volume, just like I was explaining to you when I'm mastering a beat tape from track to track is just a consistent volume. So with that said, uh, at the end of the day, it's all about, you know, how does your music sound? And then, if you're mastering a B tape, you know, you gotta pick a number and then you want a reference that for all your other tracks. Therefore, you know, you're getting with the same loudness, the same balance and everything like that. Now, let's just talk about exporting, Okay? So when you goto actually export your song, so imagine right now it's done. So you've gotten, like, you know, um, all your plug ins, like you're mastering chain and everything. I like your limiter. You take your loudness, you're happy with it. OK, so you go to file, you go to export, and it doesn't matter which one you select. The export setting is always gonna be there, so I'm gonna select it. Ah, to save it. Just to hear this for now. And so now up here, you know, you can select you don't go on a wave and MP three. So when you are exporting to, let's say online distribution, that's a Spotify. So many times you have to go through an online distributors such as like, Destro, kid. Let us use them for an example. But it's like CD baby to encore. There's, like many other ones out there now as well. There's actually tons. Uh, make sure you do reviews before you proceed. At the moment, I use Destro, kid. They've been pretty good. Ah, for me. So anyway, so wave is what's called like lossless. In other words, this is, like very high quality. F l A C is also lossless. However, it also kind of compresses the file. So is the father. It's a smaller file size, but it's what's called lossless. So in other words, from wave to MP three, so wave means that it's a high quality file. Okay, MP three means that in order to make the final size smaller, it actually reduces the data inside the files. So, other words that actually removes frequency content out of the actual file. Uh, and because of that, your final sizes smaller. But you start to get artifacts. I will create a separate video in our digital audio section, and I'll explain these audio containers and stuff a little bit more depth. Okay, But to keep it simple, let's just say we're gonna wave. You want to go 16 bit? Okay, so we have 16 bit right here. Um, the re sampling. I put it to 5 12 I leave high quality on on everything you see here. This is how I have it set up. Okay. Now, one thing I want to talk about is dither, so I don't want to get too intense with tethering, But whenever you are changing bit depth. So, for example, your music program, your Daw, you're, um isn't what's called 32 bit floating point. So when you export it, we actually exported, like, a 16 bit. So whatever, you're changed. Bit death right here. You want to dither? And this is this to do with quantum ization air. You guys can read into this, but just to keep it simple, if you change bit depth quant ties and as how simple it is now if you have a limiter which allows you to do together, um, you know it's up to you. If you want to use the dither from the plug in, you could do that. Or if you want to use the dinner from FL Studio, I would do one or the other. Don't do both. What it does is it just put a little bit of noise at the very, very quietest parts of your song to fix this quantum ization air. Um, but again, it's with super super quiet parts of your song on, you'll only hear it in like the super quiet parts of your song. So, for example, let's say one from Chorus broke down to like, let's say, a breakdown, but is only like, maybe some white always going on or like, you know, just like some kind of percussion whatever. And if you turn the volume up like really, really loud like I mean extremely loud, you're probably going to hear like this like little white noise sound the very, very bottom. Ah, but that's just it's just how this audio science works case. So we apply dither to prevent this quantity ization air. And again, this is getting very, very technical in the sense of the actual audio science can. So to keep it simple. If you're changing bit depth, apply dither and you're done an export. That's it. OK, don't even think more to it now. Just to talk quickly, though, is with deter on, you know, if these third party plug ins, they also have differently dither shapes like, uh, let's just look at like the proell here, but since we're on this window, you know, this is the settings would literally just hit start and I've done now again. You know, if you want to be focusing on like the Outro, you know, you could just send, you know, pattern that doesn't have any notes, Whatever you just extend it. And then that determines how long your song is. NFL studio. But let's quickly look at, like, the dither here. All right? So, as you can see, like, noise shaping, we have, like, basic, often optimized waited, I believe, like, other veces even have, like, other shapes and stuff Again, it's is such a small thing, so don't worry about it too much. Okay, so that's kind of the exporting process. So I talked to you both export settings. You know, if you're gonna send it off for mastering again, you know, you're not gonna have, like, a limiter on it and stuff like that, you're going to mix. It's like minus six. You'd export it to their specifications so many times, they're gonna ask you like a 24 bit 44.1. If we have 10 here, this brings you up your settings and Apple Studio. You're gonna go audio, so it's like your sample rates. So 44.1 kilohertz or like 48 k So in the film industry, 24 bit 48 K Is that the standard audio? You know, your typical CD, you know, like CDs that we listen to for many, many years is 16 bit 4 to 4.1. So let's see equality. It's very, very high quality. The difference between 16 bit and 24 bit is what's called like the noise floor. So in other words, when you go to record, the noise floor becomes much quieter compared to like your audio signal. That's the only difference. Okay, but the trade off to that is that your file size becomes larger. The same thing here. If you selected like to 48 K or even like Mawr, your final size just becomes larger. So, you know, again, that's just that's more like the science, that stuff behind audio. But that's it for like, you know the mixing process. If you're gonna mix it yourself. If you're gonna master it. One thing I'll talk about quickly. Sorry if you are gonna mix it yourself. So typically I do mix the light that minus six kids and then what I do is I would actually apply like, Ah, Freddy limiter here, for example. And I would use this for game case. So I first start by increasing my gain, and I would look into, like, my limiter, okay? And I'm also gonna be looking at my meter, so I kind of do this hand in hand. So in other words, sorry, I've always these windows. I just kind of kind of make it simple for you. So, in other words, this is before I start applying any effects so I would have my compressor here. Okay? Because again, I had this compressor going on as I was mixing into it. Now, whether you decide to put ah, the compressor before or after, it's up to you because there is a difference. You know, like, if I had the limiter before and I know this like the limiter, but I'm using as a gain plug in now, it's important that whatever plugging you use just gives you transparent gain when you increase or decrease the volume. Okay. So, in other words, this plug in is not doing anything to my audio. I'm just using it just simply for volume boost or reduction. Okay, Now, again if I'm gonna push him a middle school school real. And I'm just going to say game just to keep this simple. Okay, So if we have this game plug in before the compressor, and if we increase it by, let's say, like, you know, six decibels, we've actually increased the level going into that compressor. Now, we're going to be compressing our audio signal even more if I have it afterwards. Now, the, uh, the boost is happening afterwards. So again, it's all up to you. But typically, I would kind of start fresh again. So once they've actually mixed my music, I would have a gain plug in right here and now. What I'm gonna do is I'm going to boost the volume of my song, and I'm gonna push it into the limiter. Okay, so right now all I have enabled is my gain. Um, I will have usually turned off the compressor to Okay, so I have my gain pushing the volume into my limiter. Now, I'm also referencing the loudness meter. Now again, whatever your goal is, if you're trying to go off like that minus 14 minus 12. So what I'll do is I'll boost the gain, watch the limiter to see how much gain reductions going on and then all reference it to the meter. And this will let me know. Uh, you know where I'm at? In a sense of, you know, am I gonna have to apply some more compression, Some clipping. Ah, you know, what do I have to do to achieve the loudness without it, You know, hitting this limiter, like, you know, eight decibels or whatever, Right? So that's kind of like where I start when I'm actually kind of working on a song so I'll actually, once they actually want some actually done mixing my own song, I will take on a gain plug in, I'll boost the level. And the thing is, with digital audio, you can even actually that reduce the level here. So imagine you have mixed it. And it was too loud. You could even come here, open up a plug in and actually reduce the volume to, uh, you know, you could do that. Um, just to kind of share these things with you. So in other words, I'm pushing the volume into the limiter. I'm watching. How much gain reductions going on, and then I'm referencing in that to my loudness meter. And so if I'm not able to achieve the loudness I want and I'm getting way too much gain reduction that I'm gonna have to start applying, you know, more heavy compression, Uh, just to get, like, that same kind of loudness. Um, and you get us this kind like a reference point. That's kind of how we start flowing. Ah, And then as you start to apply compression and like a multi van compressor even like e que So depending on your EQ, you like, you know, different frequencies give you different. Loudness is, you know, if you're pushed more here, you know it, sort. It might make your music a little bit more harsh, but it could sound a little bit louder again. This is like the science of audio. Ah, and then, you know, I typically always have, like, this clipper. Um, and I typically do blend the Clipper with the limiter, so it kind of gets some gain reduction going on with that clipper and then a little bit of gain reduction going on with this limiter. But again, as you can see, there's a lot of information to understand with mastering. There's a lot to talk about. Um, but I just try to break it down in simple terms for you, so I hope that helps Hope it gets your masters up and running again. You guys can always reach out and ask me questions, okay?
22. 9-1 All About Sounds In Music Production: Okay, So in this video, we're gonna be talking about your sounds, What you should be thinking about when you're gonna be buying sounds. What kind of sounds do you want? Um, just the different things when it comes to sounds. So let's talk about sounds K. So with sounds, you have what's called one shot sounds. There's a, uh, your one shot samples. So these air like your one shot kick, drums, claps, snares, high hats, various other percussion elements. Ah, and to purchase thes, you can purchase them through. You know, many different websites. You know, there's lots of different websites where you can purchase sounds from So you want to be careful because you do not want what's called construction kits care. I'm just gonna put a big X here. Okay. Ah, construction kit essentially is someone else who has created loops and created ah song on What they do is they break that song into loops on and you know, they're pretty much allowing you to use their music royalty free like a construction kit. And you have to be very, very careful, because when you do by sounds, um, sometimes it's hard to differentiate. So You have to make sure that you are buying the one shot samples que When it comes to your one shot sounds, you want at least 16 bit 44.1 kilohertz and its wave so 16 bit. And this is ah, but wavering. Here, kiss. That is what's called the container the audio container can. So you want at least 16 bit 44.1 and wave, um, or the industry standard Pretty much is like 24 bit. And then many times it could be even 44.1 or just 48 k kilohertz. So now here's the thing. Now I explain to you that 16. 44.1 is CD quality. That has been the standard for however many years that we've had CDs now with digital audio were able to achieve, you know, higher resolution right here. Um, and just to keep it simple, so your bit is just like your noise floor. Okay, So what that means is, when you record audio, you're able to record, and that noise floor is always, like, you know, down low, okay? And what if you go down to, like, a lower bits? I could say for better eight bit. If you go to record, you're going to start hearing like no, this noise, this hiss because all equipment, it has noise. Okay? And when you have a bigger bit depth, it just pushes that noise for even lower. Okay, So for example, you know, it just pushes that noise floor even a little bit lower, and it allows you to record without what you don't with even less noise. But at the end of the day, typically your music is released in this format. So even if you buy sounds in this 24 bit 48 k at the end of the day, your music typically does get exported to this on. And then even when it goes to streaming platforms like Spotify iTunes, it even goes to MP three. Okay, so what I'm trying to say is, yes. You know, um, it's important to understand, Like what these numbers mean and stuff. But at the end of the day, uh, I honestly just suggest this to all my students care. So you was 1 16 44.1 You're good to go now. Another thing to talk about with your sounds is you want variety. Okay, that's the key to being on Awesome. Producer is variety. You do not need to have tons of sounds. You need to have hundreds of gigabytes of sounds. I think I only have like 10 to 20 gigabytes sounds I've been producing for over 10 years now, just to give you an idea, my whole goal behind. You know, when I purchased sounds without wanted Variety. So, for example, long tailed kicks, short tailed kicks, different types of snares, claps, tambourines, shakers, Bongo's You know, you kind of see where I'm going with that. So the thing is with audio, as long as you have a solid foundation of high quality sounds, it's really easy to manipulate these sounds to make other sounds case. So you know, through e que compression reverb delay whatever taped affect you whatever type of effect you want, you're able to achieve different sounds, but the whole goal is high quality. If you have high quality from the start, it makes making a beat way easier. Okay, so now I want to talk to you about organizing your sounds, and then we'll walk through an fo studio and I share with you to some of my sounds. Something like my sound kits just to kind of get you going. Okay, so we'll change. Different color here. Go blue. So I'm just going to say your music folder. Now, I also do have a separate course on this, and it's called a specific music production folder. Okay, you just search that into Google and I break down my own music production folder, step by step, and I explained to you why I've set it up like this, like, way more in depth over my years of producing music. Um, my music folder has always been really tricky to ah find a really versatile way. Where's organized. I don't have missing files. In all honesty with FL Studio, it's really easy to achieve missing files. And finally, I just kind of discovered a way. You know, over the 10 years of producing, I think is probably five years in. I just set up my music folder, tow away where I'm super organized. I don't have to worry about missing files or anything. It's just super simple. Okay, So again, for more information on that is called a specific music production folder. I break it all down step by step in that course, I want to talk to you about my actual sound kits folder. Okay, so in in seven Music folder, you know, I'd have, like, albums, beat tapes If I work with clients, um, and then sounds can So inside my actual music folder, I create a folder, you know, just kind of not really great at drawing. But, you know, this would be like a little folder, you know, like in in windows or whatever. So here's your folder, and it is sounds K so I actually create a folder, and it's called sounds now, inside of sounds, I create two folders. Okay, I create 14 actually label that drum kits. And I also, um, have one. And it's for my v ST's so v ST's and I don't worry in the India V ST's, I don't worry about organizing it in a sense of all these air effects and these air instruments, I just put all my via season here. Okay, Now what I do do in here is I create folders preventer. Okay. So, for example, um, exclusive audio is an awesome company. Are like a lot. So, for example, in like drunk, it's here. I would literally create a folder called Exclusive So Exclusive, uh, audio care. Now, if I purchase any kids from exclusive audio, it literally goes into that folder. And then you know this, you know, like this folder and then click this folder. So, you know, whatever title of that product is called, I literally just drag it in there. It's good to go. Same thing with V ST's, for example, if I work with, like, Fab filter like fat filter a lot so I would literally just go like fat filter and anything I n e v ST's I install simply just go into this folder and then I I actually include this into some type of cloud service. So something like dropbox care and, you know you could use any cloud service, whether it be things like box, like sugar sync. Uh, you know, Dropbox is what I use. Okay, so that's kind of how I organize it. It's really important that you do organize it this way because this folder right here, I'll just select a different color. So this folder right here, this is fl studio. Uh, actually, fl studio and then browser. Okay, so this is a browser, and I'll explain to you what the browser is in a second. The browser is like that side windows. So this is FL Studio. It's that little window on, like the side. All right, here. And this right here is where you store all your sounds. Now, this folder right here, you can simply just drag it and drop it right into there. And you're good to go. If you hit f 10 and go into settings, you're able to see, like, the folders which I'll share with you in just a second here. Okay, So inside efforts Did you? If you have 10 that brings each year settings or you could just come up here to options and select any of these. As you can see, the shortcut is F 10. Right? So I'm just gonna have 10. And if you go to file, Okay. So file is where you can access all of your browser extra search folders. So, like I was saying, you could just simply drag that folder into the browser. As you can see, this is the browser on the left right here to simply drop that sounds folder or drum kits folder into here. And then it's just gonna get added right here. Okay, so let's just go through a couple sounds of you know, how I have laid this out. So as you can see, I labeled it drum kits. And these are just the different vendors that I have. As you can see, I don't have tons of sounds, but if we click into, like, let's say, exclusive audio, you know, I have 1234 kits by them. I had, like, this dance kit sounds a next season. Really cool company. Now, these kids are quite old, you know, there are tons of new sounds out there nowadays. Ah, these are just, you know, either producers that I connected with or companies that I liked a lot just over the years , you know, um, modern beats in all honesty, I didn't like their sounds. I ended up complaining that sending a complaint, email and they ended up just saying, like, here, you could just keep the sounds and ended up liking. Actually, these two products I purchased a couple from them and I was just like Yeah, so and that's just my recommendation. I really like sounds in HD an exclusive audio. It all depends on the type of music you are creating the. Okay, So, you know, if I'm gonna be creating more like hip hop urban, uh, these sound kits with which I'm sharing with you are really, really good for dance music. There's a company called, um, vengeance sounds, and it's actually on re effects. So r e f x dot com I believe that they somehow have an agreement now on and all of the sounds air on there and they make extremely high quality dance music sounds. So let's just go through a couple of, you know, kits that I have. So, for example, when I talked to you about, you know, high quality sounds, you're gonna listen to some of the drums and let the collapse and you'll hear it off the start. It's like, OK, yeah, these air nice sounds, right. Therefore, it's a nice foundation. It really easy to make a high quality be if you have high quality sounds. So this is an or Dominy Okay, there. Ah, really popular hip hop group. Um and this is part one of my favorite drum kits. So this is by an or Dominy. This is a very, very first edition. They have, like, a couple of additions. Um, you don't want to see I like the 1st 1 out of all of them, so let's just check out the kicks here, okay? So just a couple of them. So, actually, let's just go file what is go new, and I'll just load in some drums and we can just kind of built a little drunk and more just kind of replacing drums. So let's just lower the temple here a little bit. And, for example, at this one. Okay, So sometimes sounds go a little bit weird depending on what vendor you're working with. So in this case, you can hear it's like repeating. And even when I click and actually click on it, look in the top left here, you have to look quick. You'll see two red lines. Okay, we see that was two red lines. So that just means that the way how this sound was programmed Now, sometimes when producers are you even sound designers are working with sounds how they export the sound. Sometimes it can be a little bit weird in different music programs. Okay? And this is all house. It was like Luke points and regions and, you know, stuff like that. So I'm going to share with you just right now how to fix it. So as you can see right now, this is what's happening. So first of all, I have to disable Lu Lieu points, but if I play it, it's still gonna be like a little clique. Okay? I was like, Well, that's not the sound. So you had to come here to the wrench. You're going to sit at the piano down here. So what you want to do is right now. Ah, the route no is on C zero. And that's why it's being so weird. So we're going to right click on C five. And if I play it, that's our drum. Okay, So sometimes certain sounds a little bit of a work around. Uh, no. All the sounds are like that. Some of them are, uh And what I mean by that is like some vendors actually have their sounds so that you know , they're legit. So you don't have to, you know, do what I just shared with you. So let's just hope into some exclusive are actually sorry, the owner. Dominy. Just go through a couple more. So, like the snares. You know, those air really, really awesome stairs that they're really, really aggressive. They hit pretty hard. Go take some symbols. Reverse. Now in fl studio. If we use the symbol, you could just simply reverse it here. Okay, years swelling. Okay, so just just, for example, all flip it. So that's normal. Okay, um, you know, some collapse. So the super high quality, right? Let's just hop into some exclusive audio sounds Will go like organic drum kit. Ochlik snares. I think this one now again, let's say our snare isn't exactly as we'd like. Now when you're actually programming the drum loop, You know, sometimes I think, yeah, it's good enough for now to get it going when I get to take the mixing stage. No, it is just a matter of readiness, like, let's say seven and then, you know, since I explained to what sends are and stuff like that, you know, there's a stair before reverb on it. It's not like a big sound, right? We could dial it back. You know this Reverb Two. Stop that back. You know, just just kind of share with you. Like what you can kind of do as you're flowing. Right? So let's go kick, kick, and, um, members say two kicks here, something like that. Put some snares in here. And this Is this what it sounds like so far? Okay, so let's just kind of go through some other sounds here. So, for example, we have, like, claps. So you know, these those kind of sound a little bit similar. I really like sound kits that have very unique sounds. So from sound a sound that they don't sound the same. Therefore, you're kind of getting more bang for your buck. You know, it's not just kind of a guy. Rinsed and repeat repeated sound. Uh, there's high hats so really important toe have closed and open hats. Uh oh. That you listen to that. So a closed hat is like this. These are extremely powerful for actually, uh, creating rhythm and stuff like that. So, for example, we could play on every 16th. Now we talk about, like, the velocity and volume and stuff like that So it's just a matter of coming here to piano roll and maybe, just like adjusting some of these notes just a little bit, you know, just because sometimes it could just sound a little bit too repetitive, So okay, And we don't have to have it on every single one. We can kind of stuff like this and let's do this, Okay? We'll leave it like that. Now, an open hat is really, really powerful is like a filler instrument. Depending on the genre you're working with, you're gonna be a place in this open hat in different places. But I'll share with you what it sounds like That's a quick one. Okay, so let's just load one of these open hats in some like this care so, uh, get depending on the genre. Sometimes you can play on every single off beat and typically indicate a dance track. This is like where you'd use this, but let's just listen so, you know, maybe a little bit too repetitive. But for example, if I only play like here and on the one, let's find a percussion sound. Okay? Which gives us a good way now to check little some percussion sounds. So, you know, with organic drum kit. You know, there's tons of sounds hear everything from skin slaps. It's like with these wooden sounds. You know, there are a little bit similar, but did you have a little bit of a different pitch? You know, but the varieties there, you know, in a sense of just lots of different sounds we have, like, shakers kiss. So watch this. So we'll play this shaker on every every single Beaucaire, so base. Okay, now, I just want one more sound on that one for a percussion element. Well, this is maybe going various percussion that made some cool. So what's this? And if you want to get creative with it, you can right click or the piano roll and you hold I hold on shift and the arrows, You can actually zoom in here, click and hold, and they drag it where you want. Many times. It's nice to extend that, um, but many times I like to kind of work off like the keyboard for this stuff, you know, typically, if it's just like one sound. Okay, So what I'm trying to say is we're in the step sequencer for Go to the piano roll Never just wanted. Just like the one sound. Yes, you can come here at the most, but I just find it takes longer, You know, I have to grab that most. Bring it over. I would simply just hold on shift the arrow keys. And I could just go up a little bit. So in this case, let's go up a little bit, huh? It's all in context if we start adding instruments and stuff like that. So it's bringing down a little bit many much. This baby will do this. So but here and we're just turned down a little bit. Okay, So I just want to walk through just some kind of sounds just to give you an idea of, like, you know, the types of sounds that you would want. Like dance kicks. This one's called vengeance toe dance Sounds of Volume one. Here's some kicks. For example. This is this would be like a dance kick now. Okay, so watch if we just go to a different pattern. So I'm gonna hit the plus. We'll drag this one in. Okay, A move. Different kick. Okay, so there's just right click on it. Go. Every four notes on every single beat. Let's take a, um so they have it under the symbols. We're gonna go closed hat. Well, actually, let's take this one. Let's just put on every single 16th. We're gonna get open hat, Okay? We're gonna put that on every offbeat. Okay, so this would be more of a public little like dance loop, for example. Uh, we'll get a snare to clap, okay, and will raise this temple up here a bit 1 20 It's really, really common on. I think that's pretty good. Just just to give you an idea. So, for example, So the biggest thing as you're hearing right now is like it sounds weird. And reason why it sounds weird is first of all, it's really, really rigid with program this super super robotic. But one thing is also volume, so this is like we're velocity. So you just simply just turn the volume down and now it's gonna blend a little bit more. Let's turn up some swing. It's gonna nudge some notes, make it sound a little bit better. We're gonna right click on these again, and we're just gonna kind of uh, play around with him a little bit. I'm just clicking him just at random spots. I have nothing specific in mind. Uh, we'll go with the disc. Yes. Was open hat to out case? Not just as an example. Let's just right. Click will insert. Will add a piano in here. Solicitous. Go. Um, addictive keys. So I made a keyboard is enabled. So So just for the time being, I'm just gonna wrote this just to you know, seven here on the actual, uh, piano insert itself fleshes. Put some e que Azaz compression. This will just help the actual piano to sound more consistent. Okay, so here we go. 1234 You know, just to give you an example. So, like, this drum loop, how it's kind of flow in context of that, let's go to her hip offish loop. Just turned on the tempo will go like 94 beats per minute. Let's just listen to the loop first. Okay, so let's just check it out. What is gonna improvise something over like this hip hop loop? It's all about high quality variety. You don't need thousands of millions of sounds you don't need to be, you know, wasting money. You just need to at the beginning, Yes. You're gonna be having to put some money in, you know, think about maybe 4 505 100 bucks kind of thing around there. That's gonna get you a really good set of high quality sounds. But you want one shot? Sounds again. As you can hear this one sound, it's just one sample. So if we look at this, you know, this is the actual sample right here. We have our snare. So that's just there. One shot sample. Now, you can use this to create your drum loops on. Then you know you use your v ST's as a humility so hopeful. That helps you out with your sounds. We're now going to get into how digital audio works, so let's get into it.
23. 10-1 Sample Rates And Bit Depth: Okay, So in this video, we're gonna be getting into digital audio. Okay, So, digital audio Now, you know, by no means am I like an expert when it comes to this stuff. This stuff is like deep science, deep math. You know, if we could really get as complex as you really wanted to get. Okay. But in simple terms, what's happening is when you record something into the microphone, you know, that's like analog. Okay, now you need to take this voltage this analog signal somehow you have to get it into your computer. Okay, So let's just say we know we have, ah, little like Mike here, so this is like our microphone. So go Mike. Okay, so, you know, you have spoken into this microphone. Okay, um, now you need to somehow get this signal because, you know, as you speak into this microphone, it's actually, you know, there's a voltage there, okay? And this is all to do with, like, electricity. So your computer is right here. Imagine this is like your little computer. Uh, you know, it's like your little stanford for your computer. Okay, so ever get here, come for a computer. So how we do it nowadays is we use a new audio interface, and an audio interface actually has a couple things going on with you. So just dollars right here. We'll draw like, a different color, like a nice pink. Now, draw it nice and big. So this audio interface has many different things, K. So it has, you know, mic inputs. And these were actually called, like, new trick connections. You know, most of them have this. And so what that means is you're able to plug in, like, TRS or TS these air kind. Like the similar connection. They just have different audio features. To them, a TRS is a balanced cable. Therefore, you're able toe travel longer distances, but with a guitar you want to use, like a T s second unbalanced signal, Um, or it could be plugging in an XLR. Okay, so an XLR You guys could just google thes for pictures and stuff like that. Um, you know, So all of just trying to say is this audio interface, it's gonna have a little circle here. You're able to plug in, you know, um, this microphone. So let's just continue on this microphone into here. So the make will go directly into the audio interface, is gonna have a little volume knob for your up and down the volume. That's what you call a pre empt. Okay, so that's another feature. Now, different audio interfaces are going to have better or poorer for preempts. And what this means is noise. Okay, so you can you can buy a preemptive is extremely expensive, like 7 $18,000 just for a pre empt. So, in other words, you plug your microphone into it, you turn up the volume and it gives you clean gain. Now I'm using a focus, right? Scarlett to I to this is the second generation. They also have 1/3 generation. Oh, now, Ah, and these devices are improving mawr and more with each addition that these companies are releasing. Its really, really awesome. Okay, when I first started, there was a lot of problems in a sense of audio agency. But now they're doing great. Okay, so you have microphone inputs care. You have a pre empt that just turns up and down the volume. Now you also have something called it an analog to digital converter and you also have a digital to analog converter. OK, so this sounds were confusing them what it is, But just think digital is computer. Okay, so let's just, uh we'll circle these case for the digital circle. That circle that will go will jump. Um, and it goes to the computer. Okay, just think digital is computer. Analog is your speakers. When I'm talking to you right now, when you speak into a microphone, uh, you know, that is analog. Okay, it's kind of you'll start to learn as you progress in your audio journey, you know, kind of what the differences. But as you speak into the microphone, you know, this is like analog at the moment. We need to come in here to our audio interface and has what's called an analog to digital converter. And even this So I told you that a pre op preempt, you know, you plug your microphone in and what's happening is the audio signals really, really quiet. So you have to actually, you know, raise the volume so you can actually get a good signal so that it's you know, that we're not like that noise floor. So it's not super noisy. We need to boost the microphone, you know? So when we recorded, we hear nice, clean audio and not so much of like the noise down below. And when we boost up that volume, I told you, you know, you could buy a preemie that's like $10,000. Now, this analog to digital converter you can actually buy these is like a separate unit as well . And they're also they can also be extremely expensive, especially we're talking about mastering. So when we talk about, like, mixing and music production, typically, you know equipment can be expensive, but it's not like the mastering gear. Okay, the mastering gear can get extremely expensive. And I really do suggest you guys going to like the website like Sweetwater. Okay, you know, there there's many websites out there that sell audio gear, but go to Sweetwater and, like, look at like their audio gear, like when it comes to like mastering gear and stuff like that. Look at the prices looked like the brands, and it's all just to do with, like, noise and, you know, so that they can get really, really pristine audio. It's honestly, really, really, really amazing. So anyways, with through this digital audio process, it goes from your microphone, you know, just, for example, into this audio interface and then through a USB cable, so I'll draw and blue. Okay, so it could be an eagle this various different ways to connect this audio interface to your computer, whether it be USB, FireWire, like thunderbolt. Um, you know, at the end of the day, it just connects through one of these types of connections. Okay. We'll keep it simple. We'll just say, Ah, USB three point. Oh, and you know, now there's at the USB type C out. Things are changing in this industry. Okay, but at the end of the day, it's all really similar, so we simply just connect this through USB. Okay? The microphone audio interface right into your computer. Okay, That's how we're getting this microphone into here. And so what's happening is this An a look is being converted to digital. And in this process of turning to digital Ah, we are actually sampling that audio. Okay, So what's happening is when we are in the digital world because it's digital, we need to sample, okay? And what that means is It's literally like taking like a picture, you know? So So So you could see my hands, but it's literally taking, like a snapshot like this. And it's just like constantly doing that, depending on your sample rate. Okay, so, you know, when we talked about, like, 16 you know, 16 bit. Sorry. So 16 bit And then, you know, 44.1 kilohertz care. So one hurt is a cycle. Okay? And it you know, this would happen once a cycle. Okay, so a cycle Is this OK, so actually draw a line, and it actually goes from zero. So it's actually zero degrees kit, and this is 360 degree skin. And this is what you call one cycle at its, you know, keep it super simple. This is this is just a sine wave. We have, like, 90 degrees up here. OK, we have 180 degrees. Uh, right here. Okay, so now what's happening is this is positive up here, but this is actually negative. Okay, um, now what's happening is this right here? So this 44.1 okay is actually 44,100 hurts. Okay, so I told you that one hurts. It does this. And as they call the cycle. Okay, so it does this, uh, 44,100 times a second. Okay, so imagine you're your actual song is like, three minutes long. It does this every single second. So what it's doing is, you know, imagine we actually talk into the microphone. Okay, So, you know, we have this audio away like this, and what's happening is, um, your digital to analog or so this a bigger analog to digital converter is literally kind of just, like taking like snippets of this case. So, you know, they're just like this, you know, we just take all these different like slices of it, and it would do this for 44,100 times a second. Okay, so not to get super super intense with this, but what's happening is it's actually sampling this audio that fast. Okay, now, this allows your audio to get into your computer. Okay? Now, inside your computer, you could do all your processing with your e que compression, you know, etcetera, etcetera. But now it has to actually come out of the computer and then back into your speakers. So that's where it goes from analog to digital. So let's just go. Ah, a And then it does this with all that. It's like a sampling at that, You know, however, many times a second, whether you're using this sample rate or for using the 48 k So, uh, you know, Sorry, it's a Lord, lower case, K. K. So, um, you know, 48 kilohertz. So again, that's 48,000 hertz. And then this goes into, you know, your computer. Now it has to leave your computer and we'll get a different color. So now has to leave your computer, and it has to go into your speaker. Okay, so we have a little speaker here, right? So this is analog to digital. Okay, then we have to go from digital to analog. Okay, That's as simple as I can Kind of break it down for you now, even for myself. You know, I still even struggle to really fully understand, because it's like I've never built one. I've never designed one. I've never you know what I mean. So I can only kind of relay what I've read and what I understand of it. But what's happening is when I speak to you, you know, in the analog world, it's like there is no riel, I guess, Resolution, in a sense, that is kind of like infinite, you know? But when it comes to digital, we actually have to sample that audio to get into our computer. Now, our ears. So as humans, we can hear from 20 hertz. So this is like little, though frequencies. It's more of like a feel. And, you know, we get up to 20 1000 hurt scared. Now, you know, the average human. You cannot hear this. Hi. I'm honestly not sure how I can hear, but I do recall when time was at a friend's house and he was just messing around Like what ? They get this keyboard. And he was playing this really, really high. Actually, he was seeing how high he could go with pitches. And you know what was going higher, higher. And I was like, Oh, I can't hear that anymore. Like you can't hear that. And he could still hear, you know, up to a certain frequency, and I was not able to hear it. So, you know, again this is this kind of in theory, but generally for 20,000 hertz of sorry from 20 Hertz to 20,000 Hertz is what humans can kind of hear, You know, typically, it's probably like, you know that 17 are no, maybe 18 killer scared. But when we have this and this is again a digital audio, Okay, so this is kind of going more intense than what I want to get in this video. But it's what's called like The Night Quest. The room. So what that means is that, um, the sample rate, even though it's 44 100 kids, it's actually half of that. And so that would be 22.5 kilohertz. K. But again, if we reference back to what we can hear is, you know, 20,000 hertz. So in other words, this is sampling the audio so we can still hear all the frequencies. Okay, Now the argument is where people say, Oh, you know, we got to do 48 K because it was higher quality. But then the argument is like, Well, we can't even hear that because half of this would be 24 or 30 ago, 24. And you can see that case the 24 kilohertz, right? Like that's half. That's to do it like the night quest. The room you could read into that again. It's getting pretty, pretty intense, K. So I just want to talk to you just a little bit about you know, the bit the big death and the sample, Right? Okay, so the bit depth is your noise floor. So if you only had four bits, you'll hear tons and tons of noise in your audio, like tons of noise. And it's something for you to play around with. There is ah, lot of free V is tease out there. They're called bit crushers and stuff like that. People use them as a creative tool. But if we're talking to strictly, like, you know, clean audio, uh, you're gonna be wanting to record with at least 16 bits if you go to 24 bits. Yes, that noise floor is even lower. So therefore, your even your you're even able to get, you know, a cleaner recording. Ah, but that noise for already at 16 bits is already pretty low. You're able to get very, very high quality. Um I believe that's even like what I'm recording on right now. So bit depth. Just think noise. Okay? Think about like that noise floor. Okay, So how it works is in digital audio. Just get a different color. Here we will go. Um, this red. So in digital audio, the loudest we can get is zero, uh, D B F s. And this is called zero decibels. Full scale, That's what it's called. And then anything under is like minus one minus two minus three minus four. And it goes all the way down. Okay, so when we talk about, like, the noise floor, imagine this was, like, you know, minus 96 db. Okay. So that your noise floor is, like, way down here. Okay. I'm, like, you know, could be up a little bit, but when we record, our voices could be up here. You know, like minus two. So that's very, very far away game. Then once we get into 24 bit, I believe its ah minus 1 44 decibels. Um, I think again, you guys could do more research on, like, you know, it's stuff like that, But what I'm trying to say is this noise for in 16 bit. So if this is 16 bit right here, you know, this is already extremely low. Okay? And then we have her voice. We record super clean audio still, but for super audio files type of people, it's, you know, they go to 24 bit. And in the film industry, it is 24 bit, um, 48 k All right, you know, again, just to fill you in on what's going on. So this is like the film industry, and, you know, it's it's kind of a standard. It's very easy to work with. You know, if you record understanding files back and forth, that's, you know, the industry standard with music production. For myself, I've always just kind of going like 16 bit, 44.1 very, very high quality. It's what CDs have been used for for many, many years. It's great. Okay, so when you think bits, think about noise when you hear ah, sample rate. Just think about this quality in a sense of frequencies. So you know how high a frequency are you able to record? And that's it. So 44.1. Like I said, with the Nike but the Nyquist theorem. It's 22.5 and I suggest that you play around, you know, play around on the high frequencies, open up like an e que That gives you like, a frequency analyzer and play around like see how high you can hear. And you can kind of start now, relating this theory to what I'm trying to tell you. So this is the reason why they've selected 44.1 because, you know, it's a little bit higher than where humans can hear. It allows that final size to be lower still super high quality. And, you know, that's just kind of the basics. Okay, so I think I'm going to stop this video here, but we're going to continue on with digital audio. We're going to talk about some audio formats. We're going talk about a phase cancellation, um, and break this down a little further for you. Okay?
24. 10-2 Phase Cancellation And Phase Shift: So in this video, we're going to talk about what's called phase cancellation. It's really important for you to understand what it is because, especially when we're talking about the low end in our music, we want to make sure that our low end is nice and tight. And if we start layering kick drums and if there's clashing in this low end, you're going to hear it. It's gonna sound week. It's gonna sound like a little bit like a wobble kind of sound and sometimes even hollow. Ah, and it's all to do with, um, face cancellation. Okay, so let's just keep this super simple. So I'm going to draw to sign ways for you. Okay, First of all, I'm just going to explain, you know what we're looking at. So we just have a signed waiver here, okay? And imagine we have, you know, appear. Let's say this is three here, Okay? Now, if we have ah sine wave, you know of the same way. Okay, so, you know, this would be like, pause of this like, negative. Okay, Now, if we have a sine wave of, like, the same way, okay? And let's just say it Woz. You know, let's say to do the same thing. Let's say it was Let's say four. OK, so now what would happen is if we play these to sign ways at the same time are net outcome , You know, if we add them up is literally seven. Okay, so what would happen is our result would actually be the sum of both of these sine waves. So if we just draw the line here, So instead of it just being kind of like little r sine wave is gonna be bigger, like you don't like this care. And it would be seven now if we do that again, Okay. So I'll just drawn over here. So if we have, you know, r sine wave and let's just say it was at, you know, let's say it was at two. Okay, Now, if we had another sine wave K just selecting a different color here, and if it's the opposite way now, Okay, so now we have flipped the polarity can. So now we actually have negative playing here and positive at the same time. So right down here, this would be like, in this case, like, minus two. Okay, but then appears is still plus two. But then right here, I'm gonna go purple again. OK, so we'll just say plus two and we're gonna come here, and this is minus two. Okay, so the net outcome off, this is zero. Okay, so this is just really important to know, Because again, if you have your kick, drums and stuff like that, if we just open up fo studio here. So if you actually click on a sound inside of FL Studio, you're going to see an option for reverse polarity. It's on the right here at the top and you click it. And if you look at the actual wave form, you can see that it's kind of changing. Okay, so it's kind of flipping. Okay, so now when we play to kick drums together, you have to make sure that you're flipping the phase just to hear what is the better one? Okay, the one that's hitting harder. You want to keep that one? Cash is really, really important. So to go back to the drawing now, OK, so that's just what I want to break down. It's just a phase cancellation, okay? It's not too intense. But it's just understanding what's happening. And it's all just to do with, uh, what's called polarity and then phase is where the actual signal starts. Okay, so for example, uh, you know, this would just be, you know, the same polarity. So positive, positive. And here's a cool little fun fact on your speakers. Like when it's positive. I believe that's when the cone sticks out. And when it was negative, I believe that's one of the cone sticks in. I'm not 100% on the direction, but I do know that positive is one way and negative is another way for the cone. So that's to something to be aware of. Um, you know, it's kind of a cool little fun fact with speakers. So now phase is actually the location of where this sine wave starts, Okay, so we can get a little bit confusing, but if we kind of draw it so I kind of have to draw like this. So, for example, you know, if we start right here, it's gonna be like this, and then it might kind of stop right here, okay, so we can actually kind of get phase cancellation like this too. So, for example, if I draw like this, right, you know, if we draw, uh, the other sine wave so I should have John in green, but it's okay, so just imagine this is like our one sine wave, and it's not It's not starting at zero degrees case. So we're actually starting at Let's say, you know, it's like, Let's they were starting at, like, 30 degrees K. Now, if we select a different color and it is starting at zero so imagine now this sine wave is actually at zero, and it's going like this. So what can happen is R sine waves are, and this is this is to do with time now. Okay, so r sine waves actually kind of nudged over. So now when I told you about, you know, if this is plus and if this is negative, if this was three and if this was to we would actually have one here. Okay? Just to kind of break that down for you. That's against super Super simple. When we're dealing with actual music frequencies, you know, each different sound, you know? So if we had two different kick drums, they have different frequencies like it's not. They don't just have, like, you know, 30 heard. So they don't just have, like, a single sign way that, like, let's say, you know, 50 Hertz, they're gonna have tons of frequencies again. Just look at a frequency analyzer when you play the sound. Now what's gonna happen is when these two different sounds play, depending on how their sound designed, they may have sounds that play a little bit later because when I talk to you about layering , right, So, for example, we talk about like the collapse, right? So when we play one clap, you know it's one thing. But if we layer multiple collapse or if you play a sample where the sound designer layered multiple collapse, this is where we can kind of get this face shift K. And this can also introduced phase cancellations. So again, you know when it comes to that kick drum, mainly most of the kick drum. You can also play around with this with, like a snare and stuff like that, too, especially if you are recording. They could drum set and you have multiple microphones. This stuff can happen to face cancellation and you know, stuff like that. So it's all about, you know, just being aware of what's going on behind your audio signals. Um, and that's pretty much all there is just to kind of be aware of it just in FL studio. Just play around with that reverse polarity, especially when you're lettering drums. Like I said, when it comes to for me to build drum loops, I typically like to have at least two or three drums in my drum loops. I like toe layer my drums just for a different hit. I also like to have kind of filler drums just, you know, to kind of play at times that the other drums aren't playing just to kind of help that drum loops and a little bit full there. Okay, so that's face cancellation. Released. Important stuff to know in our last video. Um, we're gonna be talking about audio formats, K so wave MP three stuff like that. Okay,
25. 10-3 Audio Containers Explained: Okay, So in this video, we're going to breaking down audio containers. Now, it is really important to understand the difference between, you know, wave MP three, lossy and loss less steel containers and Codex and all that kind of stuff. I'm gonna break this down. Super simple, but we're gonna draw some stuff. Oh, it's gonna give you further clarification on you know, when you're exporting your audio, what? Should you export it out? You know, should you export it at a 16 bit 44 program wave Or should you go f l a c Should you go and be three straight? You go, O G. Um, So let's break it down. Okay, So with audio containers, you have something called los lists. So, in other words, that means that the fidelity stays, you know, the high quality stays. Nothing's removed from it. Okay. And then you have what's called lossy. Okay, So what's actually happening here is it actually removes frequencies from the file to make the file size smaller. Think about an MP three, and if we're talking like 1 28 kilobytes per second, or like to 56 or 3 20 the's different sizes give you a different file size as well as a different quality K. So with MP three, there are artifacts and you get these artifacts because you're actually removing frequencies, which means data. Which means information from that file on. The reason why we use something like MP three is while it's a smaller file size and it's easy to send to a friend in like an email, right or, for example, extreme ng. You know, everyone has their phone, and, you know, instead of streaming a lossless file, that is, you know, 50 megabytes. You know, people want to conserve and, like, their data plans and stuff like that. Okay, so lossless would be like wave. Okay, so it's gonna wave, and then lossy would be like MP three now, in recent years, you know, and not super recent, but, you know, more recent than wave and MP three. These are, you know, the standard. Okay. Thes will work on any player, any MP three, you know, their tried and true. Okay. They've been around for so long. All these audio companies, when they create, like, you know, players, I'm talking like, let's say, an iPod back in the day or like an MP three player. These were, you know, the formats that have always been used can now, in recent years, they started to come out with F l. A. See, people call it like a flak file too. I believe it stands for free lossless audio Kodak on. And then there's also uh oh g g get So I'm just gonna give you a little history and breakdown of both. So again, wave has been around for, you know, since the beginning. If I'm working on a beat tape again, I export to you know that 16 bit 44.1. And then I will upload that to an on line distributor like Destro kid. And, you know, my music is good to go now. Destro, Kate. What they do is they send it off to all their distributors, like apple for iTunes or Spotify. And then they will actually, you know, apply a loss. See, Kodak, uh, you know, making it like an MP three, or like a nog or whatever, which is actually removing content out of that file. Okay, So, like I'm saying, I just use wave. This is what I use can. In recent years, they've come out with an F f l A C, which is really, really cool and confusing at the same time. So it's lost. Listen, a sense of its not removing any frequencies, any content out of that file. But the file size for whatever reason, you know they can compress the file size and make the file size smaller while retaining the fidelity. The high quality. Okay, so wave is going to be a larger file I typically use. It just causes tried and true. But this has become like a noose, you know, it's coming out, and it's really, really cool because it's the same qualities wave. But it's a smaller file size. Really, really cool stuff. Again. Now, MP three, this is Ah, CBR. So constant bit rate K. So I was gonna write constant here, and Ogi is variable, so just get a different color. So this is a variable. So what That means. And it's and it's also a VB are so variable bit rate. So here's a cool thing. Get so with MP three. If you had, let's say a to 56 kilobytes, uh, per second, you know, file and imagine your audio waas. Let's say, uh, you know, two minutes and 30 seconds get Let's go, men. So with constant bit rate, it doesn't matter how much information is going on in your tracks. So, for example, if it's played out the course, if it's played at the verse doesn't matter. It's constant. So what that means is, if you're an MP three, you go to 56 kilobytes per second and your songs two minutes and two minutes and 30 seconds . Your file size is always gonna be the same. It doesn't matter what song it is. It doesn't matter what goes to MP three at 2 56 at 2 30 It's always gonna be that same file size. If this was 1 28 at 2 30 is always gonna be that same final size of whatever 1 28 is okay. Doesn't matter what song. Okay, so it's constant now, O g. What's cool about it is this open source. So what that means is it allows, like the community toe work on it. Okay, sometimes that's cool. Sometimes, uh, it doesn't have as much support as look what you like, but it is growing and is becoming more popular. But the cool thing about it is its variable. So what that means is, when it comes to the chorus, you know it's going to apply, you know, mawr information, making your file size a little little bit bigger. But when it goes to the verse or the intro, or like the O troll, you know there's not much information going on there. Let's just say, for example, so which means that now may be your file size could be a little bit smaller. So again, you know, these are just kind of how they work. And these are just called audio containers for myself. If I'm gonna export Ah, file, I export the wave 16 bit 4 to 4.1. That would be like my beat tape. I'd uploaded to something like Destructed and I'm good to go. That's my official release. If I was going to make an MP three version, I would just go MP three and 2 56 to 3 twenties when I'd go podcasts for Tamano signal is like 96 kilobytes per second. And then, um, I personally for my own podcast, my podcasts is called music production made simple, totally free. You guys can tune in. I put it to 1 28 kilobytes per second. Okay, just to give you a reference, But in terms of actually exporting your own music at that, you know, this is for podcast. And the reason for that is just because it's voice. There's not as many frequencies invoice as there is in, like, tons of different instruments. So for your songs, if you're gonna expert MP three, I would say go no lower than 2 56 Okay, if 2 56 to 3 20 if you're gonna go any higher than that, I would personally suggest just going like a wave or NFL A c OK, so that is, um, you know, audio containers. Now, I just want to draw a little bit more in depth of how MP three works care. So the confusing thing with the word compression is when you hear your compression, you know, you think Oh, well, use a compressor, right? So it's kind of confusing, but I'll break it down. Super simple. So there is audio compression, and that's when we talk about dynamics. So if I'm talking loud and then I'm talking quiet. You know, that's the difference between the loud in the quiet parts. And we can use a compressor, a downwards compressor to reduce the loud parts and bring up like the quieter parts K. So, you know, we're making the audio market system now. That is, um, audio compression. Now, there's something also called data compression. And you know, for example, if you always see, like, the file format, zip. Right. So this is e. Okay, So if this you know, So zip. So, so imagine. You have, like, 100 megabyte file. And then now you zip it. You put into a compressed file. You know, that compressed file might be like, 89 megabytes, just, you know, just for example. So however it does it it does, though, so you can compress the file size sent into a zip. Um, and then, no, you send it to somebody, so it makes the file size smaller, makes it faster to transfer on all that stuff faster to download. And then, you know, once they have the zip, they then extract it onto their computer. And then now it's back at that 100 megabytes again. Okay, So when it comes to, um, MP three, So I'm just gonna draw something out here, Okay? So imagine this is like an e que, uh, you know, frequency analyzer. Okay, so I just rolled it quickly. So, you know, like I said, humans we can hear from, uh, 20 hertz up to 20,000 hertz care. So lowered, lower case k. And again, this is like the low, low rumble now inside of here. We're just gonna have a little quick window because this is typically what, like Aniki looks like, right. We have our, uh, no frequency spectrum right here and imagine we have, you know, now are our audio file. So, you know, have different things going on. Whatever. I'm just kind of drawing this and typically a lot of songs. You know, your low end is a little bit higher. What I shared with you like the mastering of that track from my free from a beat taste by gratuitous Volume eight. Um, that frequency spectrum was very, very, very, very consistent. I was actually really happy with the balance of that song. So what happens with MP three now, though, is again we talk about data compression. So when we have a wave, so I'm just gonna right here. So imagine that wave. This is the period right here. So Wave and Russell 16 debt. Guess what, 16 bit wave. Let's just say our track was, you know, 50 megabytes care now our mp three, Um, let's to say our MP three and this just say it was 2 56 kilobytes for second. And you can see that. You know, I'm just hoping I'm not ready to small so MP three and let's just say the final size was that's a 7.2 megabytes scare. So, as you can see, it's like that's significantly smaller. But now MP three does come with some artifacts, and I'm gonna explain to you why. So what's happening is through what's called psycho acoustics. And these are people who delved deep, deep, deep into audio. Okay, they did. You know, the dive deep into the math. They test, you know, the human ear, all this stuff, okay. And what they've discovered is certain frequencies in our ears are not as sensitive toe other frequencies. Okay, So, in other words, uh, you know, our ears are not sensitive you know, as sensitive to certain frequencies. And if there's different instruments to stuff going on, there could be masking as well. So in other words, we may not hear certain instruments at certain times because other instruments airplane. And that's just how it happens in audio, you know? So if we had, like, a horn and then we had another sound that was way louder. We're really not gonna hear that horn, because, um, you know, it's just gonna overpower that horn. You know? It's masking the frequencies to So how it works is with MP three, you know, imagine we have it just like this care. So we just have all these different areas Where again? It's samples. I guess, um, I think could be a good the correct term. Okay, but this is this will be a good idea. Um, visualization for you to see. So this is the MP three. Okay, so with wave, you get the audio as it is. Okay. And with MP three. So now what you're doing is I explain to you about you know, the cycle, acoustics or other words through science. These people have discovered that certain frequencies our you know our ears aren't as sensitive to. So in order to make this file size smaller, what they're really doing is they're actually removing certain frequencies. And I feel like this this, you know, maybe this 12 and then maybe like up here. Okay. And so now what you're left with is, you know, no, this this, this, this, this, this and this and this. And if you compare, you know, like a to 56 you know, to your actual wave, you really can't hear a difference that much. There are some artifacts if you listen to, like, let's like a symbol and listen to, like, the high end. The best way to describe it is it kind of sounds like a little swirling kind of sound, but it's pretty amazing how you know we can get this pretty high quality audio file and have it. You know what, four times less the size or something like that. So it's pretty amazing, right? So let's just kind of a breakdown of audio containers. Ah, and how MP three kind of work. So this is what you call data compression K. So again, compression could be really confusing But when we talk about audio compression, we're talking like a compressor. You know, with your audio signal when we're talking data compression, this is what we're talking about. And your Net outcome would be what I just shared with you right here and depending on, you know, your, uh, rate that you choose whether it be like 1 28 to 56 3 20 Ah, you're just gonna get mawr or less quality. And it's just going to remove one or more frequencies and you're going to get more or less artifacts. Um, and you know, you're gonna get a smaller or bigger file size. So that's just a little breakdown of audio containers, and I will create one more video here, and we will wrap up this course.
26. 10-Steps Conclusion: all right. Thank you so much for taking the course. I hope you guys enjoyed. This is my first course. Where had a green screen. So this is how you can kind of see me being cut out? Uh, also with, like, this pen here, I was able to kind of like, right, you know, stuff like this. So let me know what you thought about this if you liked it. I'm really excited to create more courses. I now have an awesome set up an awesome camera. Um, you know, I have good lights here, you know? So as you can see that, you know, my hands kind of being cut off there. So it's pretty cool learning about all this kind of even video equipment behind the scenes so I can achieve really high quality to the music production courses. So if you guys have any questions or if you'd like to see me create a course on a specific topic, I can easily create it. So what I ask from you is, if you can leave a review, I'd really, really appreciate that. And again, just Riccio, if you have any questions, if I've If I've lost you anywhere. Or if you like to see a course for me in the future. I have tons of courses. You know, everything from, like compression T Q two sampling to creating a natural beat tape. So I'm gratuitous. You guys can visit me on it's gratuitous dot com. I hope you guys learned a lot, and I hope the best with your productions.
 Riley Weller, FL Studio Trainer