

Watercolor Illustration: How to Do It and a Tutorial
Learn how to paint with watercolors and how to create a watercolor illustration with this step-by-step guide.


There’s something magical about watercolor paintings. The soft edges, the nuances in color, the graceful brush strokes—it’s enough to make you want to pick up a paintbrush and give it a try yourself! With a little help from this watercolor illustration tutorial, you can do just that.
How to Do Watercolor Illustrations: A Tutorial
Watercolor Supplies
Creating a watercolor illustration of your own doesn’t require many supplies, which makes it a fairly inexpensive art form for beginners. Bonus points for art projects with an affordable price tag!
Watercolor Paper
First, you’ll need to pick your paper. Choosing high-quality paper is more important than choosing high-quality paints or brushes. Some watercolor illustrators use 100 percent cotton paper which, while more expensive than the alternatives, does absorb water better for a nicer finish. If you’re ready to commit to watercolors as a hobby, it might be worth making the investment—but not if painting on pricier material is going to cause you a mental block!
Cellulose paper is a lower-quality watercolor paper used by many students. It will cost you less and give you the opportunity to explore watercolors with lower stakes. Cellulose paper works especially well for single-layer watercolor painting. If you become more advanced with your layering in the future, you may choose to upgrade to cotton.
Watercolor Paint
Find a watercolor paint brand with a range of colors you like and a price point that’s accessible for you. Most brands offer color options for students and professionals, the former of which tends to be less expensive. You may also want to have a palette to give you space to mix colors.
Watercolor Brushes
You can start with a few round brushes and a flat brush. Again, choose a brand that’s affordable! If you’re planning on painting larger illustrations, make sure you have larger brushes available. Regardless of how large your finished product will be, it’s nice to have a wide range of brush sizes in your collection while you’re learning and practicing.
You may also want to have a white gel pen on hand to add highlights to your illustration, along with a water jar for washing your brushes.
Why Watercolor?
If you’re a newer artist, you may be considering multiple mediums for your work. Acrylic paints and watercolor paints are common choices for beginners, and both have their advantages and disadvantages.
Acrylic paint dries quickly and can be very forgiving for newbies. Since it’s more opaque, it can be used to more completely cover the inevitable mistakes.
Watercolor paint, on the other hand, can be a bit more challenging, since it’s more translucent and can’t be layered to hide errors. It can also take longer to get comfortable with the nuances of making watercolor illustrations—mixing the right amount of water with the right amount of color, layering colors in the proper order, etc.—but it’s well worth the process. Working with watercolors gives you the opportunity to use trial and error to identify your personal style and technique.
Let’s get into the basics.
Step 1: Prep Paper
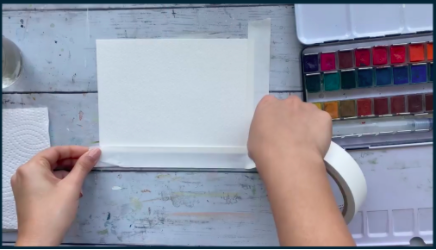
Beginner watercolor illustrators might find it less overwhelming to start with a smaller “canvas.” Consider cutting your paper down to roughly the size of a postcard (approximately five by seven inches). After that, use masking tape to secure the edges of the paper to your work surface. This will ensure that your paper doesn’t slide around while you paint and will give your finished product a pretty border! Most watercolor illustrators aim for a quarter- or half-inch overlap between their paper and tape.
Step 2: Sketch Your Subject
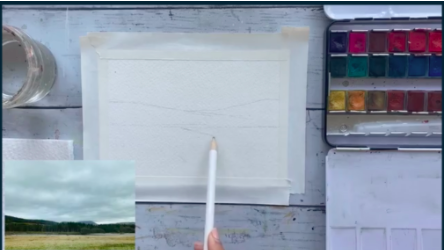
Before you begin applying paint to your paper, use a pencil to lightly sketch your subject. This is a good time to focus on a reference image. Your sketch doesn’t need to be anywhere near perfect, especially since your plan for your illustration will likely change as you go. The goal of the sketch is to guide your painting and to give you an idea of the space you’re working with.
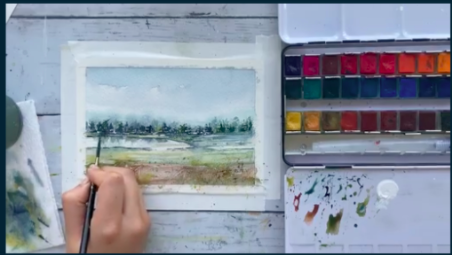
Step 3: Create the First Layer
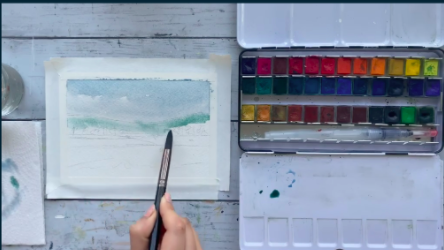
It’s time to start putting those beautiful watercolor paints to work! There are no hard and fast rules about what to paint first, but some artists suggest beginning with the main point of interest in your painting. Others suggest that you work from light to dark. Experiment with these approaches to see what works for you. Play with different brush strokes, like the Choke Up (holding the brush close to the bristles for more controlled marks) and On the Tip (holding the brush at a higher point so you have more freedom to move). Add more water to your brush and move the paint around on the paper if you feel like you’ve made a mistake.
Don’t worry about the details yet, because your first layer of paint should be fairly abstract. When you’re happy with the overall effect of your scene, let your paint dry completely before moving on to the next step.
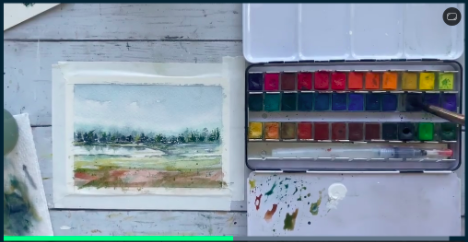
Step 4: Paint the Second Layer

Your second layer is where you can begin to add more details to your painting. Darker colors and smaller brushes tend to work best for these details. Even though you’re working on finer details at this stage, you should keep applying only light pressure to your brush. Continue to explore various strokes and techniques with the second layer. It may take some time to develop your personal artistic approach!
Step 5: Make Some Marks
There are a few techniques you can use to add additional movement and feeling to your watercolor painting, First, you can try dragging your wet paintbrush in loose lines across your illustration, especially in the foreground. You can also splash a bit of darker paint in the foreground of your illustration by holding your brush parallel to the paper and gently tapping your brush to get a splatter effect. Protect the rest of your painting by holding a small piece of paper above the brush. This will allow you to control the direction of the splatter.
Step 6: Add Final Details
If you’d still like to add more details to your watercolor illustration after the additional layers of paint have dried, it’s time to break out a finer paintbrush. A thinner brush and darker paint colors can help break up larger swaths of paint, create shadow, and add definition to the elements of your painting that need it. You can also add details with a white gel pen.
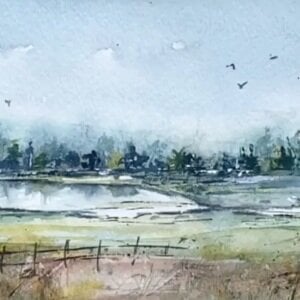
Paint Your Own Beautiful Landscape
Loose Watercolor Landscape Painting — A Simple Approach
Example Watercolor Illustrations
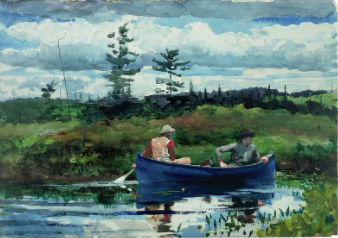
Watercolor was 19th-century artist Winslow Homer’s favorite medium. He painted The Blue Boat in 1892, inspired by the many years he spent living near the water. Just look at that beautiful sky!
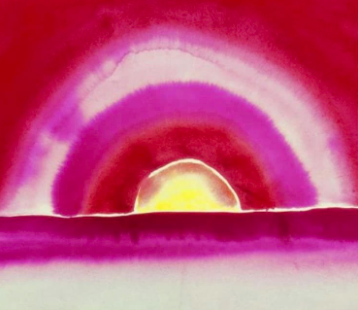
Georgia O’Keeffe is perhaps best known for her oil paintings of flowers, but before she created those, she was experimenting with watercolor illustrations. Sunrise offers a great example of what you can do with larger brushes and broad swaths of color.
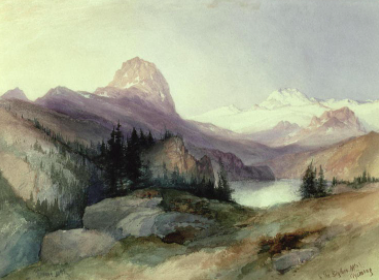
Artist Thomas Moran became especially famous for the watercolor illustrations he made of Yellowstone National Park in the nineteenth century. His work was actually instrumental in helping the U.S. Congress to formally recognize Yellowstone as a National Park in 1892! Don’t underestimate the power of your work in watercolor.

Watercolor works for more than landscapes—you can create watercolor cartoons and renderings of the people you love, as well, just like this watercolor illustration artist did. While these illustrations can require more precision, they’re certainly possible with practice and thinner brushes.
Famous Watercolor Illustrators
Mary Cassatt
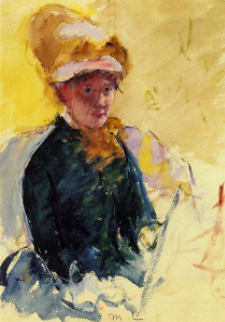
Mary Cassatt was a well-known part of the Impressionist movement. She grew up in a wealthy family and dropped out of art school due to her frustration about the way female artists were treated differently than their male counterparts. She moved to Paris to forge her own path as an artist and went on to create many beloved watercolor illustrations, including her self-portrait, Portrait of the Artisti.
Vincent Van Gogh
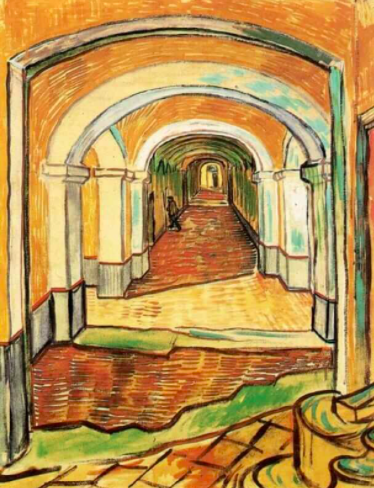
Vincent Van Gogh may have produced many of the most iconic oil paintings of all-time, but he also painted nearly 150 watercolors. In fact, he used watercolor illustrations as field studies to help prepare to paint with oils on canvas. Over time, he used increasingly bright colors in his watercolor work.
Andrew Wyeth

Andrew Wyeth was one of the best-known American artists of the twentieth century. He focused primarily on realism, painting what he really saw, often in watercolor.
Are you feeling inspired? Good! There are so many ways you can play with watercolor paints to create beautiful and whimsical work. Gather your materials and get started!
Have Fun With Watercolor Illustration
Watercolor Illustration: Transform Daily Objects Into Whimsical Characters
Try Skillshare for free! Sign up for a 7 day free trial today!
Get Started- Unlimited access to every class
- Supportive online creative community
- Learn offline with Skillshare's app


