

The Essential Guide to Pipelines in 3D Animation
Understand how animation pipelines and their key production stages work in this handy guide!


Creating a polished 3D animation is a complex process that involves multiple stages and a variety of techniques. That process is often referred to as the animation pipeline, and understanding it is crucial for anyone looking to learn how to animate, improve their production workflow or break into the animation industry.
Here, we'll break down the animation production pipeline into clear, actionable steps, guiding you through each stage of pre-production, production and post-production. From storyboarding to modeling to editing, we'll show you how to efficiently take an animation from a fledgling idea to a finished product.
Pre-Production
1. Concept Development and Storyboarding

The first step in any animation's pre-production stage is concept development, which involves brainstorming and developing initial ideas into a coherent storyline. This foundational work sets the tone for the entire project and ensures that the narrative is engaging and well-structured.
Once the initial concept is solidified, storyboarding comes into play. Storyboarding involves creating visual scripts that outline key scenes and sequences, which makes it essential for planning the animation. By creating a storyboard, you’ll make it much easier to visualize the flow of the story and make necessary adjustments before moving on to more time-consuming steps.
Hint: If your animated film will have dialogue or a voiceover, now’s also the time to start scriptwriting.
2. Character and Environment Design
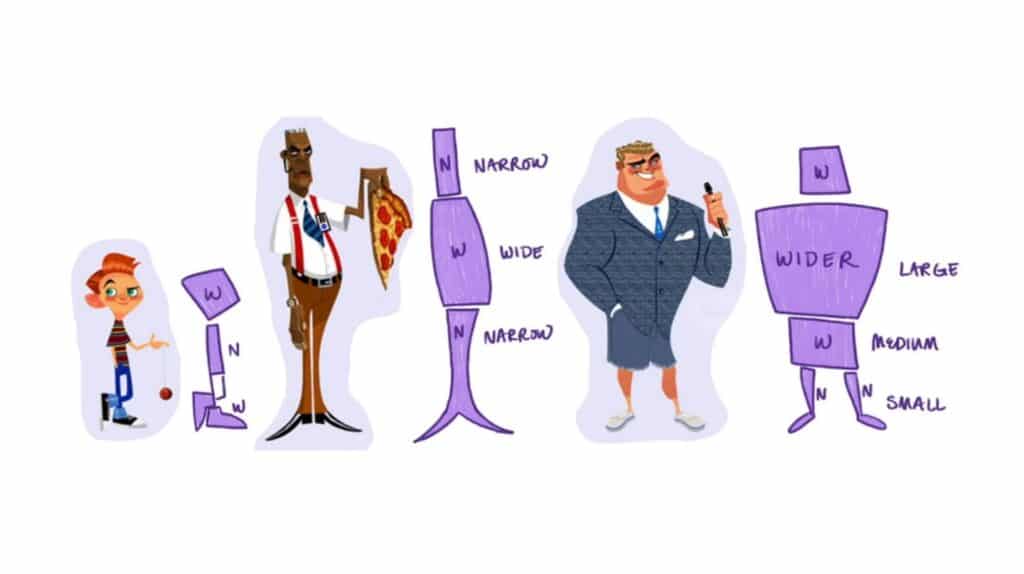
Character design and environment design are also critical aspects of pre-production. This process includes creating detailed character sheets that showcase different angles and expressions of each character, as well as background art that defines the settings in which the story unfolds.
When tackling this step, remember that consistent design is vital for maintaining a cohesive look throughout the animation. With that in mind, take the time to make sure that every fundamental element aligns with your animation's overall aesthetic and narrative vision.
Production
3. Modeling and Texturing
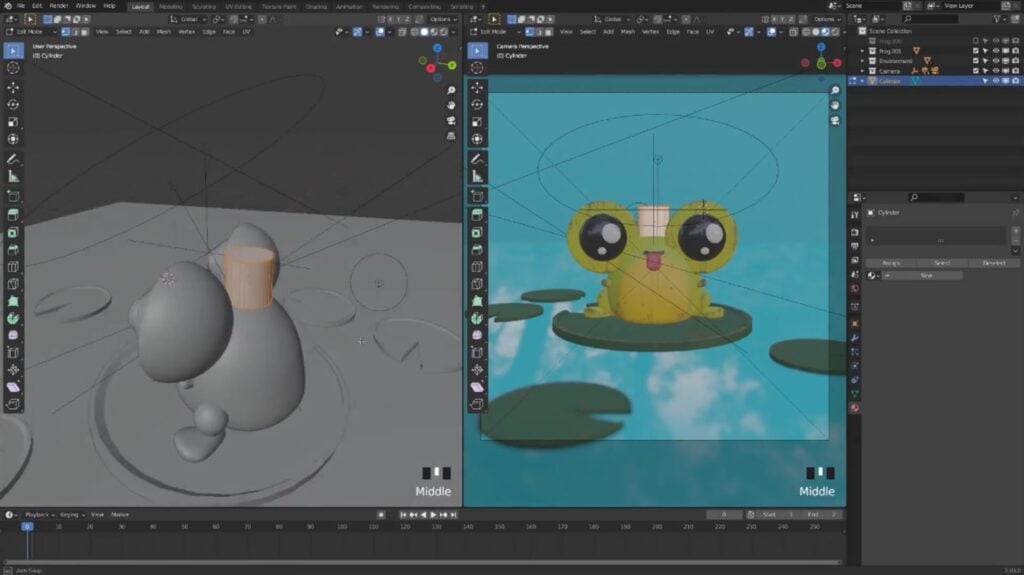
During the production stage, the abstract concepts and designs developed during pre-production begin to take shape through 3D modeling. This involves building the characters and environments in a digital space using 3D animation software like Blender, Maya or Cinema 4D, usually by starting with basic shapes and then progressively adding more details.
Modeling is followed by texturing. This adds surface details to the models and provides them with color, patterns and textures that make them look realistic or stylistically appropriate. High-quality textures are crucial for creating an immersive and believable animation, so be sure to choose yours carefully.
4. Rigging and Animation
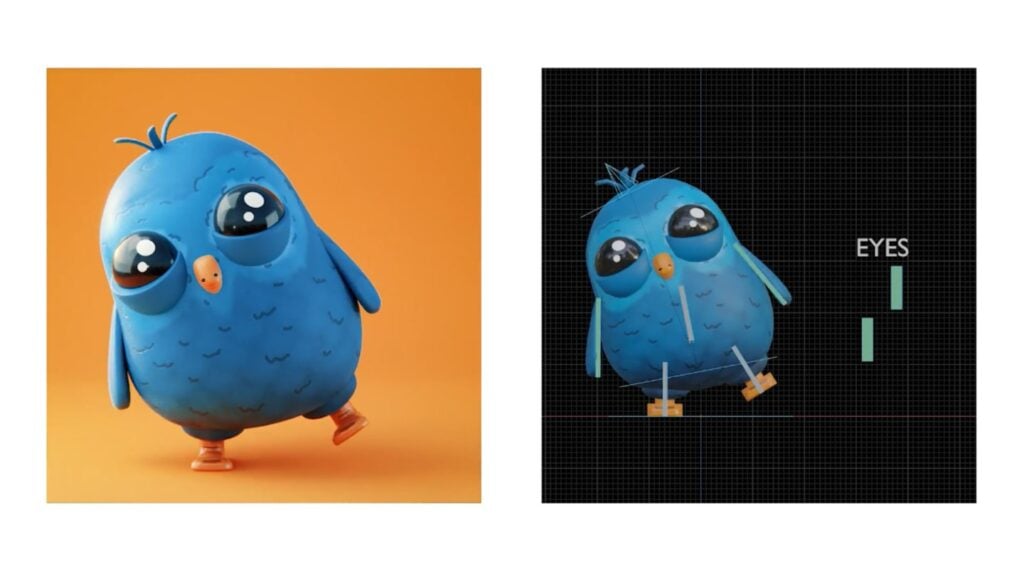
Next up in the production phase is rigging and animation. Rigging is the process of creating a digital skeleton for 3D models, which allows them to move in a realistic manner. This involves setting up bones, joints and control handles you can use to more easily manipulate your models.
The animation phase brings these rigged models to life through techniques like keyframing and motion capture. Keyframing requires manually setting the position of the 3D model at specific points in time, while motion capture records real-life movements—typically with the help of a motion capture suit—and applies them to the models. This stage is where the characters and scenes finally gain motion and emotion, and you get to see your animation come to life.
Post-Production
5. Lighting and Rendering
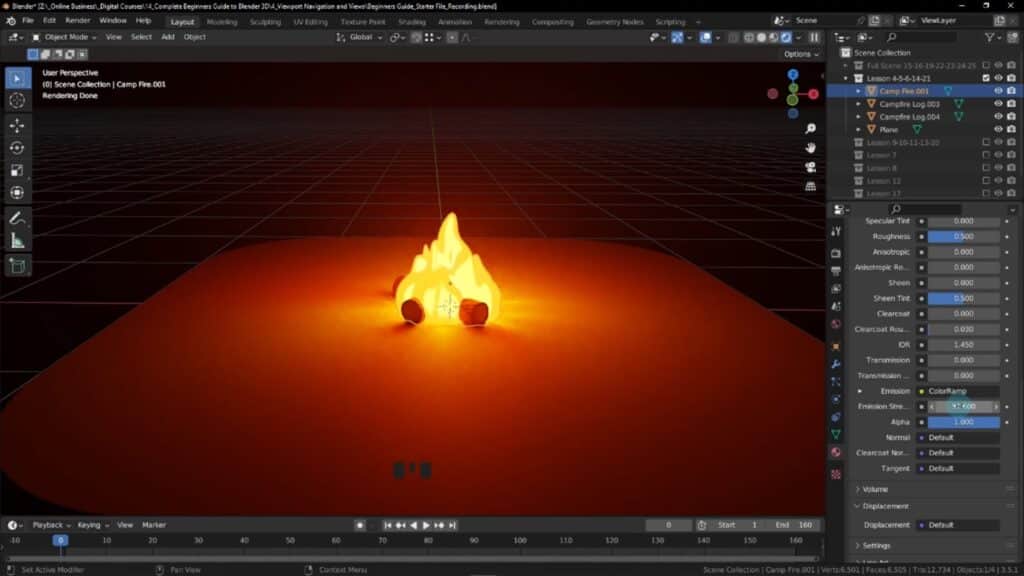
Lighting plays a crucial role in setting the mood and enhancing the aesthetics of your 3D animation. Different lighting techniques can evoke different emotions and highlight important aspects of a scene, so try experimenting with various lighting setups to find the one that works best for your project.
Rendering is the process of generating the final frames of the animation. It involves compiling all elements, including models, textures and lighting, into complete and finished frames. Rendering can be taxing on your computer and may take hours or even days to complete, but it's essential for producing high-quality animations. (Pro tip: If your computer isn't powerful enough to render your animation in a reasonable amount of time, consider using a render farm instead.)
6. Compositing and Editing
Compositing involves combining various visual elements into a single cohesive frame. This process can include adding visual effects (VFX), adjusting colors and layering different elements to create a polished animation and fix any unwanted problems.
Editing is the final stage of post-production in which the final animation is refined and perfected. This includes sound design and sound effects, incorporating additional special effects and ensuring that the animation flows smoothly and meets the desired quality standards. Color grading and color correction are also performed to ensure visual consistency from start to finish.
Elevate Your Animation Skills with Skillshare
Each stage of the 3D animation pipeline—from pre-production to post-production—is essential for creating a top-notch final product. Each step requires a specific set of skills and knowledge, which can be honed through practice and continuous learning.
To embrace continuous learning yourself, enroll in one of Skillshare's many 3D animation classes. Our experienced teachers provide beginner-level tips, advanced tutorials and industry insights that can help you become the best 3D animator you can be.
Related Reading
Carrie Buchholz
Carrie Buchholz is a freelance writer who lives in Northern Colorado with her husband and dog.
Try Skillshare for free! Sign up for a 7 day free trial today!
Get Started- Unlimited access to every class
- Supportive online creative community
- Learn offline with Skillshare's app


