

Stippling 101: Definition, Techniques & Tips for Illustrators
Use the power of dots to create life-like portraits, detailed florals and light-filled landscapes by learning the art of stippling.


Some artists switch between dozens of drawing styles, others refine one style for their entire careers. With such a vast range of drawing and sketching techniques, it’s common for artists to find it difficult to find the right one for them.
By learning about new drawing styles like stippling, you can try your hand at a portrait of your brother, a nature-mort of the fruit on your kitchen table or a beachside scene all while discovering which drawing style best fits your skills and tastes.
This guide will help beginners and advanced artists alike discover stippling and provide tools and tips for practicing it like a pro.
What is Stippling?
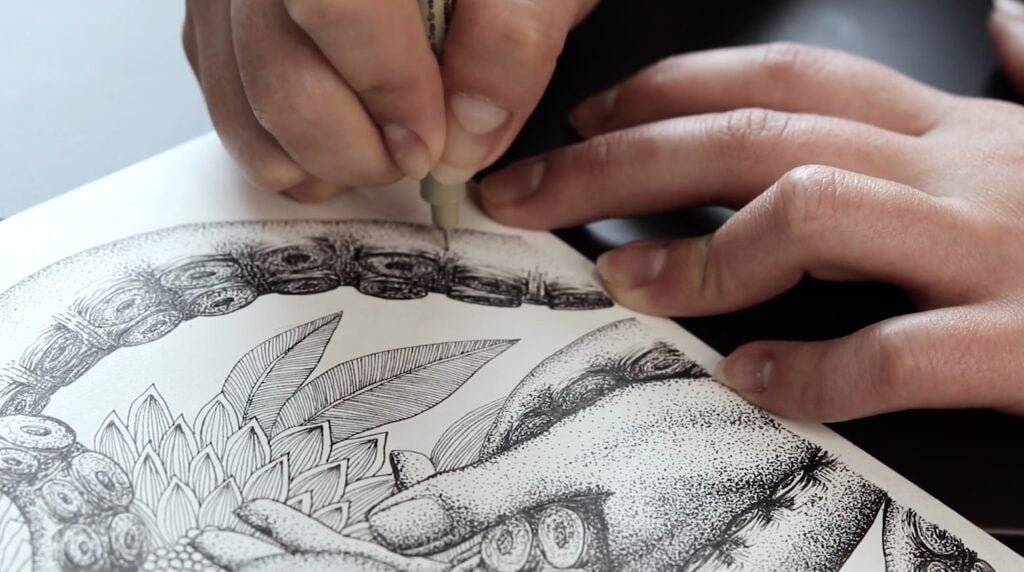
Stripping is a mark-making technique used in both drawing and painting to replicate light and shadows using little dots. You may have already seen artists use little dots to create works of art like impressionists Georges Seurat, Paul Signac or Camille Pisarro. But their works of art employ a different style of dotting art called pointillism. Stippling focuses on tonal value—dark to light—rather than dots of color to create the optical illusion of shimmering light like pointillism.
In stippling, you create dark, shadowed areas in your art by placing a larger number of small dots closer together. You create light areas by adding fewer dots to a space and keeping them farther apart.
For beginners, try starting your journey with stippling by creating a gradient. Find a small piece of paper, like a flashcard, and start with a lot of compressed dots at the bottom. Slowly reduce the number of dots as you work toward the top with your pen. Consider using a fine pen, sharp pencil or an ultra-fine marker for your stippling creations.
How to Stipple in 5 Steps
Before you start stippling, it’s important to get inspired. Use a search engine or Pinterest or the world around you to find simple objects that you could stipple easily.
Step 1: Gather Your Materials & Workspace
Start by finding a well-lit and comfortable place to draw. Stippling is a slow, precise process. You’ll also need drawing paper and your writing or painting utensil of choice. For beginners a sharp, hard pencil is best so you can erase if needed. If you use too soft of a pencil, you might smudge your work as you go. HB, H and 2H pencils are all good options.
A ballpoint pen, an ultra-fine marker or a fine paintbrush will also work. You can choose a small subject and a small piece of paper to avoid feeling overwhelmed early on.
Step 2: Sketch & Start Stippling
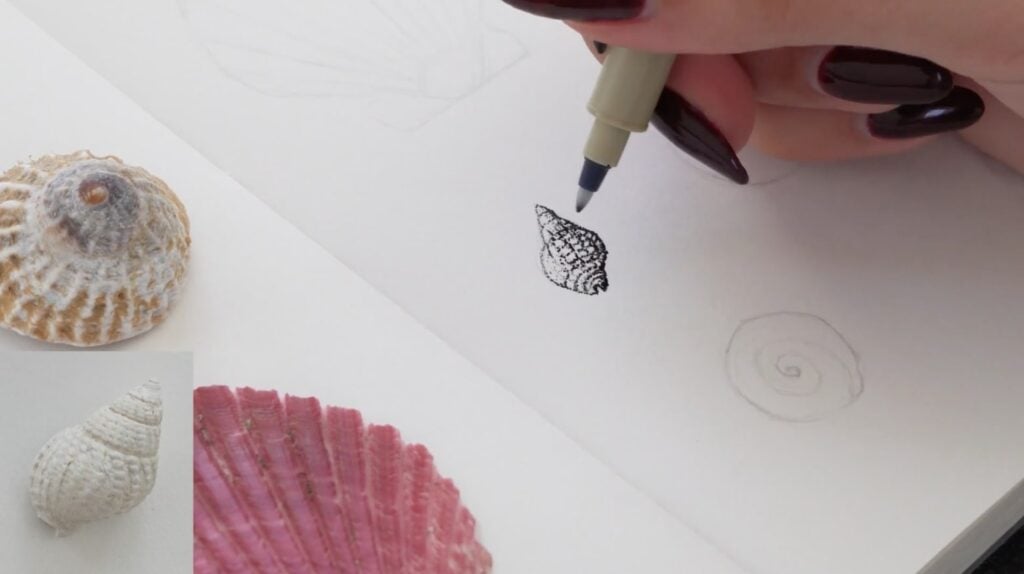
When first starting out, it can be helpful to outline your subject lightly with pencil as a guide. Most artists start stippling within the darkest areas of their subject in order to set the tonal range for their piece.
With stippling, you can always make an area darker but you cannot make it lighter without starting the area over from scratch–unless your dots are far enough apart to erase each one individually.
You can create edges by using a tight and dark stippling technique. It’s really important to keep the size of your dots consistent and your stippling pattern steady. If you start adding your dots haphazardly, your final piece will look messy and rough.
Step 3: Develop Your Image
You can adjust your dot density to change the tone and texture of your piece. A really tight dot pattern will look dark and smoother, while a semi-tight, semi-loose pattern will still look dark but appear more textured.
A very loose dot pattern will look light and smooth. Through your stippling process, you can stop and observe the uniformity of your dots. Try to balance your stippling artwork out as you go rather than at the end of your stippling session. You can do so by regularly stepping back and assessing the artwork from a distance to ensure this overall balanced look.
Step 4: Refine & Detail
One of the most common pieces of advice you’ll hear from more experienced stippling artists is to be patient. It can take hours to create a small stippling piece, and you’ll often spend as much time refining and adding detail to your work as you will creating the initial draft.
Step 5: Try Different Stippling Techniques

Once you have a handle on basic stippling techniques, you can try adding different colors or experimenting with new mediums. If you started out using a pencil, you might try using gouache or acrylic paint to make your dots. Or you can try your hand at stippling within a digital art app like Procreate.
You can also explore more complicated subjects. Consider digging up a doodle you drew in the past and trying to see how it would look stippled.
As you get more advanced, you might use some of the skills you learned while stipping to try your hand at pointillism. With pointillism you’ll use color theory to create scenes by overlapping different colored dots. If you wanted to create shades of green, you’d overlap dots of blue and yellow.
Master Stippling & More Drawing Techniques
Whether you want to make stippling your drawing genre of choice or just use these stippling tips to employ new shading techniques within your work, stippling is a key skill in any artist’s arsenal. If you want even more guidance on your stippling journey, you can explore a few Skillshare classes with tutorials on stippling and other illustrative techniques like cross-hatching.
Related Reading:
Calli Zarpas
Producer & Writer by occupation. Ceramicist & Newsletter Editor by avocation.
Level-Up Your Drawings and Illustrations with Skillshare
Start Your Free Trial Today!- Drawing classes for all levels
- Digital and traditional drawing styles
- Unlimited access to all classes


