

Learn to Paint Watercolor Flowers
Watercolors allow you to capture flowers’ vivid colors, the softness of their petals, and the joy they bring. Learn how to paint watercolor flowers today!
Table of Contents


Need an idea for your next watercolor painting? Flowers are the perfect choice. They come in a wide range of colors, textures, sizes, and shapes, so they will always feel new and interesting, no matter how many times you use them as a subject. Below learn how to paint watercolor flowers of all types, from roses to tulips—and everything in between.
How to Paint Watercolor Flowers
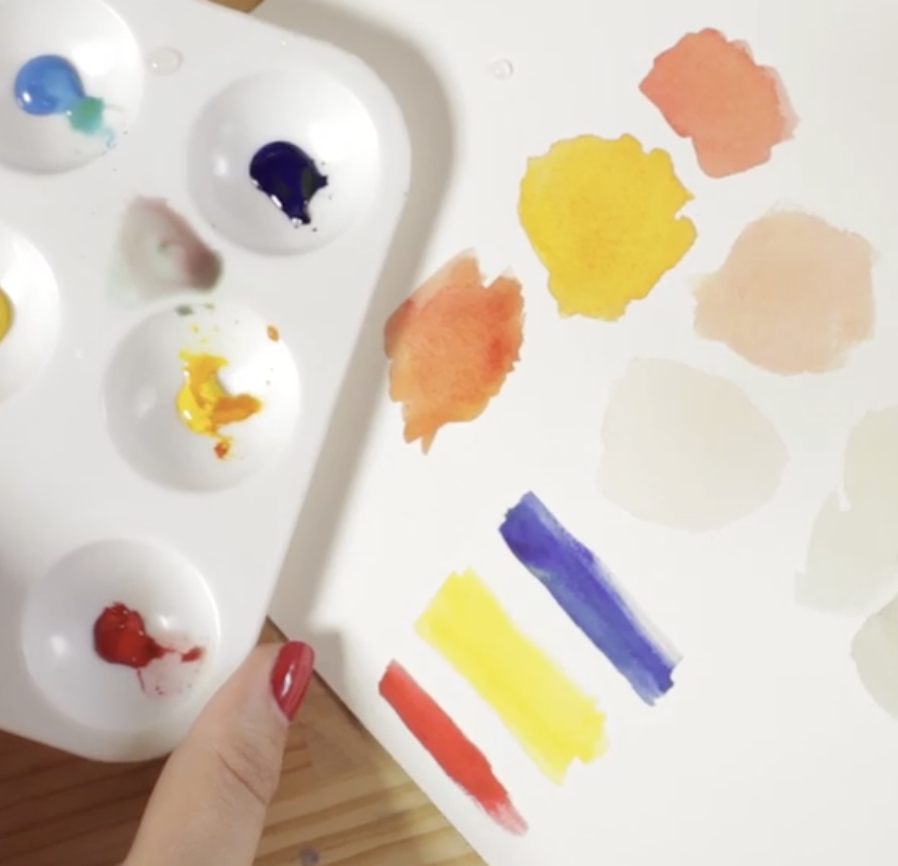
Before you begin painting, you should have a few tools: watercolor paints, watercolor paper, water, and a few brushes. While you can use whatever brushes you feel most comfortable with, round brushes are particularly helpful when painting watercolor flowers, as they hold a good amount of paint and water. Plus, they allow you to make both thick and thin strokes—perfect for painting thick petals and thin details, like filaments, anthers, stems, and leaves.
New to Watercolors?
Art Essentials: Learn Watercolor Painting Basics
Watercolor Roses
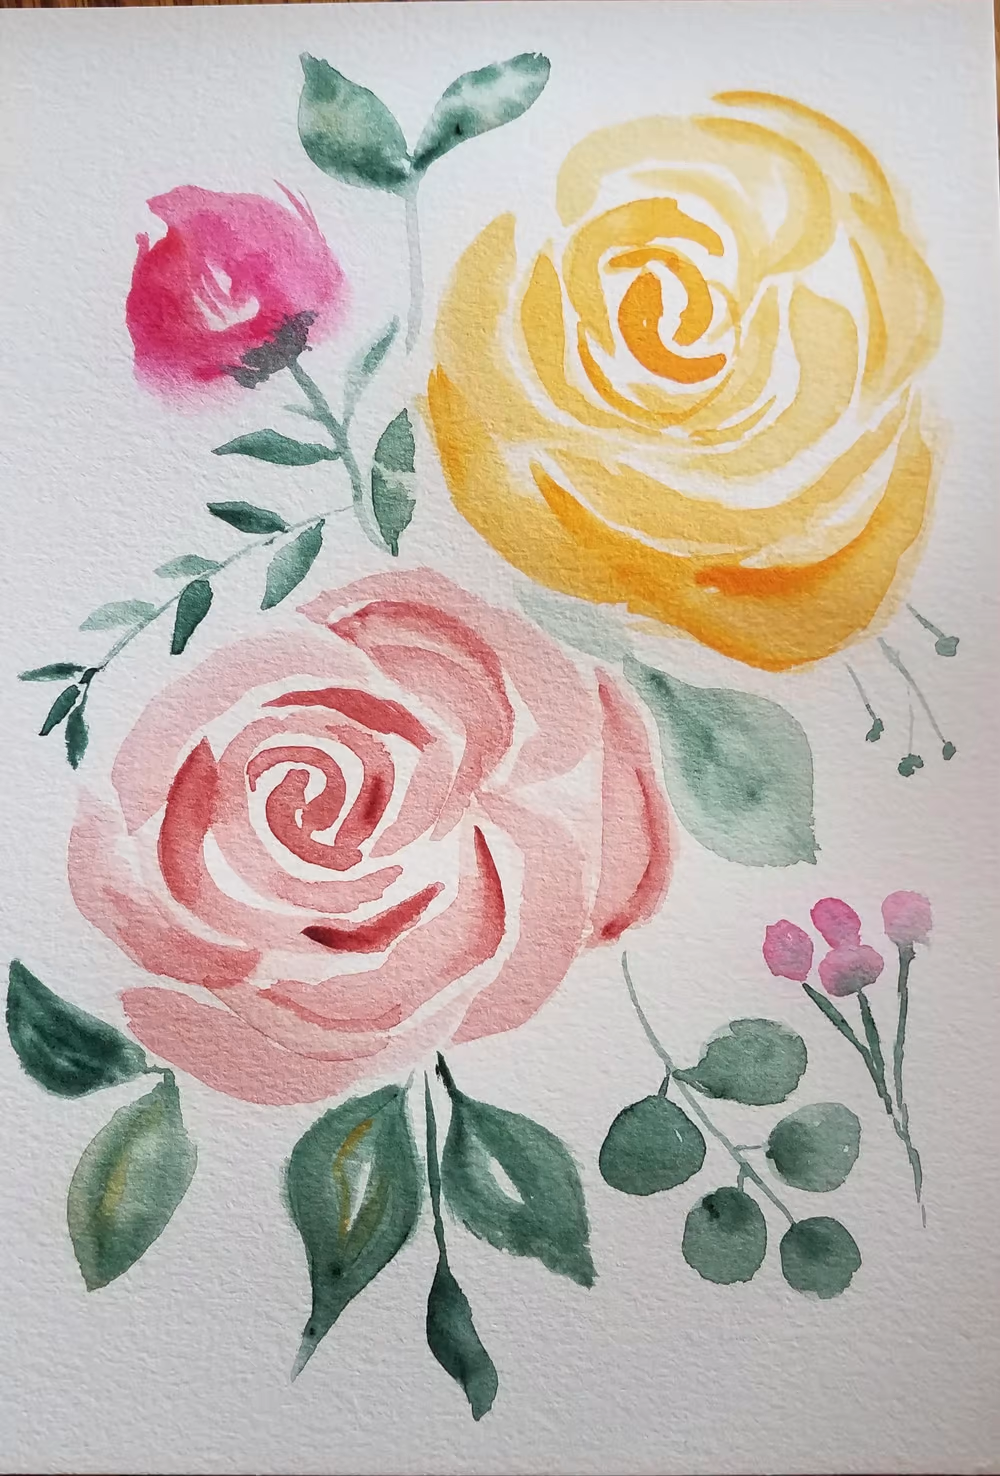
To paint watercolor roses, start with a brush that holds a lot of water. Load some paint onto your brush, and start by making two small C shapes close together—this will be the center of the rose. (Keep in mind that the center should be the darkest part of the rose, while the outermost layers will get increasingly lighter.)
Then, draw two to three semi-circular petals around the center shape. Keep adding layers of petals, leaving white space between each to add depth, until you’re satisfied with the size of the rose.
Watercolor Peonies
To paint watercolor peonies, start with two petals arranged in a V shape. Use a broad stroke to create the main shape of each petal, and then use the tip of your brush to add some wispy details on the outer edges.
Next, add another petal in the center of that V, using quick, light, up-and-down motions. Add two more petals on each side, making sure to leave some white space between each—otherwise, the paint can bleed together and make one large splotch. Finally, add some wispy strokes extending out from the bottom of the flower.
Once you have the basic shape of the bloom, use some additional paint to darken the inner corners of the center petals to create depth.
Finally, once the petals are dry, use a different color (like a dark yellow or burnt sienna) to add thin lines coming from the center of the flower—these are the peony’s anthers.
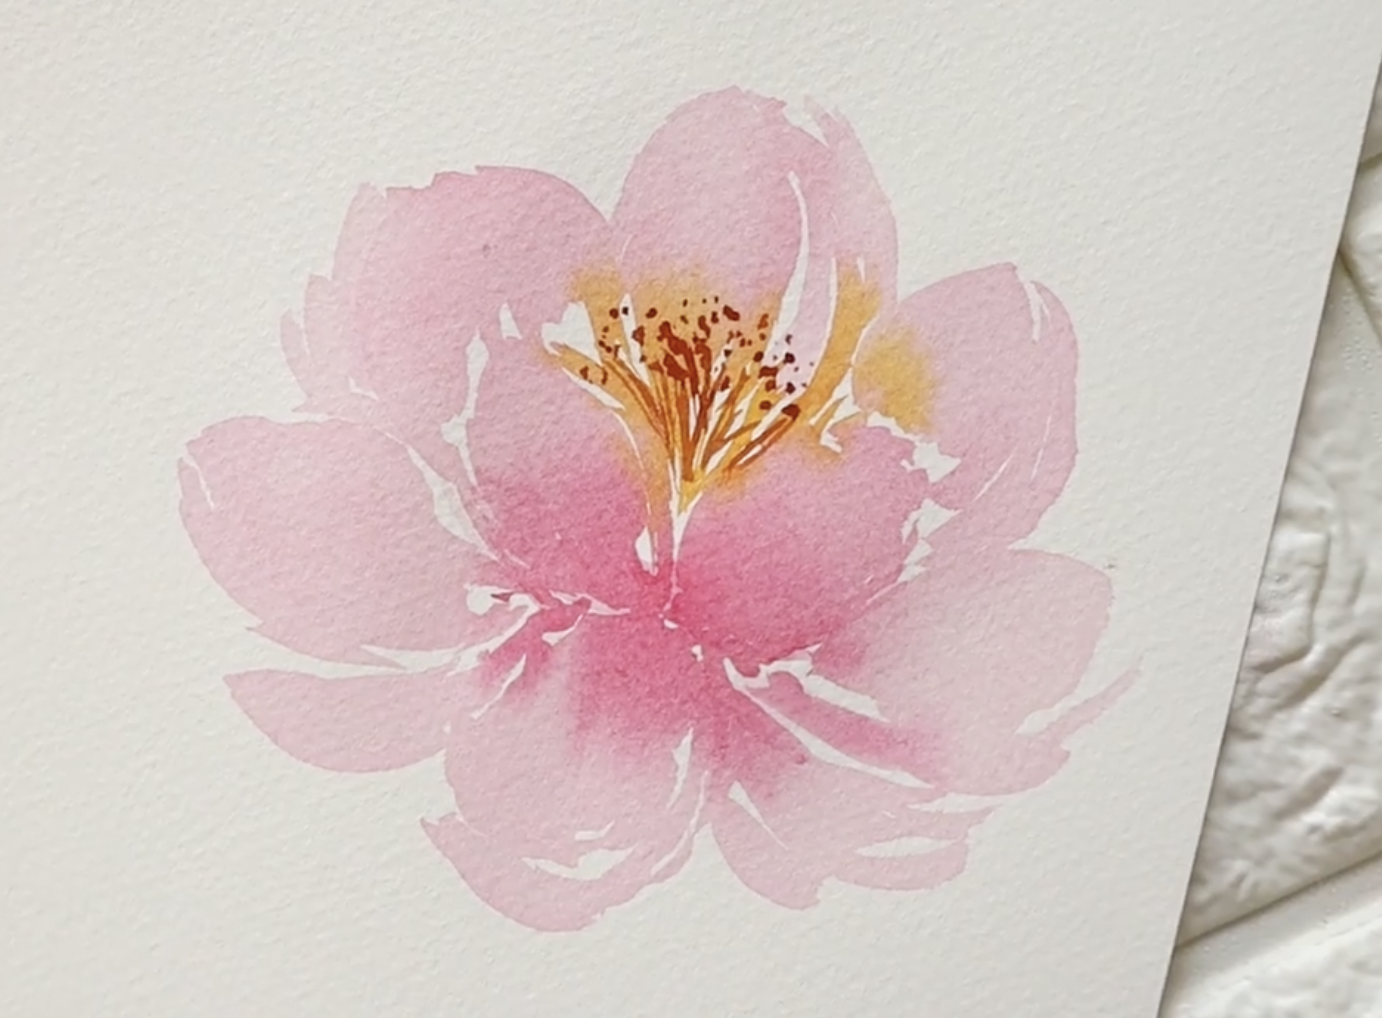
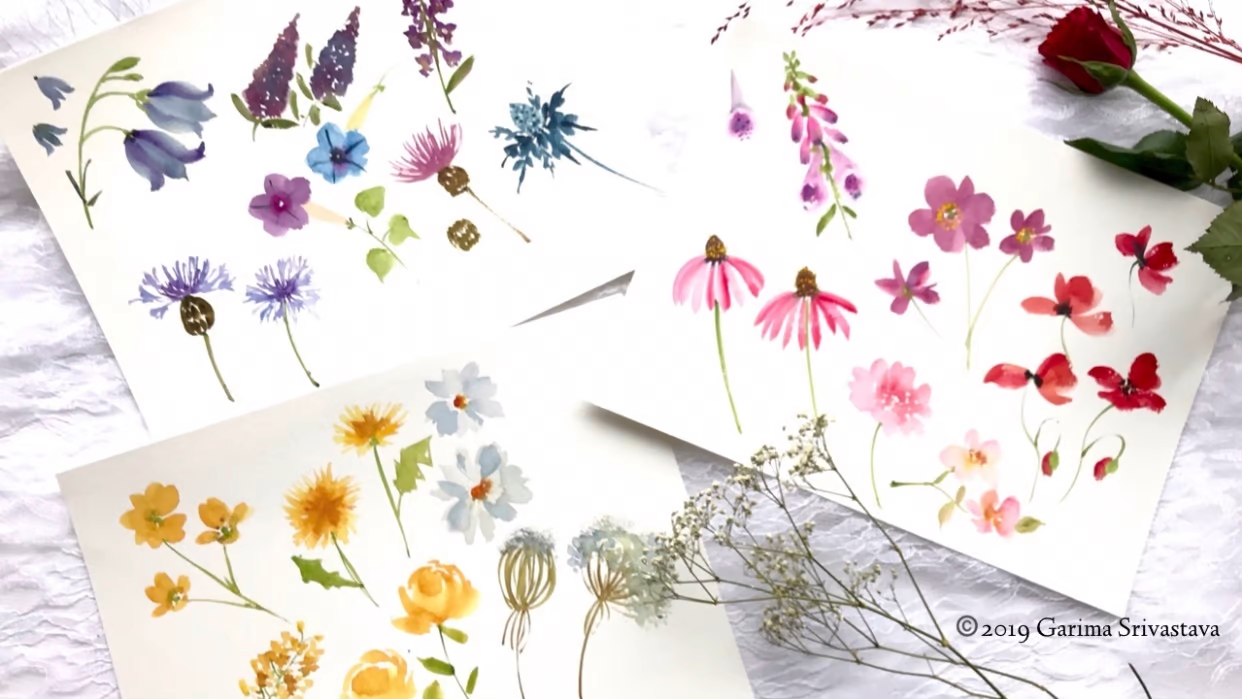
Watercolor Wildflowers
Wildflowers are particularly fun to paint because they come in so many different shapes and colors. To create a yellow buttercup, for example, start with four heart-shaped petals. Then, add a bit of green to the center and let it bleed into the petals. Finally, add a thin green line as the stem.
To create purple haze, use small dabs of purple, red, and blue paint to create a long, conical cluster of petals. Then, swipe a damp brush along the edges of the cone to soften the shape and blend the dots together.
These are just a few examples of watercolor wildflowers—there are plenty more to experiment with!
Watercolor Hydrangeas
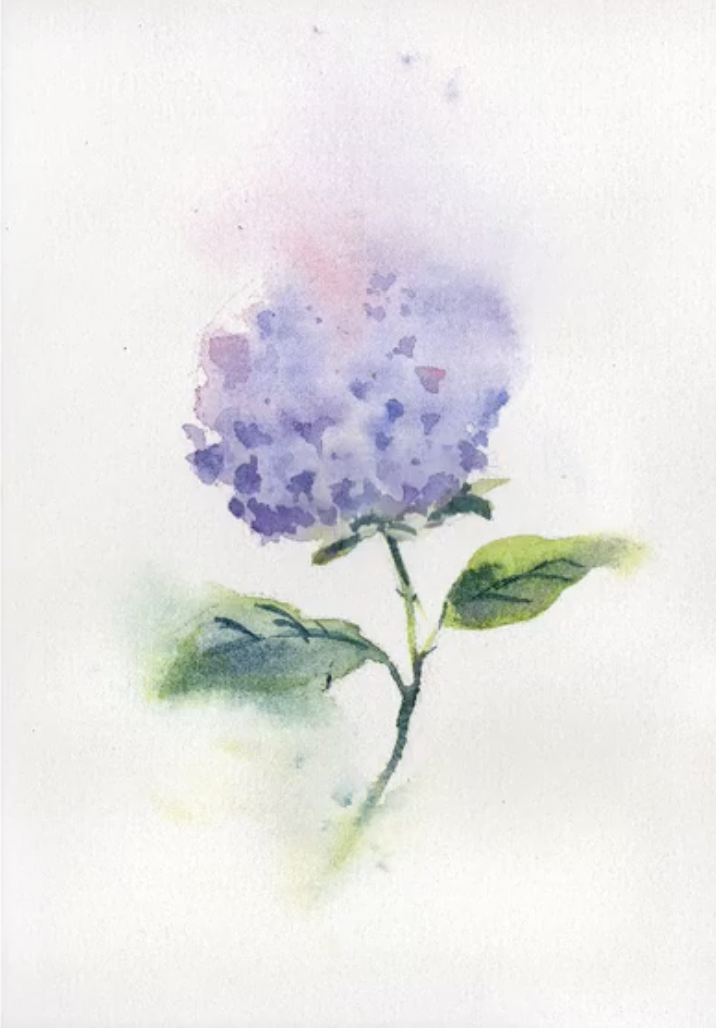
Painting watercolor hydrangeas is the perfect opportunity to practice a wet-on-damp technique. First, use a brush loaded with water and a bit of light blue or purple to create a circular shape—this is the base layer of the flower. Then, while that layer is still damp, use darker pigment to create the definition of the petals. The colors will bleed together a little, but that’s exactly what you want (and expect) with a wet-on-damp technique.
Once that paint is completely dry, you can add in additional details with your darkest pigment. Finally, add a thin stem and two leaves.
Watercolor Daisies
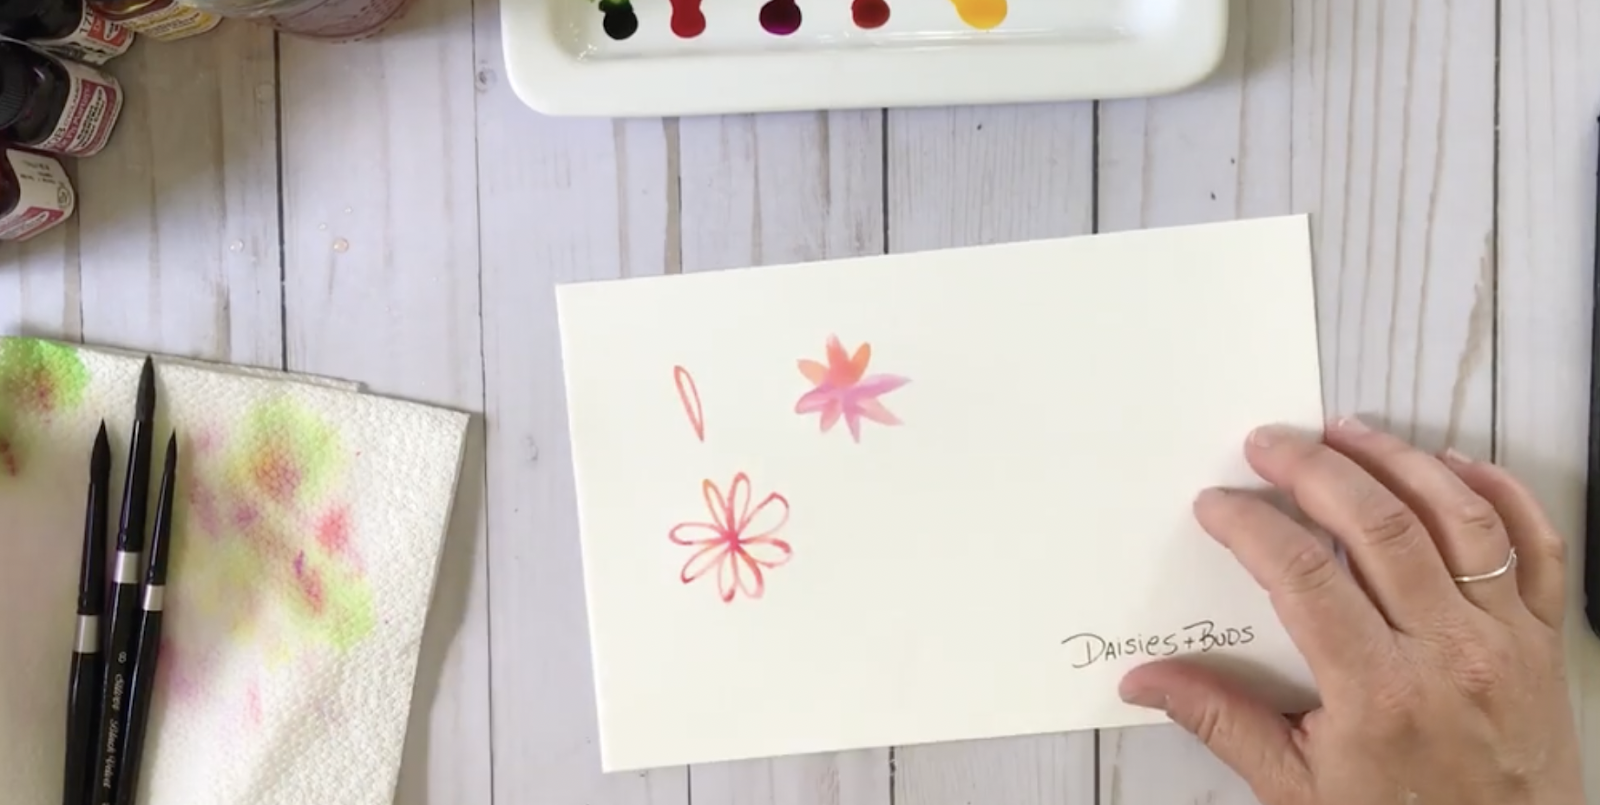
You can create watercolor daisies in many different ways, from realistic to a more graphic style. For a simple, cartoon-style daisy, use your brush to draw the outline of seven to eight long petals extending from a center point. For a slightly different style daisy, use the entire head of your brush—pressing it down almost like a stamp—to create the petal shapes.
These types of daisies are quick and easy to paint, and they are especially useful as filler flowers if you are creating a bouquet.
Watercolor Tulips
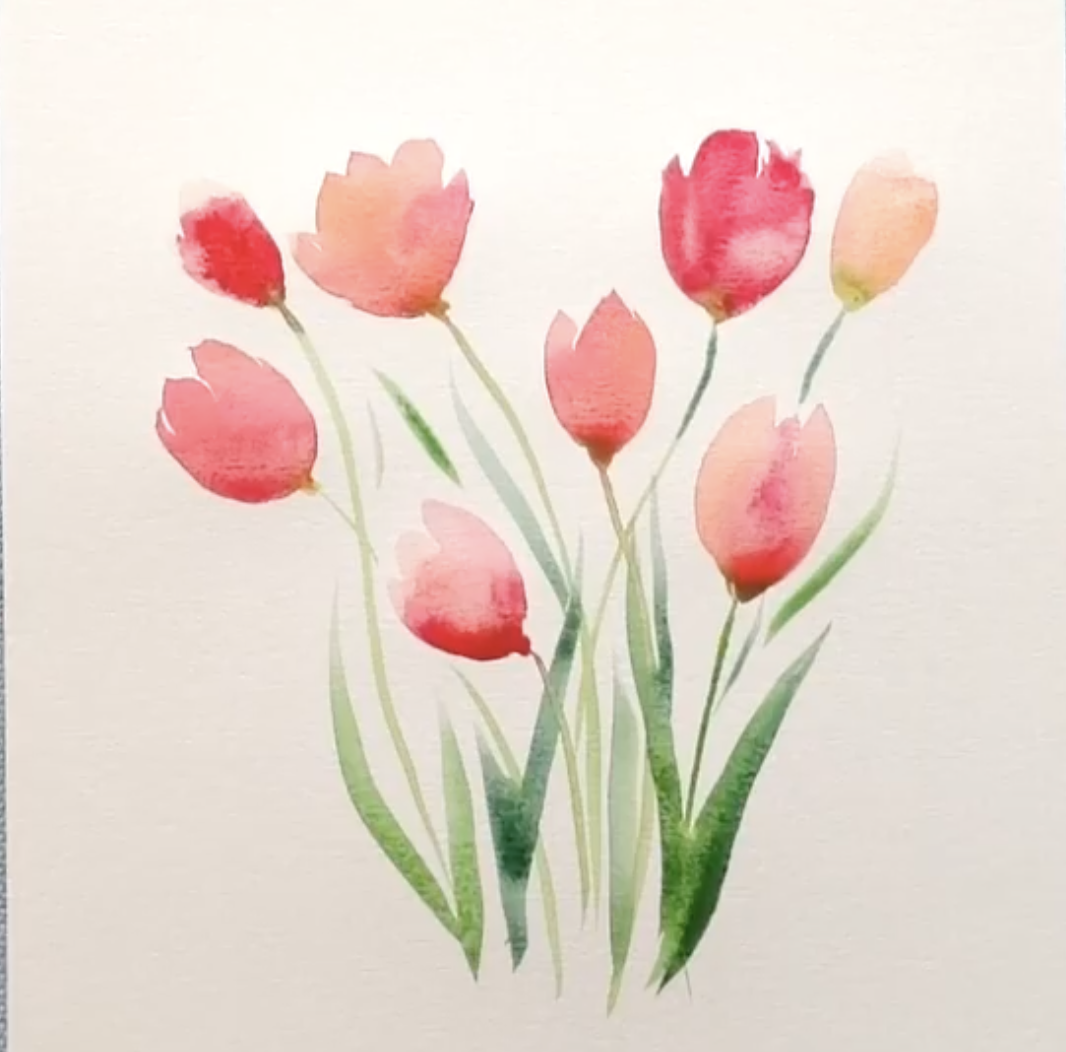
Tulips are simple, bell-shaped flowers that make them the perfect subject for a novice painter. Start with dry paper, and load your brush with water and pigment. Then, simply paint three or four broad strokes that come together in a gentle curve. The tops of the strokes should be fairly irregular, while the bottom becomes a nice, rounded base.
While the paint is still wet, you can layer in an additional color or darker hue to add dimension. Then again, before the paint dries, add a dab of yellowish green at the base of the flower—this is where the stem will connect to the bloom. Finally, add long, thin strokes of green to create the stems.
Watercolor Chrysanthemums

Chrysanthemums are made up of several layers of long, thin petals, densely packed in the middle and then gradually unfolding outward. To paint watercolor chrysanthemums, you’ll follow that pattern—starting with the center and working your way out.
In the center, start with short, small strokes and dense color. Then, add longer petals extending out from that center point. Use a variety of dark and light shades to create depth. Finally, add a stem and a few jagged leaves.
Watercolor Pansies

To paint watercolor pansies, start by forming two clamshell shapes extending to the right and left of the center point. While that paint is still damp, dab in some slightly darker paint along the outer edges of those two petals—it should bleed inward toward the center of the flower. Then, add one larger petal at the bottom of the cluster, using the same wet-on-damp technique to add a darker paint to the outer edge of the flower. Finally, using a complementary color, add two more petals to the top of the bloom.
When that paint is completely dry, add in the final details: thin, yellow filaments at the center of the bloom, as well as a few strokes of dark veining on the petals.
Watercolor Bouquet

Can’t decide on just one type of bloom? Paint them all in a beautiful watercolor bouquet! Now that you know how to paint watercolor flowers of all kinds, you can put them together in a more complex composition.
It’s often helpful to sketch out this kind of composition before you begin painting. This will allow you to look at the image as a whole to make sure it looks full and balanced. To start, think about the flowers that you want to showcase most prominently. Once you have sketched those flowers, work in any secondary blooms, followed by greenery and filler flowers—like small buds or daisies.
Then, consider your color palette. Some artists want their focal flowers to stand out, so they choose to use a wider range of hues—like pink, blue, and yellow. However, monochrome bouquets can be just as stunning, so don’t be afraid to work with just a few shades.
Let Your Skills Bloom
Painting watercolor flowers can be a fun, quick warm-up or the basis for a complex botanical composition. By taking the time to experiment with different types of blooms, you’ll challenge yourself, have fun, and produce beautiful images.
Create an Entire Garden
Botanical Illustration: Paint a Colorful Garden with Watercolor and Gouache
Try Skillshare for free! Sign up for a 7 day free trial today!
Get Started- Unlimited access to every class
- Supportive online creative community
- Learn offline with Skillshare's app


