

Intro to Photography and Photo Editing
Learn the essentials of photography including composition, lighting, and editing.
Table of Contents


There are plenty of reasons to want to improve your photography skills. Maybe you want to document the trip of a lifetime, or perhaps you’re hoping to save money on portraits for your kids. You might just be looking for photo retouching tips, trying to put your best face—or avocado toast—forward on Instagram.
This guide isn’t going to show you loads of examples of perfectly framed composition photography, or suggest a course of study where you only read and never try techniques yourself. Consider this your practical introduction to creating beautiful, persuasive photos—from capturing the image to making the final edits. At the end, we will even help you take the first steps toward building a career as a photographer or photo editor.
This guide will help you turn moments into memories. We’ll guide you through the process of capturing photographs that look like professional or studio portraits, whether you’re going pro or just want to save a few hundred bucks. We’ll reveal the tricks that help make your subjects—human or otherwise—shine. Then, once you’ve sparked your passion for photography, we’ll share the basics of photo editing, demonstrating how restoring and retouching can help you create engaging content. We’ll review the basics of composite photography, allowing you to bring together two or more favorite memories or products. And we’ll try to do it in a way that makes this part of your photographic journey a fun and creative exercise—after all, it’s one that’s essential for long-term success.
Finally, we’ll share resources to help you start photography courses online. If you’re reading this guide, you’re probably looking to take some part of your photography to the next level. Once we provide you with the foundation, we recommend you take a photo class that drills down on a specific topic. You may want to focus on the more serious side of portrait photography, or have some fun with food and lifestyle photography. Maybe you’ve nailed taking pictures and are ready to learn photo editing online. Or perhaps you want to learn photo retouching to preserve long-ago memories.
In the end, this guide is just the beginning. The experience you gain from putting these tips into action will really make you a success.
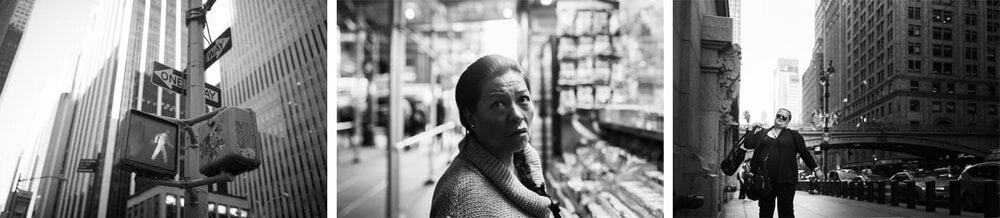
Can a photograph change the world?
Photography is proof that something happened. Whether it’s proof that two people got married, evidence that you just had the best meal of your life, or documentation of history in the making, the person behind the lens can play an important role in our world.
“As a teenager getting interested in photography I used to thumb through many a book in the library just looking at images. One day I stumbled upon Nick Ut’s Napalm Girl. From then on, I was hooked,” says Alan Gandy, British photographer and photography teacher of 36 years. “I knew then a photograph could change the world, because that photograph changed me. I knew from that moment I wanted to take photography seriously. I felt I’d had my eyes opened to its real power. I became fascinated by the Vietnam War photographers and how their work had, in many ways, influenced the war by bringing the true horror home for the first time in a way that can not be achieved with just words.”
Even with our around-the-clock access to information and imagery, a photograph still has the possibility of stopping you in your tracks.
Photography is about storytelling
Why do you want to take photos? More importantly, why do you want to take good photos? Whether it’s a magical moment or just a silent sales pitch, your photography is trying to say something—something worth remembering.
Storytelling With Product Photography
People don’t want to buy things; they want to buy a story. Consumers can go to big retailers like Amazon for two-dimensional static product images, but they’ll choose your smaller business for your story—and product photography is an essential part of telling it. Shopify has specifically pointed to low-quality or boring photos as to why some stores sell less than others online. Product photography, whether it’s for your business or a client’s, is a prime example of how strong storytelling has a role in every kind of photography.
Perhaps you sell candles—scented candles, with organic paraffin wax and no artificial dyes. Sure, you could put an unopened candle inside your portable lightbox studio and snap a photo. But what if, instead, you created experiences and stories to make your candles stand out? Think about the mood your candles create. If your cookie or cinnamon-scented candle calls to mind family and holidays, try a shot with a Christmas tree in the background. Selling a relaxing lavender-scented variety? Frame the burning candle next to an inviting bubble bath.
The lesson here is that every object has a story. If you tell that story through photos—instead of just putting an object against a solid background—you’ll stand out online, and your business will be better for it.
Storytelling in Occasion Photography
The best moments at a wedding or event can be the obvious moments, like a father-daughter dance. But they can also be the ones that are unplanned—when the fight for the bouquet gets a little too aggressive, or when the flower girl dumps her basket of petals. And, of course, you can’t miss capturing the couple’s natural interactions. Sure, you’ll take posed pics of whole bridal parties, but it’s the candid moments that sell your shots time and again.
“For me, the best tricks are to catch the most emotional moments,” says portraiture and wedding photographer Rocio Sanchez. Her motto as a photographer is “Tus recuerdos son mi trabajo” — “Your memories are my job.” She says kids often create these memorable moments, whether posed or candid. “They are so natural, which means the photos just come out better: filled with spontaneity and joy, without any need to pose.”

Tabitha Park, a lifestyle photographer who brings her memory-capturing skills to the homes of new families, agrees. “Things change so fast,” she says of time with a newborn, “and by capturing these moments in their correct spaces, it just adds so more to their story.”
Park understands that these aren’t just the beginning weeks of a child’s life. As a photographer, you are freezing moments that will hang on a wall and be cherished forever.
Whether you’re snapping pics professionally or as a hobby, make sure your photography is memorable for good reasons. Always ask yourself: “How am I creating memories?”
So Tell a Story!
Sometimes, the best way to tell a story through photos is to share a memory from start to finish.
“Build up a set of images that tell the entire story of the event from initial setup and preparation through to the final performance,” says part-time photographer and facilities management consultant Craig Shepheard. “Don’t just stand in one place for the entire event. Otherwise, every single shot will look the same.”
Still, you don’t have to reinvent the wheel. “Google is your friend,” says Shepheard, using a recent fashion show he shot as an example. “See what has worked well on other websites of other fashion shows. Watch YouTube videos of fashion shows to see how the events work.”
You don’t want to be overwhelmed the first time you’re covering an important event, so familiarize yourself with how it’ll probably go—and don’t hesitate to ask your subjects or customers to share the plan in advance. Whether you’re shooting a high-style wedding or jumping into wildlife photography, in the end, you’re just capturing a moment. Learning photography basics can help you pursue any type of photography you desire.

“The most important piece of equipment that you will ever own is your eyesight,” says Shepheard. “Think about what pleases your eye and then try to replicate it.”
Where to Start: Learning Photography
Photography courses can introduce you to the basics, take you deeper into your art, or even help you sell your services and work. This is an entry-level guide to making yourself more marketable as a photographer, so skim over what you already know and dive into what’s new. We spoke to a mix of full- and part-time photographers. Learn from their experience and improve your hobby—or even turn it into a business, just like they did—with these tips.
Read the instructions
It’s the most obvious piece of advice, yet one that we almost never follow. “Read the damned instruction manual,” says Gandy. When you’re looking to take your photography to the next level, it’s important to start at the beginning.
Did you buy a used or vintage camera? Google it. You’ll almost certainly find a user guide to help you understand how your camera works, but you’ll also likely stumble upon fan forums and Facebook Groups dedicated to helping you make the most of it.
Snap as many pictures as you can
The best way to learn photography is through practice. Taking photographs is drastically more affordable than it used to be: Your images are no longer on fragile film, and you’ll have plenty of space on a good memory card. The best photo lesson is to take advantage of that opportunity—keep shooting until you find your footing.
The best way to learn photography is to learn more about yourself. Photography is an art and success means something different to every person. Take tons of photos and be critical of the results. What are your strengths and weaknesses? Where can you improve? Where did you seem to just nail it, and what were you thinking at that time? As with all great art, strong photos say as much about the photographer as the subject. Keep snapping away until you know what you are saying.
Look for that frame-able moment
An amateur will look around to find the right shot. The pro will look through her lens and create the perfect shot. Composition photography is all about framing—and we’re not talking about what’s on your wall. Framing involves drawing attention to the subject of your photo by blocking other parts of the image with something in the scene.
The simplest example of composition photography is a window—maybe a perfect picture of the sea from your hotel room in Santorini. Composition photography draws the eye toward your focal point. This “framing” window also gives context: You aren’t just taking a pic of the sea, but you’re doing it from within a room with a view. It shows off a wave or two of that deep blue sea without showing everything, keeping the viewer wanting more. And it’s a great shot if you are photographing the hotel or just trying to spark a little FOMO for your friends on Facebook.
But composition photography isn’t just physical frames. Composition comes into play anytime you use something in the foreground to draw the viewer to the main focal point. But be careful: Try to include too much as a beginner, and your composition photography wil look more like a cluttered collage. The purpose of composition photography is to make order from disorder, so always ask yourself if you are adding or taking away from your focal point by framing. And, when in doubt, remember that we’re in the age of nearly limitless memory cards—just try it both ways.
It’s called ‘horizontal’ for a reason
Want to go to the beach and capture that perfect sunset? Perhaps you climbed that mountain and want to savor the moment, or you’re an attempted wildlife photographer capturing a cheetah running across a grassy field. Gandy reminds new photographers a simple reminder of the concept we all tend to forget as we try to get too artsy and tilt our cameras: horizon equals horizontal.
“It’s an absurdly common mistake,” he says. “Every time I’ve ever looked, the horizon is horizontal. It never ceases to amaze me just how many images I see, even from people who claim to be competent photographers, where the horizon is enough out of kilter in a landscape or seascape to make me foam at the mouth. It’s a sloppy and careless mistake.”
This is something that can be fixed during the editing process, but it’s much better to plan your shot right from the start by making sure it’s in line with your sunrise, sunset or beach line. And you don’t need to drag around a tripod to achieve it.
“Use the auto-focus points or other viewfinder elements as reference,” Gandy says. “If you aren’t confident in your own ability to level your camera, take several images, adjusting the angle slightly to cover yourself.”
Follow the “Rule of Thirds”
To follow the Rule of Thirds, you actually break up and frame your photo into nine cubes—three squares horizontally and three squares vertically, like The Brady Bunch. Our eyes are naturally more drawn to where those lines intersect than to the center. If you were taking a photo of someone standing up, you might position them on one of the two vertical lines, in the center of the two columns to the left. The head would be positioned in the top part and torso in the middle. Viewers’ eyes will automatically be drawn to the upper left corner to look at the face.
Most digital cameras will actually put the grid on your viewer to help you position your shot. Otherwise, you can just try your best. Photo editing software can help ensure your focal point is perfectly placed even after the shoot is over.
Find the right lighting
Lighting can be your most important tool or your biggest hindrance. This is what the aperture stop of your camera lens controls: It can be adjusted to manipulate the amount of light reaching the film or image sensor. In combination with shutter speeds, the aperture size can regulate exposure to light. Slow shutter speeds allow more light into the camera sensor and are used for low-light and night photography, while fast shutter speeds help to freeze motion.
Aperture usage can vary by camera, so it’s one of the most important things to read about in the manual. There are many online photography courses dedicated to aperture alone—lighting for photography is just that important.
Another important camera functionality is the ISO setting, which measures the light sensitivity of the image sensor. The more light you have in the scene you’re shooting, the lower your ISO. You can program your camera to have a higher ISO setting in darker areas, which lends to faster shutter speeds.
You won’t always have the right lighting no matter how skilled you are with your camera settings—that’s where editing photos will come in handy—but it’s important to keep in mind.
Learn More About Lighting and Aperture
Take your street style and landscape photography to the next level with Jamal Burger in this Skillshare Original.
Learn how to take professional portraits
If there’s one place where you can control lighting in photography, it’s your studio. Your studio may be one you rent, a space in your home, or a portable set you set up on the fly. If you want to take professional portraits, controlling your studio lighting setup is key. Why? First and foremost, people hiring you for studio portraits aren’t looking for honesty—they are looking for a beautiful portrayal of their subjects. No one wants to buy studio portraits that aren’t flattering. This means that in addition to good lighting, you’ll also need the skills to erase blemishes, fine lines and wrinkles, while still capturing the essence of that person.
You can take specific courses online to help you create dramatic portraits. In this Fundamentals of Portrait Photography class, learn from fashion photographer Justin Bridges about how to take stunning photos of anyone. The course allows you to follow along with a DSLR or iPhone, and teaches you to edit with Adobe Lightroom. When you’ve completed the lesson, you will have a greater understanding of how to create drama with daylight, expression, and body language. These techniques can help you delve into portrait photography in an emotional way and even build a career out of shooting studio portraits.
Editing Photos in Your Digital Darkroom
Many film photographers still use darkrooms to develop their images, but this section will focus on digital photo editing. The world lives online now, and you’d be a fool not to take advantage of the free photo editing software at your fingertips.
While you may scoff at the idea of editing photos, enhanced photos will help sell your art, whether it’s a print on a wall or a series of product shots for an online store. Photo retouching can take you from amateur to professional: A client is going to expect a polished finished product when the photos are delivered. Often, that means that you’re either going to need to do the editing, or you’re going to waste money outsourcing it.
Once you’ve got the basics, it’s important to find your own unique style of photo editing. “I learned my craft long before the emergence of digital photography, but in many ways things have not changed,” Gandy says. “Developing a recognizable style of processing is just as important using photo editing software as it was in the darkroom, albeit a lot dryer.”
Learning to edit your photos can lend a different editorial slant to your photography. It allows you to discover your style of photography, what you enjoy editing, and what makes your photos unique. “A skilled photographer, professional or amateur, will visualize the end result at the time a photograph is taken,” Gandy says. “Knowledge of the processing options available makes that possible.”
Photo editing won’t just improve your own photography. It is a highly marketable skill, and can lead to work as an assistant or at an advertising agency. Skillful photograph editing can also get you a job editing stock photos or even working for top magazines. It can also be a great in-between gig. A lot of your work may be seasonal: Whether it’s wildlife photography or weddings, there are times when you’re busy and times when you encounter a worrisome lull. Editing photos can not only pass the time, but fill in those income gaps as you look for more photography work.

Photoshop for Beginners
Join designer Meg Lewis for Skillshare Original course Fundamentals of Photoshop, which covers workflows, tips, and trips.
How Online Photo Editing Courses Can Make You More Valuable
Leaving your day to job to follow your passion is exciting, but it’s easy to fail if you’re not prepared for the competition. Diversification is key for successful freelancers or entrepreneurs. Taking multiple courses in photo retouching is a promising way to learn skills and gain hands-on experience while also improving your art.
In fact, photo editors tend to be more in-demand, and thus are able to charge more per hour —20 percent more—than traditional photographers. Becoming adept at photography retouching not only makes your art look much better, but it helps turn your art into a sustainable business.
If you have taken photography courses before and want to advance your skills in shooting and editing alike, you might benefit from a class like Understanding Aperture, a hands-on course on black-and-white photography that also explores using Adobe Lightroom to enhance your work. You can learn how to assess different equipment and what settings will optimize your focus. You will also learn what times of day and types of lighting are ideal for shooting. The course also teaches you how to compose interesting landscapes and cityscapes. Lastly, it introduces you to the most important editing tools when dealing with black and white photography.
What Does Photo Editing Work Entail?
You are your first photography editing client. But if you want to make editing an essential part of your business offering, there are various ways to make money from editing photos.
Photo editors may be expected to choose relevant pictures for articles or content; assign and often train staff photographers on company directives; modify the photos; and sometimes take your own pictures. The personality traits that mesh well with this profession vary, but you will do well if you’re a self-starter with a penchant for organization and the ability to work under pressure.
To be competitive in the job market, editors should have knowledge of different software and technical equipment, have a fundamental understanding of what makes a good picture, and have an organized portfolio that showcases their abilities. Additionally, they should be able to follow deadlines, direct photographers, and make fantastic pictures. Many times, employers will give preference to those editors who have an educational background to support their knowledge.
What Makes for Good Photo Editing?
You can’t be a great photo editor without having a knack for photography. The basis for editing is having a working knowledge of what makes a great photo. Without this foundation, you really cannot judge the merit of others’ work. However, there are ways to make great photos even greater. That’s where the next part of the photographer’s job comes in.
Just as the skills for different kinds of photography vary, so do the strengths needed for different types of photo editing. As you develop your skills for editing, you will notice that it takes different adjustments to create a beautiful portrait versus a stunning landscape. Portraiture is about presenting your model in the best light possible, removing blemishes and adjusting for skin tone. Editing an outdoor landscape, though, requires very different sensibilities. Photography courses online dedicated to each subject can really help steer your career in the direction you want it to go.
The Selfie as a Perfect Test Subject
The art of the self portrait is actually a great subject to help beginners practice photo editing. After all, we are most critical with ourselves—and having good headshots can be expensive! Take advantage of all the time you spend with yourself to play around with different natural lighting and studio lighting. Then, try smoothing out your rough edges in a realistic way, with skin tone adjustments and by removing any non-permanent blemishes. Ask for feedback, especially from your too-honest friends. Sometimes it’s hard to be honest with ourselves, but you want to make sure you still look like you, so don’t get overeager with the editing pen.
Editing Product Photography
A lot of work in the photo editing space is done for ecommerce and retail websites. People remember 80 percent of what they see and only 20 percent of what they read, yet the vast majority of online retailers are spending big on copy and little on photo editing. Yes, that copy is important, but we are still shopping with our eyes. The most successful brands connect with their customers not only through words, but through photographs, too.
As we transition to shopping without a sense of touch or smell, sight dominates our decision-making and is as important as reading the reviews before we make purchases online. Visual aspects like the color, shape, and angle of a high-quality photograph help a customer imagine what having that product might be like.
As you’re editing, consider the importance of responsive imagery. Shoppers are on any number of mobile devices, and your product photos must be visible on different screen widths and heights. For a good test to see if your product photograph photo editing holds up, try viewing it on your smallest screen.
Editing the Light and the Dark
There can be a certain retro appeal to grainy photos, but that’s not exactly appropriate for someone’s professional wedding or bar mitzvah photos. In digital photography, a noisy photo is one with a lot of extra pixels that make the scene blurry or distract from the focal point. This happens especially when you have a longer exposure shot in low-light settings. We can’t see well at night, so why would we think the camera is any different? Lowering your ISO settings, as we already discussed, will help ease this problem, but it can also increase your noise. Photo retouching is really essential here.
One way to reduce noise is to shoot on a RAW setting. In post-production, you’ll have much more flexibility to remove noise and increase exposure with a RAW file than the typical JPEG your camera will create.
Once you’ve snapped your pics, open them to the brutal honesty of 100 percent in Photoshop, or 1:1 in Lightroom. Start by playing around with the different noise reduction categories in luminance and color to find what can most clearly depict the wonder you were witnessing without making it look bizarre. Then remember to zoom out to get a feel for the whole thing.
There’s an App for That
Of course there’s an app for photo editing—there are probably thousands of them. Nothing is going to edit in the same way as the Adobe software suite, but tools like Photoshop and Illustrator take a lot of time to learn and cost a lot of money. It’s best to start off your photo editing journey with free or inexpensive phone and tablet apps that help you with composition, white balance, lighting, and other basics. It helps you get a better eye for clean photos, but just be wary of filters—they often make your work look contrived or cheap.
By learning photo editing online, you not only can dramatically improve your work, but you can save on equipment costs. You can clean up a lot of the mistakes of a dimly lit studio, weather complications, or even an inexpensive camera by simply taking advantage of the apps out there.

Editing Photos On Your Mobile Phone
Travel and lifestyle photographer Dan Rubin shares the best tips and top apps for editing photos on your iPhone.
Turning Your Photography Into a Business
Eventually, you may want to start earning money with your photography talent. That could start with taking a few weekend gigs, or enrolling in photography courses online for your resume or C.V. But maybe you’re ready to turn your side hustle into a full-grown business. Read this next section to get started.
Showcase your photography in an online portfolio.
Your portfolio is a representation of you: It is the first taste of your talent, personality, and dedication. Like a resume, it is sent along with a proposal or application to work for magazines, online entities, or media outlets. You can create your portfolio on a personal website, but you can go the route of publishing your work in different licensing databases.
Don’t neglect social media, either. A well-curated Instagram profile with an editorial slant could be your perfect portfolio. Try to stay active on a public Facebook page, or even use Twitter and LinkedIn accounts to showcase your photography—these platforms can attract plenty of new eyeballs, and their algorithms tend to favor high-quality images.
No matter where you showcase your enhanced photos, be sure to always include a very clear way to contact you. You don’t want to show off your work but fail to convert those views into new customers. “Your portfolio can just as easily seal a deal as it can break it in some cases,” says art director Alan Lavery, whose Skillshare course How to Turn Your Photography Hobby Into a Career helps beginners optimize their portfolios. “It's such an important factor to get right. It's a window to who you are as a person, and the most important tool in your sales pitch.”

Build a Strong Photography Portfolio
how off your best work with a well-curated portfolio by taking this Skillshare Staff Pick, How to Turn Your Photography Hobby Into a Career.
Do You Have a Niche?
Try to look for ways you can categorize your portfolio work, whether it is by subject—weddings and other occasions, corporate, sports, and nature—or by industry. Craig Shepheard, for example, specifically focuses on offering professional photography to facilities like the ones he manages during his day job. He’s created a niche for himself, which makes it an easier sell. Some wedding photographers only do destination weddings—which ain’t bad if you love to travel—while others, like Tabitha Park, focus on a certain season of life.
Other photographers, like Rocio Sanchez, live in small towns: Their niche is being the go-to photographer for that area. For Sanchez, any memorable occasion is a job. Her Facebook page makes sure to showcase photos—with permission—from all events, including town parades, weddings, baptisms, and festivals. She knows it is important for her business to steer away from controversy and politics and focus on town pride.
By cultivating a niche, you are easier to find online and have better search engine optimization (or “Google-ability”). More importantly, it allows you to be known for your craft. Word of mouth is still the top way photographers make a name for themselves, so you want to make sure you’re making your customers happy—not just so you can get paid, but to ensure that they’ll spread the good word about you.
Take the first step!
The first step to starting your own photography and photo editing business is to get yourself a camera and start shooting. (Of course, we do suggest you take time to read the instructions and charge the batteries, too.) Once you have your first images, start editing. A lot of the time, photo editing tools have freemium plans with fewer features or plans that offer you a free month-long trial. Try to take advantage of these until you decide which platform is right for you.
Once you’ve started, ask a (very honest) friend to look at your photos. Do you have obvious weaknesses? Are there things you can recognize you struggle with? Maybe there’s an aspect of photo editing that frustrates you. Maybe you need to improve the lighting, or you want to plan for a big trip—or just improve your photography in general. Taking photography courses online is an affordable, easy, and flexible way to hone your craft without breaking the bank. Get started today.
Try Skillshare for free! Sign up for a 7 day free trial today!
Get Started- Unlimited access to every class
- Supportive online creative community
- Learn offline with Skillshare's app


