

How to Tie-Dye a Shirt
Customize your shirts with spirals, circles, bullseyes and more using the art of tie-dye. From preparing to dyeing to rinsing, our guide will show you how.


Tie-dyeing is a creative and colorful way to personalize your wardrobe, transforming plain shirts into vibrant works of art.
Want to learn how to transform your plain shirts into vivid displays of color? We'll walk you through the process of tie-dyeing a shirt, from understanding the various techniques available to creating your own unique designs.
Types of Tie-Dye Explained
Before diving into the tie-dye process, it's essential to understand the various techniques you can use to achieve the effects you're after. Here's a breakdown of three of the most popular tie-dye methods:
- Traditional tie-dyeing: This is the tie-dye method you're most likely to already be familiar with. It involves folding, twisting or crumpling the fabric and securing it with rubber bands before applying the dye.
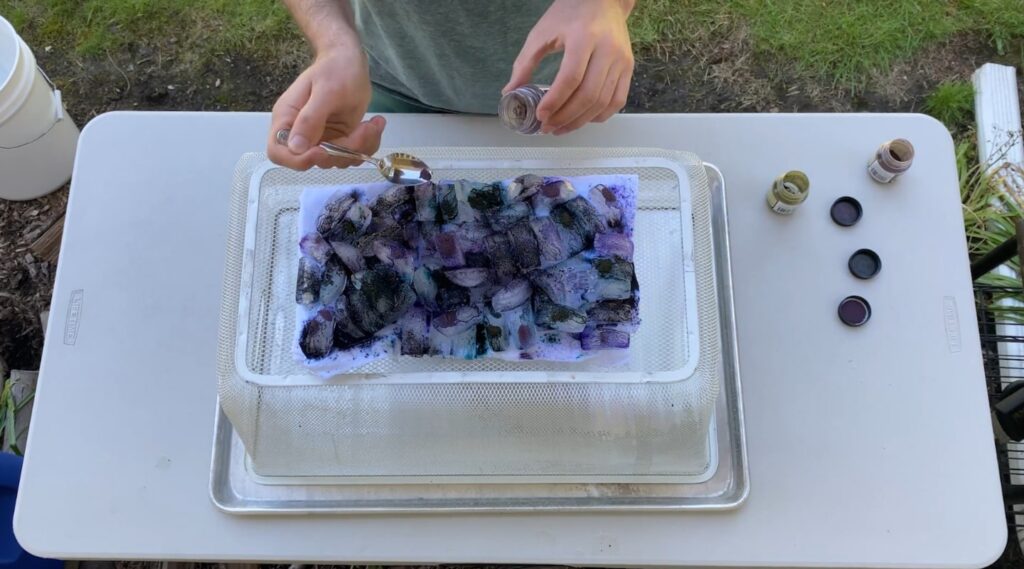
- Ice dyeing: With this innovative technique, ice is used to distribute the dye unevenly, creating a marbled and more organic-looking effect.
- Bleach dyeing: While the previous two methods involve adding color to fabric via dye, bleach can be used to remove color from fabric. This technique results in unique patterns and designs, and lends itself well to distressed and edgy aesthetics.
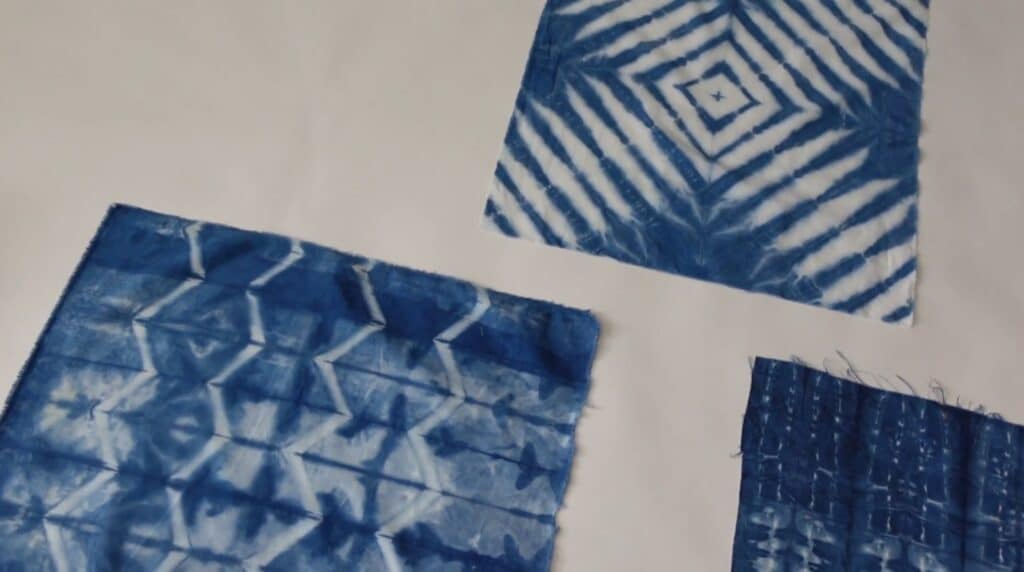
- Shibori: A Japanese tie-dyeing technique that dates back many centuries, shibori involves using string and precise folds to achieve the desired effect.
What You’ll Need to Tie-Dye Shirts
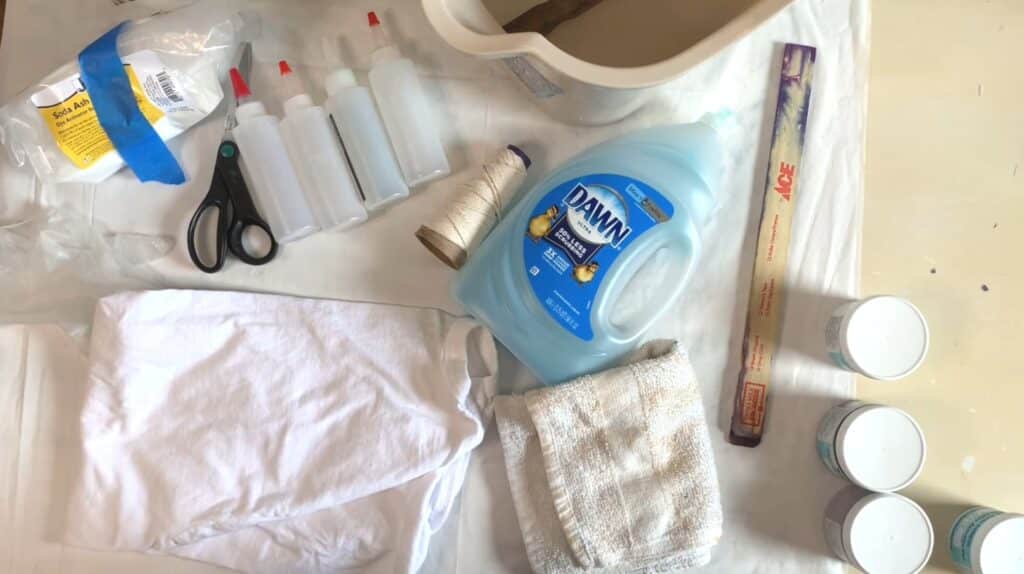
Gathering the necessary supplies is the first step in preparing for your first tie-dye adventure. If you're using the traditional tie-dye method, these are the things you'll need:
- Bottles or bowls for mixing and holding the dye.
- A large spoon or paint stick for stirring the dye and water together.
- Fabric dye in your preferred colors.
- Soda ash for pre-soaking your shirt.
- Disposable gloves to prevent your hands from being dyed.
- Newspaper to protect your work surface (a plastic sheet, trash bags, and/or drop cloths work perfectly too).
- Rubber bands to create patterns.
- A plain shirt made of a natural fiber like cotton, bamboo, rayon or even silk.
- A tub, sink or bucket in which you can soak and rinse your shirt.
- A well-ventilated place to hang your shirt up to dry.
The Best Way to Tie-Dye Step-By-Step

Once you have all your materials ready, you can start transforming your shirt with tie-dye techniques.
Follow these step-by-step instructions to achieve vibrant and eye-catching results:
1. Prepare Your Workspace
Lay down newspaper (or another disposable material of your choice) to protect your work surface from dye. This step is crucial to prevent any accidental spills or stains on your surroundings.
And since fabric dye can be irritating to the airways and eyes, be sure to choose a well-ventilated area where you can comfortably work without worry.
2. Soak Your Shirt
Before applying any dye, it's essential to pre-soak your shirt in water and soda ash. This helps the fabric absorb the dye more evenly, resulting in more vibrant colors and consistent patterns.
Fill a bucket, tub or sink with about a gallon of warm water, mix in one cup of soda ash and submerge your shirt in the mixture for about 15 minutes.
3. Tie Your Shirt
Once your shirt is thoroughly soaked, it's time to create your desired patterns.
Squeeze out the excess water, then use rubber bands to tie and secure the fabric, experimenting with different folding, twisting or crumpling techniques depending on the look you’re going for.
The way you manipulate the fabric will determine the final design, so don't be afraid to get creative and try out various tying and folding methods.
4. Dye Your Shirt
With your shirt securely tied, it's time to apply the dye. Prepare your dye according to the manufacturer's instructions, mixing the colors in separate bottles if needed.
Next, using gloved hands or squeeze bottles, carefully apply the dye to the tied fabric, ensuring full coverage of your chosen design. Remember to work systematically and take your time to achieve precise and crisp patterns.
Pro tip: Not all dyes are store-bought — with the right ingredients, you can even create your own beautiful and eco-friendly botanical dyes.
Now it’s time to test your patience — to ensure the most vibrant results possible, you’ll need to allow the dye to set in a sealed plastic bag for approximately eight to 24 hours, depending on the type of dye you’re using.
5. Rinse and Let Dry
Once you've allowed the dye to set completely, it's time to rinse out any excess dye from the fabric. Place your dyed shirt in a clean sink, bucket or tub and rinse it under cold running water until the water runs clear. Remove the rubber bands, then rinse until the water runs clear once more.
This step helps to set the dye and prevent bleeding or fading of your chosen colors. Once your shirt is rinsed, gently squeeze out any excess water and hang it up to dry in a well-ventilated area.
7 Creative Tie-Dye Design Ideas to Try at Home
Looking for design ideas to elevate your tie-dye creations? Here are some eye-catching designs to experiment with:
- Rings: Create concentric circles by gathering the fabric into a bunch and securing it with rubber bands.
- Spirals: Achieve a mesmerizing spiral pattern by using a wooden dowel or similar tool to twist the fabric from the center outward. Secure with several rubber bands to keep your shirt in a disc shape while dyeing.
- Stripes: Fold the fabric accordion-style and hold it in place with rubber bands to create bold stripes.
- Bullseye: Make a bullseye pattern by gathering the fabric into one long tube-like shape and securing it with rubber bands at regular intervals.
- Crumples: Crumple the fabric randomly and secure it with rubber bands for an abstract and textured design.
- Chevron: Neatly fold your shirt vertically using an accordion pattern, then use rubber bands to secure multiple sections at a diagonal angle.
- Heart: Fold the shirt in half vertically, then draw a half-heart shape with a pencil or washable marker. Carefully pleat all the fabric within the half-heart shape, and tightly tie it off with a rubber band.
Create Original Outfits With Customized Tie-Dye Shirts
Tie-dyeing is a fun and creative way to express yourself through fashion and truly customize your wardrobe. Whether you're a beginner or a seasoned tie-dye aficionado, there are always new techniques to learn and explore in the world of tie-dye.
Want to take your tie-dye creations to the next level? Skillshare offers a variety of online classes to help you master the art of tie-dyeing, from basic techniques to advanced designs. Just pick a class, grab your materials and get ready to make a splash with your one-of-a-kind tie-dye shirts.
And when you’re ready to explore new ways to personalize your apparel, we can teach you how to applique for clothing, embroider a sweatshirt or even start a sublimation t-shirt printing business.
Related Reading
Carrie Buchholz
Carrie Buchholz is a freelance writer who lives in Northern Colorado with her husband and dog.
Explore More Crafts with Skillshare — Start Your 7-Day Trial
Start Your Free Trial Today!- Classes featuring a variety of crafts
- Learn from experts, at your own page
- Unlimited access to all classes


