

How to Make Blind Contour Drawings (and Why You Should)
Learn the art of blind contour drawing in this step-by-step guide and tutorial for beginners.


The greatest artists are often the best observers, noticing shapes and lines in ways that others don’t. While some of this is natural, it’s definitely possible to level-up your observational skills and improve your artwork as a result.
Blind contour drawing is one exercise that you can use to see all of the details and really look at your subject rather than drawing from memory. By the end of this tutorial, you’ll understand the blind contour drawing definition, why this differs from other types of contour line drawings, and how you can start working on your own blind contour line art pieces straight away.
What Is Blind Contour Drawing?
You may be familiar with what a contour is already, but if not then that’s a good place to start. The word itself comes from the French contour, which means outline or shape, and is used to describe the lines that make up the outside edge of a drawing.
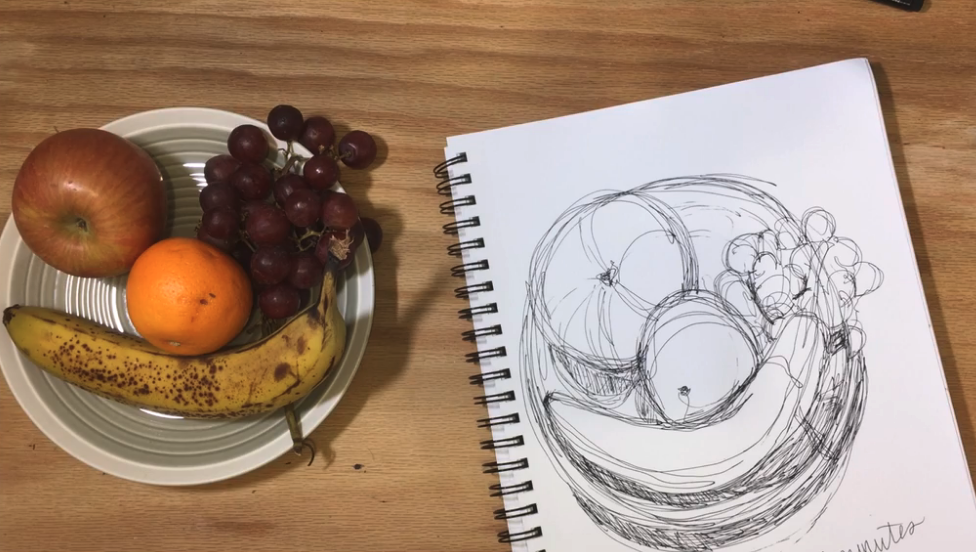
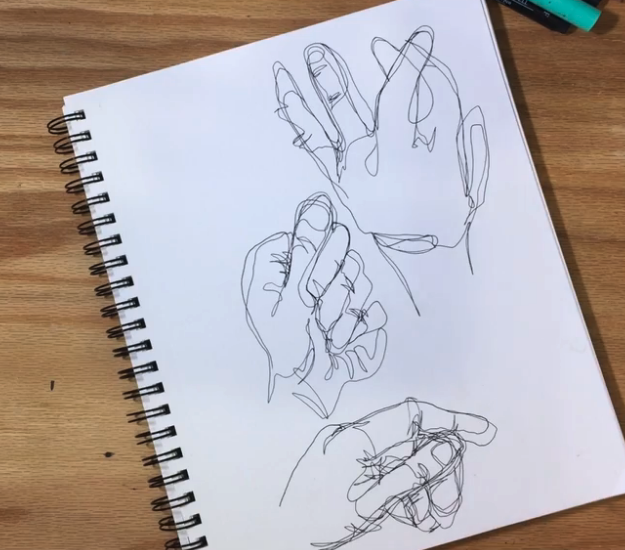
When thinking about a blind contour drawing definition, it’s most commonly described as a technique where the artist continually looks at their subject while completing the drawing and is “blind” to their work before it’s completed. The final piece is made up of one continuous line as the pencil or pen stays on the paper so that the artist doesn’t lose where they are or need to look down.
The blind contour line drawing technique was first used in the 1920s and 1930s, brought to mass attention in the art world in Kimon Nicolaïdes 1941 book, The Natural Way to Draw: A Working Plan for Art Study. It’s a great technique for beginner artists to use when focusing on observational skills, and it builds an excellent foundation for more complex artistic adventures later on. Your final drawing is usually not very realistic and can look a little messy, but that’s exactly how it’s meant to be!
What’s the Purpose of This Technique?
The primary goal of blind contour drawing is to focus your attention on what you’re actually seeing in front of you, rather than what you think you’re seeing.
Think about how you approach a typical drawing: much of it is done from short-term memory. You look at your subject then look down to draw it—not from what you see in front of you in that exact moment but from the memory of having just looked at it.
By not looking down at your paper, you’re forced to see your subject as a series of lines and shapes rather than, say, a face with a nose and eyes. Blind contour line drawing ultimately trains your hands and eyes to work together by capturing all the details that you see and translating those onto the page.
What Are the Rules of Blind Contour Drawing?
The rules of blind contour drawing are very simple:
- Once your pencil or pen is touching your paper, you must not lift it again until you’ve finished your drawing.
- You must not look down at your paper at any point until your drawing is complete.
While there’s no time limit for you to work on your contour line art, you may choose to set a timer for 20-30 minutes if you’re using this as a warm-up exercise or if you’re new to this technique. Your eyes will likely start to feel tired and you’ll begin to lose concentration if you work for much longer!
The Difference Between a Contour Drawing and a Blind Contour Drawing
There are several types of contour drawings, but blind contour line drawing is the only one that requires you to not look down at your paper and focus entirely on your subject.

A traditional contour line drawing can be any type of line sketch. The purpose is to convey the mass and volume of your subject matter through differing line lengths and thicknesses. Most contour drawings are a continuous line, like blind contour drawings, but this isn’t a rule. You also don’t need to keep a fixed focus on your subject matter when working on traditional contour drawings.
Many artists choose to work on cross contour drawings once they get more comfortable with contour drawings. These sketches show lines across the subject, following the surface area of your drawing with spherical lines to show curved areas and straight lines to show where the subject is flat. This helps to give contour drawings a more realistic, three-dimensional finish.

Shake Off Your Artistic Cobwebs!
Overcome Creative Blocks with Blind Contour Illustrations.
How to Get Started With This Technique Yourself
Step 1: Set Your Timer and Gather Materials
Tape your paper to your table or weigh down your sketchbook so that it doesn’t shift as you draw your subject. Make sure you’re in a comfortable position and can see your subject clearly without any other distractions around them or you.
Step 2: Find Your Starting Point
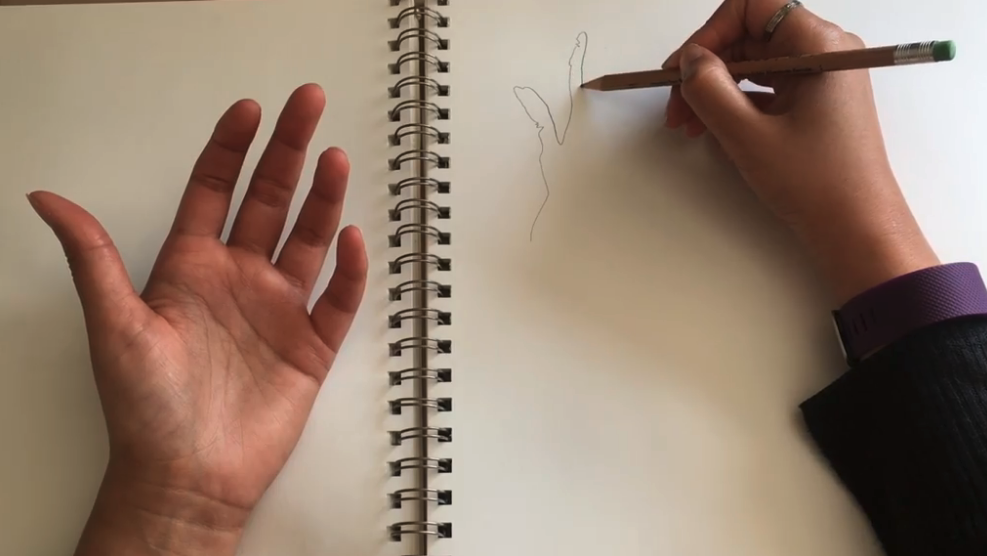
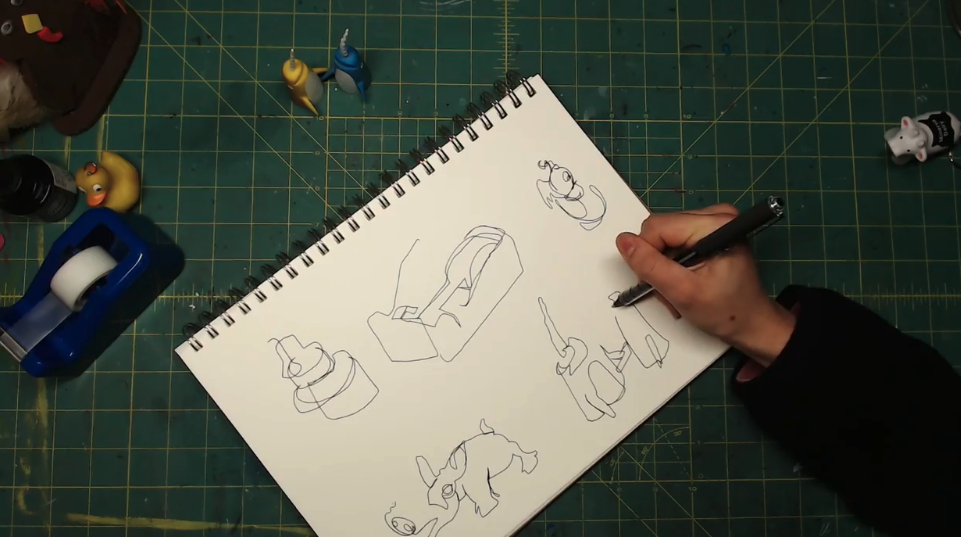
Focus your attention on where you want to start. What you consider your contours to be is up to you. You could decide to only draw the outside edges of your subject or, if you’re drawing something with detail or a person, you could start from the outer edges and work your way in.
Wherever you choose to start, remember that as soon as your pen or pencil touches the paper, you can’t lift it until you’re finished. Make sure you leave yourself enough space to complete your drawing, so start either in the middle or at one edge and move inwards on the page.
Step 3: Follow the Edges
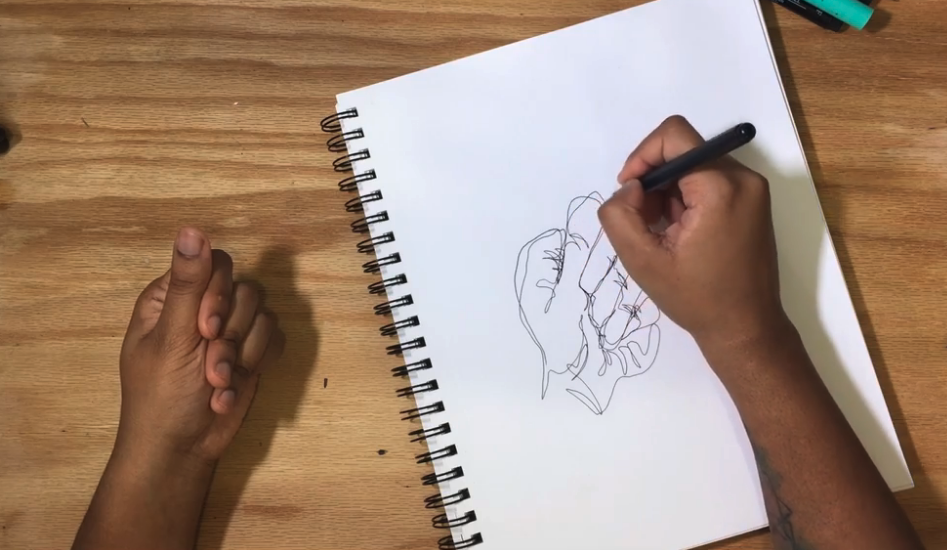
Keep following the edges of your subject with your eyes and let your pen or pencil follow. Take your time and remember to draw exactly what you’re seeing. Focus on lines and shapes rather than specific features and try to move these from your eyes to your hands in a careful and considered way. Just remember, don’t look down!
Step 4: Wrap Up When You’re Ready
Keep drawing until your timer goes off or you feel that you’ve finished. It’s at this point that you can see what your final sketch looks like.
Like any artistic technique, blind contour drawing can be challenging at first, but practice and patience will make the process more enjoyable. You’ll soon find that you’re creating unique art pieces that can help develop your skills with other art mediums and improve your hand-eye coordination. Happy sketching!
Start Drawing With These Top Tips!
Thinking With Your Hands: Improving Your Sketchwork with Simple Exercises.
Try Skillshare for free! Sign up for a 7 day free trial today!
Get Started- Unlimited access to every class
- Supportive online creative community
- Learn offline with Skillshare's app


