

How to Edit Videos for YouTube Success
Sure, you can upload content to your channel and not give them a second thought. Or, you can edit videos for Youtube to make them stand out.


You’ve finally decided to start your own YouTube channel. This is huge! You’re at the beginning of a very exciting and rewarding journey. If you’ve watched other creators’ YouTube videos, you’ll know that editing plays a crucial role in how well a video will perform. When you edit videos for YouTube, you have the power to tell your story in an entertaining and engaging way that will keep your viewers hooked and hungry for more.
If you’ve never tried video editing before, don’t worry! All you need to know to create your first video are the basics. As you make more and more videos, you’ll feel comfortable enough to try out new techniques, tricks, and effects.
For now, let’s go over the fundamentals. We’ll discuss a few popular YouTube video editor options you can use, as well as cover the exact steps you’ll take to edit your very first video.
Let’s get started!
Editing Software Options
Here are five of the most popular video editing software options, along with tutorials to help you learn the ins and outs of them:
A complete video editing tool used by professionals and beginners; available for both Mac and PC users. Adobe Premiere Elements is a lite version of Premiere Pro, aimed at beginners.
A complete video editing tool created by Apple; available exclusively on Mac computers.
A powerful, yet budget-friendly video editing tool aimed at professional video editors.
A powerful video editing tool, especially for professionals who do a lot of work with color grading; a free version is available.
How to Edit Videos for YouTube
If you’ve decided to work in Adobe Premiere Pro, be sure to check out Erin Lyons’ Skillshare class, Video Editing: How to Edit and Upload Your First YouTube Video. She’ll take you through each step in the editing process, so you can feel confident about uploading your first video.
Otherwise, let’s take a more general look at what the editing process involves, so you can edit binge-worthy YouTube videos regardless of which software you choose.
Step 1: Sort Your Footage
Sort your raw video files by theme, type, and the sections of the final video they belong to. For example, separate the main “talking head” footage from b-roll and name each file appropriately. This step may seem unnecessary, but it will save you hours of time if you ever need to go back and find a specific file.
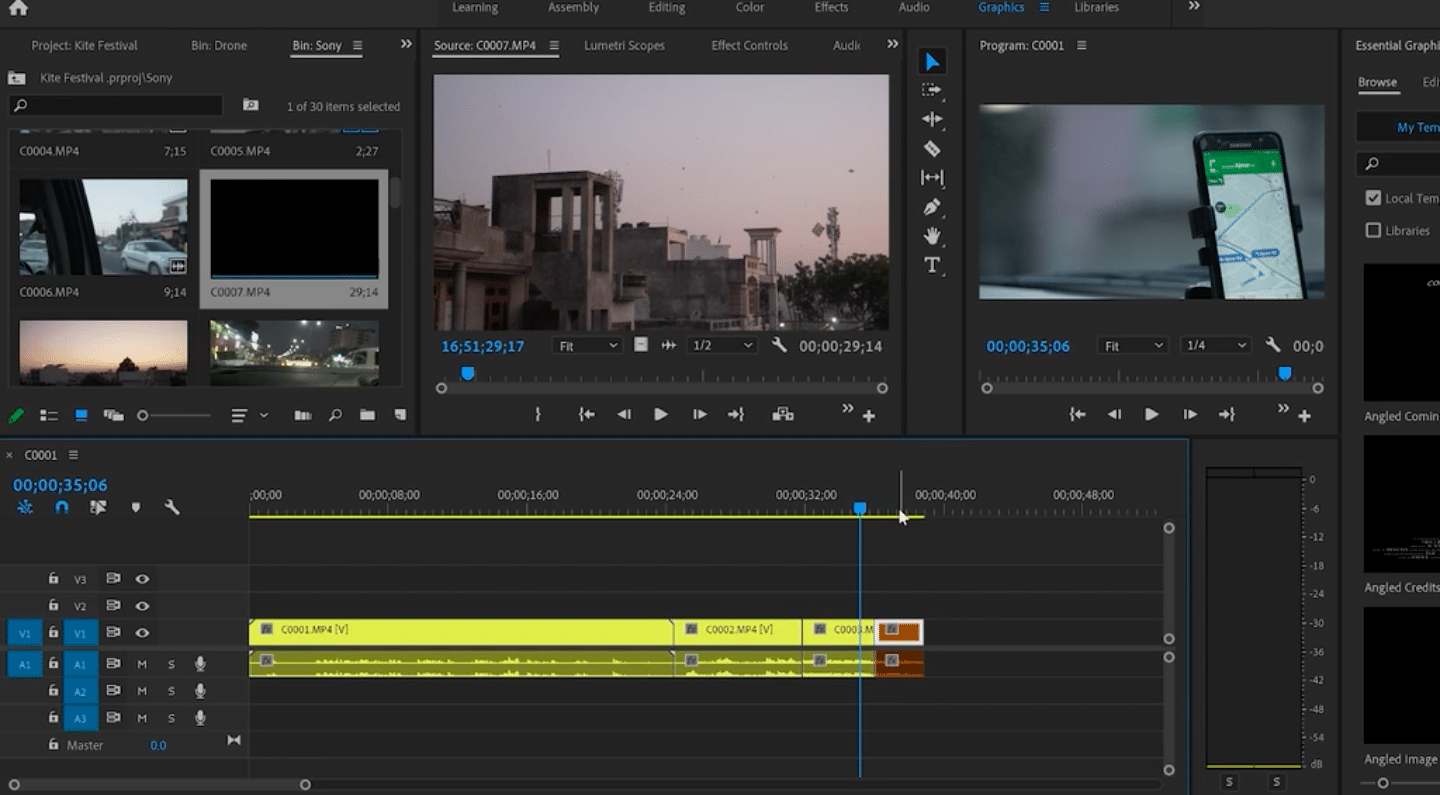
Step 2: Assemble and Rough Cut
Import all your raw video files into the editor and arrange them in the correct order. You can also take this opportunity to rough cut, which can include:
- Removing any footage you definitely won’t be using
- Trimming the footage you’ll keep, so that only the useful parts remain
- Getting rid of any mistakes and awkward pauses
Step 3: Fine Cut
Watch your video over and over and make small adjustments. Pay attention to the pace of the video—does it keep you engaged, or does it seem to drag on at certain points? Trim clips that are slightly too long and make sure the transitions from one clip to the next are natural and smooth.
Step 4: Add Transitions and Effects
Depending on the style of your video, you may want to add transitions in between clips. A popular option that works well to keep the viewers engaged is having one clip swipe off to one side, while the next one swipes in from the opposite direction.
You can also add entertaining effects. For example, if you want to emphasize something in particular, add a slow zoom effect for a few seconds.
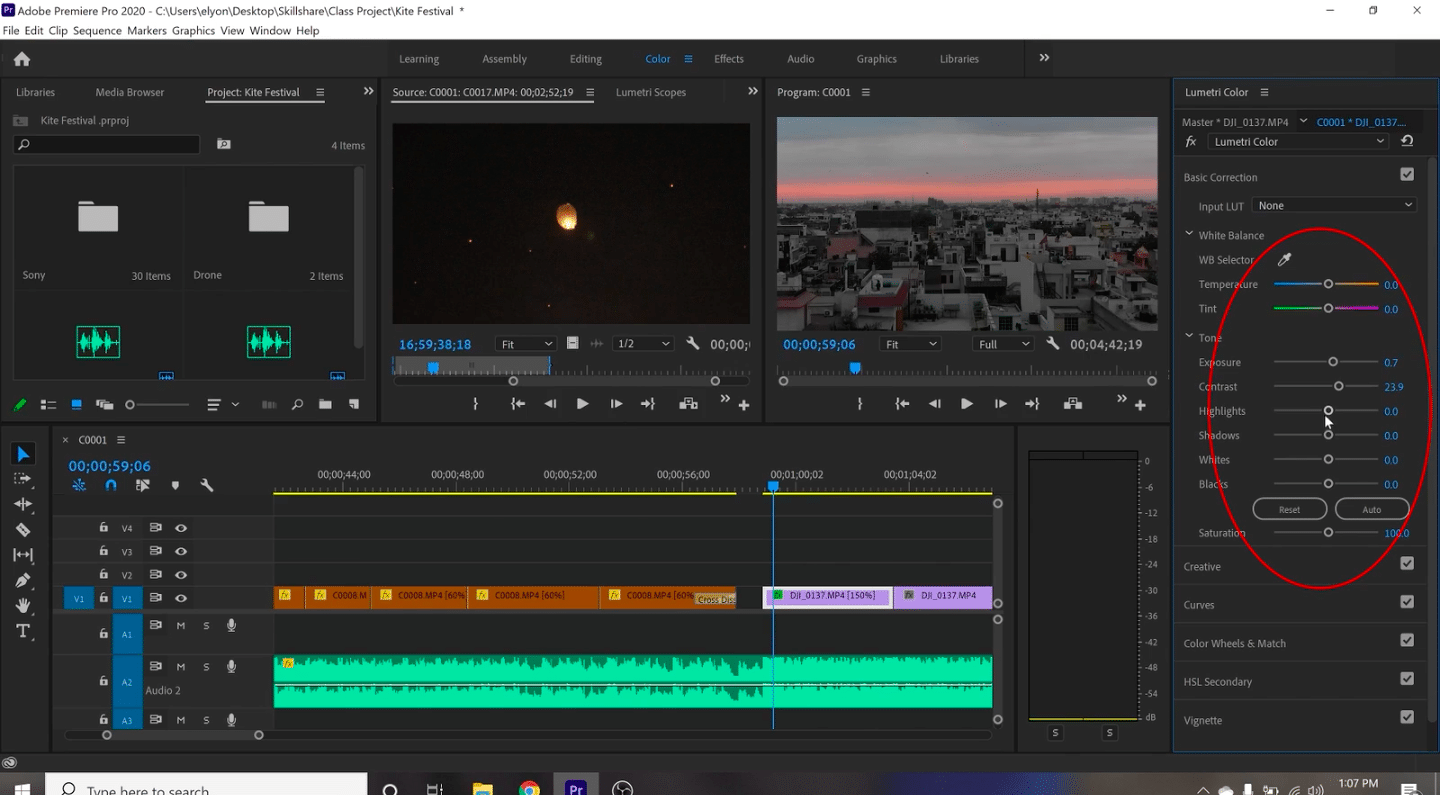
Step 5: Color Correct
Your video may include clips shot at different times of the day, in different lighting, and maybe even on different cameras. In order to make them all look cohesive, you’ll need to color correct. This is where you’ll adjust each clip’s color saturation, temperature, contrast, and exposure. Color correction can also be used to bring out certain colors and give raw footage a more cinematic look and feel.
Step 6: Add Music
The right music can create a specific atmosphere for your video, bring out certain emotions in your viewers, and make your video more engaging. Even if you’re editing a video with a lot of talking, it wouldn’t hurt to add a simple instrumental track in the background.
Step 7: Mix Your Sound
Some clips may be louder than others, so you’ll want to adjust their levels to make sure everything is clear and cohesive. You may also be talking over b-roll footage, so you’ll need to turn the b-roll’s volume to zero. If you have music, you can play around with its levels as well—turn it up when no one is talking and turn it down when the viewer needs to focus on something else.
Step 8: Add Titles and Text Call-Outs
To keep viewers engaged, add a title screen to each section of your video. If you share important information that you want the viewers to remember, add it as text on the screen. For both titles and text call-outs, you can add animations and transitions to make your video more entertaining.

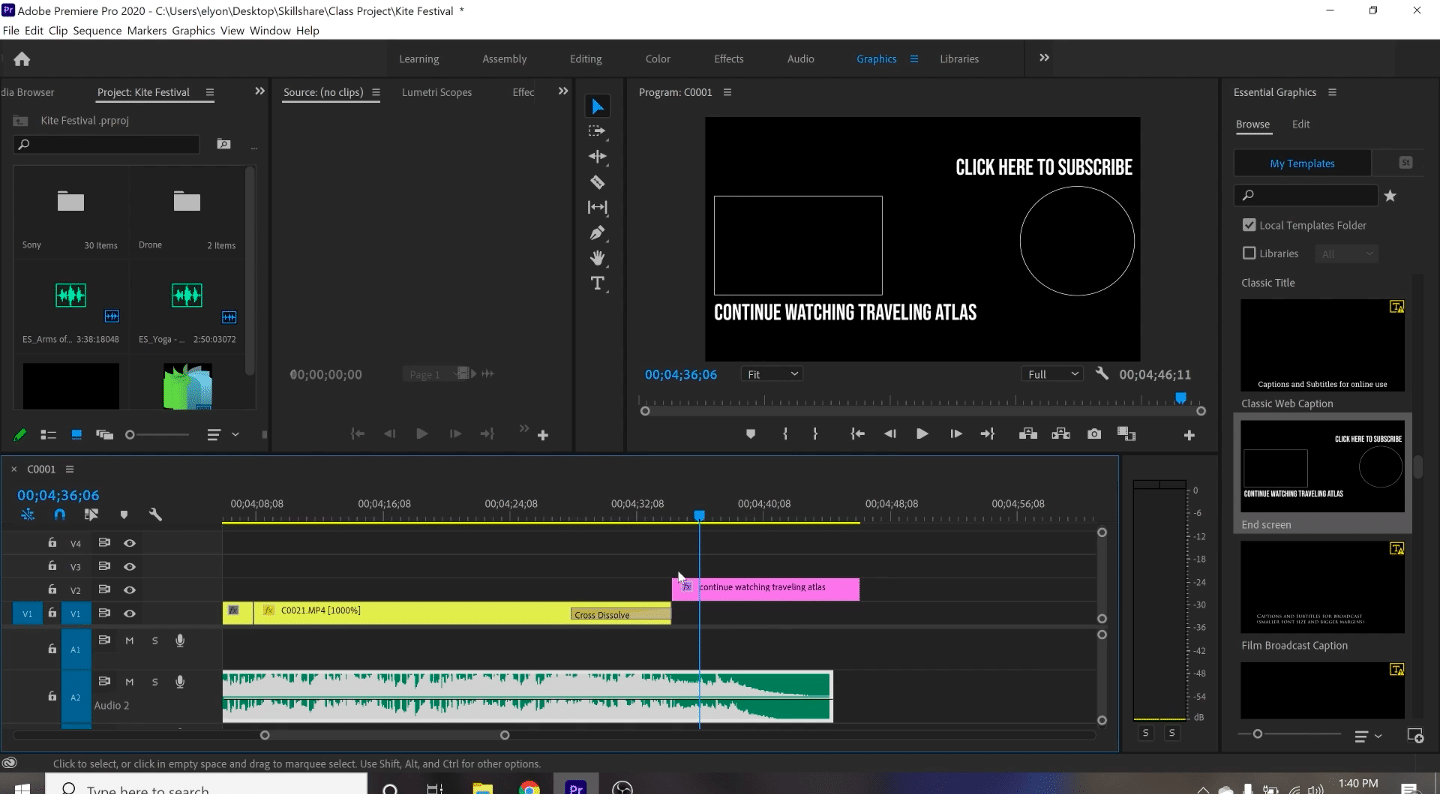
Step 9: Add an Intro and Outro
Viewers like consistency and familiarity. If you start each video with the same intro clip, they’ll come to recognize it and enjoy seeing it at the beginning of all your videos.
Be sure to also leave space and time for an outro sequence. This is where you can promote your other content or invite viewers to like, comment, and subscribe to your channel.
Step 10: Create a Thumbnail
If your thumbnail is going to be based on a screenshot from your video, now is a great time to take that screenshot. You can later add other design elements like text and graphics to grab potential viewers’ attention.
Get Started on Your First Video
Now that you know the basics, you can get started on your own journey to edit videos for YouTube success. Remember that your videos don’t have to be perfect right from the start—as you edit more of them, you’ll become faster at it and even develop your own unique style.
We can’t wait to see what you’ll create!
Share Your Passion With Millions of Viewers
YouTube Success: Build an Authentic Channel That's Worth the Follow
Sayana Lam
Sayana is a musician, writer and graphic designer based in Toronto, Canada.
Try Skillshare for free! Sign up for a 7 day free trial today!
Get Started- Unlimited access to every class
- Supportive online creative community
- Learn offline with Skillshare's app


