

How to Design an App in 10 Simple Steps
Want to design your own app but don’t know where to start? Simply follow this 10-step guide!


There are over a million apps on the app store. These apps help people find faster routes to work, keep track of grocery lists and crush their gaming high scores while in line at the post office. If you want to be the next designer adding your mobile app to an app store, there are a few key elements of mobile app development you should know.
The best apps are user-friendly, functional and consider the overall user experience. They also accomplish a specific key objective and are created with a particular audience in mind. By following a well-researched design process, using tools like wireframes and prototypes and learning top tips for success, you’ll have what it takes to create a high-quality app design.
Understanding Mobile App Design
Every mobile app designer has a specific process and design style, but there are a few key pillars of mobile app design that never change.
A good designer will always utilize UI design (user interface design) principles to make the interface as intuitive, useful and clean as possible. They’ll also consider how future users will interact with the app by focusing on UX design (user experience design) principles and the app’s overall functionality.
Alongside strong design principles, mobile app designers will also consider the target audience and their needs through every creative and practical decision.
Mobile app designers might choose different design processes if they have different personal styles, overall goals and project requirements. For example, there are slight differences to consider when designing an Android versus iOS app, like the design language and guidelines, navigation patterns and common gestures.
Step-by-Step Guide to Designing an App
Get out your notebook and your favorite pen because it’s time to get into the step-by-step guide to designing an app from concept and prototyping to publishing and marketing. After reading through all ten steps, you’ll know exactly how to bring your new app to life.
Step 1: Define Your App Idea

If you’re here, you likely have some sort of app idea—or maybe you have a few different ones. In this case, you’ll want to start out by doing some more brainstorming and refining your app idea.
Let’s say you want to launch an app that helps adults make friends. You’ll have to consider questions like:
- What sort of people are you going to help make friends?
- How will you help them make friends?
- Will your app only be available in your state or throughout the nation?
If you make your app too broad or too niche, you won’t be able to entice enough people to download. Try to find a gap in the market with enough interested customers but not too much competition.
You’ll also want to make sure that your app solves a specific problem and brings tangible value to its customers through a unique value proposition (UVP). Take a second and look through the apps you already have on your phone or the top-ranked apps in the app store. Try identifying their target audience, UVP, the problem they’re solving and what separates them from similar apps.
Step 2: Conduct Market Research
Now that you’ve nailed down your idea, it’s time to do some market research. You can start by choosing five competitors and noting some of their key stats, like the number of reviews and app ranking.
Then, it’s time to learn as much as you can about your target users. This research phase should include nailing down their demographics and psychographics.
You might even create three to five audience personas, which are fictional characters that will represent a few of the demographics or psychographics you discovered during your target audience research. You can keep these ideal audience personas in mind throughout your entire design process.
To get a better idea of your competition and potential audience, you can use tools and research methods like user surveys, focus groups, and sentiment analysis. These will help gather user feedback and market insights so that you can get input directly from the people who matter most.
Step 3: Create Wireframes and Mockups
You have the foundational information you need to make all of the key decisions for your app, starting with building out wireframes and mockups.
During this part of the design process, you’ll nail down your app’s structure, main pages and flow. Within your wireframe, you’ll build out each page so that it is as clutter-free and intuitive to navigate as possible.
Take an hour to explore apps you use and see how those designers organized common navigation tools like a back button and the app menu. Most app users are already used to specific button, color and animation placements, so you should try to stick with those instead of getting too creative.
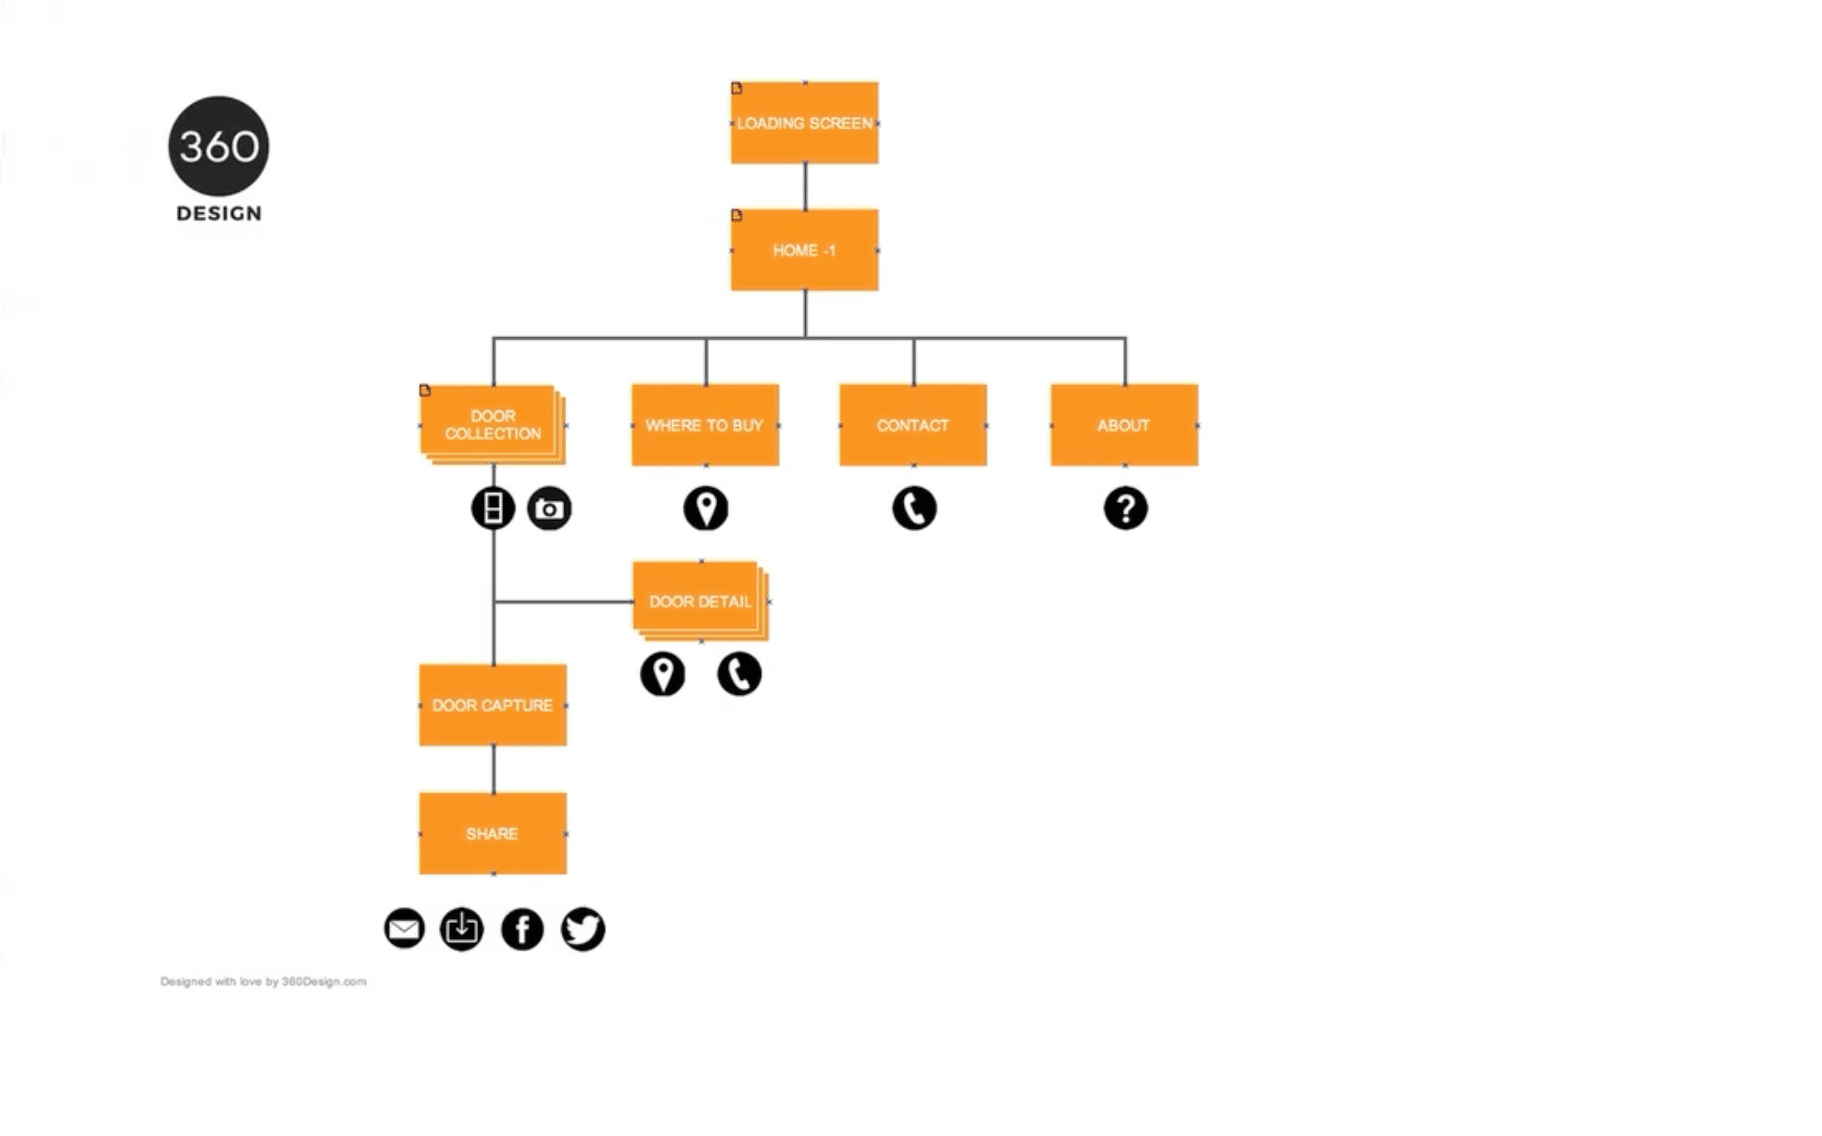
You can make a simple wireframe or sitemap that just shows how your users will navigate through your app. Then, you can use a design app like Figma to start building out each page and adding specific design elements.
With a mockup of each page in front of you, you’ll be able to better visualize the app’s user interface.
Step 4: Develop Prototypes

During the prototyping stage, you’re going to try to work out as many kinks as possible. Nobody gets it right the first time, so prototyping will help you refine your app’s functionality and build a more positive user experience.
While prototyping, you can get insights on your app’s usability, accessibility, fonts, colors, copy and messaging. First, you’ll need to work out a few specific ideas you want to test.
If you’re building an app for people to find campsites near them, maybe you want to see if your users can find a campsite for an upcoming trip in less than five minutes while using a specific design tool. If you’re building a luxury calendar app, you might want to test how many people would sign up for the deluxe version after using the free version for a week.
Next, you’ll want to pick your user research tool, whether that be surveys, focus groups, or just sending your app around to a few trusted friends and colleagues. From there, you can test your prototype and get feedback from your ideal audience.
Step 5: Design the User Interface (UI)
Most prototypes start out as a simple sketch on a piece of paper but at this stage you should have an idea of what the overall design of your app will look like. If you aren’t already skilled with branding or graphic design, this might be one stage in the app creation process that you’ll want to pass off to a professional. If your budget doesn’t allow for that, try taking an online course in user interface design or the basics of graphic design.
Whether you decide to tackle the UI design or not, you’ll want to choose your app’s color schemes, fonts and design elements while considering color theory, accessibility, similar apps and your overall brand messaging.
Since your users will make their first impression of your app based on its visual elements, it’s important that its interface is visually appealing and user-friendly.
Step 6: Focus on User Experience (UX)
Another subject you might consider doing more research on as you build your app is user experience design (UX design). Utilizing UX design principles while you create your app will help ensure your app is functional, accessible, meaningful and enjoyable to navigate and use.
Consistency and simplicity are two key pillars of UX design. To design like a UX designer, you should keep your wording, navigation buttons, color scheme and icons uniform throughout the app. You can keep your app as simple and streamlined as possible by minimizing on-page clutter and prioritizing essential features.
You can also implement usability testing during and after the design stage to ensure a positive user experience for your ideal audience. You can get high-quality user feedback through beta-testing programs, in-depth user interviews and by analyzing in-app behavior. Making changes on these results will help you iterate and improve your app.
Step 7: Develop the Backend
If you’re a designer or a creative, developing the backend of your app might feel like the most intimidating part of the process. Luckily, there are many free and paid resources and app development software that can help make the process a little easier.
When developing the backend, you’ll want to choose the right databases, servers and APIs (Application Programming Interface) for your goals. You should also ensure that the infrastructure of the databases and servers is scalable and can handle your app’s growth over time.
You’ll always want to make sure any databases, servers and APIs you choose to work with are reliable and perform well. They should also have high-quality data consistency and integrity and be as secure as possible.
Step 8: Implement the Front-End
When developing your app’s front end, you’ll want to use appropriate frameworks and programming languages. With efficient programming, you can minimize loading times and allow for a seamless navigation experience no matter the screen size.
Your app should facilitate as many positive user interactions as possible. You can do this by prioritizing responsive and intuitive design, focusing on performance optimization and designing accessibility interfaces through UX design.
Step 9: Test and Optimize
You’ve already done some testing throughout the process, but now that your app is ready to be launched, it’s time to do some final functional, usability, and performance testing.
During functional testing, you might test your login functionality, any form submissions and all of your navigation links and buttons.
For usability testing, you should make sure your users can easily complete all common tasks, intuitively find all key features and don’t encounter too many error messages or navigational dead ends.
With performance testing, you can check that your app can handle high user traffic and database overload and has fast loading times.
Step 10: Launch and Market Your App

It’s finally time to share your app with the world! Nobody wants to put months of hard work into creating an app just to launch to the sound of crickets so it’s never too early to start using these marketing tactics.
Before your app launch, you can start sharing what users can expect from your app as well as behind-the-scenes from the build out process. You might use a blog, social media or a newsletter to reach larger audiences outside of your current network. Take some time to build out a marketing strategy that includes who you’re targeting, where you’ll find them and how you’ll convert them to potential customers.
By the time you start submitting your app to your app stores of choice, you should already have a group of interested people ready to download your new app. After your app is live, you can also continue receiving user feedback, make updates and add new features as needed.
Cost and Feasibility of Building an App
Launching a new app will always require some sort of budget, but the complexity, added features, and development time will change how much you should expect to spend. If you plan to build out an app from scratch and hire top-performing experts to help, your app might cost anywhere between $150,000 and $500,000.
If you were to work with a smaller designer and mid-level or offshore developer, you might be spending closer to $30,000-$50,000 from start to finish. But there are also DIY solutions for more low-cost build outs including no-code app builders like Adalo, Bubble and Thunkable, as well as open-source tools or pre-made templates. The feasibility of a low-cost or free app is also greater if you already have design or development experience.
Overcoming Challenges in App Design
Every creative project has its own challenges. You might encounter issues when dealing with different screen sizes, ensuring compatibility with various operating systems or managing user feedback.
Stay motivated by asking for help when you need it, taking regular breaks and staying in contact with other app designers through public forums or social media.
Tips for Designing a Successful App
A successful app buildout will always start with determining what value the app will provide to the user and the greater world. Your app should fill a gap in the market by offering something that a big enough group of people would be interested in using. You’ll also want to focus on the user journey, maintain simplicity and ensure high performance through continuous improvements, new features and staying updated with design trends.
Key Takeaways
The highest-performing mobile apps are built on a strong foundation of quality brand values and messaging, a well-researched ideal audience, a well-structured design process and well-tested frameworks.
Next, they should be built out using UI and UX design principles, a strong backend and front end and multiple rounds of prototyping. Finally, an app will continue to perform positively through a strong marketing strategy and continuous testing and updates.
You can apply these steps and tips to your own app design projects by writing down any key takeaways and coming back to this resource as needed. Skillshare is also an excellent place to practice key design skills, connect with designers, as well as gain non-design skills in business, entrepreneurship and other creative pursuits.
Now it’s time to get started and give the world the app they’ve been missing!
Related Reading
Calli Zarpas
Producer & Writer by occupation. Ceramicist & Newsletter Editor by avocation.
Try Skillshare for free! Sign up for a 7 day free trial today!
Get Started- Unlimited access to every class
- Supportive online creative community
- Learn offline with Skillshare's app


