

How to Add Textures to Photoshop Illustrations: A Step-by-Step Guide
Adding textures to your Photoshop illustrations can take them from good to great. This step-by-step tutorial by a graphic designer will show you how.


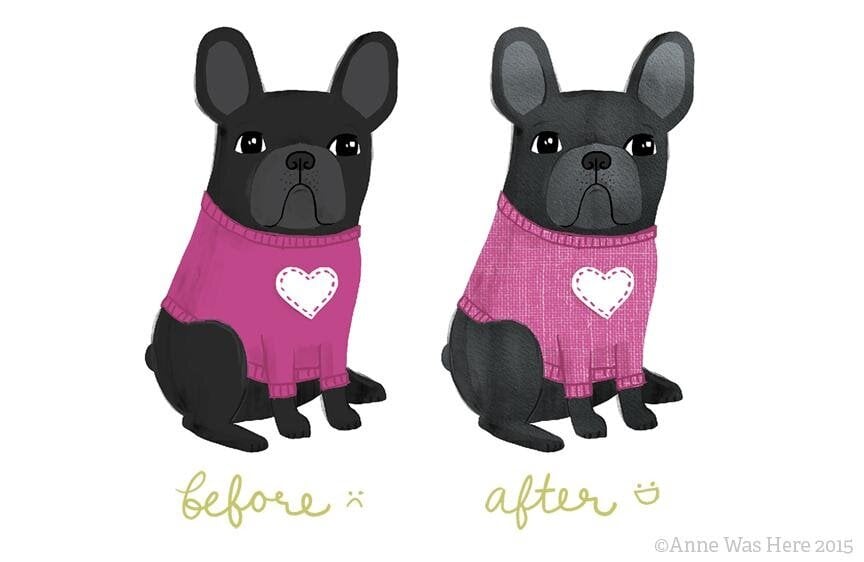
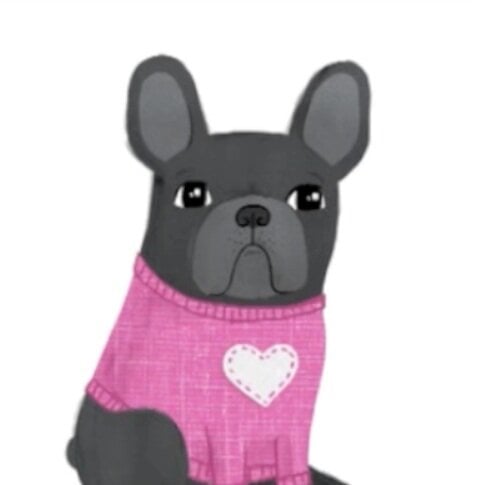
Adding textures to your Photoshop illustrations is an easy way to take them from good to great. In this tutorial, we’ll walk through exactly how to do it, using this cute pup in a sweater as an example.
How to Find a Texture
There are many sources of textures online, such as Textures.com, which offers both free and paid stock options. Be sure to read the terms and conditions before using a texture (or any image!) in your projects to ensure you have the rights to use them.
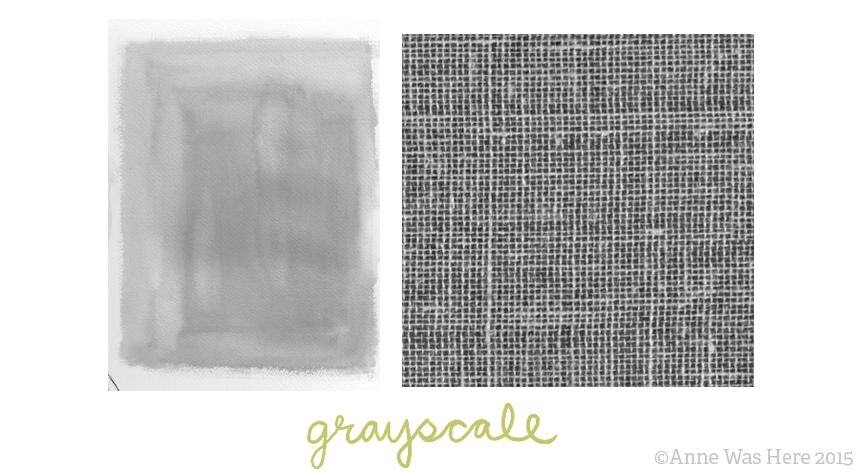
Can’t find a texture you love? Create your own by taking photos or scanning textures you'd like to use. For example, the green texture below is hand painted gouache.

Preparing Textures
Textures are most effective when they’re used as a high contrast black and white image. To adjust your texture, open it in Photoshop and turn it to grayscale by going to Image > Mode > Grayscale.
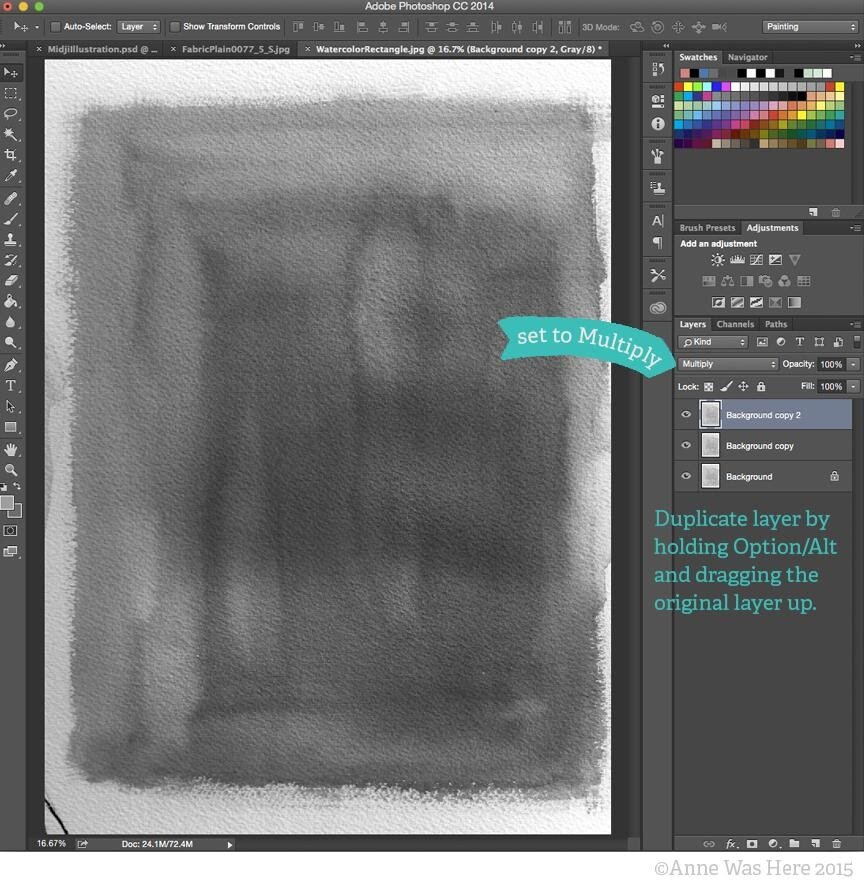
If your texture isn’t high-contrast enough (like the gouache image above), multiply the texture on top of itself to darken it. To do this, duplicate the layer and set the top layer blending mode to Multiply. Keep duplicating the Multiply layer until the texture is dark enough. Then, merge the layers by selecting them all and hitting Command/Control + E.
Bringing Texture to Illustration
To bring texture to an illustration, follow these steps:
- Select all or a portion of your texture with the Rectangle Selection Tool.
- Hit Command/Control + C to copy.
- Open your Photoshop illustration and select the layer that you want to add the texture to.
- Hit Command/Control + P to paste.
- Resize by hitting Command/Control +T and scale the texture to cover the portion of the illustration you want it applied to.
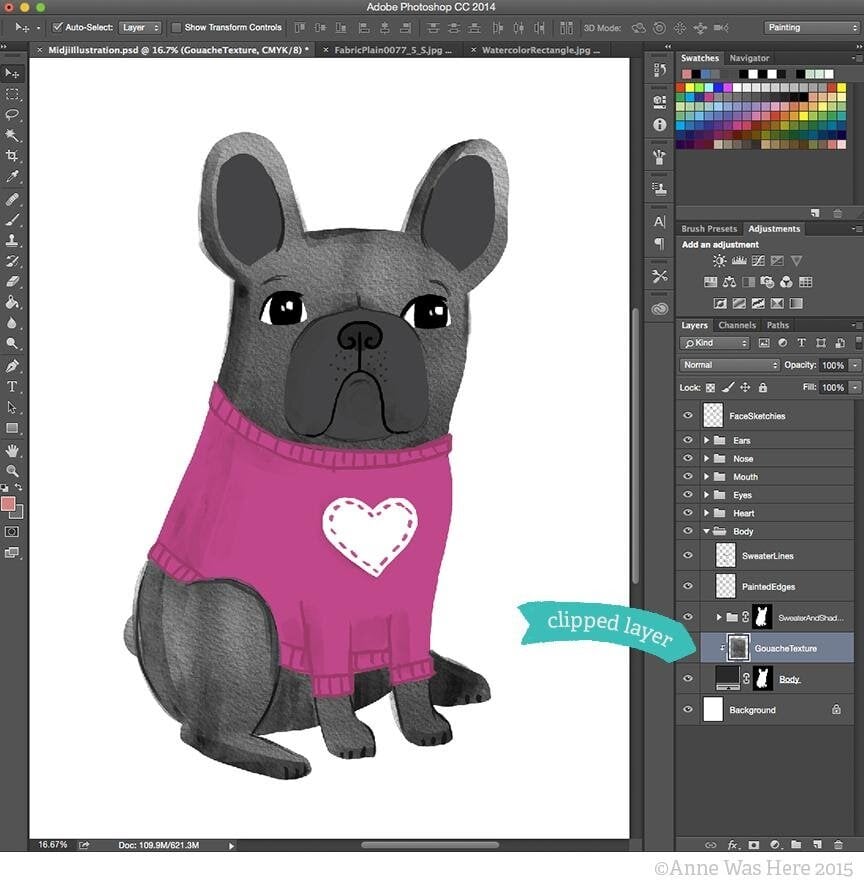
- Make sure your texture layer is directly above the layer you want it applied to.
- Clip the texture layer to the layer below by holding down the Option/Alt key and hovering in between the two layers. When the arrow appears, click in between the two layers to clip the top layer to the bottom layer.
Experiment With the Layer Blending Modes
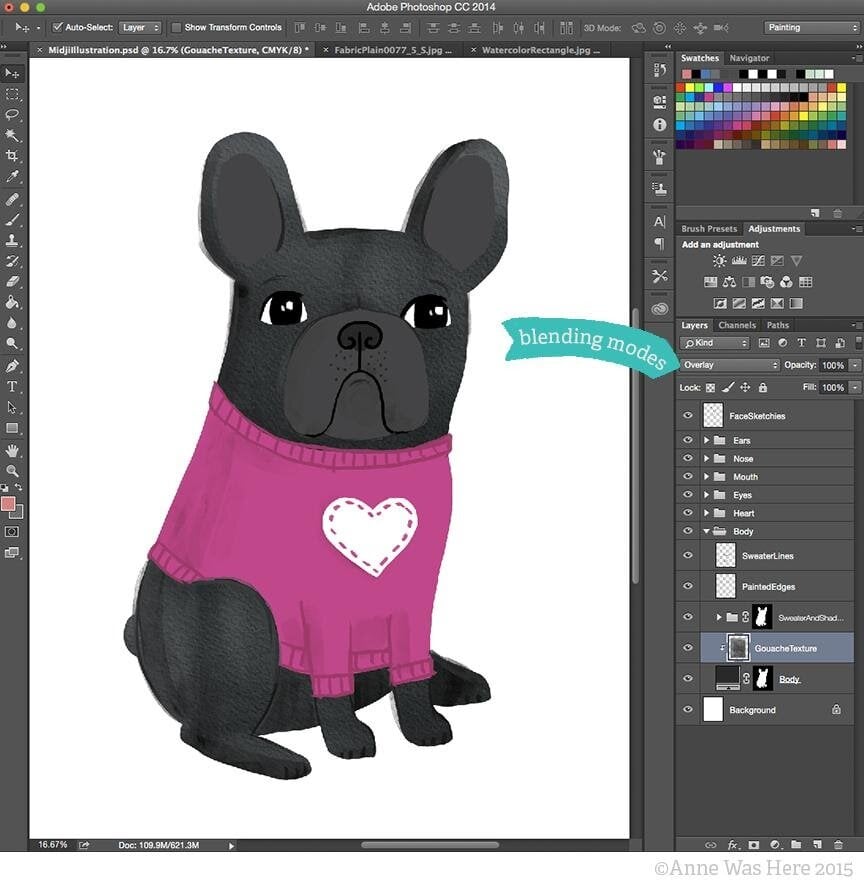
The layer blending mode that will work best for you will depend on the colors of your illustration, your texture contrast, and the effect you want. With your texture layer selected, click through the blending modes until you find one you like. In this example, Overlay is used.
Apply the Texture to Other Layers
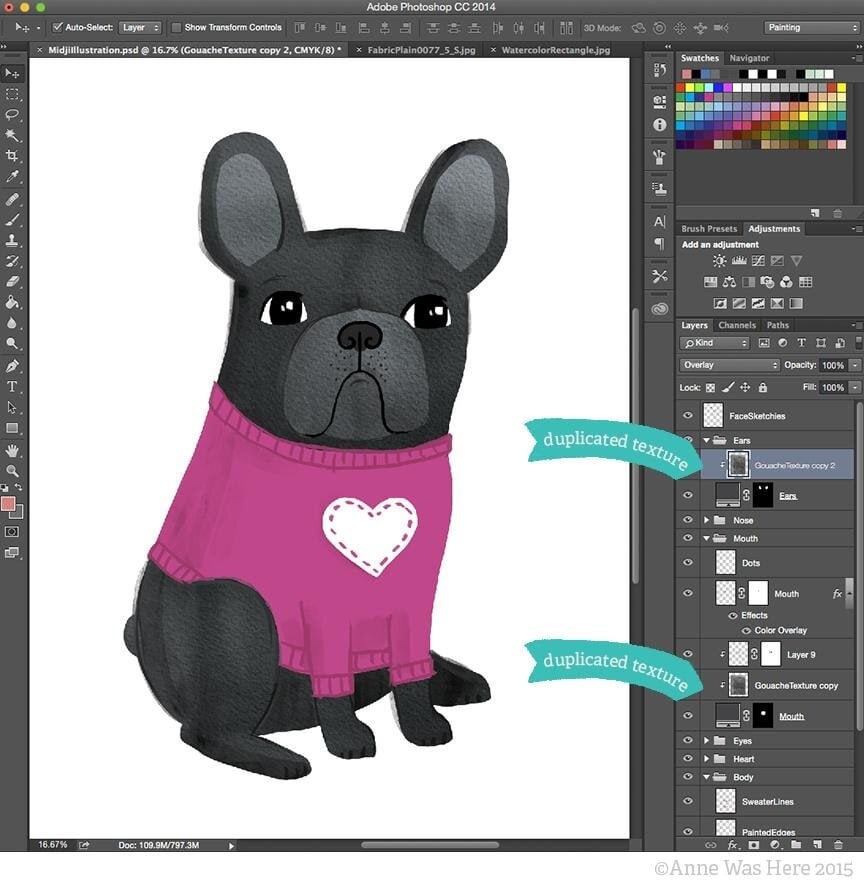
Once you are happy with how the texture looks, you can apply that same texture to other layers.
- Hold down the Option/Alt key and drag the texture layer ABOVE the new layer you want to apply it to.
- Hold down the Option/Alt key and click in between the two layers to clip it to the new layer. The duplicated texture layer should already be set to the blending mode you chose.
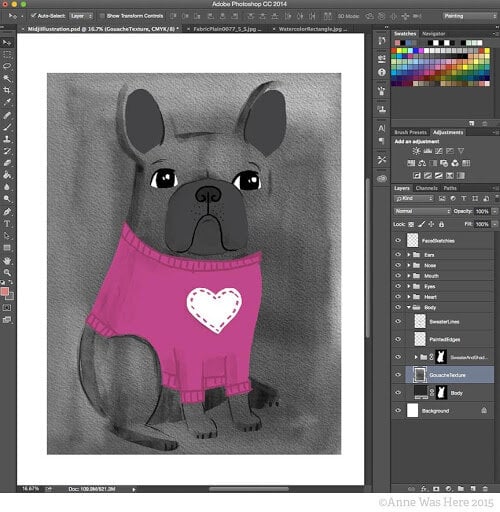
Here, the same gouache texture layer used on the dog’s body is applied to the mouth and ears.
Apply Additional Layers
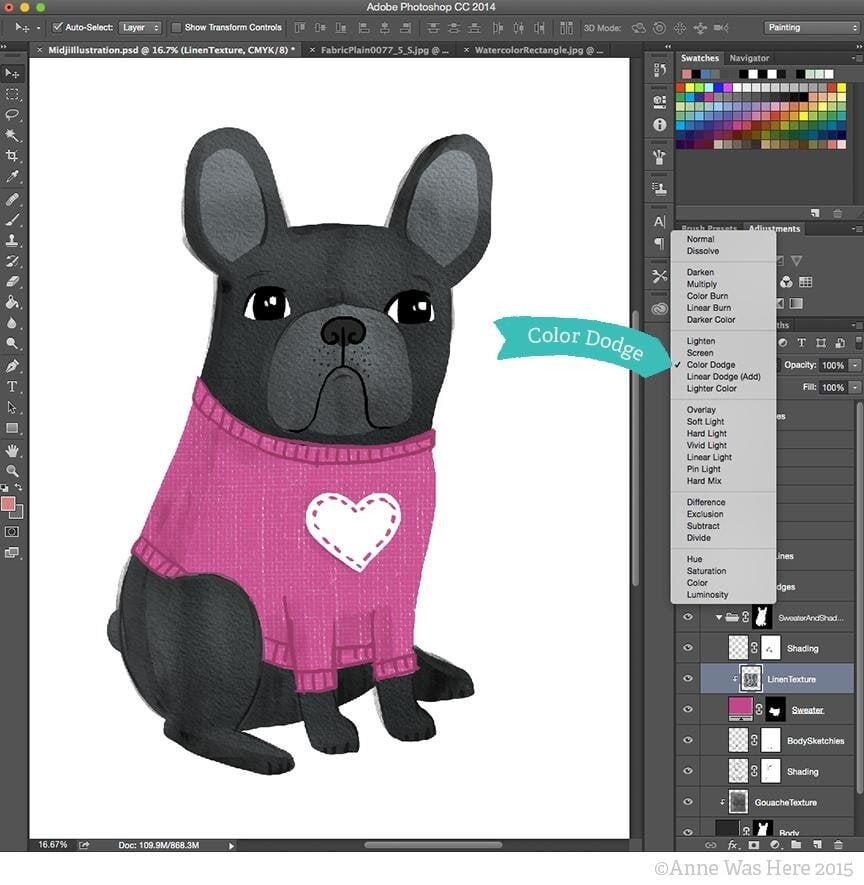
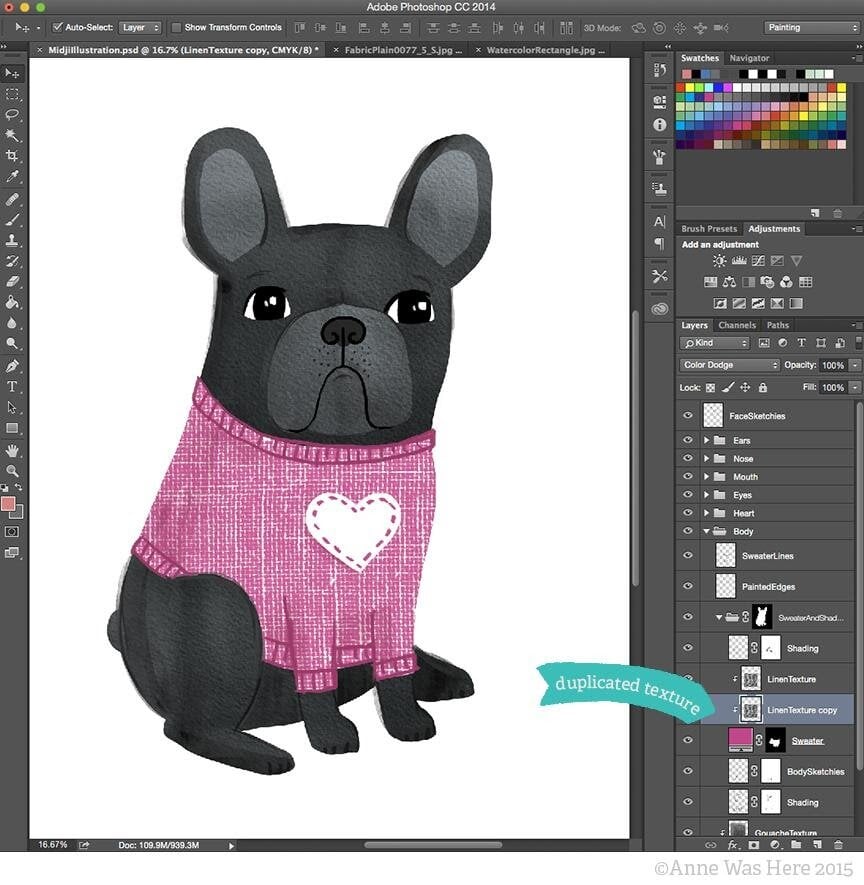
You can repeat the steps above to apply any additional textures you’d like to your illustration. Here, the linen texture is applied to the dog’s sweater using the Color Dodge layer blending mode.
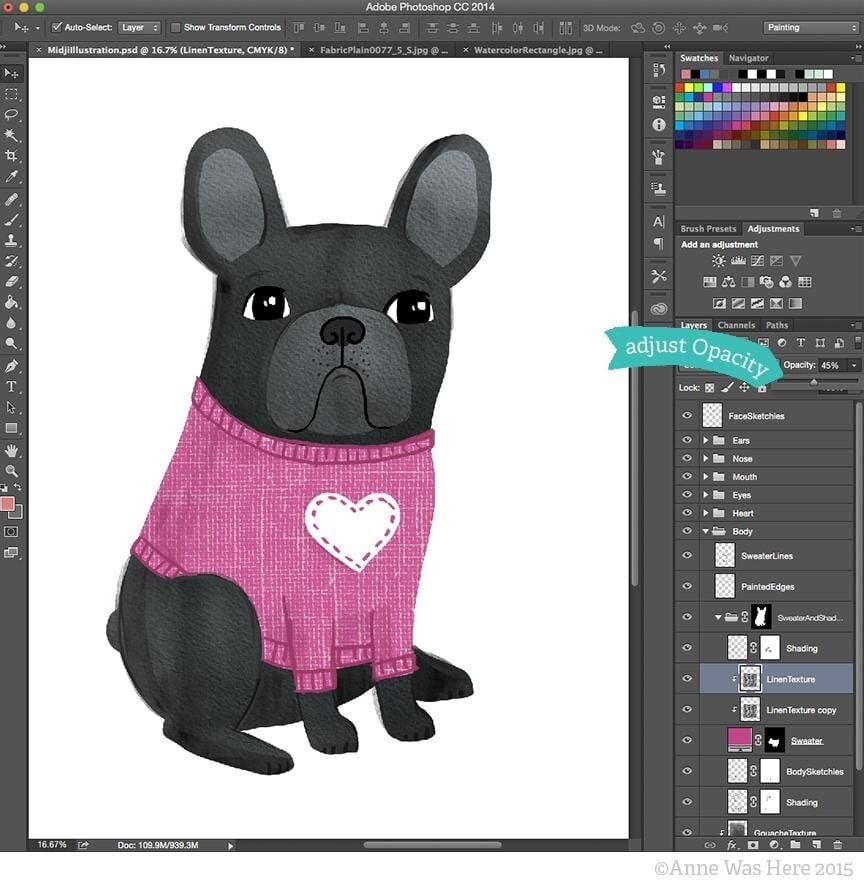
Adjusting Texture Strength
To make the texture appear stronger, you can duplicate the texture layer by holding Option/Alt and dragging it in between the original texture layer and the sweater layer.
If the texture is too strong, simply reduce the Opacity of one of the texture layers.
Once you’ve mastered this technique, the texturing possibilities are endless!
Follow Along Step-by-Step
Illustration in Photoshop: Professional Work From Your Sketches.
Try Skillshare for free! Sign up for a 7 day free trial today!
Get Started- Unlimited access to every class
- Supportive online creative community
- Learn offline with Skillshare's app


