

Guide to Needle Felting: How to Get Started
Learn how to get started with the craft of needle felting and what supplies you’ll need.
Table of Contents


Whether you’re completely new to crafting or enjoy other needle or sewing-related projects and are looking to expand your skills, needle felting is a fun and relaxing craft. It’s straightforward to learn the basics, and once you do, you can create everything from fashion accessories to toys for kids.
Here’s everything you need to know to get started, plus inspiration for needle felting projects.
What Is Needle Felting?

Essentially, needle felting is the art and craft of transforming wool into an object using a needle. Using wool in its rawer forms and special felting needles, you prick the wool repeatedly to form the desired shapes and designs. The serrated edges of the needles bind the wool fibers together, transforming an undefined wad of raw wool into a more dense, shaped object.
You can use needle felting techniques to create 3D objects, as well as to “paint” with wool. Much like a 2D painting, wool fibers can be creatively fixed to a wool surface to depict scenes or objects. The process is similar whether you’re creating a 3D or 2D project.
Is Needle Felting Hard to Learn?
In its simplest forms, needle felting is very straightforward. You just need a few basic supplies. Once you’ve practiced a bit, you can experiment with creating needle felted projects with greater detail and more complex shapes. Becoming an advanced needle felter takes practice and an eye for detail, but it’s not hard to learn the basics.
Grow Your Needle Felted Woodland
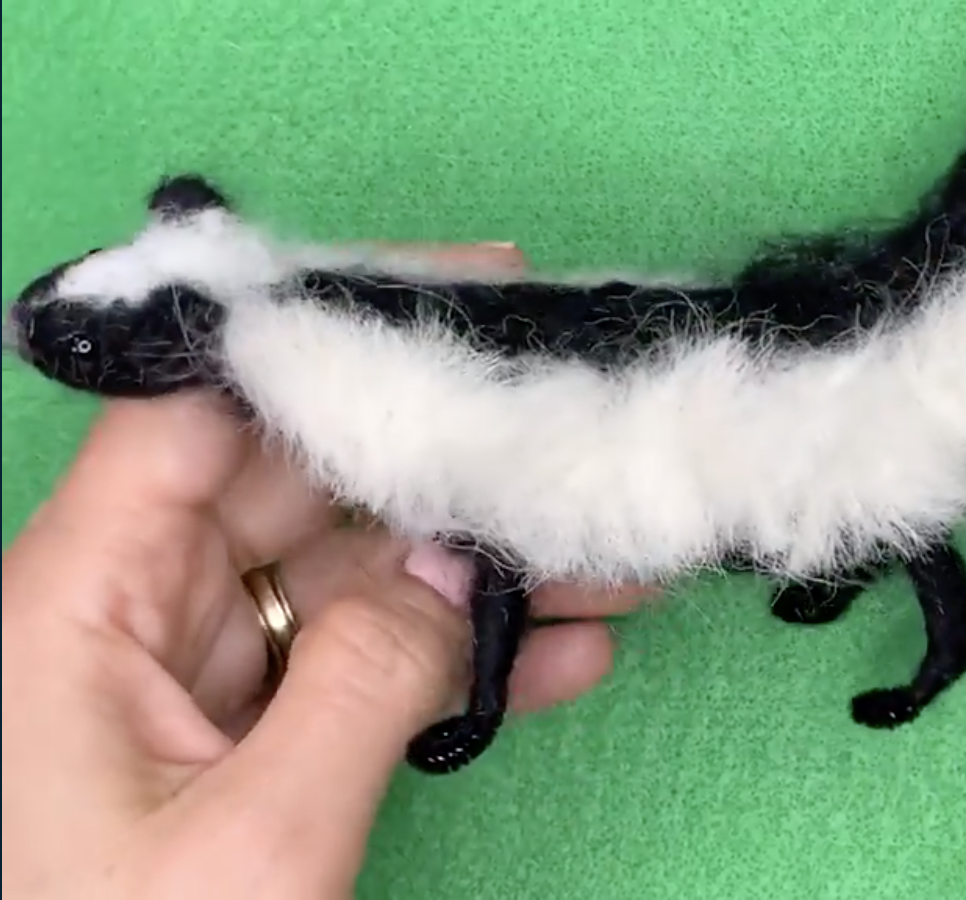
Learn to Needle Felt a Cute Skunk
How to Needle Felt for Beginners
Step 1: Gather Your Needle Felting Supplies
To create beautiful projects you need the following needle felting tools:
- Wool (carded or core)
- Foam pad
- Felting needles
- Two carding brushes (optional, but useful for mixing colors and for larger projects)
The wool you use for needle felting is not the same as the wool yarn used for knitting or crocheting. Raw wool that has been cleaned and brushed is called carded wool, and this is what’s used in needle felting. Core wool is a more inexpensive version, and it’s ideal for beginners who are practicing with the fiber. More experienced needle felters usually use core wool for the inside of their piece and then cover that frame with nicer, finer wool.

Needle felting needles don’t have an eye for threading, like sewing or tapestry needles do, as they’re used to poke or prick rather than sew. Felting needles come in different sizes, or gauges, as well as shapes, and are very finely barbed. Most beginner needle felting kits come with 38-gauge needles.
Some felters like to use needles inside a holder, which makes them more comfortable to manipulate. Holders are also available that hold several needles at once, which are convenient for felting larger surfaces of wool.
Choose a needle felting pad that’s at least two inches thick. You need the pad to be thick so that when you’re working with your needle, you don’t poke through onto the surface of your table.
As a beginner you don’t need carding brushes, but as your skills develop you may want to mix colors or prepare raw wool yourself. Carding brushes look somewhat like rugged hair brushes, and are used to brush the wool fibers into the textures and sizes you need. Pet brushes can also be used, and are cheaper.
Step 2: Take a Piece of Wool and Begin Pricking
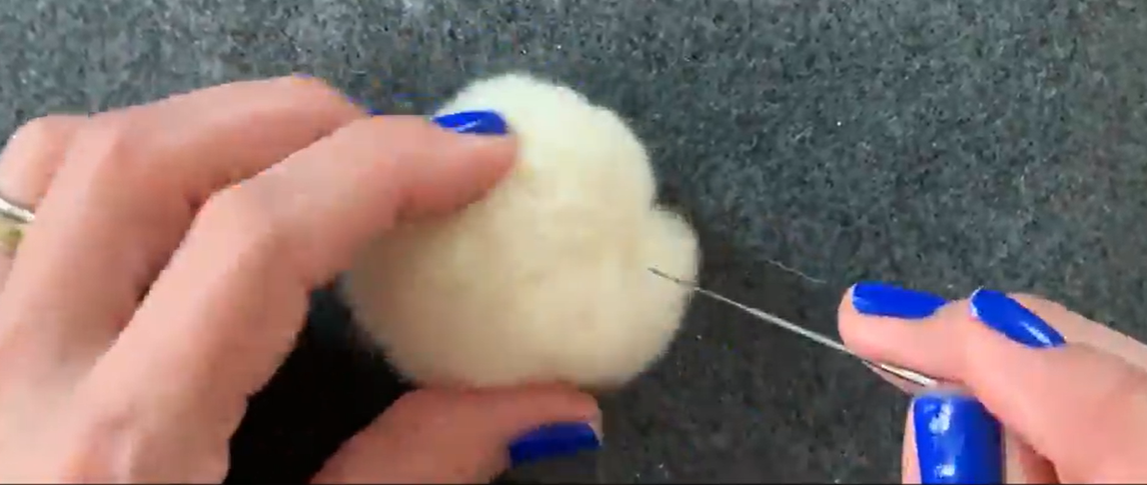
To begin needle felting, you’ll need a wad of wool and a needle. Take a wad of a size most appropriate for the object you’re creating. Don’t worry if you take too little or too much to start with, as you can always add some or take some away.
Prick the wool, using your foam pad to protect the surface underneath. When you prick the wool, the tiny barbs on the needle attach the fibers together. Turn your wool as you prick it, and squeeze it slightly. Once you repeat this pricking action enough, you’ll end up with a firmer, denser wad of wool that is less fluffy than you started with.
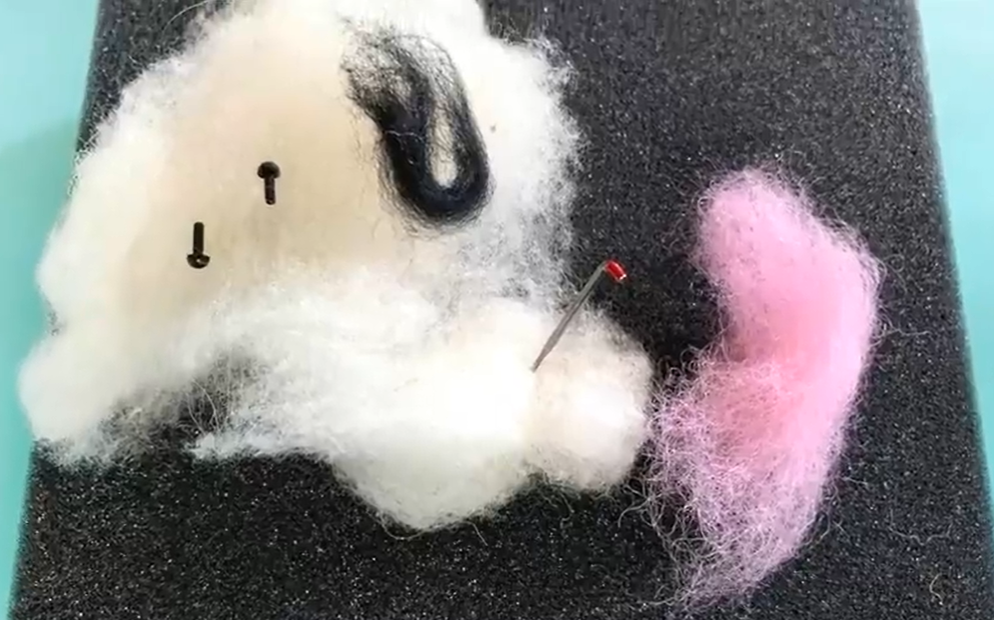
Begin with the core or central component of your felted object. In the image shown above, the felter is making a pig, so creates the round ball of the pig’s head first.
Step 3: Create Details

Depending on the type of object you’re needle felting, you’ll need to add details. In the example in the pictures, the felter is creating triangular-shaped ears for a pig. You can also add color at this stage.
When forming details to add to the central component of your object, leave ragged the edge that will be attached so you have enough fiber to work with.
Step 4: Connect Your Pieces Together

To attach details to your central object (such as this pig snout and ear in the image above!), take the ragged edge of the piece you want to attach and, using the needle, join the two pieces together using the same pricking motion you did before.
What You Can Make With Needle Felting

These highly realistic dogs are created by needle felting artist Linda Facci and show the possibilities of this creative medium.

Needle felted animals can be used as toys and ornaments or framed and hung on the wall as art.
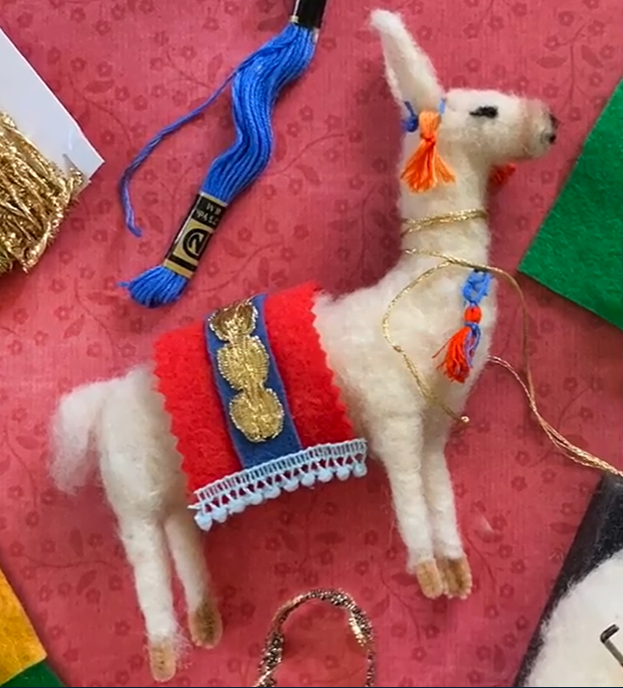
This needle felted llama has been embellished with embroidery and hand-sewn accessories—and would make a great ornament or decoration.

Various objects for a Christmas scene can be created by needle felting, including snowpeople, treets, and houses.

As shown here, needle felting can be used like paint to draw with colored wool onto a surface.

These wool paintings of sheep and lambs show the versatility of needle fiber art.
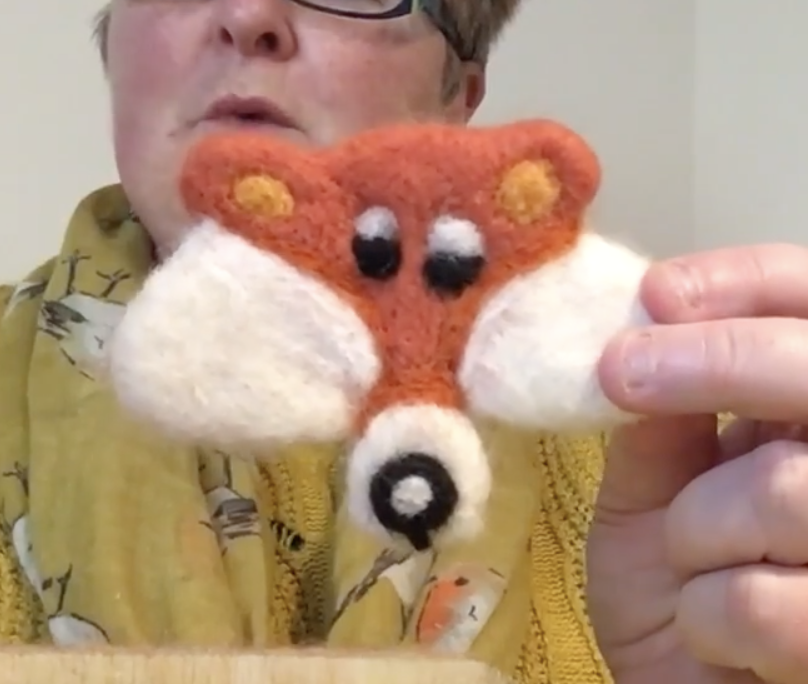
Learn From This Needle Felting Tutorial
Needle Felting For Beginners: Making a Felt Animal Head Ornament
Try Skillshare for free! Sign up for a 7 day free trial today!
Get Started- Unlimited access to every class
- Supportive online creative community
- Learn offline with Skillshare's app


