

Design Process: How Temi Coker Creates a Graphic Album Cover
Graphic designer Temi Coker walks you through his process for creating a bold, colorful album cover.


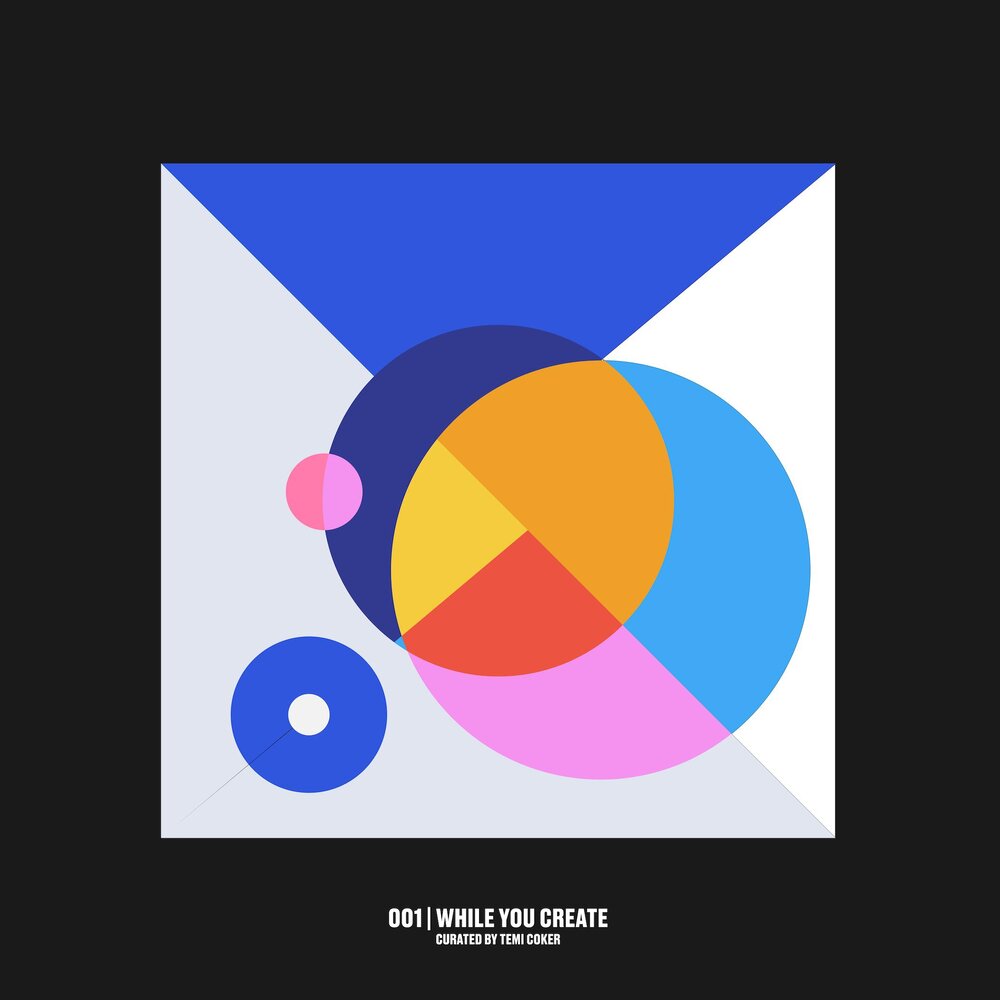
Every three months, photographer and graphic designer Temi Coker curates a new music playlist — each with its own, custom-created graphic album cover. It’s an opportunity for Temi to fuse together two of his biggest life joys, art and music, and to share new artwork with his audience.
“Music is a very important part of my creative process. I always listen to music when I'm creating, and it just helps me with my creative flow," he says in his new Skillshare Original, which walks students through the design process of creating their own bold and color-drenched playlist album cover. About the class, he says: “I think this process will definitely help you develop your own type of aesthetic. You’re actually learning what you like, and you’re pushing yourself, and you’re trying to find different ways to express yourself.”
Graphic Design: Create a Bold, Colorful Album Cover takes you through Temi’s unique approach to the graphic design process, exploring how color theory, form, and pattern can come together to create an expressive piece of art. Here’s a look at how Temi takes his album cover from concept to finished masterpiece.
Step One: Research and Get Inspired
“My work involves a lot of color and shapes and composition. But I feel like the secret sauce is in how I think. I’ll look at other artists, read interviews they’ve done, to get an insight into their brain, and how they view color and shapes and composition. I feel like that’s when I grow as an artist.””
The word “research” may not automatically spark joy in you, but Temi has a way of making it feel equal parts inspiring and soul-enriching. For him, this step is about exploring the “why” and really leaning into the excitement of discovery so he can grow as an artist. He calls this part of the design process the “secret sauce” that makes his art come to life.
Temi uses Pinterest to create his moodboards, curating each around a specific topic that informs his work: “Layouts”, “Patterns”, and “Multi-Media” are a few examples. Composition is a huge part of Temi’s artwork, so he’s always dissecting how other artists use shapes and space during his research phase.
Step Two: Sketch Your Designs
Once your inspiration tank is fueled it’s time to start playing with shapes. Temi sketches via Adobe Fresco, though you can use whatever materials you feel comfortable with — even a pencil and sheet of paper! Start by sketching out a few 1:1 boxes (or, use the album cover template that’s provided with Temi’s full class). Sketch to fill each square, playing with different shapes and layouts.
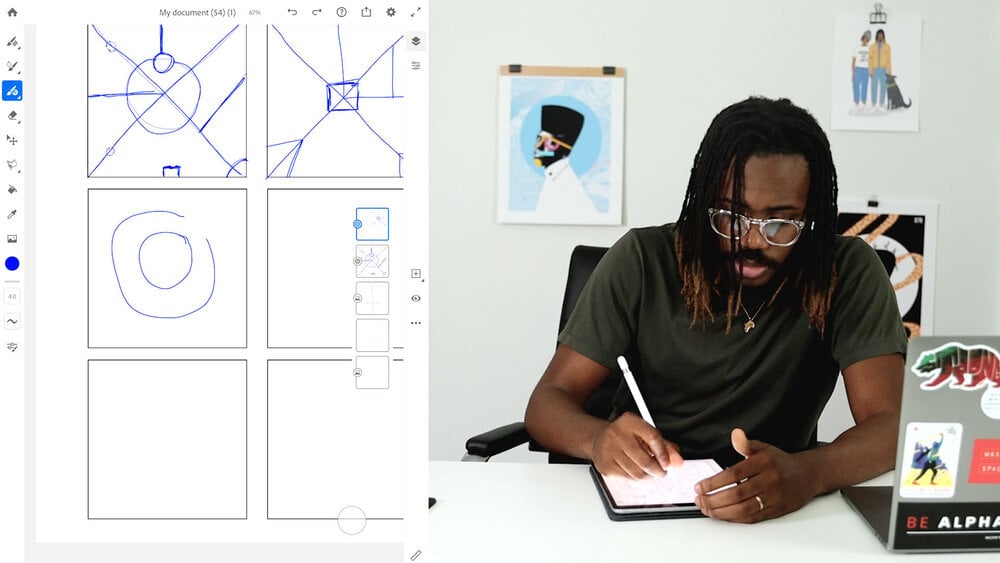
The idea for this step in the design process is to allow the creativity to flow without getting too fussy. In other words: do your best to forget about perfection and have a blast.
Step Three: Refine Your Work
With sketches in tow, it’s time to bring your design to life in Adobe Illustrator. Import your sketches, reduce the opacity, and lock your layer. You’re ready to draw on top of your initial drawings. Temi uses the pen tool and ellipse tool to trace over his favorite sketch from the set — play around with the different tools in Illustrator, or use whichever you typically work with.
Learn to Design Like Temi!
Digital Poster Design: Combining Images and Type for Powerful Visuals.
After tracing, you can experiment even more with shapes and forms, honing and perfecting your design until it speaks clearly to you. Once you’re happy with what you’ve drawn, hide your first layer (the layer containing your imported sketch) so that you’re working only on your clean, refined sketch.
Step Four: Infuse Your Design with Color
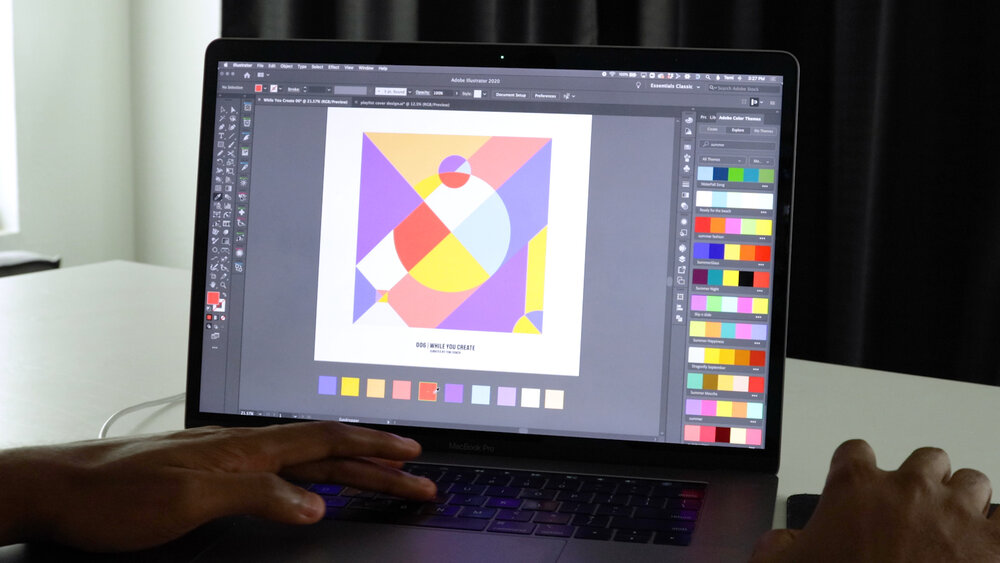
Up until now color hasn’t come into play, but this is finally your chance to roll around in the color wheel. For Temi, the key to a stellar end result is working within a purposeful color story.
“The most important thing to pay attention to is the placement of colors, and the color scheme.”
Temi uses the Live Paint Bucket Tool and Adobe Color in Illustrator to quickly and easily add color to different areas of his refined sketch. You’re probably not going to get your color scheme “just right” the first time around, and that’s ok! Allowing yourself to experiment with different shades and hues — again, not getting bogged down in perfection — is part of the design process.
What you’ll find, Temi points out, is that it really turns into an emotional process. How do certain colors make you feel? And how does that feeling shift as you pair certain colors together? Watching your color scheme come together is sort of like clicking in the pieces of a puzzle.
Step Five: Finalize Your Album Cover Design
Since you’re building a graphic album cover, text is important. In this last part of the design process, you’ll want to add things like a playlist title or a “curated by” line. Font, text, placement, color, and even a title can all be used to convey what the theme of your mix is.
After wrapping up the text, you can finally save the document and start using it. Simply export your artwork in JPEG or PNG format, and upload it as the album cover on your music streaming platform of choice. Temi stores his playlists and album covers on Spotify; we’ve included his most recent playlist here in case you’d like to listen.
What’s particularly rad about Temi’s process is that it can be applied to anything you choose to design. By learning how to properly research, sketch, and use color theory when you work, the more you’ll expand your capabilities and skills as an artist.

Want more classes from Temi? Start here:
Digital Poster Design: Combining Images & Type for Powerful Visuals
Try Skillshare for free! Sign up for a 7 day free trial today!
Get Started- Unlimited access to every class
- Supportive online creative community
- Learn offline with Skillshare's app


