

Cosplay Armor: Make It, Wear It, Own It
Stride into the next ren faire or LARP game with confidence and pride, wearing cosplay armor you made yourself.
Table of Contents


Strength, honor, glory—the pillars of the chivalrous knight and the oath-sworn paladin. If you’ve ever felt a powerful connection to these fantasy character stalwarts, then they’re probably the perfect option for you to cosplay. The tricky part is: how do you replicate their massive armor in the confines of your garage?
If you’ve ever wanted to strap on King Leonidas’ helmet and shield but don’t know where to start, here’s a primer on how to create your very own cosplay armor.
Quick Links
How to Make Cosplay Armor

Making a full suit of plate armor seems like a task as monumental as a siege on Troy. But with careful planning, you’ll find yourself at the construction phase in no time. Here are some things to consider before you begin.
- Choosing a character: Who do you want to be? Whether it’s your Overwatch main or a rider of Rohan, consider starting simple. Huge, elaborate pieces may discourage you as you get started.
- Setting a budget: Cosplay can be as cheap or expensive as you want it to be. Knowing how much you’re willing to spend before you start will help you narrow down your material choices.
- Researching: To make your cosplay as accurate as possible, pull as many references as you can. Pulling screen captures from films and video games or finding similar costumes online will help greatly.
A character costume can make you feel confident and powerful, so you’ll want to tackle your project with as much gusto as you can muster!
Materials

There really is no right or wrong way to build your cosplay—you can use any kind of materials you have at your disposal. For the main body of your armor, here are a couple of options.
EVA Foam
This flexible, soft foam rubber is commonly found in sports equipment like helmets and knee pads. It makes excellent cosplay armor because it is easy to work with, it conforms to the body, and it’s soft and comfortable to wear. The only downside is it can get a little pricey if you are working on larger projects.
Cardboard
Certainly the most widely available and inexpensive material, cardboard is easy to work with and can be quite sturdy when it’s reinforced. However, it is difficult to mold to the body and can be quite uncomfortable.
Metal
Metal armor is probably the most accurate way to make armor. However, the skills you need to work with it—welding, blacksmithing, etc.—take time to learn. If you want to go this route, consider taking a class to get the basics down and learn how to safely work with metals.
Cloth
While traditionally not used for main armor pieces, cloth additions like banners and capes are often essential costume pieces. Cloth and sewing supplies are easily found at any local craft store, and sewing tutorials are widely available and extremely helpful to avoid pricked fingers.
Here are some other tools and supplies you’ll likely need to create your cosplay armor.
- Scissors and an x-acto knife
- Black and silver sharpies
- Measuring tape
- Plastic wrap
- Glue or rubber cement
- Duct tape
- Elastic strips
- Primer, paints, and paint brushes
Once your tools are assembled, it’s time for construction!
Make Your Own Cosplay!
Learn to Make EVA Foam Armor for Cosplay
Step 1: Make Your Pattern

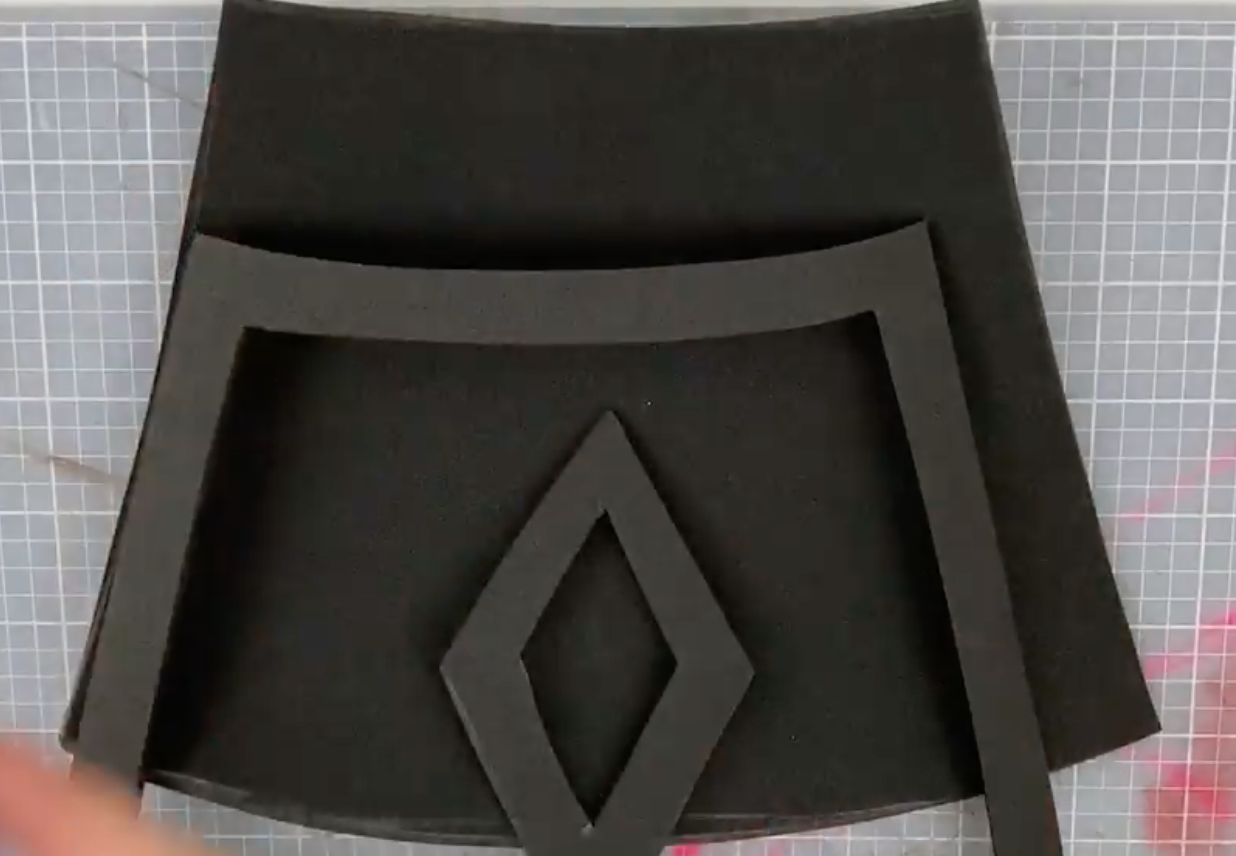
When you’re making cosplay armor, there’s nothing worse than cutting your materials to the wrong size and having to scrap them. That’s why a pattern template is so useful.
There are several ways to make a template. You can use a measuring tape to measure all the parts of your body and transfer those to your materials. Or, you can use a piece of paper or some duct tape and plastic wrap—pictured above—to wrap around your body, mark it with a marker, and cut that to size. You then trace that template on your materials.
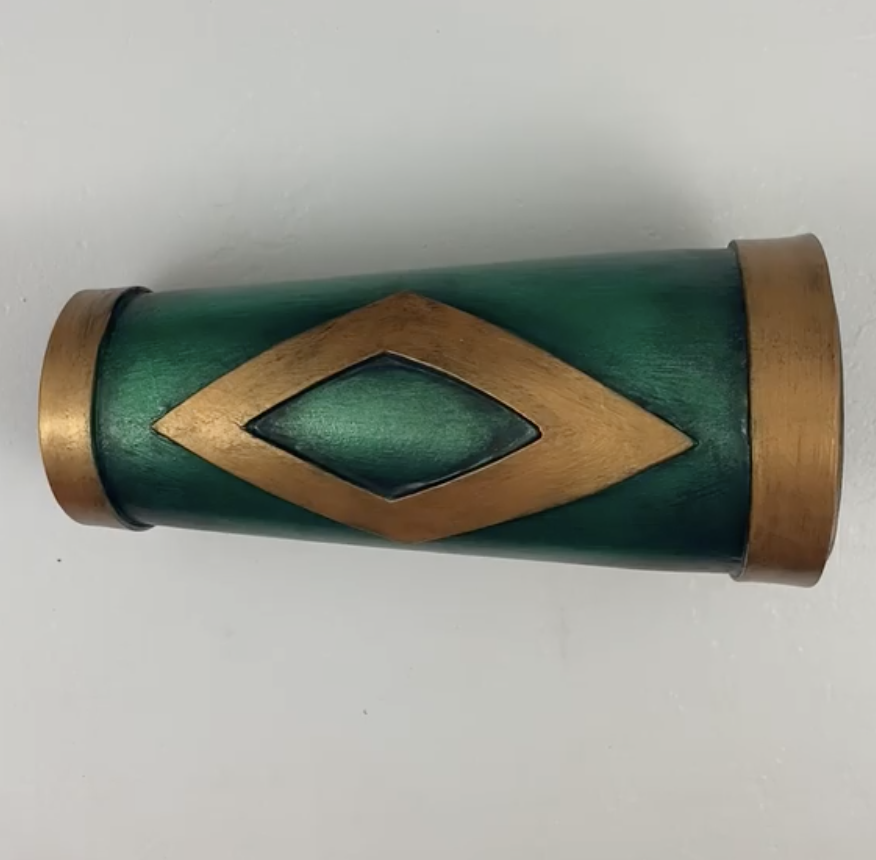
This template method also allows you to draw on embellishments that you can also transfer to your materials. An armor bracer looks cool, but when it’s adorned with a design, it looks even better.
Step 2: Put It Together
After you’ve traced your templates and cut out your pieces, it’s time for assembly. Using your glue of choice, carefully glue your detail pieces to your main piece.
This is also the time to use those elastic straps so you can actually wear the armor. Glue one end of the strap to your armor. Then, place the armor on your body to the correct shape and size. Mark the elastic strap so you know where to glue it to the other side.
Once everything is glued, use a heat gun or a hot hair dryer to heat seal the armor. This helps with the drying process and will allow the paint to adhere to the armor easily.
Step 3: Prime

Just like painting a wall, your cosplay armor needs a coat or two of primer. There are several different kinds of primer on the market, but you want to focus on ones that are specifically used for foam and plastics.
The primer stops the paint from seeping into your armor material and helps prevent cracking. Make sure to let the primer dry in between each coat.
Step 4: Paint and Weather

Arguably the most fun part of building cosplay armor is the painting. You can obtain all sorts of acrylic paints at your local craft and hobby stores. For armor, try using metallic paints—they have a sheen to them that replicates the look of metal.
Apply the paint to your armor in several thin coats. This process provides a smoother finish to your piece. Also, if you get paint where you don’t want it, use a damp paper towel to wipe it off.
Weathering is the process of making your armor look more realistic. A common way to do this is dry-brushing. Dip your brush into black paint and then wipe most of it off. Use the small amount of paint on your brush to highlight the cracks and corners of your armor.
Ride Into Battle
Your cosplay armor is finished! Now you can add swords or other weapons to complete your look and dazzle your friends at the next big convention. For honor and glory!
Make Your Own Cosplay Costume!
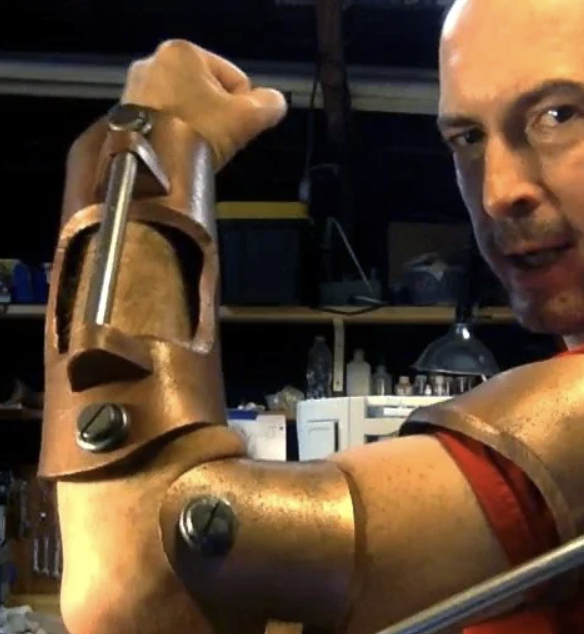
Lessons in Cosplay - Making Steampunk Arms
Try Skillshare for free! Sign up for a 7 day free trial today!
Get Started- Unlimited access to every class
- Supportive online creative community
- Learn offline with Skillshare's app


