Maynooth Furniture Project 1 - 11
Hey Dan! Just started your course and I'm honestly a little nervous about submitting this but I'd love to get some feedback on what I can improve and what I can add to make it better. It's been a great experience so far, thanks for your time!
(8/8/19)
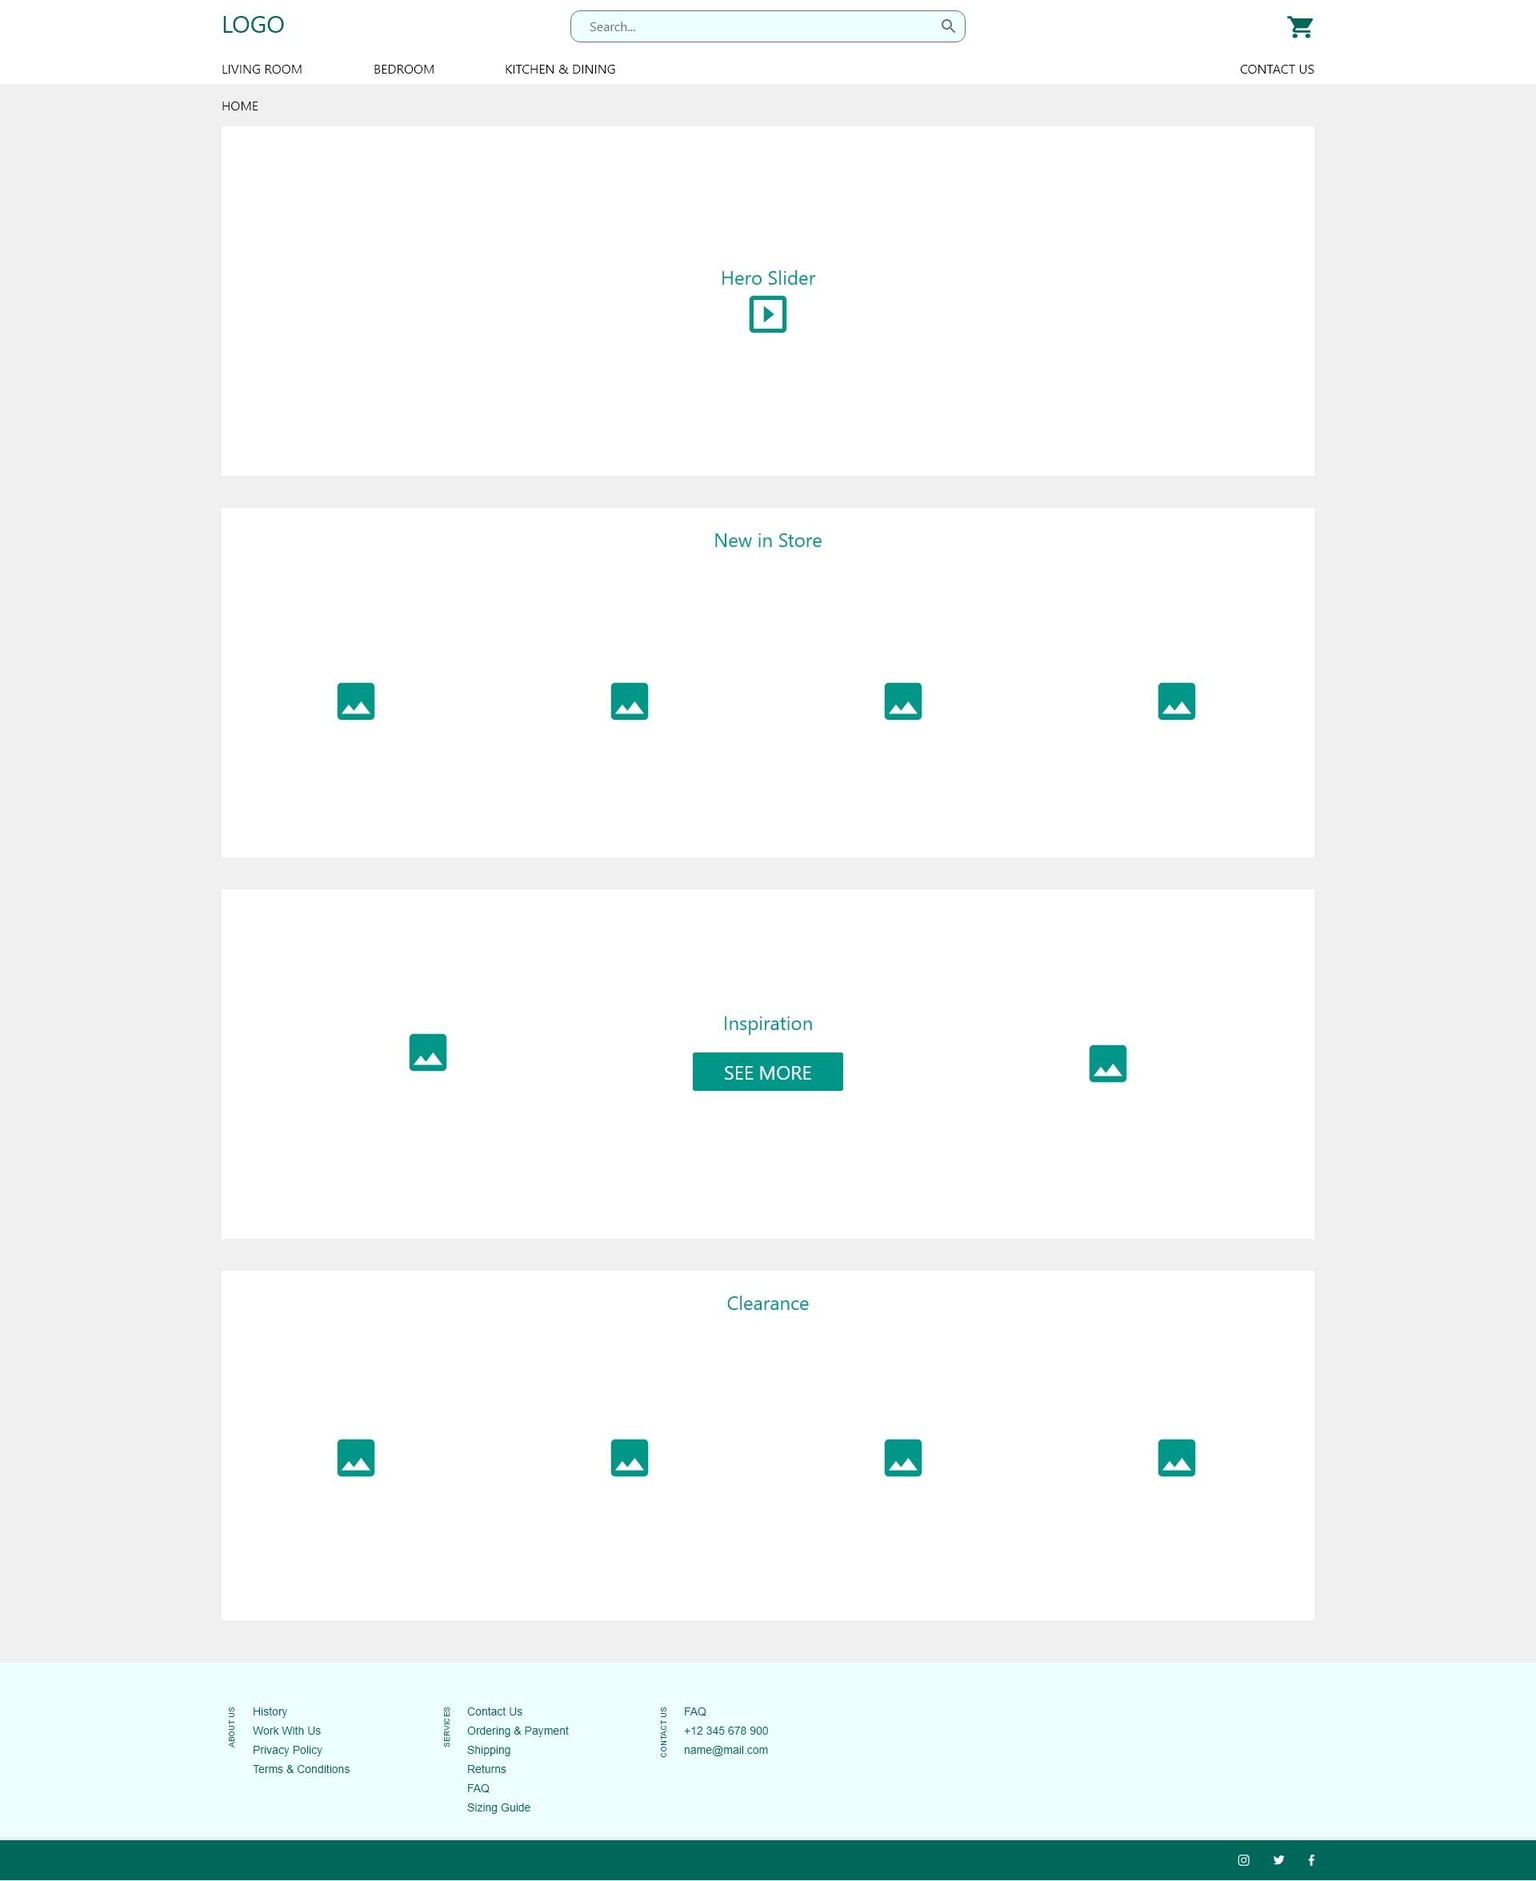
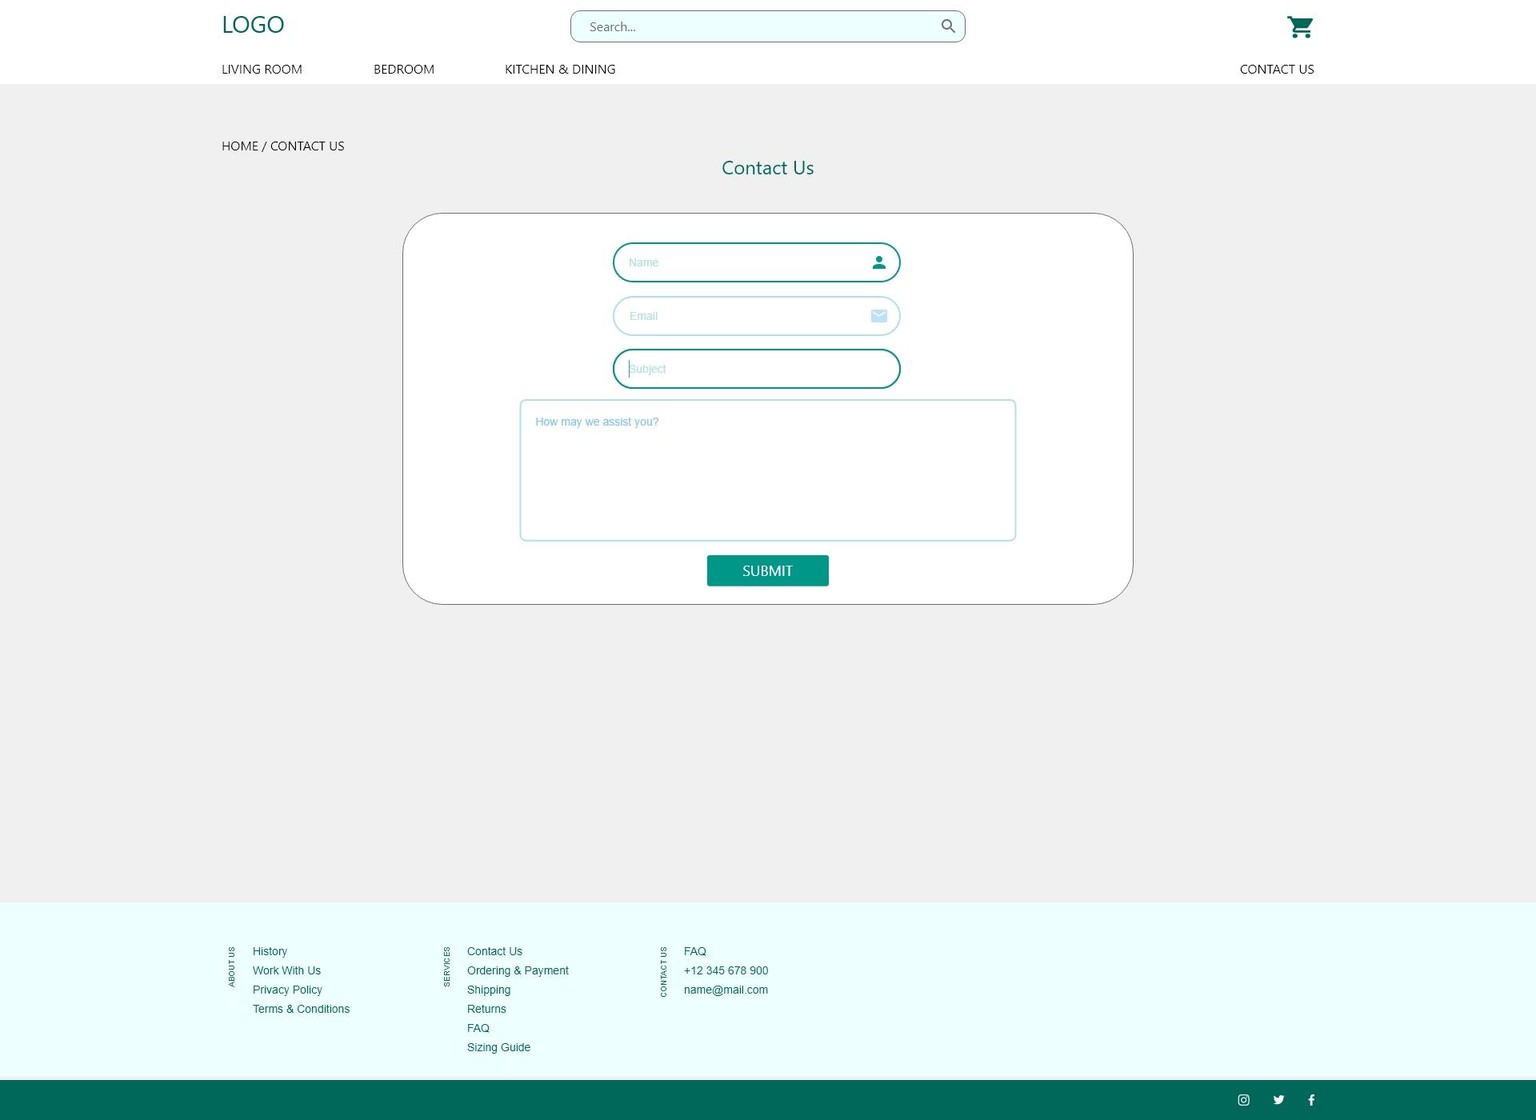
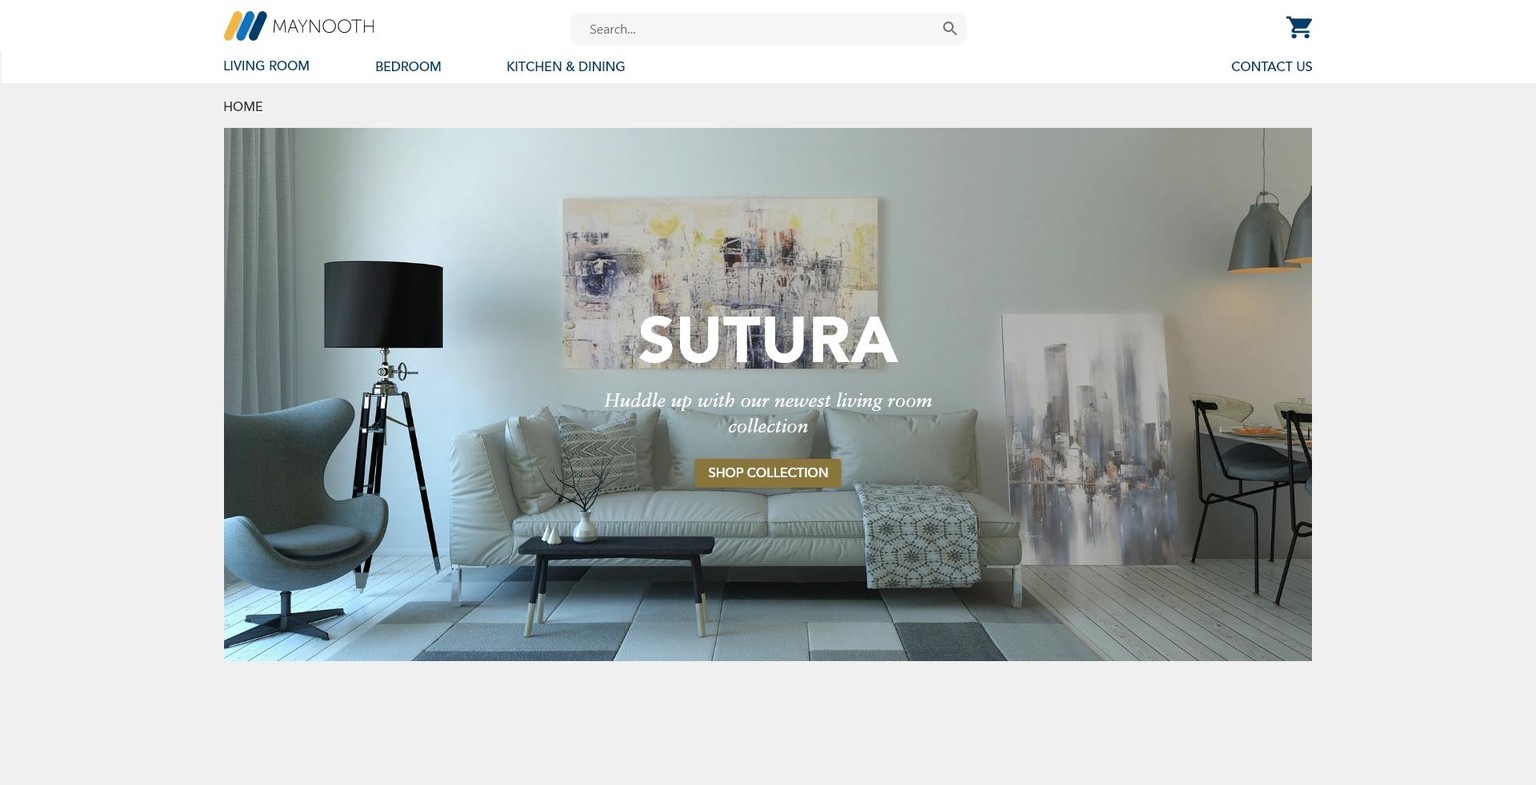
Class Project 1: Wireframe Homepage & Contact Us Page
(8/8/19)
Class Project 2: Prototyping
- Connect your homepage to your contact us artboards.
- Your contact us page can be either a page or a popup modal.
- Take a screenshot of your Prototype.
Thought it would be fun to work with both a page and a popup modal.

(8/8/19)
Class Project 3: Symbols and Repeat Grids
Made a few minor adjustments to the homepage and contact artboards.
Changes made:
Homepage
- divided "New in Store" and "Clearance" for prototyping
Contact Us Page
- added an FAQ
Contact Us Overlay
- added a link to the FAQ
- Clear your assets panel from any unintentional assets.
- Make your navigation & footer a named symbol in your assets panel.
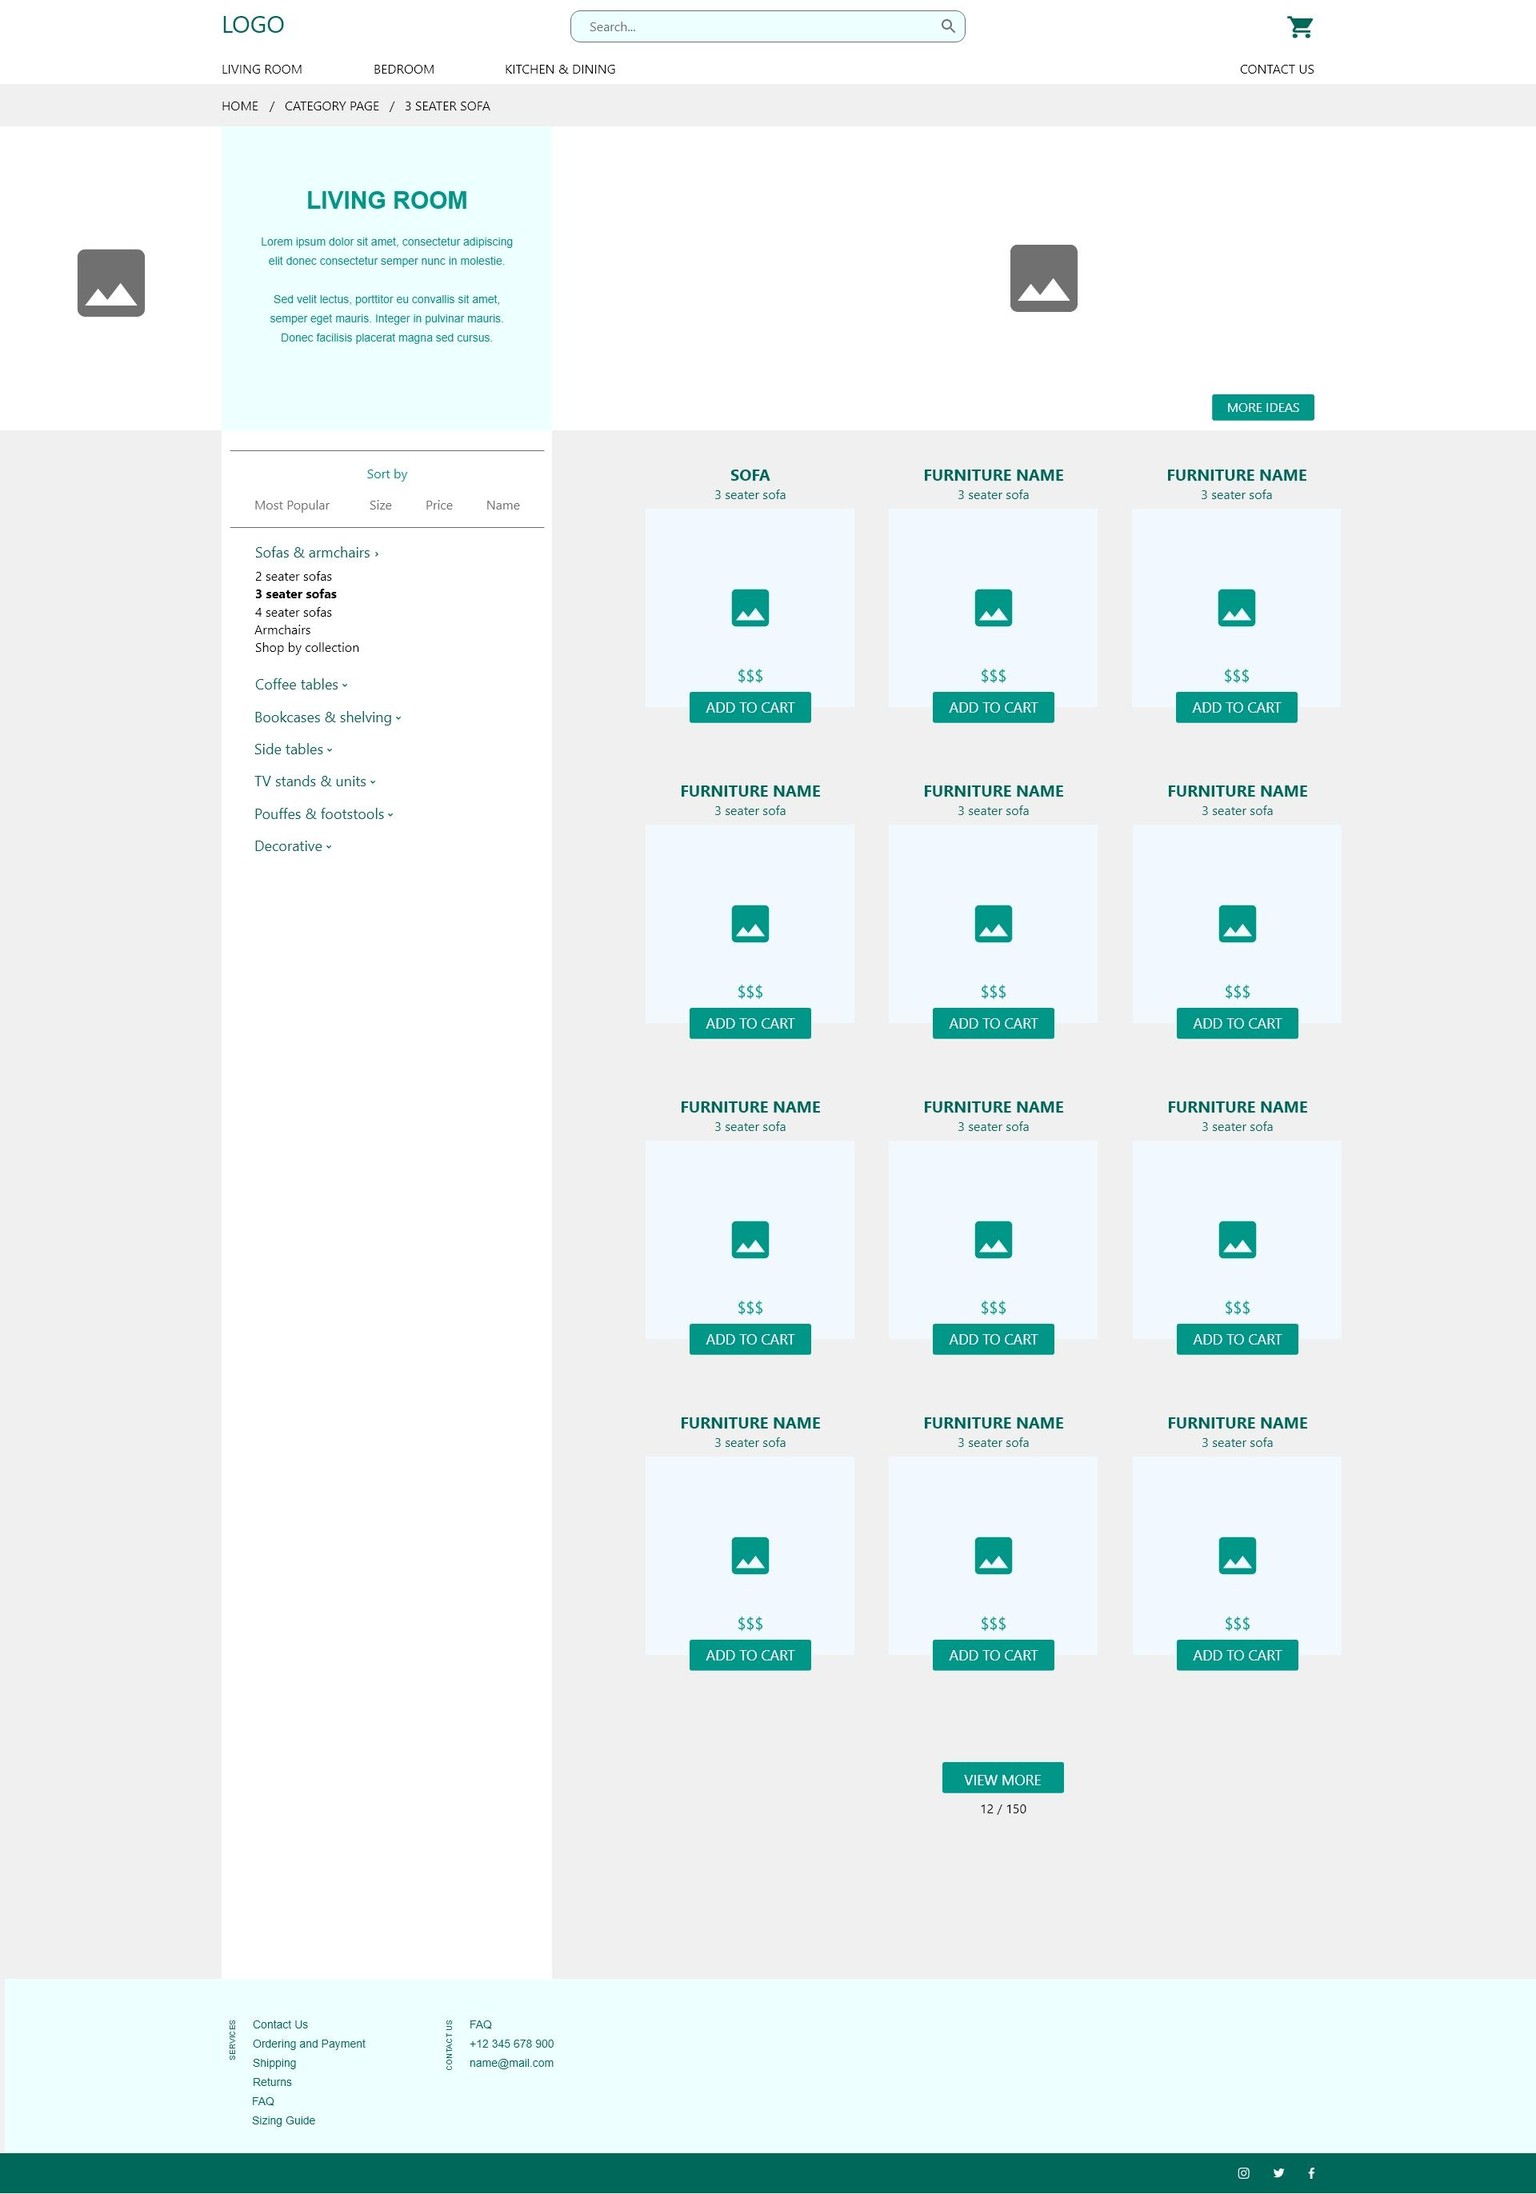
- Create a new artboard called 'Category Page - Living Room'
- Using your current wireframing skills, including the repeat grid to create a page that lists out all of the products that appear in that category.
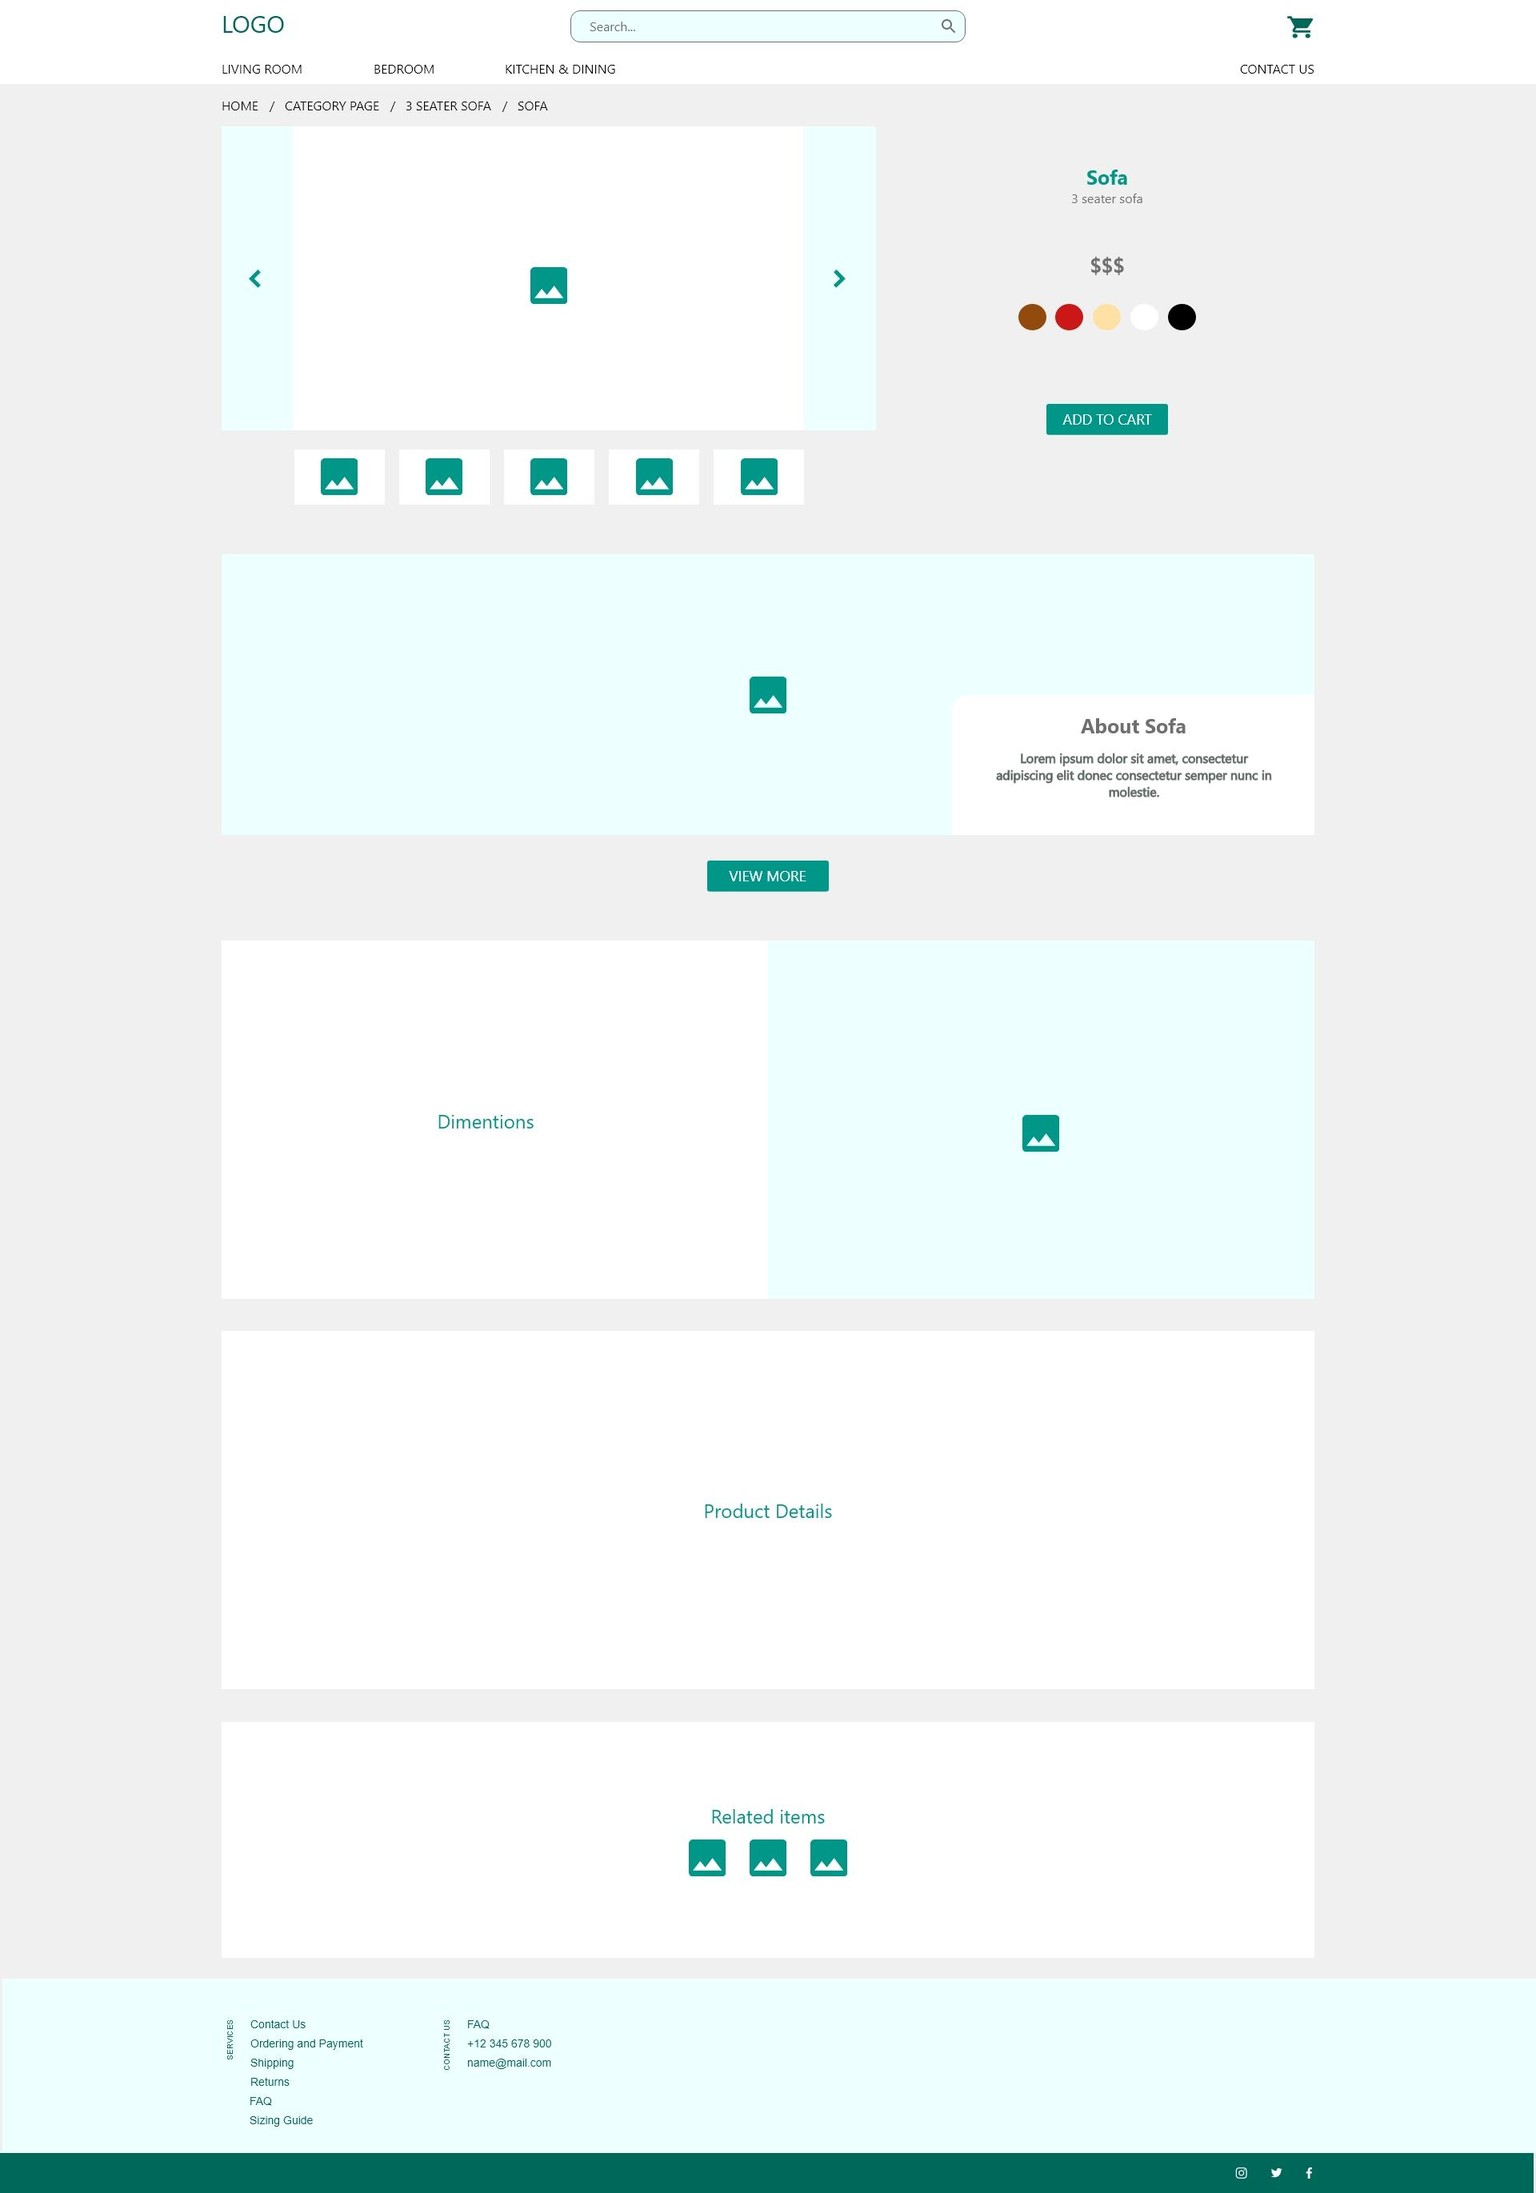
- Create a new artboard called 'Product Page'
- Using your current wireframing skills, create a page that shows details about the final product.
- As above, list out all the things you feel should be on this page to help Katherine make a purchase.
- Prototype all the pages..

(8/8/19)
Class Project 4: Wireframe Feedback
- Create a public prototype.
- Give it a name: Maynooth Prototype V1.0
- Share the link with someone you know and ask them to leave a comment.
https://xd.adobe.com/view/6d747de7-0454-4a46-42b2-e6c379df7044-1b45/ - Record yourself doing a basic demo.
*I don't own a working mic so I'll get on this when I can get my hands on one
(8/8/19)
Class Project 5: Moodboard
- With the Maynooth furniture in mind, create a moodboard for style, font, colour & layout ideas.
- Add the mood board to your artboard or niiice.io.
*I decided to use pinterest instead because I'm more familiar with it - Take a screenshot of your moodboard.
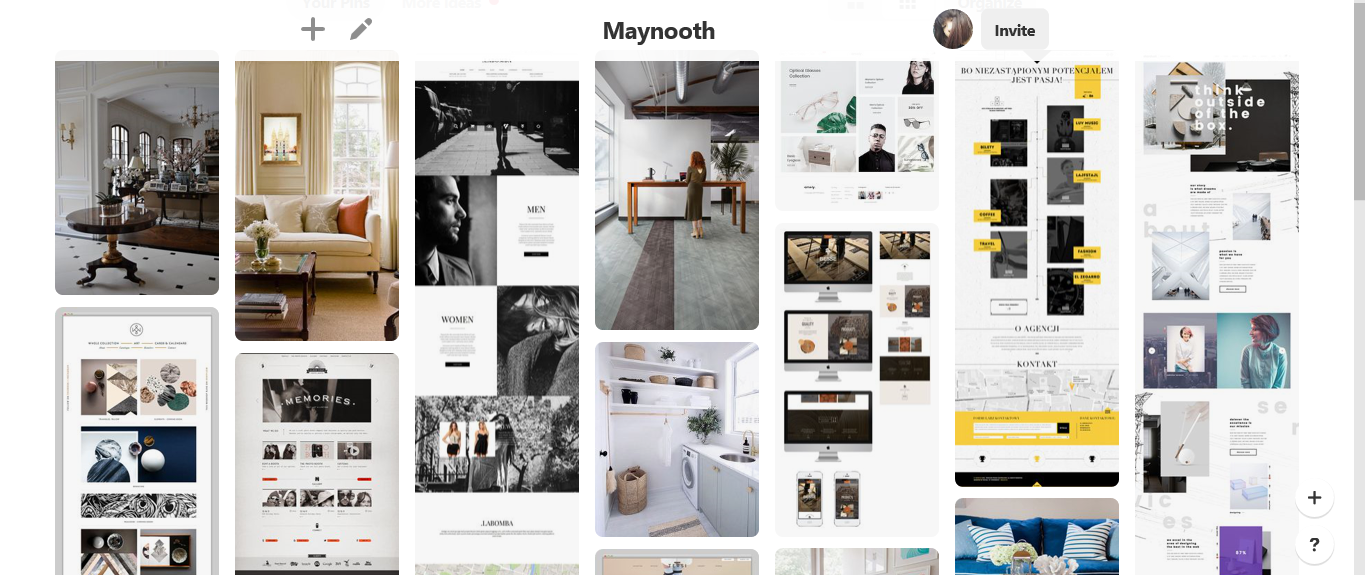
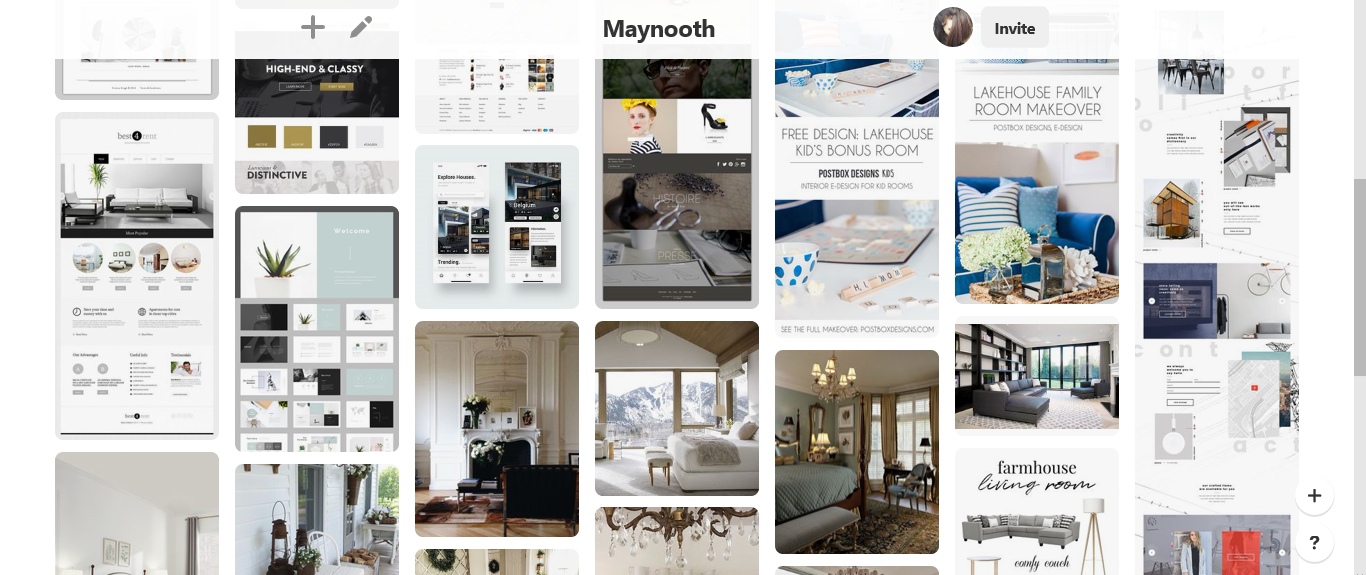
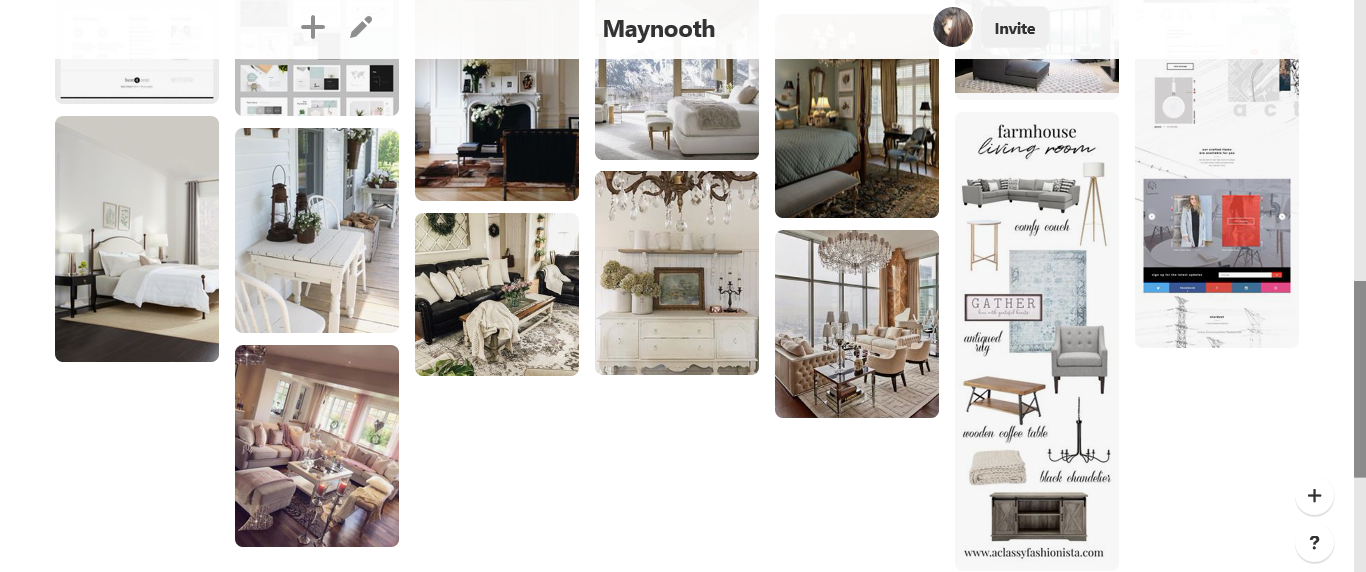
(10/8/19)
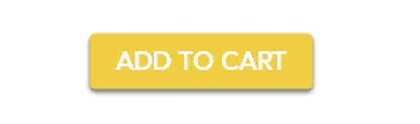
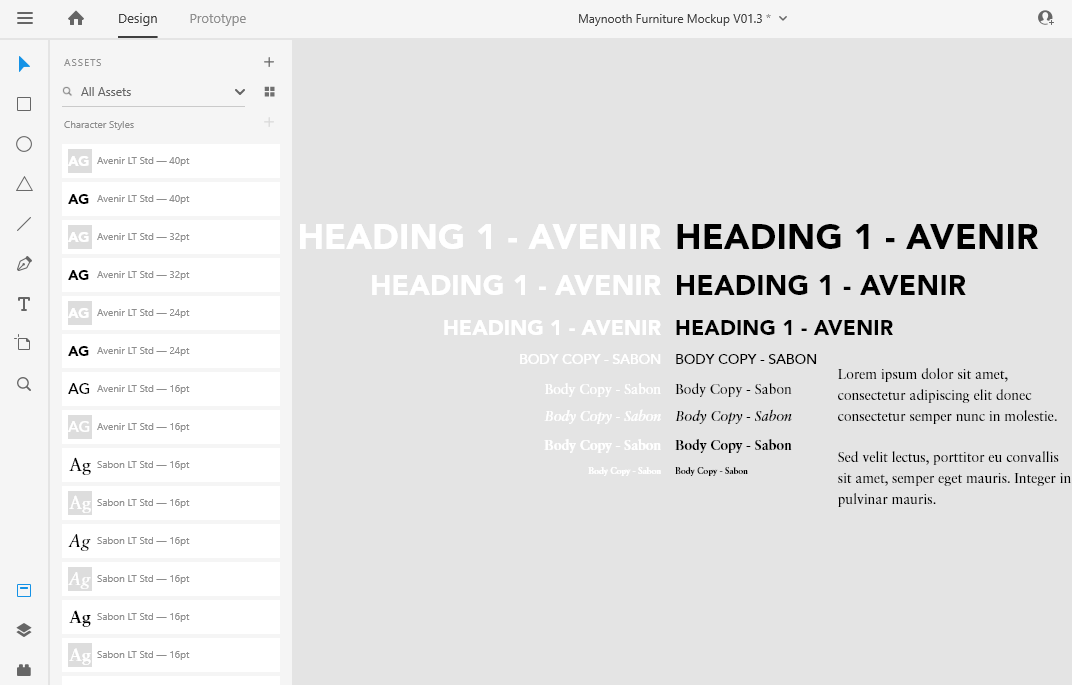
Class Project 7: Text & Buttons
- Create your text stack.
- Add to your Character Styles.
- Create your Hero Text (Heading 1 & Body text).
- Because your site is an e-commerce site you'll find the hero space is more about specials & promotions and less about brand development so we'll have a seasonal hero image.
- g. Spring, Christmas, Black Friday etc.
- Look to existing furniture sites for inspiration.
- Because your site is an e-commerce site you'll find the hero space is more about specials & promotions and less about brand development so we'll have a seasonal hero image.
- Create a button in the hero section
- What ever fits with the promo you've decided to use.
- g. Start Shopping, Buy Now, More Details.
- g. Start Shopping, Buy Now, More Details.
- What ever fits with the promo you've decided to use.
(10/8/19)
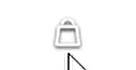
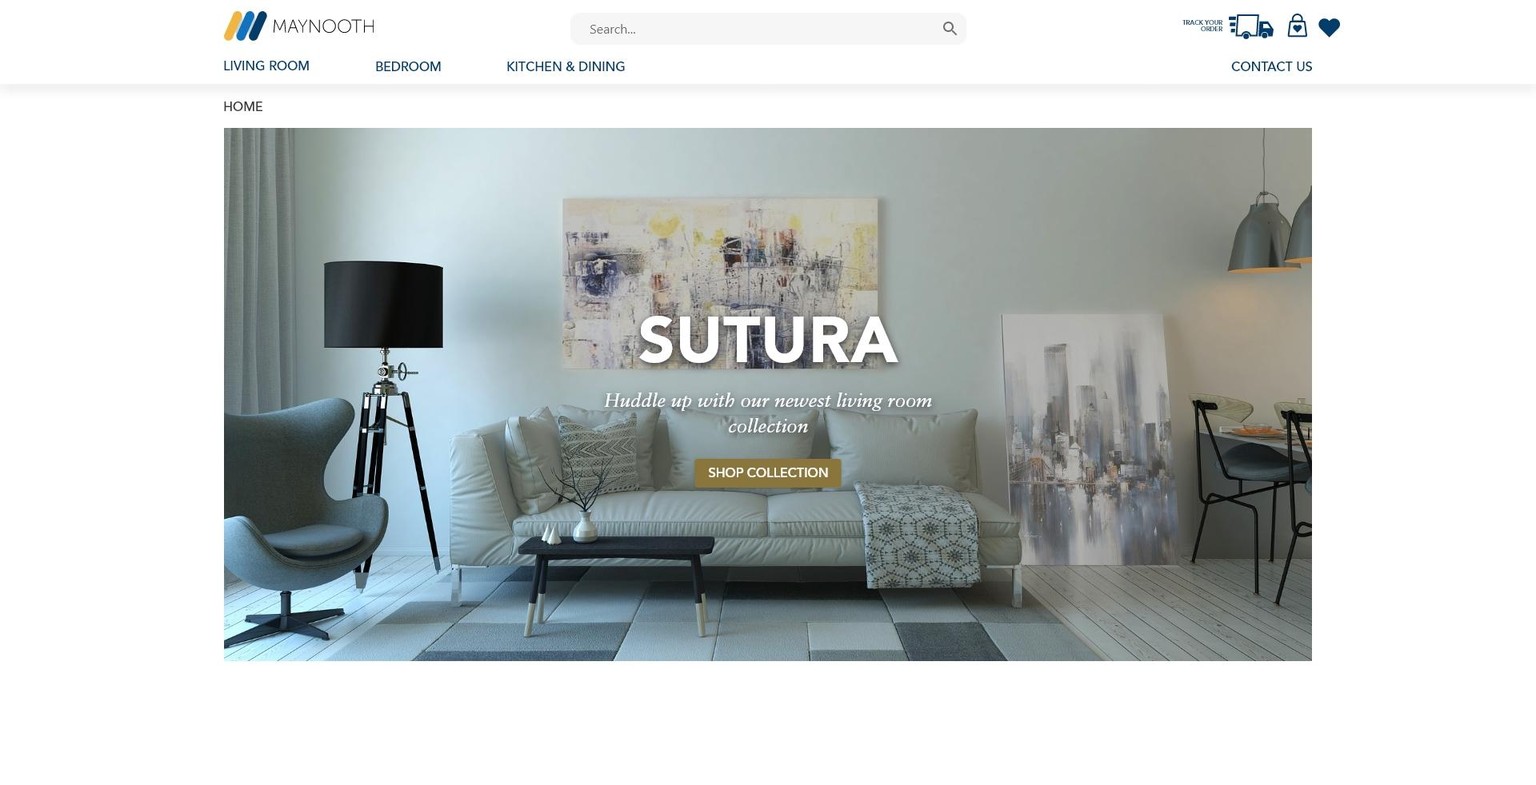
Class project 8: Draw your own icons
- Using any of the tools learn so far in the course (pen tool or Boolean) create:
- Account Icon.
- Shopping cart icon.
- Plus one more icon of your choice.
*I created a heart icon that I plan to use for the product page. For now it's sitting in the Top Nav
- Add to your Maynooth Furniture Mockup.
*Tried out a few things and ended up liking them so I thought I'd save it like this
(10/8/19)
Class project 9: Full Hi Def mockup
- Compete the desktop website views for the following pages. We'll work on the mobile/app versions later in the course. Remember you're designing for Katherine!
- Homepage
- Category Page e.g. Living Room
- Product Page e.g. 3 Seater Sofa
- Homepage
- Make sure you include all the features from the brief (Exercise Files > Class Project > Brief - Maynooth Furniture.pdf).
- Use at least one instance of the following tools/techniques in your design.
- InDesign
- Unsplash
- Download at least 1 image to use in your design from Unsplash.
*I do not own Photoshop, Illustrator or InDesign at the moment so I won't be able to complete the 2nd task for Unsplash - Add the image to CC Library via Photoshop or Illustrator or InDesign and find visually similar images.
- It's up to you if use the watermarked Adobe Stock image in your design but make sure you screen shot your results in the CC Library and share with your own homework.
- Photoshop
- Download at least 1 image to use in your design from Unsplash.
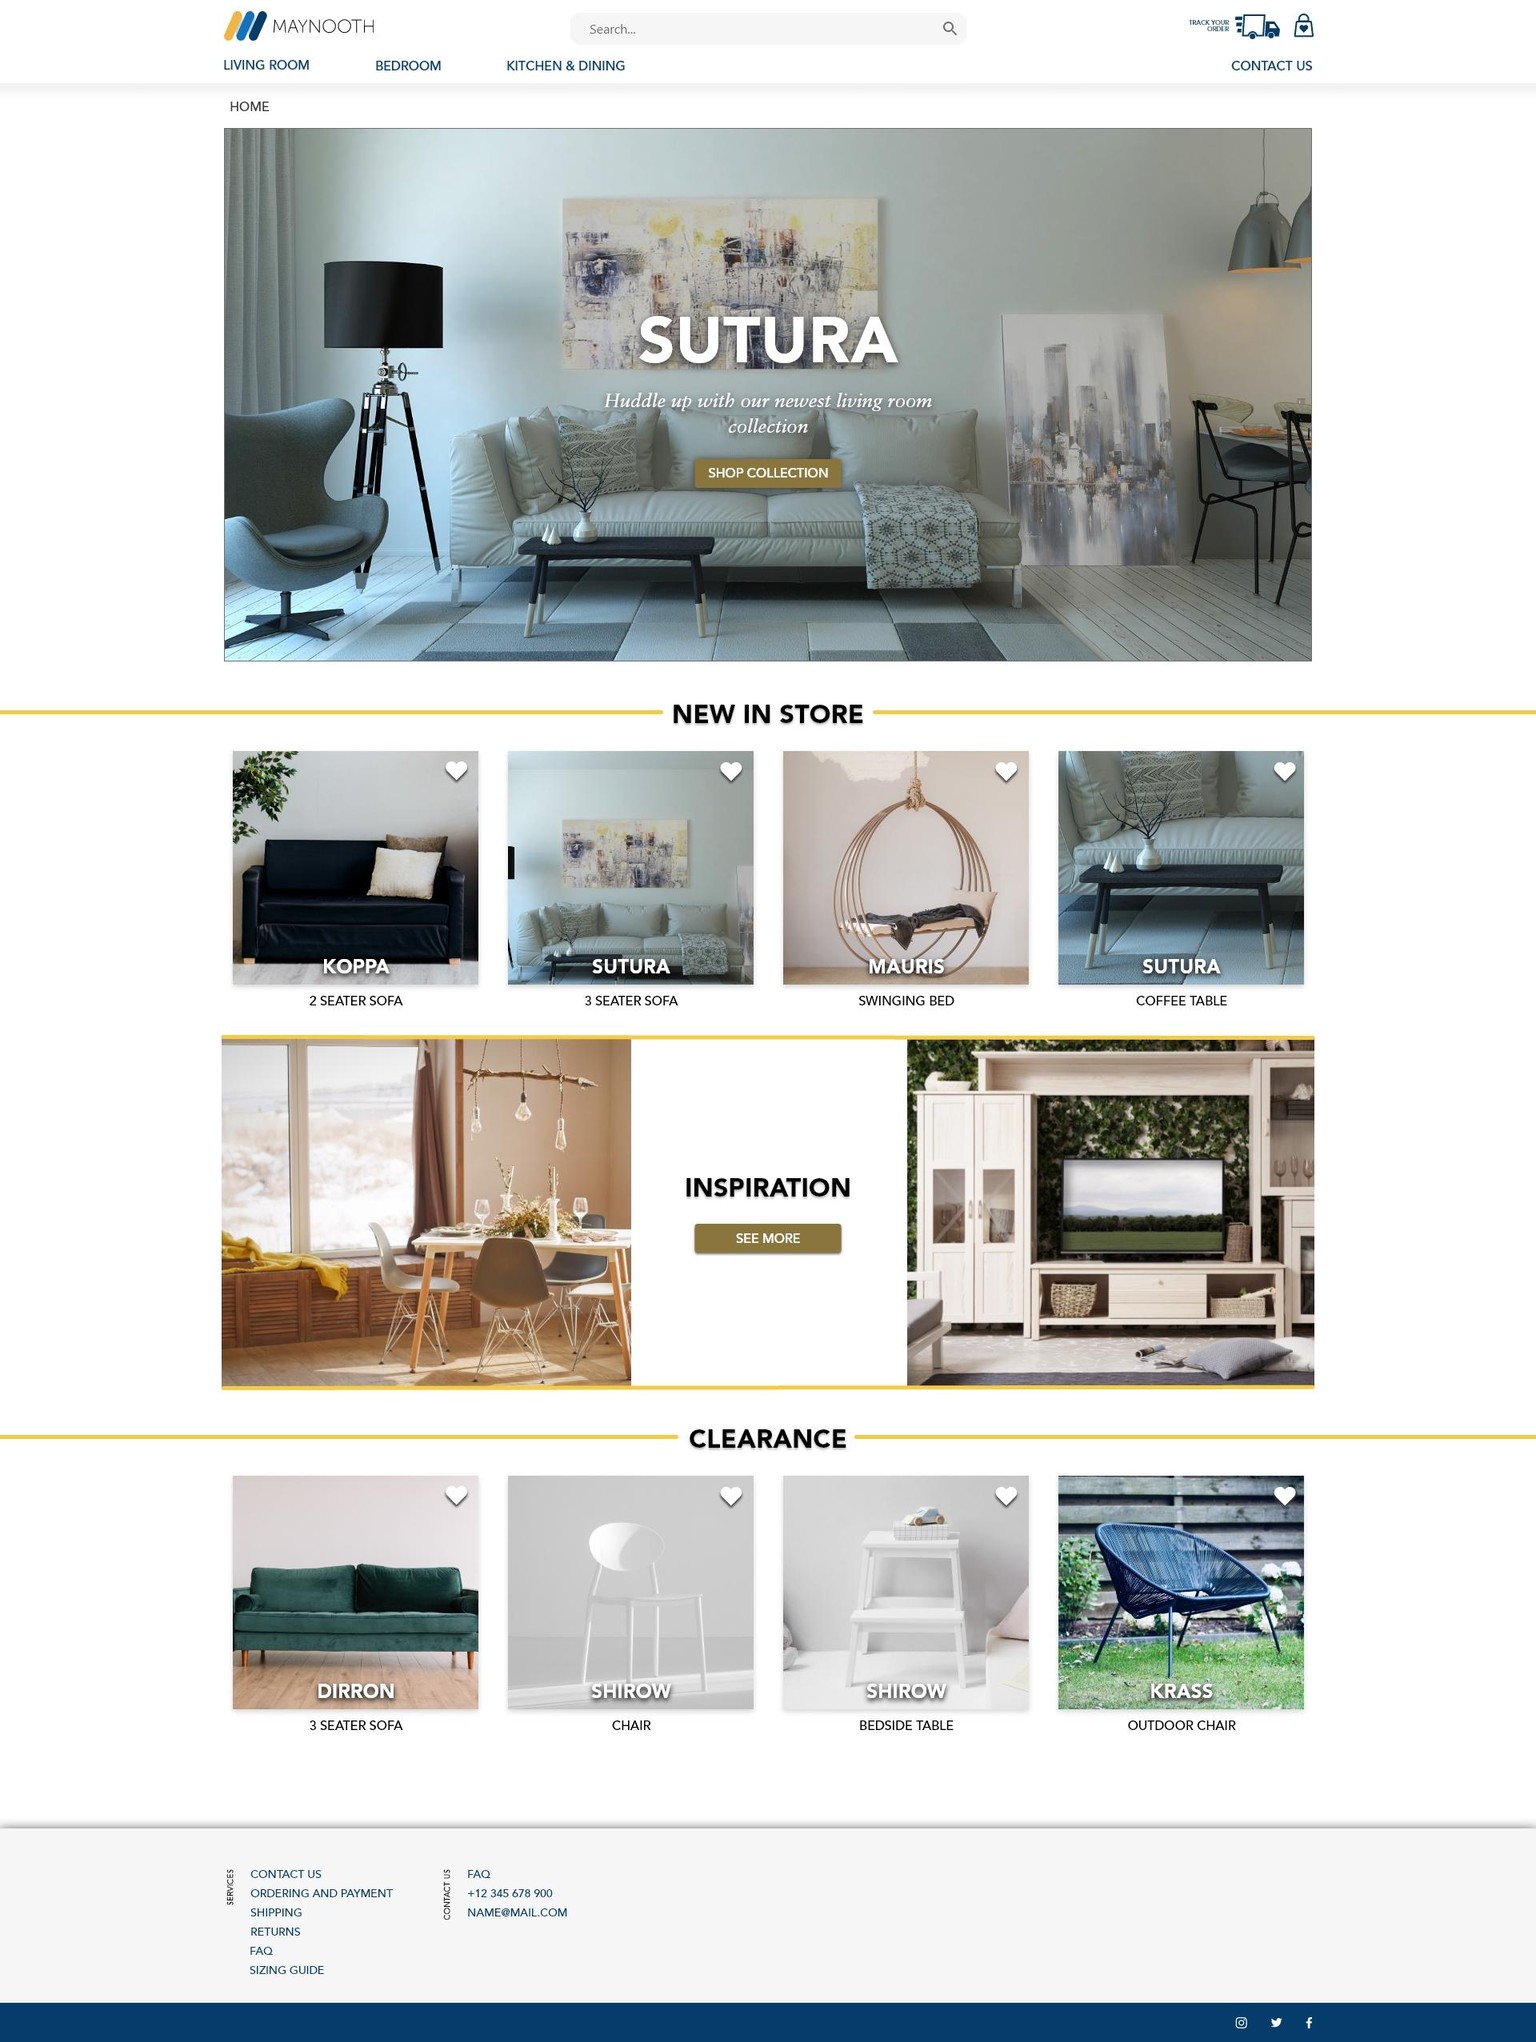

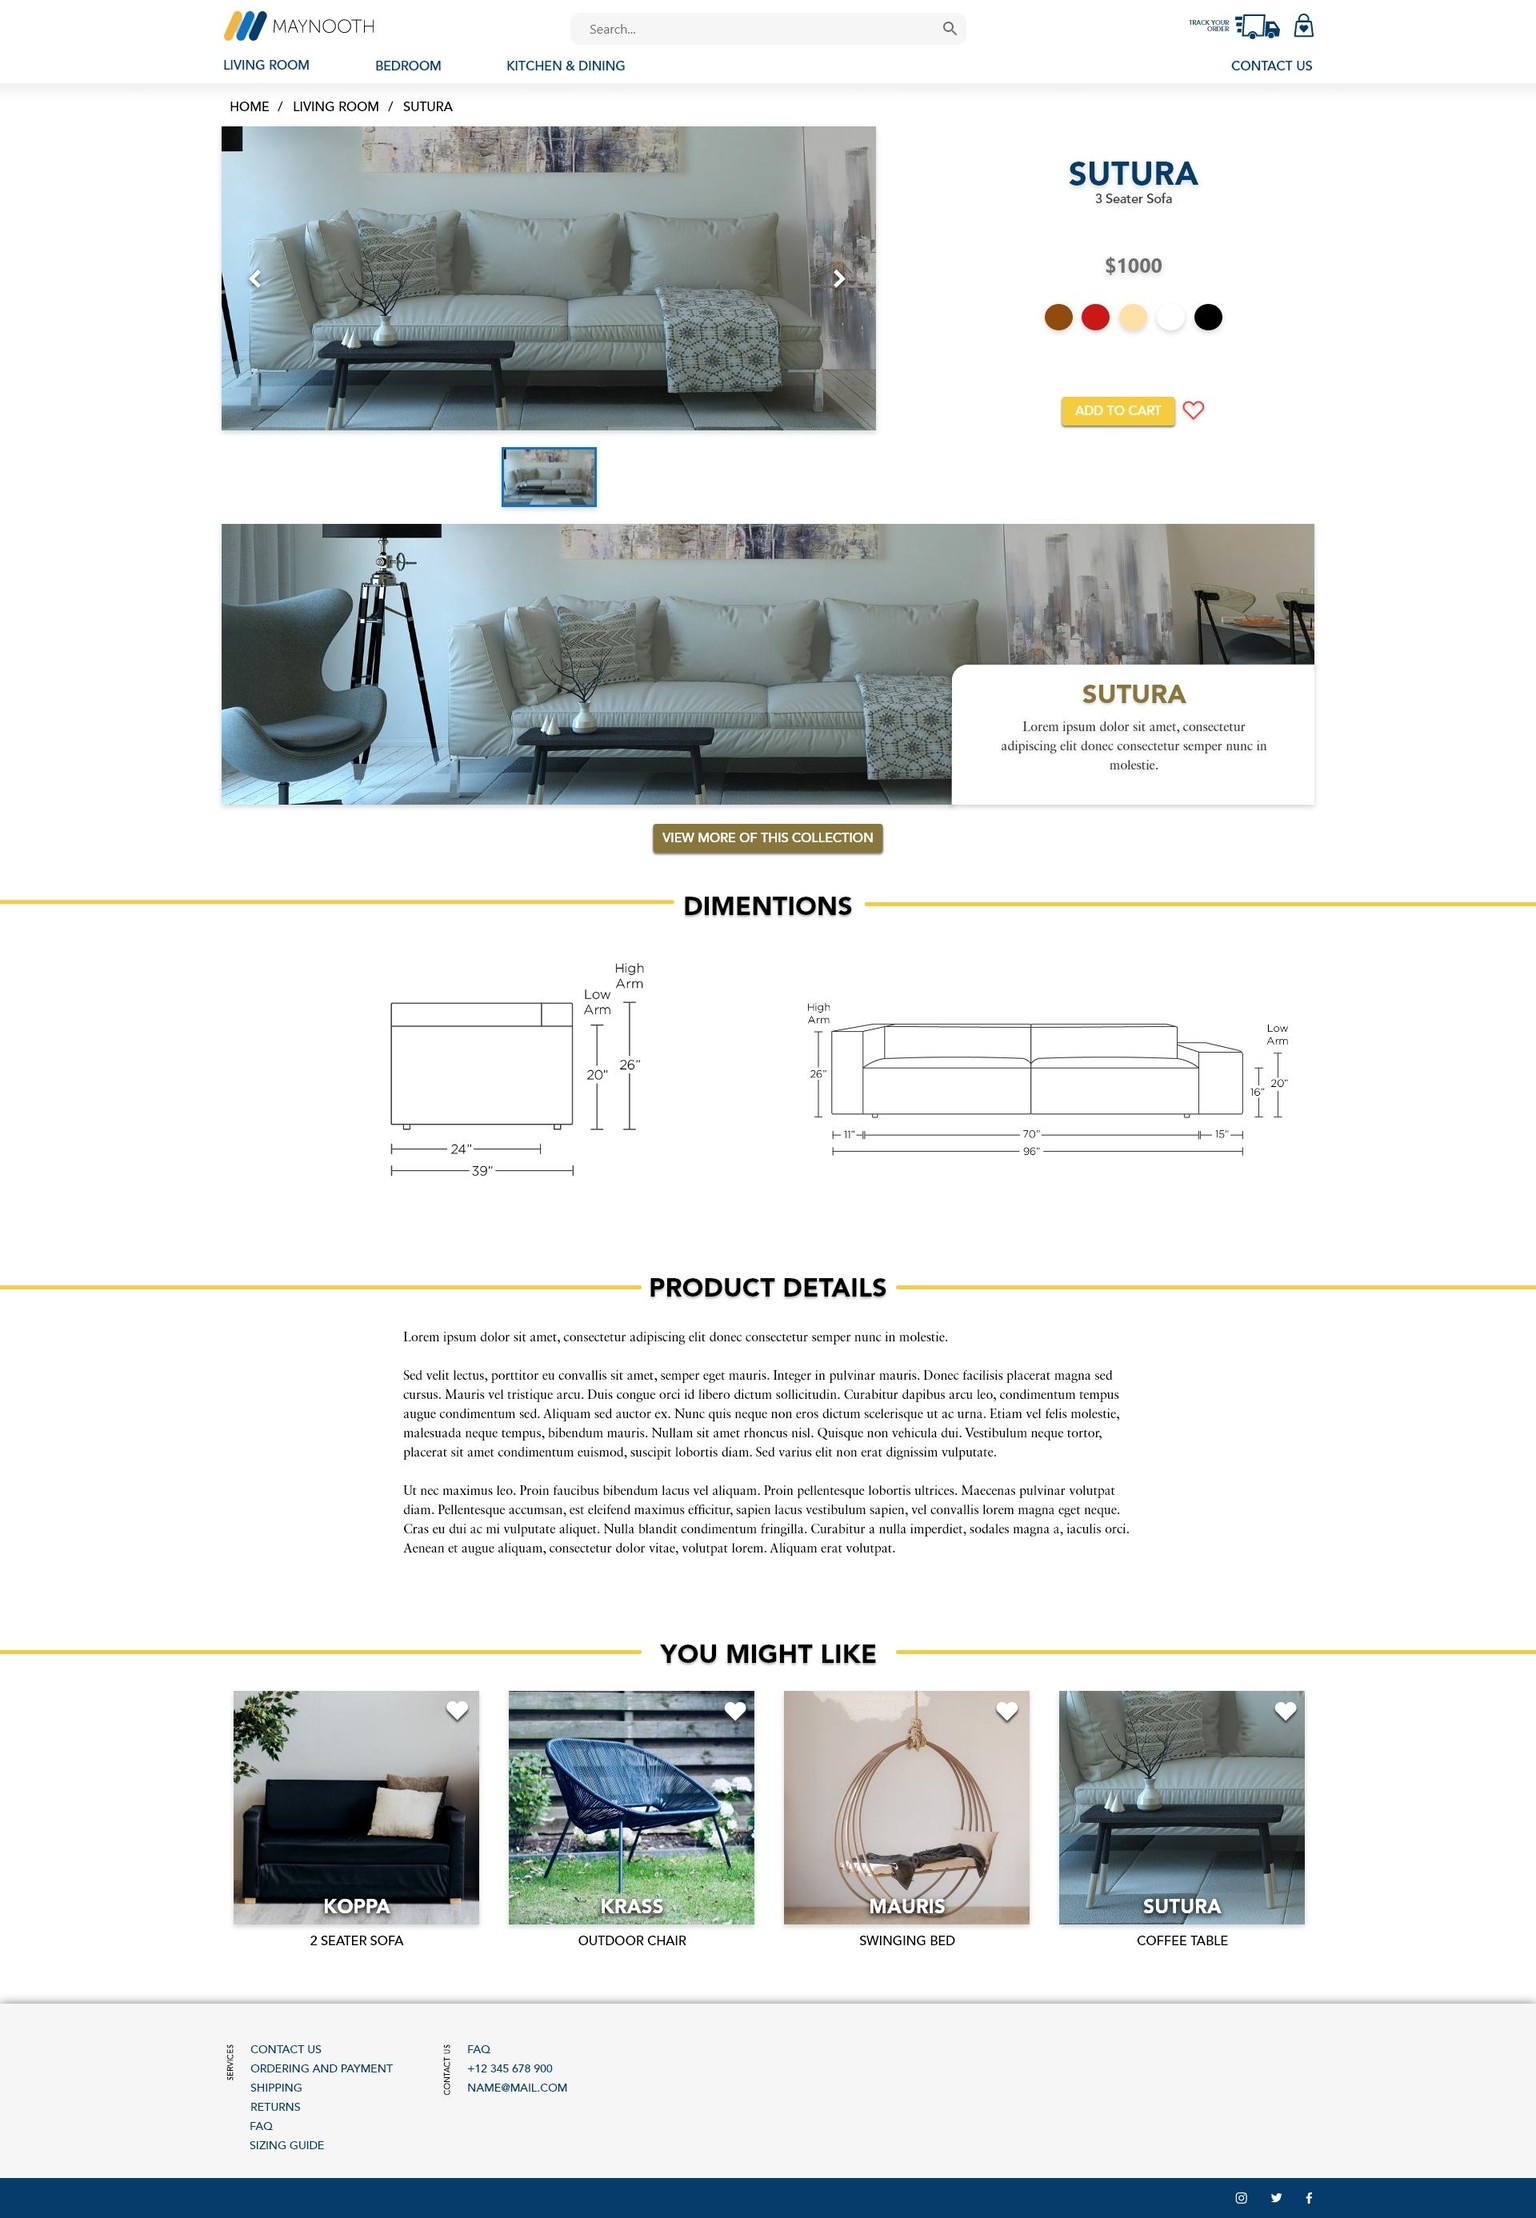
- Then add this to your XD Mockup.
- Mask at least one image.
- Adjust the blur or darkness of at least one image.
- Maybe as a background image like we did for the FAQ page.
*Done for the Hero Image
- Maybe as a background image like we did for the FAQ page.
(11/8/19)
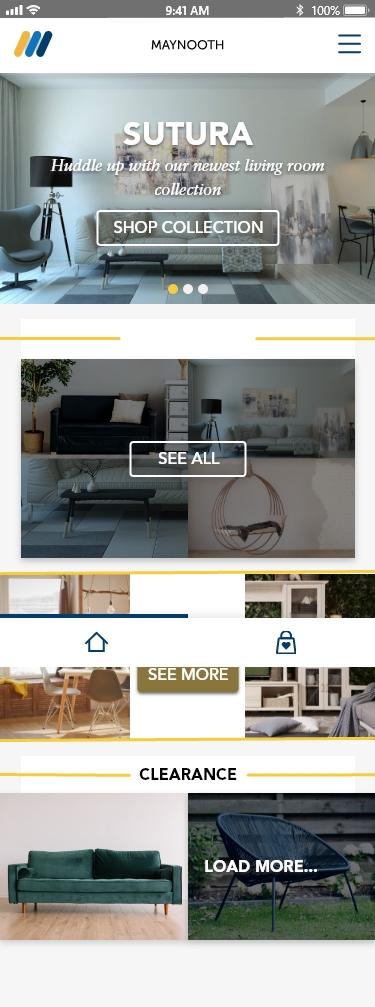
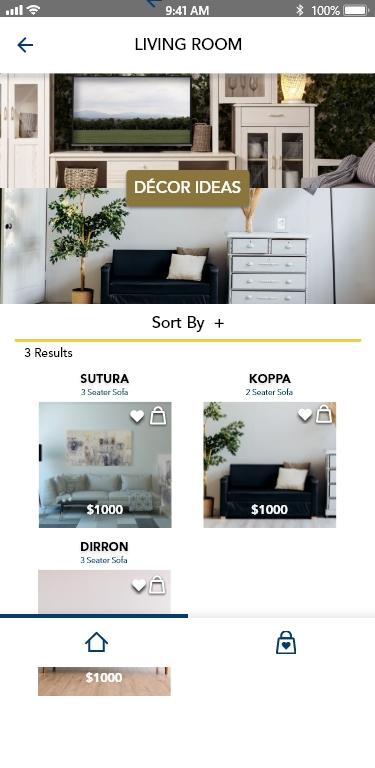
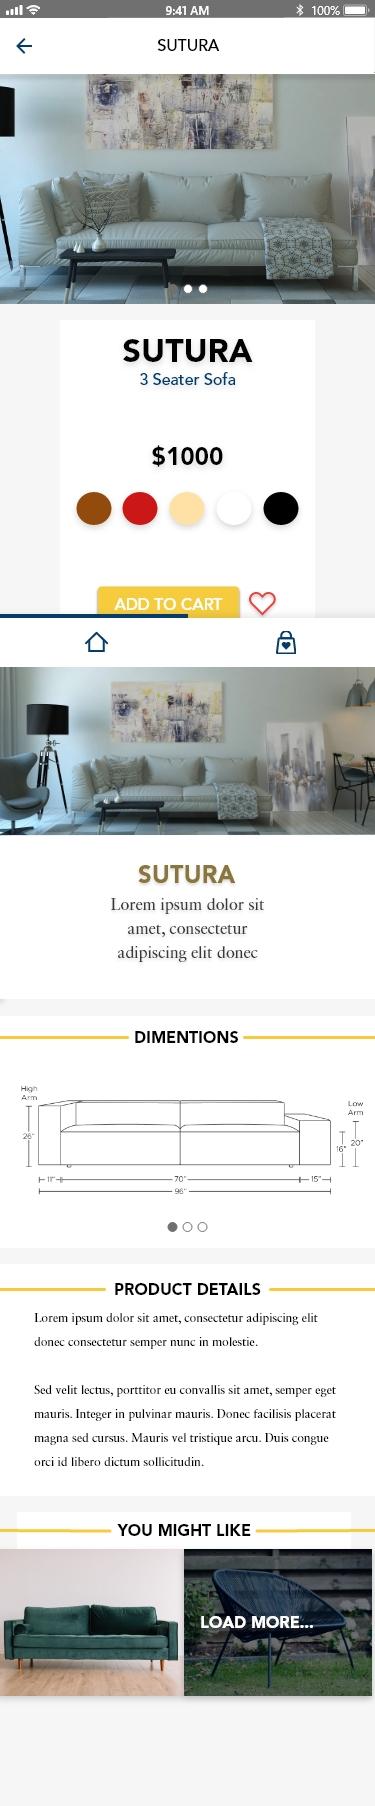
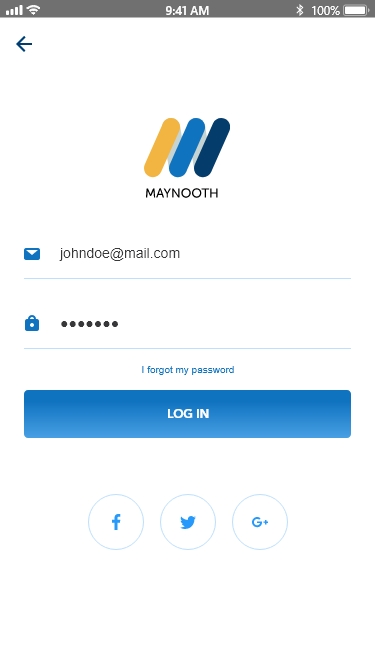
Class project 10: Mobile APP/Website
The client has asked for a APP version of their e-commerce site.
- Create mobile versions of the 3 pages you've created for the desktop view of the website .
*I added a bottom bar and fixed it into position, it works fine in the preview but it looks a little weird as it is- Homepage
- Category Page e.g. Living Room
- Product Page e.g. 3 Seater Sofa
- Homepage
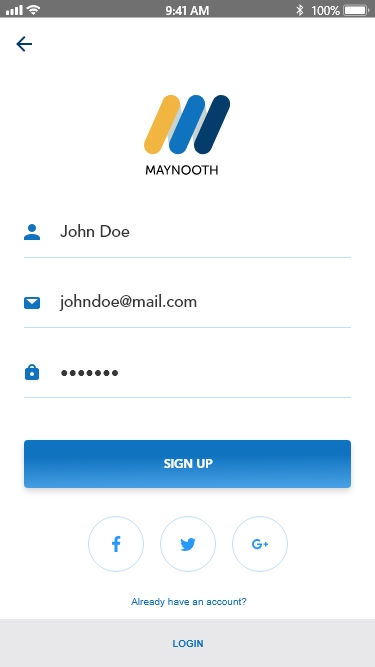
- Because this is an app I want you to create a login & signup page.
(12/8/19)
Class Project 11: Micro Interactions
- With your Maynooth Furniture project, create at least 3 examples of your micro interactions. You can use any of the techniques learnt in the course so far or to create your own.
- Record yourself testing the animations.
- Create an animated GIF version of your prototype