5 Tips on How to Take Amazing Photos at Arches National Park, Utah
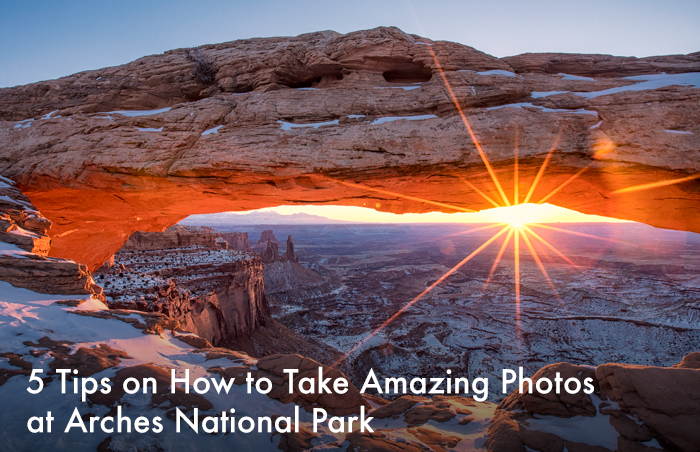
During the holidays I took a trip to Arches National Park in Moab, Utah. For the first time in a long time the focus of the trip was photography! I learned quite a bit about shooting at Arches so I thought I'd share a few of those tips with you. So here are 5 tips on how to make the most of photographing such a unique national park. You can thank me later for making all the mistakes so you don't have to. :P
1. Go in the winter.
I’m not a fan of crowds. Especially when I’m trying to take a photo. If you’re like me, then you should definitely visit Arches in the winter. How big of a difference in visitors is there in the winter? Well, Utah.com mentions that in the winter there are only a handful of hikers versus hundreds in warmer weather. I drew up a quick infographic to show you what that looks like. From my own experience, I was lucky enough to be the only person at some of the arches! I had Double O Arch all to myself for a good 20 minutes.

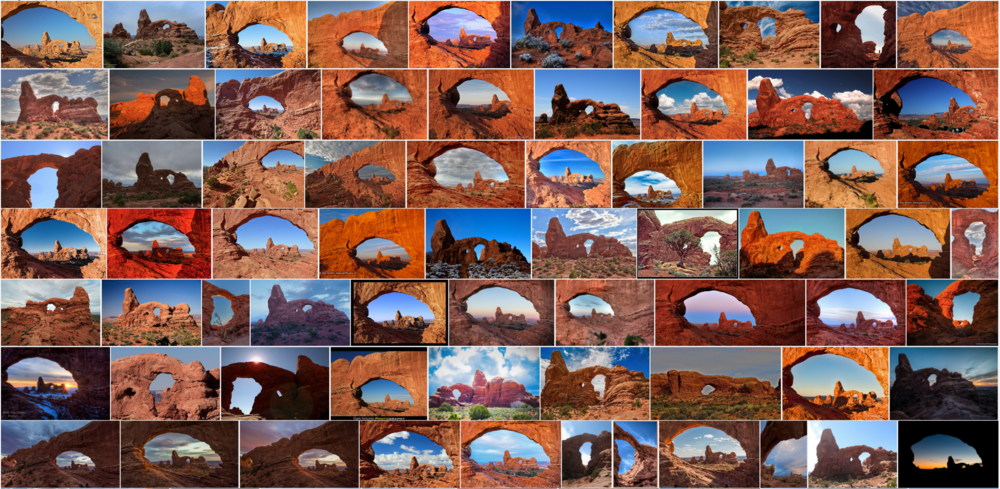
Yes, it’s freezing cold, but if you have the right gear, you won’t even feel it. If you’re lucky, there's will be a layer of snow covering the ground. This will make your images much more unique. Try doing a search on Flickr for Turret Arch. I guarantee you that there aren’t many snowy Turret Arch photos.

2. Know which arches look good when.
You’ll want to bookmark this. Some of the arches are better during the early morning while others are better during the late afternoon. I highly recommend going at golden hour (the hour just after sunrise or just before sunset) because the rocks will be glowing a beautiful red. In between those times the rocks and arches are just, well, brown and lacking those long dramatic shadows. Here’s the list of which site to visit when:
Sunrise:
The Gossips
Turret Arch
Double O
Double Arch
Landscape Arch
Mesa Arch (Technically this is at Canyonlands and not Arches, but this is a DO NOT MISS.)
Sunset:
Park Avenue
Courthouse Towers
Balanced Rock
The Windows (North, South)
Skyline Arch
Landscape Arch
Delicate Arch (unfortunately the trail was closed when I visited. But I was told it’s best in the afternoon.)
Devil’s Garden


3. Bring the right tools!
I overpacked for my trip. Which is fine. Better to be safe than sorry! Here are the lenses that I used and lenses that I wish I had. I’ve also provided a list of things that I thought I would need but didn’t.
Lenses
16-35 mm or a super wide angle lens: If you plan on getting up close to the arches, this will be your go-to lens. I used this most of the time.
70-200 mm: I used this to get the compression effect making the background appear bigger and closer to the foreground. This lens will come in handy for when you want to try and capture the scenery through the arches.
18-200 mm: I wish I had this type of lens that covered such a wide range. It was a pain in the ass to switch from lens to lens in the freezing cold.
Other gear
Tripod: You’ll need this if you’re going to shoot right at sunrise or right before sunset when there is very little light. I guarantee you will slow your shutter speed down to well below 1/30th of a second. It’s especially handy if you’re closing down your aperture to f/20 or so, to get that pretty sunburst effect. If you like to bracket your shots instead of using filters, you'll definitely be using a tripod. And of course, if you’re too cool for selfie sticks, a tripod comes in handy.
Hand warmers: OMG. Talk about life saving! If I didn’t have these hand warmers in my pockets, I wouldn’t have lasted out in the cold and wouldn’t have gotten some of the images that I did. I found it hard to manipulate my small knobs and buttons on my camera with thick gloves so I was constantly taking them off. (Or maybe just get really good slim gloves?) So after changing settings on my camera, I’d put my hands in my pockets and warm them up. (Here's another thing I learned about hand warmers - open them up at least an hour before you actually need them, especially if they're the kind that lasts for hours.)
What you don’t need
A super fast lens: Because you’re shooting landscape and will probably want everything in focus, there’s really no need for a f/2.8 or faster lens. I was mostly shooting at f/8 to f/13. (f/20 for sun flares) My f/1.8 lens sat in my backpack the whole time.
Filters: I thought I might need my GND (graduated neutral density) filters but I ended up bracketing my exposures instead. It was much easier to take 5 photos with varying exposures than it was to take out my filters, put them on, figure out how many to stack, and then afterwards take them off. But this only works for you if you know how to composite your photos.
Snow hiking poles: Didn’t I say I overpacked? There wasn’t a ton of snow to trudge through so I really didn't need them. Sorry REI, they’re going back.
4. Keep your smartphone warm!
Smartphone photographers, pay attention! Keep your phone warm or it will die. I’m a cold weather rookie, I totally admit. (Uhm, hello, California girl...) When I first took my iPhone out to shoot video, it died on me in 5 minutes. I was like, what the? I walked back to the car and plugged it in and was thankful it came back to life. But when I went out again, the same thing happened. Then it dawned on me, oh duh, it's too cold for it! Apparently my phone wanted its own North Face jacket. It couldn't handle below 20 degrees (fahrenheit). I learned to keep my phone in my jacket's inside pocket and pulled it out only for a few minutes at a time. If you have a portable charger, bring it with you to bring your phone back to life in case it freezes to death.
5. Patience and kindness
I can’t emphasize this enough. There were times when there were a gajillion photographers lined up with their tripods before sunrise and there just wasn’t enough space to get a clear shot without someone's tripod or body in the way. ( I was really surprised how many of us there were at 6 in the morning enduring 4 degree temperature!) I was freaking out that I wouldn’t get the shot I wanted and was kicking myself for sleeping in 20 minutes longer than I planned. Thank god, some photographers were kind enough to move out of the way once they shot their images. I then moved in, got my shot, and moved away to let other photographers get their clear shot of the sunrise. Please do the same!

Bonus tip
To get into the national park with a car it’s $25. You have 7 days to use this pass. But if you plan on going to any other national parks, like Yosemite, Joshua Tree, Yellowstone etc, they’re $25 a pop. So the tip here is to get the annual national park pass for $80. With this pass you can go to any national park and you can even share this pass with one other person. So if you split the cost, it’s $40 each! I got the annual pass since I plan on going to Joshua Tree, Yosemite, and back to Arches again this coming year.
If you follow these 5 tips, I guarantee you will come home from your trip satisfied with the images you captured. To see more of my photos, you can head over to my Flickr gallery.
From the cutting room floor:
