Transcripts
1. Introduction to this Course: Do you want to learn how to edit your eye-catching and professional videos in DaVinci Resolve. Good choice. Davinci Resolve is one of the finest video editing tools. And the best part is it's absolutely free. My name is Qazi and I'm a professional video editor who has literally edited thousands of videos using DaVinci Resolve over the past several years. I do remember what it was like open two inches is all for the very first time though. It was quite daunting and overwhelming and I didn't know where to even start. So that's why I created this course. I have taught two inches or thousands of students. I know where the difficulties are inverse the best learning curve. This course is designed for absolute beginners in video editing and intervention dissolve. So whether you are new to video editing or you're switching from another software to Da Vinci resolve. This class is perfect for you. Also, if you already know how to edit videos, you're most welcome to because you will learn advanced tips and techniques to make your videos look professional. We will start off with understanding the workflow and mechanics of resolved so that you feel at home when using it. We cover it all from importing and efficiently organizing media to putting together your first edit. You will learn all the video editing tools and features in Resolve. We will learn about resizing clips, making inserts, swaps and overrides. How to find edit your clips with framed level accuracy. We will master transitions, adding graphics, modern titles and lower thirds, color correction and grading, editing audio, adding music and audio effects and wrapping it up with exporting and saving it. I'll also teach you my favorite shortcuts and efficiency techniques to edit with US more quickly. Because it's more fun to learn while doing. This entire course is project-based, where we will create our very own promotional style video. All the 50 plus demo videos, music, and other assets that we'll be using throughout this class are available to download from the project tab free of charge, and you can use them to follow along. This class is going to be very interactive and I'll provide premium support. So if you ever get stuck or have a question, I'm here to help you along the way. This class is designed such that it can start editing in no time. And by the end of the course, you will be editing videos like a pro chloride. I'm super excited to learn DaVinci Resolve together with you. It's already pretty awesome that you want to take this challenge. Now, let's kick it off and let's start editing professional looking videos in DaVinci Resolve 17.
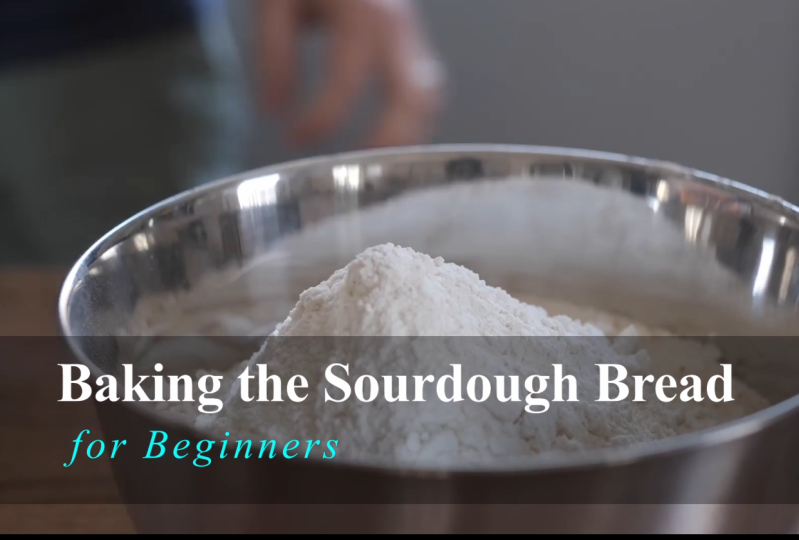
2. CLASS PROJECT & Skills Needed to Complete it: Hey there, welcome to the DaVinci Resolve 17 cores. And as part of this course, here is an example of a video project that you will be able to put together by the end of this course. So here's the video. So as you can see, this video is about baking bread. So as part of this class, you're encouraged to follow along. And towards the end of the course, you are encouraged to create a video sequence like this and submit it as the class project. Submitting this project is completely optional, but I highly encourage you to do this project. In this way, you will learn much more and you will get the most out of this class. So all the video clips you will need, they are provided to you in the project area of the course. And I also want to mention that this is just an example of a video project, okay? So you are provided with more than a dozen video clips. So feel free to use any video clips in any sequence you want and feel free to be creative. It's totally up to you. Now here are the skills needed to complete this project. And during this course, I will make sure that you learn all these skills very well. So these are the skills importing and organizing media in dementia, resolve, picking different portions from the videos provided and bring them to the timeline. Trimming and rearranging clips in the timeline, adding text and titles to your video sequence, and adding transitions and music to the timeline. And right now, if you're not familiar with any of these terms, It's totally fine. You will learn all this during this course. Alright, so that was about the project for this class. And now let's get started with Da Vinci Resolve.
3. Download a FREE Copy of DaVinci Resolve 17: Hey there, welcome to the course on video editing in DaVinci Resolve. So the first thing to do is to download the Vinci Resolve and install it in your system. For that purpose, I left you a link that will take you to the download page of the Vinci Resolve. On this page, you will need to come here and click this Download button and this download window will appear. On your left side, you can see the Vinci Resolve 17, and that is the free version. This is what you need to download for the course. On the right side, it says The Vinci Resolve yo 17. So the studio is the paid version, but we really don't need that because 99 percent of all the features are available in the free version on the left. So we will need to stick to the free version for this course. Please download according to your operating system, whether you have Windows, Mac, or Linux, then unzip it and install. The installation is very easy and efficient and I hope you will be able to do it smoothly. So please go ahead with the installation and I will see you in the next lesson.
4. Why DaVinci Resolve?: Welcome to the course on video editing in DaVinci Resolve 17. For absolute beginners. Davinci Resolve is one of the finest video editing applications in the market. And the best part is it's absolutely free. I have designed this Skillshare class for absolute beginners. So whether you have never edited a single video before, or whether you are coming from another software to try out the venture is or this class is perfect for you. How is this class different from the other similar classes? Well, throughout this class, I will provide you with my personal tips and best practices to become an efficient video editor so that you can get the most out of the Vinci Resolve. Also, this class contains many dedicated lessons on the theory and definitions related to video editing that you won't find in other similar classes on Skillshare. We will start from the very basics. This is a hands-on and project-based class. So I encourage you to follow along using the downloadable practice footage provided to you in the course. Alright, that's enough of an introduction. Now, let's dive right in.
5. EFFICIENCY TIP - Keyboard Shortcuts: Hey there, welcome back. And in this lesson we will talk about efficiency and speed in video editing. So when you are working in video editing projects, speed and efficiency is very important. And keyboard shortcuts play a major role in being efficient in video editing. So here I have mentioned my 11 favorite keyboard shortcuts when it comes to Da Vinci resolve. And I have mentioned some of these keyboard shortcuts in different lessons during the course. But here I have consolidated them all in one place so that you can note them down and use them whenever you need them. So these keyboard shortcuts range from how to select input and out point from different videos using AI and Okies in your keyboard. How to port your selections into the timeline in different ways. Whether you want to insert it, whether you want to overwrite the existing clip in the timeline, or whether you want to port the selection at the end of the timeline. So these three keyboard shortcuts will help you with that. Then while editing from your timeline, if you want ripple, delete a section, you can use shift and Backspace. Then if you want to preview your media from within the timeline or from the media pool, you can play your media in the reverse direction or in the forward direction, or you can play it and pause it using the JKL keyboard sharp curves. And if you want to undo the previous action, you can use the Control Z, very common keyword charter. And lastly, if you want to preview media between the media pool as well as your timeline. If you want to quickly switch between these two views, you can press the keyboard shortcut of Q. So I use these keyboard shortcuts all the time, and I hope they will be helpful for you in have a quick video editing workflow. Thank you.
6. THEORY - What is Workspace: Hi there. During this course, you will often hear the word workspace. Now, what is a workspace? These are different layouts of the panels within the video editing application, depending on what part of the video editing process you are doing, whether you are editing the video versus color correction and grading versus editing audio, et cetera. Davinci Resolve has seven default workspaces or pages that open up individual pages that make different panels bigger or smaller to help your editing process. So if you look at the bottom of the interface of DaVinci Resolve 17, here you can see the seven buttons representing seven different workspaces or pages. So this represents the media. This is for cut paste, this is for edit, for fusion, for color correction and grading. This is fair light for audio editing and this has for delivering and rendering your video. Also, if you work with multiple monitors, you can create custom workspaces where you have your preview monitor on one screen, your timeline on another. Basically it's all customizable for you. But the workspace in DaVinci Resolve is basically just the layout of the panels in it.
7. Creating a New Project in Resolve 17: Hello and welcome to the first lesson of this course. And now we're diving right into DaVinci Resolve. So if you're installing went smoothly and hopefully you didn't have any problems with your graphics card, then your installation should go pretty smoothly. And when you open the Vinci resolve, it should open a screen, something like this. So this is called the project manager or the home screen where you manage all your projects. So if you have been already working in DaVinci Resolve, then you should see a list of all the previous projects you have been working on in this area, predicts this is a fresh installation, then that is all you should be seeing right now. So here it has an option to create an untitled project. So let's see all the different ways in which we can create a new project in Vinci resolve. So the first option is, you can just double-click here and it would create an untitled project for you. But then later on you would have to rename that. Now the other option is you can just click this New Project option. And here it will, right away ask you for the name of the project. You can give it a name and press Create and the new project would be created. But yet there is even a third method, and that is by right-clicking in this blank area. And here we can create a new project, a new folder, and there are many other options that we will explore later on in the course. So for now, I'll just create a new project. And let's call it new project. That's very creative. And that is the main interface of the Vinci Resolve. Now, just in case if you want to go back to the Project Manager, here at the bottom right, you have this Home button that you can click to go back to the project manager. And here it will show you a list of all your projects. And from here you can open any other project if you want to. And if you want to close this, just press the close button and we're back to the main interface of da Vinci resolve. So that's how we can create a new project into Vinci resolve. And in the next lesson, we will start exploring this interface in detail. So thank you for watching, and I will see you then.
8. Workflow in DaVinci Resolve 17: Hello and welcome back. In this lesson, I will give you a brief overview of the workflow in DaVinci Resolve, which by the way is very straightforward and organized. So this is the main interface of DaVinci Resolve 17. And by default, it will open directly into the cut page, as you can see here. And at the top you can see the name of the project. So remember we named it new project. So here you can see the name of the project and here as well. And by the way, there is this white bar sitting at the top, which isn't being very useful. So we can get rid of that by going to workspace and then checking this full screen. So you can see that the white bar at the top is gone. Now for some reason, if you want to bring it back, you can again go to Workspace and uncheck this full-screen window option, and that white bar will reappear. Also notice that there are about seven buttons at the bottom, which represent the different workspaces or pages in resolve. These are the media page, got pays, edit, fusion, color, fair, light, and deliver page. So let's briefly look at the purpose of each of these pages. The very first page is the media page where we start. Here we select all the media required for our project, like footage, audio, images, et cetera. And we will drop that into this area, guard the media pool. Now, before coming to the second page, Let's have a look at the third page, which is called the edit page. Once the media has been imported, become to the speech. Here you will see that all the editing tools are available and we can use them to perform any kind of video editing. Now let's come back to the second page or the cart page, which was introduced in the version 16 of DaVinci Resolve. It is just a simplified version of the edit page and is designed for quick and easy video editing. We will explore both of these editing pages in detail during the course. At number 4 is the Fusion page, which is designed for specialized visual effects, motion graphics, and 3D effects. But of course that's optional and can be skipped if you don't need that. Then at number 5 is this color page, which is dedicated for color correction and grading. This is where DaVinci Resolve beats all other applications. And that's why so many famous Hollywood movies have been colored graded using this page. Here we have some really powerful color grading tools all at our disposal. Then at number 6 is the fair light page. And this is where we can do all the heavy audio editing, mixing, audio filters and stuff. But again, this is also optional and basic audio editing can be done on the editing page itself. And in the end, we have the deliver PID. Once we are done with all the editing and effects, this is the bit where we can produce the final video as per our needs. So that was a brief overview of the workflow in resorbed. And from this, you can easily tell that the workflow goes from left to right. Like first of all, we import the media than we do any kind of video editing, then we can do any way you'll affects our motion graphics if we want, then we can do the color correction and grading. Lastly, we can add any audio effects or audio mixing. And in the end, we produced the final video. And from the next lesson, we will start exploring things in detail. So thanks for watching, and I will see you in the next lesson.
9. THEORY2 What is RAW footage: What is raw footage? This is just a term that refers to the video files that come directly from the camera. These are unedited, uncolored, corrected. The files themselves and the audio quality, everything is uncompressed. It's just the full quality file that comes from your camera or from your audio recording device. It's just that national footage that's being recorded. So that's what's called raw footage.
10. Getting Started with the CUT Page: Hey, welcome back. So right now we are in the edit page. So let's come to the Cut page, which is designed for quick and easy video editing. During the rest of this section, we're going to explore the cart page and all the tools and features available in it. We will learn how to import our media and how to preview it in different ways. The different editing tools available here, how to add transitions, titles and lower thirds, and how to fully customize them in what's called the inspector. And actually, during the remaining lessons in this section, we're going to put together a short video sequence using the downloadable resources provided to you. We will first create a rough cut and then we will improve it and add different elements to it to create a short video project. And it's going to be fun. And by the end of this section, you will be pretty comfortable working in the cart page. So let's dive right in.
11. IMPORTANT UPDATE: Hey, there. Thank you so much for
being an engaged student. Great job for sticking
around with me so far. Here. I wanted to take
a quick moment to share that if you
have any questions, please ask them down in the projects and
resources section or in the discussion
section of this class. And I'll get back to you soon. And if you liked this class, please follow my
profile so you can see my other classes and
for future updates. Also, I would love it if you can leave a review for
this class that will greatly help me to get valuable feedback and
for your fellow students to decide if this
is the right class for them to write a review, go to the Review tab
under the video player, then click this
leave Review button. Just answered this short
and sweet questionnaire and finally hit the
Submit Review button. And please do not
underestimate the power of your reviews because they are invaluable to other
potential students. I personally love reading student reviews and
really positive ones. Absolutely make my day. Alright, that's it. Let's get back to the course. I cannot wait to see
you in the next lesson.
12. Importing Media within the Cut Page: Hello and welcome back. In this lesson, we will talk about how to import media into the cut page in DaVinci Resolve. And remember, this method is specific only to the cart page for importing media and to the edit page that will be a different section. But right now we're focusing on the cart page. And before diving into that, if for some reason your user interface looks a little bit different than mine, you can always reset it by coming to the workspace and pressing this, you reset your eye layer and now hopefully it will look exactly like mine. Moreover, again, to get rid of this white bar at the top, you can always come back to the workspace and make it full screen window so that there is no white bar. Now there are actually three ways to import media into the cart page. And some of them are not so organized. Some of them are super organized. So in this video we are going to talk about all of them one by one. But before diving into that, make sure that you have this media pool enabled. And when it is enabled, you know, out of all these options affects titles, transitions, sink, pin. So right now these are all disabled and media pool is enabled. Make sure you have it enabled. And when you have it enabled, it would say no clips in the media pool. So this is the area where all the media you have imported into the cart page which will show up here. And DaVincis or organizes media into folder like structures called bins. For right now, we're looking at the master bin, which is empty. So the first method to import media is to right-click in this media pool option. And here you need to click on this Import Media. And you also have the shortcut Control I for Windows and command I for Mac. So when you press that, it takes you to your storage, and from here you can navigate to any folder on your computer. For example, I have this as my desktop, so I have this folder media for DaVinci Resolve 17. So this is the folder that carries all the media for this course. So from here I can import the media. So for now, I will cancel that. So that was the first method. And the second method is exactly similar, except that you have a button for that instead of right-click. And this button says import media. So this button does exactly that. When you click that, now you can go to any folder on your computer. So again, this is my folder which carries all the media. And if I go inside this folder, you see there are subfolders, audio. Inside audio, there are even sub-folders. And then there is this talking head audio, then there is a graphics folder, photos, then there is a video folder. And here inside we have all the footage that we need for this course. So for the sake of this lesson, I will just go to the videos folder and I'll select a bunch of videos. And when I press Open here, it will ask me whether you need to change the project frame rate as per the frame rate of these videos to most of the time, you would want to say change. So when you press that, all those selected video files have been imported into the cockpit. And you can see that these have been imported within the master. When the drawback of this method is that it won't let you select a folder. Instead, it will only allow you to select files within a folder. So that is why you won't be able to copy or import this whole folder structure. You will only be able to import the media files. So that is the drawback. And of course I can replicate all that whole folder structure manually here. First of all, I need to get rid of these video files. I will select all of them and press Delete and get rid of them. So here I can create bins myself. Okay, this is another option. So if you right-click here, press this new bin options. So here I can call it audio. Then I can create another bin and I can call it videos. Likewise, I can clear two more bins. And inside any of the bins, I can import the respective files. For example, inside the videos, I can go to the Import Media again, and I can import all these videos manually. So in this way, I can change, and in this way I have imported one whole folder. Likewise, I can go to the audio. I can create two more sub bins in that. Likewise, I can create two more bins here like graphics and images. But, you know, this is a lot of headache that we don't really need in the wind shoot is solved. So to show you the third method, first of all, I will select all these bins and our press Delete. And all those bins carrying all those media files, they are gone. But just to remind you, this is only happening within DaVinci Resolve, okay, the media lying on my desktop is completely safe. This deletion inside the cartridge, it is not affecting my media sitting on their desktop in any way. Okay, just keep that in mind. Now the third option is what we really need in this situation. So I can go to Import Media folder. And as the name suggests here, this option would let me import a complete folder, including any sub folders or files within those folders. So this is what we are actually looking for in this situation. So I'll click that. And again, I'll go to the desktop. And here I will select this option, select this folder. And notice here instead of open folder, it is saying Select Folder here. So when I select that, you see inside the master when the whole media folder has been imported, including all the folders inside that, like the audio folder and even the subfolders inside that. And we have all the videos inside the video folder. Likewise, we have the graphics and photos. So everything, including the whole folder structure and the files, everything has been copied inside the cart page, just using this option. And by the way, when we are inside DaVinci Resolve, we should not call them folders. We should rather call them bins and substance. Now, to navigate between these bins is very easy. I want to go inside any of these bins, I just need to double-click it. And here I am inside this bin. If I want to go back, I just need to single click anywhere on this part and it will take me to their respective folder. For example, if I want to go back to this main folder or the main been here, I just single clicked it and I'm back to the main beam. And if I again want to go into any of these bins, I just need to double-click that. So if I want to go to the master been or just single click there. So these were the different ways in which we can import media into the cart page. And having done that, now we are ready to work on this media. So for that, I will see you in the next lesson.
13. THEORY - What is Opacity: During the course, you will often hear the term opacity. So what does opacity mean? You can think of it as the transparency of a media asset, of your video or a graphic. The more opaque means that you can fully see it. The less opaque or the lower the opacity means more transparent. So here you can see this image is a 100 percent opaque, so you can totally see it. Then we have the same image with 50 percent opacity. So you cannot fully see it. It is 50 percent opaque and 50 percent transparent. Then we have the same image with only 10 percent capacity. That means we can barely see it. And if you see the same image at 0% capacity, that means it is totally transparent and we cannot see it at all. Individually resolved. We typically have an opacity setting that goes from 0 to a 100. Everything is going to start out at a standard of a 100 percent opacity, meaning that you can fully see it. And then if you decrease the opacity, It's going to make that clip more transparent until you get to 0 opacity where you cannot see it at all. So that's where the term opacity means.
14. Previewing Media in the Cut Page: Hello and welcome back. In this lesson, we will learn about the layout of how the cart page is organized, and we will also learn how to preview our media in the cockpit. So broadly speaking, the cut page is divided into three main areas. This area is guard the monitor. This area is called the media pool, and this area is called the timeline. So we can adjust the real estate for any of these areas by bringing my cursor in-between these two areas and resizing anyway I like. And similarly, I can resize this timeline, increase the real estate for the upper two videos. So I can resize them anyway. I like now this monitor area is used to preview media either from the timeline or from the media pool. Okay? So there are two buttons at the top of the monitor. One says source clip and the other says timelines. So if I select the source clip, now, it will show me only the preview from the media pool or from the source. And if I select the timeline, now it will show me only the preview from the timeline. Of course, right now the timeline is empty so there is nothing to preview, and that's why it is black. Okay? But if I go to the media pool and here I have these folders imported or bins. So if I go to the videos, I can bring my cursor or any of these clips, these video clips, and the monitor should show me the preview of those clips. But wait a minute, it's not showing the preview. Well, the reason is that we have set it to the timeline so you earn if I'm scrubbing through these clips, it is not showing me anything because I have it in the wrong mode. Okay? So instead of timeline, I need to select the source clip. And now if I bring my cursor over, my cursor over any of these clips without clicking. I can just preview any of those clips. So you see by slowly moving my cursor over any of these clips, I can have a complete preview of what's lying within that clip. Likewise, I can move on to the next clip and I can see what's happening in that. I can move on to our next clip. So all is all that is happening without me clicking or any of these clips. This is just moving my cursor over those clips. What happens if I click on any particular clip, for example, this one, you see a red rectangle appears around this. So that means this clip is selected. And now I can only previewed this clip inside my monitor. Okay? So if I go to any of those other clips, now the monitor is not showing me anything because I have selected this clip for preview. So at this moment, if I want to preview the remaining clips as well, first, I need to deselect the selected clip. And now, just like before, I can hover my cursor normally over any of the clips to show me a preview in the monitor. Now, within the media pool, I can even change the appearance of these thumbnails. Ok? So at the top here, I can adjust different options. So here I can, by default, it is the thumbnail view. So that is why it is showing me the thumbnails of different video clips right now imported within this bin. So this is the thumbnail view which is showing me the thumbnail for each video as well as its name. But I can come to this metadata view. And right now not only it is showing me a thumbnail as well as the video name, but it is also showing me some other information like the date, like the time cord, and some other information. Of course some information is missing. But this, this view is supposed to give you much more information. And just like before, I can hover over any of these clips and I can preview it just like before. So these are the first two views. Then there is a strip view. So it shows the strip, a complete strip of what's happening in each of these clips. So one row is reserved for a single clip. And I can scroll through these different video clips. And I can also see what's happening within a clip by scrubbing through that. And it is also showing me the video name, the frame rate, the size, the date created, timecode, duration, and so on. Then lastly, we have the List View. And here it is showing me a list of all the videos available in this bin. You have the name, the date created, the starting time cord, the date modified, date added and so on. And within this view, if I want to preview any of the clips, I'll have to select it. And now I can take a preview of that. And then there is a search bar. So if I'm looking for a particular clip, for example, if I type a keyword, for example, green, then it will search for that keyword within that bin. And it'll show me the clips and that mass, this keyword. So in this way I can search for a particular clip. And lastly, we can also sort them in different ways. We can sort them using the clip name. You can sort them using the time cord, camera name, Clip Color, it modified and so on and so forth. And we can also even change it to ascending order or descending order. So let's choose the clip name. Let's go back to the default view, which is the thumbnail view. Now if I select any of these videos, here, it appears inside the monitor. And just like any other video player here, we have some controls to play the video in different ways, okay? So we have the normal play button and this bar, this vertical bar, this is guard the playhead. So I can scrub through this video manually by moving this play head manually around. Or I can play it in the forward direction. I can come to the star. I can play it in the forward direction. I can come to the end. I can play it in the reverse direction. I can stop it, and so on and so forth. And I can also loop it around. So when I play it and it ends, it keeps playing in the form of a loop. So that was the layout of the cart page. And this is how you can preview your media, but that is to preview media one clip at a time. So in the next lesson we will talk about another feature that is guard the source tip. So this is a different way to preview our media and the cutaways. So stay tuned. I will see you in the next lesson where we will together explore this source option. Thank you.
15. Previewing Media Quickly: Hello and welcome back. In the previous lesson, we learned how to preview one clip at a time in the cart page. And in this lesson we will explore even a better method, which lets us preview multiple clips in a much quicker and much more efficient way. So the tool we will use for this method guard the source tape method. So, but before going on to that, when we are in this timeline or source clip mode, you see this is what our media pool looks like. But as soon as I go to this tool called source tape, the look of the media pool would certainly change. See, now all the files within our bins, they have all been laid down here and here underneath our monitors. So if I scroll down here, you see that all these files, including the music files, the videos, the images, everything has been laid out here, and they have been laid out here underneath the monitor as well. If I look at the sequence here, these items have been arranged in the clip name order. So whatever sequence they are showing up here in, it is the same sequence they have been laid out in this area underneath the monitor. And since this looks like a tape of all the media items lined up together, we call it a source tip. Then notice that there are vertical lines, white vertical lines separating different clips. Okay, So this is the first clip here you see this is the location of the first video clip here. Then if I go to the next one, it, you know, it jumps to, the player jumps to the next one, then the third one and so on. And all these clips are separated by these white vertical lines which separate consecutive clips. Now another thing to notice here is that some clips are wider here and some are narrow. And this has to do with the duration of these clips. So this clip is much longer, so that is why it is represented by a much wider clip. This clip is shorter, so that is why it is represented by a much narrower clip. So it's length, or the duration between the interval between two consecutive white lines, is a representation of the length of the clip. Now in order to preview my clips, I can of course, scrub through this manually and I can have a look and feel of what my media is like. But then there is this Fast Review button underneath the monitor, so I can use that so I can come to these video clips and I can fast preview them. If for some reason it is not playing, you can try playing from here as well. So when both are enabled, it will show you a fast review of your clips, one clip at a time. Now you can see that as the clips are moving, as we move from one clip to the next one, this red rectangle around the eclipse. It is shifting from one clip at a time depending on which clip is being played. And same goes for this play head. It is also moving showing where our current location of the frames is. And as I said before, whatever sorting order we have for the clips here, the same sorting order would follow in this tape as well. So for example, if I come here and instead of Clip Name, if I sort them using date and time, you see the order changes here as well as here. So again, whatever the sorting order appears in the media pool, the same order would follow here in the source table as well. So here, this is all our media. You can see this has been sorted using the date and time. Of course, I can change the sorting order here so I can go to the sorting order and let's arrange them by Vin. So here you can see that this is the audio bin. Then under the audio, this is the music contents of the music. When this is the contents of the sound effects bin, then we have the images, we have the photos, we have the video clips and so on. Now, just like before, I can move to any of these clips. I can play it. And you see that the that the playhead accordingly jumps to that respective clip in the source table. And I can foss preview that. And this red rectangle appears around the clip which is currently being paid. So it goes from one clip to the other. And accordingly, the playhead is also moving. So that is how we can quickly and very efficiently preview all our media items in the media pool using a tool called the source tape. So I hope you found this useful. So thanks for watching and I will see you in the next lesson.
16. Creating a Rough Cut: Hello and welcome back to another lesson on the cut page in DaVinci Resolve. And now we are going to learn how to create our first rough cut in the cockpit. Okay, so here I am in the same media folder where we have the videos folder. And here you can see there are some videos. Can double-click on one of those. So here these are some video clips which are showing my co-instructor, Phil Webinar, preparing the sourdough bread. Okay, so we're going to use these clips to create a sharp, rough sequence may be around 20 to 30 seconds long. All right, nothing fancy. But we're going to just learn nuts and bolts of the cart page using this short footage. Now, before diving in, I would first come to this master been here because you can see here there are some irrelevant clips which have nothing to do with the bread baking. So I'm going to import my master been in here, let's import another folder or actually go to media for DaVinci Resolve. And here let's import another folder. And this is guard would use compressed. So it has the same videos, but only the videos related to bread baking. And these are also in the compressed form. So it would be a little bit easier for the computer to handle, although I'm sure I won't have any problem with these videos are regarding my computer. So I'll select this folder. And now you can see this whole folder has been selected. And here we have only the videos related to bread baking. And these are also in the compressed form. So the process is going to be that first, we are going to make small selections from some of these clips. And we're going to put them in sequence in the timeline to tell a story about bread baking. So here I mentioned the word timeline. The beginners might be wondering, what is a timeline. Already mentioned that this is, this area is called the timeline. But in simple words, this is an area of weird. You make small selections from your video clips and put them in this timeline area in the way you want them to appear in the final video. And then from there, you can create an MP4 video or a video in a different format using this timeline. So that is what our timeline is in simple words. So the process is going to be that first we are going to, you know, get a preview of some of these clips in this monitor. And from those, some of these clips are pretty long. And since we are going to make about 20 to 30 minutes short video from these. So we are going to make smaller selection from these clips, okay, This is called trimming. And those trim clips then we add them in this timeline area in a specific sequence, the way it happens in bread baking. All right, so first of all, we'll come to video one where we are getting the floor ready for making the dough. So here you can see when I double-click it, the monitor starts showing me whatever I have clicked on. Here. This is the playhead so I can move it manually to see what's going on. And by the way, in this monitor, if I want to check the duration of the of any of the clips, I just need to bring the playhead at the very end. And here, this is the time courts. So it will show me the total duration of this clip. Okay? So the first two digits are regarding hours. The next two digits are four minutes, then the next two digits are four seconds, and the last two digits, four frames. So this clip is about 14 seconds and 22 frames long. All right, and we, since we are going to make selections from about four or five clips. So we're probably looking for only four to five seconds duration from all those clips. All right, what I can do is I can select the most interesting part from this video. Now as far as making selections from these videos concerned, you need to learn two important terminologies. One is the output and one is the input. So in point is basically where your selection starts and out point is where your selection from the main clip ends. Okay? So by default, here, this is the end point, this is the outpoint. And by default, it is assumed that you are going to select the whole video. But of course we are going to be picking a smaller selection so we can manually drag this end point to mark where I'm going to start the selection. And I'm also drag the outpoint further inwards to make a smaller selection. Okay? And not this highlighted area showing me this is my smaller selection. Then I can bring bring my playhead to the start and I can. Blade to have a short preview of that. So this is how I can make a smaller selection from a bigger clip. And now it's a good idea that before I added to the timeline below, I take a preview of that to make sure it's the right selection. So for that, I just need to bring my playhead to the star. And I need to press the play button or the space bar. And here it will start playing. And if you notice, it just ignores the endpoint and out point because we are just playing in the normal mode. So of course, in this situation, I was more interested in this selection from input to the output. So if you want to play only the selection, you need to come to the playback. And here you need to come to play around to. And we need to select this play into out. Or there's this keyboard shortcut, Alt and forward slash for Windows and Option and forward slash for Mac. So I'll press this. And now it is only playing in between these endpoints and our points. So again, I press R and forward slash, and it is playing only between this selected portion. So this is how I can make a smaller selection and I can preview only between those two points. And if you notice that it just stops when it hits the end point, okay, so I can further turn on the looping. And now if I press R and forward slash, and it will keep looping backwards. So it will keep playing after it ends. So now that we've made this selection and via previewed it, now it's time to add it to the timeline. Okay, So adding to the timeline, it's very easy. You just need to drag it and drop it to the lower area. And it creates a timeline for us. And it just adds this selection to the timeline. Now, right now, you might have noticed that before bringing it to the timeline, there was only this folder, but as soon as I drag it to the timeline, it also created this icon. So it is decided represents the timeline. And here I can select it and I can rename it as per our projects for let's call it new project. So if I deleted, the timeline will be gone. Okay, so that is a representation of our timeline. Now I can simply preview it from the timeline. And you might notice that there is some useless background hum in this video, okay, that we don't really need compared again, that is pretty useless sound. So what I can do is I can just select it from the timeline and let me delete it for now. Okay. We don't need that useless audio, so I can come back again to the videos compressed folder. And here I can come back to video 1. And you see eight remembers my selection. Now of course I want it to the timeline, but without the audio. So there are two, there is an easy method to do that on the top left of our timeline here we have two options. So this option says video only and this option says audio only. So right now both of these are disabled. So when I drag it, it add both the audio and video to my timeline. Now if I select this audio here, it disappears because I pressed something in the timeline. So here I have to enable this to come back to the monitor. Right now with this button enabled, if I drag it, now it will only add the audio. But instead of audio we can, we want only video. So I will check that. And you notice here that both of them cannot be enabled at the same time. Okay, now I have the video only enabled. I'll come back to the monitor. And by the way, depending on where you are clicking between timeline or in the media pool. This monitor switches between these two, okay? So it automatically switches, but you can also do it by keyboard by pressing the Q button. Okay, so right now here it is for the timeline. If I press Q button, it automatically shifts to the media pool and so on and so forth. Okay, So I want to switch to the source clip, our press Q key on my keyboard. And here I am back to the source clip. And with this video only selected, now I can drag it and I don't have to worry about the audio now, it only brings in the video. So that is how we can make a selection and bring it to the timeline by choosing just audio or video. Okay? So we will look at the arrangement of this timeline in a minute, but let me jump to the next video and let's practice this in and out point and let's learn how to add it to the timeline once more. Okay, So I will come back to video 12, which is about the next step of bread baking. And that is about preparing the dual. Okay? So if I bring my timeline, bring my playhead to the end. You can see it's a pretty long clip. It's about two minutes, 10 seconds, and six frames. And if I preview it here you can see it is short in slow motion. Maybe I want to pick an interesting portion from this. So let's start from here. So I'll press I for input, and now let's preview it. So it's at one. Minute and nine seconds. So let's play it. And let's go for about five seconds. So 114, okay, so that's it. And let's press O to select the outward. And by the way, you might have noticed that instead of dragging this endpoint and out point automatically, let me undo that control Z once and control Z twice to get rid of these input and output, what I did was instead of manually moving these inputs and outputs, I just brought my playhead to wherever I wanted to start this selection. And I just press I on my keyboard, I for endpoint. So it automatically moves this for me. Then I plate and let's pick a 5 second portion of that and let's pause it. And now to mark it as outpoint, I'll simply press O. And you can see that now this is my selection. If I want to preview that our press, our forward slash with my looping on, it will keep playing in between this selection. Okay, so I'm done with previewing. Now. I'm ready to add it to my timeline. And we already chosen this video only option so I can drag it and drop it at the end of the timeline. And now you can see there are two clips in our timeline. Now, it's a good time to talk about the arrangement of this timeline. Okay. So this timeline is divided into two portions. There is an upper portion and there is this lower portion. So this upper portion, it will show you a big picture of your whole prior. So you might have a 100 clips in your timeline. And it will show you all those a 100 glimpse within this window, all squeezed together so you can see a big picture of your whole timeline. And this lower view, it is a zoomed in view of that. So if you have more than two to three clips or four clips, you might not be able to see all of them at once, but they will be still there. And you can move between different points in your timeline by grabbing these vertical lines. These are card players, So this is the lower play head, this is the upper player, but they are all sink. Okay, let me unlock this playhead. So here I can, I can move between different parts of my playhead by grabbing this playhead and moving it sideways. And likewise, I can grab this lower playhead and move it. So you can see that both these players are linked and they move together because they are representing the same timeline. Now the standard way this Lord playhead moves in DaVincis always is actually locked. Okay, so I can move the upper playhead, but you see the lower timeline behaves a little bit differently. Here the lower playhead is locked, and instead off the play-head, the clips move. So that is the standard way in the cart page. And hopefully you will get pretty used to that very quickly. It is little bit different from the other video editing applications, but I find it quite intuitive. Okay, so that was about the timeline. And now they are ready to move on. And let's go to video number 5, where we have the next step about bread baking. And by the way, you can see that the names of these videos are not in the sequence of these steps are. Okay. So Video 12 is showing the second step, video five is showing the third step, and so on. So let's move to video 5. And here it says about seven seconds long. And let me come to this part and let me play it here, fill scares in the background. Split. This portion sounds nice. Let me bring my playhead here and press I for input. And so that is where I have marked it in. And let's split. So let's end about here. I'll press or to mark it as outpoint. And if I want to preview it, I can press Alt and forward slash. And let's stop it. Now. Step-by-step, I am introducing new and new features. And it might sound a lot to you at first when you are watching this whole video in one go. But actually when you get to practice, these are very simple things and you will get to use to them very, very quickly and these will make your workflow very easy and very quick. So you remember, for the first two clips, we drag them to the timeline, but there is an automatic way to do that intervention resolve because of course we want to add it to the end of the timeline. So for that, there's this button append. So append means you want to add something to the end of something, right? So this is what we want to do with this clip. So we want to add it to the timeline. So instead of dragging it down manually, and by the way, we have already selected this video only, so we don't have to worry about this audio. So after making this selection, I can simply come to this button append, and you can see it has been abandoned at the end of the timeline. And automatically you can see the playhead has been moved to the end of the last clip. So here this is the zoomed in view, as I said before. And in the upper little timeline you can see this the first flip, second clip, and third clip. And also. When there is a keyboard shortcut for appending it, if you want to do it quickly, once you get used to it, you can be very efficient using these keyboard shortcuts. So instead of coming to this append button, you can use a keyboard shortcut and that lies here under the Edit menu. So here it says append to the end of the timeline. So shift after hour for both Mac and Windows, this is the keyboard shortcut for append to the end. So we can remember it for the next time. So now we can move to the next step of bread baking. So let's go to video number 15. And here this is a bar 24 seconds long clip. It is also filmed in slow motion. So we can pick an appropriate about five to 6 second long portion. So let's start maybe from here where he's cutting this though. So I press I to market as in point, and let's press it so we are at about 10 seconds, so predate plate and we need to stop at about 14 to 15 seconds. So let's stop it. And let's mark this as outlined by pressing on the keyboard. And we already know we don't need to preview that. You already know that we want to add it to the end of the timeline. So There's a keyboard shortcut Shift F to L to append it to the end. So I press Shift F 12. And you can see before this there were three clips and now the full clip has been added. And just like before, the playhead moves to the end of the timeline. So very easy, very intuitive. So that was the four-step and bread baking. And now we can go to the final product, which is in the last video, video number 18. So here you see this was already in the timeline mode. So if I double-click it, it comes back to the source clipboard. So now here we have the final product. This video is about seven seconds long, so we can pick most of that and the lid is about to open. So let's start from here. I'll press I on my keyboard to market as in point. Let's play it, and let's end it there. This is nice. Again, I'll press O for out point. And to append it at the end, you have the keyboard shortcut shift after all. So very easy. If you know the keyboard shortcuts, you can assemble this whole rough cut within a few seconds. So here in the upper mini timeline, you can see there are five layers, 1, 2, 3, 4, 5, and they're roughly about the same duration. And the total duration of our whole timeline. Here at this time cord, you can see it's about 24 seconds. So I think that's enough. And now we can start previewing whatever we have added to the timeline. So I'll bring my playhead to the start and I'll press space bar or press this Play button to preview it. So here we are going through different steps of bread baking. Sounds pretty nice. And here, Vr ready with the final product, which is the sourdough bread. And one more thing. If by mistake you add some wrong clip to the timeline, it's very easy to get rid of that. You can select the clip either from the upper mini timeline or the lower mini timeline. So you see you selected from any minute timeline and it is also selected in the other mini timeline as well. So here, both of these are selected. I can press Delete to get rid of that, but for now I don't want that. So I'll press Control Z on Windows or Command D on Mac to undo this operation. So that was how we are able to preview clips in the cart page, how to make small selections from those clubs and how to add them to the timeline in different ways. And lastly, how to preview them. So I hope you found this useful and in the next lesson we will continue working on this rough cut. So thank you for watching and I will see you in the next lesson.
17. EFFICIENCY TIP: Auto-Saving your Work: Hello and welcome back. In the previous lesson, we created this rough car. And before we go any further with that, it's a good idea to configure some settings in dementia is also that our work is frequently saved because sometimes these softwares might crash and you might excellently lose all your work. So it's always a good idea to configure that setting. So for that I need to come to DaVinci Resolve and preferences. And here there are two tabs, system and users for unit to come to the user tab. And here there is this option, project save and load. So here lifesaver is checked, but this project backups. It's not checked by default, so you need to check that. And here it says it will perform backups every 10 minutes, every two hours, and every two days. So that is great. And also here you can see the location of the folder where the backups will be saved. So of course you can change that. And now, with these options checked, you would have peace of mind while working that you won't accidentally lose your work. So finally, you can hit the save button, and now this setting has been saved. So I hope you've found this useful and I hope this will help you in your video editing projects. So thank you and I will see you in the next lesson.
18. Making Adjustments to the Rough Cut: Hey, welcome back. So in the previous lessons, we created this rough composition and let's keep working to further improve it. And many times you want to make a little bit of adjustments to the clips in the timeline. So that is exactly what we are going to learn in this lesson. So let's start with this first clip. So this is a mini selection from a bigger clip. So let's go to the original clip. So for that I'll come to the videos compressed. And here this was the original clip. Remember, this was a small selection from this clip that we dropped into the tablet. So let's say that I want to make this clip little bit longer. So what I can do is I can change these endpoints and out points from this original parent clip. And you see, I have widened this selection, but nothing has happened to the selection within the timeline. So that is exactly what I wanted to convey by doing this. If you come to the original clip and change these inputs and out points, nothing would happen to whatever you have selected and dropped already in the timeline. Alright, so please keep this in mind, does a very important point. This is a major distinction between the media clips in the media pool and clips in the timeline. Okay, So to make any changes to the clips already in the timeline, you have to change their endpoints and outliers from within the diamond. All right, so having said that, let's come to this first clip and now let's assume that we want to make it longer. So first, you see this is my cursor, and right now it is resembling an arrow. So when I bring my cursor to the start of this first clip, Let's say I want to move this in points and this in point further outward to make it longer. So see how my cursor changes to this arrow pointing to the left. So I can click it. And now this let me change the end point for this selection. Okay, So I can move it to the left side. And now I am moving the input for this clip further outwards. So you can see this selection is getting longer and accordingly, the remaining clips in the timeline, they are also adjusting to make way for this new additional link of this clip. Likewise, I can move it to the left side, to the right side rather to make this clip shorter. So in this way I can adjust the end point for this clip within the timeline. Okay, likewise, I can come to the end of this selection, and here I can click again. Now the cursor is facing the other side. So now I can change the output for this selection so I can move it inwards to make this clip shorter. Move it towards the right side to make this clip longer. So that's very easy. So this is called rippled dreaming. And the word ripple means that when I make the change, the remaining glyphs automatically changed the place to adjust with the new shape of this clip. Okay, So that is called ripple trimming that the, you know, the start, It's even though the clip is becoming shorter or longer, the remaining clips are moving relatively to this location to adjust for this new change. Now, this is very easy, but the problem with this method is that it's not very accurate. So here I can move it to the right side or left side. But it's very easy if you want to make a very precise adjustments, it's very easy to miss that. Okay? So there is a much better method and that is by instead of bringing my cursor to the starting or ending of a clip, what if I bring my cursor right at a cut? A cut means the point where two adjacent clips meet. So here, this is a cart, and notice how this cursor looks. I bring it to the cart. It's it's like two brackets facing different sides. Okay, so when I click that, now this hole cut is selected and now I can change both clips by making this selection. So see what happens when I select a card. What happens in the monitor? On the left side of the monitor, it is showing me the ending frame of this clip on the left, as you can tell from this content, the content of this frame and this clip matches. Alright, so this frame is basically the ending frame of this clip on the left. And likewise, this frame is the starting of the clip on the right side as you can tell by their content. Okay, So this basically gives me a glimpse of this cut. That means we're one clip is ending and we're the next clip is starting. Very intuitive. And below that here I can make adjustments. This is basically the, so this bracket is basically facing the clip on the left side. And this bracket is facing the clip on the right side. And I can grab this upper bracket and I can move it outwards or inverse to make changes to the out point of the clip on the left side. Okay, so right now it is showing digit 0. 0 means I haven't changed anything yet. So if I move it to the left side, now see what's happening to the clip on the left side, it is becoming shorter because I'm grabbing this out point and I'm moving it to the left side. And it is actually showing me by how many frames I am decreasing its length at the output. Okay? So right now it is showing 30. That means I have reduced by 30 frames. Right now it is seven frames. When it is 0, I am back to the original outpoint. And when it is on the other side, it is showing plus 10. That means I have made it longer by ten frames. So in this way, I can click a cart and I can make adjustments to the out point of the clip on the left side. And likewise, I can grab the lower bracket and I can make changes to the end point of the clip on the right side. Okay, so see what happens to the clip on the right side when I make this, when I change location of this bracket, this lower bracket, okay, so when I move it to the right side, now this second clip is becoming shorter, as you can see in the timeline. When I move it to the right side. Now it's like moving it's in point further outside. That means I'm making it longer. And by looking at these digits, you can tell whether this clip is becoming shorter or longer by how many frames right now to 0. That again yet, but now it is showing five. That means I have reduced it by five frames, by 15 frames now, and I can move it to the other side. And now the sign changes. That means now I am making this clip longer and right now it is showing seven. That means I have increased it flanked by seven frames, 10 frames, 11 frames and so on. So let's adjust it, keep it here at around five frames. So I have increased the length of this clip by five frames at the stock. So I hope now you understand the layout of this monitor when I click on a gut. So this is the out point of the clip on the left side. This is the end point of the clip on the right side. And using these brackets, you can make adjustments to these inputs and outputs. Now before moving to the next gut and adjusting that, it's a good idea to preview it a couple of times to see whether our adjustment is good or not. But that, of course, if I played just like that from here, the play button, it will keep playing around with dour looking for this selection. So of course I want to play around this selection. For that, I'll come to the playback. And here, play around to, here there is an option play around current selection and the shortcut is forward slash, so I press forward slash, and here this card is selected. So when I press forward slash or click it, now it keeps playing around this gut, but then stops. So I can turn this looping on, press the forward slash again, and now it will play it a couple times so that I can have an idea about how this got is looking for, right? Likewise, I can come to the next guard, click on that. And here again, I can look on the monitor to see exactly where this clip on the left side is ending and Vered this clip on the right side is starting. And to make further precise are just meant to move this upper bracket to change in point of the clip on the left side. So I have made it shorter by eight frames. I can keep an eye on the left and right frames above the monitor to see exactly where one clip is ending and where the next clip is starting to make sure exactly where I want this gut. So I'm happy with this location of the upper bracket. And I again come to the lower bracket and I can adjust the end point of the clip on the right side. And let's say I'm happy with here, we're fail is just, you know, bringing this ball right next to the bread loaf or Dora other. And let's say this is good. Again, right now this, this got to selected so I can press the forward slash to play around that gotta couple times. And once I'm happy with that, I can come to the next clip. And here again, I can look at these two frames and see if they are working together well or not. And again, if I want, I can make a little bit of adjustment to this left clip by dragging around this upper bracket. This is good. And to make changes to this end point of the clip on the right side, I can drag around this lower bracket. And here I have maybe let's add four more frames to that appear. He is cutting the loop. So in this way I can move from one cut to the other and keep previewing around my selection. So in this way, you can make fine adjustments, the precise adjustments to the clips already in the timeline. I hope you found this useful. So thanks and I will see you in the next lesson.
19. Rearranging Clips in the Timeline: In this lesson, we will learn how to rearrange existing clips in the timeline. And you might want to do this in certain situations. And let me show you an example scenario where you might want to reshuffle clips. So I can go to the videos folder. And here I have this video of working with the DOT so I can bring my mic a small selection. So let me press I for Endpoint, me, press O for the out point. Let me append it to the end of the timeline. Okay, So this clip wasn't existing already in my timeline. This is a new addition to my timeline. Now, later on, I realized that okay, here I am trying to tell a story about the bread baking. So here in this clip, my bread is already ready, but here I am still working with the dose. So there is something wrong, of course, with the sequence of these clips. So what should make more sense is in between this clip we are, I'm working with the flower. And in this clip we're not mean what Phil, where we're fail is working with the door. So it would make more sense if this clip was actually inserted in between these two clips. So that is one situation where you might want to reshuffle clips. And of course there could be many other situations. So for rearranging clips, the lower timeline is not very helpful because you cannot see all the clips here at once. But for that purpose, of course, the upper timeline is very helpful because all your clips are in your view all the time. And even then, all these clips here are showing in blue color. So what if we could color code these clubs? That would be much more helpful. So we would be able to track where changes are occurring. So let's say here. If I right-click on this clip, nothing happens. So I need to first bring my playhead here. And now if I come to this clip in the timeline, I can right-click and I can assign it a different color. So let me assign it a purple color. And these two clips in between which I want to insert it, Let's select these clips from the lower timeline and let's give them a yellow color. All right, so basically I want to insert this purple clip in between these two yellow clips. So for reshuffling, what I need to do is I need to grab this required clip and I need to bring it on top of the required guard where I want to insert it. So this is the required card. So you need to precisely watch your cursor in this step. Okay, so I need to bring my cursor and I bring it on top of this target cut. You see it first highlights that cut. Let me show you again. Here it highlights the cart in blue-collar. And here it is showing me this preview in gray color, showing me where exactly will this land. And here you need to be very precise in locating this cart with your cursor. If you're nor, this operation would not be done successfully. Okay? So you bring your target layer on top of this cart. And as soon as you bring your cursor on top of this card, it is highlighted and it shows you a preview. When it turns gray, you release. And here the reshuffling has been done. So the purple clip has been inserted in between two yellow clips. That is what we wanted. So of course, I just did it with one clip, but you can reshuffle any number of clips in this way. So just for the sake of another example, I can select first two clips. And let's say I want to insert it at this card so I will grab them. And as soon as my cursor comes on top of this desired cart, the cart is highlighted, it shows me a preview, I release it. And here the new rough reshuffling has also been done. Let me undo that because the current sequence is already correct. Okay, I just showed you for the sake of example. Now here I mentioned that you need to be very precise in locating the cut. Now let me also show you what would happen if you are not very precise with locating the cart video cursor, what could happen? So let's say this time I want to take this yellow clip and I want to insert it in between this yellow and purple clip. But let's say I'm not very careful. So if I wanted to do it correctly, I would just grab it and bring my cursor on top of this dessert cart. When it's highlighted, I should release, but let's say I'm not very careful. And instead off on top of this cut, I bring it over top of this purple clip. Now here it is showing me a preview of what is going to happen. And clearly it is not an insert operation. So it is doing something else, which is actually card or writing. So here it is showing me the preview that say I release it. Now see what happens. The original purple flip, a part of that has been overwritten with this yellow clip. This is actually what happens. So instead of insertion, where this purple clips should have moved over and the yellow clip would have landed in between the yellow and the purple flip. Instead of that operation, I did a mistake. And here I dropped it on top of this purple glib. A part of the purple clip has been completely overwritten with this yellow clip. So instead of the original insert operation, this is called an override. So of course in this situation, I did it by mistake. But in some rare situations, you might want to deliberately overwrite an existing clip, a part of the existing clip with a new clip. But other times, if you're not careful with reshuffling your clips, something like this could happen. So of course I will undo that. So that is how you can reshuffle clips in your timeline. I hope you found this useful. So thank you for watching and I will see you in the next lesson.
20. Using the Smart Insert Tool: Hey, welcome back. In this lesson, we will learn how to insert more clips into the timeline. So of course, we have already seen this append method, which does it in a specific way. What it does is once you make a selection from a clip and press this append button, it appends it to the end of the timeline. But sometimes we may not essentially want to add it to the end of the timeline. V might want to add it to some other place in the timeline. So that is exactly what we are going to learn in this lesson. So for this example, we will come to this purple clip, which we added in-between these two yellow clips in the previous lesson. So for now delete this purple clip and let's redo it using this method that we're going to explore in this lesson. Okay, so I'll again come to this video 11, which that purple plague was a part of. So here it is selected. Again. Here I can see the selection. And if I want to preview this selection on Windows, I can press Alt and forward slash on a Mac, I can press Option and forward slash. So here I can also turn on the looping. And this way I can preview my selection. And once I'm happy with this selection and I'm ready to insert it at this gut. Now there are two ways to add it to the timeline. Okay, I'll bring my playhead closer to this card so it's visible here. And now there are two is, the first method is to drag it to this cut manually. But for that, I need a lot of precision. Otherwise, some mistake would happen and it might result in unexpected reserves, okay? And another method is to do it automatically using a button Guard, smart insert. So that is much easier and much better. But let's explore both these methods. The first one is manual, and here, of course, before dropping here, I have this video only selected. So when I drag it, the audio portion would be disregarded. So by the way, let me press Q to come back to this selection in here. There's no audio anyway, so I don't have to worry about that. Now. I can just drag it and I need to bring my cursor while dragging this, I need to bring my cursor on top of this cut. And as soon as this cut is highlighted and I remain there, it splits these two clips and it shows me a little preview in Greek or how it will look like after this insertion. Okay, again, I have to be very precise in bringing my cursor on top of this cart. Otherwise, it could give me an expected reserves. So once I let it go, here, you can see that in-between these two yellow clips, just like before, perfectly, has been inserted in between these two. Now you also see that before this insertion, these yellow clips were together. And as soon as I inserted this purple clip, the, this yellow clip, and the remaining clips moved sideways to make room for this purple clips. So this is called ripple operation because the remaining glyphs have moved sideways to make room for this newly inserted clip. And actually this is a ripple insert operation. And now if I want to preview around this cart where I did the insertion, I can simply press the forward slash and my looping is on. So it will show me a preview around this cut a couple of times. And so it looks pretty good. Now the problem with this method is just like I mentioned before, I have to bring my cursor on top of this got very precisely. Otherwise, it could give me unexpected results. So let me show you the automatic way and first, let's select this clip and deleted or press Undo to undo this insert operation. And now let's explore the automatic method. So press Q to change this monitor to the other view. Here I can see my selection. And now there is this right next to this append button. There is this button Guard smart insert. So what this does is it uses, this arrow, basically shows you which God is closest to your playhead. Okay? So wherever this arrow is on top of that particular cut, it will insert that selection at that particular cut. Okay? So right now my play head is closest to discard or this got here. So that's why you can see this little arrow on top of this cut. So if I bring my playhead closer to any other, GOT, you see right now this cut is closer or actually discard here. So the arrow comes on top of this cut. All right, if I bring my playhead closer to this cart, now this arrow would shift to that curve. So as soon as this flared comes closer to this cut, this arrow shift from this got to that gut. So the location of this arrow would actually show me which God is the closest to the player. And that is where the smart insert would insert the selection. Okay? So since this is the target cart where I want to insert this selection, so I will bring my playhead closer to that card and see this is the benefit of this method. I can just bring my playhead closer to that. Got I don't have to be very precise. And it starts showing me this arrow above that intended cut. And once I'm happy with where this arrow is showing up on top of a required guard. I can come to that selection, and I can come to that selection by pressing Q. So here, this selection is already made and the target cart has already been highlighted using this arrow. So I can just press this smart Insert button. And here you can see just like that, the perfectly past been inserted at the desired cut. And I did that without needing a lot of precision. So that is how I can use the smart insert feature to add new clips to any location in the timeline. Just keep your eyes on this little arrow and where our this little arrow is appearing in your timeline, that is the cart where new insertion would happen. So I hope you found this useful and this would be helpful in your video editing products. So thank you and I will see you in the next lesson.
21. Using the Ripple Overwrite: Hello and welcome back. So in the previous few lessons, we have been exploring different editing tools in the cart page. And in this lesson, we will learn how to replace an existing clip in the timeline with a different clip from the media pool. Okay, So for the sake of this lesson, let me choose an example where let's say we want to replace this purple flip. By the way, we inserted this clip in-between these two yellow clips in the previous lessons. Okay? So for the sake of this lesson, we are assuming that we want to replace this purple clip with a different clip from the timeline. So let me go to this. Would you number four, where we are working with the flower. So let's say we want to replace this purple glove with a small selection from this clip we are, we are working with the flower. So I come to some point in this video. I press I for in 0 for the outpoint. And by the way here, deliberately making a shorter selection compared to this clip to show you how this ripple overwrite would work. Okay? So here we want to replace this perfectly with this small selection. And it would be a good idea to also assign this clip a different color so that we can track any changes. So let me give it an olive color. And now there are two ways to replace this clip with this selection, okay, one is manual and the other one is using a button, which is the ripple overwrite button. So first let's look at the manual way. So for manually doing it, you can drag it and drop it on top of this purple clip. And here we have already seen what would happen if I drag it on top of an existing clip and if I wait, here, you see it is showing you a preview of what would happen. And this is an example of a simple override where a part of the existing clip would be replaced with the new clip. So this is called a simple override, and we have already seen in the previous lessons. But this time we want to completely replace the purple plagued with this new clip, even though their durations are different. So this is an example oper offer ripple overwrite operation that we're trying to do. Okay? So for that, I have to bring it on top of this purple clip and have to release it immediately. Okay, so the focus here is on the word immediately. So see what would happen. This disclaimer, I drag it and drop it on top of the purple cape, and I leave immediately and see what happens. The whole purple clip has been completely replaced with a shorter, much shorter all if clip. And no part of the purple flip is left. And also you can see that even though their durations are different, it has resulted in no gaps in the timeline. So first, you have replaced the existing lip with the new one. And it is a ripple kind of operation because the remaining clips have rippled over to fill the resulting gap. Okay? So that is why we call it a ripple overwrite operation. We replace the two clips with each other and also the resulting gap is completely filled automatically by the adjustment clips. Let me show you again. So I'll press Undo. And I come to this by pressing Q, and I drag it and drop it on top of this immediately. And that is how we can do this. Replace operation. Now, let me undo, and now let's try to do it automatically. So for that there is a button called ripple overwrite. Now simply pressing this ripple, ripple overwrite button won't do anything. So first of all, before pressing this, we have to tell it to Vinci Resolve which clip in the timeline needs to be replaced and by which clip from the media pool. Okay, so I have selected this target clip, also selected this clip from the source clip in this section is a part of this selection, is a part of and having selected both these source and target lives, now I can press this ripple overwrite button, and it does the same thing. It completely overrides the purple clip with this olive clip and the remaining at digestion clips ripple over to fill that gap. Now one more thing is that the original purpose of life was much longer. And I have replaced it with a much shorter or Live clip. So as a result, the duration of the timeline has decreased. I hope that's making, that makes sense. If, on the other hand, this new selection was longer than the original clip, and I replaced this longer selection with a shorter clip, then that would result in an increase in the duration of the timeline. Alright? So that is how you can replace one clip in the timeline with a new clip from the media pool using the ripple overwrite operation. Thank you for watching, and I will see you in the next lesson.
22. Transitions in the Cut Page: Hey, welcome back. So in the last few lessons, we learned how to make small selections from given clips in the media pool. How to add them to the timeline in different ways, and how to make changes to them to come up with a final sequence. Of course, we can continue working on those clips to add more clips in the timeline to tell our story. But the purpose was to show you how to do that. And I think we have already done that. Now it's time to further spice things up by adding a few additional elements to this sequence to make it more interesting and engaging. So of course, we can add more elements like adding transitions to these clips, adding titles, maybe add a background music to make it more engaging. And that is what we are going to learn. So in the next few lessons, we will focus on transitions and how to add them to the timeline. Now, first of all, before we dive into transitions, we need to know what a transition actually is. So to put it simply, when you change from one clip in the timeline to the next clip. And especially when these clips are different, then you can make this change. Instead of this jump cut from one video to the other, you can make it a subtle change. And we can do that by making, by adding transitions to a cut. So that is what a transition is. Now, let's see where transitions actually are in the cart page. So here we were working in the media pool, but next to that you would see a transition tab. So when you select it, here comes the transition tab. And these are different types of transition available to you in the cart page. Okay. And if you look at the top here, not only we have the video kind of transitions, we also have some audio transitions. And we have a favorite step, okay, so whichever transition from the audio and video we marked as favorites, they would appear here. Right now. I have no favorites, but I can of course, come to the video and here, next to any video there would be a star. Okay, so let's say the smooth card here, I pressed this star and I also press this star next to cross iris. So if I come to the farads tab, no cross IRS and smooth cardboard are appearing in my favorites tab because I mark them as favorite. So I'm marking them as ferrets is just that easy. So I can again click this star from here and I'm back to no favorites. So let's come back to the video transitions. Now, there are lots of different transitions available. And of course, before adding any transition to any cut, it's a good idea to preview a couple of transitions to make sure that we are making an informed decision about the transitions. So for that, I would first need to bring my playhead near the cart where I want to insert a transition. So here I have this in this clip, and here we are changing to the next level, which is different. So it's a good idea to test out some transitions at this cart. So also notice that this little arrow is appearing on top of discard. That means we, whatever transitions we apply it, those would fall at this card. Okay, so now in order to preview some transitions, all I need to do is bring my cursor on any given transition. And as soon as this white border appears around that card, that means it is selected. And now I can hover my cursor around that without clicking on that. And now it will show me a preview of that in real time. So here at the start, I am at this previous clip, and as I progress, it is changing to the next lab in this particular way, it is using a pentagon I style. Here. Of course I can further preview the remaining transitions. Here. This is blur, dissolve. This is crossed is all. I can do it very fast. I can do it in slow motion to see how this transition would play out. This is deep to Color Dissolve. And here this is barn door. This is push, it pushes 1 video 2, and comes to the next video. This is simple slide splitting from one clip to the other, triangle left star. So you can see there's a wide variety of different transitions available. So here this is clock swipe, swipe, camera shake. And by the way, this is really common amongst YouTubers these days. And this is how you can preview any transition before actually applying it to a specific gut. So let's take a preview at a different cut maybe. So here this is a clip. This is one clip. This is the other. But these two clips, yes, these are different. So it's a good idea to maybe before applying transition here, maybe we can have a preview of that. So again, I'll come to these transitions. I can continue. I can continue new, previewing them. This is burned, wipe, noise, dissolve, zoom in. And here you would notice that some are very subtle, like blurred dissolve, cross dissolve, and dip to Color Dissolve. These are, you know, very discerned and very, you know, I would say they look professional, but some of them, they are very cheesy, very fleshy, especially like this circle camera shake. Okay, this, this is not too bad. This is descent. You know, some of these would be really dynamic. I would say there's a lot happening in those transitions. And some are really subtle and soft. So here this is paint on, slide up, right as flash and so on. So you can spend some time in this panel to discover what kinds of different transitions you have at your disposal. But one word of advice here I would like to give to the students is that I have seen many YouTubers and many video creators make the mistake of overusing these transitions. Of course, it is a free tool available to you once you buy the software. Or if the software is free, especially to introduce all. Once you have that software, you can apply any number of transitions. But some people tend to overuse this tool, especially beginners, okay? So I would advise you to stick to maybe some very professional looking and very subtle transitions. Because the point is to go from one clip to the other in a nice and subtle way, not in a very flashy or cheesy way. So that is just my advice or my opinion. Again, it depends on you, your style, and what kind of video you are creating. But just that is my $0.02 about transitions. So just to sum this video up, this is how you can come to the Transitions tab, and this is how you can select a card from the timeline and previewed different transitions to see which one would work best for a particular cut. Thank you for watching, and I will see you in the next lesson.
23. Default and Standard Transitions: Hey, welcome back. So we were talking about transitions, and in this lesson, we will learn a few tools that will help us add transitions in the timeline in different phase. So the first tool I want you to look at is the dissolve tool. So this actually refers to the cross dissolve transition. And whenever you press this dissolved button, it would apply the cross dissolve transition to the nearest cut. And we already saw that the nearest cart to the play head is always indicated by this little arrow. So when I press this dissolved button, it would apply the cross dissolve transition over here. Now, you might be wondering, we have dozens and dozens of different transitions here. So why do we have a special button for cross dissolve and not for others? The reason is that the cross dissolve transition is the most common and the most heavily used transition in videos, whether in movies or advertisements and so on. That is why we have a special button for that. And by the way, this is also my personal favorite transition. Right next to the dissolved button, there is this cart button. What it does is it will look for any existing transition at the nearest cut, and it will remove that. So let me change the nearest cut. So right now R0 is appearing here. So when I press this cut button, of course, there is no transition here, so it won't do anything. But as soon as the nearest cut is this one where there is a transition, you can press that in that would remove the existing transition. Let me undo that. And if you wanted to preview your transition, you can always press the forward slash. And it will show it to you a couple of times. And there you go. Now again, I would press the cart button to get rid of this transition. Then there is something called a standard transition into Vinci resolve. So you can see that out of all these transitions, there is only one transition that has this red marker right next to that. So this is a standard transition, okay? So the standard transition is the one that you tend to have really huge. So of course, if I like any, by default, cost is always the standard transmission because it is the more travel use transition. But of course I can choose any other transition as the standard transition. For example, if I like blurred is all more than crosses all, I can change it. I can make it as the standard transition. Okay, so the method is to right-click on the desired transition and check this set as standard transition. And now you can see that there is no red marker right next to the cross dissolve. And now rather it appears at this blur dissolve transition. Then under this transition pane, you can see these three buttons. Okay, so what is the first button do? It applies to the end of the clip. So what it actually means is that it would apply the standard transition to the end of the clip. Which clip? Which are clip is currently under your playhead. Okay. So right now this is the clip into the play head, but it is very short. Let's move to some other clip which is relatively longer. So right now you can see this is a clip under the playhead. So we have already selected this as the standard transition. So when I press this button, this would apply it to the end of this clip. So it should learn here. You can see when I press that here, it adds that transition and it is the blur type. Likewise, if I press this button, it would apply that standard transition to the start of this clip. So if I press that here, it adds to the start of this clip and the middle button. It applies the standard transition to the nearest edit point or the neatest gut. So the nearest got right now is here and see what happens if I press that. See, nothing happens. The reason is that there is already an existing transition here at this gut, although it is on one side, but it is at this very cutter. So pressing this button does not do anything. So first I need to get rid of this existing transition so I can use the cut button and that transition is gone. So now, since this is the act of God, I can press this middle button. And now it should add that kind of transition at the middle of this gut. So here I can take a preview and it is again of the blur time. Now, let me show you just for the sake of example, let me choose another transition as the standard transition. So I will this cross iris, although I don't really like this transition and probably I would never use it honestly. But just for the sake of this lesson, let me right-click on that and set it as the standard transition. So now I can manually come to the timeline and manually delete these existing transitions. And now let's again try to use these buttons for this transition. Okay, so now this is the standard transmission. Pressing the middle button should add it to this gut. And it does. As you can see, I got that transition. And now let's add this same transition to the end of this cut, end of this clip, which is this one. So here it adds there. Similarly, I can add that standard transition to the start of this clip so I can press this. And there you go. Now, one thing I need to mention is that if I come back to this dissolve button, I already mentioned that as the name suggests, it would always apply the cross dissolve transition. Even though the cross dissolve transition is no longer the standard transition, this button would always apply. Cross dissolve no matter what. Okay. So let me show you again here. This is the active cut as shown by this arrow. So I press the dissolved button and you can see that even though this cross IRS is currently the standard transition, this button has added the cross dissolve, because as I already mentioned, This would always add the cross dissolve transition. So this is how you can add your favorite transition. You can make it standard transition. And this is how you can add the standard transition to different places in the timeline using these three buttons. And I hope now you know the concept of the standard transition and how to apply that centered transition to the start or end of a clip and how to apply it at the center of a cup. So thank you for watching and I will see you in the next lesson.
24. Adding any Transition: Hey, welcome back. So we were talking about transitions and let's continue our discussion. But before we go any further, let's get rid of these transitions we have already added. So for that, I can either use this cut button or I can delete them manually by pressing the Control button and selecting multiple transitions and pressing the Delete button. So now those are gone. Now, in the previous lesson, we were talking about how these three buttons, they applied the standard transition to different places in a clip. So this button, it applies the standard transition to the end of the clip. This one to start off a clip and this one in the middle of two clips. But this would only happen if no other transition has manually been selected. So now let's see what happens if I select a different transition, a transition other than the standard transition? What happens if I select that and then use these buttons? For the sake of this example, let me manually choose this slide transition. You can see this is how it looks and it is very different from how this currently selected standard transition looks. So when I select a different transition before using these buttons, what it does is it disregards that standard transition and it rather applies the currently selected transition. So now, after selecting this, I can again come to this button. And here you can see that it should apply this transition at the end of this clip. So let me use that. And here I can preview, and you can see it is the slide transitions, so it disregarded the cross iris. Likewise, I can come to another gut. Right now, discard is selected. So again, I press this button. Now with this slide transition selected, I applied at the middle of this cart. And you can see that it is a gain, this slide transition. So it is basically disregarding this standard transition when I have another transition selected. Now, let me manually delete these two transitions and let me do it again with after unselected this. Okay, so as we saw before, it should now consider only this standard transition. So you can see here applied at the middle and here, again, this is the standard transmission. So this is how it behaves differently when you don't select any other transition versus when you select another transition. So I hope you can see the difference. So in this way, I can apply any transition to the timeline very easily without first making it a standard transition. All right, so let me go ahead and delete that. Now there are a couple of other ways to apply these transitions. Okay, Let's say you wanted to apply different transition at it, at every different cut, although I wouldn't recommend it. But just to show you, you can bring your cursor, bring your playhead to any cut. Just double-click on any of these transitions. For example, let's double-click on the barn door. And it would apply at the middle of this currently selected cut. So here you can see this is the barn door. Likewise, I can bring my playhead nearer to another card. And this time I can double-click on a different transition. And now this is a box type transition. So that is how applying transit different transitions at different cards is very easy. You just bring your playhead near that cut and double-click on a transition. But in this way, the transition will be only applied at the center of a cut. Now of course you can do it manually as well. For example, let's say I want to apply box to here. Then I can manually drag it. And this time I can either drop it at the center of this cart or I can also drop it at the end of the previous card or at the start of the next card. Anyway, I like. All right. So these are a few different ways in which you can add different types of transitions to your timeline, whether it's a standard transition or not. I hope you found that useful. So thank you for watching and I'll see you in the next lesson.
25. The Inspector Panel: Hey, welcome back. Now we know how to add transitions in the cut page. So the next logical step is to learn how to customize these transitions, or in other words, how to change their properties. And it turns out that each of these transitions is unique and represents a unique set of parameters or properties that we can change. Okay, so that helps us in customizing these transitions. And to do that, I'm going to introduce you to a new area in the cut page which is guard the inspector. And it is located at the top right. So this inspector, we will also look at this in detail in the edit page. So whatever I'm telling you now about the Inspector, it is applicable both to the edit page as well as in the cut pitch. Now the way this inspector works is as the name suggests, we can inspect properties of different elements within this panel. Okay, So for that, I can select any element from the timeline and it will show me its properties. And that is also where I can change those properties. For example, if I select this transition from the timeline here you can see the inspector starts showing me this transition panel, which has the properties of this transition. So I can look at them and I can change them. Now, if you look closely at the top of this inspector, you will see there are multiple tabs. Some of these are disabled, okay, So video, audio effect, image, file, none of these are enabled. The only panel enabled is transition, because this is a transition itself. It's not a video, it has no audio, it has no effects to that. It's not an image and it's not a file. So none of these panels are selected, are enabled. But the only panel that is relevant to this transition is the transition panel itself. So that is where we can see its properties and if needed, we can change them. Now instead of selecting a transition, see what happens if I change a video clip from the timeline. You see that the transition panelists still enabled, but now there are some other options here as well. So the video panel is enabled because, well, of course this is a video. Then there is no audio panel enabled, okay? Because you see this selected video clip, it has no audio. So of course, the audio panel is not enabled, then it has no effect selected. That's why the effects panel is disabled. If I had added any effects to this, the effects panel would be enabled. Now, why is the transition panel available here, even though I have selected this video? Well, because this video has some transitions applied to that at both ends. So that is why this transition panelists and enabled. There is no image in this clip, so that's why the image panel is disabled. And lastly, the file panelists and ever because this video clip represents a file. So here you can see the file properties like the filename, the codec, the resolution, the audio format, and so on. You can see the date creator. You can give it a different color code if you want. You can change the name of that if needed, and so on. Now let's come to the video properties of this video clip and look at these properties closely. So here you have all the different video properties associated with this panel. And these are grouped into different groups. So everything, every property that has to do with cropping, it is grouped inside this copying panel. Anything that has to do with the transform of this video clip or the shape of this video clip. It is shown here and so on and so forth. Now, each of these panel, I can close it by clicking on it, and I can open it again by clicking it once more. Likewise, this is open. If I wanted to close it, I can just click it once. If I wanted to open the Dynamic Zoom, I can click it. And here I can see the Dynamic Zoom properties. Likewise, composite, I can click that to open that panel and so on. Now look at the transform properties. So here I can give it a Zoom in the x or y-direction. I can change its position in the x-direction and y-direction. I can give it a rotation. If I want, I can change the anchor point in the x and y direction. I can even pitch it, I can enjoy it and flip it horizontally, flip it vertically and so on. Now in front of every property, there is a reset button, okay, so either I can reset all these properties individually or there is a global reset button at the top of every panel. So by clicking that, I can reset all these properties at once. Similarly, let's come to the cropping here. I can profit from the left. I can crop it from the top, I can crop it from the bottom. I can give it a softness at the edges and so on. And if I wanted to reset everything, I can simply use this reset button. So similarly, I can play around with these properties and I can reset them if I want. Now come to this red button in front of every panel. So if I wanted to disable all these properties, I can just toggle this red button. It turns gray. So that means now I cannot change those properties, but I can enable it. And as long as I'm not changing any of these properties here, nothing would happen even though this panel is enabled. So that is the inspector, which we use to look at the properties associated with any elements selected from the timeline. And in the next lesson, we will learn how to use this inspector panel to change the properties of these transitions or to customize them. So thank you and I will see you in the next lesson.
26. Customizing Transitions in the Inspector: Hey, welcome back. In this lesson, we will learn how to use the inspector panel to customize the transitions we have added in the timeline. Okay, so it's very simple. What you need to do is you select a transition from the timeline, come to the inspector. And under the transition tab here you will see all the properties of the selected transition. So you can have a look at them and here you can also change them. So let's look at all these properties one by one. The first one is the transition type itself. Okay? So right now you can see this electric transition is barn door type. And if I show you a preview of that, it's not the best transition available, so let's change it. So here you can see we have a list of all the other transitions available. And you can notice that without actually going to the Transition tab, we can change the type of transition by selecting another transition from here. So let's actually go to some other transition, let's say deep to Color Dissolve. So what it does is while going from one clip to the other, it dips to a specific color. So again, I would select that and we have changed the type of the transition itself. The next one is duration. So right now it did, it is taking 1 second or 24 frames, but we can change that from here. So let's make it 0.5 Enter. And you can see that the length of the transition shrinked in the timeline. So if I preview this again, now you would see that this transition would be much quicker here. And by the way, when you select a transition from the timeline, you will see that these brackets appear underneath the monitor. So I can grab the sides, are edges off or transition and changes duration from here, but it's much better and much precise to do it from the inspector. So let's make it 0.5 Enter. So now it's taking 11 frames. The next property is the alignment of the transition. So right now it is placed at the center of this edge, but I can put it at the left of the edge. Left off the cut. Right off the cut are in the middle of the cut, which is the default. Next one is the starting ratio, the ending ratio, but I would leave them alone. And then there is an option to reverse that. Then we can make it ease in and ease out. Or another one is transition curve. Okay, so we can change that, but let's reset that for now. And the most important property here, I would say is the color like which color it dips do. So by default it is white, but I can change that. So instead of white, I can go to this color panel and choose any other color. So let's choose black. Select, Okay, and now if I preview that, you would see that it would dip to black while going to the next clip. So this is how you can select a transition and customize that in the inspector who are easy. By the way, I would select this transition and let's reset its duration to 1 second. Because I think it's much better because that would go slowly. No. Then there is this next transition. So no, here it is the current transition which I change to dip to color dissolve. But if I select the next transition here, you will see that the inspector panel changes. And right now additionally properties of this next transition, which is the box kind. So if I show you a preview of this next transition, yes, it is of the box kind. So let's change it to some other transition from this inspector. So let's go to our iris. And here you can see that the all iris transition has a totally different set of properties compared to the other one. So as I told you before, every transition has a unique set of properties. So the first one is the similar one. It is about the duration, so I would leave it alone. It is representing 1 second or 24 frames by default. Then of course, by default it is at the center of the card. I can put the left of the gut or the right of the cut also, but let's put it at the center. Then there are some properties which you don't really need to believe it because it won't improve this transition. For example, here, this is, if I played, this is, this is worth this transition looks like. But let me show you how to change these properties just for the sake of showing you how to do that. So first of all, first of all, it is offset to the center, which is by default 0. So this circle appears in the center, but I can change this x offset, so it goes to, it moves on, on the horizontal axis. I can change it on vertical axis as well. Right now the overall ratio is one. That means it's exactly a circle, but I can make it an oval. I can add a border at the interface. I can add some feathering as well. I can also change that, but it's not looking nice in any way. So I would just reset all these and let's make it white. And yes, of course we can add some ease in and ease out. And we can also add some transition curve. But that is how you can play with these properties and you can change them. So let's take a preview of that. So it looks nice. And that is how you can select any transition from the timeline. You can come to the inspector and you can have a look at its properties. And you can also change them if needed. So very easy. I hope you enjoyed this lesson, so thank you for watching and I will see you in the next one.
27. THEORY - What is a Lower 3rd: In the next lesson, we will talk about how to add a lower third individually result. So what is a lower third? This is typically the graphic that appears in the lower third of a video that usually has the name and perhaps the title of your interviewee or whoever is on the camera. It's just that graphic that typically appears in that lower third region. Nowadays though, you often see people getting creative with it, putting the titles in the top third or all over your frame. But still it's often referred to as the lower third. It's generally the name and description of whoever is speaking on the camera or the title of the video, et cetera. So that's what a lower third is.
28. Adding Titles in the Cut Page: Hey, welcome back. In this lesson we will talk about how to add text or titles in the cartridge. Now here, I'm just going to introduce you to text and titles. But when we go to the edit page later on in this course, that is going to be a complete chapter or complete section on how to add text and titles where we will talk about it in much more detail. Having said that, to add titles or texts in the gut page, you need to come to the top-left. We're right next to transitions. There's this Titles tab. And here you can see that these available titles, these are grouped into two categories. The first one is simple titles here these are the ones. And then we have the fusion titles. So we'll talk about the fusion titles in the next lesson, but let's focus on simple titles in this lesson. So here we have six of them. You have left lower third, we have middle, lower third, right lower third, scrolling that you see often in the movies. And we have texts plus and simple texts. So you can bring your cursor on any of these to see its preview in the monitor. So for the sake of example, let's work with one of these. So I will simply grab it and drag it and drop it on top of the timeline, either the upper timeline or the lower timeline. So both will work. And right away you see that initially there was a single track in the timeline, but now the track two appears because here we have dragged it on top of the clip underneath. Okay, so if I undo that, now you can see that I can drag it and bring it in the same track. But for that I'll have to bring it before the first clip. But for this, I would much rather bring it on a separate track so that it is above the video like this. And here you can see this is titled, We have just added by default. This title starts here and it ends here. So it has a duration of about five seconds and it's much longer than the first clip. So to bring this title on just a single clip, what I can do is I can decrease its duration like this. At the same time, let me also increase the duration of the first clip, okay, So that this title doesn't appear on top of the second clip, just a personal preference. Now, when I bring my cursor or play head on top of this title. Here, you can see this, this is just two lines of text. And I can of course select them from here. And I can change their location. And probably I could also change the text, but that is going to be much complicated. I would much rather select this and go to the inspector where I can see and change the properties of this text or title under one banner. Okay? And when I select this and go to the Inspector here you can see that there is this file and the video tab. Both are enabled. The reason is that DaVinci Resolve treats text or titles as a video clip. So that is why the video tab is enabled here. And under the video tab here, you can see there are two tabs. So the first one is title, so we'll talk about these in a minute. And then we also have another tab for settings. So here we have settings like transform, cropping, Dynamic Zoom, composite. But we'll talk about them in the edit page. Let's first talk about the title itself in this lesson. So here you have the upper text line, so I can change it in this textbox. So let's call it baking the low read. I hope I'm spelling it right. And let's change the text for the second text line here as well. By our winner, my co-instructor. And of course I have to change some other properties of these title to make it more appealing or uninteresting. So first, let's make the upper line Board and I also need to increase its size. So doing it using this textbox is much easier and precise. So let's make it 120. Or actually 110 would be better. Tracking, I can, tracking is basically the spacing between individual alphabets. So okay, this looks good. And I can increase the line spacing. And by the way, let's also use some font which is very common. For example, Times New Roman. So here we have Times New Roman, and let's also give the same font to the lower text. So press T. And here we have Times New Roman. And just to make it more interesting or visually appealing, maybe I'll go with changing the color for the lower line. So let's give it some aqua color. Maybe. It looks much better, and it also matches with the color of the radius cool brand. So let's go with that. And let's make it Italica. Regarding its size, let's make it 80. And tracking because in the lower line we have a lot of room here. So let's increase the spacing between individual alphabets. Let's make it 15 ish. And then you can see the other text property. So these are, you'd have, I'm sure you would have seen these properties in a word processor like Microsoft Word, where you can change the font style. We can make it, you know, alignment. We can adjust to the right, to the left, middle, justified. We can change the anchor point, position, zoom, rotation, all that kinda stuff. So we can do it to both the upper line as well as the lower line. But let's talk about some other properties here so we can add some stroke, okay, so the stroke is available and let's give it a different color. Just to show you, I'm not going to use stroke, but just to show your heart works. So let's go with this purple color. And unless I change this side from 0 to a non-zero value, you won't be able to see that. So here it is. And let me reset that to get rid of that. Now, we also have drop shadow, and although this is enabled, we can not see that because all these values are at the default. Okay? But let's just to show you, Let's give it a purple color and let's give it an offset. All right, so here you can see that this helps us making our text more visible in a white background. But I would just get rid of drop shadow for now. And let's come to the background. Okay, so the background, the default color is black and outline color is also black. But right now these values are default, so we cannot even see the background. But as soon as I changed some of these values now I am able to see the background, okay? This is black in color. And here I can play it with its width. So let's go all the way. And corner radius, there are no corners. We can choose the, you know, these values. We can change opacity and it's reset that. So we can make it totally opaque. But I think it would be much better if we have some transparency. Add it to that. Again, if you wanted to reset any of these values, you can simply come to this circle in front of any of these settings. For example, let me reset the hide and all of a sudden you see that the background disappears. But let me undo that. And moreover, at the top of every panel there is this red button that you can toggle. So this drop shadow, I can toggle it and it turns off, but it doesn't make any difference here because there is no drop shadow. Now, what happens when I disable background? You see of course that background disappears. So let me enable that. And by the way, when I disable one of these, it remembers the previous values I have set it to so I can disable that. But when I enable it again, it remembers those values I have set for the background. And lastly, I can show you a little preview of this title that we've just added. So it looks visually very nice, but there is not much happening to this. So let's make it some dynamic title. Let's add some animations to that, but we will reserve that for the next lesson. Stay tuned.
29. Animating the Titles: Hey, welcome back. In the previous lesson, we added this title to the start of our composition. And frankly speaking, it looks very boring right now because there is not much happening here. So let's make it dynamic by adding some animations. And that way I can make it more engaging and appealing. Okay, So normally if I wanted to animate a text or title, I would select it out, come to the inspector. And here we can add some keyframes to its position, to the zooming, et cetera. And that is going to be very technical topic. Okay, let's reserve the topic of keyframes are animating texts or titles in the traditional way for the edit page. Okay, so for now let me close the inspector. So here I'm going to animate this title by using a little trick that you can also use in the cockpit. So that trick is to actually use transitions to animate a tax or a title. So what I can do is I can come to the Transitions tab. We have already seen that, but let's come back to this once more. Now normally, I would bring my cursor or any of these transitions and it will show me a preview of that. But it doesn't work for the titles. So for seeing the preview for a title, I would have to drag any of these transitions to the start or end offered title to see how it works. All right, so for example, let's bring this cross dissolve, drag it and drop it on top of this title at the very beginning. All right, now I can play around that and see how this transition would work for this current title. So if I show you the preview, here is how it would work. So this is additive dissolve. I can also use blurred dissolves or I can drag another one and I can drop it on top of the existing transition at the start of this title and not the original one would be replaced. So here I can see the preview of that and here this is blurred is all working for our title. And you can see the motion blur, which looks very nice. So you can play around with different transitions here and you can add them to your titles and see how it works. Let me show you another one. It looks very interesting, especially for the title. So this camera shape, I can bring it on top of the existing title. And let me show you the preview. So here this is the camera shake transition working for our title. So after adding it on top of our clip, we can select that and of course we can customize that by coming to the inspector. And here you will see a lot of different properties specific to this transition. So for example, here I have the Shakespeare. I can increase or decrease that, the shake strength, the motion blur, I can add it to that, then contrasts so lot of different properties and of course, there's the duration. Now, instead of this camera shake, Let's replace it with something generic. Let's use blur dissolve. So now you can see the set of properties changes. Now it is specific to blur this all okay, so here we have the horizontal strength for the blur, the vertical strength, the starting and ending ratio. Of course, we can reverse that. We can make it ease in or ease out. So 0s in means it comes at a fast speed and then it slows down. Ease Out means that it starts low and then it goes out very fast. So let's add both ease in and ease out to this transition. And let's preview that by pressing the forward slash. So it looks nice. And of course you can see the motion blur. And here, of course, we could play around with the duration as well. So of course it looks nice and let's use the same one for the end of this title because of course we can use this at the start. But we also need to have us little transition at the end of the title. Not just simple disappearance of this title, certainly. Okay. So let's bring this transition and drop it at the end of this title as well. And for this last one here, of course, if I just preview that. Okay, Let's come to the start of the clip. And let's show you a final preview. So it comes in, then it goes out using the dissolved transition. So that is how we can use this little trick to animate our titles. We can just simply drag any of these transitions at the start and end of the title. And that's how we can animate it very simply in the cartridge. Thank you for watching and let's continue with the fusion titles in the next lesson. Stay tuned.
30. Using Fusion Titles: Hey, welcome back. So in the previous lessons, we added this title in the beginning of our sequence and then we animated it using one of the transitions. And in this lesson we're going to look at the fusion titles, which actually are the titles with animations integrated into them. So we will look at some of these which are really neat. And using these fusion titles, we're going to add a thank you message at the end of our composition. So let me come to the end of our timeline. And here, before adding the closing title, Let's take a preview. And here you can see these jagged line at the end of the timeline. Here it shows a Whitney monitor when you reach the end of the timeline. So this jagged line means the end of the timeline has reached. Okay. But let's back up a little bit. And now you can see here, there is no transitions with this last clip is ending abruptly. So first, let's come to the transition and add some transition here so that it ends up nicely. And by the way, this cross dissolve is still set as the standard transitions for let me come to cross dissolve. And instead, let me make that the standard transition. And here I think we can use dip to Color Dissolve. We can put it at the end of this video clip, either manually. So here this feds to black nicely, or I can undo that. And with this trip, with this clip selected and with this transition selected, I can press this applied to the end of the clip button. And here I can do it using this button. Now, having done that, now we can come to the titles and we can look at a few of them. And maybe whichever I like, we can add it to the end of the composition. And by the way, let me increase this real estate a little bit so that we can have a look at all these fusion titles. So here, let me show you a few of them. You can have a preview of them by just hovering your cursor or over these and it'll show you a complete preview. So here this is draw on corners. This is pretty nice. Then we have dark box texts. So text appears in between these two bars, which is really neat. Then we have this clean and simple. Okay, this is good. Here we have text or share. Not bad. Then we have textbox swipe in. Here. There's another one, textbook swipe in. So here we have tech swiping and D bar swiping in the opposite directions. So let's pick one of these and use it at the end of the composition. So I would say dark box text. This is good, so I can drag it and drop it on above this last clip in video track two. Okay, so I'm gonna consign the transition with this title. And here let's take a short review of that. Okay, This is looking good. And I would probably decrease the duration of this title a little bit. And now we can select this title and we can come to the inspector to further player on whether its properties. So under Inspector video and the title tab here we have the controls for this this title. So first of all, instead of this sample text, let me say, thank you. And for Ford are probably still stick with Times New Roman because we have already used that in the beginning. We get regular is fine. And for the size, I could probably make it a little bit bigger around 0.9 is good. And by the way here, in front of these properties, you would see that there is no reset button. So instead of the reset button here, you can see that under these sliders there's this little dot that we can use. We can press that to reset these properties. So I'll bring it back to around 0.9. And so here we can change the tracking of course and line spacing and all that kinda stuff. The next one is the line color, these vertical bars. So these are blue, but probably we can use the same color we used in the beginning. So I will click that and let's use this color that we have already used. So probably this would be good. Okay, This is looking good. Then we have these keyframes buttons. But as I said before, it's going to be pretty technical. So let's leave it for the edit page where we will talk about it in much more detail. So let's come to the last clip and let's final preview here. Okay, Really nice. So in this way, you can use one of these fusion titles, and I would say, these are really nice. And please play around with them to have a feel of which ones you like and which one you will rather PaaS. And I hope now you know how to use fusion titles in your videos. So thank you for watching and let's see you in another one.
31. Adding Music in the Cut Page: Hey, welcome back to another lesson about the cut page. And we are working here on this composition. So I have gone ahead and I have added this standard cross dissolve transition at all the cards to make it look consistent. Now we are going to learn how to add background music to our composition to make it more engaging. And it's going to be pretty basic here. We're going to learn how to add an audio track to our timeline, how to adjust your volume and add some fade in and fade out. That's it. Of course, when you go to the edit page, there's going to be a complete section on the audio where we will talk about audio editing in much more depth. Having said that, let's come to the media pool and hear in the media for DaVinci Resolve folder. There's this audio folder. And inside we have some sound effects, and we have this music folder. So you need to come to the music folder. And here we have these three audio tracks. So to preview any of these, we can just double-click it and it appears in the monitor. Okay. And we can play from here. And right next to that you can see this audio meter, which shows the levels or the loudness of your audio. So the rule of thumb here is that these green bars should not touch red level, otherwise your audio is too high. Okay? So this is looking good. Likewise, we can double-click on the remaining ones to preview them. This is pretty loud. You can see the red level hitting. And then we have this other one. Okay. This is the, this is some pretty low-level volume. And let's come to this first one and let's use it in our composition. So I can, after selecting it and when it appears in the monitor, I can come to the inspector. And here we can change its volume from here. Okay. This is a good level. Here in the Inspector under the audio panel, you can see that there are controls for the volume and pitch equalizer and so on. But here we are going to talk about the volume, only, the remaining ones. We will talk about them in the edit page. So that is how you can preview any of these audio tracks. And if for some reason you can see this waveform, but still when you play them, you cannot hear any audio. It's a good idea to check one of the settings in the edit page. So let's go to the Edit bit. Here. There is this slider, the DEM slider, okay, so you need to make sure that it is turned all the way up for you to be able to hear the audio clearly. Okay, So let's come to the cart page. So let's use this first track for our video. And to use it, we can just drag it and drop it under our timeline. And here for audio, you need to remember that the audio track lies always under the video track, okay? So I cannot drop it above the video. It always have to be under the audio. And here of course I can drop it under the upper timeline or the lower timeline here. I have enough room here, so let's drop it under the upper timeline, okay. But make sure that the start of this audio coincides with the start of the video, okay? And the first thing you notice here is that see how long this audio track is compared to our video. So of course, we need to trim the part which we don't require. So there are a couple of ways to trim it, but before dreaming, it's a good idea to turn your snapping on, okay, this magnet like icon, you need to enable that. And this helps you to accurately position your playhead at the edges of the clips, okay. To place it at the edges of the eclipse very precisely. So before trimming, make sure that this snapping is on, this is off, this is on. And now when it comes to trimming, we can either do it manually using our cursor or we can use a button for splitting clips first, let's do it manually. So what I can do is let me disable this inspector. It's sticking to my space so I can bring my cursor at the end of this audio track. And here you see when the shape of this cursor changes, I can just click here and I can drag it backwards. Like this. Here, I need to bring my playhead exactly where the title ends here. And right. When it bring close to that, you can see it snaps exactly at the end of this title. That is why we turn on the snapping so that we can accurately positioned at the end of the title. So that is how you can trim it using your cursor. But let me undo it for now. Let me show you another method to trim it. So the other method is to use this split clips button. But before using that, we need to delve into dissolve which glib we need to split and at which location. So first, I'll select this audio clip. Then I need to accurately bring the playhead exactly where I need to trim it or split it. Okay. So here I bring it exactly at the end. And now you can see the reason why we turn the snapping on here. With snapping on, I can accurately bring display ad at the end where I want to split it. So with this audio clip selected, I can press this Scissors button. And here you can see it splits the audio clip into two. So this is the part we need, and this is the part we don't need. So we can select it, press the Delete button, and it's gone. And right away you can see the upper timeline. It expands to fill this whole space. So now you know how to use this split clips button in the cartridge. So now probably we can take a preview of this audio drag from the very beginning. So I'll bring it at the start and play it. So you can see it starts in pretty nicely. And let's bring it to the n and take a preview at the end as well. Okay, the video transition is working pretty nicely also these titles, but the audio is ending very abruptly. This is not good. So here, to make it nicely fade out, we can use some transitions. So if you come to the transitions panel here, we already saw this video transitions. But if you remember right next to that, there was an audio panel as well, where we have a few audio transitions. So let's make use of this standard audio transition, crossfade 0 dv. So we can drag it and drop it manually to the end of this audio clip. So here you can see, I can select this. Are first, do it by dragging and dropping. So I can drag it and drop it manually at the end of this audio clip, just like this. And I can also do it at the start. All right, but let me undo that. And the other method is to use these buttons. So first I need to select the track where I need to add these transitions. And with this transition selected, I can add it at the end of the clip, but I can also add it at the start of the clip. And then we can take a preview of that once more. It's working fine, but probably we can increase its duration. So let's select that and come to the inspector. Here you can see its properties for the duration by default is 1 second. Let's make it to second for now and see how it works. Okay, this is looking very nice. And we can also select the starting transition. Let's also make it to second. And now with the duration of these audio transitions changed, Let's take a final preview and let's disable the inspector. Okay, so we have some nice audio fared in. We have these cross dissolve transitions at all these cards. Let's come to the end. And I think it is looking very nice. So that is how to do some basic audio editing in the gut page. And of course we will talk about it in much more detail in the edit page. So thank you for watching this lesson and I will see you in another one.
32. A Note about Ripple Delete: Hey, welcome back. Before we go any further, I wanted to share an important information about one of the tools called ripple delete tool. Okay? And before we dive into that here, you notice that here we have an audio track which is equal to the duration of this audio track is actually equal to the length of our whole timeline. So now let's talk about how the ripple delete tool normally works. So normally what you would do is you would select a video clip from your timeline that you want to delete. You press the Delete or Backspace button so that clip is gone. And at the same time, the remaining clips in the timeline would move to the left to fill that gap. So this is how the ripple delete tool normally works. So let me try to delete this clip. For example, let me pick on this clip and let me try to ripple delete that. So I selected that clip, I press the Delete button. And here you can see that the Delete button, the ripple delete is not working properly. So although the clip is gone, but the gap is still there, okay, So the ripple delete is having some problem here. So some students have reported this problem and I wanted to touch upon that. Now, please note down that this is not a bug in dementia is all. It is working totally fine. Okay. The problem here is that the music track underneath it is equal to the length of the whole timeline. So it is not letting the ripple delete happen because if the ripple delete work normally, what you would do, what it will do is it would shrink the whole timeline. But here, the audio track is equal to the length of the original timeline. So if you ripple, delete it, the audio track would be rippled as well, but it cannot be rippled here. So basically this music track is not letting the ripple delete happen. And here by chance, it is just happening to be an audio track. It could be a video track, but you would see the same result here. Now, let me remove this audio for a moment and see what happens. So if I press Undo to bring that clip back, let me select this audio for a moment and deleted temporarily and see if the ripple delete would work. So with no audio, I select that clip again, press the Delete button, and now you can see that the ripple delete is working just fine. And let me show you another thing. So I press Undo to undo this ripple delete, and let me bring that audio back as well. Now see what happens if the audio track is still there, but it is shorter, so it is not lying underneath that clip to be deleted. Okay. So in that case, let me show you what happens. So again, I would select that clip, press the Delete button, and it rippled deleted. Okay. So here clearly there is no audio underneath to interfere with that. But if somehow I selected this clip or this clip and ripple deleted here, there is the audio underneath and that would not let that happen. So clearly here the reason is that the audio track, because it is much longer, it is not letting the ripple delete happen. So let me restore this audio to its full length. So in this situation, what you can do is first you can do the first, you can get rid of that clip. And then when the gap is still remaining, you can do another step by selecting this resulting gap and pressing the Delete button again. So here by doing it in two steps, you're really pushing to insurers or to really try to ripple delete. So it will see what it can do for you. It will look around and see which clips can be reported and ripple them and it'll ignore the rest. So I press the Delete button here. So this texts clip and this last clip, those could be easily report, so it search report them, but ignore the remaining audio, which could not be repelled. So in these situations, you can delete the clip first and then you can delete the resulting gap. But I would really encourage you to do that because this could, due to all kinds of problems. For example, one problem could be that let's say you had a sinking between the audio clip and the remaining video clips. So let me undo that. Let's say everything is sink. And now you delete this clip first, and then it is still linked by the way. But if you delete that gap, now the audience till there were the remaining glyphs moved over. So it is clearly, so the remaining timeline is clearly out of sync now, and now you'd have to sync them again. So let me undo that and restore these clips. So I hope now you know why this problem could occur and how you can overcome that. Thank you for watching and I'll see you in the next one.
33. Exporting Video in the Cut Page: Hey, welcome back. So we have learned how to put together a sequence in the timeline of the cut page, and now it is time to learn how to render it as a final video. Alright, so it's very easy and straightforward. You just come to this Quick Export button at the top right off the cart page. And as the name suggests, it is quick. Alright, so there's not going to be a lot of options. They are going to be some presets that you can use to quickly export a video. All right, The first one is 0.26. For the remaining ones are about these three social media platforms, YouTube, Vimeo, and Twitter. So in the first one, it will render a video and put it in your computer at the desired location. But for the remaining three, not only it will do the first step of rendering and putting it on your computer. But then it will also do a step to where it will take that video and upload to one of these platforms that you select all from within DaVinci Resolve. So you don't have to go to these platforms to upload it to their manually. It will do automatically for you. So first, learn how to do the first option. And then out of these three social media platforms, Let's look at the most popular one, which is YouTube. So first things first, H.264, it has some preset options that you can't change. So actually the resolution, it is taking the same resolution that your source clips were in. So our source clip were a source clips were in 1920 by 1080 P. So it is using the same resolution, same about the frame rate. Then, depending on the length of the timeline, it is showing you the duration here. Right now it is 28 seconds. Then we have some video codec and audio codec information. So with these settings, we can press the Export button. And now it is asking, where do you want to save it? So let me place here at the desktop so you can choose the location where you want to save it, and then you can give it a name. By default, it is taking the same name from our project, new project. So with these options, I can press the Save button. And now here you can see that it is rendering. And now it's completed. So I can go to the desktop and take a look at the rendered video. Here it is. All right, It looks great. And then let's come back to the Vinci Resolve and also explored the other option of one of the social media platforms. Let's look at the YouTube. Okay? So these six settings would not change, okay? Whichever option you select, these six settings would stay the same, of course. And then depending on which option you select, it will ask you for permission to gain access to your account. So here it is asking me access to my YouTube account so I can click the Manage Account button. And here I can sign into one of these. I don't have account with Vimeo or Twitter. I have a guard with YouTube. So let's sign-in. And here I'm going to sign into my account. So after I sign into YouTube account, here it is asking me for some permissions. So of course I'm going to grant those permissions, I'm going to allow it. And then here you can see that I am signed in now. I can press Save and let's come back. So here, after I sign in, I need to make sure that I have this option. Upload directly to YouTube. Check, all right. If it's not, then it won't do anything. It will just render to your desktop or wherever. It won't render to YouTube. So with that checked, it gives me some additional options. So whether I want to keep this video private or public, I would select public. And then it falls under the category of film and animation. So that's fine. I can give it a title and you can give it a description if you want. And then I can simply press the Export button. And just like that, it is asking me for the name of the project. Let me call it New Project 1. Save. And here it starts rendering it first. So this is the first step. And after it finishes rendering now it is uploading to YouTube as well, all within the same vendor. So now it's done. So after you upload your video to YouTube, it's going to take some time for YouTube to process your video. And after a while here I am in my YouTube channel. And you can see the video has been uploaded. And I can take a preview from here. So that is how you can render a video in the DaVinci Resolve cart page. And now you know how to upload it directly to one of these social media channels. So thank you for watching this lesson and I will see you in another one.
34. More Tools in the Cut Page: Hey there, how's it going? Welcome back to another section about the cut page of DaVinci Resolve. And right now, it might seem that we have guard pretty much everything that has to do with the cut page. We talked about the timeline, the tools below the monitor. Then these couple of these tools talked about the media pool, transitions, titles, Quick Export inspectors. So we have covered most of the things. But yet there is another set of tools that we haven't even talked about yet, because it's not even visible and it's actually hiding behind this Tools button. So when you click that, here, we have another set of very useful tools that allow you to manipulate your videos in different ways. And under each of the tools, as you can see, there are some settings associated with the selected tool. So here's the first one, the transform tool. So these are the settings for the transform. Then we have the crop tool. So these are the settings for the crop. Then you have the Dynamic Zoom, you have the composite, we have the speed control, the stabilization, and so on. And if you select a video clip and come to the inspector, here, you can see that under the video tab, we have the same tools available here also. Like we have the transform cropping, Dynamic Zoom composites, speed, stabilization, and so on. So what is the difference between these tools and these tools? Well, the difference here is that these tools under the monitor, these allow you to do things very quickly. So here you have only a limited set of adjustments available that you can change. While if you come to the inspector here for the same tool, we have a lot more settings. For example, let me pick on the stabilization tool. Here you can see that there is just a turn on and turn off button here. These three stabilization modes to stabilize verte on itself and the reset. But if you come to the stabilization here, you can see that not only this button and that drop-down here we have some more settings available that are not accessible here, like the camera log, Zoom cropping ratio, smooth, strengthen. Same is the story with all these tools in the inspector panel compared to these tools below the monitor. Okay? So here you have some just very basic settings. And here you can do much more with these tools in the inspector and you can go much deeper into the selected feature. And of course, all these inspector tools are available in the edit page as well. So from the next lesson, let's talk about each of these tools one-by-one in detail. So I'll see you then. Cheers.
35. THEORY - What is Aspect Ratio: Now let's talk about what is the aspect ratio of a video or an image. It's the width to height ratio that is represented by numbers such as 16 by 9. That's a common aspect ratio of a lot of television or computer monitors today. More like your standard wide screen of one-to-one aspect ratio would be a square. On the other hand, a nine to 16 aspect ratio would be nine units wide and 16 units high, or the opposite of 16 by 9. Also remember that the aspect ratio is different than video resolution, but it is related to that. If you think about the standard HD video resolution, 1920 by 1080, if you do the math, 1920 by 1080 is a 16 to 9 ratio. So aspect ratio is literally just the ratio between the width and the height of your frame. So I hope now you understand what the term aspect ratio means.
36. The Transform Tool: Hey there, welcome back. So now we're going to talk about these tools one-by-one, and let's get into it. So first of all, for the demonstration purposes, I will pick on one of these video clips. So it's sort of this clip. Let's pick this one because there is more happening in this clip. And let's delete the transitions at the edges of this clip so that we don't have these transitions to worry about. So now let's get to the first tool, which is the transform tool. And just for comparison purposes, let me also open the inspector. And here you can see under the transform tool these are the different options. So the first one is the enabled Disable option. Then we have the zoom, zoom height. Then we have position in the x direction, in the y direction, we have rotation angle, which your flip horizontal, flip vertical and reset. Okay? And if you notice in the Inspector, we have very similar set of tools available. So first of all, we have double reset and then these individual reset buttons. Then we have these keyframes which we will talk about in the edit page. So the remaining tools, the remaining settings are quite similar here we have Zoom x and zoom. Why? We have the position x and position y rotation angle. The only difference probably is the anchor point which is not showing up here, but here it is showing. We have pitch yaw and flip horizontal and flip vertical. So if you wanted to play around with these settings, you can either play around with them here or here. Both of them would do the same thing. Having said that, let's talk about these one by one, okay, so the first one is Zoom width. All right, so zooming, basically zooming in would make your video or image look bigger and vice versa. And another important thing is that whether it's a video or an image or a logo, these tools are going to affect them the same way. All right, so here we are going to transform that and we're using this videoclip to demonstrate that. But we could also use an image or a logo, so it would work the same way. So let's talk about the zoom worth. If I zoom in here, you see that it's becoming bigger and the other way. So I am basically clicking here and holding my left-click and then dragging my cursor around this textbox. So in this way I can zoom in. And if I move to the left, I can zoom out on this. All right? And here you can see that I'm not even playing around with the Zoom y or zoom height, but it's also changing. The reason is that these two are linked. And when these are linked, it basically preserves the aspect ratio, meaning the ratio between height and width. When I change one of these, the other one automatically changes to preserve its aspect ratio. Alright? So I can make it smaller or bigger. And the, the, you know, the proportion of this video would be same. And the proportions of this video would be conserved. Now, what happens when I click this log in the middle, it is the Zoom link. So what if I break this link? Now? I can change these values independently. Okay, Let me, by the way, let me undo that for a minute. And here you can see when these are locked. Now if I wanted to reset any of these values inside this text box, there is this reset button. So if I click one of these reset buttons, the other value resets automatically because both of these are linked. All right, now let's try to break this link and see what happens. Now, I can change these Zoom x direction and the Zoom y value remains constant because they are not linked anymore. And now I can distort it either in the horizontal axis like this horizontal direction, or in the vertical direction. And I can distort in any way to make it look really ugly. And now you can see that I can change these values independently. And when it comes to resetting, I can reset one of these values. So it will only reset that value. The other one would stay constant because they are not linked anymore. And let's also come to the inspector. Right? And you can see that the link, right now, this link is disabled and now I can reset. So now you can see that I reset it that, but this value is still the same. So I'll have to come to this and reset this as well to bring it back to its normal shape. So I will link them back again. Now, another thing you might have noticed is that as soon as I play around with any of these settings or click on this transform tool, a box appears around the boundary of the of this video, or even if it was an image, a boundary would appear around that. So if I wanted to transform it using this box, then I could grab any of these circles at its corners. And in this way, when I move it, I can zoom out or I can zoom in. And now the aspect ratio would be preserved if I move it from the corners. On the other hand, if I grab these circles from any of its sides, now, it would be out of the aspect ratio, so now I can stretch it and the other side would remain constant. Alright, so I'm stretching it horizontally. Here. I'm stretching it vertically. So in this way, I can distort it using these circles at the sites. So again, grabbing form the corners. It preserves the aspect ratio, but grabbing from these sites and changing these, you know, these locations of these points. It does not preserve the aspect ratio. So to reset all these in a single-step, I could use this Global Reset button either from here or here, and I'm back to square one. So that is the zooming of width and height. The next one we have is the position in the x-direction or the y-direction. So by changing any of these, I can, you know, move it either horizontally in deposit positive x-axis or positive or the negative x-axis, I can move it in the positive y direction or the negative y-direction, and I can change its position like that. Or I could use my cursor to drag it around. I can click anywhere on this video or the image and I can change its position. Now while doing so, make sure that you do not come close to this center point. Okay? So if you grab from here and move this point around, you're not actually changing the position because you see the position. Let me do it again. So here nor down this position in the x direction and y direction. And when I change this point, you see that the position does not change this center point. Actually, it doesn't have anything to do with the position. It is actually the anchor point. And what is an anchor point we will see in a minute. So just make sure that if you are using cursor to change its position, don't click on this center point. Click anywhere and you can drag it around. So this is the position x again, and this is the position y. The next one is rotation angle. All right? So when you rotate, it is actually rotate around this anchor point, which is right now at the center of this video. And which I cautioned you about while changing the position. Okay, so we haven't played around with this anchor point here. So let's see what happens when you rotated. Right now this video is rotating exactly around its center because this point is located at its center. Now, let me reset that. Now imagine if you move this point elsewhere, let's say around this point here. Now, see what happens when I rotate it again. Now it is not rotating around its center because I have moved this anchor point elsewhere. So it is actually, it will always actually rotate around its anchor point wherever it is for right now, this is the anchor point. When I rotated either in the clockwise or anticlockwise direction, it will always rotate around that anchor point. So that is why it is very important not to mess around with this anchor point, which is at the center by default. And just to make sure you can also come to the inspector where you can see the anchor point. So make sure that the anchor point, x value and y value are always 0 unless you deliberately want to change its location. So after rotation, the next one is pitch, which is actually the rotation in 3D. So it rotates the image or the video around the x-axis. So see what happens if I change this anchor point. You see this is the x-axis and here it is rotating this video around that horizontal axis or the x-axis. So this is pitch. The next one is your. And your actually rotates it also in three-dimensions, but around the vertical or y-axis. So I can rotate it like this around the vertical axis, either in one direction or the other. And if I wanted to reset everything, I can either reset it one-by-one or I can come to this global research and do it all together. And the last two features are flip horizontally. So this one is going to flip it around the y-axis. So the left side becomes the right side and vice versa, like this. And I can also flip it vertically around the horizontal axis. So if I do that and now it becomes upside down. So of course I can use a mixture of both, but then I can also reset using this button. Now, another thing you would notice is that as soon as I change any of these settings, for example, let's play around with your, you would see that a small red dot appears above the transform tool. So this is a visual indication that for this particular clip, some kind of transform has been applied. Okay? So you can see that this red dot appears only about the transform tool, not above any of these tools. So here, this shows you that some transform has been applied to this clip. If I also had adjusted the speed, There's another red dot would appear about the speed as well. And if I reset this transform setting, you can see that that red dot disappears immediately. So these are all the details about how this transform tool forks. Now, let me also show you a real life example of where this transform can actually be used. Alright, so let me go to the videos, and let's pick one of these videos. Let's actually pick this video of fill. Okay, So, yeah, this one. Let's double-click that. And let's actually pick a small portion from this video. All right, so, so I'll go to videos compressed. And let's double-click on this talking head video of fill. And here it appears, and it's actually quite a long video. So what I can do is I select a small portion from this. So this is the invoice. Let me pick a really small portion. Press O for out point. And now let's bring this above this video clip. So in this particular case, you can see that there is some audio that we don't actually need for this purpose because I'm just demonstrating. So what I can do is I can press this video only option so that the audio from this clip is ignored. So now I can grab it and I can bring it on top of this clip which we are demonstrating. And now I can maybe expand its endpoint and outpoint to mass the lower video. And let's use Transform tool here. So what I can do is I can select this video clip. And now what I wanna do is, since this video is above another video, I want to make it smaller and I want to bring it at the lower corner. All right. So I will come to the Tools. I will with this lock on, I will zoom it out. Alright. Now I want to bring it to the lower corner. I can bring it to this corner or this corner. But I think this corners empty so we can bring it here. So either I can change its position, I can change it from here, or I can drag it manually using my cursor. Now, while doing so, as I said before, make sure that you don't drag it from this point, which is actually the anchor point. So we don't want to mess around with the anchor point. So I can click anywhere on this video and I can drag it around and bring it to this lower left corner. And by the way here I'm demonstrating with the help of a video. But it could be a logo, it could be an image. It would work just like this. Now if I play that, this is an example of a video inside a video. And I'm sure you must have seen videos on YouTube similar to this, where somebody is demonstrating something in PowerPoint or in some other software. And in the corner you can also see their face. So this is actually an example of a talking head video where you can actually see the demonstration and the person is also appearing in one of the corners. Now, if for some reason I want to disable this transform feature with this clip selected, I can disable this transform, a tool either from here or here. And you can see that we're back to square one. But then I can enable this transform. And you can see that we're back to square one, but then I can enable transform. And here you can see that it remember our transform settings. All right, so that is how you can transform either images or videos or logos using the transform tool in DaVinci Resolve. Thank you for watching and see you in another one.
37. The Crop Tool: Hey there, welcome back. So in this lesson we're going to talk about the next tool, which is actually the crop tool. So to demonstrate that, let me move on to the next clip in the timeline. And let's demonstrate using this clip. So when you select the crop tool and let me also maximize this panel, cropping panel here. You can see that first we have the enabled and disabled button and the reset button. And then we have these buttons crop left crop right, top, bottom, and then we have softness. And we are pretty much the same thing here, crop left, right, top, bottom and softness. So we can change, we can change from anywhere and it would have the same effect. So here, let me click here at the top left, sorry, crop left. And let me drag my mouse around. So here we're actually cropping prompt the left side. And here we can crop it from the right side, we can crop from the top. And let's actually use these sliders here. So here we are dropping from the top, crop in from the bottom and so on. And not only these sliders or these buttons, you can also use this box to do the cropping. So we can grab these circles either at the corners or the edges, and we can also crop it like that using this box. Now, what's actually happening when we're cropping is that we are losing the parts of the video which are not visible. Okay, So we have lost parts of the video from the top, bottom, right, and left. And that is how cropping works. And of course we can crop it any shape or form. We can make it rectangular, we can make it whatever you like. Now, sometimes when you're cropping or it is, it also applies to transform. Sometimes while you are transforming or cropping, this box disappears. For example, let me disable the tools, let me come back. Now you can see that there is no, no box here. So if you wanted to bring that back, either you can, you know, you can click again on the respective pool and the box will reappear. And then you can do the cropping or transforming operation, whichever you are doing. Now, let me make it smaller and see what happens when I click on this box and when I move it around, see, it is actually changing the contents of my video. So basically what's happening is when I move this box, it is actually selecting different portions of the wrist video. Alright? Now, what if you wanted to move this window in its current state? Well, for that, you would have to go to the Transform and click on that again to bring this box. And then you can move around. And now you can see that it has a different effect. Now when you move inside the cropping, it was changing the selection. But when I move it with the transform tool, now the selection is the same. I can just move this around with the current state or the current selection. So let me come back to, and by the way, let me reset this transform and let me go back to the crop. So these are the crop left, right, top and bottom. And lastly we have the softness. So what if I add the softness? If I move to the right? It adds the softness on the outside, so it is actually increasing the selection. Let me actually move this cropping little bit away from the edge, soupy so that you can clearly see. So if I am moving the softness to a positive level, you can see that it is actually expanding my selection. And it is adding a vignette type structure at the edges so that these edges are not as harsh. Now let me bring this, let me use this slider four. Bring it close to 0. Let's say if I make it 0, it means there is no softness at all. Now what happens if I bring it to negative value now it is actually decreasing my selection and it is adding a vignette kind of structure on the inside of the selection. Okay, So that is how the softness works. Now, let me show you an example where you can actually use the cropping. So let's come back to this video where we actually implemented a talking head style video. So let's select this. Let me come to the Transform and bring this box. Now, if you concentrate on this, you can see that there is a lot of extra detail which we don't actually need. If we just wanted to focus on the person talking, we can probably crop from the left and right. So I'll come to the crop tool selected with this clip selected, and let me click again to bring that box. And then I can draw from the left side and from the right side the portions that I don't need. So there is no room for cropping at the top and bottom. But we can crop from the side to remove the unwanted portion. And you know, we already used the transform tool to make it smaller and to also bring it to the corner. And we can also probably flip it around and flip horizontally just for fun. And lastly, this is the cropping we have done to this image. So we can, if we don't want the cropping and D, the transform, we can disable them like this. And when I enable them, again, you will see that it remembers our settings even after we disaggregate them. Okay? And even if I select this clip, now you can see this red box only appears above the Crop button because we only did some cropping at particular clip. Yes, we transformed it but then we reset it. If we give it a different different, let's say flip it around. Now you see that this red box appears above the transform tool as well. So this is how cropping works. It actually removes the unwanted portions from the video. And the way it works on the video, it is the same way it also works on the images as well. So I hope now you know how to crop videos and images in the cockpit. Thank you for watching and let's reset before moving on to the next lesson. Okay, so we're back to the original clip. See you in the next one.
38. The Dynamic Zoom: Hey there, welcome back to another lesson on DaVinci Resolve. And in this lesson we're going to talk about another very interesting tool to add some more life to your videos and images. All right, and the two we're going to talk about is guard D Dynamic Zoom tool, which is the third rule here. Now, to demonstrate this tool, here, I have added a video. So this was our original timeline, it is ending here. And after that, I have added this video of this person's smoking. And I have also added this still image. All right? And both of these are available in your media provided to you in the resources. So if you come to the videos, here, you have the video of this person's smoking. And then if you come to the photos here, you have this still photo available in the resources. All right, so we have added both of these at the end of our timeline. And now if you come to the Dynamic Zoom, this is the Dynamic Zoom. When you click that, two boxes appear on your frame, okay? One is the green one. Here we have the green box and then we have the red box. And by default, the green one is smaller and the red one is bigger. So here you need to remember one thing that this green box, it, it refers to your starting point and the red box is referring to your ending point. Alright. So when we play our video using Dynamic Zoom like this, it will start from the area inside the green window, and then it will move over to the red window over the course of your entire clip, where this Dynamic Zoom is applied. And depending on the relative size and position of these two windows, it might involve some zooming, are panning or both. All right. And in the next few minutes we're going to talk about that in detail. All right, now, just for a moment, if you look at the options for the Dynamic Zoom here in this toolbar, and by the way, let me enable this. This is the Dynamic Zoom. So here we have some options for the Dynamic Zoom. And here we have some options. So let's look at them closely. We have the zoom preset, friend preset, angle preset. We have the swap, linear ease in, ease in and ease out, ease out. And then we have the reset button. And for this instance, inside the inspector, we are actually fewer options. So we have the swap option. We have these linear ease in, ease out and ease in and ease out port. But we have these presets missing in the inspector. All right, so these presets are actually provided here for your convenience so that if you want, you can apply that Dynamic Zoom very quickly and easily. Now, let's bring our clip to the start of this clip, where we have applied the Zoom and Dynamic Zoom. So let me select this clip. And here let's apply this first zoom preset, okay? So the first one, and here you can see this green boxes smaller and red box is bigger. So let's see what happens when we play that. As you can guess, it will start from this green window and by the end of this clip it will move to the red window. And over the course of this clip that would involve some zooming out. All right. So it starts small and then it gets bigger. It's actually zooming out towards the end of the clip. Now, let's get back to the same clip and now let's try to exit. You read this difference a little bit so that you can see this difference more, more clearly. All right, so now the V haven't messed around with this red box. It is still covering the entire frame, but the green box as becomes smaller. So now the duration of this clip is still the same. So it would have still the same time to move from one window to the other. Now, this green window is even smaller. So as you can guess, now, it would have to zoom out much faster compared to before. So let me preview. So you can see the rate of zooming has not increased. And again, the reason for this increased rate of change is that now it has to bridge bigger gap between the sizes of these two windows. All right, so now let's see what these four options do. The linear is in, ease out and ease in and ease out. All right, so you can think of these four buttons as little graphs. The first one is linear. That means its rate of change or rate of zooming is going to be constant. All right? So if I bring it to the star and play it, it's going to zoom out at a constant rate. But if I come to the ys in, it is actually, as you can see on this graph, the rate of change is very small at the beginning and towards the end, the rate of change is very high. All right, so that means it starts slowly zooming out and then towards the end it zooms out much faster. It starts slow and it becomes faster towards the end. Then if I come to ease out, it is the opposite of ease in. It actually starts very fast. As you can see, the rate of change at this curve is very fast at the beginning, but it becomes smaller towards the end. So it will start very fast, but then it will slow down towards the end. And here is a preview of that. It starts very fast and then it slows down towards the end. Then lastly, we have the ease in and ease out. So with this curve, you can see the rate of change is very small in the start and in the end, but it becomes greatest in the middle. So with this S pattern selected, let me play it again. So it will start slow, then becomes faster and it slows down towards the end. So these are the four patterns you can use to make it ease in or ease out or both or linear. So let's select this ease in and ease out, and let's come to another button which is the swap. All right, so let me come back to the same video clip and see what happens when I click this Swap button, okay? The red box is bigger and the green boxes smaller. So when I click this flip or Swap button, now the red box becomes much smaller and the green box becomes bigger. So the two windows have actually switched their places. All right, so now with this flip tool or swabbed tool pressed. Now if I play it again, you can see that it will start again from this green window. Just remember that green window will always be your starting point. So here it start from the whole frame. And by the end, it would end up with this little area in the middle. And as the clip plays, it would involve some zooming in. All right, and with this eschar, it will start slowly, then it will become faster, and then it will slow down towards the end again. All right, so here, let me play that. Now you can see it start from the whole frame and then it is zooming in towards the red window. So you can see that initially it was zooming out. Now with this swabbed button pressed. Now it is zooming in because the two windows have switched their places. So I will turn off the swap. And now the two windows had been restored to their original places. Let me change these windows in another way. Let me make this green window a little bit bigger, and let's make this red window watch my smaller. All right, So now you can see that even though the flip button or app button is not pressed, now it will start from a bigger area and it will end with a smaller area. So now if I play it again, now you can see, oh, I missed it. So let me play it again. Now it is again, zooming in even though the swap button is turned off. Because now the relative size of the green window is bigger and the red window is smaller, right? So you can see that I can change the shape of these windows in any way I want it. I can even resize them. I can relocate them to new positions. Another important thing to note here is that this area outside this green window, it is never considered because we start from this, whatever lies inside this green window, by the end, VR inside this red window. So this outer area is never considered. So you can think of it as, you know, as if we were cropping that because it would never appear when we blend this clip with this kind of Dynamic Zoom. All right, so we are actually losing this outer area. Now, let me reset that. And now let's talk about these three buttons, which are the presets available to you, or you can also call them templates. All right. So the first one is Zoom presets. So if I click that, it is the same two windows we have just seen. All right, so it start from this green window, ends up to this red window. And here you can see the center of both these rectangles is the same. So that means while going from one window to the other, it only involves zooming. In this case, it is zooming in. In this case, it's zooming out. But if I flip it, it would be zooming in. But there is no planning involved. Alright? There is no change of location. It's only just zooming out and zooming in. So that is why it is called Zoom presets. The next one is banned preset, and I hope you understand the term PAN. Pan means moving around on your frame. All right, so when I press pan, now you can see that it is completely different from Zoom. So in this particular case, this is the green window, and this is the red window. And as you can see, both of them are exactly the same size. So there is no zooming involved. Instead of that, there is just banning social. We start with this green window, and by the end we move to this red window. So that means we're actually moving towards the left side. So let me show you this in action. If I play that, you can see that we start from this green area and then we move towards the left as we play it. Now if I come back and let me flip it. Now you can see the relative position of these windows has switched. So now we start from the left side, we move to the right side. So it is actually involving banning towards the right side, as you can see in this preview. All right, I hope this is making sense. So I will reset that as well. And now let's talk about the third template available, which is an angle preset. So here the green window is in one corner and the red window is in the opposite corner. And again, you can see that there is no zooming involved because the size of both Windows, it's exactly the same in this case. But there is just banning and this red line is actually showing the direction of panning. So it starts from this point, the starting point of this line, and it ends up with this point, the ending point of this line. So that is the direction of panning at an angle. So these are the templates given to you for your convenience, but feel free to play around with them in any way you want. Okay? For example, let's say we wanted to start from this lamp only. And by the end we wanted to end up with the face of this person. Alright? So in that particular case, I would further make this window smaller and further move it around so that we can only call this lamp. So that would be our starting window. And by the end we want to only focus on this person's face. So let's resize that and let's also pan it. And in this way, not only affecting the Zoom, but I am also giving it a path to Ben. All right. Let me make it a little bit bigger and further resize that. So I've completely redefined this angle. And you can see that in this case, the green window is smaller. So from going, you know, while going from green to red, it involves some zooming as well as panning. So it's combination of zoom and pan. So again, I can start, you know, come to the star. Let me show you the preview. So start from the lamp and it is panning and zooming towards this person. Okay? So in this way you can implement Dynamic Zoom to your videos and images. Now, let me come to this still image and show you how you can apply Dynamic Zoom to this. All right, so let's say for this particular image, we wanted to start off with this clock. So I will resize this green window or our starting point. And I'll bring it and focus it only on this clock. And by the way, let's assume towards the end we want to have this clock as well as this black chair and the study table in our view. But we don't want this this white table. All right, so what I can do is I can, okay, I will resize my red window, our ending point. And I can make it smaller, or actually I can make it bigger here. And let's resize that so that we can only see this table, this clock, but nor the white table. All right, so that is how you can change that. And I can also add some ease in and ease out to that. And let's come to the beginning. So it will start just from this clock. And towards the end, it would be zooming and panning both. And towards the end we would be looking at this red window. All right, so here is the preview for that. So it starts slow, it becomes faster in the middle and then it slows down towards the end because we have the S curve selected. All right, and now if I wanted to make this zooming and panning faster, I can reduce the duration of this clip because we have the freedom. This is a still image so I can make it longer or shorter. So now if I play that, you can see it would be much faster. It had less time to do so. Or I can increase its duration. Like this. I can make it very, very long because it's a still image, so it doesn't make any difference. And now if I play that, you can see that this zooming and panning would be much, much slower because now for the same moment, it has a lot of time to do that. So you can see it is much, much slower and subtle. So that was the dynamics room. And I hope now you understand all the nuts and bolts of this dynamic zoom tool. So thank you for watching, and I will see you in the next one.
39. The Composite Mode: Hey there, Welcome back. In this lesson we are going to talk about the composite tool right here. And under the composite tool, there are actually only two settings. So we have the drop-down list from where we can select one of the composite Moore's. And then we have this opacity. And we have exactly the same thing inside the inspector. So here we have the composite modes and then we have the slider for opacity. Then of course the reset and disable enable buttons. So what this actually does is it blends or combines two or more videos in the timeline in different ways. The videos which are put on top of each other, like here we have one video on top of the other ones. So here we can use the composite model. So of course, to use the composite mode, first you have to put multiple clips, two or more clips on top of each other, then you can use the composite mode. Now, let me show you how it actually works. So here we have these two clips. So first, let me select this smaller clip and let me make it actually a little bigger so that you can see what's happening. Okay? So with this clip a little bit bigger, now you'd be able to see what's the effect. Now let's come back to the composite and let's try different modes. So this is the normal mode. Nothing happens. And here we can add them, okay, So the two clips are being added here. And it's not working here because there is no other clip here. It's just a single clip. But here in the central area there are two clips, so it's mixing them in the addition way. Alright, then we have the color, we have the color burn and so on and on top of this, we can also turn this opacity up or down to how are different effect. And then we have different other ones. So this is the divide button. And right now it might seem that it's not working. It's not giving some nice or presented oil reserves, but actually you are wrong. So let me come to the end of this sequence here you have this video of the person's smoking. So what I did was I added a text clip below this video clip. Normally the text clips go on top. All right, but here in this particular case, I put this text under this video clip. And since the videos on top of the text, you cannot see the text because the video is not transparent, right? But let me go to the lower timeline. And here this clip is represented by this clip. So let me right-click on that and let me, you know, this is right now enabled, but let me check that again. And now this is disabled. So it is as if this clip would have disappeared from your timeline. So all you can see is the lower clip underneath, which is the text. So what I did was I actually went to the titles and here I used the basic title. I brought it underneath this video clip and I just wrote the word Da Vinci and made it really big. That's all I did. Now that you have seen the text, let me go back and right-click and let's check it again to enable this clip. So now again, the text is not visible. But let me show you what happens now. This composite mode was not very useful in this particular instance where we had both the videos, but see what happens when we have one clip as deck. The other is a video clip. So this is the Add feature. And here it's simply adding the two and it's putting the text on top of the video clip. Then let's try some other ones. So here is the color, Color Burn. This is the darken. So this is where it gets really interesting. Okay, So the remaining video disappears except where the text is. Ok. So now the video is shining through this text as if it was a stencil or something. Let's go to another one difference. Ok, and now you can even see the video. And we can also turn this opacity up or down, either from here or here. And you can see it gives you different results. Then we can try something else, like let's multiply it, okay? Again, the video disappears. And now you have the video shining through this text in different ways. Let's go to something else when light, okay, now you can see parts of the video, okay? So in this way you can have different kinds of effects using different composite modes. And by the way, this is not a static effect unless you were working with a photo and texts, where in that case it would be static. But now here remember it's a video. So when I play that, this effect actually changes as the video changes. Okay, so this is really cool effect. So you can see it is blending text with the video in different interesting ways. And I'm sure you have seen YouTubers and other video creators use this kind of effect. So now you know how they create such effect, and now you can also use it in your video projects. Okay, so that was the composite modes. I hope you enjoyed this lesson. So let's move on to the next one.
40. The Speed Control tool: Hey there, Welcome back. In this lesson we are going to talk about the speed tool. Okay? So using this tool, we can speed clips hub, we can slow them down and we can even play them in the reverse direction. Okay? So under the monitor, when you select the speed option here you have two settings. You have the speed itself and you have the time code, which is actually the duration. And then you have the reset button. So the first option is speed. And here you can see the speed is in multiples. By default it is 1, that means the original speed. And we can change this option. The next one is the duration. So this is actually not an option. It is just a and information it is showing you. So depending on which clip you select, it is showing you the duration of the original clip, which the selected clip is a part of. Okay? So depending on which clip I select, it is showing the duration of that respective original clip. So right, notice 25, 23, if I select a different one, it is 717. If I select even a different one, It's 1005. So it's actually changing depending on which clip I'm selecting. And one thing to note is that it's not showing you the duration of the selected clip. It is showing the duration of the original clip, which the selected clip is a part of. And I hope you remember the format of this time Court I showed. I told you this earlier in the course. So the first two digits represent our, the next two digits represent the winner. Then the next two digits represented the second and the last to represent the frame. All right? So right now it is 25, 23. So let me verify this by going to the videos compressed folder. And here you can see this is the original video which this selected clip is a part of. So if I double-click on that, if I go to the file here, it's not showing the duration, but if I bring my playhead to the end of this, you can see the length of this video is actually 25 seconds and about 22, 23 frames. All right, so that is what this time cord is actually showing you. This, keep that in mind. So this duration is actually not an option. So we only have one option right here, which is the speed itself. Now compared to that, if I go to the speed control under the inspector, here we have a lot more options. So here we have the direction itself, the forward speed, the reverse speed, the freeze-frame. Then we have two wheels underneath. Then we have the same duration, time Core. Then we have two more settings, ripple, sequence and pitch correction. So with all these options combined, it gets a little bit complicated. So we will reserve that for the next lesson. And in this lesson, let's talk about just the setting under the monitor. Now, even though we have just a single option here, in the next few minutes, I will show you how you can use this value to increase or decrease the speed of any clip and even play it in the reverse direction. And by the way, if you wanted to change this value, not only you can type in this text box like this, but also you can click on this and drag it around towards the left or right. And that way you can change this value. All right, so let me reset that. Now let's see in what different ways we can change this value and what kind of effects we can expect to have. Alright, so I'll start with smaller values and go to the bigger values. So let's start with what if I enter any value between 01, okay, one is the default. So excluding one and excluding 0. Why excludes 0? Because if I enter 0 speed, that is meaningless. That means the clip is not even playing. All right? So it's, 0 is going to be a meaningless value. So let's talk about what if I enter anything between 01? For instance, let's say 0.5. So if I enter 0.5 before in pressing the Enter button, let's think about what should we expect when the speed is less than one? Like here, 0.5, you should expect that the clip speed would decrease. All right, in this case, it will become half. And when do you play something in half? It takes longer to finish that clip. All right, That makes sense. Now with half the speed, it should take double the original amount of time to play this complete clip, okay, So as a result, the duration or the length of this clip in the timeline would become double as it plays in half the speed. Okay, so let me press Enter and see what happens. As we expected, the duration of this clip becomes longer. Actually it becomes double because we are playing it in half the speed. And another thing you would have noticed is that it pushed the remaining clips toward the right, meaning it rippled the timeline. So in simple words, we are slowing down this clip and the clip becomes longer in the timeline and it also ripples. So let me show you this in preview. So it's playing in half the speed and if you notice, it becomes a little jerky. See, you can see little jerks. These are actually individual frames. Now, the reason for this is that this clip, if I go to this kind of view, it is actually the video 15. So you can see the frame rate of this clip is 23.976 frames. Now, if you know a little bit of physics, you would know probably that in order for continuous frames to be perceived as a continuous video, you need to have at least 20 frames shown continuously so that human eye can perceive it as a continuous video. But in this particular instance, the original frame rate was almost 24 frames per second when I play it in the half speed. Now it becomes almost 12 frames per second, which is less than 20. So that is why we can differentiate between these individual frames. So our eyes perceive it as a jerky video. All right, so one way to get around this problem, if I wanted to play it in less than the normal speed was, if the video was fair in a greater frame rate, so that even if I slow it down, we have more frames or we have enough frames so that our eyes can perceive, perceive it as a continuous video. So let me go to the media, and here inside the videos we have another clip, which is actually it is speed practice. Okay, so here you can see that it's short at 59.94 frames per second. So this clip, if we use it for sweet adjustment you, and if we slow it down, it won't be as jerky. So let me select this clip and let me reset it speed. And now let me bring this clip to the timeline so that we can demonstrate the speed effects. So let me double-click this to play it in the monitor. And here I have this endpoint and out point. So let me select these implants and out points. And if I show you the preview, okay, let me move the in point a little further. So now you can see that it starts moving and then becomes stationery towards the end. Okay, So this is a nice clip to be moved to the timeline. So with video only selected, I'm going to select it and drag it down to our timeline between this at this gutter right here. So this is going to be much better. Now, I can select this clip and here let me enter 0.5. And now it becomes half the speed and its duration gets doubled. But now I can play that. It plays very smoothly because now we have enough frames that even at half the speed, the frame rate is more than 20. So it doesn't look jerky anymore. So now with this clip selected, we have more room to play it in the slower speed, even if I made it 0.3053, yes. Now it becomes even slower, so it's length would further increase in the timeline if I press Enter. Okay? And even then, because we have enough frames, even now, it would not appear jerky. But if I played the previous clip at 0.3 speed, then I'm sure it would be very, very jerky. Alright, so I hope that's making sense to you. So you can see that entering any value between 01 slows down the clip. Now, what if I enter any speed value or speed multiple, which is greater than one? For instance, let's make it two. Now, I am playing it at double the speed, and as a result, it would play faster. All right? It will, you know, its speed would increase. And as a result, it would take less time to complete this clip. So it would shrink in the timeline. Let me, before entering to let me reset that. So here is the original length of the clip. So if I enter two now, it's duration in the timeline would become half because now it would play in twice the speed. If I press Enter, that's exactly what you notice here. It shrinks in the timeline and if I preview it, it would be much, much faster now. See, and towards the end, it becomes stationary. It starts fast. And then it becomes stationary towards the end. And another thing you must have noticed is that even though the clip shrank in the timeline, the remaining clips ripple down to fail that resulting gap. Okay? Let's make it even faster by entering a value of three maybe. So I am actually giving it more speed and it will become even shorter in the timeline as you just saw. And the remaining clips are rippling to fill that resulting gap. So here's the preview and a3x. So let me reset. And now what happens if I enter a negative value? Okay? So when I enter negative value, it would play it in the reverse direction. So that is how you can reverse any clip, okay? And you can mix it with different magnitudes of the multiple. Okay, so let's start with minus 0.5. So with this minus, of course it would play in the reverse direction, but this 0.5, now it will slow it down. So it would play in the half speed and it will also play in the reverse direction. So we are mixing both too. Mixing the reverse effect with the slowdown of facts. So if I press Enter, now, it would become longer in the timeline by a factor of two. And now if I played, you can see that not only it would become slower, but it will also become, it would also play in the reverse direction. So here's the preview. You see in the original clip, it was starting when you, when the clip started, it was moving and towards the end it was becoming stationary. Now here in the beginning it is stationary. And as the video plays, it would start moving because we are playing it in the reverse direction. Right? So not only is this a slower clip and a longer clip in the timeline, but it is also playing in the backward direction. And let me reset that for a moment. And let me enter a value of minus two now. So as you can expect, it would be a faster clip and it would also become shorter in the timeline. And of course, it should play in the backward direction. And that is exactly what happens, okay? It became shorter in the timeline. Now it would be playing in the reverse direction at double the speed. Right? So let me reset it down. And let me recap whatever we have learned in this lesson. We learned that when you enter any value between 01, it will slow down the clip and the clip would become longer in the timeline, right? If you enter any value greater than one, it would cause the clip to become faster and the clip would become shorter in the timeline. All right, and on top of all these cases, if you add a negative value to that multiple, it would play the clip in the reverse direction, right? And in all these cases, when you're controlling speed from here, it would always ripple your timeline. Okay, so let me reset that. So I hope now you know how to control the speed of any clip from here under the monitor. In the next lesson, we will talk about all these options and we will see how the speed control works differently from the inspector. So I'll see you then.
41. Speed Control without Ripple: Hey there, welcome back to another lesson about speed control. And in the previous lesson, we talked about how we can adjust the speed from these controls under the monitor. And in this lesson we will talk about spirited adjustment from the inspector. So these controls work actually a bit differently from here, especially because we have two additional options at the bottom, the ripple sequence and the pitch correction. So we will look at all of these in this lesson. So let's start from the top. So the first button is this rightwards arrow, and this is actually showing the forward direction. Okay? So when you press that, you play at the normal speed in the forward direction, and this is actually the default. All right, nothing special about this. And when you press that, it is actually playing at a 100 percent speed. And this is, you remember, this is percentage, so it is a 100. And that is equivalent to a multiple of one here. So let's look at the clip in the forward direction. So it starts moving. The clip starts with this globe moving, and then towards the middle it slows down, and towards the end it becomes stationary, right? That is the forward direction. And if I play it in the reverse direction, that is the next button. So if I press that now instead of a 100 percent, it becomes minus a 100 person. So all it does is it plays it in the reverse direction. So minus 1 here, right? Speed is still the same, but it actually just reverses it. So if I press it and preview, now it starts stationary C. And towards the middle it starts turning and that in the opposite direction. So that is the reverse mode. And let me undo that. So we're back to the forward direction. And lastly we have this button and this Eigen. I'm sure you have seen this before, especially on the remote controls off the cooling devices like air conditioners. So this is actually an icon for freeze. All right, so when you press that, it actually freezes that current frame which is under your play head in the timeline. Okay. So if I bring my playhead to a require frame, let's say this frame where we had these two red areas in the middle of the globe. Let's say we want to freeze it here. So what it would do is see, this is the current location of the player. So if I press this button, it would insert a cut at that particular location in the timeline. Alright? And the remaining duration of that clip in the timeline, it would be replaced by that particular frame. Alright, so nothing is moving beyond this point. It is a, it is a still frame. Let me undo that. And we can also, let me show you by freezing frame at a different location. So here let's say this is a different area where we have these two red areas here in the upper side and here in the lower side. So let's freeze here. So if I press this button now, it would insert a cut here at this point and the remaining area of the clip would be replaced by this particular flame. And if I play that, you can see it's not a movie anymore, it's a frame. And I'm sure this kind of effect you have seen in action movies and action videos, where something is moving really fast. And then it comes to a standstill for a couple of seconds and then it starts moving. Okay, so this is a cool effect which is implemented using freeze-frame feature. So inside inspector, if you're going to just use these three buttons at the top, then it doesn't matter whether you press this ripple sequence option or not, okay, because whether you play it in the reverse direction, forward or free or freeze, you see that the duration in the timeline is going to be the same, all right? Because we're not messing around with the magnitude of the speed, we're just adding assigned to that in the worst direction. And the freeze-frame v are not playing with the duration. So whether you press ripple or not, it's not going to affect the timeline as long as you're working only with these three buttons at the top. So let me undo that once again. And that's it about these three buttons. And next we have a duration box. Okay, so we had the same duration box here, which is actually showing the duration of the original clip with this, with this selected clip is a part of, okay, so nothing different here. And let's talk about these two wheels. Okay? You can turn these wheels, but both of these wheels are interconnected. Okay. So if you turn one wheel, the other one moves accordingly. So you see if I turn one wheel, the other one is turning as well. These values, you can see them changing accordingly. Let me undo that. And just to show you that these change proportionally, you see here we have a value of a 100 and below that we have around 24 or 23.976. So if I double one of these values, the other one would double as well. And if I have one of these values, the other one would have accordingly, because these are directly proportional. So for instance, if I make it to the lower one should be almost 48. And that is exactly you see here. Alright, so let me undo that. So that is why instead of these two ways, you can treat them as a single setting because the other setting would change accordingly so you can adjust the speed and you don't have to worry about the frames per second because those would change proportionally. And as I said before, turning the wheel has the same effect as changing these values by typing. Okay? And another thing you might remember from the last lesson is that if you're changing speed from under the monitor, it is always going to ripple the timeline, okay? That is the main difference between changing speed from here and here. So if, for instance I pressed the ripple sequence here, or if I allow it to ripple now, whether I change speed from the inspector or from under the monitor, it's going to have the same effect. They are going to behave exactly the same. All right? The difference only comes when when I leave this unchecked. And before unchecking. Let me check that for a moment and just to show you that they work exactly the same way, let me change speed from here with this ripple sequence check. So if I enter, like lets say anything greater than a 100 person and let's make it 200 percent or two from here, it would have the same effect. So if I enter 200, you would expect this clip to shrink in the timeline by a factor of two and the clip should play at double the speed. So if I press Enter, that is exactly what happens. So the clip is faster, right? And it also rippled. If I enter 50, let's say, which is equivalent to mine, which is equivalent to 0.5 here. Then you could expect this clip to become longer on the timeline and place lower. And that is exactly what happens. So now if I play that it is playing at half the speed. And it also report the timeline. And lastly, if I enter anything with a value with a negative sign as well, for example, let's make it minus 50, which is equal to minus 0.5 here. Now, it would slow it down and also reverse it. Alright? And you can see again, this ripple effect stays there. So it starts stationary and towards the end it would start moving in the opposite direction. Right? So this little demo just to show you that if you press this ripple sequence option from here, now the working from here and here is exactly the same. And now let's uncheck this ripple sequence option and see what will happen now. And just to tell you in advance, it's going to be a little complicated. So you need to pay a little bit close attention to see what will happen when I play around with this option unchecked. Ok. And by the way, before that, let me press this and reset that so that I bring this clip to its original state. All right, So now I can uncheck ripple. And before we play around with this, let me again show you preview. This is the clip and you can note down this original duration of this clip. It is almost this long here in the timeline. It starts moving and towards the end it slows down, and then it becomes stationary. All right, that is the clip. Now, let's start with making it slower, all right, with this option unchecked. So from this point onwards, I'm not going to allow it to ripple because I'm not checking this option. So see what happens if I press 50. If I enter 50 here. Now, you should expect normally that if it was rippling, it would become longer or double in the timeline and it would play slowly. Now if I press Enter, you see it doesn't ripple because we didn't allow it to. And now it is playing at half the speed. But it is again, taking the same amount of time in the timeline. So how is it possible that the clip becomes slower and it is still finishing in the same amount of time. Well, if I preview that, it would become clear. Why is it so you see where it finished? Actually, when I played it at 50 percent speed and I didn't repel it. It actually finishes earlier. All right. In the original clip, it was slowing down towards the middle. And the second half of the clip was with this globe stationary, but here it becomes, it starts flowing down towards the end of the clip. So the portion of the original clip with where it was stationary, it has been removed from this selection. So actually dementia is always manipulating the outpoint, all this clip in the timeline so that our point has been moved backwards because now we don't have enough space in the timeline to fit that whole clip, whole original clip. All right. If I come back to the original clip, you see normally it was it was ending somewhere here, somewhere here. But now since we played it at half the speed, this whole portion expands to fill that hole gap and this portion of the original clip hasn't even being considered. So it is removed from the timeline because this out point has been moved somewhere around here. Alright, so I hope you can understand that. So let me move back to the timeline by pressing Q here and let me reset that. Okay, so now you can see that the last lost portion of the clip has been recovered because now we're back to a 100 percent. So if you slow it down, you will actually remove a part of this clip towards the end. All right, that is what happens. And let's try playing it a little bit faster this time instead of slowing it down. So I'll use something a little bit higher than a 100. So let's use 110. So now this is equivalent to a multiple of 1.1 here. So if I press Enter, normally, what would happen is when we played at a faster speed, it would shrink in the timeline because now with faster speed, it would take lesser time to finish the same clip. But if I press Enter, you'll see the clip length is still the same. And now pay close attention to the contents of this clip to understand what's happening here. So if I play it, it slows down and then it comes stationary. Actually, what's happening is we have the same space available in the timeline because we are not allowing it to repo. So in the same available space now we can accommodate more portion or even a longer portion from the original clip. So what it did was it actually moved the outpoint of the original clip further outwards to accommodate a longer portion from the original clip. So originally the Euro around this much was the original clip, but when I play it at a faster speed. Now, this additional portion has been added into the timeline. And you can see that the original clip was ending somewhere here in original speed and that was filling up this whole space. But now with the greater speed when the original clip is playing at a faster speed, now, we have the same space so it can accommodate more longer portion from the original clip. So the out point has been moved further outwards to include a longer portion towards the end of this clip. And if I come back to the original clip, which this is a part of. So if I double-click here, this was the original selection. But when I play it at a faster speed, now, it uses more portion after this output. So this output has actually been pushed a little bit further. And now this much portion is being used in the timeline, okay? So it keeps playing until much later. And we have enough room towards the end to, you know, to add more video towards the end of this selection. Okay, So let me go back to the timeline and let me select that and let me reset that. Now, you see. That towards the middle it becomes it be, it slows down. And here kits, we are back to the original clip. Now let's try to increase the speed further. For example, let's say 150 or 200. So now this would be playing at 50 percent speed, 50 percent more speed if I press Enter. Now something strange happens in the timeline. Okay? Now here this is the clip, but it has shrunk in the timeline, even though we didn't allow it to ripple. And a gap has been introduced in the timeline. Okay, so let me show you what is actually happening here. If I go to the original clip, you remember when we played it at a faster speed. Now it was pushing this out, this outpoint further outwards. But here, look at this, this original clip. We have only a small room towards the end. And after that, the original clip, even the original clip ends. Okay? So when we play this clip at 50 percent more speed, what happens is it tries to push this out point further outwards until a point reaches when they would even the original video is ending. So what it does is it uses up all these remaining portion and even then, it cannot fill that gap in the timeline. Okay. So what it does is it uses up all the remaining video by moving the outpoint further outwards. And even then, the original video ends here. And after that, since we are not allowing it to ripple, that gap is unavoidable. Alright? So that is exactly what is happening here. We are playing it faster. So it is using more portion from the original video and putting it into the timeline. And I can also show you this when I play this clip. Were originally when this, when it was slowing down. This was the point in the middle of the selection, but now it is not even middle and we're already slowing down. And you can see that this portion towards the end of this selection, it is not, it was not a part of the original clip. Okay. But now it has been added because there is more available space, so the whole clip is used, the whole original clip is used towards the end. Now let's say we don't want this gap in the timeline. What if I move it back to a 100 percent? I move it back to a 100 percent and see, it should have come back to its original position, but it does not. All right. And that is again because we didn't allow it to ripple. So you can see that the gap is still there. So if this is the situation where you want to change it to original position and it is not. What you can do is you can manually delete this gap like this, and then try to move the output of this selected clip back to its original position. But that needs a little bit of accuracy and you might not be able to get back to that same outpoint. So in this situation, what you can do is instead of, let me select this clip. Now instead of reset, sometimes when you uncheck this ripple sequence option, the reset does not work. So in this situation you can press Undo a couple times. So here we are back to where it was, around 150. And if I press it back again, can come back to the original selection. So now it's back to a 100 percent and we're back to the same endpoint of this clip and the same output. All right? Again it's slowing down towards the middle, and after that, it becomes, it becomes stationary. So again, in this kind of situation, sometimes the reset is not helpful, so you can press Undo a couple times to get back. So here we have pressed the undo to recover the lost part of this selection. Now, normally, and especially for beginners, I don't recommend using this speed adjustment without checking this ripple sequence option because it can get a little bit complicated, especially if you don't understand the rippling operation very well. So now I hope you have an understanding of how these three buttons at the top and these wheels and the ripple sequence, all these work together. The last option is pitch correction, okay? And with some clips, it might be disabled depending on whether you have audio with that clip or not. For example, if I have selected this clip here, you have this option available pitch correction. But if I select another clip where there is no audio, this grays out because there is no audio to fix. All right, so here, this is the option. But even though we played it at faster or slower speed, we weren't able to hear the audio. Now, one important thing about speed adjustment is that when you adjust the speed of a clip, the audio often gets messed up. And that is because the pitch of the audio gets changed. Alright. Now here with this clip, we tried to play it in the faster speed, slower speed, but we weren't able to notice any difference in the audio. C, The reason is that this was not the human voice. But let's come to another clip. Here. This is the talking head video of my co-instructor Phil Webinar, available in the course resources here. So if you play it, and by the end of this lesson, it sounds pretty nice. So it's a pretty good voice right? Now, let's play around with the speed of this clip and see how the audio sounds. And before that, to keep things simple, let's check this ripple sequence options. So I would select this and let's come to the speed adjustment. And now with this ripple sequence, I can change speed either from here or here. It would have the same effect. So let's enter a speed value of two, which is equivalent to 200 percent here. So I enter that and accordingly the clipboard get short-term or it would shrink in the timeline. Just like that. But now if I play that, it sounds really funny, even though I showed you that this audio is very natural and it's perfect normally, right? So it gets messed up because I'm playing it at a different speed. Alright, likewise, if I make it 0.5 or 250%, now it becomes longer in the timeline as we expected. But if I play, that sounds really funny and unnatural right? Now, obviously it gets changed because the pitch of the sound gets affected. Now, to fix that, all we need to do is check this pitch option while changing the speed. Okay, so I have this swims same speed and same and same funny sounding audio. But if I press the pitch correction and see what happens. And even though it is playing at slower speed, you can see that the audio gets much better. And it sounds very, very natural, right? And even if I make it faster again, let's say two, with this pitch correction selected, I won't have any problem with the audio. As you can see. So although we are playing it at foster a lower speed and of course, the audio would play faster or slower, but the pitch gets fixed. And now we don't have any problem with the pitch of the audio. So that's it about the speed adjustment from the cut page. And when we go to the edit page, we're going to do many fun exercises to adjust speed in different ways. Alright, so I hope you learned a lot about speed adjustment and let's go on to the next tool in the next lesson. Thank you.
42. Stabilizing Shaky Videos using the Stabilizer Tool: Hey there, Welcome back. In this lesson we are going to learn how to stabilize shaky footage. Now, we'd use can often get shaky if they are short by a handheld camera, especially when the person holding the camera is moving. So here in the timeline, I have added two clips, which are examples of shaky footage. So if I show you a preview, this one is moving a little bit. It's not too bad. But if you focus on this area and the background, especially these corners, you can tell that there is some movement going on. So not too bad. But this one is pretty bad to the point of even being unworkable. Alright, if you try to focus here in the central area, you can't really focus it because it's moving too bad. So let's try to stabilize these clips using the stabilizer here. So the first step is to select the required clip, and then you come to the stabilizer. And here you have the enabled disabled button and the reset button. Then you have the stabilisation modes. There are actually three of them. And then you have the stabilizer itself. Now if you come to the inspector and enter this stabilization here you have more options. So we have the same stabilized button and the three stabilization Moore's. But then we have to check this check options. And then you have three sliders. So before you press this Stabilize button, you have to select all these settings. Now, let's look at all these settings one-by-one to get an understanding of them. And then we will be in a better position to stabilize these two clips. Okay, so let's talk about these Moore's first, there are three Moore's, the perspective, similarity and translation. So these modes basically mean how advanced you want your stabilization to be. The first one is perspective, and this is actually the most advanced and the most powerful stabilizer. So when you select that to ensure is always going to use all its power to stabilize your clip. So if I come to the Transform here, by selecting this perspective option, we're actually letting the Vinci Zoom our clip, reposition it rotated page or your, so all of these different properties it can manipulate in order to stabilize our video, except of course the anchor point and flip. All right, fit can use all these remaining things and it can use them to stabilize our clip. The next one after perspective is similarity. And this is less powerful than the first one, and it actually won't use pitch and yaw. So it will just use zooming, repositioning, a rotation to try to stabilize your clip. Then lastly, we have the translation, which is the most basic stabilization, alright, or the weakest one. So usually what I do is I first tried to stabilize the clip using perspective and see the results. And if the result is not good, only then I will go to the remaining two options. Otherwise, I will just stick to the first one, which is perspective. After the stabilization mode, the next thing we have is Camera log. So this locks the camera position to make it look like it was shot on a tripod. All right. So what I do is I don't check this option unless that wave was actually shot on a tripod. All right. The next option is Zoom. So this should always be checked because that's the only way to Vinci Resolve can stabilize your footage. Now, for instance. Now if you don't check it, let me show you an example of what your result might look like. So let me go to the next clip, which is moving pretty bad. And let's try to stabilize it without checking the zoom option. So I will check or uncheck the zoom option. And let's go with this. So see I'm not checking the zoom option and let's try to stabilize this. And let's try to see the result, what it looks like. So here's what is looking like and see these black areas around these edges. Let me show you again. This is what it would look like and you will get all these black areas around the edges. And then you will have to zoom manually anyway to get rid of these black areas around the edges. All right, so that is why pressing Zoom or checking Zoom is important. So let me select this clip and let me reset that. The next option is these three sliders, and the first one is cropping ratio, or you can also call it zooming ratio. So this means how much you allow Da Vinci resolve to crop or zoom your footage. Now this first slider is actually a bit weird because in order to allow maximum cropping, you have to turn it all the way to the minimum. So it, if it is set to 0.25, that means you are allowing maximum propping or maximum zooming. And if you turn it to the other extreme, which is 1, that means you're not, you're not allowing it to crop or Zoom at all. Okay. So here there would be no cropping or zooming at all. And here they would be maximum cropping or zooming. Now, why do you need this cropping or zooming ratio? Well, for example, when you have four K footage, you can zoom more and get better stabilization without losing too much quality. But to stabilize, then ATP footage or 720 be maybe you don't want a Zoom as much because you will lose image quality. After that, the next option is smooth with the minimum value of 0.25 and the maximum of one. So when you turn it to a maximum or 1, that means you are trying to make it very, very smooth or even buttery smooth. But when you make it 0.25 or the minimum, that means it's not going to be as smooth and you're still going to see some movement. And remember, the more smoothening you add, the more it will be zoomed in. And then lastly, we have this slider for stabilization strength, okay? So this is a measure of how strong you want your stabilization to be. If this is turned to maximum or 1, that means you want very, very high stabilization. And if you turn to the minimum value, which is minus one, that means no stabilization at all. But there is actually no point in turning it to the minimum because you are after all. Now, usually what I do is I just leave it to the maximum for good stabilization. Now, that was a little bit of theory around how these buttons work. And I hope that was not too much, but let me now show you how I use this stabilizer. So let me go to the first clip and bring it in the view. Now, let's try stabilizing these two clips with some lower settings, okay? And first, let's try this weakest mode, the translation. And here you can see we can do either from here or here. So let's try translation. And I'm not going to use Camera log, but of course we are going to use zooming. And let's try these values. Something in the middle, okay, something here is fine. And of course we need some good stabilization. So let's try to stabilize this with the settings. So I'm going to, after making these selections, I'm going to press this Stabilize button. So here it's analyzing my footage and see it zooms in a little bit. And let's also try the same kind of settings to this clip as well. And then we will try to preview them together. Okay, So again, for this clip, which is pretty bad, Let's try the lowest one. The weakest one, no camera log yes to zooming. And then a little bit of cropping ratio somewhere in the middle, smoothening somewhere in the middle as well, and with good strength. So let's try to stabilize this as well. Again, it will zoom in a little bit and let's try to preview them. So this is much better, although there is still some movement if you see here in the corners. But it's quite better than before. And this one is also much better than before. Before that it was not even watchable, but now it looks pretty decent. Right? Although still there is some room for improvement because we only use the weakest stabilizer. All right, so let's try something with higher settings now. So either we can jump to a better one, similarity, but let's try the strongest one and see the other extreme. Okay, so let's try perspective. Again. No camera log, yes, zooming. And this time, let's allow maximum cropping ratio. And by the way, let me go ahead and first reset both these civilizations before trying the new stabilization. Okay, So here, both are reset now. So let's select the first one and let's try the strongest one here. And let's allow maximum cropping ratio, maximum smoothening, and maximum strength. Okay, So these are the maximum settings you can see the, the most powerful stabilization mode and all these settings. So there's the maximum it can go to. And let's stabilize that. Okay, This time you see it zoomed even more because I allowed it to zoom more by bringing this crop in ratio to the minimum. All right, and let's, while we're at it, let's try it. Let's try stabilizing the other one as well in one go. So I go to the perspective again. And let's maximize this cropping ratio, maximize the smoothening, and let's try stabilization of this as well. Again, you see it zoomed more. And let's try to preview them again. This time it's pretty darn good. There is no movement at all. You can see this, this background and here you can see this time it is super, super smooth. All right? So that is how you use stabilization in DaVinci Resolve. You actually try to find a balance between goods, civilization and natural-looking footage. Now as you saw with the help of these two clips, in most cases, it's very easy to fix shaky footage in DaVinci Resolve. In fact, DaVinci Resolve has one of the most powerful stabilizers in its Lee, and I hope now you understand all its settings. Thanks a lot.
43. The Auto-Color Tool: Hey folks, welcome back to another lesson and now we're going to talk about the color tool, which is used to improve colors in the selected clip in your timeline. Okay, So when you go to the color tool, there is only one option and that is actually the Auto Color button. All right, so when you press this button, after selecting a clip from your timeline, DaVinci Resolve gets to work and it analyzes that selected clip in terms of its highlights, shadows, mid-tones, contrast, color, temperature, and so on. And it tries to bring them at the right level. Now here in this sentence, I mentioned quite a few terms like highlights, shadows, and so on. So if you don't understand any of these terms right now, it is totally fine. Do not worry at all. We will talk about all these terms in detail in the color page. All right, so let's get back to this tool or to color. So to demonstrate this tool here, I have lined up a few clips in my timeline. So this is one clip where we have some pretty bad colors. And then the next clip where we have also some bad colors. Then we have this clip and this clip where colors are actually quite good already. Now using these clips, I will show you how this color tool works on cliffs which are already good in color, and some clips which are pretty bad in colors. Now, if you apply this color tool on some clip which already has some good colors, the auto color is not going to do much. And in many cases, it might actually make it worse instead of improving the colors. All right, For example, let me show you this, this clip. We already used this in the timeline. So here you can see the colors are already quite okay. Not perfect, but these are not too bad. Okay? So if I select this clip and if I press the Auto Color button here, you can see that it doesn't do much to this clip because there is not a lot of room for improvement. All right. So you can see this is let me, okay. This is before and this is after. So there's not a lot of difference before and after. All right. Now let's come to another clip. This one, where you can see that the clip has already some pretty good colors and there's a lot of detail here that we can actually see. But if I select this clip and try to color correct that you can see that it messes up this skin tone quite aware. So these highlights, we missed quite a few details here. So this is before, and this is after. So you can see that it messes up the highlights quite badly. All right. So I'm just trying to convey that if the clip already has some good colors, then this auto color is not going to be much helpful. Now let's come to the clips which have some bad colors, like this one. So here you can see that even there are glimpses of different colors. There's not a lot of variation and right now it looks pretty flat. So if I select this clip and now if I apply the same or Tucker tool, you can see that now this looks quite better. Alright? So I would say this is not the best reserved for, it's much better than before. This is before, and this is after. All right, so it adds quite a lot of detail to these colors, especially the skin tones. And let's come to another clip here. Actually. Yeah, this one. Okay, so here you can see that the colors could be improved. So if I use this Auto Color feature here, you can see that it adds quite a bit of detail to this frame. All right? Although at some areas it makes things worse, but overall it improves quite a, quite a bit. This is before and this is after. So you can see some improvement there. Now, this result and this result, I would say these are not the best reserves, but these are quite presentable, at least much better than before. And especially if you could do this with just click off one button, then that's quite helpful. All right. Now here, looking at these examples, it's quite clear that it doesn't make the colors perfect. But it brings you very quickly to a great starting point. And you can go from there. Either you can use these colors as is, or you can further improve those colors by working on them yourself. And this tool can be useful in many situations. For instance, if you have some log footage to edit and its colors are very bad, so bad. Now, this tool can be useful in many situations. So for instance, if you have some log footage to edit and its colors are really bad, so bad that they are keeping you from starting your editing. All right? Now, you know, with this tool, you won't have any excuse, right? Because of the bad colors, because you can just use this button, just press this button on all these clips and you can improve them to the point that you can start your editing right away. Now this Auto Color tool is useful in many situations. So for instance, if you have got some log footage to edit and its colors are really bad, so bad that they are keeping you from starting your editing. Well, now you won't have any excuse, right? Because you can just to bring them to your timeline, press this button couple times. And now you have good enough colors in your clips to start your editing with. All right, so that's how you can use this auto color button to improve careers in your clips. All right. Now, let's talk about where color is inside the inspector. Well, if you look at this list, there is no color option and even there is no color tab here. The reason is that there is a whole dedicated color page in DaVinci Resolve. So if you look at the bottom, this is the color page. And you can see there are lots and lots of coloring tools and bells and vessels all over. And actually, it is an extremely powerful page that has been used to color correct and create many, many Hollywood movies. And later on in the course, there are many sections dedicated for just color adjustment, where we will explore this page in detail. So let's come back to the cut pays. All right, that's how you can quickly auto color your videos in the cart page. That's it for this lesson, and I'll see you in the next one.
44. The Audio Tool: Hey there, welcome back to another lesson. And now we're going to talk about the last tool in this list, which is actually the audio tool. Okay? So here I have this, this clip selected and you can see the audio tool is available. Here. The audio tool is still available, but with some clips, this tool is not going to be enabled and it's going to be grayed out if that selected clip has no audio. For example, if I select this clip, here, you see this clip has no audio. This has no audio as well. The reason is that remember when we were importing these clips to the timeline, be pressed this video only option. So only video is brought into the timeline. So of course these clips have no audio and hence there is no audio option either. All right, So let's get back to this clip which has some audio. And now I can go to the audio tool and you can see that there is only one setting available under the monitor. All I can do here is turn the volume up or down using this slider. Other than that, the only thing we have is the reset button and the enable disable the button. That's it. Now if I come to the inspector here, you can see that the audio option is even not available here. The reason is that we are actually under the video tab, right? So the next tab is the Audio tab. So here you will see all the options related to the audio. So the first option is similar to here. So you can see that if I change the audio from here, it changes the audio here. So if I change it from here, it changes this as well. So these are actually the same slider, but then we have a lot of other options related to audio. Now, later on in the course, we actually have a complete section on audio editing. So we'll talk about all these remaining options when we get to that audio editing section. Thank you for watching and I'll see you in the next one.
45. Conclusion & Class Project: Hey there, thank you
so much for being an engaged student and
completing this class. Now, before you
wrap up this class, I highly encourage
you to complete the class project and upload
it in the project section. So here is a playback
of the class project. Alright, so that
was the project. And here are the steps
you need to take in order to complete
this class project. So first of all, you need to go to the
project section and download the assets I have
provided for you to download so that you can
complete this class project. So these assets
include the audio, the graphics for this project, than the photos and video clips that go into
creating this project. Next, after downloading
these assets, import them into DaVinci, Resolve and do the video editing to put together a
sequence like this. Alright, so this will give
you a chance to practice basic video editing skills
like trimming the video clips, adding transitions, audio, adding titles
and motion graphics, and all the good stuff. The next thing you need to do is export your sequence into an MP4 format and upload it
in the class project section. Now, the video I
just showed you, it is just an example. Okay, so feel free
to be creative here. There are no hard
and fast rules, as long as you are learning the scale and you're having fun, that is great, alright? And doing this project
is a great way to show off your
newly learned skill to your friends and family and also to the course
instructor, which is me. Alright? Once you've finished
this project, please upload it to
the project section. And I will make
sure to offer you some create
constructive feedback. Alright, so thank you and
good luck with your project.
46. Conclusion: Alright, well done. I'm so proud of you
for coming this far with this class and I
hope you found it useful. Thank you so much
for watching it. Please have a look
at my profile for my other classes and please
hit the Follow button. So you will be the
first one to know when I publish a new
class on Skillshare. I really hope you enjoyed this class and
found it valuable. Again, if you haven't already, please make sure to
leave a review or write a few words about what you
thought of this class, that would be
absolutely wonderful. To write a review. Go to the Review tab
under the video player, then click this
leave Review button. Just answered this short
and sweet questionnaire and finally hit the
Submit Review button. And please do not
underestimate the power of your reviews because they are invaluable to other
potential students. I personally love reading student reviews and
really positive ones. Absolutely make my day. Alright, that's it. Thank you again and I
hope to see you soon. Cheers.
 GoFig Trainings