Transcripts
1. Coloured Gel Photography Intro: Good day. My name
is Warren Marshall. I'm a professional
photographer and photographic educator from
New Castle, Australia. This class is all about
using colored gels. Color is one of the
basic building blocks that we use in our photography. Color is a basic component of a lot of our images when
we're shooting in color. It can affect the impact of
our images, the subtlety, the way the tones work, and the colors work
within the image to produce the final result
that we're looking for. We use color in your photography in a number of different ways. Even if we're not using gels when we're
shooting outdoors, we have nature's color
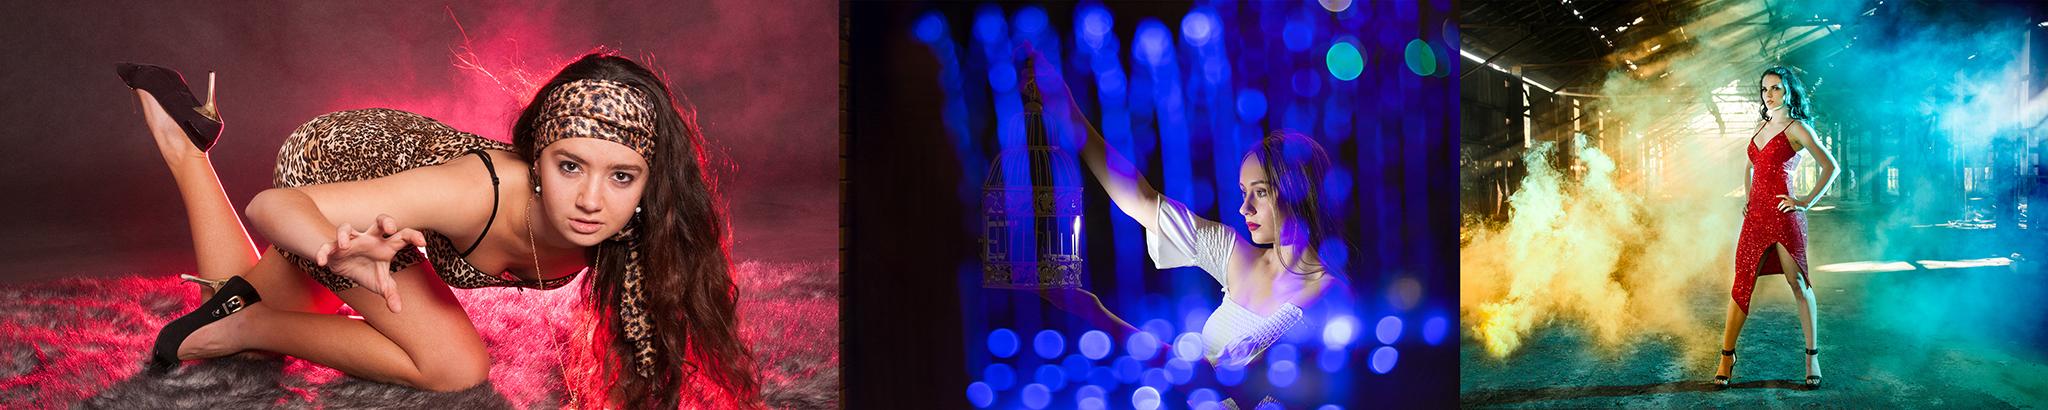
palette to work with. All of these images have color as one of their
basic building blocks. When we're using color in
landscape photography, we can choose to go out when we have spectacular blue skies, or late afternoon sunsets
or early mornings sunrises. We use color in many
of our images for the purpose of creating an image that is gonna
be eye-catching. When we're able to control and manipulate the
colors in our image, our imaging becomes so
much more exciting, particularly when
we're working indoors, but also when we're
working outdoors as well. In this class, I'm going to
show you how to use gels. Colored gels are
various different sorts to enhance your images. We're going to be going through a whole range of
different options, showing you what gels to use, how to use them, what situations
your gels will work in, and how to produce images with your colored gels that
people will be amazed by. We also have a series of photographic shoots
in our studio where we use colored gels. We use various types
of light sources, various types of gels. We're going to run through
all of those with you and explain how we use them
and why we use them. So there's a whole lot of practical experience to
be had in this class. We'll be going from
basic gel work with just a single gel, right through to images
where we use movement. In the photograph. We
use camera movement, we use subject movement, and we use constant
lights as well as flesh. Back to the day that you
went to see your family. But I've been here yesterday. You knew what I felt. A digital leave on
notch said that you meant to but you forgot
and I never saw. Please keep going. Now you don't need a
lot of equipment to produce these gel images. You can use a plain
colored water bottle and a spotlight or a desk lamp. You can use speed lights, you can use strobes, you can use constant light. You can use flashlights
or torches. Any equipment that you
have available will be fine to do these
types of images. This is a very simple technique. You can do it indoors,
you can do it outdoors. You can use any sort
of light source, including the sun, as
we'll explain later. So come in, have a
look at this class. I'm sure you're going to
see some amazing images. And you're going to learn how to use colored gels in
your photography.
2. Your Project for this class: Your project for
this class is to shoot a photograph
using colored gels. You can use cellophane, you can use actual flesh gels. You could use water bottles, any sort of translucent
material that is coloured will allow your
life to change color. You could even reflect light off a blue card are often red card, which will give you that red
hue to your light as well. There are a number of
different ways you can do it. Maybe try it with a darker environment to
begin with, either at night, outdoors or indoors
where it's reasonably dark so that those gels
can have more effect. Because as we said, The Jewels tend to
light the shadows. They don't tend to have much of an effect on the
highlights of your image. So play around with colors, play around with various
different things, see what you can come up with. I'd love you to post some of those projects in
your project section or comment on everyone
that's posted in there and get it out. Have some fun. This
technique is fun. It's great to do and
your images will have so much more interest for all of the people
that you showed them to.
3. What are Coloured Gels: Thanks for joining
us in this class. What is a colored gel? You might ask? It's a very good question.
Colored gels can be a range of different
types of materials. Most of all, we tend
to use plastic, transparent gels in
various different colors. You can purchase flesh
Jill's on the internet, quite simply, quite cheaply. In these little packets, we have a little gel that
will fit on the front of your speed light in a
range of different colors. We have a whole lot of different colors here
that we can use. We have reds and
blues and purples. You can buy this set for
probably $10 in Australia, and you get probably 50
or 60 different colors. So that's the first option. Those gels will fit
on the front of your flesh, quite simply, on front of the
speed light flash, use this little
rubber band here. The gel slides in to the side, fits over the front of the flash and slips into the other side. So we have converted a white light flash into a red light flash
with these gels, and we can do any range
of different colors. We can also use cellophane. This wrapping paper
can be used to cover over your lights and
produce a particular color. We can get in a range
of different colors. So that's one of the
simplest ways to do it. We can just use a rubber band
or a bit of tape to stick these cellophane
sheet to our flash. Whether we use a speed light, whether we use a flashlight, whether we use our big
strobe with a soft box, we can use colored
glass filters. Glass filters are
available in a range of different types,
different colors. They tend to be a little
bit more expensive. So the other options may
be a bit more economical, but these will fit on the
front of your flash just with a little bit of tape or
as I said, a rubber band. You can get various different
types of glass filters. You can get color
correction filters, which will correct the
color of your lighting. If you're using late
afternoon light, you can get a color
correction, Jill, that will blue that
light down a little bit to corrected back
to normal daylight. This one is a color
temperature orange, Jill. So it's used for lighting conditions that
are a little bit blue. This will correct
that, but you can also get color effects. Joel's, we are in a range
of different colors, more bright gels, more colorful
gels that you can use. These are meant to
go on your camera, but you can use them on
your flash just as well. We can also use specific gels that are meant
to fit on our flashes. This is a gel that
fits on the front of my cone for my studio strobe. My studio strobe attaches to the back of this and this
colored gel fits on the front. When you purchase your flashes, you can buy these at the
same time that will be specifically made to fit
onto your particular stroke. You can use water bottles, you could use plastic water
bottles that are very cheap. Simply put, you're
flashing behind that water bottle to create light emitting from
the other side in that particular color. You can get cheap water bottles in any number of
different colors, but you can do this
just holding it there behind that dam. That water bottle will
give you that colored gel. So it works. Anyway,
you want it to work. Any sort of transparent
material is going to work Well as long as it's colored and it's colored in the way that's
going to work for you. One thing that you do
need to be careful of, particularly when you're using lights that tend to warm up. So if you're using any
sort of tungsten lighting, halogen lighting, or any sort of modelling lights
inside your flashes. If you use cellophane or some other types of jewels,
they can be flammable. So you need to be very careful
that you don't overheat those bulbs next to this substance so that
you cause a fire danger. So be very careful
when you're using these that they don't overheat. Hey, proof gels will probably be a better
option for most people. You can purchase them
quite cheaply as well. And you have the peace
of mind that you're not going to melt the jewelry, not going to cause
a fire by using those colored gels in front
of your light sources. Using cellophane in front
of flesh or LED lights is generally okay because
that's not going to cause too much heat and it's not going
to cause a problem. I'm using cellophane over and LED light for my backlight here. This blue on my
background here is simply a shade of blue cellophane
over the top of an LED light. So it gives me a
constant blue color. It's very cheap, very
easy, and quite effective.
4. How Do We Use Gels: When we're using gels, it is a big help to be working in a slightly
dark environment. Because when we add light or colored
light to our subject, it will light the shadow areas. So if we have a subject that's really bright
to begin with, those gels are going
to have less effect on that environment or
on that subject. The studio that I have here, the room I have here
has white walls and white ceiling and
light colored carpet. So it is a little bit more
difficult to work in. I need to darken down the
room as much as I can before I start adding
my gels to my subject. They're not going to
show up quite as well. Also, if you superimpose
two colors over each other, you're going to get a little bit of bleeding from one
color to the other. You're also going to
have less intense color. So try to restrict your gels to particular areas
of your subject. There are a number of
ways that we can do this. We can restrict the spread of our lights to particular areas. We can use our speed lights. We can zoom the mean. So he hit the zoom button on our speed lights to zoom
that cone of light in. So it only likes a particular
area of our subject. We can use snippets. A snooze isn't effective device that narrows the beam
of light as well, particularly from
your speed light. You can use a suit like this, which is a homemade
one just made from a potato chip tube. We can fit that over
the front of our flesh. And that effectively
concentrates that light into a
particular area. We can put our gel over
the front of here, so it throws that
particular color into a small area
of our subject. We can also use
things like grids. A grid is a honeycomb
arrangement like this, generally a plastic
device or a metal device that again will slip over the
front of our speed light. To concentrate that light
in a particular area. We can get grids that will
fit on other lights as well. We can get grids
that will fit on our studio strobes or
our constant lights. This grid over the front
of this strobe will concentrate that light
into a particular area. You can get grids that will
fit over beauty dishes as we do in the shoot that you'll see at the end of this class. This grid fits over the front
of this view beauty dish, and it allows that light
to restrict the spread. So it makes that light
contain itself into a smaller area so
that we can like other parts of that scene
with various other Jill's. We can also use grids
on our soft boxes. As you can see here. We can use grids on
any size softbox. You just put that grid
over the front of the diffuser and that will concentrate that light
to a smaller area. You don't get light bouncing
all around the room. You can just restrict that
light to a particular area. And that makes it so much
easier to work with these gels. So concentrating that light
is one of the first things. Trying to light one particular
part of your subject with one color and another part of your subject
with another color. We can also restrict the
light spread by feathering. Our light. Feathering light
means that we don't aim at directly at our subject. We turn it away a
little bit to the side. So the subject is lit by
the edge of this light. So on the other side
there is darkness. The edge of this light. Maybe I'm projecting out here. So this part of our subject
is not going to be lit, so feathering that
light either up or down or in different
directions is going to restrict that light that hits are subject
to a smaller area. We can feather soft boxes, we can feather speed lights, we can feather a range of
different options that we have. Another great option
for using gels is using a torch or a flashlight, depending on where you
come from in the world. We can put a small gel over the front of our flashlight and use it just to paint a
particular part of our subject. It's a very effective way of
doing it and we can create a little bit more
control because this pool of light
is much smaller. If we get a focusing flashlight
that allows us to just like one part of
our subject quite easily or one side of our
subject quite easily. So our gels are more effective when we liked the shadow
parts of our subject because there's no
extra light beer to contaminate that particular
part of our subjects. So we get more
intense color when we liked the shadow
areas of our subject. Another thing that you
need to be conscious of is that sometimes particularly when you're shooting people, as I do, having
someone with a blue or a red face can make them
look a little bit odd. If that's not the effect
you're going for. So occasionally, as you'll see in the shoot at the
end of this class, I use a white light or a normal colored light
straight onto their face, just restricted in a small
pool so that I can look. They're faced with
natural colored light and the rest of them, I use the gels. So that gives me
that jello effect. When you're lighting, particularly
from behind a subject, which we often do when we're
using these techniques. Light is facing
toward the camera. Whenever you have light
facing toward the camera, there's a danger of
getting flare in your images because that
light reflects into the glass elements of
your lens and tends to give you a little
bit of flair by bouncing around
inside that lens. So there are various ways
you can restrict that. Using a grid can help you
because it's going to protect that light a little bit from
directly entering your lens. You can also use
what we call a flag. A flag is a piece of card, generally a black
piece of card that we place between that
light and our camera. It doesn't come
into the scene of our image to our picture because it's just
off to the side, but it's there to
block that light from directly entering our lens. Now that's great. It
does tend to give you more contrasty images and
images with a bit more punch, but occasionally a bit of flair and an image can look good, particularly when we're
using these colored gels. And you'll see in the
shoot at the end of the class we use some
flare, sometimes, particularly when we're using
some smoke in the image or we want to give the image a little bit more
of a smokey feel, that flare can sometimes add to the impact and the
quality of our picture. Now when we're using
gels over L lights, particularly flashes, but
other lights as well. The power of the light does make a difference to how
intense the color is. So it does take a little
bit of experimentation. Have you liked, turned
down quite low, then that color of
that Jill can be quite intense and
quite deep in color. Whereas if you
turn that flash up a little bit brighter or
your light up brighter, the intensity of the color tends to diminish a
little bit because it moves closer to the
white part of the spectrum. So the power of your light, how much light it's
outputting wound determined a little bit of how intense
that light is going to be. So you can play around
with that as well. There's nothing to say that one style is better
than any other. Play around yourself and
see what you can come up with and see what
suits your purposes. So we can light a subject
with colored light. We can live our background
with colored light. We can backslide our subjects so the edges of them are
lit with colored light. Now, I tend to relate a
lot of this to people photography because that's
what I do. I should people. But if you're shooting objects or you're shooting still life, so he's shooting
product photography, all of these things
you can use gels. Even landscape photography is possible to use gels
because you can manipulate the white balance on your camera to give you a
particular colored background. You can light your foreground
with a colored gel and manipulate your white
balance so your background turns to blue or
turns to orange. So there are various different
ways that you can use gels to color even landscapes. It's not as easy, but it is possible.
5. Where can We Use Gels: I love to use gels at night because it gives me more
options because I've got a lot of shadow
areas that I can use to light with my Joel,
various different colors. I also like to shoot
indoors because the effective light indoors
is fairly dark as well. So again, it gives me
more options to be able to color my subject. I'm shooting in the
rain can be amazing. When you're using gels. You can backlight that
rain with a little bit of colored Jill to highlight those raindrops as
they come down. You can use a range of different options when
you're shooting with gels, you can even shoot in shadow
areas in the daytime. Shooting in bright sunlight is probably less of an
option because that daylight does tend to take
over the colors that you use. But you can see in
the pictures that are accompanying me here how you can use gels in a number of different
situations and a number of different ways that are going to work
quite well for you. We do need to take into
account that ambient light. And that's why shooting in dark conditions works
so much better. Because ultimately
if we're using Flash or we're using
natural light, or we're using constant
lights such as LEDs, the ambient light is a
major part of our image. So controlling at ambient light, being able to add light within a artificial light
sources will make a difference and make yourself stand out that
a little bit more.
6. Settings to Use.: Many of you will know that I use flesh for a lot of
my photography. So flashes generally the type of lighting that I use
when I use Jill's. The advantage of using flashes and starts off as white light. So any colored gels that
are put on my flash is going to take on the
color of that Jill. So it's a little bit
easier for me to control. Now. I could control the intensity of my flash with a light meter. I could take light
meter readings are various different
places on my subject so that I can judge my exposure and the amount of light that's hitting those particular areas. In reality, a light meters not going to help you
a great deal with Joe photography because
a light meter is generally used for white light. So the colored nature
of the light that we're using will fool
your light meter. So it's not going to give you particularly
accurate readings. Unless you're just using white
light on somebody's face, then that's going to be
a good option for you. But you really can't tell the relative relationship of the powers of those different
colors within your scene. So it's a bit of a try it
and see sort of situation. Set your gels up, take a shot, have a look
how intense they are. Move them around
until you get them in a spot and a power
that works for you. Now also, when I use Flash, I often use off-camera flash, and I use my small triggers to be able to fire
those flashes remotely. So this little trigger
fits on top of my camera and it sends
a radio signal to all of my flashes and fires them simultaneously in
synchronization with my camera. So that makes life a
lot easier as well. But you can do it manually. You can do it in a number
of different ways, but these little
triggers just make life a little bit easier for
her when you're using flesh. When we're using gels, even though we're using a
lot of different colors or white balance setting
is fairly crucial. We don't particularly
want to use auto white balance because
auto white balance is going to try to correct any colors that we
put into our scene. All of our image is going
to be slightly different, white balance and different
colors because that auto white balance
is moving up and down trying to correct
that colored light. So it's best to nail your white balance at
a particular point. I like to use flash white
balance just so that I can have all of my images
consistent with color. And that allows me to
correct it quite well in post-production if I need to or to modify it a little
bit in post-production. But you could use
daylight white balance or any of those just so that your white balance
is not changing up and down as it would
with auto white balance. When you're using
long exposures, as I often do, my image
stabilizer is turned off as well. Because if I'm moving
my lights around or if my subject's moving with
a constant light on them, then my image stabilizer
is going to be fooled. So I turn image
stabilizer off because I'm shooting on a tripod
a lot of the time anyway. So my image stabilizer
is not needed. But if I'm careful with
my shutter speeds and how I control my long exposures, then my image stabilizer
is not needed. Be aware that any
modifier you put on your flash or on your lights is going to reduce the power. So even though your
flesh exposure might be great when you launch your
subject without the gel, as soon as you put your gel on, it's going to reduce that power because some of the
light is reflected back from that Jill and
not all of it will transmit through various
different colors, will give you different opacity. So sometimes the light
will diminish more with a blue gel than it
will with a yellow gel. Also any modifiers that you use, if you use any grids or if you use any snippets or soft boxes, they're all going
to reduce the power of your flesh to
a certain degree. It simply means that you need to turn up your flash a little bit higher or open up your
aperture a little bit more. But be aware that modifies
will take a little bit away and gels will take a
little bit away as well.
7. Do We Need Colour Theory: Many photographers
who talk about using gels tend to refer
to the color wheel. The color wheel is
a wheel of colors. Surprisingly, that shows
various different colors in relationship to
each other color. A lot of photographers say that you should use
complimentary colors. So colors that are opposite
on the color wheel, such as green and red, or blue and yellow. I'm not a big fan of
that situation because I don't want my
pictures to look the same as everybody else's. I just like to use colors that I think are going
to work well together. Experiment a little bit. Theory is theory and it's often a good idea to
know these things. But in reality, playing
around and experimenting, you can sometimes
have happy accident. So he can sometimes
come up with a result that is different to
what everybody else has. So experiment with your colors. Don't just follow
the same theories as other photographers do. You can try it and see, see what you think is best. But in my opinion, I like
to play around a little bit with those colors and the
combinations of those colors.
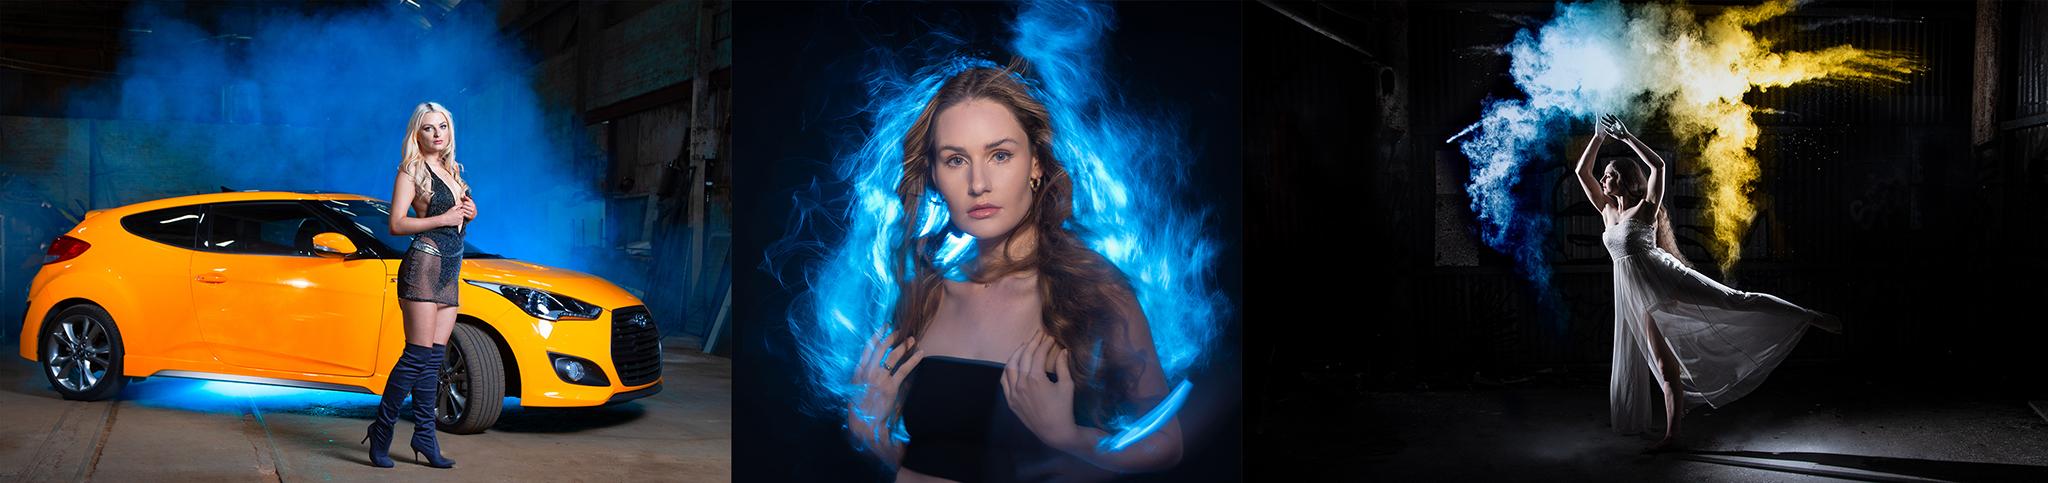
8. Possibilities: Of course, like any of these types of
techniques that I teach, you can combine them together. You can combine these colored
gels with other techniques. We can combine it
with light drawing. We can combine it
with backlighting. We can combine it with
smoke or water or bubbles. Anything we can do
that's going to merge two or three
techniques together, is going to make your shots
look a little bit different, a little bit more spectacular. So think of ways that you
can enhance your gel images. It's great to be able to
shoot these things straight and be able to use a couple
of gels to get your results, but push yourself a little bit further, try
different techniques. And you may come
up with something amazing that I haven't
even thought of.
9. About This Gel Photo Shoot: The series of shoots
you're about to see took place in RStudio. We have quite a large studio. Not large by a lot of
people's standards, but larger than a,
than a normal room. But the walls are white, the ceilings white, the
carpets light colored, needed to darken it down
as much as I possibly could to create the gel images
that you're going to see. I also shot against
the dark background, which I wanted to
place a fair way back from my subject,
my model clear. Because the closer she
is to the background, the more that jailed light would reflect
onto that background. And I wanted to try and
keep their background as black as possible
so that I could use it to build color in
the image if I wanted to. If I have color
already spilled on that background and it
limits my possibilities. So she was about three
meters in front of that black background
to try not to reflect any color
onto that background. We also used light modifiers, they're concentrated the light. So we used speed
lights to start with, with snippets and with grids to concentrate that
line in a particular area. We started off just with
a simple silhouette. So we aim to flash at the
background and we had clear in a profile so that we could shoot her as a silhouette
against that background. Then we added a little bit of backlight with that background
in a different color, just to make us stand
out a little bit more. We built up the lighting a
little bit more each time and added some different effects and different lights and things. But a lot of the time we would
simply using speed lights. So these techniques are things that you can
do quite easily. We have the equipment here, we have stripped
boxes and we have soft boxes and Octa
boxes and stuff. So we use some of those as well. But you can do all this stuff just with
the plane speed light. We used our flesh
triggers to be able to fire off all of their
flashes in unison. At the end of the
shoot, I also wanted to do some constant light, particularly behind
Claire's here. I wanted to put a fan
on her hair to blow her hair around to try and get
some movement in her hair. So the flesh on her face gave us a frozen
image of her face. And then we had the
backlight with the fan on her hair to give us some blur
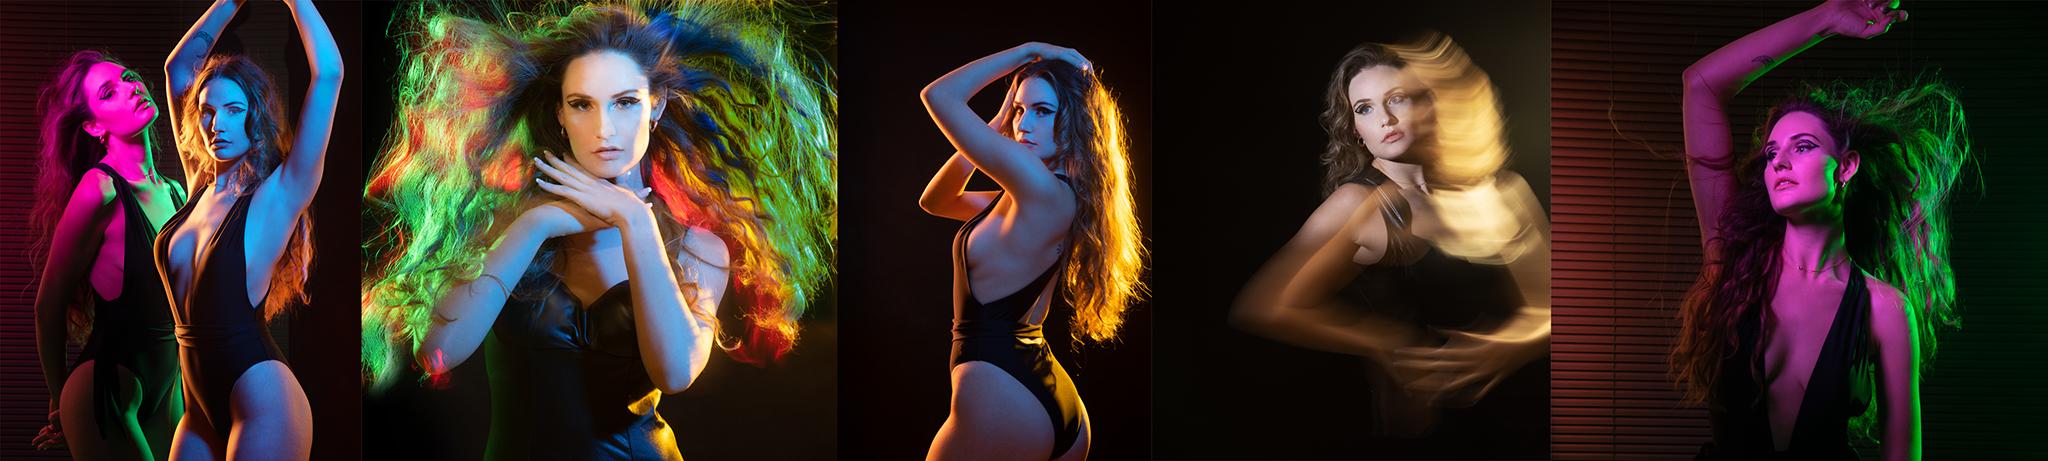
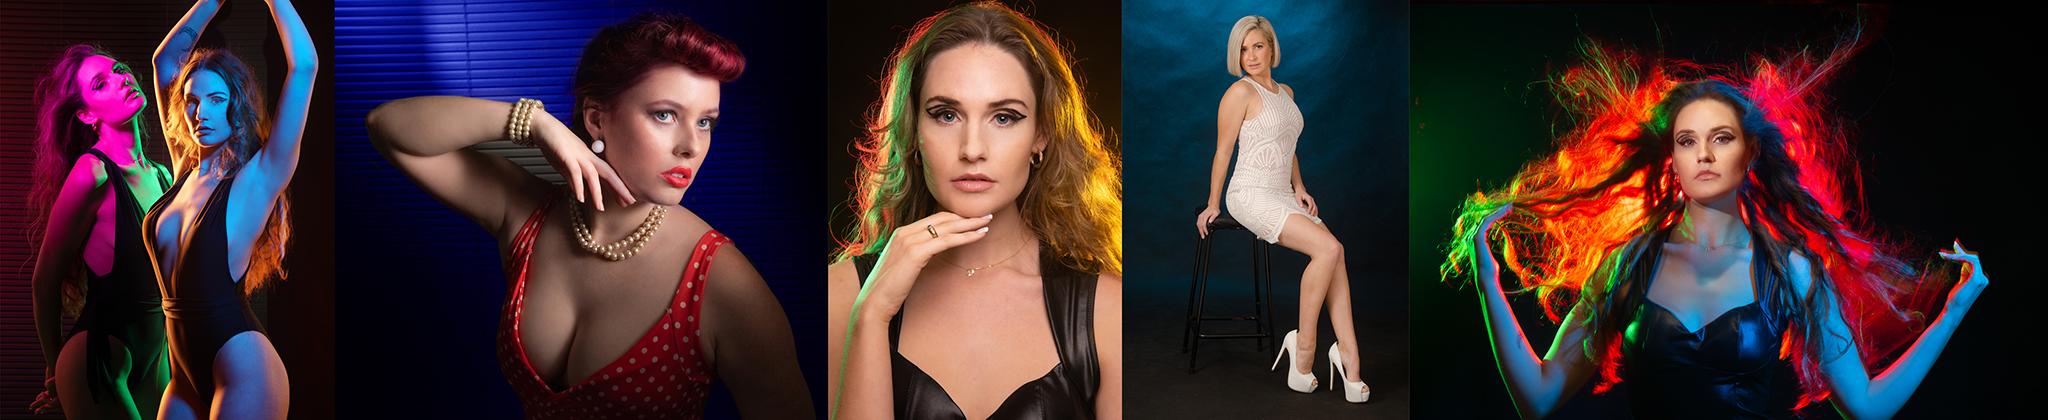
in that part of the image. So it worked out really well. You can see some of the
results that we got here, but you'll see some more of them when we get into the chutes. And I'll explain a little
bit more as we go through. So have a look at these
series of shoots. I'm sure you'll be amazed
at the images that we got. We were really pleased with
the results that we had clear was a fantastic model to
use in this situation. But various different
lighting techniques, various different colors. Have a look at it and I'm
sure you can come up with something that you
can do for yourself.
10. Intro To Our Shoot: Good day. We're here
in the studio once again doing a shoot
with colored gels. We've got clear as our model, we're going to do
a whole range of different effects with
different colored gels. You can see some of
the lighting that we're using, various
different lights. I'm going to start out
with basic speed lights because that's probably what most of you people are using. And the results that
you can get can be amazing just with small,
cheap speed lights. We're going to progress
later on to do some more work with some
softbox and gridded soft boxes. But most of all we
need to think about constricting the
spread of our light, because our Jill's will mostly
light our shadow areas. So we need to create some shadow areas for
that color to work in. We're using grids,
were using snippets. We're using honeycomb grids to concentrate our light
into specific areas. So have a look and
see what we do. And hopefully you'll learn something with
using colored gels.
11. Ambient Light Issue: Normally when we're
shooting with gels, we would shoot in
relative darkness because we don't want
the ambient light to bleed into our colors because it would make our colors look
a little bit less intense. But because we're videoing
in this space here, we've got our room lights on. It's not gonna make
a huge difference, but we need to leave the room
lights on just so we can get some reasonable
quality video for you. We've closed the
windows over so that we can we're not getting it too
much light through there. So that's why we're shooting
with the lights on, but you can choose to do it either way when you
do your own work.
12. Silhouette Gel Shots: So Claire, we're starting off
with the silhouette shot. We're gonna be lighting
the background with red from our red
gel on their flesh. So we need you to turn around to the side because you want to get a profile shot
for this silhouette. Whenever shooting
silhouettes, we always want to shoot a profile. And I need to hide that
flesh in behind you. So I needed to move
forward a little bit. Yeah, that's it. Okay. That's great.
I want you to look straight over towards
the wall over there. Yeah. Lovely. Good. Yeah,
terrific. Okay. That looks great. It's a great expression, but we're going to ramp
it up a little bit. We're going to put a blue
light on the back of view and the red light
on the background. So again, we might turn you the opposite way this time just
for a little bit of variety. Yeah, that's it.
Okay. Yep. Good. But on Egypt profile,
straight through that way. Yep. Okay. Here we go. Yes, Beautiful. So we've got that little
bit of blue coming through just to highlight
rim light clear. Yeah. Okay. It looks great on her hair
and the edges of her. We'll do one more.
Yep. That's it. Drop those hands down a little bit for me. Yeah. That's it. Good. Okay. Great. Just
to speed lights. One with the red gel,
one with the blue gel.
13. Speedlights With Gels Only: Back to the day that you
went to see your family. I'm using this black
card as a flag. A flag is something that just stops the light
hitting your camera. So we're putting, use
this to try and stop that red light in the background from hitting your camera and
causing some lens flare. Okay. So we've got Claire changed
into a different outfit. We've changed our lighter
and a little bit we've got a blue gel on air speed light hitting her from the front side, which means that's
the main light. That's the light that's
lighting the front of her face. So we'll need to
get her to turn to face towards that light. We've also got a red gel on
a speed light at the back. So again, we're just
using two-speed lights. One with backlight coming
through delight her hair, and the other one to
light the front of her with the blue gel. Okay. So we just want to get your tenure face
that way for me. Yeah, that's it. Wonderful. Just eyes to me. Turn my camera on. Yeah. Here we go. Okay. Yeah. That looks really good
and yeah, that's it. Okay. Chin down a
little bit. Yeah. Fantastic clays got
this hair that just looks really great
with that backlight. That little bit of volume
in here. It looks terrific. That may just smiled in it. Okay, Great. Well,
yeah, that's it. Here we go. Lies to me. Yeah. Good. Okay. Fantastic. Nailed that perfectly
first-time. Okay. So we'll change the light around again and we'll do a
different sort of setup. All we've done now, we've
kept the same lighting setup, but I've just put
an extra light with this Newt to concentrate
the light onto clears face. And that light doesn't
have a gel on it. So we're going to get
natural color on her face. And we're going to
have those two gels working on either side of her. So have a look at these results. Let's see it. Great. Yeah. Just tend to face towards the light a little
bit more. Yeah. That's it. Good. Okay.
Yeah. Fantastic. One more. Yeah. Right. Okay. That looks good. I'm going to just turn this light down a bit
because it is a little bit bright to make my processing
little bit easier. So I just keep going. Yeah. Yeah. Okay. Yeah. Okay. Yeah. That's it. Yep. Okay.
All right. That's great. Thank you.
14. Stripboxes With Smoke: We change our
lighting setup again. We've started using
some larger softbox is now similar results could be
gotten with speed lights. It's just that we've got
these large soft boxes, so we might as well use them. Again, their job, we've got a blue strip box
on the background. From the background, we've got a red softbox on the
other side of clear. And we've got that
neutered natural light on her face once again. So I need to be a little
bit careful here because I've got that softbox
aiming towards the camera. I'm going to get a little bit of flair because any light that's coming straight towards the
camera will give us flare, but often it gives
a good effect. So I'm going to try it out first before I put a flag
in front of it, just to see if the effect
is something worth trying. What you did before, just with
your hands here and there. I'm looking straight
down. I quite like that. Yeah. Okay. That's
great. That's good. Okay. Up to me. Yeah. Just
going to zoom in a little bit. Yep. You're right. Okay. Maybe play with
your hair a little bit. Yeah. Yeah, good. Okay. Nice to me. Yep. Okay. Lovely. Now we're just going
to use a little bit of smoke in the background,
a little bit of smoking. It can just to spray it around, just to give us a
bit of atmosphere. And for those job lights
in the background, just to have a bit
more of an effect. That's great. Clear. Yep. Beautiful. When
you're ready Alison. Down a bit lower.
Yeah. That looks good. See this effect we get. So moving up and down. We don't use too much because
we don't want to place too. Philip. Yeah. Great. The unload them little bit more. We need yeah. Up and down, just yep. Alright. When you're ready. That's it. Yeah. That's great. One last one. Maybe just around
to backup your shoulders. Okay. Here we go. Yep. That's it. Okay. Yeah. Terrific.
That looks good.
15. Intentional Flare: Okay, so is that one
on your face again? We've got different
setup here again, I've still got that
snooty light on declares face to give her a natural
skin tone on her face. But I've moved a couple
of speed lights in behind her and there'll be in the shot. So there'll be given me a bit of flair in their background. It's going to give me
a little bit more of a glamorous sort of
look to the shot. But we could do it with a little bit of smoke and with that a little bit of smoke. So we'll do a
little bit of both. You'll see the
results that we get. Okay. That's great. Clear. Yeah. Just like that. Wonderful. Here we go. Okay. Yeah. Like that
took frame here. Just turn your face a little
bit towards that light. Yeah, that's it. Okay. Great. Yeah. When
I'm up will be good. Good. Yeah. Maybe turn around to the
side a little bit. Yep. That's it. Okay. Yeah. Alright. We'll get
a little bit of smoke in there and
see how that looks. Okay. When you're
ready. Yeah. That's it. Hey. Yeah. Alright. Just one more Elson. Yep. Here we go. Yep. Okay. Good. Okay. You can see how that smoke just diffuses the flesh and the background and
just makes it look a little bit more cinematic. Even though I don't
like that word. There's no other word for it. People say cinematic when they can't think of
anything else to say. Okay, that's good. Alright, we'll get
your changes again.
16. Full Length Shots: So our next setup where using a small beauty dish just to throw natural light
on declares face, we've got a couple of acolytes. They're, we're doing full
length shots this time. So we did try a
couple of shots and her feet were very dark because most of our light's
coming from above. So we've got a small snoop throwing a bit of blue light
down onto Claire's feet. Focus. Yeah, that's good a lot. They're looking up at the
camp. They're like, Yeah. Okay. Great. Yep. Yeah. Okay. Maybe feet
apart a little bit. It's time. Yep. Good. Yeah. Okay. Alright. Okay. That's great. So we've got clay sitting down this time. Similar sort of lighting
scenario just to get a different sort of
look to the shot. Okay. Here we get a clear, great. I'll just check my
first one to see. Yeah, that looks good. Lovely. Here we go. Yeah. Okay. Maybe throw all your hero
for that one side for me. Yeah. Good. Okay. Here we go. Push the **** back off
the shoulder for me. Hip. Good. Yeah. Great. Okay. All right. Wonderful. Claire's nailed
it again. So great. Working with a model
who knows what to do. Not that any of my
other models don't know what to do. I think
I'll cut that video. Yes. Alright, That's terrific. Now we're gonna do
the blowing hair ones with the lighting behind so
we might get your change.
17. Lots of Movement: Back to today to when he
said to see your family. You yesterday. We've refined our technique
a little bit here. We're going to be lighting Claire's face
without beauty dish, with a grid on it, just to throw some natural
light on her face. And we're using an LED light in the background, not a flash. It's a constant LED light. So it's, it's joe blue. So it's gonna give
us that blue effect. But I'm gonna take
a couple of shots. First with a fan blowing
to blow Claire's here. Then I'm going to slow
my shutter speed, write down what she's
going to still give us the sharp image of Claire's face because our flesh will
fire on her face. But the hair is going to be blurry and moving
around and swirling because of that low shadow split that slow shutter speed with the constant light
in the background. Okay. So we'll just do one
like that first clear. Yeah. Just push
your hair out onto the point of the
shoulders if you can. Yeah. Yeah. That's it. Yeah. That's good. Chin down a little bit for me. Yeah. Okay. Great. Okay. Bring your hair
forward on both sides. And we get allison to just
blow it a little bit. Let us know if this gets
uncomfortable, Okay? Yeah. Lovely. Okay. Alright, that's great. Okay, so what we're gonna do now is change my settings
a little bit. Run 2.5th. So we'll
probably go down to one full second.
That should be good. Okay. Yeah. Okay. Focusing right when
you're ready, Alison. Yeah. Okay. But we need to do is turn out the
lights. Now a need. We're getting good bit of ambient light in this shot so it clears a little
bit blurry because of the slow shutter speed. So we're going to
turn out the ambient lights so that that flashes. The only thing that's
lighting clear. Okay. So we're in darkness here. We're focusing. Okay. When you're ready, Alison. Right? Okay. That's good. Now we're going to change
background gel to read. Alright, now we've changed
to a red backlight. So it's gonna look a
little bit more like flames has Claire's
here is blowing around. I'm going to turn out
room lights out again. And we're shooting on
1 second exposure. Okay. Here we go, alison. Yep. Okay. Good. Now I did something a
little bit tricky then I moved the camera
at the same time. So we've got a little bit
of flare on Claire's here. But I moved the camera
around a little bit just to give a little bit more
movement into the shot. I'm not sure if
it worked or not, but we'll play around
with that a little bit more and see what we can do. So you can see it a
little bit experimental. I'm not sure if it's worked yet, but we're going to play
around with a couple of camera movement
shots and see what we can come up with when
you're ready. Awesome. Okay. Yep. Okay. Good. We could get some fire
and put them behind you. I mean, in Photoshop reality, where just finishing off with a bit of a holocrine,
sort of a shot. We're going to have rainbow
colors all over the place. We've got all of our lights on, most of our lights working in this shot going to
have green ones, red ones, orange ones, blue ones all over the place. So we'll just see
what we come up with. We're gonna do a little bit of a slow shutter speed to
during this session. So I want a 100th
of a second now, I'm going to drop it down
to about a quarter of a second or 2.5th
just to finish off. Okay. Great. Here we go. Just focus. Yeah. Great. Good. Just checked it that
lights in the right spot. Yeah. Terrific. Okay. Yeah. Lovely. Evening close.
Yeah. Good. Try to keep your face towards a
beauty dish if you can see it. Okay? Yeah, love it more. You play with your hair
a little bit more. We can mess it up now
it's at the end of the session here. Good stuff. Yeah. If he's smiling shots. Yeah. Imagine you're
enjoying yourself. Lovely. Yeah. Great. Last one. Yeah. Okay. Terrific. Now, we're just going to slow down the
shutter speed a little bit. Um, you don't need to
do anything different. I'm just going to move my
camera around a little. So I'm gonna go down to 2.5th. Now need to be a little
bit careful when I'm doing this that I don't have the lights going
over clears face. I need to be a
little bit careful with how I move my camera. Okay. Here we go. Good. Yep. Right? Yeah. Yeah. Good. Yep. Okay. And last one. All right. Okay. Wonderful. That's a wrap. Thank you very much. Clear. Well done, everybody. So we're all finished
now we've had a fabulous shoot with clear. You can see all the
results that we've gotten. So we've done shots with
different colored gels. We've done in slow shadows. We've been dragging the shutter. So it's a really
creative techniques that you can play around with. And I'm sure you'll
get some great shots. You don't need a
lot of equipment, just some cellophane or
some little flesh gels you can pick up for $10 on eBay and use your speed lights. You'll be amazed at the
results that you get. Okay. We've finished our shoot.
Claire did a fabulous job. We used a lot of different
lighting effects and things. I just want to ask
clear what she thought about the shoe because
it's a little bit radical, something that she
probably hasn't done before. Did you have fun? Yeah. Yeah. I love working with
the fun lights. I usually do a lot more
like sterile a column. So it's so much fun. I loved every second. It's something we don't do
here. We don't do sterile. They come. Okay, we'll see you
in the next class.
18. SS Gels Conclusion: So there you have it. All of those shoots
that you just saw. We use colored gels to
produce some amazing results. And you can do the same thing. You don't need the
equipment that we've got. You just need basic equipment. But the possibilities
are endless. Just doing this shoot has given me ideas that I
could try in the future. Things that I haven't
tried before, new things that they're gonna
give me different results. So each one of these
techniques that you try creates more possibilities. It also increases your
repertoire of shots. If you need to do
something specific for a client or for a
customer or for a friend. You've got these skills in hand. Every time you try
something new, it increases the possibilities for your photography
in the future. So get out there and give this a go using colored
gels is going to make your shots look
different to everybody else's that really stand
out on social media. So get out and do it. I'm sure you get
some great results. I'll see you in the next class. Thank you for watching.
 Warren Marshall, Passionate Photographer