Transcripts
1. Introduction: Hi, welcome to my
stop-motion course. My name is Chris, and I'm a full-time filmmaker and
photographer from England. Now, throughout this course, I'm going to be talking
all about stop motion. What's its A's, how to do it, how to get a really
amazing shot using stop motion photography
and what you should avoid to get a really
clean results. So join me throughout this
course and we're gonna jump into the world of
stop motion photography. Let's get into it.
2. What is Stop Motion?: Now before we jump into the how, let's just first take that
back and talk about the watts. What is stop motion photography? Essentially, stop
motion photography is video made up of still images. So essentially the
waist stop motion photography works is
you take a picture of an object and then you move the object and take
another picture. And essentially we
just recreating video, but with still images. Now, the sounds
really complicated, but I'm going to
run you through the process of what to do, what to look out for, and what to avoid
when you're doing, you'll stop motion photography. Now the reason why somebody
would choose stop motion over a different video
technique is because stop-motion can bring
objects to life. You can literally
move an object in a way where it wouldn't
move in real life. But through stop-motion,
you can create a really dynamic animation that really brings
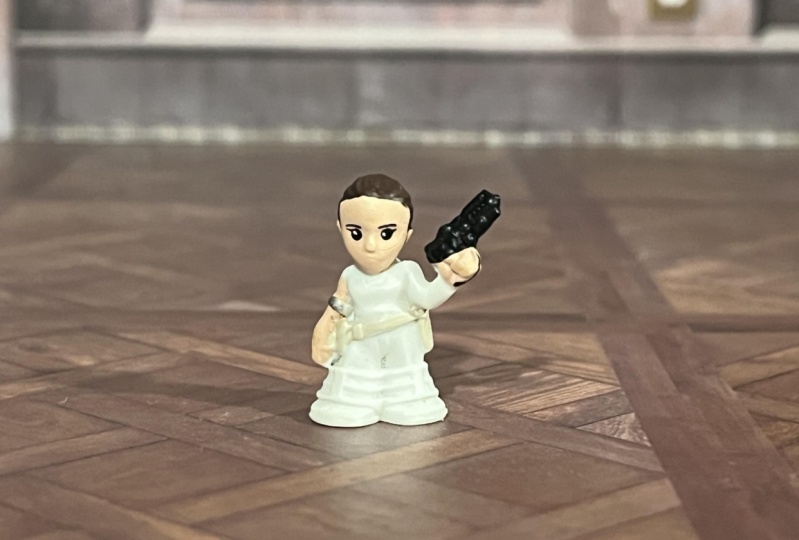
the object to life. Now the objects could
be a piece of paper. It can be a cause, it could be a camera battery or it
could be a clay character. Now the famous examples of
stop motion photography, although he's Lego animation and films you used to
watch when you were younger or you have
clay animation films. These are really widely known
as stop-motion animation, but you can get really clever. I'm really into stop-motion, but you could also relate
back and create a really interesting simple
stop-motion animation. So in the next video, I'm going to jump into the
pre-production and figure out what you need to do before
we start taking pictures.
3. Planning and Pre-Production: When it comes to
video production, you can kind of winging onset. You can turn the camera on the lights in the
perfect position. And you can be very creative
and just come up with things on the spots and you can create some really amazing shots. But the problem is
stop motion doesn't work like that
because you'll not turning the camera on and film or whatever's going to
happen in friends of you, you're having to craft
everything by hand. You have to make sure you
know what is happening. Because if you're
just trying to figure it out when you're in
front of the camera, then it's going to take a lot longer than it needs to take. And you could just be
wasting large amounts of time, efforts, and resources. So pre-production is
really important. Now the first thing that
you want to think about is what's actually do
you want to animate? So what's the object? What's the carrots or what do
you want to bring to life? And then you need to
figure out its roots. So let's just take this
remote for example. So if we want this to let you to go from this side of the screen, this side of the screen, all we need to do is
figure out the root, and that would be this. So we would just go through
the process of taking all of the images so that animates across screen in that direction. Now the problem is if I
turned up onto set and then I spent half an hour
doing the sequence, and then I decided I didn't actually want it to go this way. I wanted it to do a circle, for example, then that's
a lot of wasted time. Now the reason why is because it takes a lot of time to capture a stop-motion projects when it comes to the world of video, video is made up of frames and you'll frame is
basically just an image. So generally, when
you're filming video, you'll frame rates
is going to be 25 frames per second or
25 images per second. Now, this does vary
depending on where you are in the world and what type of frame rates you're using. But this can be 24, 25, 36 day. But generally it's going
to be between 24 and 30. Now, that's 24 to 30 still
images for 1 second of video. So if you wanted to
animate this object to animate from one side of
the screen to the other. And it's going to
take two seconds, then that's
potentially 60 frames or 50 frames that you're
going to have to take. So 50 images. So you take a picture, you move it across, you take a picture, you move it across. So it's crucially important
that you map out the roots. And it's also
important that you map out the pace because
the program is, if you've only got
this much distance and you needed to
take two seconds. If you take one photo here, one photo here, and one photo
here, that's three frames. That's not even going to
be a quarter of a second. So it's really
important that you get your route planned out, but it's also really important
that you figure out how far the object needs to
travel in the frame. You don't have to have
this figured out exactly, but as long as you roughly
know how long it's going to take you to get from
one side of the screen to the other to
complete the action, then you can roughly
figure out how far you need some move the objects in each
different frame. And then of course, when it
comes to your pre-production, it's really important
as well that you shoot. You'll stop motion in a controlled environment where you can control the lighting and nothing else in the environment is going to change around you because this could completely
ruin your efforts. Now, I'll get more into
lighting on the next episode. But essentially you, basically, once you find the
location that a suitable to do your
stop-motion animation. So make sure the location
that you're capturing in. You can control all
of the lighting. You can close the windows, and there's no natural light
spilling into the location. So once you've got
your root figured out, you've got your character and
you know roughly how long it's going to take and you've
got the perfect location. Now we can go ahead,
get the camera onto the tripod and stop
capturing images.
4. Capturing your Sequence: Now that you've completed
your pre-production, we can move on to the
production stage. And this is where
we need to take the images for us
stop-motion video. So like I mentioned in
the previous episode, we need to make sure we're
capturing 25 images, at least 25 images for
1 second of video. So this means if we want
a 4 second sequence, we're going to need to take
100 still images if you know how to shoot a time-lapse than the process is very similar. So we're going to
have to take photos and stitch them together
to create a video. But the difference is when
we're shooting a time-lapse, the objects or the subject is
moving in the frame freely. So this could be
the clouds Cause pulsing by people
walking past the camera. And you'll just take some
pictures of that movements. But when it comes
to stop motion, you're having to create
the motion yourself, not with the camera, but with the object. So the first thing you need
to do is grab your camera. Um, first of all, we need
to put this onto a tripod because we're taking 25
images for 1 second of video. If I was to hold the camera in the rough position and
take 25 different images. When I stitch these together and speed this up to 1 second, It's just going to wiggle
all over the place. The shot will look horrible and it won't look
very professional. So the first thing you
want to do is just put your camera onto a tripod. Next up with your camera
onto your tripod, you, once you frame up your image so you want
to find your subjects, figure out what the
reframe is going to be, and that you want to
set your focus and turn your camera into manual mode. Now, manual mode is basically
just the setting in your camera at way you can control all of the
settings yourself. You say the problem
is when you go to automatic or you go to TV mode or AV mode or
bolt mode on your camera. Your camera is going to
be constantly analyzing the scene and if something moves that it will
change the setting. And the problem is
if it does this for every single image in that 25 image
sequence throughout that 1 second video will have 25 different brightness levels. And this means
there's going to be this constant brightness flickering in our footage
and it will really amateur. So if we set all of our
settings to manual, so this means we set
the shutter speed, the aperture, the white balance, and normally the other
settings in camera to manual. That means we have
full control over the look and the
style of the video. But once you've got
your camera mounted on a tripod and it's
in manual mode. You've got everything framed up, and now we can actually look
to adjusting the lighting. So again, to avoid
that flickering light, we need to make sure that
the light is not changing. And this means that we
can't rely on daylight or another source that we
don't have control of. So when you're in your location, make sure you close
all of the blinds, close the curtains,
close the windows, and light the scene with
a lights that you own. So a video lights this way, you can set the brightness level on your light to a
specific setting. And therefore,
every single image is going to be the same. And we'll have that
same brightness level across all of our images. And we won't have flickering or color balance changes or any of that messy stuff throughout
the stop-motion sequence. So you basically, once you set your camera to manual mode, set your lights up and make sure there's no natural light
spilling into the scene. And then we can
actually go ahead and grab ourselves a wireless
remote for the camera. Now, the reason
why I'm suggesting me grab a water SSH
remote for the camera is because when you physically press the camera
and you can make a micro adjustments or you can slightly move the
position of the camera, and that will affect the
final result of the video. So when you speed this up and every frame is
slightly difference, there's going to be this really dramatic
wiggling effects. But if you get a wireless
remote for your camera, you can press the button on here and it would take
the photo on the camera. So you can go hands for a you don't touch the camera
and they spins. You only have to worry about
moving what's in the scene. So it with your camera
sets on a tripod, it's in manual mode,
your lighting is good and you've got a remote. We can actually go
through the process of capturing our sequence. So let's say we've got
the camera sets up in this position and this is
going to be our object. First of all, we will just place the object in its
first position. And then we would
take a picture. Then we would just
nudge it over again. And we'll take another
picture, not utopia, where again, take
another picture, nudge it over again. Taking a picture, and you just keep repeating this process until it goes through the
full range of motion. So until it's got
to that endpoint, it's really important
by the way, that when you take
the picture of the objects that you
step out to the frame and make sure you haven't
got any shadows or anything in the frame
which shouldn't be there. Now as you can see
in this example, I'm literally just using
this light to remote. So this is just a
physical objects which I'm just moving across a table. But you can get really
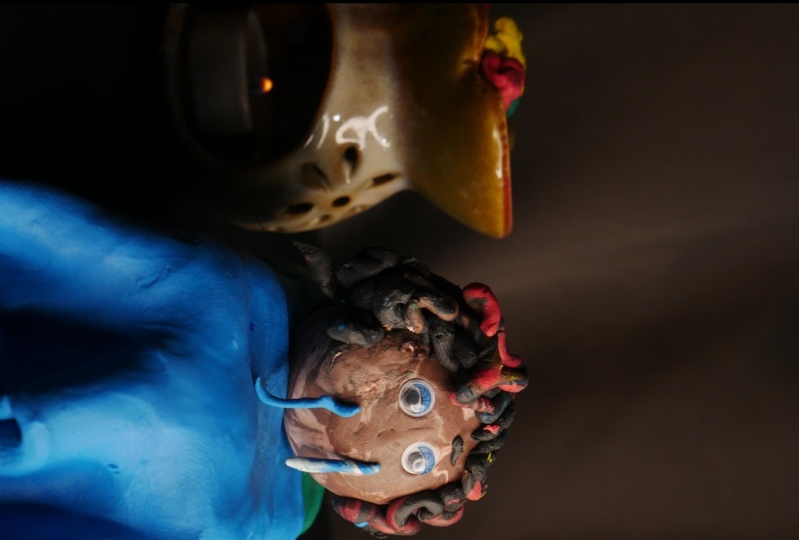
intricate with stop motion. So you can't actually
get malleable materials like clay or card or paper. So you could potentially be screwing up a piece of
paper over time and every frame it's crumpled
up a little bit more or have some clay
and move us around. Now that some really famous
high-end stop-motion movies out there where they using
clay to build that characters. And then frame by frame, they're moving their limbs
and changing the position of these characters to create the simulation of them
walking or traveling, or jumping, or doing
something in the scene. Of course, you don't have
to get that complex. You can get a really dynamic and really awesome effects using stop motion just by simply
animating a simple objects. So regardless of
whether you want to do as simple objects
or you want to use something a bit
more complex and a bit more malleable
like clay or paper called The results
are going to be incredible as long as you make sure your cameras
in manual mode, your cameras on a tripod and
the lighting is constant. And just make sure
you're getting those 25 still images
for 1 second of video. So a 10 second sequence is
going to require 250 images. It's really important
that you keep track of the number
of stills that you've taken so far and how many you need to
complete the sequence. Because if you need this to travel five seconds
from here to there, and you've only got 50 frames. That means it would
take two seconds rather than five seconds to
travel that distance. So just make sure you know
exactly how far that needs to travel over what
period of time.
5. Demonstration: Watch me Create a Short SM Sequence: In this episode,
I'm gonna give you a brief case study and show you exactly how I would shoot a really simple
stop-motion sequence. So as you can see, my
camera is on the tripod. I've got my time-lapse remotes, connects it and it's
taking the pictures, and I've got my camera
settings sets in, so my shutter speed is 1 over 4. My aperture is F7, 0.1, my ISO is 100, my white balance is 5500, and then I've got single
shooting sets on haha, the photos are set to roll and the lens is set
to manual focus. So it's not going to
automatically change focus halfway through the shots. So I'm just going to run you
through the process of how I would do a very short
stop-motion sequence. So without leaning
on the table or without getting my shadow on
the table, as you can see, my shadow is
affecting the table, so I'd have to make sure
I was all the way back here when taking the picture. But first of all, I would
just look at the image. So I just turn the
monitor on it, make sure it looks good. Then just press the button. And we've taken a photo. Now I just move this across
and we'll take another photo. And I'm just going
to keep repeating this process over
and over again. I omega, I could just keep
going on and on and on, but this is going
to get very boring. But this should help you
understand the exact process of what I would do when capturing
a stop-motion video. So with all of those
frames now added, and if I was to get this onto the computer
and play this back, you'll see we've got
this really awesome stop-motion animation
now created. Of course, I wouldn't need
to go through the motion and make sure that I've got all
of the frames that I need. So if I wanted it to two
seconds stop motion film, I'd need to do this 50 times, but this is exactly how I
would go through the process of creating a stop motion video.
6. How to Add Movement to your Stop Motion Animation: Now chances are
you've probably seen some really famous
stop-motion examples where the camera is actually
moving with the cart says, or maybe the camera is
orbiting around a carrot, so or stop motion animation. And you're probably wondering
if it's possible for them, Then why have I suggested in the previous episode to keep
your camera on a tripod? Well, the problem is
when you're moving your camera, we stop motion. You have to make sure that every movement is
absolutely perfect. And these high-end projects
have a motion controlled rig. And basically a computer is analyzing exactly
how far the camera needs to move for each frame to get this really dynamic
camera movements. So chances are we probably don't have
access to that equipment. I definitely don't have
access to that equipment, but that is a way to
add a little bit of lumens into your
stop-motion animation. And this is leaning into
something called a hyper lapse. So if you're familiar with
time lapses and hyper lapses, basically the difference is
a time-lapse is basically a static shots and you're hyper lapse is going to be a
dynamic moving shots. And we can take the same
principle from time lapses and hyper lapses and put that
into our stop-motion world. So the way a hyper
laps works is you take a paycheck of an object framed
up at a specific points, and then you move across
and take a picture again, framed up the same. And you keep repeating
this process until you get all your photos and
you stitch this together to create
a 3D dynamic shots. And we can do the
exact same thing with OS stop motion animation. But instead of orbiting around
a building or a landmark, we just go into orbits around a really small surface area. So let's say we want to all
based around this remotes. Again, we would need to take pictures of the camera
coming around here. But the problem is
there's no point just holding the camera because this is going to
be, again, really rough. So this is where we have to
get very specific and very precise with how we're
moving the camera. Now the way that I like
to do this on a budget is to get a pen and
a piece of string. Tie the pen to the piece
of string called the 1.5 of the string in
the sense of the frame. And then just draw a
circle with the pen. Keep in that string
nice and tight. So you've created this
perfect circle around. Now you can divide the
circle up into sections and then you can basically get your rough sense a
point for the frame. And then every time
you take a picture, you've got an exact mach on
where the camera needs to go. Now, you can get extremely precise with this and you
can get a laser pointer and attach that to the bottom of your camera so that you know exactly where the
camera is in space. Now the laser pointer is a very precise way
of doing this, and it does give you brilliant
amounts of accuracy, but it does add a lot
of extra work on. So once you've got
that circle maps out, you can just roughly figure out where the
camera needs to go. You can maybe position one
of the legs on the tripod. It's always be on the circle. Or you can just roughly have the camera on top
of that circle, but just make sure you're
moving the camera in the specific same amounts
of increments over time. Because if you move
your camera centimeter in one frame and $0.05 bases in the next
frame is going to be a big jump in the
stop-motion video. So as well as animating what's in the center
of the frame, you also move in the
camera and all but single slided, not
Paulson objects. So that you've got a
really nice dynamic mix of motion in the frame. Now if all of that sounds
like a loss of work, then you can't actually buy two different devices that
can kind of do this for you. So first of all, is a gimbal. So this gimbal is the
Manfrotto MPEG-2 20. It's a pretty standard gamble. It does what most
other Gimbels do. And it has pretty awesome
time-lapse feature. And the time that's
feature allows you to set an in point
and an out point. So with the camera
mounted onto the gimbal, you can essentially say
that the time-lapse, she starts here, and then
it should finish here. And then you set the duration so it should take 20
minutes, for example. So you were saying in 20
minutes your cameras, you go from here all
the way up to here. And you can use this to bring your stop-motion
animation to life. So you could say, you could start it here
and then after 20 minutes, it will go over here. And the gimbal is just going
to complete the action. And you can set
up an interval on your time-lapse remotes
of around five seconds, and that gives you five seconds
to jump into the frame, move the item that
you're animating, and then step out before
it takes the new picture. So basically your jumping in a move in the objects
that you're animating. Camera is on the gimbal moving in space and
your time-lapse remote over here is taking the pictures
at regular intervals. Now, the problem with
this option is you are grounded at a
specific points. As you can see, we
can pan, we can tilt, but unfortunately we can't slide or push
forward into space. So this is where you can
buy something called a slider and you can buy a motion controlled
device like a syrup Genie to add onto the slider. And this basically means
you can select the camera across in space and you
can say in 20 minutes, I want the camera to start
here and ends there. And you can animate
the pan and the tilt to work to create
a nice parallax. If all of that sounds really complicated, then don't worry, we don't need these
really expensive fancy motion controlled
rigs or Gimbels. We can get rid of
those and we can just focus on doing
this by hadn't. So just make sure you're taking photos at the exact same
distance and make sure that you're always focused
at the same points in the frame and
the moving objects. And you'll get a really awesome dynamic moving
stop-motion video. If all of the sounds just
way too much, householder, then focus on a static
stop motion shots and at the movement
into your shot with what you're animating, rather than adding the
movement from the camera. So focused on creating a really cool animation
with what's in the frame. And forget about what
the camera's doing.
7. Editing your Images in Adobe Lightroom Classic: So now that we've taken
all of the images required for stop-motion video. We can get these onto
the computer and get these into Adobe Lightroom. Now, this process
isn't essential, but running your images
through Adobe Lightroom will give you more access to
in-depth color controls. And if you capture
your images in a raw file or a Cl2 file, then you'll be able to
take full advantage of that rural file inside
of Adobe Lightroom. So I'm going to run you
through the process of how I would import and
batch color correct, and color grade all of my images from my
stop-motion animation. So we're inside of
Adobe Lightroom, and as you can see, this
is a previous import. So in order to import
a new group of photos, I'm just going to get
down into import. Then I'm just going
to go ahead and navigate to a specific folder. And as you can see, this folder contains all of the images
that I want to import. So I'm gonna make sure
isolates, check all. And then I'll just press Import. And Adobe Lightroom
will just take a moment to get
these all imported. And once it's done
that you can see all 28 images are now here. So rather than going to the first image and
color correct in this, I'm going to go
towards the end of the sequence where we've got
more aptitude in the frame. So let's go for 25, double-click that, and
then go into develop. So now you can see this
is our image and it is ready for color correction
and color grading. So the first thing you
can do is go over to the left and you can see all of these are
different preset. So, so you're like to room
might look like this. So I just got into presets
and you've got all of these awesome presets installed
onto Adobe Lightroom. So just scroll through
these and see how these affects the
look of your image. Now personally, I quite like the look of this one if
those quite vibrant. So I'm just going
to select that one. And then we'll go over to
the right and we'll go into the basic controls. So if I just drop down
all of these arrows, you can see we've got multiple
different folders here. So we've got basic tone curve, HSL and color, color grading, detail, Lens Corrections and transform effects
and calibration. I'll run you through all
of these very briefly. But the main bulk of
this is going to be done in basic and then
a little bit in color. But let's go into basic. So you can see the top slider is the amount of the preset. So at the moment the
profile is modern one and I can turn this down or it can
turn this all the way up. Now I do like that
more extreme looks, I'm going to keep that
all the way up to 200. Then you can come
down here and you've got your color temperature. So you can warm this up where
you can call this down. In my example, I'm going
to warm it up a little. Then we can go into
tens and we can push it towards the greens
or the purples. But I want this to look
as natural as possible. Then we've got exposure,
which is brightness. So get this to a point where
it looks correctly exposed. Then we've got contrast. So I'm going to keep that
roughly in the middle. Your highlight
slider is going to affect the brighter
parts of the image. So as you can see
that it's going to be the paper in this example. And then your shadows
is the darkness. So as you can see, the shadow under here
for pull it all the way down gives us
really nice contrast. But I'm going to
keep this roughly in the middle to keep
this nice and natural. And then the same
thing again, we've got whites and we've got blacks. So this is essentially
highlights and shadows. Next, you've got the present, so you can do a
texture effect to get this really contrast
did heavy effect, or you can make it really
soft, then you've got clarity. And again, that's doing a similar things
that's gonna make it really defined
and really harsh. Or if we pull this down, it's going to make
this very soft. So that's completely up to
you where you want to go with your image. Then
we've got a D Hayes. And if you pull
this to the left, it's going to make
this quite hazy. And if you pull this to the
right and it's going to really get rid of any
haziness in the frame. So it's just going to
read a contrast there. Then you got Vibrance
and Saturation. And both of those are affecting the intensity
of the color. So get those to where
you want those to go. Next up, we've got
the tone curve. And the tone curve
is essentially the RGB curves from
Adobe Premiere Pro. And if you don't
know what that is, essentially a tone curve
or the curves effect is allowing you to color correct
or color grade your image. And it is separates it
into a combine channel, the red channel, the green
channel, and the blue channel. And the top right
is the highlights, the bottom left are the shadows, and the middle is the midtones. So if I wanted to make the
midtones a bit brighter, I just push them up
to the top left. Or if I wanted to
make them darker, I'll just pull it down
to the bottom right. And the same thing
with the highlights. If I want the highlights
to be brighter, I'll pull that to the left. Or if I want the
highlights to be darker, I'll pull that down
and to the right. And then we can go
into the individual channels and do the same thing. So we can pull the mid-tones of the red down towards here so
that we get a green effect. Or we can go into the grain
and we can do the opposite. So just have a play with the
tone curve and figure out if you want to color correct or color
grade with this tool. Personally, I skip
this in Lightroom and just go straight down
to hate yourself and color. So you can go
through the HSL menu and you can adjust the hue, saturation and luminance
or separately. So essentially if we wanted to affect the blue on the hue, we can just pull
this across and it's going to change the
color of that blur. Or we can go into
saturation and we can increase or decrease
saturation of that blur. And then the luminance
is essentially the brightness or the
intensity of that color. But I prefer to do this
in the color slider. I select a color
at the top here. And then as you can
see, I've got the hue, saturation and brightness
sliders all next to each other. So I can push this toward
more of an aqua blur, can increase the
saturation and I can increase the luminance to make that pop a little bit more. And there we go. So once you've
adjusted, the color, will now go down
to color grading. And you can see you've
got your highlights, midtones and shadows. And this is a color wheel. So you can just move the specific points
towards specific colors. So I want the highlights to go towards a red, for example, the shadows I can push
towards a blue and these highlights and that
are pushed towards a red. So that was mid-tones
at the top, highlights at the bottom rights and shadows in the bottom left. And I can increase or decrease the intensity
of that as well. But personally, I'm not
a massive fan of that. Looks, I'm just gonna
get rid of that. This again is a tool
that I typically skip over at this phase. Then you've got detail,
and in detail you've got sharpening and
noise reduction. So if I zoom in and I increase the sharpening
all the up to 100, you'll see it gets
really crisp and really sharp. I'm going to
pull that down to 0. It's a little bit softer. So generally I would advise puts a little bit of
sharpening in here, but not too much because too much cannot really artificial. And then you've got
radius and detail. Again, these are just controls that are related
to the sharpening. And then you've got
your noise reduction. So if you can see here, I don't know if you'll see
it in the screen record, but the some noise down here. If I was to pull up
the noise reduction up on the details of the
contrast and the luminance, it should actually helps
you fade that out. But again, you want to
go quite soft on this. Don't go too much because you'll soften up the image as a whole. Next up we have
Lens Corrections. And Lens Corrections
is basically used to correct the
distortion of your lens. So if you have a fisheye
lens or a wide-angle lens, then you can just go into distortion and you
can counteract that. So if it looked like this, then you can pull it back
the other way or if it looks like this and you
can push it back this way. Now, I don't think I have to add any distortion or any lens
corrections onto this. I'm just going to
leave Lens Corrections alone and move
down to Transform. And Transform is a whole load of different scales, positions, rotations, horizontal
skewing, vertical skewing, Y offsets, all of that stuff. But again, I'm just going to
keep this as it was before. So there we go. That looks good. So now I'm gonna
go down to effects and we've got a
post crop vignette. So if I pull this all
the way to the right, then we get a white vignette. If a pull this to the left
and we get a black vignettes, and of course we can adjust the midpoint of that vignette. We can change the roundness
of that vignettes. We can feather this
so we can have a really harsh edge or you
can have a really soft edge. And then of course, we've got the highlight slider
here and then move in. Now we've got grains so we can increase the grain
and the size of that grain and the roughness of the grain so that we get
something like this. But again, I don't want that, so I'm just gonna get
rid of the vignette and then I'm going to get
rid of the grain as well. So this is the
image that I have. So from here, if you go back to the Library tab and
we go back to here, you can see only this one image is kallikrein sit and all of these other images than
normal previous version. As you can see, this is this
one and this is this one. So to copy that, we want to go back into develop
with that image selected, we go down to the bottom
left answer, Let's copy. Make sure everything
here is selected. So check all. Then
we'll press copy it, go back to the library. Go to that first image, will go into Develop, and then we'll just
paste that on. Now we'll go back to library. And then with that
first image selected, we want to highlight everything. So to do that, I just
pressed the first image, held down shift on the keyboard and select
it the last image. Alternatively, you
could do Command a or Control a and a if
you're on Windows. But basically you just want
to highlight everything. And then we'll go
to the bottom right and select sync settings. And you just want to,
for a synchronize. And that's going to
copy that effect and add that onto every other image. As you can see that all now getting this color
presets applied, now you just want to
highlight them all again. Then we'll go to the bottom
left and press Export. Then from here you
just want to go to the export location
and you want to export these to a
specific folder. So my example, I think it
was four, yes, four edited. I'll choose this folder. Then we'll scroll down to file images and
make sure these are JPEG and make sure
the quality is 100. The file sizes will be
larger if you select 100, but the quality will be
as good as it can be. So I would advise keeping
that as high as possible. Then you've got all of this
imagery, sizing Output, Sharpening, metadata, watermarking, all
of that fun stuff. But that doesn't matter. We can just press Export and Lightroom is now
just going to go ahead and export all of those images into
our specific folder. So once Lightroom has
exported all of these, we can now get
these imported into our video editor of choice.
8. Editing your Video in Adobe Premiere Pro: At this point in
time, you should have successfully run all of your images through
Adobe Lightroom and got them into
specific folders. If we go into my finder and look at the stop motion
images folder, you can see I've got all of
these different folders. So let's go into
for, for example, we've got four, then
we've got edited, and we've got all of
the edited files here, and we've only got the images parts of that
sequence in this folder. So that's why I'd recommend
you do before you put these into your editing program. Makes sure that all organized
into specific folders. Because then when you import it's going to be a lot easier. So in order to import
these into Premier, there are two methods. There's the easy method
and then there's a slightly more complicated and a little bit more
time-consuming method. We'll start with
the easy method. So first of all,
you just want to go into your project tab over here. We'll right-click
and press Import. Then you can see
you want to just navigate through to your folder. So let's go to four edited. And you just want to
select the first image of that sequence and make sure they're running descending. Then select that first image, go into Options and makes your image sequence is selected. Then just press Import
and Premiere will import all of those
images as one video file. So we'll just drag
this into our sequence and will keep the
existing settings. The reason why we're
guessing this is because the composition in
Premiere is 1920 by 1080, but the images around
5000 pixels wide. So we'll just keep the
existing settings. And as you can see, all we've
got is a big blue screen. And that's because
we need to pull the scale down so we go into effect controls, motion scale. And we'll just pull
that scale all the way down until it fits the screen. So that is around 33 and
a half in this example. Now when we play this
back, you can see that is our stop
motion animation. Now of course, this
stop-motion animation only consisted of 28 frames. So this means it's playing at a 25 frames per
second frame rate, and that means it's playing
for just over 1 second. Now, if you wanted to, you can actually slow this down. So we go right-click
Speed Duration, and we speed this
down to half speed. So 50 percent, you
can see we're going to get 12.5 frames per second. Now, typically, I
wouldn't normally advise dropping your video down
to 12.5 frames per second. Because if you were to do
this with normal video, it would look really amateur. However, stop-motion, you kinda get a little
bit more flexibility. So when we play
this back, you can see this actually gives us this really iconic
stop-motion look. If we pull this
down even further. So let's go to 25 or 24. You can see this is now started to look a
little bit too slow. So if we go back to 50 percent, you can see we're getting
that really nice stop motion. Look. I'll give you
another example. So let me import something else. Could it go through to go through five and just select this
first image options, image sequence, press
Import will directly send. And I'm just going to speed
this down to 50 percent. And again, we'll make
the scale 33 and a half. So let's see how this
looks at 50 percent. This example does have a really called dynamic
stop motion look to it. Now if you wanted to,
you can speed that up a little bit. So let's go 80%. And there we go. That
looks quite fluid. Or alternatively, you could take that all the way back up to 100% to achieve your
25 frames per second. And it looks really smooth now. So regardless of whether
you want to go for this slightly jerky or traditional style of
stop-motion animation, or you want this really
clean, slick version. Both options of really good uses of stop motion videographer. Now because we're in
a 10 ADP video and these images are roughly
5000 pixels wide. You can see the scale
is 33 and a half, which means we can actually
add some keyframe animation. So if we go to position
and scale and creates a new keyframe by selecting
the stopwatch icon. We can then move to the end of the sequence or towards
the end of the sequence. And we can increase the
scale and then adjust the position and then move
those keyframes to the end. So now you'll see we're slowly
zooming in on the action. The beauty of doing
this is it's giving us this really subtle
camera movement and it's actually helping to take that animation up
to the next level. So I would definitely consider adding in some
keyframe animation onto your stop-motion videos to really take those
to the next level. So that is the first way of importing a stop-motion video. That's the easy way. That's the method that I
would definitely recommend. But if that's not
working for some reason that you can do
it the other way, you could do it the manual way. So I'm just gonna
create a new folder. So new Ben will call
this stop motion one. It's going to get into
that Ben Amor going to right-click and press Import. And then we're just going
to navigate through to a different stop
motion image sequence. So let's go for this one. So we've got edit said, and now we want to
highlight all of those and make sure image
sequence is not selected, highlights all of those
and press Import. So these are now going to import as 5 second images may just want to
highlight all of those. So Command a or Control a and a. Then we'll right-click
the top one, Amoco, new sequence from clip. So you can see if I
zoom all the way in, each image is five seconds long. Now if you wanted
to, you could rename this so you can reveal the
sequence in the project. So it's over here and
we'll call this stop motion and nest. There we go. Now when we go back to
our original sequence, we can drag this
sequence into here. But you can see we need
to pull the scale down. So we'll pull that anti
33 and a half again. And we need to speed
this up because this taking way too long. So we're just going
to right-click and we'll go speeds
flush duration, and we'll speed this up
to Ashuka all the way. Let's just go 9999, so that's 1 second. Let's see how this looks. There we go. That has
definitely worked. It does require a
little bit more work, but the beauty of
doing it this way is when I played this. But you notice there was
a bright frame here. I don't know what
happened there. There must have
been something in the camera where I
adjusted the exposure. But by doing it this way, we can actually go into
the sequence here. We can find that bright image. Then we can go into effects, search for levels, drug
levels onto that one image. And we can just pull
the Gamma down. State. It's a little bit more dull. There you go, you can
see it's going to match a little better. You can also adjust some
of these other settings as well so that we'd get
down to that point. And now when we go back
and you can see that doesn't look as obvious. Now, I'm just going to increase the scale of this a
little bit to get rid of those black bars at the left and the right of
the play this back, you can see we've
got this really cool stop-motion animation.
9. Outro: And there you go. That's it for the
Stop Motion course. Now it's really important to note that this
course is basically meant to be treated as an
introduction to stop motion. Because once you know
the basic fundamentals of stop motion and how
stop-motion works. The rest is up to you
and your creativity. That's something
that I'm not able to teach and talk
about in a course. So now that you know
the basic rules of how many stills you need
to capture for 1 second of stop motion and how
to put your camera on a tripod and make sure
everything is controlled. Now what he's up to you to bring your ideas to life
through stop motion. So regardless of whether you're using characters
made out of clay, you're using physical
objects or you're molding paper or card
within the scene, that's completely up to you and that is up to you
and your creativity. So my challenge to you
now is to first of all, just go ahead and have fun
practicing stop motion. And then once you feel
comfortable and confident with the process of creating
a stop-motion video, it'll be great to see you. So if you have created
somewhat which you're proud of and you would love
to share with the world. Then please do upload that to the student's project section because I would love
to see your work. If you do, then I
promise I will share my thoughts and opinions
on what you have created. So thank you ever so much
for watching this course. I really do appreciate it. And of course, if
you're interested in video production than I do have other courses available
on my Skillshare page. So feel free to give
those a quick look. But if not, thank
you once again, and hopefully I will see
you on the next course. See you there.
 Chris Brooker, Filmmaker & YouTuber