Transcrições
1. Apresentação: neste curso, vou mostrar-lhe como usar para criar para desenhar personagens mangá. Quero mostrar dicas muito simples para desenhar seus personagens do esboço para a tinta, e um exemplo vai ser sobre a cor que você pode usar os diferentes exemplos Teoh usar e tomar as diferentes dicas para existir como você mesmo para não importa se você tomar um papel largo para usar com um lápis. Se você usa seu próprio software procreate com seus tablets, você pode seguir os diferentes exemplos,
desenhá-los e, finalmente, aumentar suas habilidades de desenho.
2. Personagem de dragonBall: Neste primeiro exemplo, vou mostrar-lhe como com o procreate você pode criar um personagem de manga. Estou começando com o primeiro passo, que é o do esboço. Então, para esboçar um personagem, Eu sempre usando uma opção de lápis que você pode encontrar nas opções certas em sua interface. E então eu estou começando a desenhar as linhas básicas onde na construção do rosto para ter certeza que nós temos uma espécie de correta uma proporção para a ciência direita e esquerda da cabeça. Então acho que o personagem está sendo muito simples de desenhar que se você respeitar as diferentes regras, eu estou começando com os contornos do rosto e começando, em
seguida, com sobrancelhas, como este é um personagem principal, os olhos bro. Meu irmão é muito simples de desenhar, mas você tem que respeitar essa simetria. Dificuldade aqui vai ser a simetria do seu desenho, porque se uma faca ou um mano de NY está tendo sinais diferentes do que o do outro lado vai ser algo estranho em seu desenho. Então, como um exercício pode tentar fazer o mesmo. O que estou fazendo aqui, reproduzindo cada passo e cada linha e tentando obter algo muito parecido. Então eu estou trabalhando aqui nos olhos, certificando-se de que a orientação dos olhos é a mesma. Dois. Porque se os momentos certos olhando para a direção diferente, que a esquerda também vai dar uma espécie de aspecto estranho, e seu personagem, em vez de ser muito cruel, é sério, ele vai estar tendo uma atitude divertida, e provavelmente não é o que estamos procurando. Então agora eu estou durante este esboço da boca e começando a colocar onde os cabelos vão ser um empate, você tem que observar quaisquer problemas que você pode encontrar quando você está desenhando. Só por ter uma visão global, você pode ampliar e diminuir o zoom em seu desenho, mas certificando-se de que você está sempre tentando desenhar o esboço com a exibição grande em primeiro lugar. Para ter certeza que você está, você está sentindo todo o espaço disponível em seu espaço de trabalho em sua página em branco e não cair no problema fora. Não tenho espaço suficiente para desenhar o resto do seu personagem, então agora estou esgotado. Os cabelos em formas muito simples não eram ainda no personagem mangá para que você possa obter
formas muito simples . Estou usando suas formas geométricas básicas, e a partir daí você pode tentar desenhar assim. Estou tentando fazer formas geométricas muito simples. Não mudaria quando vamos adicionar o pensamento. Não vai ser instantâneo vai realmente mudar a mesada. Vou apenas desenhar as linhas,
as linhas pretas que vão ser o resultado final do desenho preto e branco. Primeiro, temos que colocar com um esboço todas essas formas que estão sendo finalizadas na última etapa do desenho. Então sua primeira coisa a ver é a composição global de secagem se a composição global. Se você acha que há algo errado, encontre isso e corrija imediatamente. Não espere para estar no último passo da coloração fora da tinta para perceber que você tem mudar algo na posição, estão no formulário. Tente ser muito organizado quando você desenhar tal desenho, especialmente porque aqui temos o foram iniciados o pensamento e é
linhas muito puras e limpas estavam desenhando. Se houver algum erro, você pode escondê-lo com algum tipo de sombras são técnicas de eclosão e assim por diante. Você não pode trapacear com esta técnica, então certifique-se de que seu esboço está muito limpo antes de iniciar o Então Now estamos começando o pensamento, sempre começando com o contorno do rosto porque é como no esboço. Este é o ponto básico a partir do qual você está desenhando o seu então durante os olhos. A intensidade fora do local do personagem é muito importante. Então estamos durante isso, e a partir daí continuaremos com o resto fora. Os olhos vão fazer com o nariz, e provavelmente a boca não é grande o suficiente, então eu provavelmente vou ter que mudar algo aqui. Então, desenhando e nós vamos ver até mesmo satisfatório o suficiente ou não. Provavelmente vamos deixá-lo assim agora, e eu continuo a desenhar os contornos principais para que você possa se você tiver algumas dificuldades para desenhar com seus tablets. Por exemplo, se a sua mão está aderindo na tela, o que provavelmente não está acontecendo muito por causa da tela do seu iPad é muito boa qualidade. Mas se acontecer, sugiro que use o globo. Você tem luva especializada global para um desenho tablet onde você tem que dedos livres e os outros estão na luva. Este é um muito útil para divertido pessoalmente para cair, e você está se certificando de que não há nenhum contato falso com sua mão e seus comprimidos. Porque às vezes quando você coloca a mão no tablet, o software está reconhecendo um tipo de digitação, como se você estivesse digitando com o dedo, deveríamos fazer o caso, então ele vai desenhar algo em sua tela, e você tem que apagá-lo e assim por diante. Então tente encontrar um bom bosque e tente desenhar com ele. Então agora estou usando Ah, a tomada em preto e branco. Estou jogando alguns espaços. Os espaços são supostamente as sombras cortam os cabelos abaixo do pescoço, e vamos tirar algumas sombras que vão ser muito eficientes para tornar o seu desenho mais poderoso. Então, quando você terminar com isso, você pode continuar a colocar algumas, hum, sombras e também adicionar alguns detalhes na pele como se ele tivesse tido uma briga recentemente e ele
ainda teria alguns traços disso. Então tome o tempo que você precisa para desenhar essas linhas,
as linhas pretas levam o tempo para encontrar o pincel certo que você precisa e para desenhar esses pequenos detalhes. Não
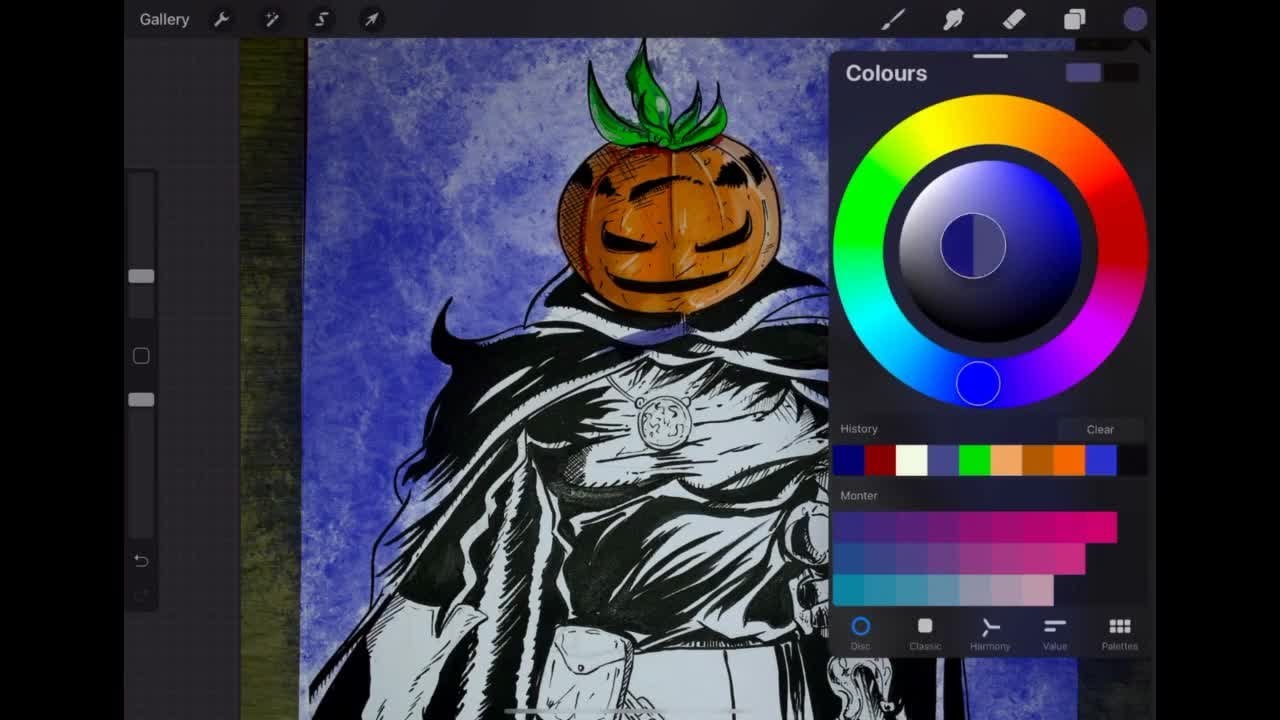
consigo ver neste vídeo alguns pincéis que estou usando. Estes são os pincéis básicos do software off pro cria, mas se você precisa descobrir uma criatura em versos, você pode fazê-lo. Não é um problema, mas eu gosto de explicar que você pode trabalhar imediatamente com ferramentas. Oferecê-lo com as opções básicas do software. Porque se você tem que criar seus próprios pincéis, estamos entrando em mais complexidades. Isso poderia não ser muito interessante se você está começando a desenhar com este software, então eu posso dizer que eu estou desenhando com opções básicas. Sempre e geralmente é o suficiente. Então agora eu estou colocando as sombras sombras muito pretas sobre os cabelos apenas para dar mais volume sobre isso e adicionando alguns tentou criar que não deve muito. Você não tem dedo do pé sobrecarregar seu desenho com as coisas que poderiam ser inúteis, especialmente se você está pretendendo adicionar um pouco de cor em seu desenho. Se houver muito preto e branco e cores demais sua bebida é, vamos levar muito tempo para fazer. E se você está criando um livro de quadrinhos vai ser muito doloroso e muito absorvente em. Você realmente teria muito tempo para desenhar cada quadro de sua banda desenhada com muita quantidade de detalhes. Então aqui, com este estilo Mangus, temos sorte de podermos ter suporte. É muito fácil de desenhar, mas como em voz alta para baixo Klein destes desenhos são muito simples. Você, no entanto, tem que respeitar o tipo fora esotérico adicionando as sombras corretas nos lugares
certos. Então, neste exemplo, você pode ver como poderia ser correto desenhar. Isto despedaça. Então, este é apenas um exemplo em que você pode desenhar a si mesmo. Estou mostrando cada passo, e tomando até mesmo um tablet, você pode pegar um papel branco e um lápis e censurar o que vemos aqui para fazer. O principal descreve as sombras e tentando fazer cada passo. Estou mostrando a você para tirar o hábito, drenar proporções atuais e bem colocar sombras. Este é um lado muito bom existir, a
propósito de fazê-lo Então você também pode encontrar casal off e exercícios interessantes como este. Todos esses vídeos vão mostrar essas coisas. Você pode reproduzir alguns exemplos de muitos exemplos para reproduzir primeiro. E se você fosse ir, mais longe você pode primeiro. Reprovação é o que você vê aqui neste vídeo. Então você não usa o vídeo para fazer isso de novo e você compara todos os seus desenhos. Meu conselho é manter todos os seus desenhos sobre as ordens cronológicas e depois de muitos dias ou semanas ou mesmo meses, você pode colocar a sua ilustração na ordem cronológica e ver a melhoria do nosso desenho uma habilidade. Você pode realmente fazer isso. Você vai ter certeza de que ficou impressionado que você é o aumento de sua habilidade, sua habilidade para cair. - Então como passo final, posso adicionar alguns grandes valores no meu desenho. Se você está usando um natural em nosso lápis, você pode apenas censurar a doença com bancos normais e lápis normais preenchendo os espaços com isso. E se você estiver usando este software procreate, você pode encontrar a cor no canto direito do seu software.
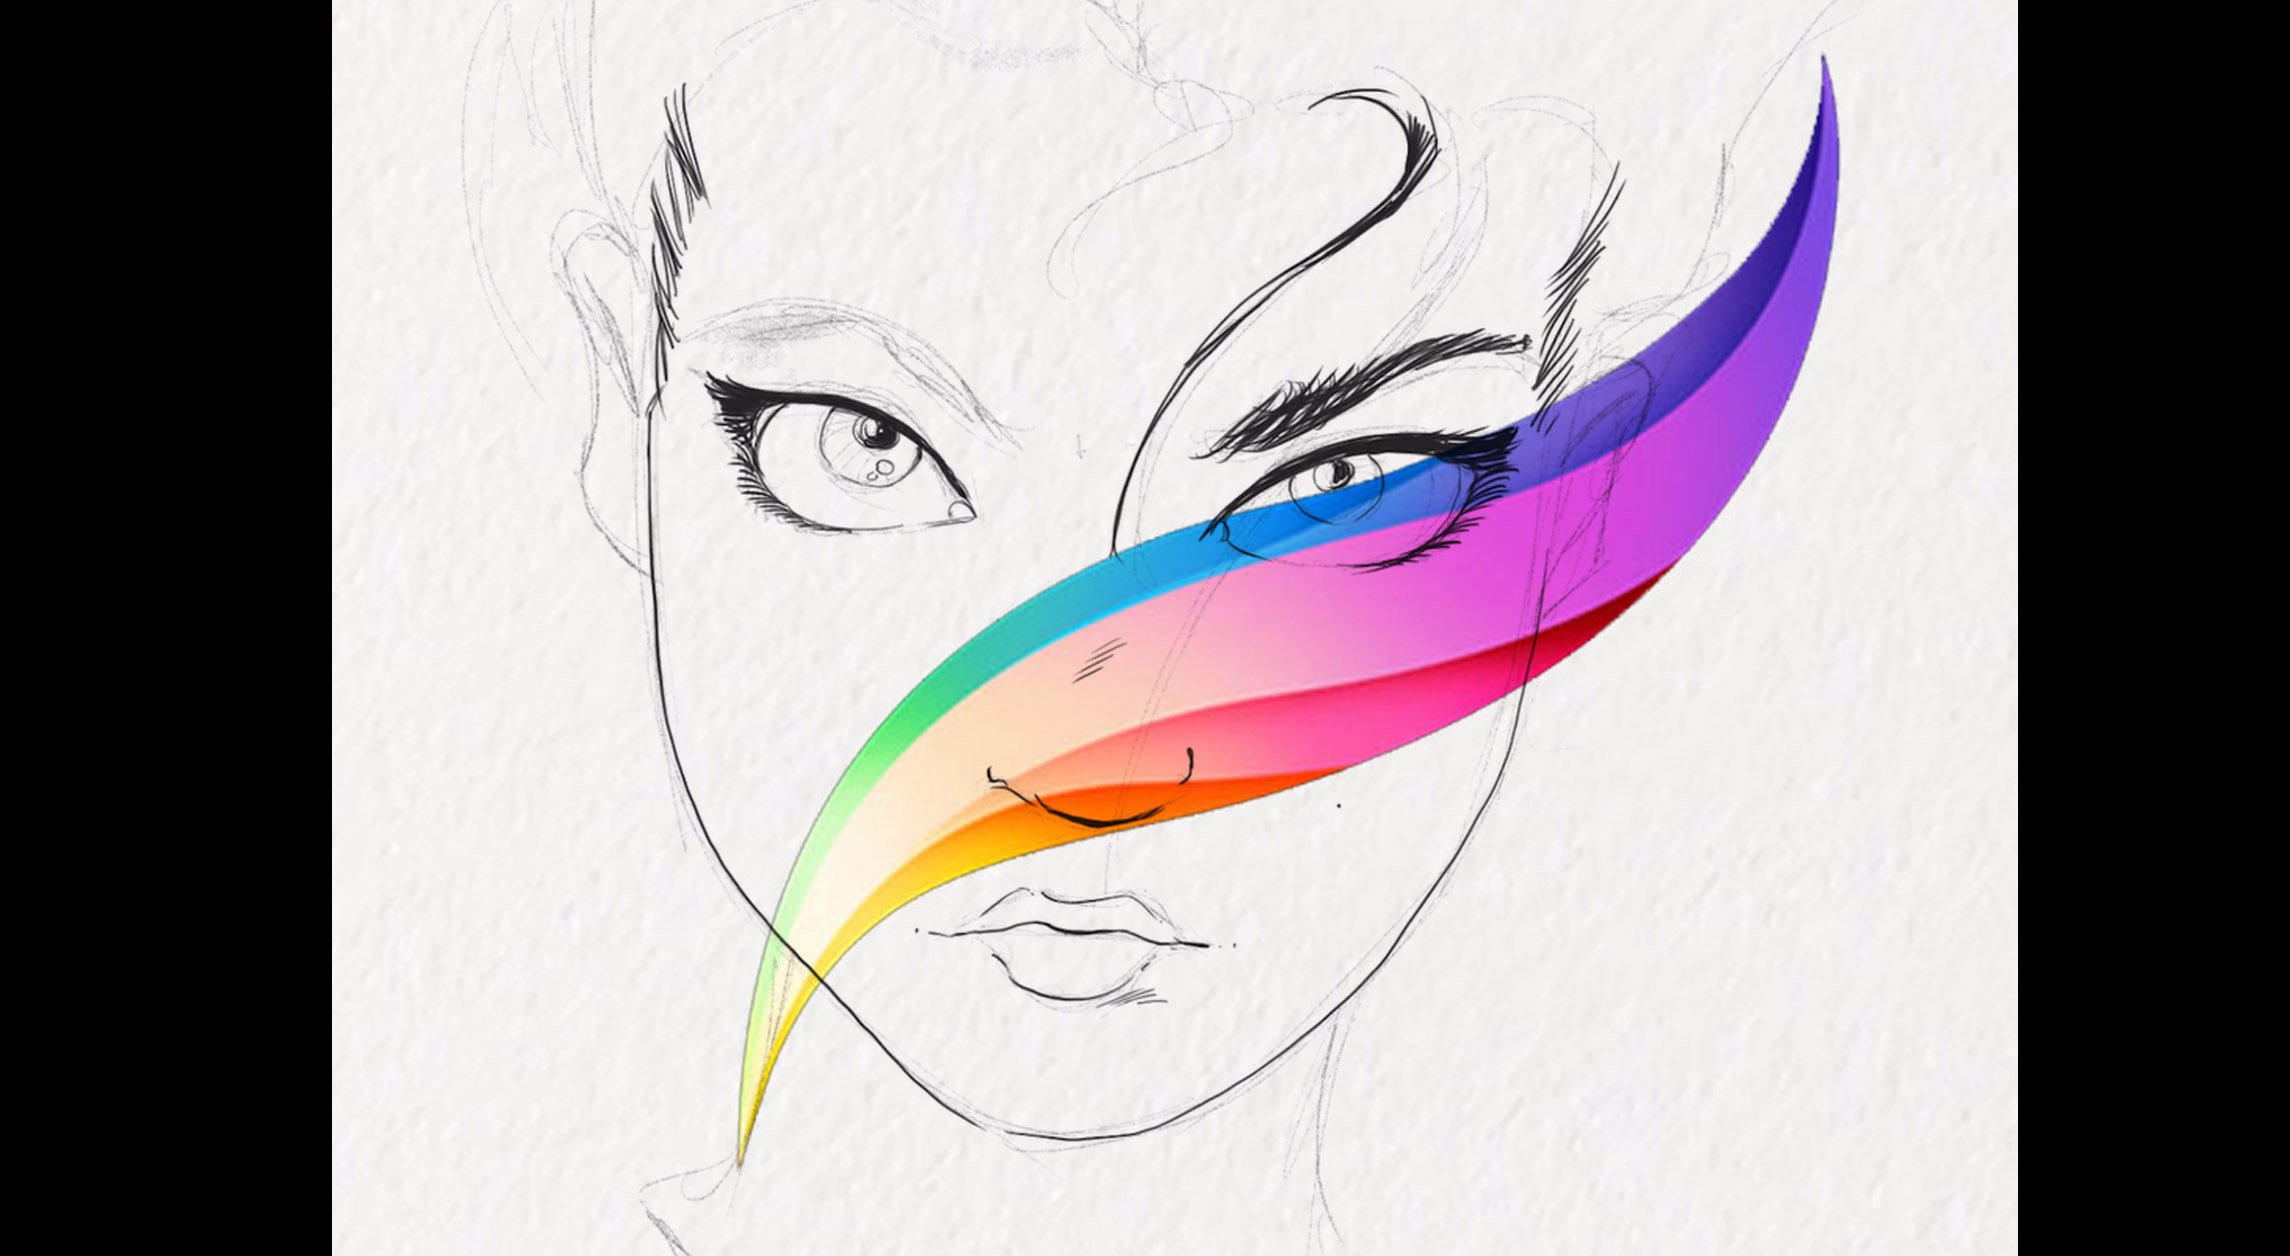
3. Menina de manga: E ele faz? Vamos ver como criar um personagem minger desde o esboço até o passo final
da tinta. Quando um verde para adicionar qualquer cor, vamos apenas desenhar passo a passo este personagem. Então primeiro nós sempre paramos por esta cozinha, e este exemplo é muito interessante porque vamos ver um ponto diferente, incluindo como podemos fazer o esboço por qual elemento do corpo temos que começar e como
podemos criar também um personagem que tem movimentos muito interessantes, não um movimento muito grande, mas algo que é apenas o suficiente para tornar este personagem vida. Este personagem é uma mulher segurando uma tigela em uma de suas mãos, e começamos pelo início, secando formas geométricas e procurando algo na forma. Quando você começa a desenhar, você tenta encontrar, e em primeiro lugar, o básico
a posição principal fora do corpo para que você possa começar a desenhar. Nem estou desenhando o braço primeiro. Só estou envelhecendo o corpo sem o exército. Quando o corpo parecer correto, então estou criando os braços, tentando encontrar uma posição para os braços. É importante começar com a posição do próprio corpo primeiro e depois continuar com a posição dos braços. Então eu decido onde fica o quarto. Ir para a bola vai ser esperança no lado direito do personagem e continuar a olhar na outra direção. Então, a mudança de direção, segurando a tigela em uma mão e olhando na outra direção também está recebendo algum. Podemos dizer algum movimento. Os movimentos não necessários algo amplo, como um personagem saltando estão pegando, fazendo algo muito amplo com seus membros. Você pode apenas criar alguns movimentos, e poderia ser suficiente para obter alguns para dar a esta Paris a este personagem algo vivo. Então agora eu terminei com o primeiro passo do esboço. Eu vou criar uma nova camada, acabei de fazer uma nova camada, e este nuclear vai ser contra alguns lápis pegando, mas com mais detalhes. Eu estou deixando esboços muito ásperos, e eu estou brincando com detalhes adicionais como coração. Vou desenhar os olhos,
o nariz, os cabelos e assim por diante. É muito importante, se você quiser, Eu não tenho certeza de como jurar personagem para trabalhar esta captura em dois passos Primeiro, o esboço muito áspero e Cygan, os detalhes pegar e tudo isso antes de começar a pensar. Nós já dissemos onde quer que você já ouviu isso em um dos meus vídeos. Mas isso é importante que o esboço seja bem feito se você tentar terminar ou adicionar cores em seu desenho enquanto você não tem certeza sobre o esboço, você pode criar erros. Como se o braço um dos danos ou um dos são você desenhar não está no lado direito, tamanho
certo. Você pode criar um erro pintando este Sr. Você não corrigiu. Então agora estou completando estes horários pelos cabelos. Desenhar os herdeiros no tempo mais longo é muito simples, mas você tem que fazer os cabelos descendo de cima para baixo. Você trabalha do topo da cabeça e desenha como ondas. Estas ondas especialmente ela tem cabelos longos. Ele vai fazer como ondas, descendo os ombros e sendo muito simples, não entrar em muitos detalhes, especialmente para o tempo mais jovem. Você não vai fazer algo muito detalhado. Certifique-se de ficar muito simples e em seu Se você quiser fazer algo mais realista, você vai deixar o mangga e chegar a algo mais. Mais perto de prender. Desenho provavelmente não é o que você está procurando agora. É possível que, talvez, em outro curso aqui, tenhamos procurado linhas muito simples para desenhar. Você pode ver isso vital para fazer este passo Cygan esboço especialmente, por exemplo, para as mãos que você pode ver que os dedos nas mãos são algo muito difícil de desenhar. Andi, é importante concentrarmo-nos nisto. Ah, quanto tempo for necessário. Então agora eu estou quase terminando com esta cozinha e também tomar o tempo para diminuir um pouco para ver a administração geral. E eu posso ver aqui. Provavelmente o ombro esquerdo deste personagem está entre estranho, talvez 22 grandes. É algo muito pequeno que isso é suficiente para fazer qualquer coisa que possamos corrigir isso em breve. Vamos ver, talvez mais tarde eu vou grande isso para respeitar as promoções, respeitar a posição, e quando isso é feito, você pode ter certeza de que você ouve, Por
exemplo, eu estou mudando mais dando mais, uh, a perna mais diferença. Sim, mudando algumas coisas. Agora estou diminuindo a cidade aberta da camada de esboço. Eu escondo o primeiro câncer que agora é inútil, e eu posso começar a desenhar o pensamento. Então, quando você começa a ouvir as dunas vieram orar com muito. Não aumente o aumento demais fora do pincel novamente do homem recebe tempo, nós não estávamos indo para usar linhas muito grossas. Você joga com linhas finas ao redor dos conectores dentro dos personagens e para todos os detalhes do escritório do crime e os olhos, a boca e detalhes do rosto, este é um gráfico stands que não está usando muito. Pense linhas Não aumentar o tamanho do pincel,
em seguida, construir você começar com suas linhas re claras Não deve fazer eclosão nos contornos . Você continua desenhando, você leva o tempo. Você não precisa correr para ser mais rápido. Você apenas tomar o tempo para desenhar linhas muito claras ao redor do personagem. Você pode tomar o exemplo dos olhos e fazer aqui também. Exercício também durante os altos. Meus caras que às vezes são muito especiais para ir para que possamos continuar desenhando isso agora traga a boca. Então este homem é presente. Eu sou muito simples e difícil de fazer porque isso é difícil nesta simplicidade porque temos que
representar a emoção da asma como possível em linhas muito simples. E às vezes não sabemos se é suficiente ou demasiado ou não o suficiente,
esta não é uma prática que você pode encontrar a certeza de como seus captores estão sendo atraídos. Então agora você pode apenas reproduzir cada passo. Estou lhe mostrando aqui e você verá que praticando de novo e de novo, você vai encontrar a maneira que você vai usar o seu próprio de você dentro de sua própria técnica de tinta, que poderia ser bom. E você vai ver aqui eu estou desenhando o ombro e eu também estou adicionando alguns detalhes de clubbers sobre você. Veja, estou ampliando um pouco. Posso ver que o ombro dele está provavelmente em turnê. Talvez possa ser mudado. Eu não sei o que você está pensando que isso é definitivamente se você vê algo que nós somos você pode se você tem uma droga, você pode simplesmente continuar se você está andando em tablet. Isso é ótimo porque você pode apagar qualquer coisa da maneira que quiser que poderia ser diferente se você trabalhar com as ferramentas clássicas como a China. E porque se você aplicar tinta chinesa no papel, então isso não pode levantá-lo mais. Você tem que usar alguns produtos brancos e poderia não ser muito bonito fracasso, desenho e provavelmente danos de papel de qualquer maneira. Então aqui, com o programa procreate, você pode usar o problema das navalhas. Então, contando com você, os dois dirigiram seus contornos e seguida, um jogo em nova, uh, camada. E esta camada está voando em um novo modo. Hum, e isso é, como você vai ver, criado tipo de efeito de transparência. É transparência. Efeito é apenas criado com o modo de multiplicação. Você pode ver há pouco que todos os outros meses e isso é muito algo que eu recomendo para você se você quiser criar a transparência que temos aqui. Então eu estou aplicando alguns valores de cinza para representar as sombras, e eu reivindico que as sombras completam os detalhes como partes. Atrás dos cabelos atrás estão em cinza os detalhes da metade da bola e assim por diante. Então esta técnica é muito simples. Não e muitas sombras só querem é necessário sobre o que é realista de alguma forma e você vai ver tudo em armas é a maneira que eu estou jogando aqui. Dê um bom exemplo de como você pode fazer isso
4. Uma guerreiro de mangá: Desta vez eu vou mostrar a vocês uma guerreira roubando o estilo mangá, e nós vamos desenhar o primeiro esboço com tinta azul. Então esta técnica da tinta azul vem da técnica original de desenhar com
lápis azul este desenho de captura e porque quando no tempo tivemos que copiar até, digitalizar o desenho com um desenho azul e a tinta em preto com uma máquina de copiar, o azul estava desaparecendo quando você estava digitalizando estão lidando com máquina, e é por isso que o lápis azul foi usado para. Então eu estou apenas mantendo esta técnica do esboço azul porque quando você tem uma cor azul , é mais fácil do que trabalhar tipo de esboço Cygan acima com a uva e eu. Então agora eu estou colocando todos os elementos fora do meu guerreiro com as linhas básicas básicas, formas
básicas, formas geométricas, e nós podemos então parar de desenhar o braço. Ou então a dificuldade aqui é desenhar uma mulher. Então uma mulher que ele supostamente muito, muito você pode dizer enfraquecer linhas salgadas que eles fazem deste personagem uma mulher e que é muito diferente de um homem. Então, quando isso for possível. Temos que fazer o braço ou não muito grande. Tem que ser a equipe Ristic. A mulher forma amigos. Forma de mulher. Então temos elementos diferentes. E Armel que representa está no tronco no DNA. Muito Armel sob armas e assim por diante. Então nós temos que criar um par de detalhes sobre a armadura é apenas para fazer a armadura não é para esvaziar adicionando várias coisas e trabalhando mais sobre o medo, esquecendo detalhes para ter certeza de que não estamos perdendo algo. Como, por exemplo, aqui no Dream Belt, este cinto tem que ser bastante realista, então não queremos dizer também, alguns detalhes, como coisas para que os tornassem mais não parecidos com um tem dois parece um normal não apenas um terno fino de pano fino, por isso tem que estar trabalhando fora com diferentes detalhes onde podemos ver aqui. - Então eu posso ir um pouco mais em detalhes desta captura, e eu comecei a desenhar os olhos. Claro, você tem que ter certeza que os olhos estão olhando na mesma direção, tem um espaço entre os olhos que agora estão pensando rosto estranho. Você também pode ter que tirar o tempo para diminuir o
zoom, ampliar apenas para ter alguma visão diferente do seu desenho, e movendo-se para dentro e para fora, você pode realmente ver alguns problemas de proporção. Então, quando isso é feito, eu crio uma nova camada, e esta camada está sendo os contornos do meu desenho. Então você pode algum tempo diminuiu a capacidade do esboço, demorar para se certificar de mais visibilidade sobre isso e, em seguida, pode começar a fazer
linhas muito finas , todos os contornos do personagem. Estou sempre começando a desenhar a cabeça porque é o ponto principal que vai ser visto pela pessoa lendo sua história lendo seu gibi. Então você sempre começa a desenhar o rosto. E se o rosto é bem feito, não importa se alguns outros detalhes, como a mão, são parte do braço ou assim por diante. Não tão bem. Isso é mais importante para criar olhos que são bem feitos do que os outros. Os detalhes dos nossos mouros estão fora do seu caráter. - Então você desenha os detalhes do braço ou e pode ser difícil tornar isso mais real, então vamos ver como a cor podemos criar outro supermercado, os grandes valores e as diferentes técnicas fora de tinta. Podemos tornar este efeito o mais real possível quando eu quero dizer realmente significa que ele parece um normal, não realista, uma sobressalente uma foto como olhar como comida com algo que é muito o desenho tem que
representar o que é Era suposto ser. Significa que uma mulher se feriu por isso desenhando as linhas. E quando os contornos dos contornos exteriores não me concentram no interior do braço. Certo, agora estamos fazendo isso, aproveitando os braços, os cabelos e com uma técnica similar, que
significa que estou usando linhas Finn. Não brincando com diferentes ah fortes são que podemos dizer diferente, tipo fora de espessura, nossa densidade fora das costas. Todas as linhas são mais espessura da medicina, e quando você fizer isso, você verá que ele estará mais perto do estilo mangá do que para os quadrinhos. Tipo com espessura das linhas é realmente diferente de linha para outra. - Quando você estima que o desenho das linhas e contornos são feitos, então você pode sentir algumas partes com preto como atrás dos cabelos e não muito preto, exatamente onde parece ser necessário para que você possa ver que há está atrás dos cabelos. Há provavelmente na armadura, mas não muito,
e, em seguida, criar uma nova camada e esta camada. Estou aplicando o moinho no modo de jogo para obter alguma transparência. Então eu escolho Gray, e este grande está sendo usado para tirar as sombras do meu personagem. Mas primeiro quero que meu personagem tenha pêlos de cachorro faça isso. Eu estou me sentindo completamente com um único valor cinza, e a partir daí eu quero mudar pequenas coisas para fazer alguns efeitos sobre esses ares, - eu
vou aplicar um pouco na cor cinza. É muito parecida. Se você está desenhando no papel, você vai encher os cabelos com algum Grey Inc. E quando isso é quando você pode desenhar sobre isso, você pode quando Quando está seco, você pode voltar com caneta branca apenas para sugerir este Luz branca. E essas luzes brancas são muito eficientes para dar mais vida. Claro, você está desenhando. Em vez de ter algo muito plano, você vai ter alguns pequenos detalhes adicionais muito fáceis de adicionar ao seu personagem que vai fazer toda a diferença. Então, para completar você adicionar alguns grandes em torno de algumas partes do desenho, não em todos os lugares com apenas o suficiente para obter algum volume em alguns detalhes adicionais para tornar este personagem muito vida. Então agora para a munição, apenas também algo que você tem que foram cuidadosamente você pode adicionar um pouco de cinza em diferentes partes
do exército, mas para obter algo brilhante um pouco, você pode adicionar alguns grandes como eu estou fazendo aqui no meio da armadura paz e deixando algum espaço branco em torno deste poderia. Isso é complicado porque isso realmente na sensação de que você pode fazer isso. E se acha que adicionou
demais, apague. Suba nos brancos. É muito mais branco do que cinza. E se você acha que cometeu um erro, apague e coloque menos bem no braço
5. Desenhar com Procreate: Agora vamos ver como fazer estreitar a famosa Megan nunca. Mas desta vez vamos adicionar um pouco de cor. Então eu estou começando com este passo de sua captura. Vou adicionar algumas camadas mais tarde. Primeiro, começamos a camada onde desenhamos as linhas principais. Estou sempre começando com o tamanho esquerdo e desenho direito do lado direito e tentando respeitar as proporções e sobre o fato de que os dois lados são relativamente iguais. A simetria da corrente é muito importante porque se não se pode ter uma parte
diferente da outra. A simetria da corrente é muito importante porque se não se pode ter uma parte Então, estou desenhando linhas de diferença. E o que você pode fazer aqui é também dois cheio deste vídeo. Ao tirar sua própria vida, são pensativos nosso papel, e para fazer o mesmo, tentar reproduzir cada linha passo a passo. Então nós sempre tentamos fazer este personagem como ah, semelhante ao original. Provavelmente haverá alguma diferença aqui, é
claro, e quando você vai dirigir, você verá também diferenças. Isso é o mais importante também para lidar com este software e ter o verdadeiro empate médio com ele. Então, se o personagem não é exatamente o mesmo que o original. Não é um problema. Ele virá mais tarde com a prática. E de qualquer forma, esta é a sua habilidade, a
sua habilidade de usar a sua secretária apropriada. Isso é mais importante do que apenas fazer uma cópia simples fora do desenho já existente. Então, concentre-se nas técnicas e este Stickney também é uma técnica que eles usaram entre especialmente para os olhos que você pode ver aqui. O gelo é muito simples, com difícil de desenhar de qualquer maneira, porque você tem que fazer tem que desenhar todos os detidos dentro dos olhos e não há muitos detalhes. Há apenas um ponto preto, mas esses dois pontos traseiros dentro de cada olho tem que olhar na mesma direção. Não os faça mudar um pouco. São um olho olhando um pouco para a direita e o outro e para a esquerda. Caso contrário, sua captura vai parecer um pouco estranha. Então você completa o desenho global Goebbels pegando, e quando isso for feito, você verá fica mais realista, visão
mais global do seu trabalho. Então, quando você terminar com isso, bem, vamos completar alguns detalhes sobre o esboço antes de começar a pensar e aqui
vamos nós . Criamos em sua camada e começamos a desenhar uma linha muito simples. Não mude muito a espessura do pincel. Você apenas desenhar com a mesma espessura todos os nove do personagem que você vai ver. E já foi definido em vídeos anteriores que em um mangá, a espessura das linhas é muito semelhante a um personagem para outro. Uma coisa é quando você desenhar quadrinhos americanos que terá que jogar com
espessura diferente não é o caso aqui. Então você desenha primeiro velho fazer esboços básicos tudo o que está em torno do personagem dentro. E você não tem nenhuma eclosão ou qualquer coisa adicional que faça este personagem
muito complexo. Você mantém muito simples este design. - estou Também
estoua aproximar os olhos para ter a certeza de não criar erros contra. Veja, há alguma diferença entre esses dois olhos e este é exatamente o senhor que você não tem que fazer. Você tem que respeitar pode off simetria e este matrons para ser muito importante antes nos olhos para que mais tarde possa mudá-lo. E eu estou bebendo também, se você tiver alguma dúvida, não
importa que você continue a desenhar todas as partes do seu desenho, você sabe desenhar e você vai corrigir isso mais tarde. Não fique preso em alguma coisa. Continue e continue. Temos direto para ter um software muito, muito bom. Procreate é muito burro. Você pode apagar inimigos que você fez a qualquer momento. Então você não pode em você a tinta. Você ainda tem seu esboço na camada abaixo. E você vai ver que quando tinta será feito, vamos esconder esta camada de esboço e vamos adicionar a cor agora para radical sobre os cabelos em tomar a ferramenta de seleção Freehand e eu estou selecionando os cabelos podem ver. Estou apenas selecionando com os pontos com os primeiros pontos de partida e fazendo todas as formas com meu lápis e juntando os primeiros pontos. Quando isso acabar, estou usando um pincel grande e estou apenas brincando em todos esses cabelos. Muito simples. Então começamos a adicionar cores planas, e eu estou me certificando de que estou usando um pincel que não está criando um Aqui está o pincel que estou usando. Se você está olhando com cuidado, é como se fosse um hematoma. É como se estivesse desenhando ou usando pintura no papel. Há um tipo de efeito fora do papel. Então eu estou adicionando as sombras dos cabelos com amarelo que bate Docker, adicionando isso e eu faria o mesmo para o outro lado dos anos, então sentindo a cor fora dessas partes. E como esta parte é em metal, eu vou jogar com efeitos diferentes. Eu não estou me sentindo completamente esta forma com grande. Estou deixando algum espaço em branco para criar isso, refletir a luz nele. É muito eficiente para realmente é muito simples. Só tenho que fazer assim. E eu também estou usando ah e agora o azul para criar outro tipo de efeitos fora. Nenhum tipo de reflexão sobre isso algo mais complexo do que isso. Você pode jogar com três cores diferentes e apenas criar saiu esforços. Agora eu estou sentindo o rosto para fazer o rosto. Terminei de preenchê-lo completamente antes de voltar e completar com as diferentes coisas que temos que apagar, especialmente usando a borracha no gelo para manter o gelo branco e adicionar algumas sombras. Agora as sombras estão para baixo com a cor escura. É uma cor de pele, mas Dr. Room e eu estou adicionando adicional, hum, amarelo no primeiro dos cabelos que eu esqueci e completando com shows também, como um disse reservado costumava. Ele levantou a cor nos olhos. Então, trabalhar nos dois olhos com adultos está em azul dentro do gelo, e você verá que o esboço está sendo feito rapidamente. Então o que vimos aqui é técnica diferente esboçando, pintando aqui neste exemplo fora do curry para que você possa voltar no zio, tentar reproduzir uma e outra vez esses diferentes exemplos apenas para obter o hábito em, obter alguns para usar o seu software procreate. E aqui os vídeos eram personagens de mangá da morte, que vai vê-lo funciona com qualquer tipo de estilo.
 Damien Barban