Transcripts
1. Introduction : Hi there. My name is Michelle. And in this glass, I'm going to teach you how to paint. Lose watercolor roses. Painting a rose can be very relaxing and fulfilling, especially when you see the end result. However, for most of us, especially for beginners, the process can be a bit frustrating because sometimes we end up with a big blob of paint on paper. So in this class I'm going to share with you my techniques in three different ways using three different brushes so that you're able to enjoy the process of painting watercolor roses. I hope that you stay with me throughout the entire class because I guarantee you that you will enjoy the process that I will be sharing with you and you learn a lot. And if you practice, then definitely you will see progress. So I also invites you to do a project for this class and see your development with that said again. Welcome to my class. And now let's begin
2. Materials and Practice: before we begin painting, I'm going to show you the materials that you'll need for this class, and I'm also going to demonstrate a few brush strokes for the pedals and the leaves. We'll be needing clean water for rinsing your brushes, some water color and this 100% cotton paper. This is 300. She's M. One of the brushes that will be using is this 1/4 inch striker brush. We'll also be using an angled brush. This is 38 inch, and we'll also be using a size eight round brush. So those are the materials that you need for this class. Now I'll be moving on to demonstrate the brush strokes, using the's different brushes. So we're going to use Taliesin Crimson for the pedals, and we're going to take the striper brush for the first demonstration. I'll be putting my brush and dipping it in. Al is airing crimson. Okay, so straight from the pan, I'm going to move on and dabbed the center of the rose, using very short, curved strokes. Like so the middle part of the ruse well, look like to seize or commas facing each other, and they'll be very dark compared to the rest of the flower. Now, as you can see, a dip, my brush in water slightly dipped it and then took up the excess water so that the pedal will be a bit lighter than our middle parts. Hey like that, when you're gliding your brush, it's best for you to glide it, um, towards the flag portion of the brush because the dagger brush or this striper brush has a flat side and there's a curved side. So whenever you're sliding, your brush glide towards the flat side of it. Okay, Now I'm going to rinse this one as we move onto the next brush, which is the angled brush. So far, this brush, we're going to use the same techniques. Okay, so we're going to dip the brush again in alleys, are in crimson and will be making too short brush strokes using the longer tip of this angled brush for the center of the rose. Okay, again to seize facing each other or to common strokes. Then dip this likely in the rinse bottle and glide the brush for the pedal. Let's do this a few more times. Que more more. You'll see that the pedals using the angled brush our narrow work compared to the ones that we have created using this striper brush. Okay, now let's rinse this brush and move on to the size eight ground brush again. We're going to let the brush and dip it in alleys, Iran crimson, then paint to seize, facing each other or two comma strokes facing each other. Now we're going to dip the brush again in the rinse water. Okay for the pedals. We're going to glide the brush sideways and you see that this round brush produces much softer pedals and much rounder ones. Okay, now that's Princess brush and move onto the leaves. Okay, so now we have a fresh bottle of Clearwater so that we don't get any money. Colors for their leaf or leaves were going to use olive green and you'll see that I'll just do a quick sweet. They are gonna lee and work from here going outwards for the leaf. Now we're going to do another one, but this time it's going to be a leaf. That scene from beneath the top metal again, just outward strokes. Now let's do one more leave now. This time from beneath one of the bottom pedals. Okay, so now we're ready to move on to our first Rose. I'll see you in the next video.
3. Loose Pink Rose: Materials: the 1st 1 that will be painting will be this light pink rose. And for this we're going to use 100% cotton watercolor paper, 300 GSM. And for the colors, we're going to use bright rose and permanent magenta, as well as varied in hue and peacock green. For the leaves, we're going to use the size eight round brush for the leaves and this 1/4 inch striper brush for the pedals. Okay, so let's move on to the next video for the pedals.
4. Loose Pink Rose: Petals: Now that we have all the materials ready, we're now ready to begin painting the pedals for this light pink rose. So let's take the striper brush and dip it in bright rooms, then place some of the watercolor in this dish ceramic dish. We'll also be adding some water here so that we have this very light and fluid consistency . This is what we call the T consistency, which is very, very fluid wash that has a lot of water. This will help us achieve very soft pedals. Now we're also going to use permanent magenta, and this time we're going to put very little water to it. And this is known as the honey consistency. This collar will form the inner part of the pedal and by using these two colors, we will achieve a great and effects on our pedals. Okay, so now that's begin to paint the rose. Okay, let's dip the brush into permanent magenta, and then we're going to do the two comma strokes for the middle parts using the tip of your brush que. Now we're also going to add a couple more very small comma strokes surrounding this part carefully and very softly, making sure that there's a gap between the middle part and the surrounding problem. No, After cleaning the brush, we're going to dip it in bright rose, loaded brush with bright grows and then slightly dip it in permanent magenta and blind your brush for the bigger pedals. As you can see, the pedals are very soft, and you can see the subtle radiance that is formed because we're using two colors for these . Okay, when your brush gets dry, it's important for you to rinse it before you load it with the bright rose color and dipping it again in permanent magenta so that you have clear pet owes that show the greedy int that we want each time like that again, make sure that there's a gap between the new pedal that you're painting and the one that is directly decided so that you don't end up having a big blob of faints on your paper will be painting the rest of the pedals, using the same process and making sure that the outer petals as we go out for every layer each petal will alternate the ones in the inner part of the rose, meaning like this one. Okay, The pedal is actually between the two pedals that are in the inner layer just beside it. Okay, so these are larger. See, for common strokes. Using the kree didn't effects that we have from the bright rose and the permanent magenta combination. Whenever you're rinsing your brush, be sure to take off excess water so that your team mixture will not get too diluted because this is already very light. Okay, As you can see, this pedal is a bit darker, but that's okay. It will help defined the pedals more and it will create a more interesting effect here, Rose. Now we're going to paint one of the pedals for the outermost layer of your rose, and you will see that when you're painting the outermost petals, these would be a bit bigger and whiter than the ones in the inner layers. And you can achieve this effect by placing greater pressure on your brush as you glided. You'll notice that I'm not adding any color to my ceramic dish. This is because as we go to the outer layers of our rose, they wanted to look softer. We want the pedals to look softer and adding color to our T mixture for the break. Rose will only create a consistent Grady and all throughout. We don't want to have that. Instead, we want the pedals to look softer as we go towards the outer layers. Okay, Now we just add a few more pedals and we're good to go. Okay? You add a few more to the thought of parts. Um, and this one would look the softest compared to the rest of the pedals, almost feeding as he can see. And that's what we want to achieve a dreamy and very soft effect for this pink rose. Okay, so this is the last battle, and we're done. As he can see, it's very easy to paint the pedals for this very lights and dreamy pink rose. And now we're ready to move on to the next video where I will teach you how to paint the leaves. Next again, Thank you for watching this particular portion over class. And now let's move on to the next part where we'll be painting this them in Leeds. See you there
5. Loose Pink Rose: Leaves: Hi again. We're onto the last part of her first rose. And in this video, I'm going to show you how to paint the stem and the leaves. There'll be two layers for this. The 1st 1 would be Viridian Hugh. Okay, We're going to create a curved line from the bottom part of the rose. Make sure that your brush is just loaded with the right amount of water and paint so that it's not too dark. Otherwise, it will overpower the flower above it for the leaf. I'm going to do very light upward and downward strokes, and it will not have a very clean line. Instead, the two sides of the leaf would look a bit jagged. This would make your leaf look more natural. Now let's do one more leave on the left side. And as you can see, a normally start with a diagonal sweep of my brush, and this marks the middle of the leave middle part of the leaf, and it guides me as to how I would do the rest. No, For the second layer, we're going to add some details using Peacock Green. Now, as you can see, the brush that I'm using has a very pointed tip, and this is ideal to paint the details on our leaves. So I'm going to do a quick sweep for the middle part of the leave and from this middle part , some upward and outward strokes to create the veins of the leaf. And since their leaves are still a bit damp from the first layer, expect to see softer lines, which is great, because we're creating a dreamy effect for this particular piece. And we're also going to add some shade of peacock green on the stem. All right, we're done with the first Rose. I hope that you enjoyed watching this video, and I hope that you learn a lot from my process. And now we're ready to move on to the next Rose. See you there.
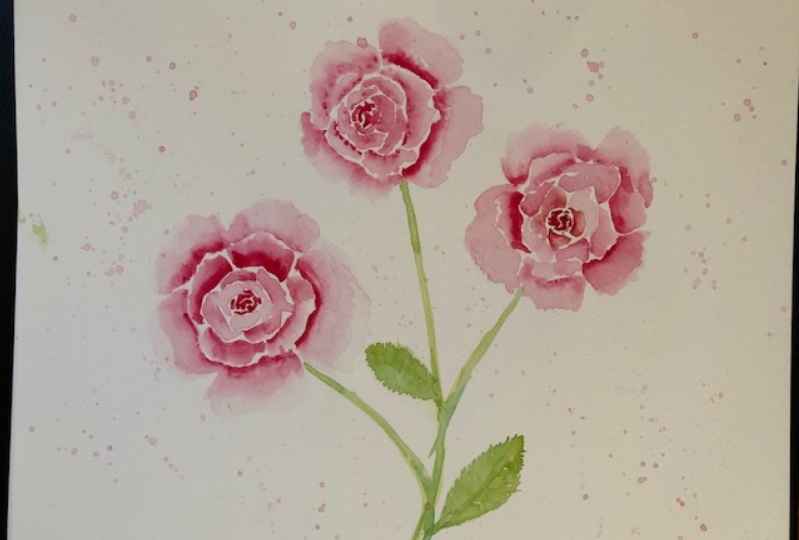
6. Loose Red Roses: Materials: this time we're going to paint a bunch of red roses and for the materials were going to use the same 100% cotton, 300 GSM paper and hooker screen and all the green for the leaves and Eliezer in crimson for the pedals. For the brushes, we're going to use the angled brush and the size eight a round brush. Okay, we can now begin with the pedals. See you in the next video.
7. Loose Red Roses: Petals: Now that you have the materials ready, let's go ahead and start painting the pedals for this bunch of loose red roses, so I'm going to dip my brush in clean water. Then with a tip, dip this in alleys, Aaron crimson and directly paint on the paper we're going to do to calm a strokes. The ones that look like letter sees. That's for the middle part of the roads town as he saw that I dipped the brush again in water and took out the excess water so that the next layers from that middle part looks softer. Okay, so just glide your brush sideways team, and normally you would like to glide your brush towards the longer side of that angled brush. And as you go further along the outer layers of the rose, you can dip your brush again in water and take out the excess water so that the pedals would be looking much lighter than the previous layers. As you're painting, the pet does. You might want to wiggle your brush a bit so that the pedals would look a bit waving and not just flat or straight, and you want to do longer letter sees as you go along. Still, these are what you call comma strokes. But as you go along the outer layers, the perils would be longer or whiter than the previous layers. Okay to now onto the next throughs, and we'll be doing the same. I've did. My brush in alleys are in crimson, and with the longer tip of the brush I painted the middle part of this second grows again. As we go along with the outer layers of the pedals, we're going to dip the brush in water, taking out the excess water and then lighting the brush side base to create those see strokes for comma strokes, like in the previews lesson that we have for the loose pink rose. Remember to alternate your pedals so that the pedal that you're working on is actually between the two pedals of the preview slayer. Again, I'm wiggling. Make brush as I go along as I glide the fresh sideways so that the pedals would look levy and natural. And as you can see, the outermost petals look much later than the ones in the middle. Also, to create an illusion that this rose is facing upward I'm not adding more pet does to the upper right portion of the rose. Instead, I'm adding more pet does to the sides and the bottom parts. Now this one is the bud. We're going to add one rose bud in this piece, and basically you're just dab the tip of the rose bud with the tip of your angle brush and work downwards. I think so. It's going to be a lot darker than the other roses, as you would normally see in a Rose Bush. Now I accidentally splattered some water on the paper, and it has some paint on it. So it's evident now if that happens to you, don't panic. Just get, um, some tissue paper and likely dab on the paper. And that should, uh, lift the color from your paper now onto the third rose. We're going to do the same procedure as we did the 1st 2 roses, doing the middle part with two comma strokes and then dipping our brush in water, taking off the excess water and gliding the brush sideways to create the outer petals. Now, like the second rows that we did, I want this rose to look like it's at an angle. And this one would be looking, um, towards the left. So I'm adding the outer layers of the pedals to the right side of this rose again. The outer layers would be much softer compared to this to the center and to the inner layers of this rose. Okay, so we're done with these roses, and we're now ready to move on to painting. Believes. See you in the next video.
8. Loose Red Roses: Leaves: Okay, so now we're ready to paint the leads and we're going to use hooker screen and olive green for this. The brush it I'm using is the size eight a round brush. So for the first layer of the leaves, I'm going to use hookers green. And as you can remember, from that segment where I introduced the materials and, um, demonstrated some brushstrokes, this is how we're going to paint the leaves as if they're appearing from beneath the roses , no less. He can see very, didn't you? Looks a bit right. Okay for the leaves. And you want to team this down a bit. So what we're going to do is get some olive green and add this to some part of the leaves, appearing to be shading from the the rose petals and also adding them as a means so that the leaves would look a bit darker and more realistic. Okay, so we're going to do the same thing to the other roses, adding the leaves beneath the pedals first with varied in hue, and then later on adding some shading and details using olive green. When you're doing the leaves, it doesn't really have to be a perfect shape. Remember that in nature there's no perfect symmetry. So, uh, just make sure that they're flowing. And normally you would see a darker shade closer to the flower. Since they're actually positioned beneath these roses. No. Next will be painting the CEPAL that part underneath the rose bud and shorts them. Then we're going to go ahead into the rest of the leaves. Now this one will make it a bit bigger to give an illusion that it's actually closer to the ones that's looking at it. Still using the same combination of colors for it in you and Olive green. Okay, Now, let's add two more leaves over here. Okay? Now, for this particular leave, I'm actually comfortable doing the strokes this way from this angle. But if you're having difficulty doing the strokes, you can actually turn your paper to make it much easier for you. Okay, - Okay . So at this point will start painting leaves that are going to be lighter compared to the previous ones that we've already done to represent the leaves that are farther below the other ones that we've just painted. Now, at this point, they don't look lighter in color yet. But later on, I'll be adding water to this so that there's this fading effects. Okay, I'm trying to figure out where else to add the leaves. Unless you can see not all of the leaves are of the same size and shape. That's what we want to do so that our piece looks more natural. Okay, Now we're ready to add water to these leaves while they're still wet. I'm going to add the water and soften the edges of some of the leads blending them, blending the pigment outward for a fluid and dreamy effect. Okay, Now, looking at this, it seems that it's better if we add a few more leaves to it. So maybe add one here and another one on the left. Okay. Like that. Just very soft looking these. And so I have splattered some water on the paper again. And that's not a problem. Just down. Just dab it with tissue paper to lift off the pigment. Maybe add more. One leaf here. Okay, I think we're done. I'm pretty happy with this piece already. So I hope you enjoy this part of her class. And now we're ready to move on to the third and final Rose. I'll see you in the next video.
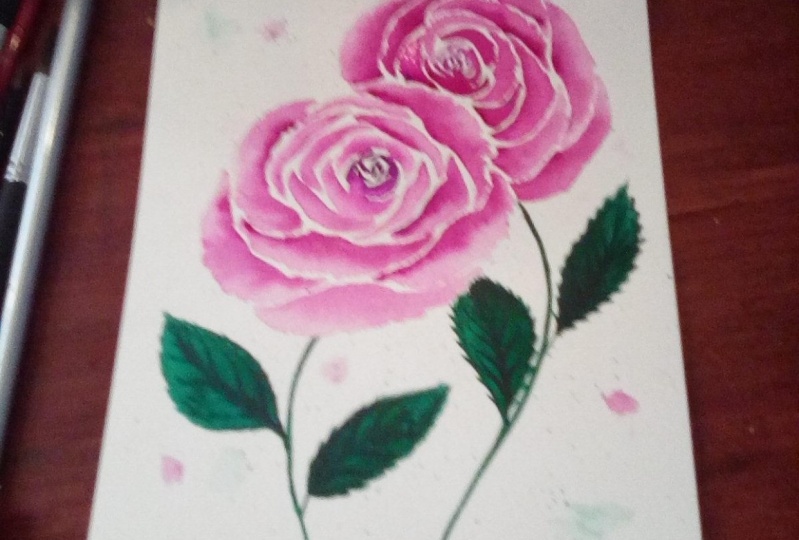
9. Loose Red Roses II: Materials: Lastly, we're going to paint these two roses, and for this we're going to use 100% cotton and 300 GSM watercolor paper permanent magenta for the pedals, olive green and in Deco for the leaves. And we're going to use our size eight round brush. Now let's begin painting the pedals.
10. Loose Red Roses II: Petals: Now let's begin painting the pedals for these roses with your round brush with water, clean water and dip it in permanent magenta as the previous roses that we painted, we're going to do to see strokes or comma strokes for the middle parts of the rose. This part would be the darkest part of the flower, and if you want, you can add one more like that and dip your brush ones in water, take off the excess water and add the surrounding pet does now. Unlike the striper brush or the angled brush, you'll see that using the round brush is actually much easier when you're painting the pedals. Since the here is distributed more evenly now, at this point there's very little pigments in my brush, and I'm just reading the paper with the shape of the pedals and and getting some pigments permanent magenta and we'll be doing some wet on wet technique for these two pedals. I just love how the color bleeds into the water on. This is actually much more evident when you're using 100% caught on paper, so we'll repeat that process of painting the shape of the pedal with very little pigments and introducing the pigments using wet on wet technique. You notice that when I'm adding the pigments, I just add this in the inner part of the stem, and I just let it bleed throughout the rest of the pedal. That way we achieve a very soft effect for these pedals. Now, this one is a much larger petal compared to the others, and this would be one of the outer petals of this ruse. Now I want this rose to look like it's facing the left side, so I'm not going to add a lot of pedals on the upper left side of this. This would be the last petal for this side. Now we're going to have a few more on the opposite side, and this would be also large compared to the middle pedals. Now I want to soften that upper left pedal, and I'm going to do that bite, doing a quick sweep over the edge. Just show that the outer part of that pedal becomes softer. When you're doing this, just make sure that there's not much water in your brush so that the water the excess water does not run through out the entire pedal. Okay, so here's another large pedal, and again we're going to introduce the pigments in just the inner part of this pedal. At this point, we can go back to the pedals that we've already painted earlier and add a darker shade to it by simply adding some strokes to the inner part of those pedals. Remember, when you're painting with water color, the paint would look much later as your paper dries. So this is why, as we go along, we can add the pig men to the earlier pedals so that they would look the way that we want them to look once they're already dry. And we want to go back to these pedals while these are still wet. Now that's add just one more small pedal on the side. And after that, we're ready to start with the next throws. Okay, so again, we're going to dip our brush and permanent magenta and just with a tip of the brush. As you can see, we have a very pointed tip, which we like. We're going to paint two comma strokes for the center of the ruse, then dip your brush and water and take off the excess water for softer looking pedals surrounding the center part no. For these pedals, you'll see that I am touching the earlier ones that we've just painted with just the water to spread the pigment outwards and soften these edges. Now this better is again just water, and I'm going to add the pigment in the inner part of the pedal. Now I'm comfortable doing thes strokes without moving my paper. But if you feel that it's difficult to achieve the shape of the pedal that you want, then feel free to adjust your papers angle. Now remember, as I've mentioned in the previews roses, the beef painted your pedals should be alternating, so the one that you're currently working on should be between the two other petals in the layer before that. Okay, we're now starting to paint the outermost petals, so, like the one that we first painted, the's pedals would be a bit larger compared to those that are positioned in the middle portion of euros. - Now let's go back to the previous rose that we painted and add more depth and definition to some of the pedals. Again, we're only adding pigment to the inner part of these pedals still using permanent magenta. Now on the second Rose will be doing the same thing, adding definition by going back to these pedals and doing some light brush strokes in the inner part of these pedals with permanent magenta. At this point, the pedals are pretty much dry, so that when we're doing the brush strokes over these pedals, they will no longer bleed towards the rest of the pedal. But that's okay, because at this point we're just adding definition. And as you also notice, I'm adding the pigments trade from the pan without diluting it with any water, so that I get the dark shade of this pigment, - adding a few more depth and definition to the rest of the outer pedals. And once we're done with these, we can now move on to the next video, which will be all about painting the leaves. Okay, it's done. I'll see you in the next video
11. Loose Red Roses II: Leaves: Now we're ready to paint the leaves. So for this one, we're going to use all the green and indigo, and we're going to use the same brush the size eight round brush that we used for the pedals. I'm mixing olive green with a little bit of indigo so that the leaves are a bit darker, and I'm just adding just a few amount of water so that our mixture is not too thick or to fluid. So we'll start with a top right portion of the roost at the right hand side again. We don't want the leaves to be perfect or perfectly shaped. We want the edges to be a little bit jagged as what the rial leaves look like, and we want the leaves to have different sizes, and we want them to look flowing. - Now . At this point, I'm going to makes indigo and olive green once again, but this time I'm going to create darker leaves by adding more indigo into the wash. When you're painting with two or more shades of the same color, it gives greater definition and interest to your piece, so that's what we're trying to achieve here by adding darker leads. Then we create depth and an illusion of some of the leaves appearing to be closer to us than the other leaves. I'm going to paint one more leave here and then after this one, I'm just going to paints a very light and fluid wash in between these roses to pull them together. I'm diluting the wash a little bit with some water and making very light strokes in between these two roses and adding more water as they go outward just makes him zigzag motion with your brush very lightly to spread the pigments. And as you go outward, the pigment should become later as he add more water to it. And now we're done.
12. Final Thoughts and Project: Thank you so much for joining my class. I hope that you learned a lot from the techniques that I have shared with you. If you have any questions, please don't hesitate to please them in the comments below. And I also want to encourage you to practice and submit your projects here. And you can actually send your progress over time. And I bet that you will be happy with the results. Because practice does make progress until the next class. Thank you again by
 Michelle Gonzalez, Water Color Painting Made Easy