Transkripte
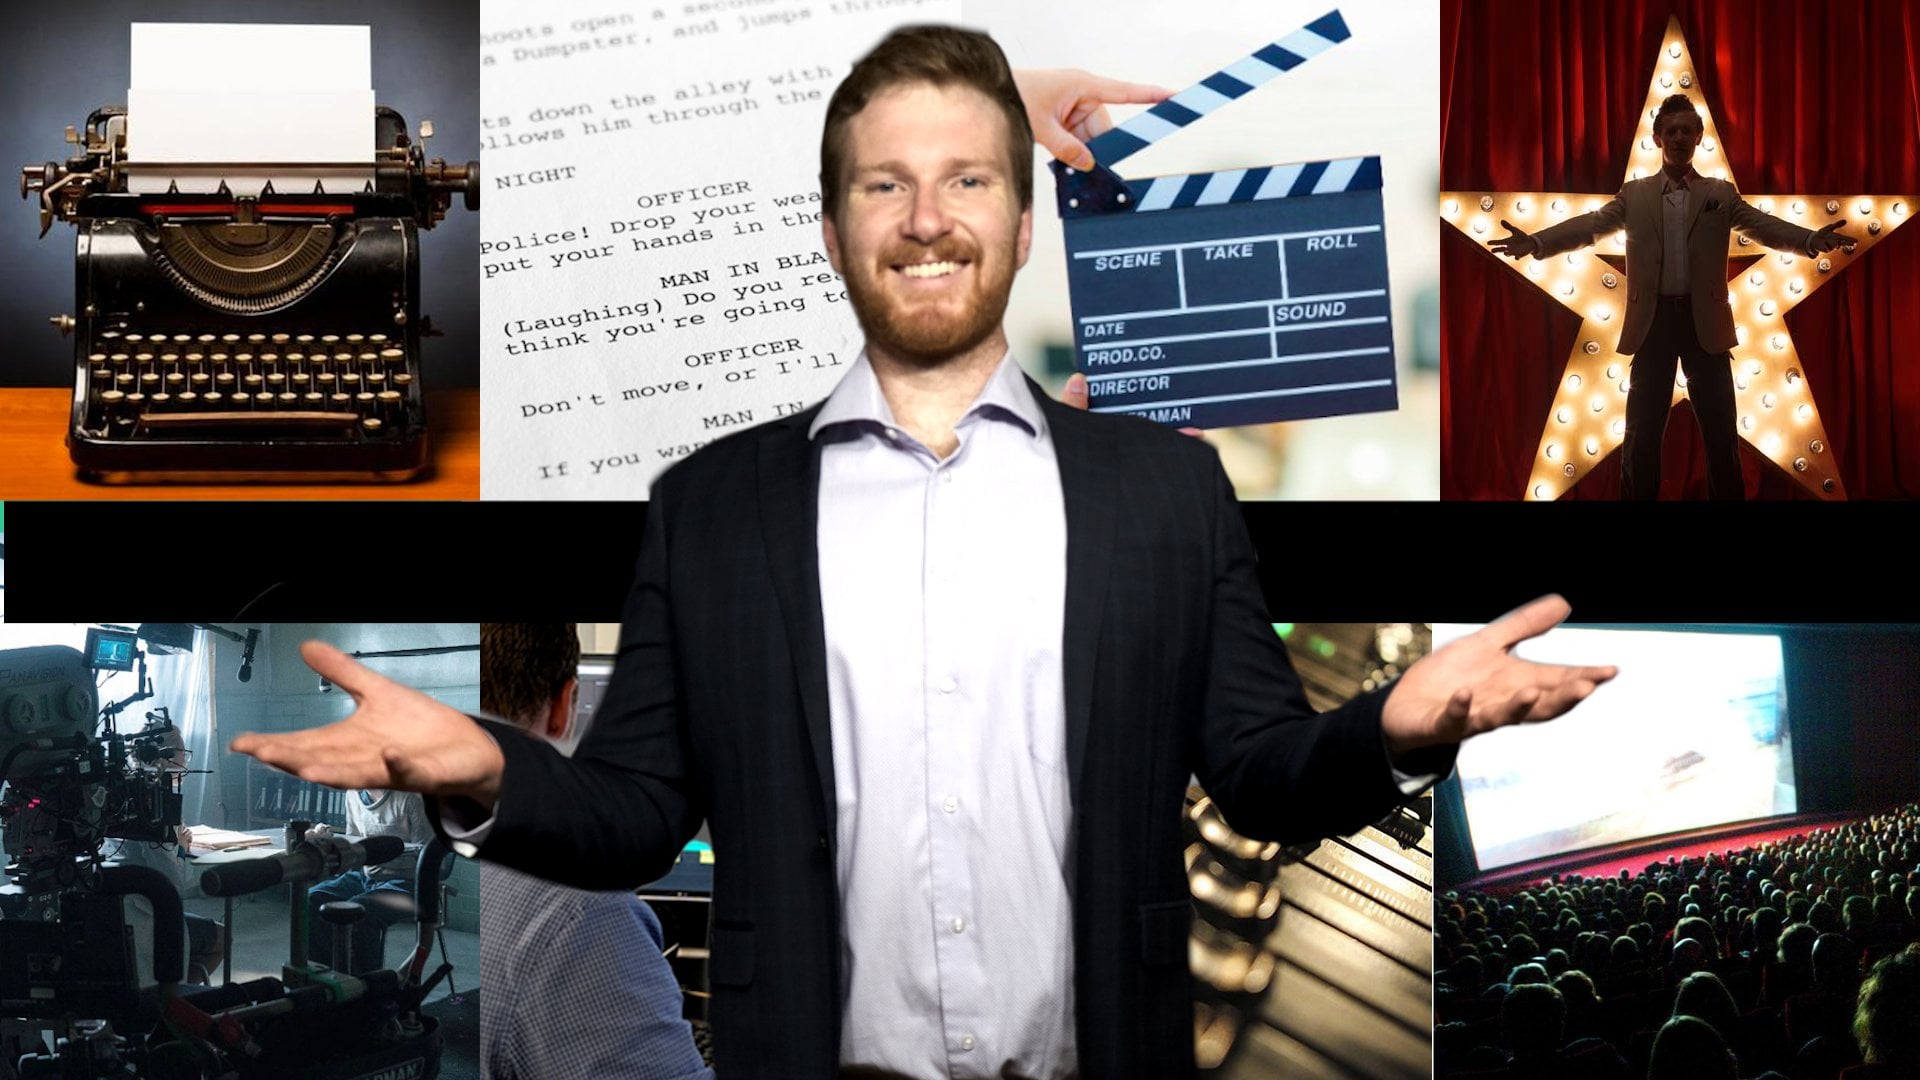
1. Einführung: Seit ich ein Kind war, habe ich Fotografie,
Filmemachen und bildende Kunst immer geliebt . In jungen Jahren trug
ich immer eine Kamera überall hin, wo ich hinging und fotografierte alles, was mich interessiert. Ich fing an, in diesem Alter zu sehen, wie dies zu einer Sprache auf sich wird. Hallo, mein Name ist Ben Rountree und ich bin Filmemacher in New York City. Meine Schwester, Sarah, ist auch eine kreative Person und eine sehr talentierte Koch. Sie arbeitet in einem Restaurant namens Blue Hill. Seit Jahren beobachte ich ihre Koch in der Küche,
gründete ein Eis-Sandwich-Geschäft, experimentiere mit neuen Gerichten. Ihr Prozess ist immer inspiriert mein kreativer Prozess. In dieser Klasse werde ich Ihnen zeigen, wie Sie
einen anspruchsvollen einminütigen Kochfilm für Anfänger kreieren können. Dies ist etwas, das Sie leicht in Ihrer Küche tun können, und wird sich mehr auf den Prozess des Kochens als auf ein Rezept konzentrieren. Aber ich würde es lieben, dass du viel kreative Freiheit hast und einen Film
kreierst, der dir in dem nützen wird, wofür du ihn verwendest. Wenn Sie sich für irgendetwas zum Kochen interessiert haben, haben
Sie wahrscheinlich bemerkt, wie Kochfilme gerade sehr beliebt sind. Von den erstaunlichen leckeren Videos bis hin zu Binging with Babish, Chef's Table und allen Kochfilmen ist das
Filmemachen ein sehr effektives Werkzeug, das Sie verwenden können, um kulinarische Kunst zu präsentieren. Wenn du jemand bist, der Essen liebt, genau wie ich, oder andere kochen filmt, wie ich es auch tue, wird das eine großartige Klasse für dich sein. Wir gehen über einige filmische Techniken, Beleuchtung, grundlegende Bearbeitung, und Sie können all dies durch jede Kamera, die Sie
zu Hause oder Ihr iPhone haben, tun , wenn das ist, was Sie verwenden möchten. Dies wird sehr relevant sein, wenn Sie Ihre sozialen Medien aufbauen
möchten, eine Website, einen Food-Blog oder wenn Sie auf der Suche nach Lebensmittelwerbung sind. Ich bin super aufgeregt, diese Klasse zu filmen, weil ich Ihnen wirklich zeigen möchte, wie
Sie kulinarische Kunst und erstaunliches Essen in der Kinematographie präsentieren können. Vielen Dank, dass du mitgemacht hast und lass uns loslegen.
2. Kursübersicht: Hi, Leute. In dieser Klasse werden wir einen einminütigen Kochfilm erstellen. Jetzt gibt es viele Möglichkeiten, wie Sie sich dem nähern können, aber ich werde mit Ihnen eine Möglichkeit teilen, dass ich
es nähern und Ihnen Alternativen zu anderen Wegen geben würde . In den letzten fünf Jahren habe
ich an einer Reihe von Werbespots,
kurzen Dokumentarfilmen und Erzählungen gearbeitet . Aber ich muss sagen, einige meiner Lieblingsprojekte
haben den kreativen Prozess eines anderen erfasst. Ob ein Bildhauer in New York City oder ein Möbeldesigner oder sogar Köche in der Küche. Ich liebe es, den kreativen Prozess der Menschen einzufangen und vor allem die Bilder so gut wie möglich aussehen zu lassen. In dieser Klasse werde ich Ihnen zeigen, wie Sie an Komposition,
Bearbeitung, Beleuchtung und kreativen Entscheidungen arbeiten . Materialien, die benötigt werden, sind eine Kamera aus offensichtlichen Gründen, Sie brauchen definitiv eine Kamera, um Bilder aufzunehmen. Aber das könnte jede Kamera sein, die Sie mögen, und auch eine Bearbeitungssoftware. Ob es Adobe Premiere oder Final Cut Pro ist oder sogar ich dein Instagram verschiebe, denke ich, wäre in Ordnung. Materialien, die nicht benötigt werden, aber vorgeschlagen werden, sind Beleuchtung und ein Stativ. Je nachdem, wie oft Sie diese Filme machen möchten, denke
ich, dass die Investition in einige Beleuchtung eine großartige Ressource sein könnte, wenn Sie viel daran arbeiten
möchten , weil Sie eine Menge Kontrolle über Ihre Bilder haben werden. Was ich mehr in der Beleuchtungsklasse reden werde. Ein Stativ, denke ich, wäre großartig, wenn du in einer
Situation bist , in der du dich selbst beim Kochen filmen wirst. Wenn Sie sich selbst kochen filmen, müssen
Sie sich auf die Aufnahmen konzentrieren, die Sie drehen, sowie das Kochen selbst und Sie werden wahrscheinlich ein Stativ wollen, um das zu tun. Damit würde ich auch sagen, es wird wirklich gut sein, an einem Rezept zu arbeiten, das Sie wirklich gut kennen, ein Rezept zu arbeiten, das Sie viel gemacht haben und dass Sie wissen, innen und außen. Denn neben dem Filmen selbst müssen
Sie auch das Kochen machen. Ich hoffe, ihr Jungs seid wirklich aufgeregt von dieser Klasse. Ich kann es kaum erwarten zu sehen, was ihr macht.
3. Beleuchtungsdemo: He, Jungs. Für diesen Teil der Klasse werden
wir über die Beleuchtung gehen. Nun, das klingt vielleicht etwas seltsam, aber ich persönlich liebe Licht und Beleuchtung so sehr, dass ich immer, wenn ich ein Café oder Restaurant betrete, immer auf der Suche nach der besten Gegend, die viel Licht hat, sei es ein Fenster oder ein Ambiente. Es gab sogar einmal, wo ich
30 Minuten wartete , nur um einen Platz am Fenster zu bekommen, der großes Licht hatte. Also das ist alles zu sagen, ich liebe Licht. Ich denke viel darüber nach. Ich versuche es in Filmen zu bemerken, die ich sehe und es hat einen großen Einfluss auf die Filme, die ich mache. Wenn Sie jemals Chef's Table oder den Film Chef auf Netflix gesehen haben, haben
sie einige erstaunliche Food-Fotografie, einige tolle Food-Aufnahmen. Neben der Tatsache, dass sie sehr High-End-Kinokameras haben, machen
sie auch einen tollen Job mit der Beleuchtung und hat einen großen Einfluss auf den Film. Eine Sache, die wirklich interessant und cool ist, ist, wenn man das Wort fotografieren und auseinanderbrechen, Foto und Grafik, übersetzt es aus dem Lateinischen als Zeichnung mit Licht, Fotolicht, Graph-Zeichnung. Dies ist sehr wahr, denn wenn Sie
ein Bild aufnehmen , braucht die Kamera Licht, um sie aufzunehmen. Also, was du tust, ist, dass du mit Licht zeichnest. Also werden wir heute über drei verschiedene Arten von Beleuchtung sprechen, und die erste ist hartes Licht. Es klingt sehr ähnlich wie es ist, aber hartes Licht ist Licht, das von einer sehr kleinen Lichtquelle kommt. Man kann also nachmittags darüber nachdenken, wenn die Sonne sehr
hell ist und man sehr dunkle Schatten und sehr helle Lichter bekommt, schafft
es ein sehr kontrastierendes Bild und das ist hartes Licht. Viele Leute neigen dazu zu sagen, dass dies nicht so
gut mit Beauty-Fotografie oder Food-Filmen funktioniert , aber ich würde argumentieren, dass es eine Möglichkeit gibt, dies zu nutzen, wenn Sie
bewusst sind und sich dessen bewusst sind, was es schafft. Die zweite Art der Beleuchtung ist weiches Licht. Nun unterscheidet sich weiches Licht sehr von hartem Licht da es von einer sehr großen Lichtquelle kommt. Das wäre also wie der Nachmittag, der sehr bewölkt ist. Die Wolken diffundieren das Licht und erzeugen eine größere Lichtquelle für die Sonne erzeugen
so ein weicheres Licht. Es schafft ein weniger kontrastierendes Bild, das mehr Übergang von den Schwarzen zu den Weißen hat, wodurch entsteht, was viele Leute sagen, es ist ein sehr erfreuliches Bild. Die dritte Art der Beleuchtung, über die wir sprechen werden, ist natürliches Licht, das erstaunlich ist und was jeder liebt zu simulieren und es ist die wirklichste, es ist das, was wir wissen und mit dem wir vertraut sind. Die Sache mit natürlichem Licht ist jedoch, dass es sehr schwer zu kontrollieren und zu verwalten sein kann. Es gab eine Zeit, wo ich angeheuert wurde, um Essen für
eine Website zu fotografieren und ich entschied mich, nur natürliches Licht zu verwenden. Was aber passiert ist, ist den ganzen Tag über das Licht veränderte, ging in und aus den Wolken und ich musste kompensieren, um ein zusammenhängendes Bild zu schaffen, das alle ähnlich und vorhersehbar waren. Aber das zweite Mal wurde ich wieder eingestellt und ich ging und brachte meine eigene Beleuchtung, und es war so viel einfacher, weil ich in der Lage war,
das Licht zu steuern und damit, wie die Bilder aussehen würden. Das ist also eine Sache, über die man nachdenken muss. Wir werden mehr darüber reden, während wir schießen. Ich werde Empfehlungen für verschiedene Lichter geben, die Sie betrachten können, so
dass Sie sich damit vertraut machen können. Ich würde Sie auch ermutigen, wenn Sie das nächste Mal einen Film oder eine TV-Show sehen, beginnen zu wissen, wie sie die Szenen beleuchten, woher das Licht kommt und ob es hart ist, weiches Licht, oder wenn sie natürliches Licht verwenden und wie das wirkt sich auf die Bilder aus. Bevor Sie überhaupt anfangen zu filmen, möchte
ich, dass Sie über den Ort nachdenken, in dem Sie filmen werden, die Kulisse und anfangen, darüber nachzudenken, woher das Licht kommt, und ob es irgendeine Möglichkeit gibt, es zu gestalten oder damit zu arbeiten. So zum Beispiel, das ist meine Küche. Ich bin offensichtlich sehr vertraut mit diesem Raum, aber Sie werden feststellen, dass ich hier ein tolles, schönes Fenster und eine Menge Gegenfläche habe. Hier werden wir unsere Vorbereitungsarbeiten machen, denn ich habe viel natürliches Licht, um unser Thema zu beleuchten, und viel Platz, um unsere Komposition zu bauen. Der zweite Raum, in dem wir arbeiten werden, ist der Ofen hier drüben. Es gibt nicht so viel Licht, mit dem man in diesem Raum arbeiten kann. Ich habe diese drei Leuchten, aber ich weiß, sie werden nicht das Licht erzeugen, das ich will. Also brachte ich mein Kino Flo Licht ein, das ein tolles Licht ist. Dieses Licht erzeugt ein sehr weiches Lichtquellen-Licht, und so wird das unsere Motive beleuchten, wenn sie hier am Herd kocht. Dies sind Dinge, die Sie berücksichtigen möchten, mit dem Raum, in dem Sie arbeiten, und wie Sie es gestalten und damit arbeiten können. Das ist das Kino Flo, mit dem wir unser Subjekt beleuchten werden, meine Schwester Sarah. Ich werde Ihnen den Unterschied zeigen, wann es ein- und ausgeschaltet ist, damit Sie sehen können, wie das Licht eine Trennung zwischen dem Motiv und dem Hintergrund schafft. Dies ist das Licht, das derzeit eingeschaltet ist und Sie können sehen, wie Sarah schön beleuchtet ist und der Hintergrund sehr sanft abfällt. So wird es aussehen, wenn ich das ausschalte, und wenn ich nur das natürliche Licht benutze, dann ist es ein ganz anderes Bild. Dies ist also etwas, das Sie
berücksichtigen möchten , wenn Sie Menschen und Themen filmen,
ist, wie Sie diese Trennung schaffen und wie Sie Licht zu Ihrem Vorteil nutzen. In der nächsten Klasse werden wir über Komposition sprechen und wie Sie Ihre Themen umrahmen können.
4. Komposition: Hey Leute, heute schauen wir uns an, wie Sie Ihren Film durch Komposition und Shot-Design
interessanter machen können. Komposition ist also im Grunde, wie man ein Bild in Gesamtheit komponiert. Was Sie aus Ihrem Rahmen einschließen oder ausschließen, und ich möchte, dass Sie darüber nachdenken, dass Sie dies als etwas,
das Sie kontrollieren können, dass Sie nicht nur ein Bild von etwas machen, das bereits vorhanden ist, sondern Sie machen ein Bild und bauen etwas, so dass Sie die Kontrolle über es auf diese Weise haben. So wird eine Regel früh in der Fotografie die Regel der Drittel genannt, und dies ist eine Rahmentechnik wirklich darüber, wie man
ein Subjekt positioniert , um seine Beziehung zu einem anderen Element in der Szene zu zeigen. Wenn Sie Ihren Rahmen haben und sich vorstellen, dass es ein Tic-Tac-Toe Board überlagert, würde
die Regel der Drittel sagen, dass Sie möchten, dass Ihr Hauptthema
auf einer der vier Ecken des Tic-Tac-Toe Boards ist, und daher würde es Platz lassen im Rahmen, um ein
anderes Element und ihre Beziehung zu diesem Element darzustellen. Das ist also eine Regel, die ich sagen würde, dass Sie nicht folgen müssen, aber es ist wirklich gut, sich dessen bewusst zu sein und zu wissen, wie
man es bricht, abhängig von Ihren Absichten. Also mit dem Food-Film, eine Sache, die ich gerne tun, ist, die Beziehung eines Kochs zu ihrem Essen zu zeigen. Also lege ich den Koch auf der linken Seite des Rahmens, und die Pfanne oder das Essen auf der rechten Seite, um ihnen zu zeigen dass sie damit
interagieren und damit ihre Beziehung zu dem, was sie kochen. In Ordnung. Es gibt also drei Shot-Typen, die ich gerne übergehen würde. Ein großer Schuss, ein mittlerer Schuss und eine Nahaufnahme. Also ist der Wide Shot im Grunde alles, was von Kopf bis Fuß eine volle Person oder breiter zeigt, und diese Aufnahmen sind großartig, um mit
zu beginnen, um die Umwelt,
den Ort, die Kontexte zu präsentieren . Sie geben eine Menge Informationen im Rahmen, weil es viel Platz zum Arbeiten gibt. Der zweite Schuss, über den wir sprechen, ist ein mittlerer Schuss, und ich könnte einen mittleren Schuss als
einen Taille-Up-Level-Schuss definieren , der ein bisschen näher ist als ein Großschuss, aber es kann das Thema zeigen und vielleicht, was sie arbeiten mit oder ihre Beziehung zu etwas anderem. Dann ist die dritte Aufnahme eine Nahaufnahme, die genau das ist, wie es klingt, und obwohl es ein bisschen subjektiv ist, funktionieren
Nahaufnahmen wirklich gut mit der Präsentation von Textur und Farbdetails, und sie funktionieren großartig mit Essen, weil man die Essen wirklich nah und machen es wirklich lebendig, vor allem auf einem größeren Bildschirm. Mit meinem Prozess beginne ich
normalerweise damit, einen Wide-Shot zu erfassen. Dies ist ein großartiger Schuss, mit dem ich anfangen kann, weil ich mich an den Raum gewöhne, ich werde mich damit vertraut machen, ich zeige sie in der Location. Ich stelle fest, was vor sich geht. Es ist ein komfortabler Standpunkt. Es ist nicht klaustrophobisch, und dann arbeite ich mich auf mittlere Schüsse und dann arbeite ich meinen Weg, Nahaufnahmen zu bekommen, und manchmal gehe ich hin und her zwischen der Nahaufnahme bis zur Weite. Aber Sie möchten in einer Weise darüber nachdenken, die mit
dem Shooting, das Sie tun, sinnvoll ist , um sicherzustellen, dass Sie alle Inhalte haben, die Sie brauchen. Weil ich weiß, dass unser Film nur eine Minute lang ist, benötige
ich wahrscheinlich nicht mehr als 10 Sekunden pro Schuss, je nachdem, wie viele Aufnahmen ich verwenden möchte. Also, wenn ich filme, werde ich nur versuchen, zwischen
5-10 Sekunden zu filmen , damit ich nicht überschreitet. Aber ich denke wirklich über meine Komposition nach und ich bin in der Lage, so viele Winkel wie möglich des Prozesses zu bekommen. Es gab eine Zeit, als ich einen kurzen Dokumentarfilm über ein Restaurant in New York drehte, Eleven Madison Ave, und ich hatte nur 15 Minuten, um die Köche in der Küche zu filmen. Also wusste ich, dass ich meine Zeit mit Bedacht nutzen musste, wenn ich nur 15 Minuten habe, und so tat ich, wie ich erwähnt habe. Ich begann damit, all die weiten Aufnahmen zu bekommen, die ich brauchte, und dann
wechselte ich , um alle mittleren Aufnahmen zu bekommen, die ich wollte, und dann fing ich an, all die Nahaufnahmen zu bekommen, damit ich die Schönheit des Essens bekommen kann, und sie interagieren mit ihm und wirklich zu präsentieren, was sie erschaffen. Es war toll, das in dieser Zeit Zweifel vorbereitet zu haben
, so dass ich wusste, worin ich hineinkam und ich einen Plan hatte. Manchmal wird es eine Balance geben zu wollen, um vorzubereiten und einen Plan zu machen und auch auf das zu reagieren, was passiert und Spaß haben und gehen Sie mit Ihren Instinkten und Entscheidungen aus der Manschette zu treffen. Ich denke, es gibt eine wirklich gute Balance zwischen diesen beiden Dingen zu haben. Aber einen Plan zu haben und etwas zu wissen, in das man hineingehen will, ist wirklich hilfreich. Eines der Dinge, die ich mit vielen Shootings machen werde, ist, dass ich eine Shot-Liste schreiben werde, und ich könnte sagen, all die breiten Aufnahmen, vielleicht zwei oder drei breite Aufnahmen oder mittlere Aufnahmen, Nahaufnahmen. Wie viele möchte ich vielleicht? Wie viel könnte ich gebrauchen? Wenn Sie noch weiter gehen wollen, können
Sie eine Zeitleiste von einer Minute schreiben und einfach
aufschreiben , wie viele Aufnahmen Sie wollen und wie viele Sekunden jeder Schuss sein würde. Das ist eine sehr detaillierte Beschreibung, um genau zu wissen, was Sie wollen. Wenn Sie möchten, dass Ihre Wide Shot 10 Sekunden oder mittlere Aufnahme
drei Sekunden sein , um fünf davon zu haben und dann mit einer anderen Breite enden. Sie können es wirklich so viel planen, wie Sie wollen und haben dann viel Flexibilität, um Entscheidungen aus der Manschette zu
treffen und sich
in einem Moment inspirieren zu lassen und haben eine Menge Flexibilität, wenn Sie filmen. Ich denke, es ist gut, beides zu haben. So können Sie darüber nachdenken und vielleicht darüber nachdenken,
einen Plan zu schreiben und Verweise auf das zu machen, was Sie wollen. Die Bilder und das Shot-Design, die Komposition aussehen, und wie viele Aufnahmen Sie denken, dass Sie brauchen werden
, Weite, Medien und Nahaufnahmen. Also, während Sie weitermachen, denken Sie
weiter über Komposition nach und üben Sie es, um
ein Gefühl davon zu bekommen , was Sie interessiert sind und was Sie mögen und wie Sie gerne komponieren. Denken Sie weiter darüber nach, was Sie einschließen und aus dem Rahmen ausschließen, und arbeiten Sie weiter daran, wie Sie diese Anpassungen vornehmen können. In unserer nächsten Klasse werden wir über
kreative Entscheidungen sprechen und wie das Ihren Film verbessern kann. Also freue ich mich darauf, dich dann zu sehen.
5. Kreative Entscheidungen erstellen: Hey, Jungs. In diesem Video werden
wir über
drei kreative Entscheidungen sprechen , die Sie bei der Drehung Ihres Films berücksichtigen können. Die erste ist Bewegung. Bewegung ist wirklich cool, weil es ist, was Fotografie von Filmemachen unterscheidet. In der Fotografie haben Sie in der Regel nur einen Moment oder einen Bruchteil einer Sekunde, um ein Bild aufzunehmen. Mit Video haben Sie die ganze Zeit, die Sie brauchen, um eine Szene zu erstellen, und in dieser Zeit können Sie so viel mit der Bewegung der Kamera tun. Nehmen wir an, Sie haben zum Beispiel eine Kamerabewegung, die sehr langsam und statisch ist. Es kann eine Stimmung schaffen, die reflektierender ist. Aber wenn Sie eine Kamerabewegung haben, dass
es schneller ist, kann es die Emotionen erhöhen und mehr Energie in einer Szene bringen. Sie können wählen, wie Sie darüber nachdenken möchten. Es kann neugierig sein, oder es kann energisch sein. Was immer Sie wollen, was auch immer der Stil Ihres Films sein wird. Eine Aufnahme, die ich besonders mag, wenn es darum geht einen Künstler oder einen Koch
zu filmen, ist eine Aufnahme, bei der es
mit dem Künstler oder Koch beginnt und
sich langsam zu dem Essen oder ihrem Handwerk bewegt, an dem sie arbeiten. Ich liebe das, weil es die Handwerker in einem Schuss zur Kunst zeigt. Die zweite kreative Wahl, die wir in Betracht ziehen werden, ist Zeitlupe. Zeitlupe ist wirklich cool, weil es nicht so ist, wie wir die Zeit normal sehen. Sie können sich einen Moment Zeit nehmen und ihn
stark erweitern , so dass wir diesem Moment mehr Aufmerksamkeit schenken und uns mehr darauf konzentrieren können. Ich denke, Zeitlupe ist in
gewisser Weise auch romantisch , weil es in der Vergangenheit in
Filmen verwendet wurde , und wegen der Qualität, die Zeit zu
verlangsamen und den Blick zu haben, der viel länger ist. Sie können das in Ihrem Film verwenden und damit experimentieren. Die dritte kreative Wahl, die wir in Betracht ziehen werden, ist die Tiefenschärfe. Nun wird die Schärfentiefe dadurch definiert, wie viel des Bildes im Fokus ist. Wenn Sie eine flache Schärfentiefe haben, bedeutet dies, dass nur ein kleiner Teil des Bildes im Fokus steht. Wenn Sie jedoch eine größere Schärfentiefe haben, bedeutet
dies, dass ein größerer Teil des Bildes im Fokus steht. Es ist großartig, denn wenn Sie eine flache Schärfentiefe haben, können
Sie mit dem spielen, was Sie wollen, dass der Betrachter darauf achten, was Sie wollen. Sie können das in der Kamera steuern. Mit Food-Filmen ist es großartig, weil es so viel Farbe
und Textur hervorbringen kann und Sie damit spielen können, wie Sie wollen, dass sie Ihre Bilder sehen. Jetzt bei einer Kamera steuert
Ihre Blende die Schärfentiefe. Auf Ihrer Kamera würde ich sagen, irgendwo zwischen einer Blende von 1,4 bis 4,0 wird
eine flache Schärfentiefe sein und irgendwo von 5,6 bis 22 wird Ihnen eine größere Schärfentiefe geben. Dies sind drei kreative Möglichkeiten, die Sie bei der Drehung Ihres Films berücksichtigen können. Ich möchte Sie ermutigen, mit ihnen zu experimentieren, sie auszuprobieren, zu
sehen, was Ihnen gefällt, zu sehen, was Ihnen nicht gefällt, und sich mit ihnen vertraut zu machen. Fangen Sie an, sie auch zu bemerken, wenn Sie fernsehen und andere Filme sehen. Sehen Sie, wie Menschen Bewegung verwenden,
sehen Sie, wie Menschen Zeitlupe verwenden und ob jemand eine flache Schärfentiefe oder eine größere Schärfentiefe verwendet. Je mehr Sie sich an diese Techniken gewöhnen, desto mehr werden Sie sich sicher fühlen, sie
effektiv zu nutzen und die beste Geschichte zu erzählen, die Sie erzählen können. In unserer nächsten Klasse werden
wir über die allerletzte Drehung des
Films sprechen , was wir den Helden erschossen nennen werden. Dies wäre ein wichtiger Schuss, weil es das Endprodukt sein wird,
es wird das letzte Essen , das ihr Leute kreiert, zu fangen, und es wird das auf die bestmögliche Art und Weise präsentieren. Vielen Dank, dass Sie heute mitgemacht haben, und wir sehen uns die nächste Klasse.
6. Die Hero-Aufnahme: Hey Leute, hier werden wir darüber reden, die allerletzte Aufnahme deines Films zu kreieren, was wir den Helden erschossen nennen werden. Dies wird ein Schuss von Ihrem fertigen Lebensmittelprodukt sein. Es wird das Essen präsentieren, das Sie in eloquenter und raffinierter Weise geschaffen haben. Damit würde ich sagen, dass Sie viel kreative Freiheit haben. Es wird eine Menge Spaß machen, denn Sie können wählen, welche Art von Beleuchtung Sie verwenden möchten, wie die Einstellung aussehen soll. Wenn Sie einen kühlen Tisch haben, den Sie herausbringen möchten, ein Tischset oder einige Marmorplatten haben, möchten
Sie eine Szene erstellen, die das Gericht, das Sie herstellen, am besten repräsentiert. Sie haben viele Optionen damit. Auch logistisch würde ich sagen, dass es sehr wichtig ist,
den Ort zu finden und zu finden, wo man das filmen möchte, bevor man etwas anderes filmt. Auf diese Weise, wenn das Gericht fertig ist und es vollständig gekocht ist, können
Sie es sofort mitbringen und schießen, denn mit Essen, Sie wollen nicht, dass es draußen sitzt und kalt wird. Du willst nicht, dass es herumwartet. Sie wollen es direkt schießen, wenn es frisch ist, genau wenn es bereit ist zu gehen. Dies wird eine Zeit sein, in der Sie experimentieren können, wenn Sie harte Beleuchtung oder sanfte Beleuchtung verwenden möchten, wenn Sie vielleicht ein paar Kerzen verwenden oder etwas dekorieren und
darüber nachdenken, ob Sie Texte im Bild wollen, wo der Text sein soll, wie Sie möchten, dass dieser mit Ihrem Bild interagiert. Manchmal kann es wirklich gut aussehen, einige Texte von dem, was das Gericht genannt wird, zu haben oder Sie können Ihren Namen dort oder alle Informationen, die Sie hinzufügen möchten. Für mich werde ich die drei kreativen Techniken verwenden, die ich übergegangen bin. Ich werde eine flache Schärfentiefe verwenden. Ich werde in Zeitlupe filmen, und ich werde sehr langsame Bewegungen in meine Aufnahmen einbinden. Sie werden sehen, dass und Sie können sehen, wie es aussieht und was Sie verwenden möchten und was Sie nicht verwenden möchten. Sie können eine Aufnahme wie diese sehen kann viel Aufmerksamkeit und Detail erfordern, aber Sie können es wirklich so einfach oder komplex machen, wie Sie es sein wollen. Sie können eine sehr einfache weiße Kulisse haben und halten Sie es schlicht und eloquent oder Sie können es mit allen möglichen Dingen dekorieren und es so machen, wie Sie es wollen. Das sind im Grunde alle Klassen, die wir für den Drehungsaspekt haben. Für unsere nächste Klasse möchten
Sie alle Dreharbeiten abgeschlossen haben und Sie sind bereit, mit der Bearbeitung zu beginnen. Das werden wir in unserer nächsten Klasse machen. Ich freue mich darauf, Sie dort zu sehen.
7. Bearbeitung: Hey Leute, ich bin so froh, dass ihr es so weit geschafft habt. Wir sind fast am Ende der Klasse hier, und an diesem Punkt sollten Sie alle Aufnahmen aufnehmen und bereit sein, mit der Bearbeitung zu beginnen. Ich werde Ihnen beibringen, wie ich in Adobe Premiere bearbeite, aber Sie können jede Bearbeitungsplattform nutzen, die Sie haben und sich wohl fühlen. Ich möchte auch vorne sein, indem ich sage, dass dies keine tiefgehende Bearbeitung oder Adobe Premiere e-Klasse ist.
Fühlen Sie sich frei, auf jeden Fall andere Skillshare Klassen darüber zu überprüfen. Aber wenn Sie eine Plattform haben, mit der Sie sich wohl fühlen und einige allgemeine Kenntnisse
haben, das wird großartig funktionieren. Hier ist unser Premier Pro-Projektdateifenster und Sie können sehen, dass ich alle meine Dateien importiert habe. Das erste, was Sie tun wollen, ist alles in Mülltonnen zu organisieren. Organisation ist auf jeden Fall super wichtig und es wird Ihr Leben viel einfacher auf der Straße zu machen. Auf diese Weise verpassen Sie keine Dateien oder verlieren später Informationen. Sie können hier sehen, ich habe meine Sequenzen bin, die alle meine Sequenzen haben wird. Du wirst sehen, dass ich meinen fertigen Filmbehälter habe
, der eigentlich der Film ist, an dem ich für diese Klasse gearbeitet habe, also macht das nichts aus. Aber dann habe ich meinen Footage-Ordner mit all den Aufnahmen, die ich habe. Dann habe ich meine Musikbox, die alle Songs hat, die ich ausprobiert und gesehen habe, die am besten funktionierten. Dann habe ich meine Titelseite. Sie möchten darüber nachdenken, welche Fächer am
relevantesten sind , während Sie weitergehen und sie entsprechend erstellen. Das nächste, worüber ich wirklich schnell reden möchte, ist Musik. Jeder hat einen ganz anderen Ansatz, wie sie Musik verwenden, und es gibt nicht wirklich ein Recht oder ein Falsches, aber eine Sache, die ich persönlich mache, ist die Musik, die ich weiß, dass ich verwenden werde, oder einen temporären Track, der in das gleiche Genre oder Stil, den ich verwenden werde. Auf diese Weise wird es das Tempo und den Stil beeinflussen und wie ich über die Bearbeitung gehe. Damit
habe ich zum Beispiel etwa 20-30 Songs angeschaut, und dann habe ich es von dort eingeengt,
vielleicht 10-5, und schließlich bekam ich die Erlaubnis eines Künstlers,
Stan Forebee, der wirklich coolen Hip Hop macht, Chill-Hop, Jazz-Stil Beats. Er gab mir die Erlaubnis, eines seiner Songs zu benutzen, und ich mochte sehr wie dynamisch es war und ich mochte den sanften Ton, um mit meinem Film zu gehen, also ging ich mit diesem Track. Aber du könntest auch eine grobe Bearbeitung
deines Films starten und später einen Song einbringen und ihn so formen. Dies ist mein Adobe Premiere Projektfenster. Sie können sehen, ich habe alle meine Dateien importiert und ich habe damit begonnen, Abschnitte zu organisieren. Dies ist das erste, was Sie tun wollen, ist die Organisation all Ihre Vermögenswerte in einem Filmmaterial. Sie werden feststellen, dass ich meinen Sequenz-Ordner habe, der alle Sequenzen enthält,
die ich verwenden werde Ich habe meinen Finished Film Ordner, der eigentlich der Film ist, an dem ich für diese Klasse gearbeitet habe, also macht das nichts aus. Aber dann habe ich meinen Footage-Ordner, der alle Aufnahmen enthält, die ich gedreht habe, und dann hatte ich den Musik-Ordner, der alle Songs enthält, mit
denen ich experimentierte, und dann meine Titelsequenz. Sie werden darüber nachdenken möchten, wie Sie
Ihre Dateien am besten organisieren und was für Ihr Projekt am sinnvollsten ist,
aber organisiert zu sein ist super wichtig und es ist definitiv sehr hilfreich wenn Sie bearbeiten, so dass Sie
Verlieren Sie keine Dateien oder verlieren Sie etwas. Ich bekomme das ganze Filmmaterial durch. Das nächste, was wir tun werden, ist, dass wir all unsere Aufnahmen auswählen. Wir gehen in unseren Footage-Ordner, wählen das gesamte Filmmaterial und ziehen es in unsere Timeline. Ich nenne die Timeline, Footage Class, aber du könntest es einfach Titeln Footage, oder was auch immer für dich hilfreich sein wird. Das nächste, was ich tun werde, ist, mit meinem Abspielkopf, ich werde im Grunde durch das gesamte Material schrubben und dann die Clips
auswählen, die am besten für unseren Film funktionieren werden. Wie ich das mache, werde ich entweder mit dem Auswahlwerkzeug
klicken und auf die zweite Ebene ziehen, klicken und auf die zweite Ebene ziehen so dass ich es als einer der Clips identifizieren kann, die ich mag, oder wir können einen Rasierer verwenden
, der hier drüben ist, der Rasiermesser Werkzeug, es ist auch eine Verknüpfung C. Wenn Sie also auf C auf Ihrer Tastatur klicken, erhalten Sie den Razor. Wir können einen Teil des Clips ausschneiden und ihn dann auswählen. Verknüpfungen C und V, ich werde sie wirklich in der Nähe halten, weil C das Razor-Tool ist und ich das verwenden kann, um einen Teil des Clips zu schneiden, und dann V ist das Auswahlwerkzeug, und ich werde das verwenden, um es auf den zweiten -Layer. Von hier aus werde ich so ziemlich einfach durch das ganze Filmmaterial schrubben, die Aufnahmen
schneiden, die ich mag, und dann am Ende haben Sie eine gute Auswahl an Clips, die Sie verwenden möchten. Genau so. Ich schrubbe einfach durch, schau mir das ganze Filmmaterial an. Manchmal haben Sie wahrscheinlich Clips, die sehr ähnlich aussehen, also möchten Sie nur die besten verwenden. Ich habe so ziemlich schon alle meine Clips durchlaufen und die besten ausgewählt, die ich verwenden möchte. Sie können hier sehen, ich begann ursprünglich mit etwa einer Stunde und 30 Minuten Filmmaterial, das ist definitiv eine Menge Material für ein Video. Ich habe das auf etwa 10 Minuten Filmmaterial reduziert, und dann habe ich das wieder nach hier gekürzt, das sind etwa drei Minuten und 46 Sekunden. Dies ist eine gute Zeit, in der
ich mit drei Minuten und 46 Sekunden Filmmaterial über meine Musik bringen und anfangen kann bearbeiten und zu sehen, welche Aufnahmen am besten funktionieren werden und wie ich sie zusammen herstellen möchte. Wenn Sie zwei Aufnahmen haben, die sehr ähnlich sind und gut funktionieren könnten, schließen Sie diese
definitiv ein und sehen Sie, wie Sie diesen Fluss machen möchten, und geben Sie sich Optionen in der Bearbeitung. Von hier aus kann ich zwei Dinge tun. Ich kann diese Timeline duplizieren und einfach mein ausgewähltes Filmmaterial behalten, oder ich kann eine neue Timeline erstellen und all das Filmmaterial einfügen. Ich erstelle eine neue Zeitleiste, um Ihnen zu zeigen, wie das aussieht. Sie gehen in Datei, Neu, Sie gehen zu Sequenz, und ich werde diese Sequenz Titel Food Film_1. Ich gehe in Einstellungen und du willst nur
sicherstellen, dass alle deine Einstellungen deinem Footage ähnlich sind. Ich möchte mein Video, 1920 x 1080, das ist HD. Ich möchte sicherstellen, dass mein Zeitrahmen 23.976 ist, worauf ich den Film gedreht habe. Du bist gut zu gehen. Von hier aus bin
ich in meiner Footage-Sequenz, ich werde alle Clips markieren, die ich will und ich werde es in Food Film_1 einfügen. Dann werde ich mein Lied mitbringen. Ich habe meinen Track hier Portrait genannt. Ich werde das hineinbringen und Sie können sehen, dass der Song viel kürzer ist als das Filmmaterial. Dies ist wirklich der kreative Teil des Prozesses, in dem Sie Ihre Kreativität und
Intuition nutzen und entscheiden, wie Sie Bearbeitungsentscheidungen treffen möchten. Mit diesem, normalerweise, was ich tun werde, ist, dass ich den Song ein paar Mal hören werde, ein Gefühl dafür
bekommen, was die Stimmung ist, was der Ton ist, manchmal werde
ich sogar Marker auf
verschiedene Punkte des Songs setzen , von denen ich weiß, dass wirklich wichtig sein. Ich werde Ihnen zum Beispiel in diesem Teil des Songs zeigen,
wenn es hier einen Beat gibt, von dem ich weiß, dass es ein großer Übergang ist und ich wirklich treffen möchte, werde
ich Tastenkombination M drücken und das wird mir einen kleinen Marker geben, und so werde ich wissen, dass es ein Punkt in das Lied, in dem ich wirklich etwas
übergehen möchte und das wird ein wirklich wichtiger Moment sein. Manchmal werde ich das tun und das finde ich hilfreich, aber dann ist eine Menge davon nur das Hören des Song, das Durchgehen und Bearbeiten des Beats oder Offbeat oder wie auch immer Sie die Dinge zum Laufen bringen wollen. In meinem Film habe ich etwa 40 Clips, die alle etwa eineinhalb Sekunden sind. Sie können festlegen, wie lange der Clip sein soll und wie das Filmmaterial sein soll. Ich möchte, dass meine ein bisschen schnell ist und in der Lage sein, viele Kompositionen zu zeigen, die ich bekommen habe. Ich habe das getan, indem ich schnellere Schnitte in und aus dem Beat des Songs kreierte. Zwei Verknüpfungen Ich werde erwähnen, dass ich
in dieser Phase der Bearbeitung sehr hilfreich finde , sind
der Buchstabe B. Der Buchstabe B ist ein Bearbeitungswerkzeug, mit dem Sie einen Clip verkürzen oder verlängern können, und es hält alle anderen Clips zusammen. Es ist wirklich hilfreich, um einen Clip zu kürzen, einen Clip zu
verlängern und einfach alles zusammenzulegen und viel flüssiger zu halten. Die zweite Verknüpfung, über die ich mit Ihnen sprechen werde, ist die Verknüpfung N. Dieses Tool ist großartig, weil es Ihnen erlaubt, zwei Clips, die nebeneinander sind, zu manövrieren, auch mit allem zusammen zu halten und nicht die Clips um sie herum zu beeinflussen. Es ermöglicht Ihnen, einfach zwei Clips zu bearbeiten, die direkt
nebeneinander liegen , ohne den Rest der Clips um ihn herum zu beeinflussen. Damit haben Sie viel kreative Freiheit, wie Sie es bearbeiten möchten. Wenn Sie wollen, dass es erzählerisch ist, wenn Sie wollen, dass es sequentiell in der Zeit ist, wenn Sie wollen, dass es am Ende beginnt, Sie es tun wollen, haben Sie eine Menge kreative Freiheit. Fühlen Sie sich frei, diese Bearbeitung zu machen und diese kreativen Entscheidungen zu treffen. Wenn du dann an einen Ort kommst, an dem du das Gefühl hast dass
dein Film gerade fertig ist, hast du den Song bearbeitet, es sieht gut aus, normalerweise denke ich an Text und wie ich Text einbinden möchte. Für mich werde ich nur eine Titelkarte auf die letzte Aufnahme hinzufügen und den Text,
der das Gericht ist, Linguine alle Wodka. Aber wenn Sie Texte im gesamten Film verwenden möchten, wenn es ein Kochvideo ist, das lehrreich ist oder dass Sie Zutaten verwenden möchten, wenn es eines der Anleitungsvideos ist, dann können Sie Text im gesamten Film einfügen, aber ich werde , um Ihnen zu zeigen, wie ich es am Ende gemacht habe. Ich wollte einen Text, der beredt,
anspruchsvoll war , einen, der wirklich nett aussah. Hier habe ich einen Legacy-Titel erstellt
, den ich Ihnen zeigen werde, wie es geht. Gehen Sie zu Datei, Neu und gehen Sie dann zu Legacy-Titel. Ich kann es die Titelseite nennen, stellen Sie sicher, dass es die richtige Größe hat. Dann haben Sie hier eine Option für so viele verschiedene Arten von Schriftarten und so viele verschiedene Arten von Farben, und Sie können wirklich viel mit dem Text hier tun. Was das tut, dieser Legacy-Titel, es erstellt seine eigene Datei direkt hier, die Sie verwenden und über das Filmmaterial legen können. Sie können tatsächlich sehen, dass ich das hier schon getan habe. Das ist meine Akte. Wenn ich darauf klicke, kann ich sehen, das ist der Text, den ich verwendet habe, Linguine alle Wodka. Sie können die Schriftgröße ändern, die Aspekte, führende. Kerning ist eine Sache, die ich gerne benutze und ich habe hier verwendet. Kerning verbreitet im Grunde die Buchstaben im Text. Ich benutze es gerne ein wenig und ich fühle mich wie ich mag, wie es den Raum im Film nutzt. Sobald du das Gefühl hast, mit deinem Film glücklich zu sein, du bearbeitest gerne, die Farben sehen gut aus ,
du bist glücklich mit dem Text, dann wirst du dein Video exportieren wollen, und das war's. Es gibt so viel mehr, über das wir mit der Bearbeitung sprechen können, aber ich möchte Sie ermutigen, sich andere Skillshare Klassen anzusehen, es
weiter zu üben, und Sie werden immer besser werden und Sie werden sehen wie viel Spaß es sein kann und wie viel -Steuerelement, die Sie über Ihre Bilder haben. Sie haben so viele kreative Möglichkeiten, wenn es um die Bearbeitung geht. Es macht eine Menge Spaß, weiter zu üben. Vielen Dank, dass Sie heute mitgemacht haben, und wir sehen uns in der nächsten Klasse.
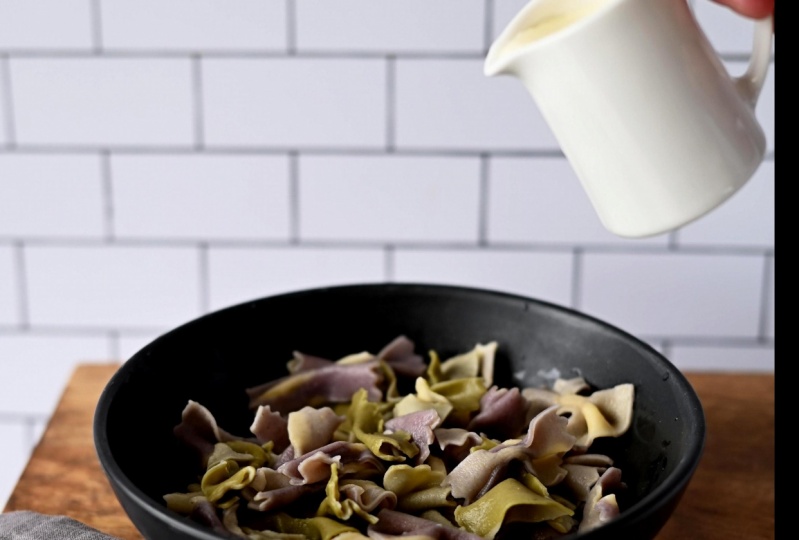
8. Der letzte Essensfilm: Hey, Jungs. Also, bevor wir uns einpacken, möchte
ich nur das letzte Kochvideo teilen, das ich gemacht habe. Ich hoffe, dass dies Sie dazu inspiriert,
Ihre eigenen Filme zu kreieren und über einige der Konzepte nachzudenken, die wir behandelt haben.
9. Schlussbemerkung: Herzlichen Glückwunsch zum endgültigen Abschluss dieser Klasse. Ich bin so aufgeregt für dich. Vielen Dank, dass Sie sich angeschlossen haben. Ich hoffe wirklich, dass Ihnen dieser Kurs gefallen hat, und ich hoffe,
dass Sie auch in Zukunft Lebensmittelfilme machen . Während Sie weitermachen, üben Sie weiterhin Komposition, Bewegung und Beleuchtung, und üben Sie weiter mit Ihren Freunden, mit Ihrer Familie auf Instagram. Je mehr Sie in diesen Fähigkeiten wachsen, desto mehr wird es Ihre Kreativität beeinflussen. Es gibt so viel mehr, was wir in dieser Klasse hätten übergehen können. Aber ich hoffe, dass Sie zumindest sehen wie effektiv die Kinematographie sein kann, um ein Publikum zu engagieren. Danke nochmals so sehr, dass du mitgemacht hast. Bitte vergessen Sie nicht, Ihre Projekte hochzuladen. Ich freue mich sehr darauf, zu sehen, was du erschaffst.