Transcripts
1. Introduction: okay. I didn't see you come in. Well, I'm glad you're here, because today we're gonna be learning a technique that's widely used among companies like Blizzard Entertainment in various media, such as television, video games, YouTube videos and even comic books. We'll be starting by cutting up the image in photo shop, taking it over to aftereffects where we'll be using various fix and color greedy. But before we start, let me introduce myself. I'm Jacoby digital artists who's been working professionally for over five years. I've worked in motion graphics and video games and now here to teach you some of the skills I've learned throughout the years. For this course, I do recommend having a basic understanding of photo shop because we'll be diving right in tow. Aftereffects. It'll be more focused on the animation process, so that all said, Let's jump right in
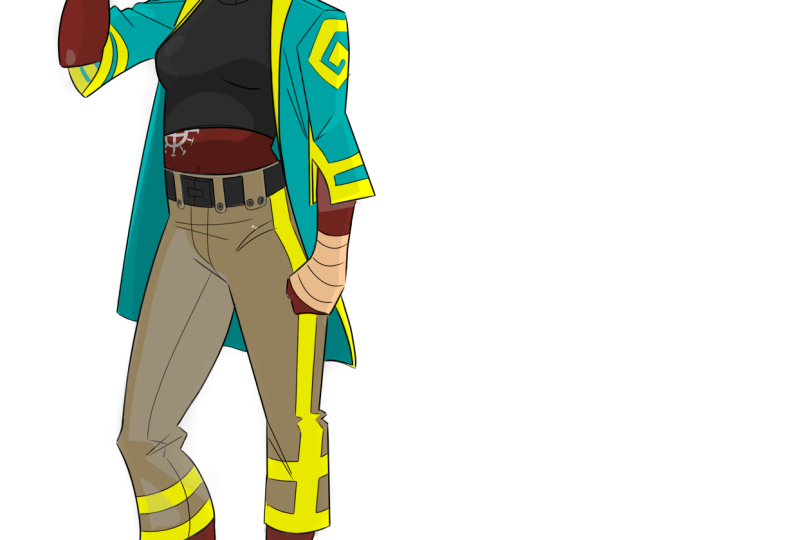
2. Cutting Up the Image in Photoshop: this lesson will be covering a necessary skill for preparing a two D image for animation. Images are inherently static, and therefore we will need to bring it into photo shop so that we can more easily manipulate the image in all of its moving parts. So let's go through the steps. First step will be determining how each part will be animating and what those parts are. Which parts are in front or back. Which parts are rigid or fluid, etcetera. Here's another example. The foreground in this image is very clear, so we could start with that and leave the rest of the images the background. There's also the cape, which will want have flapping in the wind some cars that will want to be moving and lights flickering in the background. Use selection tools such as the last the Tuller pen tool. To make a selection around the exact part you would like to separate. Make sure to be a Zach. You're it is possible with your edges to save time with clean up all the layers selected Press control X to cut those pixels out and then control shift V to paste those pixels onto their own new layer and maintain their original position. The old layer now has a gap that you will need to fill in with one or more of the falling methods and painting either with the brush er, smudge tool or by using content aware fill. So is the nature of working with the two D image. You're going to have to use your imagination to fill in the gaps with what was assumed to be there, but never really waas content aware Fill. Congrats you most of the way there, but you'll still probably have to clean up afterwards. Group objects into folders and name each layer, according Toa What that part is. For example, if the upper body will be moving as a whole independent of the legs, you can group the arms, head and torso until one folder. That folder will then become its own composition when we import it into after effects. Don't worry if your images in 100% complete in terms of painting because you can always go back and update the Photoshopped file is you're animating. Aftereffects will automatically update the changes after you save. Just make sure, though, to keep the names and structure of your layers the same. If you need to add more layers, you'll have to import them into after effects is a separate Photoshopped file. So that's pretty much all you will need in order to separate your image into logical parts . When you're done with that, we'll head over to aftereffects to start animating.
3. After Effects UI & Workflow: after effects is an extremely powerful tool in their infinite possibilities for what you can create. But how the heck and what the heck. On this video, I'll be explaining theater fix interface and going over the overall workflow so you know exactly what's happening. Moving forward upon creating a new project, you'll be met with this interface. You got your tools such as the move, tool pen, tool, text tool and some other tools, which will be using later. On the left is your project panel, which contains all the content of your projects, such as videos, images and audio, which you can import into after fix. Then you have the composition panel that shows you what your video will look like in real time. You can place and manipulate objects here. Everything in your composition will be contained in the layers panel on the bottom. It operates a lot like Photoshopped layers. Layers on top will be shown above the layers below it. Right next to it is the timeline. But you can scrub through to show how the layers change over time. Finally, the effects panel, where you can add all your after effects you can use the search party easily find an effect . So what's the overall workflow first created composition? Upon doing so, you'll see the composition settings dialog box appear. You can set the name the resolution, which will do full HD for our animation frame rate, duration of the clip and even the background color. Click OK. You add layers to her composition by either dragging assets from your project panel or by right clicking and going to new and then choosing one of these objects from the drop down. You can also create a composition from any asset by dragging it into this little icon on the project panel. By doing so, aftereffects will create a new composition with the exact dimensions and length of the asset. I imported this video by going to file import. Speaking of which, you can find a bunch of free videos on pixels dot com. If you wish to follow along now, you can apply effects to change in animate, laters each layer as a set of attributes. By default, they have things like position, scale, rotation and capacity. You can see all of its attributes by expanding this drop, them effects can be applied toe layers, giving them even more attributes to play around with every attributes. Have a stopwatch next to it, and by clicking it, you can set a key frame on the attribute to start animating it. Remember the time line to the right of the layers. This is where you can move in, adjust your key frames. Have you pressing you? You can see all of the active key frames he frames are essentially points on the timeline that hold a certain value or state of change when the timeline goes from. One key for him to another uses the information from the key frames to interpret late the values between the key frames. This change in values over time is what creates an animation. It's a simple is that now, of course, you can get fancy by either telling after affects how you want to go from one value to another by changing the interpolation or using the graph editor. But we'll get into that later. You can also use expressions to actually use the coding language within the program. Pretty cool stuff, but that pretty much sums up the aftereffects workflow Before we move on. I want to show an example of key frame. - So go ahead and experiment with setting key frames and applying different effect. You might stumble upon something really cool that you can use in your class project, so you in the next lesson.
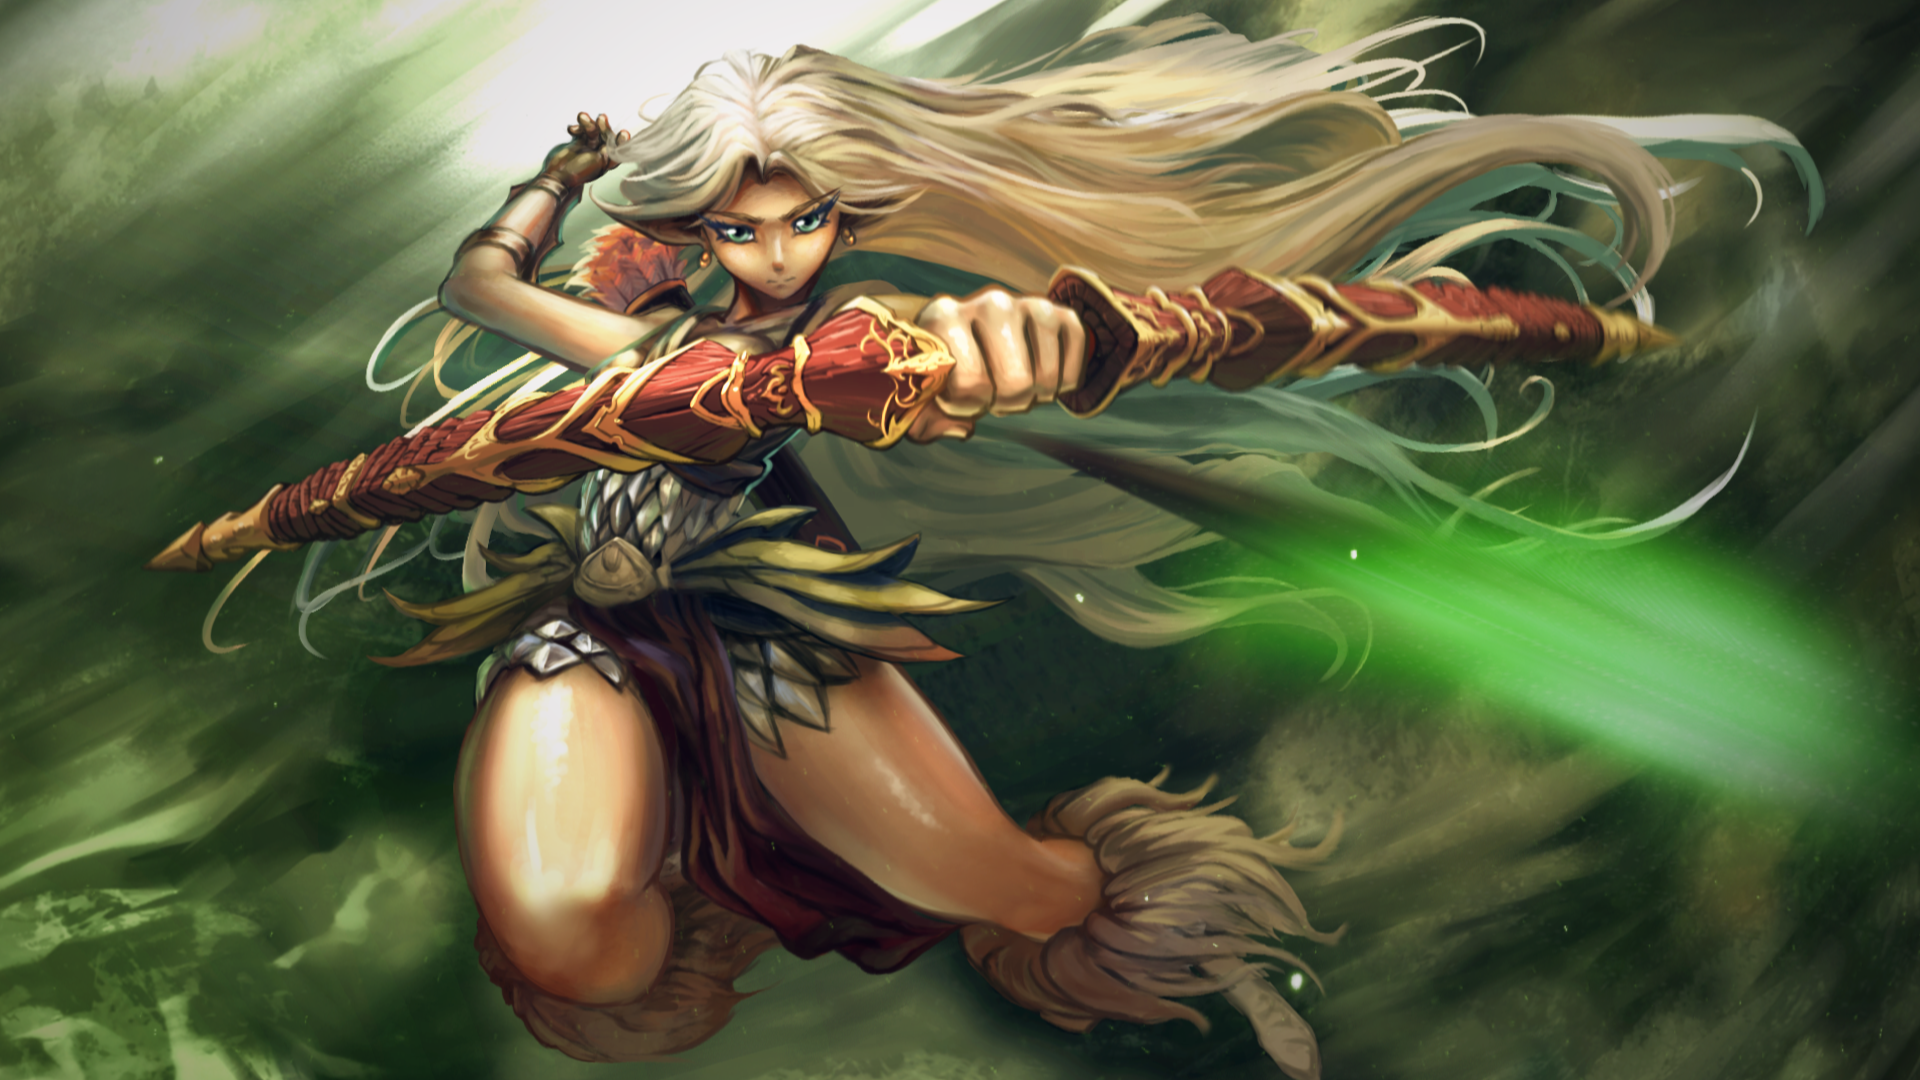
4. Project Organization: and this video will be going over. How to organize your project is you can see on the left. I've organized the project into five folders. Assets Audio Main calms pre Cumpston Writer Cops You can create a new folder by going to this little icon down here, and I highly recommend this structure because it really contains everything that you'll need in after effects project. So in assets, usually you'll want all of this stuff you'll be animating like images, video vector graphics, footage. Audio is pretty self explanatory. It's anything that isn't visual and sound based. Pre camps are similar to folders and photoshopped. They contain groups of assets to create larger, more complex objects. Main comes are larger cops. That air, composed of multiple pre comes render comes are your absolute final compositions that are going to be rendered. Usually they only include a few layers of Maine comes and audio. Here's an example of these different groupings of compositions. As you can see here, I've got one composition that contains all of the elements that comprise the archer and within that you have pre compositions for each piece of the archer and then the pre compositions are simply your assets. So there's two layers in this composition that makes something pre composition. There's only really one type of composition in after fix and these air simply naming conventions that will help you keep organized throughout your process. So with that being said, we're ready to dive right in.
5. Importing Photoshop File into After Effects: Now that we're comfortable with the AFTEREFFECTS interface, let's go ahead and import are Photoshopped file. Simply go to file and then import file. Select your photo shop file and go to this. Drop them. Select competence composition retained layer sizes. This will ensure that all of your layers are imported as separate objects. You'll be met with this window. Just click OK, now you can see that it imported a folder with every layer as a separate asset, as well as turning all of your photo shop folders into compositions. Notice how in the photo shop file, I have a folder called Archer Main Quiver Hair BG their corresponding compositions to those names within that those compositions are each layer that was in the folder exactly in the same position and order as they were in your photo shop file. So now that we have our assets, we can start animating
6. Graph Editor Basics: graph editor allows you to tweak the curves that affect how values between key frames are interpolated. This essentially gives you more control over how the animation progresses in terms of speed and value. You can access the graph editor by clicking this icon. When you click on a Layers attributes such as Position, the graph editor will be populated by a curve. If you right click on the graph, you can choose which graph you wanted. Edit. I won't go into too much detail on how each graph works, because there are plenty of tutorials out there explaining the same thing. But I will show you a practical example of how you can make smooth animations by manipulating the curves on the graph. So in this little animation of a kid going and slide, you'll notice when I hit play. He doesn't go down a slide the way it's you'd expect him to. It's very linear, and he stops abruptly when he hits the bottom. You'd expect him to slow down or toe slowly, gain speed when he starts on the slide into slow down. When he hits the bottom on the way, we can make him do that now the way we can make him do that is if we if I right click on the key frame, I can go to keep from assistant and then choose Eazy e's out and I'll do the same on the last key frame where he goes to the bottom. Easy is he's in. What that does is it pushes the frames closer together when he stops, so let's try that. So let's try being the animation now that I've applied the the easing so you can see that it does help a little bit. But there's a way to use the graph editor to strengthen the easing effect on the speed graph. You can see there's one manipulator on each key frame. If I drag this out like that, you'll notice the little dots on the on this curve. They're getting pushed towards that key frame. If I move this one, they're getting pushed towards this one each dot on this line. That indicates his position represents a position up in time. So as I'm nudging forward on the timeline, his position is actually going right where those dots are. The easing effect keeps his ah position closer to the ends, which is exactly what we want. So now you see that we have much smoother and more natural using in and easing out, then just the default. So I hope this has been helpful and you are able to utilize these techniques to your advantage for your animations. See you in the next video.
7. Parenting & Rigging: parenting is a feature and after fix that is used to allow layers to inherit the transformations that is position, rotation and scale of other layers while maintaining their own relative transformations, similar to how a planet rotates on its own axis but still revolves around the sun. To show an example of this, I have the archer, the archers head and her body. You'll notice that when I move the body, the head stays in place. This is because the head isn't parented to the body in order to parent it, click on the layer that you want to pair it to another layer and select this pick whip icon , then drag it to the layer that you wanted to follow. You can also choose the layer individually by clicking on this drop down. Now you'll see. When I move this layer, the head follows along with it. If I were to animate the head, you'll see that no matter where I move the body, the head will still maintain its rotation. You can use this technique Teoh, rake your character, attach its legs, arms, head to its body or any other use. You confined for it. So this has been the basics of parenting breaking
8. Wave Warp Effect: in this lesson, I'm going to be showing you how to use the way for perfect. First, go to your effects search bar and type in waves warp. Apply it to the layer that you want a wave war. So here we have wave height, wave, width and direction and wave type wave type is the shape of the wave wave. Height is the distance and pixels between wave peaks. Wave width is the size of the wave and pixels. You can adjust these settings intended with each other to get the look and feel that you want. When you scrub through, you'll notice that the effect is being applied to the entire layer. To change this, you can adjust the pinning you'll notice when I said it to bottom edge. It keeps the pixels on the bottom the same, while wave warping the rest of the image. Since I said it to vertical edges, only the center is being affected. So with this knowledge, go ahead and try it on your own animation.
9. Puppet Pin Tool: puppet pins are points that you can create on a layer to move and manipulate large chunks of pixels surrounding those points. In order to access the puppet pin tool, click on this little icon on the top. Select the layer you want to effect and then click on any point on the layer to create a pin. You can create as many points as you'd like. The more pins that are on the layer, the more control you have over your manipulation. Those last two pins I created are mostly there to act this anchors so that when I move the other pins, they won't move. You can always reset the pins position by clicking. Reset here, but keep in mind it will create a new key frame. Upon creating pins, Key Frings will automatically be created. The key frames represent the position for each pen, and when you move them on a different point in the timeline, the key frames will save those positions and allow you to go from one position to another with those pins. In order to move a pin, simply click and drag on it. You can just the expansion and DNC on the top. What this will dio is increase the resolution of the distortion effect. You can also combine the puppet pin tool with other effects, like way for work to provide even more motion and versatility.
10. Mesh Warp Effect: So we've taken a look at the puppet pin tool, which is really good for moving large parts for your animation. But I wanted to show you another effect that offers a little more versatility, and that's called the mesh warp effect. So you can either type in mesh work to get the effect, or you can go toe affect this store mesh warp. So go ahead and add it on there. And what this does is you can choose how many rows and columns of definition you want Teoh have on your image to distort it. And each of these intersections gives you a point when she can distort your your your pixels. So I don't really need that much definition song. A scaled down to about fourth do three for now, actually, 24 And if you want to animate it, just click on distortion mesh and move the points around until you find something you like . I kind of just want the cloth to be whipping around in an irregular way, but she's moving across the screen. The best thing you use this for is for organic things like cloth or waves like water, because you get really irregular and cool, distorted shapes with it, so that could be our first state. Then I conclude the timeline down a little bit and distorted some more to another state. You can also take these handles and move them like that. Yeah, that's looking so far, but this is just an example to show you. So basically, just go around. Go in futz with it until you find something like no way you could even move around. The key frame stopped for more variety after copying and pasting them. All right, so let's take a look at the next effect.
11. Displacement Map Effect - Part 1: this lesson will be about the displacement man. Perfect. First, I'm going to explain how it works, and then I'll show you step by step on how to do it. So a displacement maps or depth mapas, it's usually called is an image that's in gray scale, which represents the surface of an object and how close or far it is from the viewer. Pixels that are white represent parts of the object that's closer to the viewer, and pixels that are closer to black represent surfaces further away. So in order to do this effect, I'll start by showing you how to create the depth met or displacement maps. Generally, when you're using this effect, you want a group all of your layers in tow, one composition and have a black and white version of it To go with it, you will see that I duplicated the head composition, and I'm going to use that to be my displacement maps. Apply it if Phil effect toe start with gray as a base. So here I'm duplicating all my layers with control D. Then I'm gonna go to pre compose and call it body. This placement This is an entirely separate group of layers that use the same exact layers . That's the other composition. Once I've selected all of my layers and applied to fill effect to them, I'm using ingredient map to allow the layer to fade smoothly from black to white. With this effect, you can adjust both little icons. That will be the position of the end and start of the ramp. But my goal here is tohave. The knee, the brightest part of the image since its closest to us and have the rest of the leg received two black, indicating that the black is further away in the white is closer. Now I'm going to apply an inner shadow layer style. With this. I want a black shadow to wrap around the leg in orderto sell the form that its rounded. I'm fast forwarding through the rest of the layers because I I want you to see how generally you want the black to fade into the background and white to be closer to the viewer. Notice how nothing else on the images as white as the knee. And that's because the knee is the closest thing the hair I have fading to black on the right because it recedes into the background. It takes a bit of practice to get a good sense of depth. One thing you can do is, uh, Gogol. This is Google depth map, and you can see tons of examples of how people of how people have used this type of effect and some three D renders of of other depth maps. So just be patient and go layer by layer, applying the fill radiant map an inner shadow layer style, and those should get you by with most layers. Again. I dark in the foot quite a bit because that's the furthers thing away. So here's the end result. In the next video, we'll show you how to actually use the displacement map effect.
12. Displacement Map Effect - Part 2: we've gone over. How toe Make our displacement met for the effect. Now let's go over how to animate it. First, typing displacement map and the effects search bar. Apply it to your layer. The displacement. Let map layer will be your body displacement or whatever layer you have as your displacement that it's a good idea. Teoh. Apply a Gaussian blur to your blip displacement maps, so there's a bit more of a smoother effect because you'll notice without the blur, you get very harsh lines. There's a lot of weird artifact in going on in the background of the, uh of the parts that are moving. You can see it, especially in the leg in the face, so what you want to do is select effects and masks so that the blur is actually applied. You have the horizontal and vertical displacement set toe luminous because luminous means it's looking at the grayscale values of the image. So in order to actually enemy, click on max, horizontal displacement and max vertical displacement and mess with the values. For those you want to find sort of a sweet spot where it won't make your image to distorted . But it will also maintain the three D effect that you're going for. By animating these two values, you can achieve this effect.
13. Particles: How to Create Fire Magic - Part 1: this'll fire magic effect was made entirely in after effects using the particle systems to effect, and in this lesson, I will show you how to do it first. Let's start by creating a new composition. The size doesn't really matter cause we can adjust the later, but I'll start with a square 1920 right by 1920. Then we'll want to start with with a solid layer by going to new, solid or oppressing control y on your keyboard. Next, we can apply the particle systems effect. So here we had the birth rate of your particles. Longevity, which is how long each particle lasts. Producer, which is where the particles will originate from or spawn physics are how each particle behaves. The particle is how you affect what the particle itself looks like when the random seed. You don't have to worry too much about, but it changes how the how the randomness of the particles are affected. To start. Let's see how it looks by the fall, so that's not quite what we want, but you can see that particles are being generated from the center point here, but what we want is for to behave more like fire, so we can start by changing the birth three. Because we don't quite need that much. Let's say one over that longevity. We don't want it to reach the edge so we can make it last half that wall. I'm just clicking and typing values until I get what I like. Next looks, let's look at the physics. The behavior right now is explosive, which means it's happening all around the words in point, but we can set it to fire to make it go upward. So that's already looking like what we want. Next. Let's look at the position which can be found right here. We can either click on this little icon and choose where you want things to spawn. I will do around the center like that, or you can move the values individually. I didn't lower the birth three go velocity. We can change or commit said it a little bit lower than that
14. Particles: How to Create Fire Magic - Part 2: So that's pretty much all we need for the behavior of the particles. Now let's go ahead and apply some blur effects and glows. Let's start with Sisi, Radio Blur. Radio Fast Blur. This we can. We should want want it to come from the bottom. That gives us a pretty cool effect. I can adjust the amount, and with that it kind of unifies the whole fire effect. Next will want to apply a glow. Don't worry too much about the color at this point, cause we can change that later with C. C. Toner. I'm not going to really say specifically what to do here. It's all about messing around these values and seeing which looks the best, All right, So once we have that done, let's, uh, what's that? Another effect called Victor Blur. This is what's going to give it that really cool. Look what Victor Blur does is it uses, uh, uses a black and white map to decide which way the blur is going. So it's a little bit of a smarter blur than Goshen or radio. In effect, the softness, smoothness. You can always go back to other effects to change things and I put the radio player after the vector blur because the vector blur gives you the overall thing, and then you just wanna unify it with the radio blur. All right, finally, let's add some color going to typing in C. C. Toner. This is where you can choose what color your highlights. Mid tones and shadows will be by default. It's like a brownish color, so you can always go in and change the hue to something that you to whichever color you want. I tend to leave the highlights white. You can choose Pantone to give even more color variation. All right, looks. That looks pretty cool. One last thing will do is you can go back to the vector blur, give it more specific black and white map to go off. So that's not so. We can use fractal noise, which gives us, uh, a random black and white maps. And if we hide that layer, go to Victor Blur back in the vector blur effect. Make sure to have it on Luminant, so that looks at the white or black values. Uh, this is which layer effects so chose the fractal map, and she was affects a mask so that it knows to look at the effects. This is in the fractal noise I adjusted. The contrast you can see makes the different values more defined. That's about all you really need to dio for that part of the effect now, to give it a little bit more life we can and an expression to the producers position. But in order to do that, hold Ault and then click on the stopwatch Next position, then type in, wiggle and choose this middle expression and we're gonna type in two values. The 1st 1 is how Maney wiggles the how many Wiggles that will do per second. So hit two and then second number will be How much of a change So we'll do try 100 So each wiggle will change these values by 100. So in this case since its position, it will move it 100 pixels in a random direction twice per second. Now that we have the random position to find, we can go down here and I want to set the position of the radio fast blur to follow that randomness See? So by clicking on this pick whip here go up and drag it to the position, the one with the expression on it. And now this is parented to this, so it'll follow wherever that goes. Now we just kind of want to bring the detail back in. So I had its sharpness sharpen. I see it at its little, adds more definition to the effect.
15. Particles: How to Create Fire Magic - Part 3: next. Well, at the secondary, uh, secondary particles. And for this one, we don't need any of the blurs. You just delete all these. We'll call this tiny particles, and this is just lens fade. And instead of exploding like fire, we'll do. It'll be twirly position. We don't want to be random. Put it right there. Reduce the glow. Change the change. The particle size, two way smaller to increase this decrease that no gravity and the lost city slightly more. It can increase the birth rate and then at the globe back in. - Okay , So go ahead and tweak the valleys. Teoh, however you'd like, and I'll see you in the next video.
16. Compositing: Overlaying Footage: adding particle footage to your animation is a quick way to spice up your video. Excellence dot com has a lot of free videos that you can use. You could also buy professionally made videos on video copilot. I went to pixels dot com to get this video of dust settling against a black background. It's a pretty lengthy video, but you see, it has a lot of cool abstract shapes that we can use and manipulate toe overlay on top of our animation. To start a wanna, remove the black background by going to the blending modes, which you can access within this little icon and select screen. Here's what it looks like without screen. Now that the dust are now that the black background is removed, you could see a lot of the work has been done for us. But there are additional effects we can add to play around with how it's over laid. So let's add levels. With this, we can change how much black and how much white has shown I can make the white spider or the black starker. You can even go further and Ed and Tony's toe whatever color you want by using the C C. Toner effect. Once that's done, you can drag the layer back and forth to change which part of the video you want to show. So go ahead and play around with that, and I'll see you in the next video.
17. Color Grading: and this lesson will be going over ways to add color grading effects to approve and unify the overall look of your animation color grading. Most typically uses effects that allow you to have greater control over the red, green and blue channels of the colors on screen. It's widely used in movies, games and several their media to provide a specific look to a scene. So in your main composition, right click and go to new adjustment layer. This is where we'll be applying her fix. If you look to your effects panel, you can see an entire section dedicated to color correction. Most notable our effects like curves levels, color balance, brightness and contrast, cc toner and hue and saturation. These are the major color grading effects that will go a long way and do most of the work for you. I'm starting with color balance in order to tweak the individual channels in the mid tones , shadows and highlights of each of those channels, C. C. Toner will allow you Teoh choose different colors based on the value of each pixel. Most of this process is really just trial and error, and you'll see me taking on and off the effect quite a bit to see the before and after. Finally, I'm using exposure, which will brighten the highlights. To really make those highlights pop, just make sure not to overdo it with any of these effects. Subtle is usually better, another very useful effect. This cease even yet it darkens the edges around the border of the image to draw the eye towards the center in the focal point of the image. So you can see when I a toggle the visibility of the adjustment layer, how much of a difference it makes to have good color grading on your animation. So go ahead and tweak those values. Play around experiment. I'll see you in the next video.
18. Rendering Your Animation: in this lesson, I'm gonna show you two ways to render out your animation. Make sure your final composition is selected, then go to file export. And the first way will be it to add to render queue. So the way this works is you have your output module, which is basically the video encoding by the fault. It's set to a V I, which is an UN compressed format but not really ideal for animation. Here you can see all of your choices for video for Mets, and I would, I recommend is quick time because it has a has ah sub encoding called animation, which is a high quality encoding. If you click on format options, you can see that it has all these different video. Codex GoPro Senate form is extremely high quality, but your file size would be really huge, so you wouldn't be able to upload it to ah to a website. If you have any audio you can select on offer auto, right. Once you're done with that click, OK, then you have your video settings. You can see that you could set the quality resolution. You can say your color depth, which is how dense the color information will be and these other settings. You don't have to worry too much about Click OK and finally, where you want to save and what you want the file's name to be. So I'll see you when that's done. Okay, Now I'm gonna show you another way to render from after effects. Click on your composition again. And instead of clicking on add to render queue, you can add Teoh Adobe Media Encoder if you have it installed. Usually, if you have ah, creative cloud subscription, you can. It installs automatically when you install aftereffects. So one common video format is H 264 which is great for maintaining quality and reducing file size. There's a match source version, which will which will look at what settings you haven't aftereffects and match the render to that. If you click on match source, you can go into the settings and tweak things individually, regardless of what you do. If you're doing an animation, make sure your field order is set to progressive and not interlaced, because interlaced will try to automatically fill frames in between to make it look smoother. But for animation, it doesn't usually look good. So click this little green arrow and I'll see when that's done. If you want to upload your video somewhere, there's always YouTube, which I'm sure you've heard of. And video, which is, Ah, very professional interface that may not get as many views as YouTube, but it's great for showing in your polar folio.
19. Outro: so we've reached the end of the course. I hope you guys have found this useful. It's a really cool technique, and I hope to see you continuing to use it and experimenting to create some awesome stuff. If you enjoyed this course or have any feedback, please leave some feedback and reviews on the review section e also encourage you to post your project on the class gallery so we could all see your hard work. And if you want to see more tutorials and research and have some resource is like this, consider supporting me unpatriotic. I'll be giving resource is templates, tutorials and free assets for you to use in all your projects. I also want to think these guys for providing music and skill share for providing this awesome platform. So thanks again and hopefully I'll see you soon.
 Yaakov Weinstein, Digital Artist