Transcripts
1. Welcome to Class!: Welcome to class. My name is Andy and I
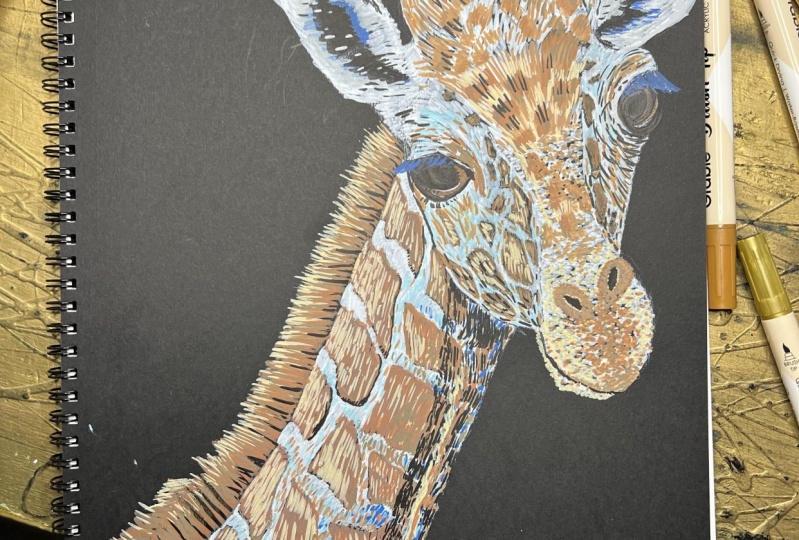
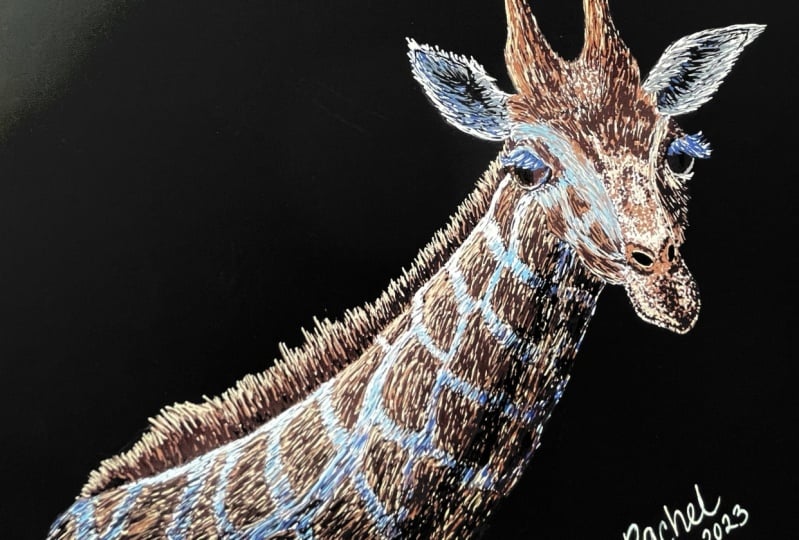
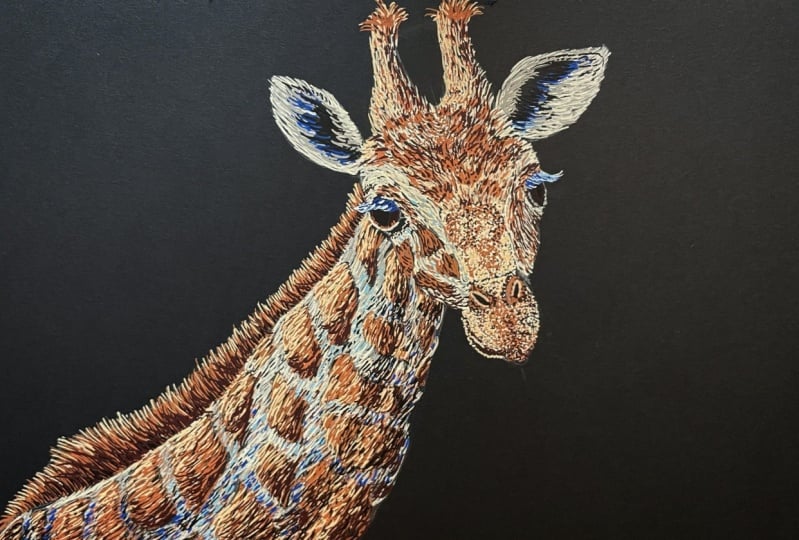
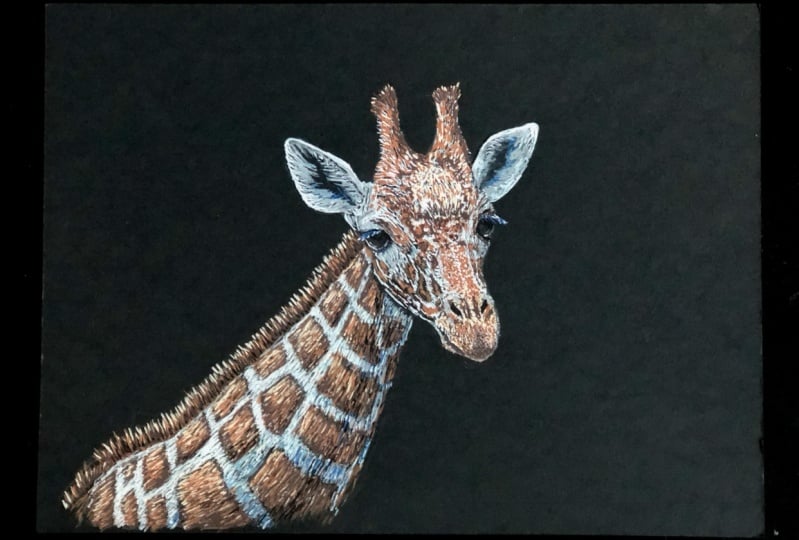
am a freelance artist working out of my home studio and bring veil, south Carolina. And this class while we drawing a giraffe using a
credit or markers, while we're learning how to
combine the corners and use them to sane and get the
desired effect that we want. Where does our knowledge and
practice this idea acquire? You'll be able to draw
animals of your choice. To start off, we'll be attaching the giraffe using
a white pencil. Then we'll move on to using Posca markers to add the
colors for this class, I have provided several
handouts for you to download in the projects
and resources tab, my loan is a video. In addition to downloading, the reference photo will be working from
over the giraffe, but there's also
a few photos with notes and my own sketch
that you can use. I encourage you to
take your time, have even stressed out
part of the design. Take some time off and then
come back to the drawing. In the next video, we'll be discussing the materials
you will need for last.
2. Materials: Alright, welcome. So right now we're
going to go over the materials that we'll
be needing for this class, laying them out for him to see. How should we put in the dish. And as a class description, check it out there as well. For our great prayer
where we work in with this tension, hot, fresh board and engendered surface for our markers to one. And to do our drawing on the
page that I'm working on is 14 by seven inches in size. They ever taught I
recommend is a T-square. Well, it isn't really
necessary for this project. I do recommend having one and it can come very much in handy. Then we'll be using are
quite current potential. In my case, I'm saying
parent, feminine. But if you use Christendom
credit or fabric, just tell any other
brand is fine. What is important is that we use a byte or wherever right? Shade pencil as we want her to show up for our
outline of our word, Tad roof without wanted to show you how to craft these markers. So when he did it, how
does it do you need to do is find a scrap
piece of paper or paper towel and pressure maybe five to ten times
in order to get the paint out of the tip. And from then on, you really need to press down to accept every
once in awhile to hit the paint
drilling and get it points to in where
that isn't very often. But when you're using
an image general, you don't need to
press down hard. You use them just as even use
any other American or plan. Rays are going to be the colors that we'll be needing
traditional project. And you enjoy it
and we're able to take note what we're
needing today.
3. Structural Lines: In this section and at
the following videos, we'll be drawing the giraffe. So what I have now is my wife, Karen dash 100 pencil and my ruler like triangle
that I'm often to use. And it says it necessary, you don't have to use
a ruler like this, but it's what I write,
one of my favorites to use when drawing
and Poseidon. We can't see this right
over here off camera. I have a black and white print out the tariff for
me, the client said, and when I draw and you can either print it out or have
it on the computer or tablet. Choose to have something
that you can look at and see and work from. So what everyone
is start doing is drawing the angle of the neck. So I'm looking at a photo
and trying to see what the main axis or
angle of the neck is. And then I'll draw
it here on my part. So I went to handheld interrupt when right
here in the middle. The more and so I think
the neck it comes off and goes to the
right number, right? So I'm going to move it over sr, my hedge of my ruler trying
to see what I think is inappropriate Henkel and
eyes when the around here. And so I think that's an
appropriate angle right there. So I'll draw the line and
you don't have to press really hard quiz
just wanted to have a basic idea of where
the neck is Cauchy. So that's our neck. And now we need to have
a line or an ad says of the head SOC going down
as a middle of the head. The head is encode
town and to the right. I'm analyzing it, trying
to find what looks right. Credible, clear. So drawn from maybe an inch above where this
white line ends. And I'll draw it downwards. The top of the head was
turned right around here, not including the
ears or the horns. And then the bottom of
the head where me and hearing on right
now around here. Okay. So here we see
our basic shape, our basic form of our
giraffe representing the neck and then the
head, the basic angle.
4. Structural Lines Part 2: All right. And then
I went to throw in there where the
highs are there, Ingo pen and please
include a photo. We see that the
left high is a bit lower than the right
because the head is facing a bit to the right
terrain now I'm locating where the
eyes are and I'm noticing that that
have tiny is almost hits the edge of the
neck on the left front, right around, around in here. So I'm going to say
their left eye is right about there by having the rotor at a basic handle
going up and to the right, a bit, not too sharp. And then open it. And so they're high on the right will
be relevant here. I think what I'll do is
I'll extend this over. Prefers. One thing to note
is we aren't seeing more of this and the left side
of the giraffe head, then we do see the right skull. We'll see more of it, more of a decidable to face. Alright, the other thing, and last thing I want
to do in this part, his drawing here. So the basic angular ears and as we said is
right around here. If we kept program Friends
ear his ragged partner high. So it starts right around here and it goes up
and to the left. And then we have here
on the left and then one goes up into the right animal we can
do is free if you want. I'm not going to
go to the right. You can draw a similar
line from where it is. Here ends right here, has the same angle, has highs between the two ears. So I'm going to draw a
night nine because our gear is right and left high
school right around here. And then we'll draw it at
an angle and to the left. Okay, so that's
our basic axis of our main shapes have
our neck or head, our eyes, and our ears. And provide a photo of this for you to
download if you like, in the Student Resources
tab of this class. Alright, so in the next videos, we'll be trying out and
adding oddity tails and form to our giraffe.
See you then.
5. Drawing the Face: And now what we can do
is we can start building the structure around
this framework of these lines that
we've drawn out. And usually what I like to do is I'd like to start
drawing the eyes. So what we'll do is
we'll start trying the left high and their terms. And I is right around
here and we notice it has a beautiful curve is repeated
of well-paid giraffe eyes. So starting at the upper
corner near the eyelid, add curves town and n, and then it sharply
turns and goes up. And this right here is
the corner of the eye. And so now paired it
takes never turn. And those up and to the left. And then it curves down to meet the other
side of the eye. And then we'll have our
Azure AI over on this side, but we don't see
quite as much of that IS which no
one on the left. So our CO2 is neutral, kind of cluttering
the top and bottom. Choose if we trace them over top of this one with
more info here. And that one would be here, Server monitoring as a curve. And then in this
one we really have a curve and it comes to cloner. Same with this one
corner on our axis. And so this one will turn. And then it turns and
joins they high down here. Okay, Now we're going to feel the nose and we may need to
make these guys have better. We'll see later on
Commodore looks, we'll make adjustments
as we know. So it will do is I am
looking at the shape node, the forehead and the nose is, comes down this way. What I really see as a new lead to higher
ground and perform it. Here's curve of the
bone, red and here. And comes write it on the edge of the eye right around there. And continues to occur. And then right
around the middle, or maybe a bit lower, it comes and turns outward
and flows to the left pad, that's where we have our
snout of the giraffe. And so that's going
to turn back. So we're looking at these
prolines, how they flow, how the curve down there's
S's may see it as kind of a stretched out S
suddenly fell back. And we're going to end up
making this a bit longer than our original line that
we drew for the center. But that's okay. So this is
the tip of the nose or mouth, whatever even in
precisely call it. So right in the middle of this mineral line is
when we went to his wherever we want to turn and
start curving background, this will be the lowest
point right here. And again, because
we're looking at this from a bit of a side view, we're going to see
that it's kind of this right side and
more of the depth. So let us try that again. We're going negative
curve coming down and pay their on S, coming curving and
flowing back up. And to a degree going on to mirror what's
happening on the left, we went to merit on direct, Silverado it up and
then curving out as this one curves out when traveling in the
opposite direction. And then we notice on this one, especially Evan nice paid more
when it's a high bar, is. When I form a nice curve
right here to show that, and I'll add the
same and the others. And sway got that established. Now, we're going to draw
some of that cheeks. So we too, as I'm looking at
this line that flows from I found and it flows and it joins and a mouth
right around here. This is the main cheek cavity. So you have a nice gentle flow going down a bit of a curve, but not too much. Hadn't read nears where it turns sharply in curves
into the mouse. Okay, and then we want
to show their lower lip. So go from where it is. Nine came and joined. We'll start another line
that comes out a little bit and it curves back in to
the lips right there. And then we need to add in this right side a chick
solar seen this of course, then written on the left. So this hairpin have some of the high selfie right in here and Muslims
killing over it. So I have a little bit of
a hard pitch right there. And then another That's
knows town to there. And I'm going to go in and to find some of this
hybrid little bit. So it is a bit more
apparent soon as a muscle and bone in
here prominently seen, there's a bit of a curve
and separation right around this area and then
it joins into the eye. Okay, So we're now but I want to work on his forehead hand. If we look at our photo, we can see are very
distinct path now where the fur pattern
is more defined, where it's warm brown and separate from what's
more white fur. So I wanted to draw that
in and distinguished that. So later on when
we go in and try and ADKAR how
nowhere it had been, hires need Soyuz, try it
out on this left side. And we're going to do is
draw the curve red in here. And that goes and joins with
the rest of the nose red. And then our mirror
that on the left side. Okay, So arriving at has
an orange, the tariff. And so we're going to, and so we're going
to reference off of this center line right here. Then we're going to do, is we're going to try
and be curved to be two. So it would follow a same flow of these
lines with this angle. Now we have here in Wichita and everyone for the ears here. So I'm going to delete the end three end trauma
where the top of the horns shouldn't be this
left one should be a bit narrower than the
one on the right too. I think they'll end
right around here. So now what I'll do is
I'll draw that center you shape for the center. And keeping in mind that
we're kind of throwing up and delay of case or just kidding
the basic structure near. And then we'll go in and add more details later
on and so forth. At this left horn, there's a bit of a curve
for the left side of it. It froze from where this
pattern of fur is M cones. And how? And then it's right around here, strings out and go strainer. And then that's where we have
the tube's have firstly, I'm just kind of have
that in very simply. And so do the same
procedure on the right.
6. Drawing the Ears: Power rate. So in
this segment we're going to draw the two heirs. And what I want to point out before we get started is that the left here is a pitch smarter in our view
than the right, showing one to
keep that in mind. And if we notice this, right here is ever going
to work on right now has about 1234 sides. So here's our first, our stored at the top
upper part of the ear. And I think it's charged right around where this sandwich of the horn slows in and down and inward is where
that ear starts. So it goes up at a
rather steep angle. And then shrink, think curves. And then we get
to the end and it has a nice curvature here. These two lines are
a bit straight, flatten this one
here was more curve. And it almost joint has one into the fourth
sign of the ear, which is down here. And what I think how do is
make the're a bit more Gong. And what I'm gonna do is just
if you notice in the photo, there's a bit of a curve
period where the eraser, and I'm just going
to indicate some of those folds by adding nine. So it's easier for me to know
where they are later on. And if you look on the right-hand
side of that dark area, there are either
make out a PID of a W shape and that's how I
like to simplify my forms. So it comes down and then turns, curves around that down and then back inward. And then further left
side of that dark area. It has nice Swirl Port pen and it goes in like that. Okay, Now we're going to
move on to the left here. And what I think is
happening in the photo is that the left hand here is a more turn towards
this show are not changing as if we
were out like this. My hand is, instead we're
seeing it at more of an angle. So that's what we'll trawl
and source turning it. We're not starting at the porn. We're going to draw an
arrow segment outwards from the horn, Coleridge. And then we're going to
do is we're going to draw a line going up. Again following the same pattern as though we're on the right. We have four sides
to this air going along and then curve around. And then we turn
in, flow back down. And if we notice this here, close almost straight into
the eye, but not quite. Dead ends right
above high Honda. I'm Raul.
7. Drawing the Neck: Okay, so now we're going
to draw it the neck. So start on the
right-hand side of the neck that it flows from right around
here on the cheek. I know it's not really
coming out of there. Let him the freedom of our
third node never worked in. That's where it starts. So I'm going to try and
has a very gentle curve. It's almost straight. Scum love him with my pencil out where this line would hand. So right around here is we're going to have a very
center slope to it. So how ever so much pen and bad can maybe
that's even too much. So are thickened this part of the physics harder to
erase the white pencil, but now thicken it up. And I don't know MIT, so
I have a list of a curve, but still identify that case
connects our right side. And what I'm going
to do is I want to work on the left side. And that has a much
more radical curve. Has it shows its basic case. Trade comes out around that
line right around here and comes down this way. And then right around
this area is swept, swoops town and in a way, alright, and so this area right here is the path of the neck. Handler needs the
back of the animal. And Scott has a bit of a simpler hang time,
has opposed town. Now we need to do is draw in as a personal favor and the neck and looking at the
photo starts right in the HMO standing here,
right around here. We're just going to add a bit of a case where we want it to be. And it's going to follow
nine of our neck. We're Git's uplift sector
as it goes down here. And then right around
this area is where turns and flow goes up. And that's because
it's traveling with the flow of the animal. And then if StackOverflow
strategos down and up a bit, and then back down display. And it disappears.
8. Spots: Okay, so I'm gonna do a few adjustments and
I'm going to end. The horns are a bit higher than what I had
originally and then outline to extend because I
have no paint down further. And now when added some
details hand as well, and then has a non straws and they're going to be right
above where the cheek is. Purchase right around here
and there at a nice handle, thrilling inwards
towards the middle. And this one on
the right will be higher than the one on the left. And we wanted to find
this cheek on the left. It has It's not as curved as what I drew
originally, Nate, so it kinda come in there and then back out
and then it curves in a, in an froze out
tennis heart rate. And now what we need to do
is try n has a patterns. So we're not going to draw
the patterns on the head. We are going to charge
the patterns on the net. Soviet was to follow that
photo as it is we can do that. Are temp1 into your own
pattern however you like. Okay. Already then surface area of our patterns and
felt and connect. I also added a bit of
patterns on the cheek. And later on when we cover it in where the patterns
on the forehead. So that concludes
our join period. So in the next videos, we'll be adding curves and blending and doing
all that fun stuff. So I'll see you in the next
segment. See you then.
9. Neck Pattern - White Lines: Okay, Welcome to this part
of the video. You made it. Congratulations. And now we're going
to start covering in the giraffe and how
we using my markers. And what we're gonna do now is we're going to
fill in and work on the upper back and the neck
area land for this part, you have several options and I will explain
what are we doing. So you understand I have
this thicker marker that is about 2.5 millimeters
and in size. So as you can see here,
when I take the tram, it has a Vader had and so then the other
one are we using? Is this 0.7 millimeter in size. So here you can see
the tip of this one. It's a bit acinar gland. Either will work fine
for what I'm doing. I'll be using the
bigger one because I could fill in more
space and less time. So if you don't have
the big one is fine. Even use this one or
one or vice versa. Either, well, we're always
will flourish started. I'm going to shake this one
out to fish rich nation. And then over here to the
side or tested out, go. Okay, so I'm going to go
in in between some of these swatch here all the way up the neck and fill
it in with white. And one thing I am doing, and I encourage
you to do as well and try to search in our
dots are near yours, but I'm doing the little lines
and joining them together. So on drawing lines
with the tip of my brush going in an
upward filling out, the survey lines are
drawn sample here. They're like, rather than
rate their winter are joined together and doing this
will just give it a winner, a hint of some further in there. And we don't need to have
a solid mass of white. And it's okay if some
black does show through, there's no problem in that. And similes are
longer than others. Similar 900 bit
rounder because we wanted to look like it's
had short for server, giving it a bit of a
layered appearance. And again, I'm
throwing triangle it. I'm sure. The neck,
head around militia. Confirm officially
went all of the fur and fell in the same direction
depending on where it's located on the body. Great. Now what I'm doing is I'm going back to these areas where I notice in HIV RNA bit more
light, more coverage. Again, I'm not trying to
cover it completely much, just a little bit more. As I'm getting to this
right edge, have the NAG, I want my firm to firm up in
a more inclined position, should go up like more
hard angle going upward. Whereas over here in this area, it was more of a softer angle. So as we move over and read
it closer to this edge, we're turning and our furs growing up more at
a steeper angle already then. So we've run our sparse laid out where
they're going to be. We have our white area current n. So in the next video will be no end with some
gray to add a bit of shadow to this white
and even some brown. So we'll do that in the
next video. See you then.
10. Neck Pattern - Adding Brown: Hey, welcome back. So in this segment we'll be
working with our gray marker. And this one is an extra
fine.7 millimeters. And I do recommend that
the vowel one like this, that is fine for our details. So as usual, we'll shake
it up, test it out. And then we're going to work on this lower area around in here. And also add a bit
of this gray around this right-hand side of the
neck to have a shadow and a little bit of curvature and roundedness and bring that form of the neck and make
it more distinct. So are we working down in
this area to start out? And when I'm doing
is I'm not covering the entire wider because X21 to light to be there
and when I am going in and just adding
a few strokes, no gray to give
it some contrast. And I'm also going to stick to this lower turnover
region town in through here on this area from where
my finger is downward. So only adding the gray and then I'm fading it out
as an adult birds. So again, I'm trying to get my, for my strokes to note that fire and blend
with some white. And I'm going to have
nice fine strokes. Appear to be fair
swelling of the neck. Okay, so we'll stop there with
this query and the rest of this region will be
leaving nice and white and right without
any of these gray on it. And now we'll be moving on
and using our brown again, it's a 0.7 millimeter. And so we're going to start and we're going
to basically go over the same area that
we had it with the gray. And just now, and we'll be
starting out down to our left. And again, we're trying not
to cover up the entire light. We're just adding some
lines of brown in. It, gave it a PID
of color and shape. I'm going to go in
with this brown and add a second vector layer along this edge gets about one inch and
short-term about here. I'm not going to cover it all, but I do want to add
a bit more brown to bring out an ad and
printing and paper shadow. Cannot do that
down here as well. Add again darker
areas just to give it more contrast or shame or depth. Right now that that is dry, I'm going to go in
for a third layer and add in a dark brown. And this one, this is the
only dark brown I have. I don't have the fine tip, extra fine tip and brown
for this 1.3 millimeters. So that's what I'll be using
and I think it'll work fine. And I'm going to start up on a simpler edge going in the
same area that are added. The second layer of brown
in just a minute ago. Soon we'll be adding that in. And what I encourage
you to know as you're starting from
the right side here, they wanted to be the parent
is n. Then going left, we wanted to gradually
get Vader and warm white. So try to do that. Try to thin out inner mountain
that you're adding this brown as encode more
than half of the neck. And we're only
focusing on adding this round to about
one inch of this sign. Then of course, only
on the white area is we're not working
on this part C yet. Ashley.
11. Neck Pattern - A Bit of Blue: Okay, so now we're going to go back and we're going to
go in with some Brill. I'm using a 0.7
millimeter Posca marker. So what I'm gonna do is add a stroke not as heavy as
any of the other layers. I've added register
with lunatic name with a shadow in this right hand side of the neck on the way down. So that's what
we'll be doing now. And again, where the
mesh fine hairs not covering up how much their party standing and
bring it into this corner. So it brings out more
blue, more shadow. And he sang eminence, nice form and a bit of color to our shadow
soldier that now, okay, Now that we've done that, I'm going to step back again. And here's a 0.7
millimeter light blue. And this is more of an
aquamarine planner. And you can see that the
difference, in fact, one period to the dark will show we're
using this one now. I'm going to do is go in this main section in between the white and a dark over here, and an in-between
here going down and adding 100 of this blue and this kind of gives
it a third degree. So going from dark,
light terminator, so we're not covering upon where you're just
standing impaired, fading out as regular
petition rate and solid white and fading out as we don't
have this dark blue, dark brown to solar film. Same ride and here heading appeared on
this night, millennium. Okay, so I think adding the blue really limited and have
a nice curve to it. I really like what it
did having the right and then transitioning
to the light bill, and then over here
to the dark green. I really like the effect. So that's about
it for this part, how we letting it
dry and when we come back when we were working
on and the spots. So that's it for now. See you in the next
video. See you then.
12. Neck Pattern - Brown Spots: Alright, in this segment, we're going to work on
filling in the spot sharp, the neck of the giraffe. And we'll be using our brown marker for
this rather brown color. So we'll be doing
that and we'll be drawing them in a
similar fashion as we did for arrest him
for the white and blue that we added in
the previous videos. So we adding the for
having them fill hub that going in an
upward direction, starting over here, throw it to the right and then
go up and up and up. So we're doing that now. And one thing I
would like to point out is that as you can see here, these strokes of
forbid I'm adding, are only about half an inch in length or maybe a
quarter of an inch. They vary and link p1 to have a variety of and not have
them all be the same. But we're 200 hands
these in pretty sickly, not covering it completely. We don't want to have
increasingly thick layer of this brown. Okay. And that's pretty much
kind of say phi one brown to me and I may
pick up later on. But we'll see as we go
on with because they answered showing
find them Yvonne. Spots over here and over on the far
left-hand side. And our spot right here, we do want to finish 10 More
going down to the left. So Vietnam more of
an incline that I am holding this
mercury right now. And the reason we want
to do this is to show that flow for as it flows
down and then back, zoom, growing national
roller coaster town, and then we level
out a bit around hair and then resort
town right there. Okay. So right around in here. We had a mountain and
we're starting up. Hi. Okay.
13. Neck Pattern - Highlights: Okay, So now the way logger mid-tone brown set in and dried, we're going to go over and
use this range color tab, some of the highlights on
the brown, on brown spots. So up around here we'll
focus on adding this. So one is stirred up in here, and the upper part
of the neck on the left-hand side,
how this part and I'm not going
to add too much of this way stressed enough to give it a bit of a lighter tone. Especially I want to
focus on the first side, spots around and hair on these brown spots to this upper edge because
that's where right, which is coming from up here is hitting our spikes
and heading the net. And so we want to show
that that light is hitting this further and further
up area of the spot, similar to what we did with the white areas
around the sparks. And as I go further
down on a spot, I want to change it
out and have a look. And then so with these spots down on the far
side of the neck, I want to limit my
search of the base. And that's because I have this term shadow in here
that we added to it. And the white stripes. And I want to indicate that, and we'll add that Morin, as we've gone with the colors, but I don't want to
add as much base, maybe just a little bit
around with bottom part. Just enough to give it
the idea that it's there, but not as much as I am
adding up here on the top. Okay.
14. Neck Pattern - Shadows: Right, So we've done
that night and Beijing, and now we're going to go
and use our gut brown to add more shadow and
especially around the lower neck area
and wrong and here, so P adding that, again, we're flowing with the drilling down and that the stripes
are not occurring in solid. And I encourage you to
do add this stroke color and gradually and see how
it looks best on yours. Again, we're starting really, basically sick with her
lines around the edge. As we now go up this way, we're getting thinner
and thinner until a fade out and merge hands in
either area, a pair. And just to be clear, we're only working
on the ground spots, so we're not doing anything
to the white area. Stripes were living
those unknown. We're just working
on them brown. So here's a great example
of what I'm talking about. Me having a nice
chart area down here. What's a favorite little bit, so weiter for sticking out and appearing and
then we'll turn dark brown or gradually
fading out and using less of it as we go
up to this area over here. And then we're not using any or adding in a hub in this area. And for some of these spots, I'm going to go around the very edge of it
serves as this one, S1, S1, maybe even
this one and this one. And add a bit of this
brown but not much Chester where it indicate
have bit of a shadow, chest, shoulder of it. I don't want to overdo
it or anything. So I'm being very
conservative was how I added this brown to they
scratch in particular.
15. Neck Pattern - Muscle/Skin Shadow: Okay, so now what we're
going to work on, as I'm noticing, if you look
at the reference picture, there is a bit of a shadow
that skirt from about here down and flows down to
here, manage rather thin. It isn't really,
really thin on mine. It's about the thickness
of my pen, I would say. So. I want to indicate that we use in our black
marker for this. We're not going to
Clarence Charlotte, we're just going to
add a previous stroke. So platinum, these areas going down in here to
add a bit of a shadow. And so now I'll show
you how I do that. And I'm going into
the white area, having a brain of this black. And so this is the
main area where it start and charge
the center of this. I'll add more. And then
as I get further out, oh, start to fade out
and nevertheless rind. And then we're going down. So that's basically
the rock I want. And then Shaw go on down. And what this really does is it gives a more of
a dimension because I think we're challenging
pump Schoenberg we're trying to do is give it more
formed, more dimensionality. Now it's just tell one shape could have little
shapes southern parts of the neck sutures
right here that or have a bit of a valley red. And here we're showing with
this shadow is a bit of a valley where the skin
is poor n or trypsin. And that's what's
happened in air. And then it goes over more
muscle and bone and so on. So at least has, again, gives a more interesting look. How case we got that laid in. And now we're going to go in, I'm going to darken them
similarly shadows and the crown over to the right
and side show around in here. I'm going to deepen the
shadows with my black. I'm also going to run
over a bit of this white for emergent
bit character. And I'm going to
continue doing this. Adding a bit of
shadow was a bad. And in here, this
edge over to there. And I said I'm going over
a band of this light, her to just give it
some black shadows. What I'm doing now is
using the very tip of my black markers can in
this section around, in the white part, to add little bits of
black hair just enables a fair bit of
dimensionality and form. Handling very
conservative positioning. I'm adding just a little
bit of this black, I think that'll do it. I'm not going anywhere pair. That's where I want my
strongest highlight to be alkane. One more thing I'm noticing
is that right it on. So we have our shadow right
here and it's a bit of a tip in the fair skin. And so You're not
going to further, there's a period of
a highlight where the light is coming
over and it's right around in here on the
neck soil just went add a bit of a ridge crest my
page to lighten it up, parade around in here. I remain shadows right here. So we're going along it
reminded on the side. And then we're failing this page out as we go down this way
because we have our curve, this area right around in here. And we've got that in. Now I'll go in with
my regular brown and not as a dark brown
with my resident brown. And just go over where
I just added the base. I'm going to go over
that image covering similar Rosa, chance to tab. And I'm going to
go over here was my brown and kinda
milled summaries page hairs that are here. I feel like if comparing
it to the photo therapy, too bright, too late. Panther, This is
something I encourage you to do with your
drawing and drawing in general is analyze it compared to tear photo
that you're working from. Thanks compound and say Hey, what can I improve on? What needs to be edited and
memory lane in up here and darken it up there to see
what you need to work on and finish as you go along. Right? And I'm going to lighten my shadow up just ever so much. Using my brown intellect
says 10 bit too dark. Okay, So that about
does it for the neck. So in the next video
when we are working on as a fair here on
the ridge of the neck. So same in the next video.
16. Mane Part 1: All right, so now we're going to work on the hairs up here. And for that, I'll be using my brown has a base
coat for this layer. And the way I want you to think about these hairs is like a, okay, so they're sticking
straight up basically. And what I encourage
you to do is take your pencil and marker and angle it as if it were crushing the net is
going straight across. And that's how you find the proper angle
and where Harish, and so if you flow
down this way, we're training a bit
as the NEC terms and today's hairs will be an
opinion of a steeper angle. Now appear and down, down, down or turning, drilling up more and had
an even steeper n log n. And these kind of turn
and go down the back. So start out lattes and we want them to be
for the most part, the same length, but some conveying prints
longer than others. And what I'm doing is I'm
starting here at the neck and pushing upwards like that apps that technique I use as I know, I'm lifting my markers. I have a nice
feathering in my mark. As we're going down the neck, these hairs are getting longer, appear director
short, a town here. And they're a bit longer. So right around here,
these hairs start. And I think what's
happening is that there's a turn in
the body and so the hairs are coming this way on down and then they churn and
that's what we're seeing, that that photo right
in this vicinity. So what I'm gonna
do is stop them there and have them
go to that length. And then I'll have
some more years flowing down is when
the page will be a bit shorter potential they've
twisted and gone around names snake to round
and sewer saying this, the Harrison, this
area a little bit, predator BATNA then
these right here. And then right
around here is where the hairs to appear
over the ridge back. And I'm going to add a few more, just thicken it up and have
a nice layer now, brown. Okay, so that's it
for our first layer. We'll let that dry. And then the next
ones will be adding some shadows and highlights.
So we'll see you then.
17. Mane Part 2: Alright, now that
we've got this ground, we're going to go in with our garden ground Posca marker
and add a bit of a shadow, a bit of a darker hairs
in here and medicine. And so that's what
we're going to do now. I'm going to do is
focus on the rower, three quarters of
these strands of hair. So if we took the
strand and divided it into four when we were
working on a network part. So I wanted to start right
here at the lower part, had to borrow and Hathaway
is what I'm doing is I'm pushing my marker
and as I get to the top, I'm lifting up and releasing. What I'm doing is
paving a bit of lighter at the top here. Okay. This is the location where these hairs
and wrong in here, our friends from back. So what we'll do is
we'll step down with her current marker
and have the hairs of his time. Okay. So that does it for
the dark brown. Now, I'm going to grab my
what I would do is add a few strands of black in here just to deepen
the shadow with it. I have not had as much as
I did add a dark brown. What I do in a few in here to indicate the
darkness and shadow. Now I'm going to
grab and a base. What I'll focus on is the top of the hairs adding a
better highlighted here. This time what I'm
doing his own draining down and feathering it out. I'm not going to crazy and adding too
much and very intense. I was when I added the black. Just go along here and hit somebody strands
every once in awhile. Top of them, so they
have a nice highlight. We want some of them to be
a bit longer than others on either be the same
length and we don't want them to be the same length, we want them to be
different random. That's it for the base. And now I'm going to
return with my mom around the regular ground and
hit somebody's page. Lines have the tip at
the bottom edge of them. So for example, department, this one just him blended hand
tend the rest of it more. Let me go back and explain
why we added come brown. Just now, what I
wanted to do is have a transition from
similar to what we did down here on the
neck when we went from a very proud shadow
amid shadow to highlight similarly we
know from down here and then we go from a dark
brown to make it lighter. And then tell a nice
highlight tips. Have it on the hair
was transitioning from shadow to the mid
tone to the highlight. And that's what we've
done on the neck and the neck hairs
up here. Very well. That does it for
all of this area. And the next videos we'll be working on the head already.
I will see you then.
18. Right Ear: The first part we're going
to work on for the head of a hears someone starting
out with right here, and I'm going to use my
thick white wash her murder. And this is one of
the better ones. Do is kind of knowing and vein hairs and the
white area photo, there's a white area on an
here and along the edge here. And then right in here when
we children who said shadow. So we'll go in and they
tears flowing and then downward and to the right
direction around here. Then as they move on and
turning to face upwards more, going to the right hand, up. The hairs around this edge of the ear are going
to go up upwards and curve around and
curve around the hair. And then as we get to this
inner edge right along in here, going outwards, in to the shadow and overlapping these hairs right and wrong this
heritage are doing. They are overlapping
in hanging over this shadow and this goes into the air and the air cavity. So now that we've
got the white knight in and it's try it out. We're going to go in with and we're going to
work on the shadow. So what I wanted to
do is start dragging some of these new
items and white. We're going to evolve
along this edge. Weight and dragging over it, having the blue to it
gave it a transition from a white highlight here to the mid tone of
this print them, we're having the glue then to Perkins air inside where Trump. Now we're going to use some gray in-between and over
some of this blue and white to add a shirt
transitionary car. I'm going to go and
bring this gray up here near the top
of the air a bit. Shall miss some other
spray over this part. Here I want to create
some nice soft hairs. I'm overflowing cavity
of the right in here. Now I'm going to use my black marker and had
admit in here in the shadow. Darken the shadow of even
more may not be necessary, but it's what I
like to do and I'll try it out over
some of this blue up here at the very top of
the hair because there's a bit of a bit of a ridge. Have a shadow. Here. Comes this way. And then it was around and
stops right about there. And then I'll mix
in a minute just to tone down some of
this white area here. What I'm doing is I'm adding a few Mitchum in order to reduce the amount of white and mixing it in,
blending it in. Okay, and then I'm
going to go back, let us migrate in. Somebody's white at
the edge just a bit. So it's not quite right. And so quite as good to me. Now what we're going
to do is allow her to the left here and we're
repeating the process. So I did that in the next video.
19. Left Ear: Hey, so we're using
her right again, going to repeat
the same process. Are we using white glue to
add in our different colors? I was started in my
hand, my white fur. Now we're going to go and
blue shadow shorter that now next to a plant, our gray mixing it in
with white and blue. And finally, I'll use R
to go in and take it, and take this shadow and try it. And there's white area. So that's it. For this year. We've got our ears done.
20. Left Eye: Alright, in this
video we're going to start working on
the left hand high. What we'll be doing is
using our Posca marker. And I'm going to go ahead and
drag in it in current in. I want that to be really
dark, really black. And I believe that the marker determiner than
the actual paper here. And also I want to it
out and be showing you a nice up here at the top, nice gentle slope around
and also at the bottom. And I'm going to use
my dark brown marker, such as adequate
of an Irish around here when we went to note
that the science of cooking, because inside I won't say it completely round
circle for the pupil. Iris. Instead we're
seeing a bit of an oval. And this may not
show up on screen, but it does show
up in real life. And it's just enough to give it a hint that there's a
difference in the eye. And now I use it around and I'm going to go in
just around this bottom left side of the eye
and then I print a brown to give an opinion
of a hint hover highlight. Okay. I'll come in
here with my client, seven millimeter white marker. This is the incentives
when I have and I'm going to write it on this rage where
the ground meets, step back with the highlight. And I'm going to add a
bit of a nine right in here to indicate the
rage of that. I did that about does it for that part of the
high and then we're going to work on ground
fairly in it in, and adding a bit of fur. And to do that now use my classical America
and a white one. And I'm going to work
in a circular motion. I'm going to have is
at first start here and go off over to the right. And it's following the eye, the circular motion going
up and around and down. And we're extending them up. They've been going around this area right in here is where the pattern within forehead is. We're not going to say
we're going to stop writing on this nine is a trick of the upper eye is right along
in here and for downwards. Then we're going
to come down here, but it goes up and around here. And we went to remember
today the Black Knight Rider on this edge of the
eye for the eye lid. And then the hair right
in this area in here starts to town has
trials and their bone. Okay, So that's a great start. And now I'm going to use my brown to add some color
right here on the upper lid. And we're gonna do this show
right in this area down. Hey, I want to switch
over to my dark brown and go in that same area and add a bit more brown in there too, to deepen his shadow. Just heading towards
satisfying and everybody that we
haven't bit of a shadow. I think I'll turn
this down here, but it was just him blend it in. Paint, white, hammer so much. Had a bit of a shadow where the eye they had
to meet some bone. Record photo. There's a small
shadow right in here.
21. Left Cheek: All right, so now that
we got to high in, we're going to work
down here on the trick. And I'm going to fill in the white areas with
my white marker. I have the pattern laid out
and I want just go in-between here for flowing down and
around and achieve those town. And I sway. I'll add it right in. This range has well, okay, the right has dry. I'm going to use my
light blue and I'm going to go in and
add it in here. Now that the view is in. Welcome back with gray and then shame area and then the
average and that we added blue hairs that we're having right now. Going down. Now we're going to use brown, regular Brown and her
in these spots here. And what we'll do is, well, who is going down and sent
around town this way? We went to leave a little bit
of black showing through. So don't in a causal way. Okay, We've got to
scratch in. Now. We want to do with his same
round and hair's dirty white. So it's not quite so pretty. I think that's enough. I didn't want to overdo
it and have it be brown. So stop right about there. Okay. I'm going to go
in with my brown and I went to had a bit
of a shadow around these growers spots just to give it a bit of
curvature to make sure we understand that this is curving around and under them, Lizzo was a giraffe, limiting or less dark
brown up on this spot. And this spot that's about
all we want is this brown. I'll stop right about his air. Alright, so to
finish up this area, I want to add in a few
eyelashes because we knew that drives are very famous
partner on creating. I've answered this and I'm
going to use this blue. I went over it with black. We really wouldn't
see nationalist. So I'm going to use an, a blue and started this far
up maybe 1 third of the way. And now some nice
Nash is going down until they're almost
going with his neck out over to here. That's looking good to me. I'll do one more thing
before we stop this part. I'm going to hit the very top of these blue lines with my white. Just very quickly add a
bit of a highlight to them right in there. And then the next will be
working on the right. Hi.
22. Right Eye: Okay, so to start out, we're going to use
our platform marker and we're going to occur in this high and go ahead
and add this layer in. All right. We're going
around for the pupil and iris this time is
going to be even Center and more wrong than
it was on his lifetime, but we're seeing it
at a greater angle. So most of this side will be
filled in with her crown. Okay. And now I'm
going to use my gray and go right in and have this high enough to write
about her there and stuff. And then I'll bring it
this way around the edge. Alright, so that is it
for the eye for now. We'll come back to it later on, right now what we're
gonna do is add in white and we'll be working
hard on this half marriage. And what we're doing
is we're looping around and down and around. Let's change how indicate where these lines Halle went
to frill, we're coming. They can pass them around
and around the bone. We're going to have our white
right here, tennis range. News turns into the cheek, right around in here we have this hearing and
then it turns stops, turns down right here, heading our way along this hand, right in here, and on
the right-hand side. Then looking at a
photo of gratitude, you exceed the upper
lead giraffes high, pleasingly triangle
sticking out right here. Now that the white has dried, we're going to add some gray. So again, we're going to
start up here and we're currently in town and
around and around. Now that it raised dried, we want to add in this shadowed
and we see here on this, we went to add it over here. I'm putting this to the eye, are starting out with brown. And then we'll go into later on. While I have this brown out. And we're going to
add a few ridges. And I, and I think they're
forwards in the skin wrinkles. And so they're riding
along in here, just go in and mapped them out. We have this crown also
add in a few spots. We aren't seeing as many
of them because they're around on his side so
we don't see them. I went to see a few write it on this hearing right in here. Then I'll use this
brown to journey. Similar, this white
switch, not so white. Okay, Going back ground, we want to add a
few hairs around in here to add a shadow
for this range. Above that, I, what I'm
doing is I'm just tapping, adding little dots and
building them up. My shadow. Well, hairs with our
dark brown down. Here. Again, we're going to add in some blue. And we're going to go over this triangle most shirt
there and drag them out. As we had these. Once that blue is dried, we'll go back in with a white, similar to what we did here. Same way, we'll add some white highlights to the tips of these
hairs. Test with a 0. Our marker. That's includes eyes and the chase. And the next video we'll
work on the nose and mouth, and then we'll work our way up the hand and we'll be done. So that's it for this video. I will see you in the next one.
23. Nose: Welcome back. In this
segment we'll be working on as a nose and snout. And we'll be starting out
using our white marker. And I'm going to start my adding little dots and covering
this whole area, it at least most
of it with white. And instead of adding
little lines like we did for the sheets and neck, won't be adding dots. We're doing this
because if you're not at the noses of dogs, cats and in this
case in Giraffe, their hair on their
nose tends to be much shorter and stronger than the hair on the other
parts of their body. We went to show this on the
snout of our giraffe too. I'm going to continue
on for ways in between the two nostrils. Right Shrew this middle
section of the ways to about here and we'll
stop right there. Then in a reference Frodo. And when we drew here, we have embedded lip, the lower lip that we see. I'm going to add to
the entry of that. And then later on how
go into divide that. And then later on I'll go in and define these helper part of the mouth from the lower
part with a brown first row. Add in that right along this
white line using the light. Now we're going to go
back with our brown. And we're going to start
in this middle section, and we're going to focus this
round in this middle area and then fade it out or feather it out as we go off to the side, this side and the other side. So we want to have
less dots with the Brown has we go to the
left and to the right hand, our main concentration, it needs to be here in this
middle section. Alright, so here we have a great example of how
it's nice and thick, natural ground, not
completely covering it. Went for the most part. It is brown around here. And then as we do to this
outer section here and here, It's not thinner and less round. So we see some white
showing through. And we have a nice blend
of brown and white. And it was his idea
of an item around. Then down around this area had tomato moves out for an IV, we have a bit of a shadow. Hypotonic comes down here and then goes back
down to there to show, we'll add that in right now. In this section up here, I'll have less frown similar to what we
have here and here. I'll just go in and add
a few dots of brown to give it the idea of there
being some ground there. All right, I'm going to use the dark brown and I'm going
to deepen the shadow that we ran it on here and that loop and then
curves back down. So we use the dark brown, lay that in and we're going to be pretty thick
amount for this. But as we get up to here and up two right here
and we'll send it out. So I'll have it feather
out as we go higher. We'll have a thrill up. Having a few random catch up. They're stuck around, not too heavy because we don't
want to overdo it. So I carried this brown shadow up to right about
here and I pleasure. And if our identity
breaks and disappear, and I'm going to
do in this section here and this section here and adjust this brown very
few, nothing to it. And then I had a few over here. And then I need to add in the division that
we talked about, which mean that after them
and hand habits in town. Here. Now I'm going to use some vague and
code on this section. But as his creditor variety, I don't want it to
be quite so white. So add that in here. This hearing where
I'm at right now and also on the other
side over here, a bit of here and then
around this hair jobs.
24. Nostrils: Now we'll work rather
than nostrils. And we're gonna start
out with how around and around central
section or the nostrils. Now that that's made in, I'm going to use my nose. Nostril homes. I'm going to add beige
and I'm going to go wrong these flags hose and adequate him a
highlight there. I'm not going to join these
two ninths together now in this one right there and
this one here at the bottom, and same on this right side. Then what needs done is to add a bit of a limp or shadow right along the bottom of this nostril mound
that we just had it. So I'm going to use the dark brown and just write it on here, add a bit of brown to indicate
energy transition or lip. And I think I'll
just add it here. Going around this hair. I didn't know a bit.
Not started drying. Just starts here and there. Notice that down here near the bottom, right. That does it for this
section of the nose. So next we'll be moving
on and working on as he knows. And for it.
25. Lower Forehead: I'm going in with my white, I'm going to start adding
more dots similar to what we did down here on this section, going up for the nose and
now stop right about here. And I already have
a line drawn in from where I drew the
eyes to connect them. But I'll use that
as a reference. And so I'll be drawing, adding dots to write
them out here. And then once I hit this
section or this nine, and I wanted to start
having aligns very wrong. So here we're adding, here we're adding nine, Henry, getting a bit stronger as we go up and around
the forehead. We hit this section. So now we're struck
bending these signs well, frail and Hopper and to
the right direction on this right side and to
the left on this naps. Britain in the middle
we went to have sound and I go straight. So as you draw these designs, have them fell into the right, straight in this area here, and up into the left over here. So we got to white in. Now we're going to go
back around and we're going to mix it in similar to
what we did in the answers. Here are going to try to
lay in some patterns. I encouraged you to be free
and choose your own patterns. You don't have to find
out exactly what I'm doing or what he was doing. Good. Try to Ln some patterns around this area of the
nose and into the forehand. And I will explain
more as we go along. But again, in this section, we're just adding an option, got the same way we
didn't down here. And we will be building
them up more in the center, having a solid mass, not a completely
surrounded again, but more sounded the
same as down here. Well period is pronounced
section was more sorted. I'm gonna send her and I was a nose up this way and
then to the forehead. If you don't have the
photo around in here, they're saying rounded triangle, so I'll add that in for mine. If we look at the photograph, they have this brown hearing here along the
center of the nose. More ground, more soft and
round and the center is wider. What we'll do is we'll have more ground types and then towards the center
will be more sparse. I'm adding a few little shapes
right and wrong and here, and then I'll end here
just for some variety. Has hidden well, start heading and blending
them with touch. As we get up here towards
Nick our forehead. What I'm going to do to start
is just added this brown, brown hairs on and on this area. And then I'll go back
and add some areas that are more excited
for somebody. Patches around. Now that we've got
that and they are in, we're going to define
some spots around in here and make them
stand out a bit more. And so I'm just
going in and playing around and say
what works for me. What I'm doing is
I'm covering most, if not all white in these areas so that I can show
where the spots are. I want to use my dark
brown dark enough. Similarly spots show
this one right in here around the edge where
the forehead meets that. I tried this right side and also I went to deepen the summaries areas
around in here. It sounds really
found midway down. So I'll start by adding this hedge fund trustee of view and then
training them mounted torch in the middle
of my spot here. Then I said I want to
talk around in here. Okay? And what I need to do is use my page and
just go in and add some white areas
and add a bit of current are not ours, so blue. Okay, so that's
looking really good. I'm very happy with how they spotter training out of blending the lighter brown with a dark
brown on top of the white. So I'll be repeating
this process as we fill up here
towards your forehead. And we'll do that in
the next few videos.
26. Upper Forehead: In this segment,
we're going to work on her forehead and horns. And we'll be starting off with our markers and we'll
be doing something similar to what we did down here on her forehead by
adding a white layer. So we want the hairs to
continue in an average. Some overlap around
the forehand, the ones on the
right-hand side and this left and right and the
rest will continue upwards. Here I've drawn
arrows to indicate the direction hairs should throw in up and
around their horns. And then straight up orange. In this first session,
I was turned off. I try the hairs
and rank them in. Right here in this triangle, has to have some
other hairs growing.
27. Upper Forehead & Horns: Alright, now that the
wine is late in and dry, we're going to go
in with our Brown had first when we focusing on this middle area of a
circle right around here. And then looking at
the reference photo, it appears that there is a
bone right in here that scorn bone is sticking
out of it are very much near the
surface of the skin. So I'm going to do around here, hadn't pointed to is
adding circular pattern. All right, Another
way, fan of browning, we're going to go on either side and we'll add a pattern of brown spots are going up
inside of this circle. So around here and around here. Wherever we are doing right now, going in and adding
a layer of brown, very thin layer up and down and everywhere where it's white
on the horns and forehead, similar to what we did here. Now that we are going to go in here around this Eliana though, and we're going to add a
pattern spots going up and around here meeting metal. And around this side
had a meeting in the middle that now
just having narrow spot here and they're going to want to remember which
way our first relink. So here's a right. Here, it's going upward and
we want to keep that in mind. Now I'm going to
add a thicker layer of brown going up
with the horns. I went to reduce
some of this white. Going to go away
with Kirk Brown. And the same thing
as we did down here. We're going to direct
inhibition of the spots. What I'm doing right now, he's adding a bit of a shadow right in on this
front page of your forehead. And around and kind of
sound right here and then down to this part of a shadow
right in this facility. And then it fades down. Just had a few hairs and this white area pattern
in this section. Even though it isn't apparent, handy reference photo,
I went to add a shadow, can never recommend
U22 had a shadow on the right-hand
side has a two horns. So from the Trump going
down the right side, and similar to what
we did on our neck, we want to have a really
thick 100 right-hand side and then fade out as we
go over to the left. Now I'm going to use my marker. I'll add a pit of
page, left-hand side. Highlight an unfailing it
has I go to the red brown.
28. Horn Tufts: Now we need to add a tuft of hair and let him
have the horns. And even though in the photo convey our car and
I wouldn't show up, we used an interrupt and brown, so I'm opting to use
my red or brown. We'll just have a few
news hairs growing out. Okay, Now that that
Brown has laid it out and attempts
of these taps and added some beige
same way we did down here on the neck hairs. All right, so that about wraps up this part of the giraffe. And in the next video, what we're going to do
is we're going to do a few minor edit, a few tweaks. You may not need to do it, but in my case I'm going to do it and showing you what I do. Okay. We'll see you then.
29. Final Edits: Okay, so these edits and minor adjustments now
we're going to do, you may not need to do them. In my case, I choose two because I want my drawing
to look a certain way. So I'm going to start
out with my dark brown and add a shadow on
this right-hand side of their face because I wanted
to be the same or similar to their horns and to
the shadow of the neck. So I'm going to go in and
just lay hairs growing in the same direction as the
ones that are already there. I had a shadow up here on the right side of
this high over here. I think in the case of the nose, how extend some of
these shadow down in here on the ranch
side of the snout.
30. Student Project: All right, welcome to the student projects
part of the class. So next, I'd like for you to choose an animal that
you'd like to draw. It can be any other animal
or even without for them in, if you start with
one who it's for. And that's precursor, the
similarities what we did on this project has to
drawing an animal was for, find very similar
ways of drawing for, so don't overwhelm yourself. I recommend only choosing
maybe a portrait. Phase seven animal. Focus on their head and don't worry about
doing their body. Just choose a portrait photo and just shading in and
start clearing. And please, if you have any
questions or any concerns, don't hesitate to
comment down by row in the discussions tab. So really focus on Ray, Ray, and when you think
you've added enough, go in with some more
colors and add some more, get some really nice texture
to it for nice shadows. Shadows, highlights,
animal, and try to fill that in your drawing. Really saying something real. That is your student project.
31. Thanks for Watching!: Thank you so much for watching. I really hope you enjoyed this class and we're able
to learn something from it. Please feel free to post a
picture of your drawing below this class so that
all of us here on Sco chair can see what you did. If you have any questions, don't hesitate to start a discussion in the discussions
tab below this video, and I will be happy to
answer your questions. Well, if you would
like to support me, please check out my website at www.andartitude.com
And feel free to visit me on Instagram and
Facebook where you can see daily updates of my artwork
at Andy's attitude. Stick around here on
Skillshare and follow me because in the coming weeks I will be uploading
more classes. That's been it for now. I hope you have a wonderful day. See you in the next class.
 Andy Villon, Fine Artist