Transcripts
1. Ep00 Course Introduction : Hi everyone. Welcome to a complete
beginners guide to iMovie. My name is Richard and I'll be your instructor
for this course. I've been teaching
for over 19 years and during that time, I've designed and taught numerous steam and
stem related courses. This particular
course is on iMovie. It's a course geared
for those new to video editing and for
those who want to learn more about
how to use iMovie, I've broken down the
course into smaller, simpler videos where
you can follow the step-by-step
instructions so that you can learn the basics
of video editing. I start from the very beginnings where we talk about
how to download and install iMovie to getting
your media organized. The very basics and
fundamentals of video editing. As we progress
through the course, we'll start applying our skills. And finally, we'll
share a videos. I hope to see you guys
inside the course and I hope you guys
share your videos. Thanks for watching. I'll see you guys
in the next one.
2. Ep01 Install iMovie & Opening First Project: Hi folks and welcome to
the iMovie tutorials. In this video, we're gonna
download and install iMovie. For those of you who don't
already have our movie, what we're gonna do first is
navigate to the App Store. We're going to click on it. In this search bar up
here in the top-left, we're just going to type
in iMovie and press Enter. And once we do that, you'll see that it'll populate with a number of
different software. But the one we are concerned
with is iMovie here. So make sure you're downloading
a movie and you see this icon and we're just
going to click Download. Take a minute. So with the
magic of video editing, we're going to have
it fully installed. Alright, so I'm movie has finished downloading
and installing. We can tell that
it's done because now it says open and there's no longer the little pie
chart that's being filled up. So now that we have
everything done, Let's open up iMovie. Once we do, you're gonna
see iMovie opened up. And you may have
a welcome screen. It may have a couple
of different options depending on when you're
downloading this, but you're just going
to click Continue next, and you're going to
progress through. Now when you arrive, you're going to
arrive to a screen that either looks like this or it may automatically
opened up a project for you. So if you see this screen, you're just going to
click on Create New and you're gonna click on movie. And most likely you
either ended up on that previous page or
you're here in this screen. We're in here in
our iMovie project. And you'll notice a couple of different things in this
top left-hand corner. It's kind of our
media library area. We'll talk more about
this in the next video. For right now, we're just
going to briefly go over the layout and then
save our first project. Over here on the right side we have a little preview window. Down on the bottom is our
timeline where we'll be dragging and dropping a lot of our clips, photos, and music. Alright, to save, we're
just going to click on this little back
area, this one too. We'll pop us out and it'll show us all the projects
we're working on. It's asking us here to save it. So all I'm gonna do is just
call it my first iMovie. And I'm gonna click Okay. There we go. You can see that we've ended up back on this main landing page, which is what will happen
usually when we're opening up iMovie because it'll ask us which project we'd
like to go into, since this is the only one here, that's the only thing there. And normally it would populate
with some screenshots, but because we don't have
an immediate in there, we're just going to double-click and get back into it already. Well, I hope this
video was helpful. We've basically
downloaded, installed, and opened up iMovie
as well as saving our first project
as my first iMovie. And that's going to wrap it up for this introductory video. In the next video,
we'll talk more about the library events,
what they are, how your media stored, and we'll go from there anyways, I hope this video was helpful. I'll see you guys
in the next one.
3. Ep02 Organizing & Importing Media: Hi folks and welcome back
to the iMovie tutorials. In this video, we're
going to import media into our project. But before we get started, I just wanted to
talk briefly about organizing your media
files on your computer. If you haven't already in
the project description, I have a link for downloading
all of these files. We have a couple photos
in MP3 soundtrack, as well as some video files. You'll see it in the
project description. Feel free to pause the video now and download those files. Once you have them, I placed my folder
on my desktop. Now this is just for ease
of access for this video. But generally what I
would recommend is moving it into a
folder, for example, your movies folder,
or your pictures or documents or wherever you feel
comfortable placing them. The reason for this
is that I want you to imagine in the future
that you're working on your sixth or seventh project. And what does your desktop
start looking like? Well, it'll start looking
like a lot of folders, but I'll start looking messy. And if you're okay with that, then feel free to
fast-forward this video and get to the importing
portion of the video. But I just wanted to
show you that this is where your desktop can
start looking very messy. And so you may want to move
these folders with your median them into
your movies folder, for example, like
placing it in here, it'd be a lot easier because
now your desktops these clean and when you
need a backup items, whether you're moving them to another hard drive or whatever, it's a lot easier to
know where everything is for the sake of this video and for the
sake of importing, I'm actually going
to leave that on the desktop so that it's
easier for us to access. I'm gonna leave it right here so that it's easy to access. But I just wanted
to touch on that just in case you
guys were curious in how to best organize your media
files on your computer. Alrighty, So let's
bounce back into iMovie. Now that we're in here, what we're gonna do is we're
gonna click on Import Media. And since it's on our
desktop and for really, for the sake of
how easy this is, we're just going to click on everything and we're going
to click import all. So all I did was I
held the Shift key, I clicked on this item and then the last item
and it highlights everything in-between while
I'm holding the Shift key. And then I can import all if I wanted to selectively
highlight items. So for example, if I only
wanted to highlight, let's say every other one, I would want to press
the Command button and then I can highlight
the items I'd like. But because this is
our entire project, I'm going to select everything. So I'm just going
to go and press Shift and select all of
this and click Import. All right, so we've now imported all of these
media files into iMovie. You can see that we not
only have video files, but we also have images as
well as that MP3 soundtrack. In the next video, we'll talk
more about the difference between project media
as well as libraries. And why you may want
to use libraries to your advantage for a
future movie projects. Anyways, that's going to
wrap it up for this video. Thanks for watching. I'll see you guys
in the next one.
4. Ep03 Libraries & Events: Hi folks and welcome back
to the iMovie tutorials. In this video, we're gonna talk about libraries and events. So let's get started. The first thing you'll
notice is when we imported all of this footage into iMovie, it fell under something
called Project media. What that means is that
it is accessible for this project to be used
for creating our iMovie. And this is all great, but one thing that's
different and that iMovie has created is called
libraries and events. And what they are are basically
containers for which we can use to store media and access from
different projects. What I mean by this is that this project media
that we have up here, this is only accessible to this particular project
I'm working on such that if I create a new project and I wanted to access any of
these clips or photos, I would not be able to. This is where libraries come in. Under this iMovie library, we have nothing here really. What we'd want to do is we'd
want to create an event. One way to do it is we
can press Control click or two-finger click if you have that enabled
and click new event. When I create this event, all I'm gonna do is let's
call it nature clips. What I can do is I can
take this project media. So I'll just click in here, press Command a, which
will select everything. Or I can use command
and just pick and choose the clips
that I would want to possible use in the future, and then click everything over. But I'm going to select
everything over to nature clips. Now, I've created this event, which is basically a sub-folder
under iMovie library. And what this allows me to do is it enables me to now have these clips so that
they are available across all my future
projects that I work on. Now the purpose of events is basically a
organizational system. So naming it based on what it is is gonna be helpful
also doing it by date. So for example, you
could create a folder called January of 2021 or 2022, whatever year you'd like. And then also with
organizing libraries, you can do it by year. So let's say we wanted to create an iMovie library
for 20191 for 2020. We could do that by
going up to File. I'm going to open
library and create new. We create a new library. And all these files
that are in here now, there are about 1.5 gigs. What we'll notice
is when we go to our finder in our movies folder, you'll notice that
iMovie library, which is what we named it, now, consists of those files. One of the benefits of having this library is that
we can now move this to any other hard
drive, USB stick, backup drive, and we
can use iMovie on another computer
and transfer all of our project files
over in one simple, easy step, all we would
do is highlight this, copy and paste it and bring
it to another computer that also has iMovie
and we are set up. Anyways, I just wanted to
talk about how libraries and events can be useful for
organizing our media, as well as for accessing
them in future projects. Now that we have it here, we can leave it and now we
can start working on editing. But I just wanted to
just talk briefly about them because I
think they're very helpful and something
that's good to know before we start progressing
through our future projects. Anyways, I hope this
video was helpful. I'll see you guys
in the next one.
5. Ep04 Layout & Scrubbing Through Clips: Hi folks and welcome back
to the iMovie tutorials. In this video, we're
gonna talk about the general layout of iMovie. And then we're going to start
playing around with some of the media that
we've imported. The first thing you'll notice and that you might
have noticed in the first video is
this top-left corner. Now this top-left corner is
basically our media browser. On the left we have navigation towards our
libraries and events. The very top of
our media browser, we have different menus for things will access
in future videos. For example, adding titles, adding backgrounds as well as transitions between our clips. Then we have our
actual media itself. Now you'll notice
as I move my mouse over these clips or
to the right side, you'll see that it's
giving me a preview. This is called scrubbing. As we move through these clips, it'll give us a preview
of what's inside of them and then it'll show
us the photos for those. That's what the right window is. This is our preview window. Up top, we have a
couple more buttons which we'll explore
in future videos, which kind of go along with
color grading, cropping, and other features that
we can do to our videos. You'll also notice down here in the bottom left-hand corner
of our preview window, we have favorites and
reject selection. And basically what
this allows us to do is as we are going
through our clips, Let's say I like a
certain section. If I highlight the clip,
it'll select the entire clip. But I can also just drag
these in from both sides. And let's say I really
want to just this particular section and
I really liked it. I could just click on this
heart and it would tell me that I liked this
particular clip. Whereas let's say I'm going
through this clip and I don't really think it's
useful for my project. I can go and press this x and it'll mark it out,
read this way. It's just quick ways
for me to indicate to myself that these clips might be useful to have or not to have. So I'm just going to turn
them off so that they are back and reset. And then you'll notice
we have the play bar and then if you wanted to
maximize the preview, you can always
press this button. Now in the very bottom is the
main feature, our timeline. This timeline is where
all our cliffs will go. For example, let's say I have this clip right here and I
wanted to bring it down. You could always do it just
by clicking this plus button. Now remember, you can
select portions of it. So if I wanted to
just do this section, I could or I could select the whole thing
and bring it down. And when I do, you'll notice
that it will pop down. And so we have this
selection down here. And then the final
thing I'll show you before we finish up this video is the Zoom. Now this Zoom is really
helpful when we are editing our projects because
it not only lets us kind of zoom in and
get a microscopic view. So for example, if we
need to be very precise, we can zoom in or
we can zoom out. So you can see I'm
zooming out right now, but if I needed to zoom in
and I move it the other way, you'll notice that
I'll just move my you are you'll notice
that I'm now zooming in. And what this allows us to
do is to move a lot more slowly through the clip
versus if I zoom back out, watch how fast I
move through it. You can see that by
changing the zoom setting, it'll allow me to be more
precise in my editing. And this is really helpful, especially if we want things
to be perfectly timed, for example, with the music. Anyways, I just
wanted to show you those features and the
general layout of iMovie. In the next video, we'll
explore more about clips, how to trim them, how to split them, how to delete
portions out of them. And once we do that, we'll start building
on our iMovie. I hope this video was helpful. I'll see you guys
in the next one.
6. Ep05 Undo Key and Editing Video Clips: Hi folks and welcome back
to the iMovie tutorials. In this video, we're gonna
talk about how to start manipulating our video clips and learning more
about video editing. Before we begin,
we start talking about a trim and split clips. I wanted to talk about a very useful key combination
called Command Z. This is your undo
key combination. If, for example, if, let's say I didn't want to
start off with this clip. If I press Command Z, it
will undo my last action. My last action was
to bring it into the timeline and
Command Z will undo it. Likewise, let's say I
have this photo in here, and then let's say I bring in the lightning video
clip afterwards, but I didn't really
time that well, and I want to kind of undo this. So all I would do is, let's say I did
something by accident. I will just press Command Z. If I wanted to undo the action before that I could
press Command Z again. And it will undo everything. That's a really neat feature
to have and to know about. So I just wanted
to show you guys that before we got started. So one of the benefits of
having our media browser here is that it allows us to kind of scrub
through our clips. Now one of the benefits of being able to scrub
through clips is that it gives us a general
idea of what we can expect to come
in that video. For example, let's
say I wanted to start off with these
birds on the post. Now one thing I could do
is I can just come in and crop this section where
I wanted to start off with, let's say I wanted to
start off here and then somewhere
right around here. That says this is
a 14.4 section. This 14.42 section is laid
down into my timeline, and this is where we now can start editing our
video even further. The purpose of the
browser is just to give us a general sense of
what we wanted to bring in. But let's say inside of here, I wanted to trim the
clips a little bit. All that requires me to do
is click on the clip itself, just go to the edge and you'll see that my mouse has changed. If I click and drag, it'll allow me to
drag and change. As I move through my clip. Let's say I like
grid right there. That's perfect. I'll
come back here. And if I press the space bar, it'll allow me to play. And you can see my
preview window. Super. Alright, it looks good
here comes the bird. Backs away. The other bird. Alrighty. Let's say I wanted it
to end right there. All I would do is I marked
it off with my mouse. I just clicked on there. Oops, I got to make
sure I'm clicking. Just drag it right back there. Perfect. All righty. So I just trimmed my first clip in the timeline and I feel
pretty good about it. You can see this is how my
video is going to start. We have that section. Now the next thing I'm going to want to do is let's say I wanted to bring another clip and let's bring in
some of this clip. I'm going to say I
want some loops. I just want to bring
it in a little bit. Let's say I wanted to
start right around here. I don't want the clip to be
too long, about ten seconds. And I bring, you know what, Let's say I wanted to
bring in 20 seconds and I'll explain
why in a second. I'm gonna bring it about
20 seconds. All righty. Now I'm going to use the Zoom
settings so I can kind of have a bigger glimpse
of both my clips. So I have a twelv second clip right there in 19.82
clip right here. The next tool we're
going to learn about is the splitting tool, and that's called
the blade tool. If I choose a clip and let's
say I wanted to choose it somewhere around
half round here. Let's say I wanted to split it. I used the key
combination command B. What that will do is
that will split my clip. Now I don't have to be ultra precise with this
splitting because what I could do is I can
trim after the fact. Or if I did want to be very precise with my clip spinning, I can just go into my zoom. I can zoom in. And because this is basically a blade of grass with some
water dew drops on it. It's not doing much. But if I'm in an action clip or someone's doing something, it would make a lot
more sense to zoom in like I did because
then I get to be a lot more precise in where I'm
cutting a particular clip. But because it's just a single
leaf wavering in the wind, I don't really have
to be precise, so I'm just going
to go and now I'm going to delete
the unneeded clip, though I don't
need this anymore. Press Delete. There we go. We now have
our two clips back-to-back. Yeah, we're getting started
with our first video. So all I need to do if
I want to rewatch it, just clicking the
front press Spacebar. And there is some sound to this, but because I'm recording, I don't want some of this sound to play
in the background. I will a little bit later on, but it's very, very
slight sounds. The rushing water definitely
is a lot louder of a glib. But yeah, this gives us an idea of what we've done so far. And so this is
basically a fun way to start editing your
clips and picking and choosing the bits
that you'd like. Anyways, that's just going to
wrap it up for this video. I hope this video was helpful. In the next video, we'll
start bringing in more clips and we'll start learning about transitions and different
things like that. So thanks for watching. I'll see you guys
in the next one.
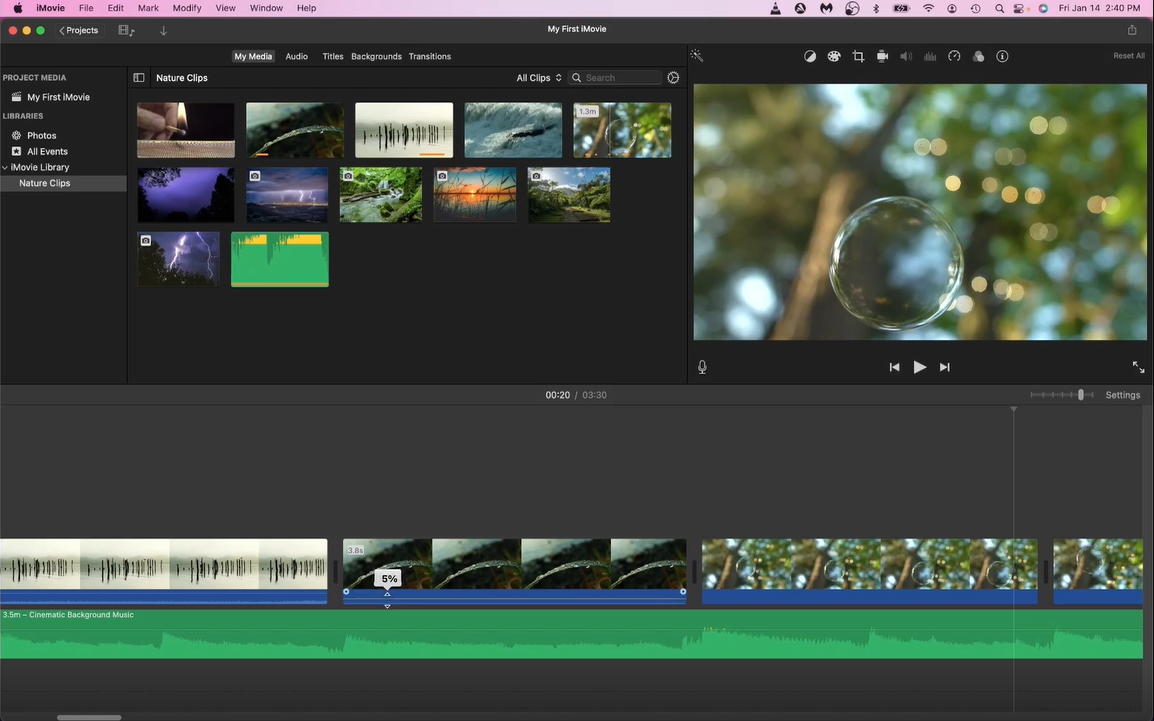
7. Ep06 Background Music, Blade Tool, & Editing Video Clips: Hi folks and welcome back
to the iMovie tutorials. In this video, we're
gonna be talking about the audio tracks, in particular, how to manipulate the audio so that we can dim down
some of the tracks. And then also about
how to make editing a little bit more fun and
doing some jump cuts. What we have here is our
birds on a post clips. So let's take a
listen and hear some of the audio that's
attached to this clip. We can hear some of the birds, they're Alice, take a
listen to this one. You can hear very subtle
ripples of water. It's a lot more subdued
than the previous track. Now we have these two tracks and let's say we wanted to bring in some
background music. So we're gonna take this clip, we're going to just
drag it right below. You can see the waveform
here, it's pretty uniform. You can see where the beats are. I chose this track
because it's pretty uplifting and it has a good
BDE. So let's take a listen. Okay, we can hear that and
it has pretty good beets here and here everywhere
where the waveform peaks. And we're gonna be using
that to our advantage. Now, with this scene change, you can see that
it's slightly off. The beginning of the
scene is slightly off from this peak right here. And so there's a couple
of things we can do. The first thing we can
do is we can click and we can drag this over. Now as I've dragged this over, you can see that the waveform
is moving and that's fine. Now, it's still a little off. And this can be
very frustrating. And so this is where this
zoom bar comes into play. Because by zooming in, we can really
finesse our editing. So you can see here
now as I move, watch how much more precise wave four moves as I move
frame by frame. And you can tell that's
pretty much right spot on that as this second
beat drops right here, it'll change to the scene.
So let's take a look. So changing your video clips to the music can really make the video a little
bit more engaging. And so the next
thing we're gonna do is we're going to bring
in another video clip. Let's say we wanted to
bring in this bubbles. Now this bubbles clip is 1.3 minutes and that's
fine because what we're gonna be doing is we're going to drop it in here
and then we're gonna do something similar to
what we did in this clip. So let's first take a look
and we don't need a watch 9.6 seconds of this grass
blade kind of floating around. So what we're gonna
do is we're going to come around here. I can finesse this later, but generally right around here you can see the bead changing. I'm actually gonna blade
the clip right here, so Command B, and that's
going to split up my clips. And then I'm gonna
take this second clip and I'm gonna get rid of it. Now. The next thing
I'm gonna do is this clip starts off out-of-focus and it
comes in focus there. So I'm gonna start
off right around, let's say around here. And I'm gonna bleed it again. And Command B. And I'm gonna get rid of this clip and I
highlight it, I press delete. And the reason why I
did that is because I don't think we want
to just sit there watching ten seconds of
an out-of-focus bubble. But I think it's pretty neat
to see it come into focus. And what we're gonna do after that is we're going
to do a bunch of jump cuts to these beat
changes down here. What I'm gonna do now
is I'm going to zoom in so that it's a little
bit easier for us to edit. The first thing we're
gonna do is we're going to finesse this scene
change right here. So we're going to just move this back a little bit by little bit. That the peak starts on this scene changed
when I watch it again, Let's take a look. Okay, cool. That was pretty neat. And so you can see here that this little bubble is floating
around coming into focus. It's in focus now. And for this next scene change, or for this next beat change, I'm going to have
another scene change. So what I'm gonna do
is I'm gonna move my mouse cursor over
just the pinch. So let me reset, let's
say right around there. And I'm going to
blade it right there. Then what I'm going to
do is I want to find another portion where the bubble is in a different location. So somewhere right
around, let's say here. I'm gonna blade here again. Then I'm going to
delete this out. Now the reason why that's useful is when you
do a jump cut, you want to go from scene to
scene relatively quickly, but you also want it to look a little
different because if the bubble is just
still hanging around on the bottom portion
of the screen, then when you do
the dump jump cut, then when you do the jump cut, it won't look as clean because it'll look like it barely moved. But if it's now floating near to the mid half top portion, then you can see that
it's made some progress. And so we're going to be
listening to your music. And then again, it's going
to be moving a little to the left and
right around here. I'm going to want
to bleed it again. And what I'm gonna
do basically for the next couple of
minutes is I'm just going to start cutting through some of my clips so that it looks
a little bit more drastic. So like let's say
like right around here, that looks pretty good. I'm gonna bleed that there
and get rid of this trunk. And I'm going to wrap this
video up right around here. I want you guys to take this time to kind
of play around with jump cutting and just trying to line up your clips
with the music. And just learning
how to finesse some of these scene
changes to the beets. I think it makes video
editing a lot more fun. And I think this is hard of that creative process of being able to show what you want to do with your own video edits. So thanks for watching. I hope this video was helpful. In the next video, we'll
bring in some more clips. We will start playing
around with some of the clip features such as slow motion and speeding up
clips, amongst other things. I just wanted to show
you something fun and I hope you guys had a blast. See you guys in the next one. Thanks for watching.
8. Ep07 Editing Clip Audio and Range Key: Hi folks and welcome back
to the iMovie tutorials. In the last video, we finished up with doing some jump edits, and I've done a couple more. You can see them right here. But the focus of this video
is gonna be on how to adjust the volume of our clips. Not only of the audio tracks attached to the
videos were shooting, but also of the audio
clips we might bring in. For this particular audio
clip of the bubbles. There is no audio track, but you can tell for these
other two clips that there are because you can see very
small wave forms underneath. And also if you move your
mouse over the lines, you can use that to adjust them. What I'm going to do is
with this particular track, I'm just going to
move them to 0. And likewise for this one, before I move this one to 0, I just wanted to show
you a couple of things. Let's pretend this particular
clip had a person talking. Or if it was, let's
say at a party, then we may not want to have that background music
with the normal music because it interferes and causes some noise
in the background. And so in that case, that would be something
where we would want to take this volume and
minimize it to 0. Now, let's take a listen to
hear what that sounds like. And it sounds pretty clean. Just the music.
I'm going to undo that just so that you guys
can hear the difference. And this is what it sounds like with the birds in
the background. You can hear some
of that white noise in the background because
of the recording. If that's something
that you like, feel free to keep that in. But if you want your track
to sound a little cleaner, it actually helps the audio
when you minimize that to 0. Now the next thing
we're gonna do is, and you can see it
on this track and any audio track is that
you could fade them in. So if you keep your
mouse over here, you'll see it says
Audio fade-in. And so we're just
going to this over. This is really useful
in case you have a very sharp opening
or you wanted a little bit more gradual in terms of the introduction
of the soundtrack. So now if we listen, you can hear the
volume gradually getting louder and louder. That sounds pretty good. Now the next thing
we're gonna do is what we're going to pretend here is, let's say in this particular
portion of the audio track, you have someone talking
who you want to listen to. So let's say someone's
giving a toast at a birthday party
or a wedding. There's gonna be one particular
key called the range key, which is going to help us. So you can see
here it says press the R key while dragging
to select a range. Well, that's what
we'll do right here. So let's press R. You'll notice that my cursor has
changed slightly. And if I click and drag, it'll allow me to select a certain range of
this audio clip. Now the reason why this is
useful is because now I can take this audio clip and
I can minimize it to 0. Then let's say for this appear
this clip of the birds. Let's say this was where I had someone speaking and where I
wanted to hear the volume. Oops, that's the
wrong wrong thing. And I'm going to raise
that up through 100. Oops, I got rid of the range
and just press the R key. Highlight that. And then
let's bring up the volume to one hundred one hundred
twelve. That's fine. Now what we're going to
hear the music and then the music's and a fade out
relatively quickly. And then the sound from this
clip is going to come up. But we're going to pretend
that someone talking, so that's what we want. All right, So you heard that
and that's pretty neat. You can tell by the
waveform that it's a pretty abrupt adjustment in both the soundtrack and the
volume of this clip up here, there's gonna be a quick change. One thing you can
do to alter that is grab these white things. Now these white things
are called key frames. And basically what
they allow us to give us a little bit more control
over what we're doing. If you watch, I can drag this over and it'll introduce
it a little bit slower. Likewise, if I want this to
fade out a little bit slower, I can drag this out
and you'll notice that it'll be a more
gradual fade out. So let's take a listen.
And so you can tell it was a more gradual introduction of this top clip and a gradual
fade out of this bottom clip. You can do that with
the other side. I'm not really going to do that much more because I don't need to do that because no one's speaking here. I'm just
going to undo that. I just wanted to show you
how you could use the range key in order to adjust
the audio for your clips. All right, and we're
back to normal. Yeah. I just wanted
to show you that these are options
for you in order to adjust the audio for your particular clip that
you're working with. I hope this video was helpful. Thanks for watching. I'll see you guys
in the next one.
9. Ep08 Speed Adjustment, Slow Motion, and Speeding Up Clips: Hi folks and welcome back
to the iMovie tutorials. In this video, we're
going to be playing around with clip speeds and changing videos so that we can slow them down
and speed them up. In the past video,
we basically did some volume adjustment
for our audio tracks. And so what we're gonna do now is we're going to just move on over and we're going to start
adding some other clips. So let's start off with
some running water. So I'm going to choose
this and I'm going to choose a smaller section. So let's find a good
place to start. It all looks pretty
much the same. What we're gonna
do is we're gonna choose maybe a 5 second chunk. That's okay if it's not
precise, don't worry about it. So let's just say
I have this 4.7. Let's add that there. The reason why we're gonna
choose a smaller section of this is that it's a
pretty fast-moving clips, so we're going to
slow that one down. And then over here we
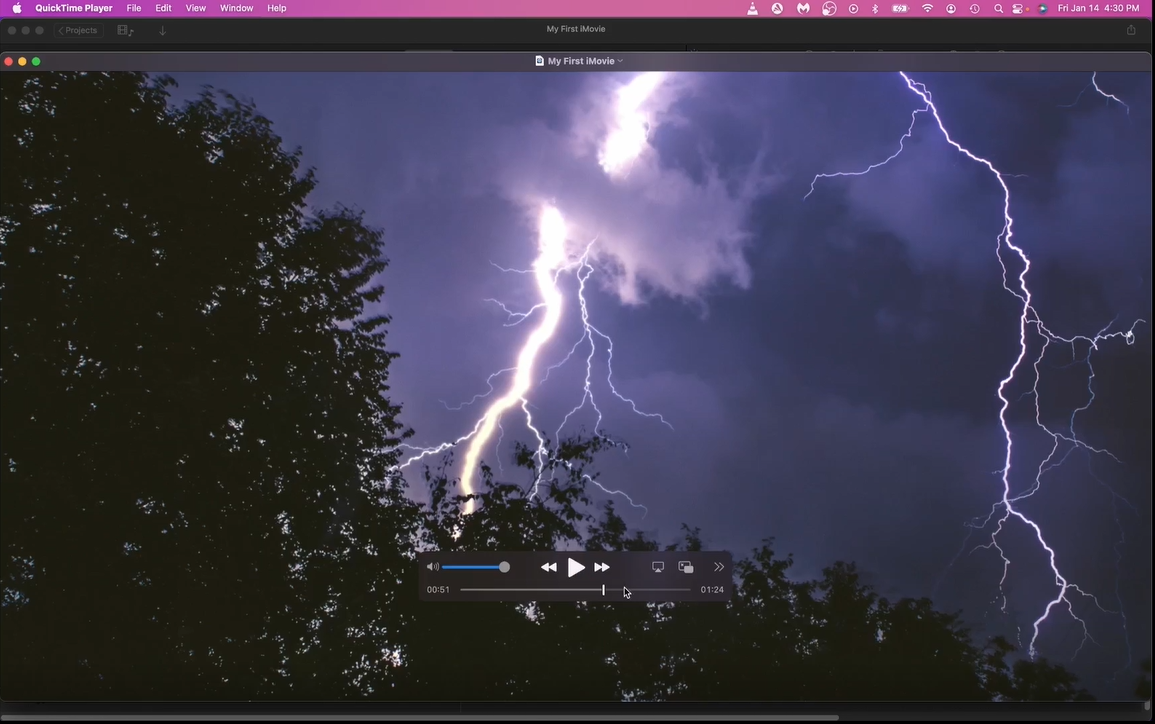
have a lightening clip. Whereas that lightening
there it is. All right. Let's move this over a little bit more like
that lining right there. And let's end it. Where's that other
lightning bolt? One? Alright, let's add that. Then let's add
this match strike. Not nature related,
but still pretty cool. Right around there somewhere right after the
flame stabilizes. In this clip is pretty neat
because it looks really cool, but also it gives us some
opportunities to play around with speed
adjustment. All righty. We have these three clips and let's watch some of
this water clip. All right, so the volume
is pretty loud here. So what I'm gonna do is I'm actually going to minimize it. And since they don't have
volume on my other clips, generally what I'll
do is I'll take out all the audio just because that way the track stays pretty clean with just
the background music. So let's watch it
again. Alrighty. Now you can see that
this, that this, now you can see that this
water is moving pretty quickly as we go
through the eclipse. So what we're gonna do is we're going to slow it
down a little bit. So what I'm gonna do is I'm
going to choose a clip. And then I'm gonna
come up here and you can see that there's
a Speed Editor. The speed editor allows me to change the speed of my clips. If I want it to be slow, I can choose slow. And when I do, it'll allow me to change the amount
it is slowed by. So do I want it and
percent of the speed, twenty-five percent of the
speed or 50% of the speed. Now remember when
I first imported this clip is only 4.7 seconds. When I slow it down 50%, what happens is it lengthens the clip to twice as long
because it's playing that clip, but it's spreading it over
twice the amount of time. Now if we watch, you can see that the water
is a lot slower. And if we change it to 25%, you can see it's a lot slower. Now what you also might
be noticing even more with the twenty-five percent
then with the 50% slowdown, is that it becomes a lot
more choppy, almost jittery. And that's because when this
video is normally shod, generally we shoot at
30 frames per second. When we changed it to 50%, it went from 30
frames per second, 215 frames per second. Generally, our eyes like things that are above
24 frames per second, which is what
movies are shot at. And so if we watch this, you can still see some of that jitteriness and
it's not too bad. But when we change
to 25 or even 10%, watch what happens.
It's really rough. And so one thing to
just be aware about is if you're shooting
something and you know, you're going to want
that in slow motion. Try to set your camera to the highest frame rate possible. Sometimes you'll have to
come down and resolution, but it really makes slow
motion look that much better. And so what we've done
is we've slowed it down and you can
also customize it. So if you wanted to choose
your own percentage, you could change
it to 65 or 75%. That's totally possible. But for the sake of this video, we're just going
to leave this at 50% now for the lightning. So with the lightening, we see some pretty nice
bolts of lightning. But this one is I
think the best one. And so what I'm
going to do is I'm going to blend this
clip right here. Man, be splayed the end
portion right here. So now we have this really
great chain of lightning. I think this is another area where we can change the speed. Let's slow it down. Let's leave it at 50. So
let's take a look now. Let's start from the beginning. You can see some
of the lightning. You can tell it's in a
little bit of a slow motion. Yeah, that's much clearer. And it didn't look
too choppy either. That looks fantastic. So that is another way we can use some
of the features in iMovie, especially with the
speed adjustment. Now let's take a
look at this candle. So now let's take a
look at this match. So I'm going to zoom
out just a bit. We can watch the whole thing. And so basically what I
want to do is I want it to start right around here. I wanted to speed up this clip. What I'm gonna do because I
think he moves pretty slow. If we start watching this, I won't play the whole
thing pretty slow. So what I'm gonna do is I'm actually going to speed this one up V2 times as fast. So let's watch this now. Alright, so there's a
lot more manageable, but this portion
is really slow and it's like the longer portion. So what we're gonna do is
we're actually going to speed this one up even more. This one, well,
we're going to want to do is we're going
to speed this up. And I think we might change
it to four, possibly Adx. So let's watch her
what forex looks like. Yeah, that looks pretty
good. So you won't notice any of the
slowdowns that we get when we have to distribute the frames per second
when we do slow motion, you're in the clear when you're
trying to speed up clips. So that looks pretty good. This video basically covered
how to use the speed control in iMovie and how to slow down clips as well
as the speed them up. I hope this video was helpful. In the next video, we'll
learn how to bring in photos, how to adjust them, and how we can use
them to overlay them on top of some
of our videos. Anyways, I hope this
video was helpful. I'll see you guys
in the next one.
10. Ep09 Bringing Photos into Timelin, Ken Burns, & Editing Photos: Hi folks and welcome back
to the iMovie tutorials. In this video, we're gonna be talking about how
to bring a photos into your iMovie.
Let's get started. What I'm going to do is I can bring in the
photos one-by-one. I can also highlight them all and then click
the plus button. Either way. When you
bring the photos, one thing you'll
notice as we watch the preview is that
it applies an effect. So as we watch, you can
see that it's going to zoom in and zoom out. And what this effect is called is called the Ken Burns effect. Now the Ken Burns effect is men to simulate some
type of motion as we are watching these clips
this way it doesn't feel very stagnant when you
just look at a photo. For example. Let's take this
photo, for example. If I turn it off and
I just set it to fit, then for four seconds
we're just going to be looking at one particular photo. Now you may want to do this for effect and that's totally fine. However, they always apply this Ken Burns effect when you
import photos into iMovie. And so that's just something
to be aware about. Now, with the Ken Burns effect, what it does is it sets a starting point so it'll
start zoomed in a little bit, and then it'll have an endpoint which is slightly zoomed out. And likewise, if
I come over here, the Ken Burns effect for this
one will be the opposite. It'll start zoomed out and
it will kind of zoomed in. What it does is it flip-flops
between the photo, so it doesn't have
the same effect for consecutive photos. That's what we're
looking at here. Now, with these photos, you can change some
of these effects. So for example, if you want
to change a starting point, you could have it
starting over here, a little moved up or you can move down wherever you'd like. Generally one rule with
Ken Burns effects that you don't want the movement
to be too drastic. And what I mean by
that is let's set this starting point and
let's change this endpoint. This is a pretty
drastic move and you're gonna see what
happens when we do that. It generally just
looks very unnatural. And so I'm going to
command Z that and undo that, that change. And I'm going to
command Z it again all the way back
to it's original. And so that's just
something to keep in mind. The next thing that
we can choose to do is we can do
crop to fit in case you'd want to crop
your photos and you want to just focus on
one particular thing. You can come in here and
choose whatever you'd like. So if you just wanted to
choose a section of the photo, feel free to do so. Then over here we have some
rotation options in case our photos were taken upside down or the orientation
is a little bit off. You can use this to help rotate
your photos. All righty. We've basically covered all
the different options we have with our photos when
we bring them in. Now the next thing we're
going to talk about is we can shorten these photos
depending on what they are. So if you wanted to,
you can shorten them. The standard time
is four seconds. If you'd like to keep
them four seconds, that's totally fine. But what I'm gonna do here
is we have a photo here. We're photo that's four seconds. And then the second section doesn't really have
much lightning. What I'm going to do is
I'm gonna take this photo. I think this photo is just a great little photo to have at the end of
this clip because this could be one of those photos you took while you were sitting outside during a lightning storm and you are able to capture it. And so what we get to watch here is a slow motion image of the, what we get to watch
here is the slow motion of you capturing
some whitening as well as the still image where
I think it looks fantastic. This is one way to
take your photos and your videos and you can
do something called overlay. And what it does is it
basically allows you to take your photos and lay them over
your video and or photos. This can be particularly useful because let's
say you have someone talking in the background and you wanted to
reference a friend, family member, grandparents,
and you could have a photo of them overlaying
your video and audio track. That's really useful to have. And you can do that with
photos and, or even videos. Alrighty, So we have
these different photos. And I think that's
going to pretty much wrap up the length of our video. We've imported pretty much
all of our visual media. What I'm gonna be doing
actually is I'm going to just trim this
all the way down. All the way back.
Whoops, too far. Right around there. And like I said in one
of the earlier tracks, I'm just gonna do a fade out and fade this
out a little bit. So it has a nice gradual
ending. Washington of Eclipse. They will gradually fade out. Alrighty. Up and starting from
the beginning already. That's going to wrap
it up for this video. In this video, we basically learned how to bring
photos into our timeline, how to adjust some of
the photos and how to overlay on top of our
video and audio tracks. Anyways, I hope this
video was helpful. I'll see you guys
in the next one.
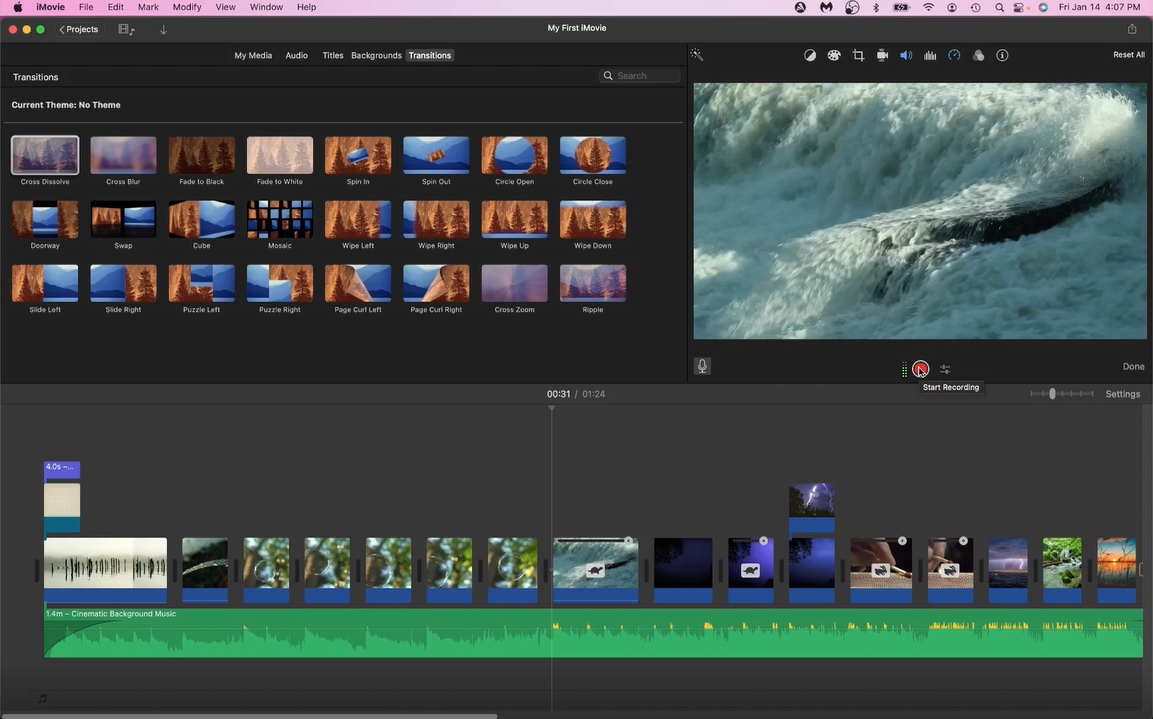
11. Ep10 Titles, Backgrounds, & Transitions: Hi folks and welcome back
to the iMovie tutorials. In the last video, we basically
wrapped up having all of our videos and photos
imported into our timeline. What we're going
to learn about in this particular video is
how to create titles, slides, introduce
backgrounds and add some transitions
to our video. Let's start at the very
beginning and let's take a look. So we have this opening scene and we have the gradual
music coming in. And so this is where we can now do some
interesting things. So the first thing we
can do is we can take a look at the
different backgrounds that are available to us. For example, there's this
silk beige which might be a good compliment
to what we have. And the reason why we can, or the reason why we'd want
to choose something similar is if we have it fade
over to this one, It's not much of a change. So for example,
if we just watch, it's not a big color
contrast there. And so with this background, it'll be useful to have, because what it
does is it gives us this uniform background upon
which we can apply a title. Now, we can apply a title
to our actual video, but it just doesn't come
out as clean usually. So for example, let's take
this title right here. I'm going to drop it right here. And we're just going
to click on it. And then over here, we're just going to change
it to my first movie. We can change the
color if you'd like. So over here, you can change it to maybe
like a dark charcoal. It looks fine to me. What we have here is something
that looks like this. That's a good
introduction to seeing what we can do with our
title and background. And it looks pretty good. And what we might want to do is something similar
towards the end. So if at the end we wanted
to keep these four seconds, well, we could do is we
can choose a background. Let's choose a darker
background like a black. And let's add it
here at the end. Four seconds is perfectly fine. We can minimize it, let's say even to
say three seconds. So it's not too long. Let's think this audio track, Let's extend it out so it
fades out into the darkness. And now let's take a
look at this ending. It just turns off. Now this is where we can start
introducing transitions. If you go to transitions, we have a lot of
crazy transitions. You don't want to choose
some of these more. I don't know how to describe
a complex transitions. I think the general rule that simpler is better
is totally correct. And so I think the two main transitions
that you guys would, I think the two main
transitions that work the best are cross dissolve
and cross blur. So I'm gonna choose
cross dissolve. And I'm going to drop it
right between these two. And you saw what it
looked like before. Let's take a peek now. It does a nice fade to black. You could have also
chosen fade to black, but because it's already
fading to black, we didn't need to
choose that again. And so cross dissolve
works really well. And likewise between
these photos, quick change might be something
you want just for effect, but in case you
didn't want that you could try cross
dissolve between there. And if you watch now, It's just a nice little
transition to have. You don't need to have
transitions between everything in your video clips,
especially for example, where the jump cuts are, those are not necessary
because you want to have that distinctive motion
between your edits. But that's just
something nice to have. Likewise over here
when we change from The Birds to the grass, you may want to have something there, but you don't have to. Anyways, I just wanted
to show you guys how to get started with
adding some background, some titles to your video, as well as working
with some transitions. I hope this video was helpful. I'll see you guys
in the next one.
12. Ep11 How to Voiceover your Video: Hi folks and welcome back
to the iMovie tutorials. In this video, we're going
to be looking at how to do voiceovers for our videos. So depending on what type
of videos you're creating, you might want to
do some voiceovers. For example, let's
say you're doing a tutorial video and you're
recording you demonstrating, let's say how to
shoot a basketball. Then you're recording
this outside, then you may want to
take that clip footage, since most likely the
camera will be set some distance away from you and it's probably not
recording the best audio. And what you may do like we
did for these clips is to, it reduced the volume for
these cliffs and then to introduce some of
your own recorded audio. The way we would do that is
we have a button over here, which is your microphone button. And what it's gonna do is
when we first click it, it'll show us kind of like our volume range and then
we have a record button, it'll start a countdown. And so what we're
gonna do is let's say, let's start over here
with the rushing water. So let's say I wanted
to just start a voice-over starting from here. All I would do is I would
click this red button. It's going to give
me a countdown. And let's just jump
right into it. 21. Hi folks and welcome back here we have some running
water, et cetera, et cetera. I'm just going to
pause it there. And what you're gonna notice
is if you just saw that, is that it actually
subdued the music track because it's going to take it
into account my voice-over. So let's listen a little before and then you'll hear that
transition into my voice-over. Folks. Welcome back. We have running
water that are etc. And basically what it does
is it allows me to put this audio track and it overlays that over
the audio track. If I wanted to, I could also totally cut out
this audio track. Remember we use the range key. I could range key
this section and completely eliminate that
volume if you wanted to. But that's one way you
can use the voiceover. It's a very handy tool to have. I just wanted to show you guys
that and how to use that. Anyways, That's going to
wrap it up for this video. I hope this was helpful. I'll see you guys
in the next one.
13. Ep12 Color Correction & Other Video Effects: Hi folks and welcome back
to the iMovie tutorials. In this video, we're
going to be talking about some of the tools
that are up here, including color correction and stabilization as well
as other things. So let's jump right into it. So what I'm gonna
do is I'm going to choose this one particular
clip of the bubbles. And up here we're going to
look at the WAN button. Now the one button
will basically try to, as iMovie can best do, is to improve the video
and audio quality. Watch what happens. I'm going to click this. And almost immediately you can see the changes in the colors. Now for the most part, this is something that's
a bit subjective, but there are certain things
that do pop out immediately. One is you could notice that
the trunk got a lot darker. Let's see if I can
turn this off. The trunk got a lot darker, but also the leaves on the
left side got a lot browner. And that's not necessarily
something I particularly like, but that's just something
to be aware of. What it's done is it's gone into your color balance
and color correction. And so what it's doing, and if you open it up, it's chosen the auto mode. You can also choose
it to match a color. So if you have another clip, you could have the colors
matching between the two clips. The reason why that
would be valuable is that if you are shooting
the same person who's, let's say walking from a different scene to another scene and the
lighting is a little bit different than this
is where matching the color would look better. You can also change
the white balance and skin tone balance. And those are things that come later in a little
bit more advanced. I'm not going to cover
too much into that. Then the next one is
your color correction. So over here you
can see that it's moved some of these
a little bit off. So this is making the darker
is a little bit darker. If I move this a little
bit back to where it was, it will change it a little bit and let's move it
a little bit more. Makes it darker, a
little bit less dark. Make this a little bit brighter. Alrighty. So you can see that this side is making
the brighter parts a little bit brighter and this one makes a darker parts
a little bit darker. This is your color saturation. And then this is if
you want the tone to be a little bit
warmer or cooler, you can see it as we
move our mouse over. And this is something that
takes some time to learn. And really what you'd want
to do is use these so that it makes the eclipse look
as good as possible. So you can see the
difference between this clip now and that clip. And so depending on what
you're trying to go for, sometimes it's better to have this color correction and sometimes it looks
better the way it is. So this is just something I wanted to show you
so you guys could play around with it
in upcoming videos. The next thing we're gonna
do is we're gonna keep going through and we're
gonna look at the cropping. So similar to what
we did with photos, you can also use the Ken
Burns effect or you can prop your videos just like
you did with your photos. You can do a lot of
the same things. So just wanted to show you that the next thing
is stabilization. Now this is really useful
if you're shooting video with your phone or with a camera and
you're moving around. Because what it does is if I choose to stabilize
this video, it'll actually crop a
section of this and it will try to remediate all of
the shaking and the video. And that's really useful because all these
videos are shot on a tripod and they're
not moving video. It won't really have any effect, but I'll click it anyways, just so you can see
what's happening. And you can see here it's saying analyzing for a dominant motion. And basically what it's
trying to do is it's trying to figure out
if you're moving. And if you are moving how
to best crop the video so that it can focus on
just the main object. You can see here. It really didn't do
much to be honest. I'm one side or
that side effect. But one downside is when
you stabilize your video, it tends to also
reduce the quality. I'm not as big of a fan
of that as, you know, is if you use the gimbal, but it's very useful if you need to stabilize some shaky video. The next one is our volume. Obviously that's
something you can change. We don't have any volume
for this particular clip, so it's not an option. But if I did, for example, if I chose this one,
I do have volume. I can change the volume
to whatever I'd like, but I'd set it all to 0, which is why I'm not
going to change that. So I'm gonna go
back to this clip. Let's see. We have noise reduction. So this again is, if I recorded this and
there's a lot of wind noise, this is really useful
just like what stabilization does is that it uses iMovie to try to
reduce all that extra noise. So if you have wind noise, it helps to try to clean
up the audio a little bit. We talked about speed over here. We have clipped filters. This is just something
that's a little bit more on the fun side of things. And so you can come over here and you can see
what these filters would do for your clips depending on what
you're shooting. If you want to go too dreamy, some of them do have a purpose and they might
be useful for you. So feel free to explore, pause the video here
and just play around. There's a lot of
filters to checkout. So I'm just going
to cancel that. Then we have audio filters. Again. You have to have audio
in order to have the audio filter
option available. And so this is very similar. It'll take that audio
and for example, it will take it and change
them to whatever you want. Um, it's trying to take the background music while we're playing
through them. But yeah, for example, if you have a person talking
in the clip or whatever, you may want to use
some of those effects. But again, at your leisure, feel free to explore. And then finally is Inspector, all it's doing is it's
telling us the name of the file and other
little details. All righty. So basically that was a brief overview of some of the options that are
a little bit more advanced that you can use
for your video editing. I hope you guys learned a lot. And if you guys
have any questions, feel free to post in the chat. Thanks for watching. I'll see you guys
in the next one.
14. Ep13 How to Export your Video: Hi folks and welcome back
to the iMovie tutorials. In this video, we're
going to learn how to export our video. Assuming you've
gone to your video, you've watched it,
you reviewed it, and you like what you see, then what we can do next
is we can export this. Now there's two ways to do it. One is this little
button up here. When you click on
it, you'll have a couple of different options. You want to upload IT
strategy, YouTube or Facebook. Once you click on this,
it'll ask you to log in. But right now what I'm
going to choose to do is to export file. The reason why I want to do this is it's going to allow me to save it somewhere and then I can choose what I want
to do with it. In terms of the format. If you wanted to only
change the audio. In terms of the
format, if you only wanted to save the
audio, you could. I'm going to leave
it video and audio. Now for the resolution, you can change it to
a lower resolution. What that means is it will make the file size
a lot smaller. It just won't be as high
res as the other options. So if I chose 540 p, Obviously that's the
smallest resolution. And that also gets reflected
in the size of the file, which you can see here. 703 p's next step up, slightly larger file and then ten ADP is the best quality, or the quality high as
good best is ProRes. And that makes the files
relatively larger, but it also makes the time for the exporting a lot longer. Likewise, with the compression, you want better quality. It'll just take longer. For the sake of this video, I'm just going to keep
these as high and faster. I'm going to click Next. It's going to ask me where
I'd like to save my movie. I'm gonna say, that's
perfectly fine. Let's save it in movies
as my first iMovie. Once you click on that, you'll notice that we have a little pie chart that pops
up here in the top right. You'll notice that depending on the speed of your computer, the size of your video
file, this will vary. So generally the
newer your computer, the faster they should go. But if you're also working with higher-quality videos or photos, then this might take longer. And so what this is is
the exporting process. And basically once
we're done here, we'll be able to access our
files in the movies folder. So I'm going to speed this up and we're going to
open up our file next. Alright, so you can
see we're about done and it's finished. Well, let's go to our finder, open that up, and we're
in our movies folder. And you can see right here
we have our first iMovie. I can double-click it and
it'll open up and it'll play. Perfect. You can see that this is
the whole entire video and I'm just going to X out. And so now we have the option to upload it to
whichever platforms, social media or video
website that we want to. So that's going to
be that and that's how we publish and export
our first iMovie project. Congratulations for your
first finished iMovie. I hope this experience was as great for you as it was for me. I thought this was a
really fun course to teach and I hope you
guys enjoyed it too. If you haven't already
considered sharing your video with the class, feel free to upload
it just to see how you've edited your videos. I think it's just a lot of fun. And yeah, if you guys
have any questions, please post them down below. And I'll see you guys
in the next one.
15. Ep14 Congratulations: Hi folks. Congratulations on finishing a complete
beginners guide to iMovie. I hope you guys enjoyed your
time throughout this course. If you haven't already, please consider sharing your
iMovie project with everyone so they
can see how you've applied the skills you've
learned throughout this course. If you haven't already,
please check out some of my other courses I have on
steam and stem related topics, including programming,
3D modeling, as well as other steam
and stem related areas. Thanks for taking this course. I hope to see you
guys in another one. Take care, Bye-bye.
 Steamaker Studio, Maker, Teacher, STEAM Enthusiast