Transcripts
1. Introduction: Hello, everyone.
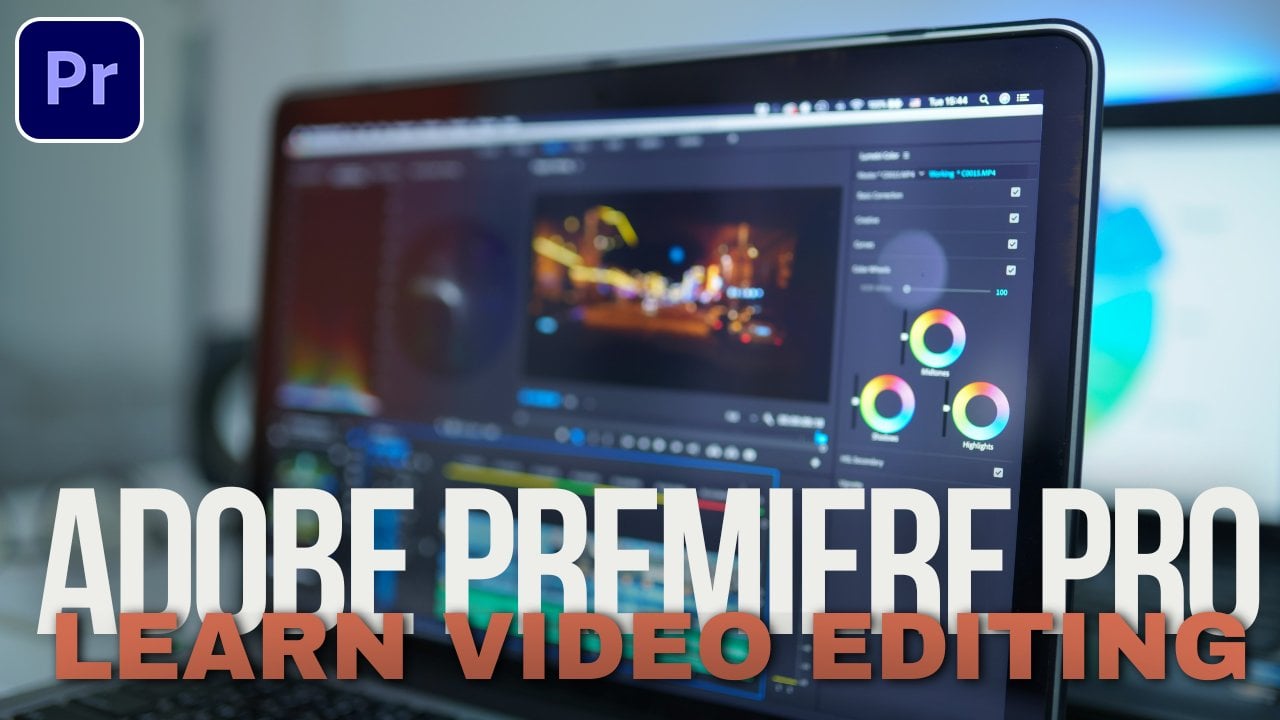
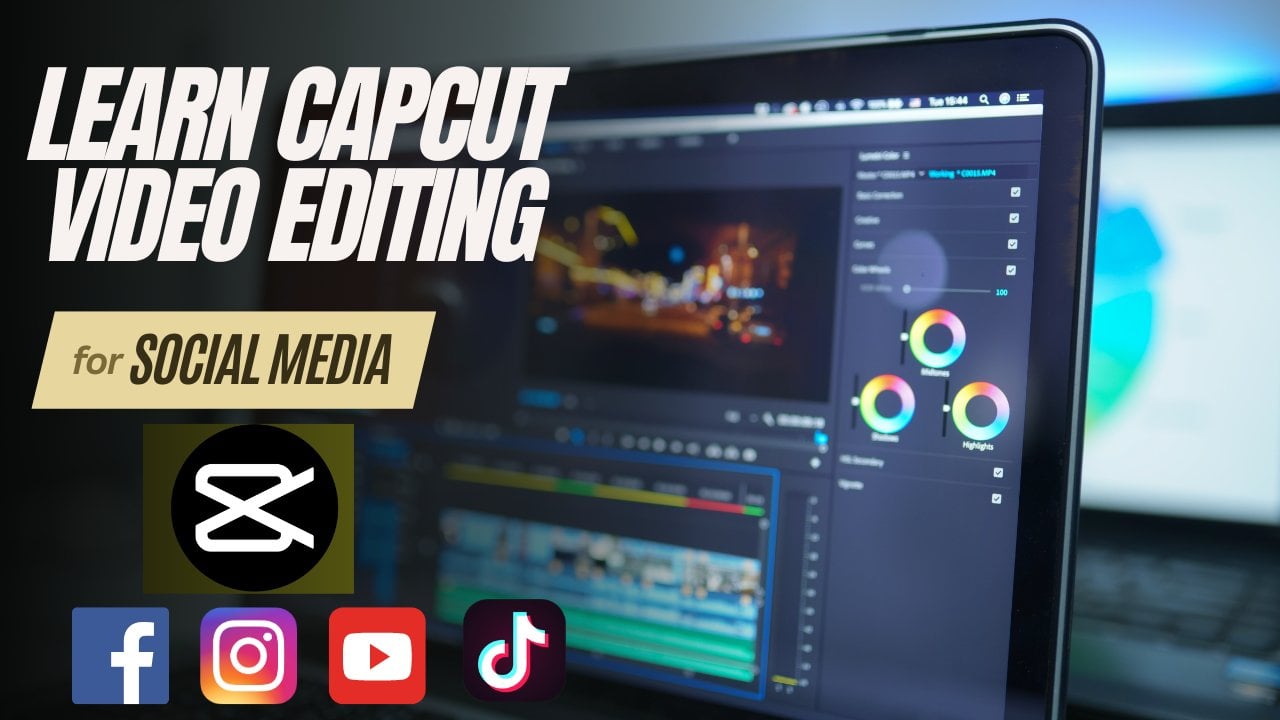
Welcome to our class of Advanced Cap cut tutorial
for learning video editing. So if you're planning to learn advanced level video editing, then you are in the right
place because in this class, we will cover
everything to get you started with Advanced Cp cut. Let's take a look what you
learned from this class. Introduction to cap cut, masking in cap cut, mastering keyframes, silk
simple mask transition, blurring a phase or object, text to voice feature, cinematic color
grading in cap cut, smooth zoom in, and
zoom out effect, pop out effect in cap cut, rotational animation
with keyframes, the strolling text effect, cloning in cap cut, removing a green screen. After completing this class, you will be able to learn
advanced video editing skill, learn cinematic, color grading, understand about masking
and its feature. Learn different kind of effects, learn about using advanced
level of transitions. This is a project based class. So during learning, you'll
have class project. So what you learn,
you will be able to participate in class project, and you can do practice
while you're learning. Have supporting
resources in this class, so it will be easier
for you to learn. During learning, if you face any issue or if you
have any question, then feel free to ask me. I'm always there for
you to help you. So now let's start learning Advanced cap CT for
video editing together.
2. Starting to CapCut: Hello, everyone. And I'd
like to welcome you all to our first chapter of the Advanced Cap Cut for
Video Editing Tutorial. So as we are on our
Chapter number one, I will be giving you guys
and introduction to CAP Cut, what all we are going to learn, what all we'll be
exploring over here. So let's not waste time. And let's get started
with the first chapter of Advanced Cap Cut for
Video editing Tutorial. So the topic is Mastering
Advanced Cap Cut Video editing. And I'd like to
welcome you all to the Mastering Advanced
Cap cut video editing. And in this tutorial, we will be basically exploring advanced features and
different kind of tips to elevate your
video editing scale. So if you're joining
in this class, I guess you already do have a basic knowledge
about how you can work in CAP CAT and how to actually
import your video, how you can actually work with different kind
of effects. Okay? So you do have some basic
idea about video editing. And if you don't
have any basic idea, I will refer or I'll
tell you guys to first some basic idea
about video editing, how video editing works, how cap cut works, then you guys are totally prepared for joining
into this class. So I'll be giving you guys
different kind of tips, which which you need to follow over here
throughout this tutorial, and we'll be learning about
different kind of skills, which are very important
if you want to do advanced level of video editing
in the CAP cut software. So the first thing
what we are going to do is understanding keyframes. Okay? So keyframes are basically used to actually give some kind of animation
to your video. Okay? We'll be understanding about different
kind of keyframes, how you can work
with key frames, how you can change the opacity, how you can basically change different
kind of positioning. Let's say you want to
zoom in or zoom out. You can do it using
the key frames. We'll learn the power
of keyframes in CP cut for precise control over
animation and effects. So using keyframes, also, you guys can basically
work with different kind of k effects as well. Okay, different kind of
keyframes in case of effects, and also mastering keyframes, we'll basically take
your editing to a whole new level
of professionalism. Let's say you already do have put different kind
of transition, you do put different
kind of effects. And also, you put some different kind
of animation as well, which are already there, like pre made animation. So if you do have CPC before
you guys are aware that what are pre made
animations are. So once you start
using keyframes, it is actually
manually animating. Let's say if you want
to have a 2 seconds gap between the first word and the last word to
enter your screen. You guys can actually do the same timing using
the screen frames. So if you use key frames
so precise, in that case, you will see that your
animation looks stunning, and you will have a total
control over your video, that what you do want
to go to your viewer. Okay? So it will just increase
your professionalism. And well, professionalism
basically comes with a lot of practice. So if you're just using the key frames for
the first time, and if you might think, well, it doesn't
look that great, but you need to understand that practice makes
someone perfect. So you need to keep on
practicing on a daily basis, actually try out
different stuffs. And also, you guys can actually recommend different
kind of teachers. You guys can actually
learn from your friends. Otherwise, you guys can refer
different kind of videos. And by looking at
this video, also, you guys will be able to
learn the advanced features, well, most of it, basically. Actually, cap consist of
a lot of these features, and also a lot of animations, a lot of transitions,
maybe effects. Okay. So the next thing after key frames is
advanced transitions. So over here, we will be
discovering on how to create similars and
captivating transitions. So I'll show you that once
you apply transition, how you can actually
change those transitions. Let's say you do have put upper transition between two
videos, how you can have Control over those. And where do you want to put
up those transition? Let's say, do you want to put at the center of the two videos, or you want to put at the
end of the first video, or you want to put that
particular transition at the starting of
the second video. Okay? So there are
different options of using transitions. And also, there are these options using
advanced techniques in CPC. And once we use transition, it basically elevate our video with sophisticated
transition effects. Okay? So if you do
have any kind of smooth effects or smooth
transitions between your video, it actually gives a stunning
look to your video, which actually attracts
a lot of people, okay? So the next point is
color grading, mastery. So over here, we will also
learn different kind of color grading and what all
colors you guys can use, from where you guys can actually take up
your inspiration. Okay, there are
different kind of websites from where you
guys can just look at the image and check how color
basically affects an image. If you just take up a
look on my screen itself, you guys just look at the image. So the behind you guys can see, there is some kind of blurt, but they do have a
red bus as well. And also, the dress of that particular lady
is red as well. Okay? So you guys can
see the contrast, and just underneath the image, you guys can see that I
do have the swatches. Under swatches,
you guys can see, I do have on the extreme
right hand side, a deep red color, and after that a bit lighter. And here you guys can see. At last, I do have
the black color. So the color
combination throughout this image, it's quite stunning, and you guys can also use
this for your image as well. Not only with this color, let's say you want to work
with some other color, or you want to
work with an image which is under a sun or a
footage, which is under a sun. Guys can work with that. So over here, we will basically unlock the secrets of
color grading of how you can actually enhance the visual appeal
of your videos. And also over here, we'll learn the art of professional color
correction and grading for studying visuals. Okay? When the viewer tries to view your video or your footage,
which you have created, it should make them
feel that wow, that's such an amazing
job whoever have done, or there is a great
color combination between the whole footage. Okay, so we'll be learning about this professional color
correction and color grading. And the next point over here
is advanced audio editing. So let me tell you
guys one thing that whenever you're
working with video, understand that once a viewer basically views your content, 50% consist of the video, and 50% goes to the audio. Let's say you do have a footage or you are just
scrolling around in the YouTube, okay? And in that case,
you just felt like, Okay, this particular thumbnail of this particular video
looks quite great. And the topic is also quite relevant. Let
me just play it up. And once you played up, you guys noticed that well, the video editing of that particular video
is quite amazing. But the audio is not that great. So ask yourself, that are you going to continue to watch that, or will you have the
same interest level, which you had started
watching that video? Okay. So most of your answers will be a
no, that it won't be. You might see the whole video, but maybe you won't have the same interest which
you had at first. So once the audio and the video both are at
the professional level, it actually enhances
your viewer experience or your experience as a viewer. Okay. So in that case, you need to make sure
that if you're actually doing a stunning work
on video editing, do the same with your
audio editing as well. And there comes CAPCOt
that using CAP Cut, we will be basically able to edit our audio quite
an amazing way. Okay? So we will be exploring different kind of tools
and different kind of techniques for advanced
audio editing in CAPCut. So different kind of tools are available over
here in Capcot, which we'll be using to actually maintain our audio to
a professional level, and also we'll be learning
different kind of techniques for advanced
audio editing in CAPCOt. So we'll elevate the quality of your videos with
professional sound design and editing. Okay. Once we have actually
edited a video, we will also see that how
you can actually make that particular
video sound quite professional over
here in Capcot. And the next point over here is mastering, text and titles. Okay. So by the heading itself, I hope you guys do have
gotten basic idea that regarding what are
we going to work? Okay? So over here, we will learn how to create an impactful text and titles using advanced
techniques in CAPCut. So already CAPCuT is basically providing you with
different kind of word art, which you can actually use. But using CAPCut, also, we can create some
stunning advanced level of text and title animation. Okay, so using key frames, you guys can actually
work with text and titles as well, and if you use different colors and if you
use different kind of text. Accordingly, it will
basically elevate your videos with professional
typography and design. Okay? So if you
just take up a look on the right hand
side of my screen, you guys will be able to
see that particular image, which consist of
different kind of words. Okay? So the word is basically Holood. Okay. And you guys can see how it's
actually placed. So you guys can
also do like that. Otherwise, if you do want
to use some of the preset, you guys can also use
those presets over here. And the next topic over here is advanced effects and filters. So we already know how to apply different kind of
effects and how to apply different
kind of filters. But over here we'll be learning this in
an advanced level. Over here, we will
basically dive into the world of
advanced effects and filters in Cap cut to add depth and creativity
to your videos. Okay. So once you refer different kind of video
editors and their work, you will get a lot of knowledge regarding video
editing over here as well. So we will basically learn different or advanced
kind of effects. And also, we will learn about advanced features or filters in Cap Cut to basically add a depth to our
creativity of videos. Okay. So elevate your editing with professional
visual effects. So that's about it. And now lastly, I would like
to say you all that elevate your editing skills to
a professional level and create stunting
videos with confidence. So yeah, I hope you guys to
have understood this class on how you can basically
get started on CPCut. So we'll be learning
about CAPCut. From the next chapter. We will go into the
software itself. We'll be learning about
different kind of effects. A different kind of cinematic views also
we will be learning. So take care, everyone. I hope to see you all
in the next chapter.
3. Masking: Hello, everyone, and
welcome you all to another chapter of the Advanced CAP Cut for
Video editing Tutorial. So now we are on our
Chapter number two, where I'll be showing you guys
about masking in CAP Cut, like how you will be able to mask like a professional
in CAP Cut, we'll be learning
about all those things over here in detail. So let's not waste time, and let's get started. So over here on my screen, as you guys can
see that I do have this particular window once I open CP cut over here on my PC. Okay, so you guys can just
sign in into your account. And over here, you guys can see. If I click onto this option, I will be able to create
up a new project, a? And under here, you
guys can see over here, I basically do have all the recent projects with
which I worked over here. Okay. And over here, you guys can actually
check the trashcan, like what all images, or what all videos, you have deleted, you guys
can check those out as well. But after 30 days, it will just get
erased by itself. Okay. And over here, you guys can basically
check out your history, like if anyone do have
shared any file with you, if you do have shared
any file with anyone, like if you do want to create a group account or group
project in that case, you guys can click on Create, or if you do want to join
in someone else's project, you guys can join that as well. And another new
feature which came in cap cut is the auto reframe. Okay, let's say you
do have a video. And it will just automatically
reframe it for you. You don't have to
manually go and you don't have to come
there and actually, you don't have to manually
crop those things out, okay? It will just do it according to the aspect
ratio that you put. Okay? So this is one
of the nice feature. This is AI based
features, basically. But as we're going to
learn about masking, let's click on Create Project, which will open up my
workspace right over here. So over here, as
you guys can see, this is the workspace in which
you're going to work on. And if you do have worked any other video editing
software like Fil Mora before, then you might be familiar
with this kind of interface. Okay? So from here, basically, you guys understand that
what importing is, like, if you do want to import a file, let's click over here, and it will basically
redirect you to your page. Okay? So if I do want to import all of these
videos right from here, let's select all of it. Let's click on Open, and I do have imported all of these files right
over here. Okay? If you do want to work
with those files, you guys can come here and basically work with
those files over here. Otherwise, if you do
want to check out different kind of
stock materials, you guys can come here, go to stock materials,
and from here, you guys can take
your desired video, which you are looking for. Let's say, If I just
give a prompt over here, in my search engine, let's search for nature.
Here you guys can see. I do have a lot of videos
regarding nature over here. And basically, I
can download just by clicking onto
this small icon, which I do have over
here on the sides, and over here, you guys can see. That I will be able to preview this particular video on
my preview panel as well. Okay? So if you do have used
premier pro Davin resolve, they do have separate
source monitor, and they do have a separate
final output monitor as well. But over here, basically, it is actually the same. So once I import this video
over here on my timeline, what happens is this
particular panel only will turn into the
final preview panel. Okay? So let's come over here. Let's cancel this
particular prompt. And also, if you do want
to put out any kind of cap cut logos in the sense, you guys can go to brand
assets, and over here, you guys can see
that you do have this cap cut logo
right over here. If you don't want to put
it inside your video. Okay? So in that case,
you guys can do that, and also under spaces, like, if you do want to
upload any media, especially into this
particular panel, you guys can also do that. Let's say you are
working on a project, and in that particular project, you do want to upload
some of the things. You guys can just save all those things out
right over here. Let's say if I come here, if I just right click
and over here now, new folder with selected item, you guys can also do that. And over here, you
guys can actually have it in a splits seen as well. Like if you do want to split it, you guys can actually do
that, as you guys can see. It is just splitting or no
scene transition found. There is no transition. Let's say if you do add
two or three videos, and if you do want to split
it according to that, you guys can do that for free. That is also a AI feature. If you want to see the details, let's click on this video, and over here, you guys can
see what is the frame rate, what is the path, where it is being saved, and here you guys can actually check out
all of these options. So for me, what
I'm going to do is I'm going to come here and I'm going to import this video over here in my timeline. Okay? So there are
different ways to do that. You can right click. Otherwise, you can just drag this one over here
into the timeline. Otherwise, just click
on this plus icon, which will directly add your
clip into your timeline. So let me just click over here, and here you guys can see the whole video
has been imported. Okay. So now, if you
do want to mask, so basically, what is masking? Let's say I will take this particular video
as well on top. Okay? So let's select this
video. Let's bring this one. And let's place this
video on top of this one. And now I will just decrease the size, or I will just keep both
of these at the same size, and now let's click to Zoom to fit over here in the timeline. Okay. So over here now, let's try to manage this one. Okay. So now what I can do is let's bring my playhead
right over here. And as this one is on top, let's say, if I do
want to mask it. So once you click on that
particular footage over here, onto your properties panel, you guys will be able to see all of the properties option. Like, if you do want to do some basic scaling,
positioning, rotation, or if you do want to apply different kind of blend effect, you guys can do it
right from here. Okay? But the same way,
let's come here, and let's try to mask. Okay. So under masking, you guys can see there are
different kind of mask, okay? So the first one is horizontal, then you do have the mirror. You do have the circle, here you do have rectangle, here you do have the heart. So let me just go with
the circle one over here. And as you guys can see, now, this is how you guys can
actually mask this thing out. And also, if you do want
to increase the size, k, or if you do want to
increase the feather, you guys can actually do
that. Okay. Let's say, Now, what I want to
do is I do want to increase the size of this one. Okay? Let me just come here. Let me just put my mask over here onto
this particular place. And this is how you guys can do, if you can manually do it
from your player, okay? Otherwise, there is other
way of how you can do that. So here under this
masking option, here, you guys can see the x
axis and the y axis. If you do want to move your mask towards the x axis,
you guys can see. It is basically moving
on the x axis, okay? So this one is
basically the x axis. And if you want to
move it on top, you guys can actually
increase the y axis. If you do want to go down, you can decrease the y
axis right over here. And at the same time, this
is basically the mask on the first video as you have applied it on
the first video, a, So in that case, if you do want to give this one upper rotation, you guys can come here, and you guys can basically give this one upper rotation,
how much ever you want. Otherwise from this, you guys can just scroll this
around as well, which will also mask. Okay? And here you guys
can see you will be able to manually change
the size of this mask. Directly from the screen. Otherwise, you do have this particular option
as well from here. Okay? So you guys can see, you guys can increase
the mask from the sides. If you do want to increase it from top, here,
you guys can see. You guys can actually increase it from the top and
bottom as well. Okay? And the next option comes
here is the feather. So now, if I just
select outside here, you guys can see as
I have two videos, outside part of this
particular video is basically very sharp, or the cut over here
is quite sharp. So in that particular case, what we can do is we can come here and we can just
increase the feather. And once you increase
the feather, you guys can see that it
is actually showing the next part as well. Like, if I just put too much of feather, you guys can see it is
just totally transparent. But in that case, I don't
want to do that because both the frames are
not that clear. Okay? So in that case, now I will just decrease the
feather to a certain extent, let's say, I will just
go on and let me just Put this thing
somewhat around five. Okay? So once you put this, now, if you just play it, this is how it will
basically be played. Okay? At the same time,
if we do want to move it, you guys can come here, and you guys can just
move this one up as well. Okay? So this is how it actually works right over
here for the feather. But the same way, if
instead of circle, if I just go with mirror, Okay, let's come here. And here you guys can see this
is how it will work. Okay? And at the same time, if
you do want to decrease it, a, let's say I do want to
move it right from here. And now I will just select
this particular footage, and let's go to basic, and I'm going to scale
this footage up. Okay? So now from here, let's play this thing. Okay? So if I come here and
if I just play this thing, you guys can see how
it actually looks. Okay? So in one
particular frame, basically, I am
playing two videos. So if you do want to
make any changes, any kind of changes over here, you guys can come here, if you do want to move
this one to the X axis. Okay, you guys can
actually do that. If you do want to
move of the y axis. You guys can come
here, and you guys can actually move it towards
the y axis as well. So here now, let's
say this is fine. I will select this footage, and let's go to basic, and I will just increase the size of the footage
right from here. Let's go with 165. Okay I'll just go with
165 right over here. And now, let's play this thing, and let's see how
it actually looks. Over here, it kind
of looks like this. And if you do want to do
or make it look better, in that particular case,
here you guys can see, you do have different kind of animation as well,
which you can use. Okay, Let's go to
this masking option. Let's select this one. And if you do want to increase
the feather anal, let's come here and let's
increase the feather, let's say, uh, y eight. Okay. So now, if
I just play here, you guys can see
the feather, okay? So otherwise, let's see by
increasing it a bit more. Let's come here. And now, if I just play this thing, here, you guys can see how it actually looks
right over here. Don't want to increase the
size. Here you guys can see. Now I will only be able to change this one from
top and bottom, but not on the sides. It totally depends on the type of mask
you're using as well. And if you have seen that, this mask, I don't
like the mask, which I have over here. In that case, what you
guys can basically do is you guys can come here and
you guys can click on none, and none of the mask will
basically get selected. So as I do have this
pedicular footage, right over here, let's
go to the mask option. Otherwise, let's go
to this basic option. And from basic,
what I can do is I can just scale this
down to 0%, okay? And now or 1%, right over here. L et's place it at the starting. So I can just add up a key
frame right over here. And after that, let's
move up a few frames. Let me just go till this mark. Let's say this 3
seconds mark over here. What I can do is I can
come here and basically, I can just scale this thing
up somewhat around 100%. Let me just go this one and
let me just go with 105%. And both of the key frames, I do have added right over here. So now let's see how
it actually looks. So here you guys can
see this is how it will basically appear
on your screen. So this is about that. And now here you do have the
retouching option as well. If you do want to turn on
the retouching option, if you want to smoothen your video or if you
want to brighten it, about which we'll be
learning later as well. And also here, you do have this particular
tracking option. Okay. So this is basically
the motion tracking. So in that case, you guys can
actually track the motion of this particular thing
right over here as well. Okay? So we'll be learning
about that later. But I hope you guys have got up an basic idea about
masking in cap cut. Okay? So here you guys
can see there are multiple tools using which you can basically
split it. Okay? But over here, I do have
actually showed you that how you can actually come here and
basically mask your video. Let's I'll select this.
Let's go to mask. Over here, you do have the horizontal masking
option as well. And at the same time,
you guys will be able to give this up
our rotation as well. Okay? So let me just go with
the 90 degree rotation. Let me come here. Let me just select this
particular video, and let's go to basic. And now I do want to
actually position it. Okay. Let me just go over here. Let's say, 160. So I'll just click on Enter. And now over here, if I just play this thing, here you guys can see how
it will actually look. Okay. So if I do want to move
this one a bit more, Okay? Let's go with minus 240. Okay. So let's go
with minus 240. So I'll just click on Enter, right over here again. Let's come here. Let's
play this thing up. Here, you guys can see that I do have this particular footage. And if I don't want
to bring it more, let's move this one more onto the X axis.
Let's come here. Let's position this whole video. Okay? I'm coming
right over here. And as you guys can see, my screen is being
getting moved as well. Otherwise, you guys
can come here. You guys can directly select
this particular frame. And let's say I do want
to select the video, which I have right over here, and I do want to move
it right on one side. Okay, let me just place
it right over here. Let's select this video, and let me just place it
right over here as well. Okay. So now, if I
just come here at the starting and let's play
this particular video, and here you guys can see this
is how it actually looks. Okay? So over here, now, if you do want to add any
kind of text over here, you guys can basically add
different kind of text. And here in masking, what I can do is
let's go to mask. And over here, basically, I can actually
increase the feather, let's say, by 50%. Okay? So once I do
have done that, now, if I just play it up,
here you guys can see. Now this is how it
will basically look. Okay? So once you're done, if you do want to add any music, let's go to the audio part, and over here, you guys can see there are different audios. Let's say you want some audio and you search
for the keyword love. Okay? So I'll just click
on Enter over here, and you guys will see that I do have all of these
options right over here. And from here, if you
go to download play. And you guys can listen
those out as well. So if I like this audio, what I can do I can come here and I can just click
on At to track. And now let's move this one up. And if you do want to trim this, you guys can come
here and basically, you guys can trim
this up as well. Let's Zoom to fit
here in the timeline. Let's trim it down
from here as well. Now again, let's click on
Zoom to fit in the timeline. And now let's see the
preview of my whole video. So, yeah, this is the video
which I do have created. And now once you are done
with this particular thing, now the next thing is
you do want to export. Okay? So to export, you need to come here on top, and over here, you do
have the export option. Otherwise, you guys
can click on me. And from here, if
you go to settings, and you guys can actually
work from there as well. Okay. So let's click on Export
right from here on top. And here now I will be able
to save the file name. But before that, let me show
where it will be exported. Let's go to Dektop. F here, let's come
to my resource file. And from the resource file, I will just select this
particular folder. Let's rename this one
as masking. Okay. So I will just name this one as mask and I will select what is going
to be the resolution, what is going to be the codec. Okay, so it's h264, which is a MP four. And here under format, also, I will select it as
a MP four version. The frame rate is fine, and the audio format
is in MP three. And once you're done, you can click on Export
and it will get exported. So here, my file has
already been exported. So now let's come here and
let's go to my folder, and let's see how
it actually looks. Okay. So F here, let's cancel this thing. Now let's come here into my PC. F here, let's go to my
dektop, and from here, let's go to resource
file, and over here, I do have saved
this video as mask. Okay So if you just come
here, play this one, let's go and play this one right over
here. This is the audio. Let's come here. Let's play
this particular video. So here you guys can see this is the final result of my video. Yeah, I hope you guys to have understood this class on how to do masking in CP Cut
in an advanced level. I hope to see you all in
the next chapter till then, take care and goodbye, everyone.
4. Mastering keyframes: Hello, everyone, and
welcome you all to another chapter of
the Advanced CP cut for Video editing Tutorial. So now we are on our
Chapter number three, where I'll be showing
you guys about mastering key frames in CP cut. Okay? So I'll show you guys the advanced usage
of key frames, how you will be able
to work with those. So let's not waste time, and let's get started. So over here, this is basically the home
page of the cabinet. So let's click on
creating a new project, which will actually redirect me to my workspace
right over here. Okay. So now, once I do have this particular
workspace, the next thing, what I'm going to do is, I'm
going to click on Import, and let's go to Dektop. Let's go to my resource file, and I will just import the videos using which
I do want to work. Okay? So let's take this videos, and let's open this one up. And the same way,
again, let's come here. Let's click on Import. And over here, I can basically import
these logos as well. Okay. So here you guys can see that I do have this
particular logo, if you do want this one. Otherwise, if you do want to
take this particular logo, you guys can take this particular
logo from here as well. Okay? So let's come here. Let's open this one up
right over here as well. Okay? So from here,
now, the next thing, what you're going
to do is if you do want to import this video, you can just drag this one down. Let's say I will take this one. So I'll just drag this video, and I'll just put this one over here in the particular timeline. Okay? So this
particular video right now is over here in my timeline, and now I do want
to work with that. So you guys can see already
on my right hand side, I do have this box
of properties, okay? So if I do want to work with
anything right over here, I will be able to do it
over here itself. Okay? So in each and every
point, let's say, whether it be the video, whether it be the speed, Okay, whether it be the
adjustment right over here, you guys will notice
that there is this small icon on
the sides, okay? So these are basically
known as the key frames. Let's say, as I do have
this picular video. Now, what I want to do is let's start with
the very beginning. Okay? So let's click on video. And over here, now, what I want to do is I do want to actually scale
this video up, okay? Or let's say I do want to
position this picular video. So for me, now, what I'm going to do
is under position, I will just add up
a key frame. Okay? And once I'm working
with keyframe, I need to make sure that I am at the starting of my video, okay? Because I do want it to start
right from the beginning. So let's say I will just put my playhead right over here,
and under positioning, what I want to do is I
want appear or I want to make this particular thing
appear right over here. Okay? So in that case, what I'm going to do is first
thing, let's come here. Let's add up a key frame. Okay? So once I do have added a keyframe here, on my screen, as well, you guys can see
that at the starting, I do have the key frame. And now, what I'm going to do
is I'm going to go here and I'm going to move this
one in the y axis. Okay. Let's say I will just come here. I will just place the
frame right over here. And now let's say I will just
come for few six over here. And now I will just bring this frame back over here again. So if you want to
do that, otherwise, directly click on
reverse Option, and let's see how
it actually looks. So I do have applied
the keyframe, so if I just play, this
is how it should appear. Okay. So this is how you guys can actually
work with key frames. Let's say if you do want
it to move a bit fast, decrease the gap between
both the key frames, okay? So here you guys can see. So here you guys can see, now it's quite fast. And the same way,
what you can do is, you guys can come here, and you guys can just copy these key frames right
over here as well. Let's select this
one. Let's come here. And now let's just select this. And what you're going
to do is, let's go with Five. So I'll just click
on Enter right over here. And now let's remember
this particular number, which is two, 225. Okay? Otherwise, in
that particular place, let's come here, and I want
I want it to disappear. Okay. So in that case, what I can do is I do want
to give this up to rotation. Okay. And also at the same time, I do actually want to
scale this down as well. Okay. So for me, now, the first thing is, I do want
to scale it very down, a? So let's come here. Let's add up a key frame over here into the hundred
seconds mark. And again, now I will just
come at the last of my video. And over here, what
I'm going to do is, I'm going to go with zero. Okay? So let's come here. Let's go with zero, and I
will just click on Enter. Okay? So just scale it down. But at the same time, also, what I want to do is
I do want to give this thing up a
rotation as well, okay? So let's come here. And over here under rotation, first, let's go with zero. Okay. And now I will
just add up a key frame. But once I come at the last, during this phase,
I will just give this one up a 360
degree rotation. Okay? So now let's add a keyframe right
over here as well. So now let's just
play this thing. This is how it should
appear on your screen. And now, you guys will see that it just rotates and go off. Okay? So here this
is how you guys can actually work right over here with all of
your key frames. Okay? So I do have scaled
it over here as well, and I do have given this one
up a rotation as well, okay? So this is how you guys can work using the positioning
and the rotation. Okay? And let's say, over here, you do have
different options. If you do want to
use different kind of motion blur and stuff. Okay, you guys can do that. And also, let's now go to this retouching option
right over here. If you do want to give up
some retouching option. If you do want to smoothen this. You guys can come here,
and you guys can basically increase the smoothening
option over here. Otherwise, you guys
will understand it in a better way if I just
go to adjustment, and let's say at this
particular point, once my screen
basically appears. Now, what I want to do is I do want to increase
the temperature. Okay? Let's say I
do want to come right over here from
this particular point. Let's say I will
just go with -30. Okay. So what happens over here is basically
for temperature, if I'm going on the minus side, it will actually show me that
the temperature is less. Here you guys can see there
is a bluish coloration, which actually gives you a perspective that
okay, actually, I guess it is showing me that
the temperature is less, and it's not sunny. But once you move on to the yellowish side or the
oranges side over here, it just happens
exactly the opposite. Okay? So let's come here. Let's add a key frame
over here. And now I will just move
out a few frames. And over here now, let's go with plus 30. Okay? But when I apply plus 30, here you guys will be
able to see the changes. Let's place this thing up. And now over here, let's increase the spacing, and here you guys can see the color changes
quite well, okay? But now, as you guys have actually put out a
difference over here. Now, if you do
want to change it, let's say from here, this color, it's actually changing to
this particular color. But once I come to this
particular frame, now, again, what I'm going to do is
I'm going to come here, and I'm going to work with
other options as well. Let's say I do want to change the tint or the saturation
at the same time. Okay? So let's come
here and from here, let's go a bit down over here. If you do want to fade in. Okay, you guys can come here, and you guys can just fade
in right over here as well. Okay, so let's go with 55 or let's come and let's
put up a key frame first. And once I do have
put up a keyframe, let's come here to this
particular position. And let's go with 55. Okay. So I do have
put 55 right over here. And again, once I come to
this particular place, again, I will just put out zero. Okay? Let's come here. Let's go with zero. Let's click on Enter. But
now again right over here, you guys can see that I
will have 50 And again, at this particular point, I will just again
go with zero. Okay? So now here you guys will
be able to see the changes. So if I just place
this thing up, here you guys can
see it fades in, fades out, fades in again, fades out again, and
disappears from your screen. Okay? So this is how
you guys can actually work over here with
your adjustment layer, and there is different LUTs which you guys can
actually use as well. Okay. So you guys can come here, and if you do want to upload any LUT, you guys can do that. Otherwise, let's say I do
have this particular preset, and I can actually make
this particular preset as a LUT as well. If I just go and click
on, save as preset. Okay? So here you guys
can see this adjustment preset has been basically saved. Okay? So I will just click on, Okay, right over here. And under HL as well, let's come right over here. Under HL level. We guys will be able to change up the 1010 stuff from here. If you do want me to
increase the saturation, if you do want to increase
the lightness from here, you guys can basically do that. Okay? So let's say I do want
to work with this color. Let's go with this one. Let's decrease the saturation. Let's increase the lightness. And now let's go with
the yellow color. So the same way, color wise, you guys can basically work
right over here as well. Okay? Let's go with this
one. Let's come here. Let's increase this one. And now also using the curves, you guys can actually work. Let's say you do want to work
only with the red color, only with the green color. Let's say if I come here
onto the green option. First, I will add
up a bit over here, and I can actually
change up this image. But over here to this
pedicular class, we do have learned about
this spedicular key frame. The same way, Let's say, if I come here, if I do
put another layer on top. Okay? Let's see the video. So here fade in, fade out, fade in
again, fade out. And this what either looks good. Okay. So over here, now, if I do want to put out the
same thing, let's come here. Let's click on this one. And here you guys can see this particular JPEC
file have been added. What I'm going to
do is, I'm going to put this one on top. Okay. And now I'm going to
decrease the size over here. Okay? Now, as I'm going to decrease the size
right over here, let me just keep this
thing one particular side. Okay. Let me just place it
in one side right over here. And now, what I'm
going to do is, let's say I do have this
particular key frame. So I'm going to put this
one right over here. And now Over here as well. I will just go with this
particular footage. Let's go with video. And from here, now
let's go to basic. And if you do want me
to scale this thing up from zero, let's come here. And at this particular point, what I'm going to do is
I'm going to come here. Let's increase it
till this much. And over here now, let's add up a key frame. And after that, let's come
to this particular position. Let's increase the size. Let's say let's go with 14. And again, the same way, what you can do is you
guys can come here, and you guys can just
click on this one, and at the same time, if you
do want to copy this one, you guys can actually do that
right over here as well. Okay. So here now
again, come here. Let's add up a key frame. And lastly, at this
particular point, you guys can just
fade this one out. Okay. So over here, Now, let's place it. And now you guys can just go
here and go with one. Okay? So slowly it will fade away, ok? So over here, slowly
it fades away. So now let's play this thing, and here you guys can
see this is the logo, which is appearing
right from here. And again, here
you guys can see, slowly it moves out. So this is the use of key
frames, what you can do. So the same way if I go
to this audio option, So from audio, basically, I can actually get different
kind of sound effects, and different kind of audios. At the same time,
let's click right over here to get different
kind of audios, okay? Or let's go with sound effects. You guys can basically put different kind of sound
effects from here as well. If you do want to extract
audio from any video, you guys can actually do that. Okay. So let's come here and
let's search for adventure. And over here, I
do have adventure. And here you guys can see my resources are
being loaded. Okay? So now here you guys
can see that I do have a lot of this audio. So let me just
download this one, and let's hear which one
actually sounds better. Okay? So now, this one is getting
downloaded, right over here. Let me just play this one, which I have over
here on my screen. So this downloading
might take some time. Totally depends up
to the speed of your Internet using which you're working So now as all those
things have got downloaded, let's hear these things out. Okay? So let's play this
one. Yeah, let's play this. So let me just take the first
one on that salve better. So I will just drag this one, and let's bring it over here. Okay? So I'll just place
this thing right over here. And after that, I will
just click on Shift plus Z to Zoom to fit over
here in the timeline. And the next thing will be just decrease the timing of
the timeline, okay? And now over here, the same way, just stream this one
down a bit as well. Let's increase the size. And now from here, let's click on
Control Ze to Zoom to fit over here
in the timeline. Let me just place
it right over here, and let's see how
it actually looks. Let me come here. Let me
place it right over here. So, yeah, this one
kind of looks good. Okay. And for you, if you do want to put out
different kind of effects and stuff that also you guys
can actually do, okay. But over here into
the audios, okay, you guys can actually use
the key frame as well. Let's say, for the
first few seconds, I will just keep my
at the starting, you just want this
music to fade in. Okay? So in that case, what I'm going to do
is let's come here. Let's add up a key frame, which will be just -40. Okay? So I will just add up
a keyframe right over here. Now, what I'm going to do
is I'm going to come here. Let's say I will just
bring this over here, and now again, I will just take this keyframe
to 0 decibels. Over here, you guys can see this particular curve.
And the same thing. What I'm going to do is once I'm going to come
right over here, I'm going to apply
the same thing. Let's go with -40. And again, right over here, I will just go with zero. Okay, let's go with 0 decibels. And let's see how
it actually looks. Or I just t the vice versa. Okay. So over here again, I will just add
another key frame, and let's come right over here. And over here, I will
just add one key frame. But now once I come at the last, I will just decrease it. Okay? So here you guys can see a slanting graph over here. Okay, now let's go So if
you do want to increase it, or let's say if you
do want to move this one right over
here a little bit, you guys will be able
to see the difference. So, yeah, I hope you guys have understood that how you
can work right over here. And also directly, you
guys can actually put out the fade in or the fad
effect from here itself. Okay. So there are also
different options. Like if you want
to enhance voice, if you want to reduce the voice, and here you do have the
voice changer option. Okay? There are different kind of voice filters over here. Like if you want to actually get Some speech to a song. You guys can also do that. And also, you guys
can actually maintain the speed of that
particular audio as well. Okay? So once you're happy, once you're done
with this thing, you guys need to export. So from here, also, basically, you guys can actually export. Otherwise, you guys can
just click on menu. Let's go to file, and from here, you guys can click onto
the Export option. Okay. So now, from here, you guys select the file, where do you want to save it? Let's go to DTO. From here, let's
choose my rest file, so I'll just select this fit. And over here now if I do
want to edit my cover. So I'll just click
on Edit cover, and I'll just keep
this particular frame. Let's click on Edit. And over here, you guys can
see that I can actually have a cover design right over
here in CAP Cut itself, okay, which is such a great
feature by CAP Cut, okay? So here you guys can see
there are a lot of things which you guys can actually
use for working out. Okay, so I'll just
wait for this one, and I will just click on Sam. And this one will basically turn out to be my cover page. Okay? So I will just rename this
one you mastering key frames. Okay. So I will come here. I will just write
mastering key frame. And now you guys can check out that what is going to be the
resolution of the video, What is going to be the codec, the format, and also the frame. And once you're happy, you guys can click on Export and this particular file
will get exported. So let me just
export this one and let me show you the
final result over here. So here as you guys can see that it has actually got
downloaded right over here. So I'll just click on Cancel. Let's go to my resource
file, from my PC. Let's go to Dektop, F here, let's go to my resource file, and it is being saved
as mastering keyframe. Okay? So let's come here. Let's go with large icons. And over here, you guys can
see that I do have the video. Okay. So from here, now let's click this one. And here the video
will be played. So let's come here.
Let's check this one. And now, if I just play you guys can see
how it actually looks. So, yeah, I hope you
guys have understood how you can actually
master key frames, how you can work in your audio, as well as in your video. So I hope to see you all in
the next chapter till then, take care and goodbye, everyone.
5. Simple mask transition: Hello, everyone, and
welcome you all to another chapter of
the Advanced CAP cut for Video editing Tutorial. So now we are on
our Chapter four, where I'll be showing
you guys about simple mask transition
in CAP cut. Like how you will be
able to transit between two videos and how simple is that using
key frames and stuff. I'll be showing you guys about
that over here in detail. So let's not waste time, and let's get started. So over here, as
you guys can see, now I'm over here in basically
the interface of cap cut. And from here, now instead of importing any kind of
videos, let's say, if I just go to stock material, on the stock material, you guys can see that I do
have different kind of videos. Okay? And from here, let's say if I do want to
search, let's say, Man. So I'll just come here. Let's search for man
right over here. And what I can also do
is let's type walking. Okay, so I'll just have put
two of these key frames, which will show me that someone is basically walking
right over here. Let's download this
particular video, and also let's come here, and let's download
this particular video right over here as well. Okay. So now from
here, basically, what I can do is, let's say I do want to import it over here. Okay, I will just import this particular video
right from here again. Okay. And also at the same time, I will just go to this
positioning option. Let's say I do want to position it over here onto the x axis. Okay? So let's come here. Let's just position it towards the x axis right over
here. In one side. Okay, so let me just
place it right over here. And at the same
time, you guys can just scale this
thing up as well. Okay? So if you do
want to scale it up, Okay, you guys can come here, and you guys can basically scale this one up from here as well. Okay. So now, once you are done, with this particular part, now, if I just play this video, ok, you guys can see how this particular video
actually looks like. Okay? So if you now do
want to move this one up, you guys can actually come here, and you guys can basically move this thing up right over here. Okay? So from here, now, I can just take some
other video which actually suits it better, or what I wanted to do. Let's say if I just
place this one, okay, because I want one
particular place to actually have one, or let's go. Let's go filter and let's
filter it only for videos. Okay? So let's come here. I want a person walking from one side going to another. Okay? So in that particular case, now what I need to do
is, let's come here. Let's delete this
particular video. And from here, now I need to
search that right over here. Okay. So as you guys can see, I do have this particular video, let's say, I do have this particular
video right over here. Okay, so I can just use it. Use one from here, let's say. Let's come here. Let's download this
particular video. And over here, you guys can see this is how it
actually looks. Let's import this video right
over here on my screen. And now, over here now, if we do want to scale
it up, let's come here. Let's just scale this video up. Let's move this one
over here in one side. And now let's play this thing
up right over here again. Okay? So in that case, if you do want to
increase the size, let's say if you do want to move this one eventually
right over here. You guys can also do that. Let's come here. Let's increase the size. And from here, what you're going to do is,
let's play this one. And now you guys can actually move this one slowly
onto the sides. Okay, so according to the frame, I have to work right over here. Let's place this one
at the beginning. And from here now, what I'm going to do is, I'm
going to come here. And I'm going to put up a key frame right over here
at this particular position. Okay. But now, eventually, once I just move over here, what I want to do is, I want to select this particular frame. Okay? Let's say, I will just take out this particular video, and I do want to place the
video right over here. Okay, otherwise,
let's come here. Let's move out this
particular key frame, and let's see how
it actually looks. So I will just play
this thing up. And here you guys
can see that it is just moving onto one side. Okay? So from here,
now, basically, if you do want them to
go out of the screen, you guys can actually do that
right from here as well. Okay? So in that
particular case, what I need to do is, I need
to scale this thing up. Or let's say, I
will just come here or let's place it at the
beginning. And over here. Now, once I come here, let's say I will just
add up a key frame. But once I come to
this particular part, okay, I will just scale this
thing up a bit as well. Or let's say, what I want
to do is let's go back. And now let's play
this thing up for now. Okay. So I can just move out the position
from here as well. L just move them
out of the screen. But at the same time, what I can also do is, let's come here. And from here, what
I'm going to do is, I'm going to duplicate
this thing up. Okay? So for that, let's right click. From here, let's click on Copy
and Control V to paste it. Otherwise, you guys
can come here and basically paste this
thing over here as well. Okay? So let's come here. Let's click on Copy. I'll just come here, I will just paste it right over here. And I'm going to
put this thing just on top of this particular video, which I have right over here. Okay. But now I will just select this
top particular frame. And now from here, let's go to remove background. And from remove background, what I'm going to do is I'm
going to go to auto removal. Okay? So it only actually
removes the human figures. Let's see how does
that basically work. Okay. So now it is actually removing the
background right over here. So I'll just wait for some time. Okay, here you guys can see that this particular thing
is getting processed. So I will just wait
right over here. And now if I just turn this
off, here you guys can see. Now, it did a pretty good work. So now if I just
play this thing, here you guys can see
how it actually looks. Okay? So now I will just play this thing up
right over here. And now Ah, the next thing, what I'm going to do is, I'm going to come
here, and I'm going to select both of these frames. And after that, I am going
to make up a compound clip. Okay? So once I do have
this particular frame, let's try And once this
thing is basically done, let's bring my playhead. And let's go to the first video, which I do have imported, which already do have the
background over here. And what I'm going to do is I'm going to go to the
masking option. Okay? So, under masking, you guys can see there
are a lot of options, but for me, I'm going to
take out the horizontal one. Okay. So I will just take
this horizontal one, and at the same time, let me just come here and let me give this things
up a rotation. Okay? So let me just go
with this 270 degree. And if you do want
to position it, let's come here and let's
position this one accordingly. Okay? So from here, now, what I'm going to do is
I'm going to come here, and I'm going to basically add a key frame over here
in the position. Okay? So now, let's move
this one up a few frames. Okay. So over here now, let's move this one
up a few frame. And over here, again, if I do want to give
this one up a key frame, I will just add a key
frame right over here. And at the same time, let's come over here. Okay. So let's come right
at this particular point, so this particular
key frame is added. And let's play this one
up right over here. And as you guys can see. Slowly, it will just go
out right over here. Okay. Slowly, it
will just go out, let me just come here. And let me just play
this one accordingly. Let's just totally change the
background quite like this. Otherwise, let's just
keep it right over here, and let's put up a background
right over here as well. Okay. So here now, let's see how it actually looks. So if you just play this one up, slowly it will just come here, and slowly it will just go and choose up a
different frame. Okay. So if you come
right over here, if you do want to
increase the feather, a, you guys can come here. Let's go for a feather of six. Okay? And now, So now over here, once you have done
this particular thing, let's say, I will just
come right over here. Let's play this thing up. But at this particular point, what I'm going to do is, I'm going to come here and I'm going to work
with some key frames. Let's say I have come here and I do have used this
particular keyframe. Let's delete this keyframe, which I have over here at. And now let's just come here. And over here, now,
let's just move it. Okay? So let's come here. Let's move up to this
particular keyframe. And again, let's come here. Let's just move this thing
at this particular point. And what I'm going to do is I'm going to come
here and I'm going to decrease it right
from here as well. Okay? Let's say at
this particular point. But now let's play this one up. And now over here again,
what I'm going to do is, I'm going to come here and I'm going to add up a keyframe. Let's move this one up. And let's add up this particular keyframe
right over here back again. And lastly, what I'm going to do is I'm
going to come here, and I'm going to go out all. So let's come here.
Let's play this thing. And slowly, you guys can
see it is just tracking. And over here now, it
will just totally go off. Okay. So now, once
you're done with this, let's select both
of these frames, and you guys can right click, and you guys can create a compound clip out
of both of this clip. Okay, which will actually merge both of this
clip right over here. So let's click on Alt
and G from our keyboard. Okay? So Alt and G
from our keyboard, and this particular thing
has basically been created. Okay, so over here, you
guys can see this is how this particular compound
clip basically looks like. Okay. So over here, now, what I'm going to do
is let's come here. And from here, let's
move this one on top. Okay. And now let's search
for another background. Let's go with nature. Okay, so I'll just search
for nature over here. And if I just click on Enter, you guys can see that I do
have all of these options. Okay? So let's say
I will just take this particular video or
let's say I will come here, I will just take this
particular video, and I can just come here and I can just place it
right over here back again. Okay, so if you do want
to increase the duration, you guys can come
here and basically increase the duration
right from here as well. Okay, so here you guys can see the changes right over here, and slowly it will
just move out. So this is how you guys
can actually work, Let's say if I just increase the size of this particular
footage, I can also do that. Let's come here, and this
is how it actually looks. Here, you guys can see
how it actually works, and you guys can actually create a mask transition right
over here itself. Okay. You guys can use
any kind of background, whichever you like over here. Let's say if you do
want to just put out any image as a background, not a video exactly, you guys can also do that, okay? So let's say, if I just go with this one or this
particular footage. Okay Let's come here. Let's delete this one. And from here, now
let me just put out this particular video
right over here, and let me just
decrease the spacing. And what I'm going to do is now if I just play this one up, here you guys can see
how it actually looks. So this one basically
looks better, I believe. And now from here, once I'm done, let's
add up an audio. Okay so you guys can just
come here on the audio. And under sound effects, let's say I will just put water. Okay. So as I do have this particular thing right
over here in the background, so I want to put out some
water sound over here. Let me just download this one, and let me just
play a few of this. Let's see how it
basically sounds. And after that, I can actually apply those particular
things right over here. So now let's play this one. And yeah, this one
sounds better. And what I can do is
I will come here, I will just place this
thing right over here. Again, shift to Zoom to fit
over here in the timeline. And guys make sure that
when you're working, that you are basically using different kind of
shortcut keys, okay? Because once you
use shortcut keys, it actually helps you to basically go with
the same distance, or it actually helps you to
do your work quite easier. Okay. So now once you are done, let's play this thing up. So, yeah, this is how
it actually looks. And now let's export this one. From here, let's
click on Export. And from here, basically, let's change the name. Okay. So I will just do this
one as mask nition. And after that, I will just
check all these things out, the video resolution,
the audio resolution, and let's click on Export. So this particular video has
basically been exported. Let's cancel this now. Let's go to my resource
file, right from here. Let's go to Dektop. Let's go to my resource file, and here you guys can see. I do have this particular video
known as mask transition. So over here, I will just play
this particular thing out. And here you guys can see
the full view of my video. Okay? So the transition
looks quite great. And now I will just
close this thing out. And yeah, I hope you guys have understood
this class on how you can actually create a
mass transition in CAP Cut. So I hope to see you all
in the next chapter. Where we'll be learning
more about CAPCuT itself. So see you all, take
care of everyone.
6. Blurring a face or object: Hello, everyone, and
welcome you all to another chapter of
the Advanced Cap cut for video editing. So now we are on our
Chapter number five, where I'll be showing you
guys how you can basically blur a face or an
object in cap cut. So we'll be learning how to
do that right over here. So let's not waste time
and let's get started. Over here, as you
guys can see now, this is basically the home page or this is the
workspace of CP cut. And now the first thing,
what you're going to do is you're going to
come right over here, and you are going
to import a video. Okay? So let me just take
this particular video itself, which I have showed you
in our previous classes. And this one is basically
a guy just walking around. And over here, if I do want
to blur this thing out, let's first come here, and let's import this video
over here into my timeline. Okay. So once I do have
added Here you guys can see in my import panel over
here, you guys can see. This particular video is
showing me as added, okay? So again, to do those
thing, let's come here. You guys can just check
out the whole video. If you do want to
just stream it. Let me just go
around 15 seconds. Okay? So the total duration is now 15 seconds and seven frame. Shift Z over here to just Zoom to fit over
here in the timeline. And well, there are
different ways of how you can actually come here and you can actually you can come here and basically, you guys can put out your blood. So one simple way is if you just go to text, and from text, let's go to add
text, and from here, let's say, if you just take
up a default text box. And over here, now, let me just add up a full stop. So if I come here, let me just add this
thing up and over here, let's select this, let me just
add a full stop over here. And after that, what
you guys can basically do is you guys can just
increase the size, and you guys can just basically put this particular
thing on top. Okay. Let me come
right over here, if you do want to
select this one, and if you do want to move. Otherwise, there
is another way of how you can do is,
let's select this one. Let's delete this first, and if you just go over
here into stickers, you guys can just take any
kind of sticker from here, and you guys can basically put that kind of shape
on top over here. Okay? So let me just die for shape. Okay? If I just click on Enter, here, you guys will be able to see that I do have
a lot of shape. Let's come here. Let's take
this particular shape. And now, if you do want to bring it,
you guys can come here, bring this particular
sticker right over here, and you guys can
increase the size of the sticker right
from here itself. Okay? So let's say I will
just place this sticker. And now you guys can just decrease the size of
this particular sticker. Let's say you guys can just
keep it right over here. Okay? And after that, go to the effect
option and flow here, if you just search for Blur. And if I just click on Blur, I will have different
kind of effects. So F here, you guys
can just choose one. And after that, if you do want
to paste this one on top, you guys can come here,
and you guys can basically paste this one right
over here on top. Okay? So if you just come here, it will just come
onto the whole page. The same way, let's
delete this one. Let's delete this
particular one as well. I will show you guys the
most basic way to do so. So you guys first right click, and if you want to copy, let's click on copy
from here and again, now I will just paste this
one over here on top. Okay? So I'll just paste this particular thing
right over here on top. Now, I will just select
this particular layer. And from here, now I
will just go to mask. Okay? So once you're coming here over here in
the mask option, let's go with circle. And here, basically,
you guys can see, you guys can actually
crop this thing around. Okay? So let's come
right over here, match this particular size. And now you guys can just
click on this blur effect, and you guys can put it over here into this
particular footage. Okay, let me just come
over here at the starting. And from here, let's
leg this blur option, and you guys can eventually change its size
from here itself. Let me just put this
one over here on top. And now, what you're going to do is you are going to
play this thing up. Okay? Let's say if I just bring this one over here onto
this particular frame, I will just move
this one as well. But for that, now, what I need to do is,
I need to come here. And I need to put
out a key frame. Okay. So this is the
starting keyframe. Let me add a keyframe
right over here. And let me just play
this particular video. Okay? And now, again, I will just change
its positioning, and you guys will
notice that here, automatically a key frame
is basically being added. So I'll just continue
this process. Let's say I will just
come right over here. And now over here, I will just move this thing
around over here again. Let's move this one. Let's right over here. And again, what I'm
going to do is, I'm going to come here, place
it right over here again. And now let's come here
at this particular point. And now I'm going to move this particular blur
right over here as well. Let's come here. And now again, I will just
place it right over here. And you guys can see, I'm
just changing the position as the blur is being
applied all by itself. Okay? So I will just come here. Let's place it right
over here again. And now over here. I will just place
it exactly here. And lastly, let's come to
this particular position. Okay Let's right over here. Let's add a key frame. Let's go to this position, and let's add a key frame
right over here as well. Okay. So now, if I just play
this thing out, let's say, let's come here, and
here you guys can see that particular face is being
blurred throughout. Okay? So you guys can see it is
being blurred like this. You guys can come
here, and you guys can basically work with those
key frames accordingly. So this is how you guys
can blur your face. Also, if you do want
to increase the size, you guys can come
here and basically, you guys can increase
the size accordingly. Okay? So let's come here. Let's increase the size. And here now you guys
can see that let's say I will just click
right over here. Now, let's play this thing up. And here you guys
will able to see that particular face is being
blurred right over here. Okay so you guys can see now it actually
looks quite good. And you guys can make some small adjustment here and there, but this is the possible way of how you can actually
do this particular thing. Okay So once you are done, if you do want to
come over here, if you instead of
this particular mask, if you do want to use other
kind of mask or you want to put out a rectangle in case of a circle, you
guys can do that. And manually, if you want to increase the size
and decrease the size, you guys can also do that. And at the same time, you guys can also give them
some rotation. And let's say, if you want to reverse this
particular action, you guys can click onto this
reverse option over here. And if you do want
to reset everything, you guys can come
here and click on this button to reset
each and everything, o, let's say to a certain
point, I need this blur. And after that point, I don't want any blur again. Okay. So for that, now, you guys can click on to
add a keyframe as well. Let's say, till here.
I do want the blur. But after that, I don't
want the blur again. So in that case,
let's come here. Let's add up a key frame. And from here at this
particular point, I will just put out another key frame where I can just change each
and everything. Let's say I will
just put on none, or let's say I will
just put out a star. Okay? So I will just put out a star effect
right over here, and I can just do that. Let's say I will just
decrease the size from here, and I do want to put this particular star effect
over here on top of the face, then I can just put out this effect right
over here again. Okay. So if you do want to go back again, you
guys can come here, and you guys can just go back And now let's just
play this thing up. And here you guys can see. This is how the blur effect
is basically going to work. So here you guys can see. I do have my blur
effect right over here, and my video right over
here will basically end. Okay? Like, if you
do want to hide any kind of identity
of any person, you guys can actually use that. Also at the same time, once
you have applied this one, and let's say if I
just click outside. Okay, you guys can
see that the edges are kind of bit sharp. In that case, if
I do want to make those edges a bit dull, I will come here and let me
just add up the feather. Okay let me just
add up till five. And let's come here, and
here you guys can see. Now, let's play this
thing up, okay? So let me just play this
one up right over here, I do have added a
feather of five. So you guys can come here, and you guys can basically do
this one over here as well. So if you do need to make
any kind of changes, you can come here and you can just work on
with this keyframes. Let's say this particular
keyframe over here. And if you do want to
work, Guys can come here. Let's say I will just play
from this particular part. And now over here,
you guys can see. Now this one looks
perfect, okay? So I will just end this one. And now I will just export
this particular file. Okay? So for that, now, you guys can go to export, and you already
know how to export this particular file
right over here. Okay. So in next class, I will be showing you guys
how you can actually turn a text into a voice file. Okay. So let's not
waste time and we'll move on to our next
class using the same video.
7. Text to voice feature: Hello, everyone,
and welcome you to another chapter of
the Advanced Cp Cut for Video editing Tutorial. So now we are on our
Chapter number six, where I'll be showing
you guys how you can actually turn TX
to voice feature. Okay? So we'll learn how you
can actually put up a text, then you can just change
into a voice over here. So let's not waste time, and let's get started. So over here, you guys can
see this is the same frame using which we work
into our last class. Okay? So over here,
now, basically, if I do want to come
here and if I do want to turn up a text into a voice. So for that, what
I need to do is, I need to go to the text
and over here, now, I need to go to this AI
generated option, okay? So here, you guys
can actually create amazing text effects with
simple kind of prompts. Otherwise, you guys can
basically go to add text. And from here, now, you guys can basically add this particular text
right from here. Okay? So once you do have added
this particular text box, basically, you guys can just
write your text around. Okay? Let's say I will come here and I do
have my text box. From here, now let's change
the color of the text. Let's say you also want the
text to be in your page. So now from here, you guys just
manage all of this, like what kind of font
are you going to take? Let's say I will just
take this rbi one. And what I'm going
to do is there he goes to his journey. All alone. So if you do want to
write it over here, you guys can write it
down over here as well. There he goes to his journey
all alone and full stop. You guys can write
don't know when will he return back to home again. Okay? So you guys can just
type this thing around. And let's say, now what you want to do is, let's come here. Let's just give out a space. And after that, let's say you do want to put out
this bubble effect. You guys can also do
that over here if you do want to put out any
kind of bubble effect, but what we are going to talk about is basically
the text to speech. Okay. So for me, I will just click on text to speech Option. Right over here. And now, whatever text did
you have right? You guys can just
check out which one of the text or the speech
style you want to use. Okay? So here,
let's say, Jessie. Let's try to hear
this one out, a? So you guys can just
click on Start reading, or let's say there are
different options, okay? Like serious female. Do you want a voice of a peaceful female or here are also
different options, okay? So on top, basically, you do have the
female voices mostly. Okay? But over here, you
do have the normal male, the charming male,
here different kinds. You guys can just check
out right over here. So once you have selected,
okay, let's say, once you have selected which
one you want to work with, you guys can come here,
and you guys can just click on Start Reading. Okay? So now, let's
slick right over here. Let's bring it back
on to this place. And now let's select this one. There he goes to his
journey all alone. Don't know. When will
he return back to home again? Here
you guys can see? There he goes to his
journey all alone. Don't know, and will he
return back to home again? And if you do want to make
any changes. Let's come here. Let's go to this
text option again. Let's go to basic. And from here, now you guys
can just put out a coma. And what you can do is now let's go to text to speech,
and let's go to So. There he goes to his
journey all alone. Don't know when will
he return back to home again. So here. There he goes to his
journey all alone. There he goes to his
journey all alone. Don't know when will he
return back to home again. So here you guys can see. There he goes to his Jamey home. So he ey. Go to history. There he goes to his
journey all alone. There he goes to his
journey all alone. Don't know when take this
his journey all alone. Don't know when he return? Or let's go with the goes
to his journey all alone. When he re on this
particular option, known as start reading. Okay. So it's basically applying the text to speech
right over here. And as you guys can see, it had already done
it right over here. And now, what you can
do is if you do want to increase the duration,
you guys can't. But all you can do is
you guys can come here, and you guys can just place this one right at some
particular point. Okay? So now, if I just play
this video all along, let's come here. Let's play. There he goes to his
journey all alone. Don't know when will he
return back to home again. So once you have this text, let's say now I can just
delete this one as well. Okay? So let's come here. Let's click on Delete. And now, if I just take
this radicular audio. And if you do want to
enhance the voice, let's click on Enhanced voice. And also, you guys can
basically enhance a C here. It's basically processing
the voice right over here. So I'll just wait. And now
let's hear this one out, how it actually sounds. Okay? There he goes to his
journey all alone. Don't know when will he
return back to home again. So, yeah, and once you are done, if you do want to fade in, let's say for 0.4 sex. And over here, I will just put 0.4 sex right over
here back again. Okay? So let's see how
it actually salve. Here he goes to his
journey all alone. Don't know when will he
return back to home again. So yeah, this is how you
guys can actually work. Okay. And if you do want to increase the volume
and stuff over here, you guys can also do that
right over here back again. Let's keep it right over here. And from here, now I
will just decrease. And now let's add a key frame. And over here, now at
this particular point, what I'm going to do
is let's come here. Let's just bring it at
this particular point. And what I'm going to do
is I'm going to add up another keyframe just by
moving this one up. Okay? So I'll just add one
keyframe right over here. And the same way, let's bring it at this
particular point. Let's add this
particular keyframe. And lastly, I will just
put it right over here, Let's decrease it at
this point over here. Let's add up a key
frame over here again. Okay. So now, I do
have applied this one. Let's come here. And let's
see how it actually sounds. There he goes to his
journey all alone. Don't know when will he
return back to home again. So, yeah, this one sounds
quite professional. And this is how you
guys can actually use this particular option of
this basic audio setting. But now, if you do want to
change this particular voice, let's say, I will go to
Voice changer Option. And here, you guys can basically change
the voice as well. Okay, There he goes to his There he goes to this
journey all alone. Don't know. There he goes
to this journey all alone. L et's to his journey all alone. Let's go with There he goes
to his journey all alone. Okay. Don't know
when will he return. There he goes to his
journey all alone. Don't know when will he
return back to home again. So basically, over here, you guys can actually
change the voice as well. Okay? So different kind of
characters are here, okay? So you guys can actually
use different characters, different kind of
voice filters as well. Okay. You guys can check
those things out if I just goes to his
journey all alone. Don't know and will he
return back to home again? So once this is done, now let's export this
file, and for export, let's go to this export option, and you guys can just name this file and basically
export it right from here. So I hope to see you all in
the next chapter till then, take care, and
goodbye, everyone.
8. Cinematic color grading: Hello, everyone, and
welcome you over to another chapter of
the Advanced Cap cut for Video editing Tutorial. So now we are on our
Chapter number seven, where I'll be showing
you guys about cinematic color
grading in CAP Cut. Like, how you will be able to do some cinematic color grading. In CAP Cut, we'll be learning about all those options
right over here. So let's not waste time, and let's get started. So over here, as
you guys can see, now I'm here in the home
page of the CP cut. So the first thing,
what you're going to do is you're going to
import some videos. So let's click on Import, and I'll come down
and over here, in my resource file, I will just select all of
this using my control key, and I will just click on Open, and those videos have gotten
imported right over here. Okay, so over here, now I will work with these
three footages. But now Let's say I don't want to import the
whole thing out, okay? From here only, I
do want to trim, and I do want to import. Let's say I will just choose the starting point of the video, as well as, I'll choose
the ending point. The same goes with this particular video.
Let's come here. Let's select this and
over here as well. Let's select this video
from here till here. And now I will just
click on Enter. Over here, and you guys can
see all the three videos which I do have imported
has come right over here. Okay? So now, if you do want
to check those things out, you guys can come here, and you guys can just check
all of this video out. Let's say, this is
the second video, and this one is basically
the third video, which I have over
here on my street. Okay? So now let's start the
editing right over here. So to do that, the first thing, what you need to do is you
need to come here and you need to check this
speed of the video. So now you guys can see the total duration of
the video is 43 seconds. So let me just play
it right over here. And what you guys can do is
you guys can just click on Shift to fit it over
here into the timeline. Let me just decrease
the total timing, Let's say let's come
right over here, and let me just keep
this particular part. Now I will just stream a lot from the starting.
Let's come here. Let's stream. And from here, now let's say, I want to just zoom from this
particular part. Let's see. Let's come here and from here. I do want to have
till this much. Okay. So let's come and let's have this
video till this much. So now it is around 32, and let's click on
Shift Z to Zoom to fit over here
in the timeline. So if you just look at
this particular video, here you guys can see that this particular video
is kind of slow, a? But over here, you guys can see actually this
one is showing me that this one is basically
it is in its normal size, okay or its normal pace. But over here, also, you guys will be able to
see that this one also is in a bit of slo
but not that much. So I do have downloaded
this video from pexels.com. So the first thing what
we need to keep in mind is we have to work
on with the speed. Okay, as I do want to do some cinematic color
grading in the sense, we need to make
sure that to create a cinematic grade footage, we have to work with a lot of things like the speed
and stuff as well. So from here, now, let's
assess the first footage, ok So now once I come right
over here, let's say, I will just come to this
particular position, and I will just cut. Okay. So let's come here. Let's go to the split option. And from here, now I will just split this particular footage. And now what I will do is I will again take this selection tool, and I will just select this particular part or
let's say I will come here, and let's come to this
particular point. And now let's split it
right over here again. And you guys can use the
shortcut key as well. Okay, let's come here, and let's just look at this particular footage
over here as well. Okay. So here you guys can see that I do want from
this particular part, let's say from this
particular part till here. Let I will just give this one up a cut exactly at this
particular point, and I will just give
a cut over here. Okay. So till Here. Okay, let me just give up a cut right
over here as well. And once I've given up
a cut, let's come here. Let's now take my
selection tool, so the shortcut key is
A from our keyboard, and my speed tool is now
as a selection tool. Now it have turned
into a selection tool. So by footage by footage,
I can just select, and I can just
change its duration. Let's say for the first footage, I do want to keep this
one right over here, but over here, I will
just come to this option. And four speed, I will just
go to the speed option. And now over here, let's say, I will just increase the speed of this particular
footage. So let's come here. Let's play this one up. And over here, now you guys can see how it actually looks. Okay? So over here, let me just go with two. Okay. So I will just come here. I will just place
this footage as two. And over here, you guys can see. Otherwise, let's go with three, and let's see how
it actually looks. So here you guys can see this particular video or here
the speed now is five x, which I will decrease
in two, 3.5. Okay I'll come here. Let's play this one, and now over here,
you guys can see. This is how it looks. But now again over here, what I'll do is I'll
take this footage, and I will just decrease
the speed, let's say 0.6. Okay let's come here and once this footage
is basically done, you guys can see, here it
is in a lot of slow mo. But now, again, over here, what I'm going to do is I'm
going to two x the speed. Okay, so I'm going to come here, and I'm going to
two x the speed. And let's say how it
actually And now again, over here now, let's try
to check out a preview. Okay? So here you guys can see, I do have slow more,
this pedicular part, but over here now again, it's kind of fast, and I'll just keep it
as the same pace. Okay. But over here now
at this pedicular part, what I'm going to
do is I'm going to decrease the speed,
let's say, 0.8%. Okay, let's come here. So I'll just decrease it by 0.8 or let's say 0.7% over here. And if I just come here and
if I just play this thing up, okay, you guys can see
how it actually looks. Okay? So over here, it kind of looks great. And also, over here, I will just decrease
the speed by 0.4. Okay? So let's come
here and over here, now you guys can see how it actually looks till this much. Okay. So now, This one
kind of looks great. So once you're done over here, you guys might think that, okay, but over here, it
is not that smooth, or it doesn't look that great. Yeah, I well do understand that. This is just the first
part which we covered. But now we are going into more details about this
particular footage, okay? So for that, now, if you do want to use some stabilization in
any of your footage, you guys can come here,
and you guys can basically stabilize the footage
all by itself. Okay? So you guys can come here, click on the stabilize option, and your footage will
basically get stabilized. And also, over here, if you do want to
put the adjustment, you guys can come
here, and you guys can basically adjust this
particular layer. From here as well. Okay? So let's go
to this adjustment. And if you do want to
put the adjustment on top altogether for
all the footages, you guys can come here, and you guys can first take
up a adjustment layer. Okay? So for the adjustment
layer here on top, I will just select this
adjustment option. And under presets,
here you guys can see that I do have
a lot of presets, which I can basically download. Okay? So I can come here and I can just download this
particular presets, and let's say I already
do have LUTs. Okay? So there are different kind of cinematic LUTs which you
can download from here. Okay? So you guys can just
click on Import over here, which will redirect
you into your page, and you guys can apply
those LUTs right over here. Okay? So from here, I will show you guys
about that, like, let's say download free LUT. If I come here and you
guys can see there are very 48 free custom
LUTs for lock footage, and let's say free LUT for Cp cut. Okay. So I'll
just go with CAP cut. So here you guys can see
there is 13 cinematic Lutes. So there will be a lot of these websites which you guys can go and access
if you come down, here, also, you guys will be
able to see there are more. Okay, so you guys can just download those contents,
and afterwards, you guys can just get those files into
your cap cut itself. Okay, so you guys can just search for this one, let's say, Okay, you guys can just download all these
things for free. Okay, so let me just
click here to download. So let's come down, and I will just click on
Download LUTS for free. So let's see this particular
file is of six MB. Okay? So I'll just
wait for it to get downloaded and that I
can basically apply. Okay, so I'll just wait for this one to get
downloaded first. So over here, I am done
downloading this LUT ZIP file. Okay, so what I'm going to do
is, I'm going to come here. I'm going to cancel
this. Cancel this part. Let's close this down. And from here, let's go to my downloads to
check this LUT file. And now, what I'm going to do is I'm going to extract
all of this, okay? So let's come here. Let's
extract this whole file. And from here, now I will
just delete this ZIP file. And let's Cut this one. Let's go to my desktop. Let's go to my resource file. Control V to paste it. Now, from here, let's
click on Import. Okay. So once you
go to import, here, you guys can see
that you do have all of this LUTs, which
you can apply. Okay? So let's see
it in a large icon. Let's say over here, if you do want to
import all of this, so I will just click on shift, select all of it, and I will
just open these things up. Okay? And here you guys can see all these LUTs are
getting exported. So over here, if you do want to see how it actually looks, you guys can come
here and you guys can check those things out
from here as well. Okay? So to check this one. Let's go to this
adjustment layer. Let's click on
customer adjustment. And what I can do is let's
bring this particular layer. And from here, you guys can
just increase the total size. And after that, I will
just click on Got it. And under this LUT under the adjustment layer,
Here, if I click, you guys can see that I do have a lot of LUTs,
which I can apply. So if I just bring
my key on top, you guys can see it is
being applied accordingly. So you guys can actually
apply all these things out. Okay, let's say, if
I just come here, let's apply this particular LUT, and let's just play this thing up. Here,
you guys can see. This is how this
cinematic one looks. And also from here, like you guys can just
decrease the intensity. Let's say by 60%, and over here, you guys can
see, this is how it looks. So this is how it
used to look before. And using the Ts, this is how it looks right now. So this is how it
used to look before. This is how it looks right now, and you guys can just apply
this basic thing accordingly. Okay. So once you
are basically done, right over here,
you guys can see, this particular thing actually
looks quite cinematic. And if you want to actually protect the skin tone as well, you guys can come here,
click on Protect skin tone. It will basically just protect the skin tone
from here as well. Okay? So here you guys can
see this one looks quite cinematic right over here. And again, here you guys can
see it looks quite amazing. Okay. So this is how
you guys can work. Let's say only in one
particular video, I'm going to apply this LUT. But in this particular parts, let's say I will just add
another custom layer, and I will just put this
adjustment to layer right over here and let's place it exactly to this
particular place. But here, in this
adjustment layer, what I'm going to do is
instead of putting in the LUT, individually, I'm
going to work with this temperature tint
saturation and stuff. Okay. So let's say I will just bring my play
head right over here. And firstly, let's look
at the temperature. Let's say I do want to decrease the temperature
at this particular point. Okay? So let's say I will
just change this one. And after that, what I'm going to do is I'm
going to come here. I'm going to increase the tint, and at the same time, I'm going to increase
the saturation. Okay. So again, what I'll do is, I will just decrease
the exposure, let's say, by -5%, okay, -5%. And also, I can just
increase the contrast. Here you guys can see
the background is actually getting a
bit darker. Kay? So over here, if I just
increase the contrast, too much isn't good as well. Okay, so I need
to make sure that I put some details in
my background as well. Okay? So let's say if I just go around 15,
this one looks good. Here you guys can check
out the highlight which actually focuses
on this particular part. Okay. Let me just
lighten this up. Okay. Let's say by
minus h 35 looks good. And also, if you do want
to put out any shadow, you guys can come here, and you guys can basically
put up a shadow of two. Okay? So now, the next part is balancing the whites and the blacks of your
total footage. Okay. So over here, now, if I want to come here, let's say I want to work
on with the whites. I can just increase it. Let's say if I want to darken this whites, I can also do that. And now here it will just
concentrate on the blacks. So over here, I can
just come here, and let's say I will
just go by -4%. Okay? So here that
is how it looks, and if you do want to
sharpen this image, you guys can come here, and basically, you guys
can sharpen this image. If you do want to
increase the clarity, you guys can come here, do that. And if you do want to
fade in and fade out, you guys can also work with this particular
point accordingly. Okay. And also, if you do want any kind of lining
on the sides. Okay. White lining, then you
guys can go to minus, but if you want black lining, let's go to plus ten, and here on the sides, you guys will be able to see that there is some black line. Okay? So let me just
go with -15 over here, and this is done. So after that, here you guys
can come to the HL option. Let's go to green color, and here it will just change the tint the saturation and also the lightness
of the greens, and the same way you guys can work with all these
colors as well. So without the adjustment led, this is how it used to look, and this one is
with more details. Okay? So again, you guys
can come here to the curve. Let's say you want to work
with the green color. Okay? Let's come here. Let's
move this arrow. After that, what I'm going to do is I'm going to
go to color picker, and I'm going to take out
this particular color, and you guys can basically drag this one down a little bit, let's say, or I can come here. I will just keep it
right over here. And at the same place, if you do want to put
out different color, you guys can actually do that. Okay, So the same
way, let's come here. Let's go to the blue. Let's
take this color picker. Let's take this
particular color. And now over here, I am going to adjust
it quite well. Okay, so let's increase
the blues over here. Let's add a bit and increase this one a
bit over here as well. So this is how it
used to look before. This one is with more details. If you just play
this one up as well, you guys can see the cinematic
view right over here. So you do have just
changed up the color. Okay? Again, now let's
click on custom adjustment. Let's bring this
adjustment layer right over here in one side, and let's place it. And now let's bring my
playhead over here as well. So let's go to adjustment layer. Let's go to basic one. But now over here, let's put this one
at the beginning. And what I'm going
to do is I'm going to increase the temperature. Okay. Let's go with 25. And at the same time, what I'm going to do is
I'm going to come here. Let's decrease the tint, and I will just increase
the saturation. Let's increase the
exposure maybe by 12. And over here, I will just
increase the contrast by six. And from here, now I will just
go with minus ten shadow, and over here, I am going to work on with the
highlight as well. Okay, let's go with 20
highlights, and for whites, if you do want to decrease it, let's go with -15,
and you guys can come here and concentrate
on the blacks as well. Okay. Let's go with minus two, yeah, minus two is fine. And now over here, if you do want to apply any get, you guys can come here and
let's say I do want to apply Vignet of minus five. Okay? I'll just apply
a minus five over here. So without the adjustment led, this is how it used to look, but now this one is
with more details. So let's come here and now if
you do want to increase it, you guys can come here, and you guys can just
increase it all by yourself. So let me just put it around 15. So this part is basically done. So the next thing, what
I'm going to do is, I'm going to come
over here and I'm going to put out different
kind of transition. Okay. So to put out different
kind of transition, what you guys can do is
go to transitions option, and from transition option, there are different
kind of transition. So here you do have
the camera transition. Here you guys can see
how it actually looks. And here you do have the
pool transition over here. So let me first download
all of this, okay? So the one which I want, I will just download
it right over here, and I can just put this one
inside the videos, okay? Let's just try to
check out more. Okay, you guys can just stroll, and you guys can just check
this out more as well. So let me just take
this Woh transition, and I'm going to come here, and I'm going to take out this transition and
maybe increase the size. Let's see how it actually looks. Okay. So this is how it
actually looks right over here. And now at this
particular point, let's say, I do want
some simple cuts. So in that case, I can
just put that as well. Okay? So I will just
scroll this one up again. So over here, if I
do want to apply the black fade, let's
bring this one. And over here, I can just apply this black fade onto
this particular point. Let's decrease the
size or the duration. Let's go with 0.3 seconds. And the same way
here, you guys can see you do have this
black smoke option. Okay, so just drag this one
and just place it in between. Okay? And if you do want
to increase the size, let's say 0.6 second duration. You guys can just put this
one right over here as well. Okay, now let's
play this thing up, and let's see how
it actually looks. So let's play this one. And now let's see the
transition over here. And this is how it looks. Otherwise, let's increase
this to 1 second, okay? Be that particular color
is not looking that rate. So I'll just come here and
here you guys can see. This is how it will basically appear right over here
on my particular screen. And once you're done
with this thing, now here you guys can see
there is another transition, and here you guys can
see that I do have this particular transition at this particular point as well. Okay? So if you don't
want to put this one, just delete this one
right over here. And what you can do is
you guys can come here, and you guys can just
go with Black fade. Okay, so you guys can come here, apply this black fade, and you guys can just decrease the duration for 3 seconds. Let's come here.
Let's apply this one. And you guys can apply this. Otherwise, you guys can just
apply this x option as well. Okay. So let's delete this one. You guys can just try Okay, whichever is suitable for you. You guys can just try and see which one
basically looks good. Okay. So let's come
right over here. Let's play this one. And here you guys can see
it basically mixes it up. So the same way, you
guys can come here, and you guys can just put out this transition
over here as well. And also the mixed transition
right over here as well. Okay. So now let's come here, and let's just increase it. Increase the size.
Let's elect this one, let's increase the size. And now let's just
play over here, you guys can see the mixed transition kind of looks great. And also over here, you guys will be able
to see that there is this mixed transition
looking quite great. Okay. So long once you are done with
this particular part, you guys can see that
I will just click on then and now let's put out
this transition over here. And also the same way, I will just play it
right over here. Let's decrease the timing at this particular
point as well. Okay. So now let's
just play this one. And here you guys can see
how it actually looks. Okay? So now once I do have
applied all of these things, the next thing is, I will come here, and I will just go on
to the effects option. And from effects, I
can basically apply a lot kind of effects
right over here, okay? So let's say I do want
to apply some effects which are basically
this horizontal close. Okay, I I do want to apply
this horizontal close, so I can just come here, and I will come here, and I will just close this, and I will just open
this one right up. Okay. So for that,
now, let's come here. Let's apply this
particular effect. And what I'm going to do is I'm going to come
right over here, and at starting, I want
it to open horizontally. Let's play this one. This
is how it should open. And now here, what I'm going to do is I am going to
come right here. And at last, let's
download this one and I do want to close this
one up at the last. Okay? Let's come here. Let's place this one. And at this particular point, I do want it to close as well. Okay? Let's come here. Let's just check out this
close option. Right? Over here, let's just play this. And let's see how it
will basically close. Okay, If you do want
to increase the size, you guys can come here and basically increase
the size as well. Okay. So here you
guys can see this is quite slow. So I will come here. Let me just apply it, and here it will
basically be applied. Now, once this is
basically done, the next thing is out of
this particular places, while the transition
takes place, if you do want to put out different kind of
stickers and stuff, you guys can also do that. Otherwise, if you do want
to use some body effects, there are a lot of
options where you can just use some body
effects as well. Okay? So here you guys can see. Now, if you do want to add this kind of body
effect, let's say, I will just download
this right over here. Okay? Let's just
download this one, and let's bring this one on top. So I do want to apply this particular effect over here at this particular point. Let's come here, and
here you guys can see. You can just apply
this kind of effect. Okay, so I will just
increase it till here. Let's play this one. And this is how it
actually looks. And the same way it
will just go off. Okay? Let's come here. Let's apply it till this much. Okay. So I'll just apply it
over here till this much. And now let's add some audios. Okay, so I will come here. Let's go to this audio option. And under audio, let's
search for fashion. Okay, so I'll just search for this keyword
known as fashion. And here you guys can see that
resources is being loaded. Okay, so I'll just wait
for here sometimes. And now let's just
download this one, and let's play these things up. Okay? Let's come here. Let's first download
all of this. And I'll just wait for
it to get downloaded. So one, this stop one
already got downloaded. So Let's come here. Let's play this one as well. And if you do want to download this as well, you
guys can come here. Click on that download option, and it will also get downloaded. So I'll just wait for this one. And let's see what is the
total duration of my music? I can come here and I can
work on with that as well. Okay. Let me just come here and place this particular thing
right over here. So let's come here.
Let's drag this one, and let's place it
right underneath. Again, what I'll do is shift Z. And now let's just decrease
the size and shaft Z again. Let's come here. Let's
stri this one up. Let's bring it right over here, and let's st it over here again. And once you're done, let's try to see how this
particular video look. This is how my final result
basically looks like. And if you want to
add more to it, like if you do want to add
more type of sound effects, you guys can come here. You guys can go to the
sound effects option, and you guys can just put out different type
of musics. Okay? Let's say I will come
here under sound effect, and I can just search for burst. Okay? Let's come here. And if I just type for burst, you guys will see
that I will have different kind of sound
effects regarding burst. Okay. So let's come
here, let's just play So let's play this one. So let's come here. Let's try to to play
this one over here. So here, let's take this. And what are you going to do is you're going to come here, and you're going to put this
one right over here as well. Okay. Only in the
point of transition. Okay, so let's come here
and let's copy this one, right click, and let's copy. And over here, you guys
can just paste. Okay. So now let's place this
one right over here. And what are you going to
do is right click again. Let's click on Copy. And over here, you
guys can just paste. Okay? So if you do want that, you guys can also do this
one right over here. Okay? So let me just
play this one out. So Let me just
increase the gunshot. And yeah, that doesn't sound or that doesn't look
that great over here. Okay. If I do want
to increase it, let's come to this
particular point. Lastly, what I'm
going to do is I'm going to come here.
Let's delete this. Let's delete this stuff, and I'm going to apply it. A So yeah, this is how you
guys can actually add up music effects as well. Or let's say you
guys can actually add some sound effects of leave. Okay? Let's go with leaf and if you just click on Enter. Okay. Let's type leave. And let's click on
Enter and let's see what are the options
right over here. Okay. So let's just
download this three. And let's see what
are the sound effects available over here. So let's play this one up. And Let's play. Yeah. So let's bring
this one down over here. And what I'm going to do is, I'm going to come here, and then I'm going to play Chief Z. Let's stream this one up. Let's place it right
over here, right click. Let's click on copy. Let's click on paste, and I'm going to paste
it right over here. Okay. Now let's see
how it actually looks. So if I do want to decrease
the decibel, let's say, I can come here and I can
just decrease the decibel, let's say by eight minus eight. Let's come here. Let's put
this one at minus eight. And now let's this thing out. So, yeah, I hope
you guys to have understood this
class on how you can actually work on with some
cinematic footage over here. If you do want to create
this kind of effect. And now the last thing
left is exporting. So let's click on
Export from here. Okay. So let's click on Export, and if you do want
to edit the cover, let's click on it Cover. And now let's select
particular footage. Let's say I will
just take this one. And now I will just
click on edit, and this particular footage will basically be as my cover design. Okay, now I will come here. I will just wait for it to come. And you can also edit it. I will show you guys in
some different class. Okay. Let's click on Save. And this particular thing
is getting saved as the cover image or the
cover photo of my Footage. So now let's double click. And now I'll name this
one as cinematic footage. And now everything else is fine, and I'll just explore it. Yeah, I hope you guys did have understood this
class on how you can actually create a cinematic
footage over here in Capct. I hope to see you all
in the next chapter. Till then, take care
and goodbye, everyone.
9. Smooth zoom in and zoom out effect: Hello, everyone, and
welcome you all to another chapter of
the Advanced Cap cut for video editing Tutorial. So now we are on our
Chapter number eight, where I'll be showing
you guys about smooth Zoom in and
Zoom out effect. Okay? So we'll be learning about all that right over here. So let's not waste time, and let's get started. So over here on my screen, as you guys can see, this is
the home page of CAP Cut. Okay? So from here, basically, if I do want to create
up a new project, let's click on New Project
or Create Project, which will basically
redirect me into my interface right
over here, okay? The first thing is going
to be importing. Okay? So let's click on Import. Let's go to my desktop
file right over here. And from here, let's go
to my resource file, and underneath over here, you guys can see that I
do have these videos. Okay? So from here, let's take this
particular video. Let's click on Open. And now this picular video is being opened right over here. So now from here, let's say I do want to trim
the video a little bit. Okay? Let's say I do want to
trim it around 30 seconds. And now if I just click
onto this plus button, here you guys can see the
total duration of the video is 29 seconds and
28 frames, okay? Because over here, you guys can actually get information
about this video as well. But the thing, what we're
going to work over here is basically that how you will be able to work
with this footage. Okay? Like, how you
will be able to give this a zoom in and
zoom out effect. But before that, if I just
play this video, let's say, here you guys can see
this particular video is not that stable. You guys can see the camera, it's not basically that stable. To make this particular
footage more stable. In that case, what
I'm going to do is I'll come here into
my property spanel. And from my property spanel, let's go to the video option. From there, I will just go
to basic and on the basic, let's come down and over here, you guys can see that you do have that option
known as stabilize. So I'll just stick mark
the stabilize option. And over here, you guys can see it's basically stabilizing. So I can actually
choose what kind of level of stabilize do I want. Okay? The one which
is recommended or the minimum cut or the
most stable available. So let me just give
the recommended one, which is the medium
level of stabilization, which we'll try to
fix out most of the problem or most of the
shakiness of my video. Over here, you guys can see, so the processing
might take some time depending on the size of the video because it
analyzes the whole thing, and then it tries to stabilize the whole video right
over here itself. Okay? So from here now, we will try to understand about that particular zoom
in and zoom out effect. Okay? So let's wait for it. And here it's almost
done 100%, okay? So I'll just wait for this one, and I'll show you once it's
stabilized, how it looks. So here you guys can see. Now, this particular footage
is being stabilized. And now if I just play,
here you guys can see, the video over here has been stabilized to quite
a lot extent, okay? So this one actually
looks quite amazing. Now the next thing,
what I'm going to do is once this is stabilized, let's work with the zoom in and the zoom
out effect. Okay. So first thing, first, let's go to the
starting of the frame. And over here, what
I want to do is I do want to scale this one so up, and now I do want to
get it back as well. So for that, let's come here. Let's go to the scale option. And from the scale option, what I'm going to do is, I'm going to come here and I'm going to just move it
through the y axis, or I will just go
back over here in the y axis right over here
at this particular part. L et me just get
this one at -80. Okay. So now, if you do want to scale this one up a
little bit as well. Okay, let me just
move this frame down. Okay, so I'll just move
this frame down as well. Let me just scale this to 150. So once I'm done
right over here, let me add up this particular
key frame from here. So once I click on key
frame over here, also, you guys will notice
in my timeline that a key frame is basically
being added at the start. Okay? So once I do
have added this one, let's come here a
few frames forward. Okay, so I will just come right over here a few frames forward. And now I'm going
to go back to 100%. Okay? So let's go to 100. And if you just click on ter, that is how it looks, and I'm going to decrease the size quite like
this over here as well. So let me just play
this thing up, how it actually looks. So this one is basically
the zoom in effect, a, like zoom out effect. Okay. So at the same time, if you do want it
to move faster, let's say you want it
to zoom in faster. So this is how you guys
can actually do, okay? And also, after that, if you do want to zoom
out again, let's say, what I'm going to do is, I'm going to come here and
slowly I want it to disappear. So let's say I will come
to this particular point. And what I'm going to do is, I'm going to add another
key frame right over here. And lastly, what I'm going to do is at this particular point, I'm going to make
it as a whole zero. Let's just scale
it down totally. Okay Now let's see
the whole preview. So this is basically the Zoom
in effect right over here. And slowly, it will just
move on as you guys can see. Okay. And last, let me just
bring it right over here. And now let's take a look. If I just play this one, slowly, it will just move out. So you guys can actually use
this one quite over here. Okay. So now, once you are done, if you select this one, Okay, you guys can
basically work. Okay? And at the same time, if you want to add on some animation, you guys can come
here, and you guys can basically add on some
animation as well. Okay, Let's go with this
FAD and Stuff option. Okay, let's go with this one. Okay. Let's come with
this one right over here. So I'll just use this one. And for out over here. Now, what I'm going to do is I'm going to come
right over here. Let's take this one.
So let's come here. And now I will just
take this out again. Otherwise, let's
select this one. Okay, so I'll just
select this one and apply it right
over here again. Okay, so this is
how it will start. Okay? So the same thing, basically, you guys can actually
apply for text as well. Okay? So let's come here. Let's try to apply it on a text. So for that, let's come here. Let's select text.
And from here, now let's zoom in, and let's apply the
zoom out effect. So now let's go to default text, and what I'm going to
do is let's enjoy life. So I'll just use this particular
phrase right over here. And what I'm going to do is, I'm going to select
this thing up. Let's go to the font option, and you guys can just use
this text right over here. Okay. But now, at the same time, what I'm going to do
is, let's come here. Let's change out the color. So Let's come here. Let's enjoy life. Let's go to the font size. And what I'm going to do is, I'm going to come here,
and let's make it 30. And what I'm going to do is, let's come back right over here. Let's place it at this
particular point. And at the same time,
what I'm going to do is, I'm going to come here, and I'm going to place it
right over here on top. So I'll just put this particular
text right over here. And what I'm going to do is, I'm going to zoom in and
zoom out that as well. Okay? So from here, I will just start it a very slow and very
small from here. Okay. So for that, now, let's click on shift. What it will do is it
will just come here, and it will just snap. Okay, so I'll just come
here and I'll just snap. And what I'm going to do
is under this font size, basically, I can just
put out an effect. Okay? Let's say if I
come right over here, Under transform
option, under scaling, you guys can see that I
do have this key frame. Now, the uniform
scaling is open. Let me come here, let me add
this particular key frame, and now let's just
decrease the size. From here, now I will
just decrease the size. And now, what I'm going
to do is let me just come right over here at
this particular point, and over here, now
let me just put 155. 155 And let's click on Enter. Okay. Let's see how
it actually looks. So let me just play
this right over here. And now slowly you guys can see that your text
will just zoom in. And at the same time, if you
do want to zoom out as well, let's come here, and let me just place this right over here. Let me just come
over here again. And what I'm going to do is
let's add another key frame. L et's add this
particular keyframe. And lastly, I do want to
zoom this one out as well. Okay, let me add this one
right over here as 55, and I'll just click on Enter
right over here again. Okay. So now let's see
how it actually looks. Okay? So if you don't
want to see this, so I can come here and I can just turn back the
lock again from here. Okay? You guys can
just come here, and you guys can unlock
this again as well. So for that, now let's
go back over here, and now this is back on again. So now you guys
can just play it. And over here,
now, you guys will see that it will go
down back again. Okay? So this is how
it will actually work. So this is the Zoom in
and the Zoom artifact, at the same time,
let's select this. And from here, if you do
want to do some tracking, you guys can also do that. Okay? And also, for the
opacity, let's come here. Let's click on shift,
and over here, Now I will just decrease
the opacity to zero, and let me add up a key frame. And what I'm going to do is once I come to this
particular part, okay, so I'll just make
the opacity as 100. Okay? So I'll just add this
key frame right over here. Let me just come here and
let me just play this. Okay. And now you guys
can see the zoom effect. And also over here on my text, you guys can see the Zoom
effect quite effectively. Okay? So now, at the same time, let's come here.
Let's select this. If you want to add on some shadow or any kind
of curve interior text, you guys can also do
that right over here. So this is basically about the zoom in and the
zoom out effect, but this one looks a bit dull
because at the same time, what I want to do is, I want to actually put on some
sound effects as well. Okay. So now let's
type zoom over here. Okay? So once I type Zoom
under the music or the audio, you guys can see that over here, I do have a different options. So for that, let's
download this one, and let's try to
om and and om out. So, yeah, let's put this one. So let's come here. Let's place this one over here. And let's place this. Let's come right over here. And now let's play this one. And now, again, what I'll
do is I'll come here. And now, again, I will
just click on Alt, and I'll just
duplicate this one. And maybe at the same time, I will just put it
right over here again. Okay, so now I will come here. I will just select this one. Let's click on Alt, and I'll just keep this
one over here again. Yeah, this one kind
of looks good. I'll just click on Alt again, and I'll just place
it right over here. Now this is basically done, but what I want this is just going to be
the music effect. But now over here, let's go with modeling. Let's come here and
let's type modeling. Let's click on Enter, and let's see what
kind of audios do I get over here right now. Now let's play this one. Let's play this music
up. Let's come here. Yeah, this music sounds good
as well. So let's come here. And now I will just put out my music right over
here back again. Okay now let me just
place it right over here. And at the same
time, what I'm going to do is, I'm going
to come here, and let's I will just
decrease this to 6.5. Okay. So the same way, I will just come here and
just apply the same thing. So let's go with 6.5, 6.5. Let's go to this point
and over here as well. 6.4 is good. And the same way, let's come
down over here back again. And let's go with -6.4. Okay, let's click Enter again and let's see how
it actually sounds. So, yeah, I hope you guys to have understood this
particular class. But this particular site, it's actually looking that I don't have much effects
right over here. This particular place
is looking a bit dull. So to do that, let's go to
effects, and over here, you guys can see that I do have different kind of
video effects, okay? So in that particular case, if you do want to come here, let's say if you do
want to apply any of this or let's say
let's come here. And now, if you want to
have this age glow option, I can come here, and at
this particular place, let's place it over here. Let's increase the size. And after that,
let's play e one of. And, you guys can
see how it gloves. Okay. So you guys
can apply this. Otherwise, you guys can apply
different options as well. Okay, if you want to download
here, you guys can see. Okay? So here, you
guys can see that you do have this particular effect as well, which is the Hallow. So you guys can place
this right over here. Let's select this age glow. Let's select this
particular part. And now, again,
at the same time, just increase the size. Okay. Let's say I will just increase it. Now
let's place this. So this one also gives you
some cinematic loop over here. Okay. Let's say I will just
place it right over here. And again, I will click on Alt and place it over
here back again. Okay, so let there be
some gap in between. So, yeah, I hope this class
was basically clear on how you can actually create a Zoom in and
a zoo out effect. So over here, I do
have make you guys understand about
the sound effect, and also as the main
audio over here. So, I hope to see you
all in the next chapter. Where we'll be
learning more about C. So see you all in
the next chapter. Till then, take care
and goodbye, everyone.
10. Pop out effect: Hello, everyone,
and welcome you to another chapter of the Advanced CAP Cut for
Video editing Tutorial. So now we are on our Chapter 19, where I'll be showing
you guys about the pop out effect in CAP cut. So we'll be learning
about all that over here in this
particular chapter. So let's not waste time, and let's get started. So now over here, as you guys can see, this
is another new project. And what I'm going to do first
is let's click on Import, and I can basically import different kind of
videos right from here. Okay? So as you
guys can see that I do have this particular
video right over here. And at the same time,
what I can do is I can just take some other video
which I do have created. Otherwise, let's say I will just open it up. Right from here. Okay. And also, from
the stock materials. I can actually import a video. So if I just search for here, like the key word of model. Okay? So I just want to show
some modelings over here. Okay? So over here, you guys can see that there
are different kind of videos. Okay, so you guys can basically
use any right from here. So let me just take
this particular video. Okay. So let's go here. This is a image basically, which you can also use. So for that, now, let's try to search for any
kind of horizontal video, or let's say some landscape
video right over here. Okay? So you guys
can actually search. Let's say I will just take this particular
video, and over here, what I'm going to do is,
I'm going to come here, and I'm going to import this video right
over here as well. Okay? So once I do have
this particular video, the next thing is, Uh let's come here. Let's go to my device. And from here, let's import this particular
media as well. Okay? Now, I will just click on Shift Z to Zoom to fit
over here in the timeline. And now let's bring this particular video
at the starting. So now let's check what
is the total duration? It is somewhere around 25 Now I will just decrease
the size of the frames, let's say, I'll just decrease
the size right over here. Let me just play
this frame on top. And what I'm going to do is, once I just bring this
particular playhead over here on top, I'm not able to see
this overlapping frame. So for that, what
I'm going to do is, let's come here,
select this one. Let's select my frame, and now I'm going to
decrease the size manually. Okay, so I'm going to come
here, decrease the size. And at the same time, I'm going to put this
one right over here. Now we need to
understand that we are trying to actually
create a pop out effect. But this particular video, somehow, I'm not basically
liking this video much. So let's go to this
model option again. And from here, let's try to take some video regarding
my key search itself. Okay, let me just take this particular video
right over here. And for now, I will
just delete this one. And let's search. Let's click on this option, and I'm going to place it
right over here on top. Okay? So at the same
time, I will come here. I'll just decrease the size, and here you guys can see how this particular
video looks as well. Okay, so let me just place
it over here in one corner. And once you have
placed this one, if I just click outside, you guys can see
how it will appear. Okay? So this is how it will actually appear just
with a perfect cut. Okay. But at the same time, what I want to do
is I do want to increase the size and over here, now I do want to
put up next, okay? Or this is the next video. So in that particular case,
now, let's come here. Let's select this particular
frame at the beginning. Now I'll just click on shift, and I will just place
it right over here. Okay? So once you
have placed it, let's go down and under opacity, you guys can just give
this up a zero opacity. Otherwise, you guys can just
change its position totally. Okay. So to do that, let's click on Add key frames. And now I do want it
to appear from down. Okay? So one key frame
is already being added. So now I will just
bring right over here. And now I will just bring this particular
video up over here. Okay. So I'll just add
another key frame. And now it's 6.24 frames. And now exactly
around 7.2 frames, I do want it to bring down. Okay. So let's see how
it actually looks. So let's play this one. Let's come here.
And you guys can see that there is a small jump. So let's notice that
particular jump again. And over here now, let's move this one up. And now let's play this. So I will just go back again. Let's delay this one. And now let's delete this again. And after that, I
will just click on this particular option. Over here, and now let's just move this one right
over here on top. So make sure to click on shift to have a perfect
straight lining. Okay, I'll just come here, bring it over here. And after that, let
me just go around a few frames exactly
around seven sex. And now let's click
on this option again. Let's click on shift, and I will just bring
it down back again. So now let's see this
is quite alignment. And here you guys can see. Now you guys can see
the pop out effect. Okay? So over here now, let me just stay at
this particular point. And now over here again, I will just add
another keyframe, which is at 69 sic. And again, what I'm
going to do is, I'm going to come
right over here. Let's say exactly
right over here. And what I'm going to do is, I'm going to click on shift. Okay. Let's select this one. Let's click on Shift, and I'll just move it
on top a little bit. And lastly, let's
come here at the end. Okay, Let's come
right over here. And what I'm going to do is, I'm going to click on this one. Let's click on Shift. Let's go back. Let's click on shift, and now let's move
this one down. Okay. So this is how
it actually works. Let's see the pop out effect. And here you guys
can see it pops out. And again, it pops out again. Okay. So now let's
just pause this thing, and here now let's
try to add out some key frame or
some musics as well. Okay. So before that, let's go to the audio. Okay. And from audio, let's search for pop out. And if I just click on Enter, you guys will be able
to see that I do have a lot of music. So let's go to sound
effects from here. Okay. Let's just
play those things. Okay? Or let's just put the keyword as slush. Okay. So let's see what
kind of music I have. Now, I will come here, and I will just put out this
music at the beginning. Okay? So let's come here. Let me just put out
the music over here. And also at the same time, what I'm going to
do is I'm going to put out different
kind of transition. So let's click on Alt and let's come right over here,
and let's place it. Okay. So once you're done, let's play So, yeah, this looks quite nice. But at the same time, what I'm going to do is, I'm
going to right click. And now I'm going to deactivate, or I'm going to extract
the audio out of it. And I'll select this audio, and I'll just delete this audio, as I already do have
audio with this one, a But if you want me to actually get some
different ones as well, or let's go with pop from here. Let's try to play
these things out. So, let's come here. Let's
try to place this one. So now shift Z to Zoom to fit
over here in the timeline. So now I will just
place it right over here, Shift Z again. And again, it is actually
coming right over here itself. C. So I can come here and
I can just go with 4.6. And also, I'll just go
with 4.6 over here. So let's hear how it fs. One. So yeah, this is basically done. But the next thing,
what is left is, I need to add some
text over here with this B roll particular
footage as well. Okay. So for that, now, first thing,
let's add this one. Let's go to animation,
and over here, you guys can actually add
some animation as well. Okay, so let me just go
with this shake iation. And also under out, let's go with the Zoom in. So yeah, this one
actually looks good. But now again, I'm going to put another text box
right over here. Okay. So for the
text box, again, what I'm going to do is,
let's go to text option. And from text option,
let's come here. And now let's go to this text. Let's select presets, and here you guys can
see that over here, you do have different
kind of presets. And under templates
here you guys can see, there are a lot of templates
which you can use. Okay, so these are some of the nice templates
and mostly used one. So from here, let's select one. Okay. Let's check which one
can we take from here. Okay. And let's take this one. So let's come here. And let's download this one. Ps just come here. And now let me just add
it over here itself. Okay. Now, from here, let's select this text. Let's bring my playhead. And now let's come here, and if you just right click. And if you want to come here, and if you want to
create a compound clip. You guys can do that.
Let's come here. And now I do want to delete
the first paragraph. Okay? So if you do
want to come here, if you do want to delete
the first paragraph, you guys can actually do that. So. Okay? So let's come here. And let's just
select this phrase. Let's go to this option. Right over here. Come here and now
let's write up next. What I can also do is, I can just flute an
exclamation mark over here, and now I can just place
it over here as well. Let me just place
it somewhere here. And if you do want to give this one up a rotation
at the same time, you guys can come here, and you guys can just have a rotation over
here as well, okay? So let's go here. Let's add a rotation. Okay? And here, you guys can
see this one looks good. Okay? So at the same time,
let's select this one. And if you do want
to add up a stroke, you guys can come here, click onto the stroke option, and you guys can
also work with that. Okay? So at the same
time, right over here, you guys can see
if you do want it in a work sens black option. You guys can also do that. Otherwise, totally,
you guys can just give this one a rotation
right over here. Okay? Let's come
here and from here. Now, let's just place
it on the site. And let's see how
it actually looks. Let me just decrease the size. Yeah, let's decrease it
right from here again. Now let's click on shift. And at this particular point, let's see how it appears. Carry a So yeah, this one kind of looks good as well without any animation also. This one basically
looks quite good. Carry a So yeah, once it is done, if you're
happy with this one, you guys can see that now
I do have actually put out some sound effects over here as well in the pop out place, and now this is time
for some animation. So over here, I do have applied some animation
over here already. Okay? So lastly, let's
select this one. And if you want to work with any kind of blend
and sf or opacity, you guys can come here and work with those options
right over here again. Okay. So now, once you
are basically done, So now over here as this is done at this particular
point, okay? So this one actually
looks a bit too dull. Okay, this particular area. So for me, let's put
some kind of effects. So let's search
for pop over here. And under Pop, you guys can see that I do have a lot
of these options. Okay? So there is video effects as well as there
is body effects. So you guys can come here. And you guys can actually
download from here as well. You guys take this
cartoon option over here. Here, you guys can see
there is cartoon one, there is cartoon two. Okay. And there is this pop
option as well. Okay. So now, what I can
do is first thing, I can come here, and I can just decrease the
level of the audio. Okay. P. And what I will
do is I'll come here, and I do want to put this
one at some certain points. Okay. Let's say I will just
put it right over here. And now let's click on Alt. Let's place it over here. And let's click on Alt, and let's place it
right over here again. So now let's see how it
actually de Or also, let's go with this
lightning effect. Okay. Let's stay
over here. Okay. So now I will come here. Let's put out this lightning
effect over here again. Let's just place it exactly the same place where I do have
put that cartoon effect. So let's come here.
Let's select this one. Let's click on Alt, and let's place it over
here on top again. So now let's play this. D. Feel very. S. So yeah, this
particular part. Let's click on Alt, and over here, let's
put in the same way. Let's put it right
over here back again. Okay. So yeah, I hope you guys to have
understood this class on how you can actually work on this particular video
using the pop out effect. Okay? So I do have used this
lightning effect over here. I do have basically used the pop effect
over here as well. So once you are done, you guys can see what is
going to be the texture, what is going to be the filter. And once all those are fine, you guys can just go
and click on Export. And over here, let's
change out the name as pop out effect. So I'll just click
on pop out effect, and here you guys
can see is done. Let's click on Export, and this particular
video will get exported. So I'll show you guys
about that as well, but let's wait for some time
for it to get exported. So, that this particular video
has been exported as well. So now let's move on to my player where all this file basically will get saved
in my resource file. So from here, let's search
for the pop out effect. Okay. So here I do have
the pop out effect, and here now let's view
it on a large scale. Okay, let's come here. Let's just decrease
the audio from here. Let's go with 50%. And now let's play
this particular video. Is. So yeah, I hope you guys have understood this
class on how you can actually create a pop out
effect over here in Capct. So see you all in
the next chapter till then take care and goodbye.
11. Rotational animation with keyframes: Hello, everyone, and
welcome you all to another chapter of the Advanced CAP Cut for
Video editing Tutorial. So now we are on
our Chapter ten, where I'll be showing
you guys about rotational animation
with key frames. So we'll be learning
how you can actually do some rotational animation using these key frames in CAP cut. So let's not waste time, and let's get started. So over here, as
you guys can see. Now again, I'm over here in
the interface of CAP Cut. So first thing, first, let's go to the import option,
and from here, let's import the videos
which I have over here. So once you have imported
these particular videos, the next thing is,
let's come here. Let's add these videos up. Okay? So let's just come here. Let's select this
particular video, and I will have all
the properties of this particular video on the
right hand side top corner. As you guys can already
see, it already appeared. So if I come here and
at the same time, if I just decrease the size
of this particular video. Okay. Let's say minus 1184. Okay, let me just go
with minus 1180 and 480. Okay? So let's come here. Let's go with 480, and under scaling
you guys can see. I can just go somewhat around 35 or let's say 30
is fine as well. Okay, so I'll just
keep this one as 30. And again, the same way, I'm going to come
here and I'm going to apply this one right
over here as well. Let's stream this one down. And now let me just
decrease the size to 30. Okay? So let me just
go with 30 right over here and make sure
your smart guide is on that I can align
it over here. So let me just align
it over here as well. And now the last thing
is, let's come here, and let's add this particular
video as well from here. Okay, let me just come here. Let me just add this one. Then shift send. Let's stream this down, and let's just scale
this one to 30. Okay. So let's go with 30. And I'll just click on Enter. And what I can do is, I can just bring this one
over here in the center. And what I'm going to do is, now I'm going to come here. I'm going to place it at
one particular point. And the same way,
I will just place it at this particular point. And what I'm going to do is I'm going to add out some text. Okay? So I'll just come here, and I will just add
some text over here. So for that, let's go to text. Let's click on default
text box, and over here. Now, let's type watch later. Now, I'll just put this one. Again, what I'm going to
do is let's come here. Let's place this one. And let me just keep
this thing right over here in the center, okay? So at the same time, if you
do want to decrease the size, you guys can come here and place it in one exact place over where I can just actually put out different
kind of arrows over here. Okay? So I will just
place it over here, and at the same time, the same word, if you do want to give this one a
different stroke, let's go with stroke. Over here for color. Let's go with a dark color, let's say, so I'll just go with some dark color right over here. And also you guys can work
on with the background. So let's come here for
the background option. Okay? And also under
background option, I can basically choose
out the color. Okay. So let's come here. Let's
add this particular color. And now let's go to
Stickers option. And from stickers option, you guys can see that I do have different color of these arrows. So let me just search for
arrow itself over here, which might give me
more options, okay? So I will be able to choose from a lot of options over here. So as I told, you guys
can already see that I do have this particular
options right over here. At the same time, what I'll
do is, I'll just come here. I will just take
this one and I will just increase this
over here again. And what I can do now
is let's come here. Let's place it, and now, let's try to add this one. I'll just come here. And
now I will just give this thing up a rotation.
Let's come here. Let's give this
one up a rotation. F Here, let's place this one. And now let's give this
one a rotation from here. Let's say let's go to -45. If I just want to
stay right over here. So let's say minus one, 28, and let's add up a key
frame right over here. Okay. So I'll just add
a key frame over here. And what I'm going to
do is I'm going to come at this particular point, and I'm going to give
this one rotation. Okay? Let's say I'll just give this one up a
rotation tail here. And let's see how it
actually looks. Okay. So at the same time, I do want to repeat this
particular circle. Okay? So now, once
I'm over here, let's see how it is. So it is 128. Let's click on shift, and 96. So I'll just come here. Then again, I will just
select both of this. Using shift or let's go
and let's place this one, and let's type rotation 128. So 128 over here. And again now over here. I'll just put 96. Let's come here again. Let's put 96. Let's click on Enter. So I'll just repeat the same
process all over here again. I'll just come here, and again, let's go with 128. Let's click on Enter. Let's come few frames. And now I will just put 98. Again, I will just repeat
the same process throughout. Let's go with 128. Let's click on ter.
Let's come here. Let's go with 98. Let's come here.
Let's again put 128. Lastly, at this particular
point, let's come here, Let's put 98 and over here, at last, let's go with 128. Now this is basically done
this particular frame, and let's see how
it actually looks. This is done right over
here. But the same thing. What I'm going to do is,
I'm going to click on all. Okay, I'm going to come here. I'm going to select this and let me just
bring it over here. Right click, let's say copy, and you guys can come here, and you guys can basically
paste Control C, and also control V
right over here. Okay Now after that, you guys can just select
this whole thing up. Okay. So just select
this whole thing up, and you guys can just
move this thing around. So let's just select
the whole thing. And now just move this thing around right over
here back again. Okay, so at the same time, what you're going
to do is, you're going to come right over here. And you're going
to place this one. But at the same time,
what I'm going to do is, I'm going to come here,
and I'm just going to do the exact opposite. Okay? So for that, let's
come right over here. Let's place this one again. And let's see how
it actually looks. But here, this one actually
looks the total different. Okay, so at the same time, let's click on delete. So over here, you guys can
see how it actually looks. Okay, I just have to apply the exact opposite
thing right over here. Okay. So over here, now, let's elect this one. Let's control C, and let's
paste this one over here. Control V. Otherwise,
let's select control C, Control V. And now
let's leg this one up. L et's place it right
over here back again. And what you can do is
you guys can come here, and you guys can just move
this thing around over here. Let's come here and
at the same time, let's move this one on top. Let me just keep this one at
the same place where it is. So let's come here. Let's move this one up
and also in between. If you do want to move this, you guys can come here, and you guys can just move this particular key
frames accordingly. So let's say let's
move this one, and let's see how
it actually looks. Okay? But over here, it will just become
quite smooth. Okay? So over here,
you guys can see. This becomes quite smooth. So let's delete this one. Let's come here.
Let's click on Alt. Otherwise, let's click on copy. Let's come here, let's paste it. And at the same time, let's put this one over here on top. And if I do want to give
this one a rotation, I can just give this
one a rotation as well. Okay, so let's come here. Let's give this one
upper rotation. But now I do want to delete
all the key frames. Okay. Now for that, let's
select those key frames, and you guys can just
click on Delete. And at the same time,
let's select this effect, and you guys can just
click on Delete as well. Okay, so I'll just
delete this one. Otherwise, directly
from here again, I can just come here, and I can just take this one. So let's click over here. Let's place this one on top. Again, now let's come here. Let's decrease the size. Let's decrease the size
from here as well. Now let's give this
one a rotation. And now over here, let's select this one. Now, over here as well, I can just give a rotation
onto the sides as well. From here at the starting, let me just bring this
one a bit over here. And what I'm going to
do is at starting, let's add up a key frame. And now let's give this
one up a rotation. Okay, let's go with 12. Okay, so I'll just give
this one up 12 rotation. And the same way, let's
come right over here. And also, now let's
just arrange it. Okay. So I'll just come
here and I'll just arrange it over here as well. So now you guys can see that
how it actually will change. Okay? So over here, you guys can see this is
how it actually changes. Or let's say I do want
just the vice versa. Okay? So in that
particular case, now let's increase
the size from here. Let's increase the size of
the footage from here itself. Let me just come here and let me just change
the positioning. So let's say I will
just put this one at the starting and
this one at the end. So let's come here. Let's place this key
frame at last as well. But let me just place it
right over here exactly. So now let's just play this. So, yeah, this is
how you guys can actually do some
rotation animation. So now after selecting this one, let's go to Animate, and you guys can just select
the bounce in effect. Okay? And also for out, you guys can just select
the bounce out option. So the same way,
let's come here. Let's go for in. Let's select the
bounce in for out. Let's go with the
bounce out option. Okay. So now, once you are
done, let's play this thing. And here you guys can see, this is how it
actually looks. Okay? Also, you guys can actually
add different kind of videos. Let I'll just take
this particular one. After that, let's select
this one from here. Let's decrease the size. What I'm going to do is, I'm going to put this one
right over here.'s place it. And now I will just keep
this one in one side. And also, the same thing, I'm going to put it on top. So let's click on Old. Let's place it over
here on top as well. Now let's come here. Let's go with some animation. So let's here, let's put on some animations
over here as well. Okay? Let's come here. Let's play this
one, and over here, you guys can see that I do have this particular
animation as well. Okay? So let's come here. Let's just select one. So from here, let's move
one onto the site. Okay. So now this one
basically looks good. Let's go with this one, and for animation, let's
select the loop option. Okay. So here, if you do want
it to jiggle throughout, it will basically
jiggle throughout. Okay? If you do
want it to whipper, but I do want it and over here, if you do want it to rotate, you guys can also do that. So let's come here. Let's apply this Zoom. And let's come here. Let's apply rotate. If you do want to
use the flash one. You guys can actually do that. Okay, so I'll just select the
flash one. Let's come here. And over here, also, I'll just add out the flash
option over here as well. Okay? So now let's go
to the stickers option. So from sticker option, you guys can see what
is the scale over here. Under animations, I do
have the look. Okay. And also, you guys
can select the speed. So let's go with 1 second. Okay? And now, this
is basically less. So once this is done, okay? So what I can do is,
let's come here. Let's go with bounce in F out, bounce in as well. Okay. So I'll just add, let's come here, bounce in, for out, let's bounce out. For loop, I do have
the flash all ready. Okay? But over here
at the same time, let's increase 1 second. Let's come here and this
one is 1 second as well. Now let's play this one up. Yeah, this is how it
actually should look like. This is the type of
animation I was looking for. And at the same time, what I want to do is I want all of these icons
to just disappear. For that, let's go to this option right over
here of the videos. And from the videos option, I can basically select that. But if not, let's come here
if you're happy with this. Let's go to the audio, and from here, we can
actually download music. Let's add this particular
music from here. And once you are done, let's click on Shift
Z to Zoom to fit over here in the timeline.
Let's come here. Shift Z again to fit
in the timeline. And let's just play this one. So yeah, I hope you guys to
have understood this class. Let's leg this one.
And over here, you guys can actually add
some animation as well. Okay? So let's go with fade in.
So I'll just come here. I'll just apply
fade in over here. Let's go with this one. Let's apply fade in
over here as well. Okay, so let's see
how it actually ss. So the same way,
let's go to Out. Let's go with fade out. Okay. So I do have the fade
out over here as well. And the last frame, also, let's go with the fade out. So yeah, this looks good. And lastly, let's
select this one. And over here if you
want to just scale it down over here or decrease the opacity
at the last place. You guys can also do that. Okay, so you guys
can come here and basically do that thing
from here as well. So under blend option,
you guys can do that. Otherwise, you guys do have this opacity option
over here as well. You guys can just
scroll this thing down, and here you guys can see those options over
here of opacity. And you can work accordingly. Let's say if I come here and if I just decrease the opacity, it will kind of work like
that. So let's come here. Let's decrease the opacity of
the whole thing altogether. So for that, again, right over here as well. I do have 100%. So let's come here, and at starting, I do want
to just keep it at zero. So let's go with zero over here. And now let's go to few frames. So over here, once I do
have this particular frame, let's go with the
opacity of 100. And now let's see, and let's come down the
same way over here. And let's add another key frame. And let's come down and let's decrease the key
frame to zero again. Okay? So over here. So now let's play this one up. Let's decrease the
level of audio. Let's yeah, I hope you guys have
understood this how you can put it with
all of these options. Let's pause this thing down. And now over here, let's export this thing. Okay? So to export, let's go to
the export option from here. And now you guys can just
name this accordingly. Let's this one as
Rotational animation. So let's type rotate
Schnall M sin. Okay. So once you're done, let's click on Export, and it will basically
get exported. So this one already go exported.
Let's cancel this one. Let's go to my resource file. So let's go to decktop. From here, let's go
to my resource file, and from my resource file, let's go to
rotational animation. Let's change the
view to large icons, and over here, I
do have the video. Yeah, this is how
it actually looks, and let's increase
the audio as well. So yeah, I hope this
class was clear, so I hope to see you all
in the next chapter. Where we'll be learning
more about CAP cut itself.
12. The scrolling text effect: Hello, everyone, and
welcome you all to another chapter of
the Advanced cap cut for Video editing Tutorial. So now we are on our
Chapter number 11. So the chapter is the
scrolling text effect. So we'll learn how you can actually get that effect
of the scrolling text. So we'll be learning about all that over here in
this particular chapter. So let's not waste time, and let's get started. So over here, as you
guys can already see, that now I'm over here at the work interface
of the cap cut. So first thing first, let's
go to the imput option. And from import option, let's take a video using which
I do want to work. Okay. So let's take this video. Let's open this thing up. And here you guys can see. Now I do have this particular
video right over here. And what I'm going to
do is I'm going to come here and let me just
import this video. And the length of this video is 15 seconds and five frames. Okay? So now if you do want
to do the text animation. So the first thing is, let's go to the text option
right from here on top. Okay. And after that, let's click on the plus sign of the text box. And what I'm going to do is, I'm going to increase the
size of this text box. Accordingly, let's come here. Let's add the whole size. And now, what I'm
going to do is, let's double click over
here into the box. But at the same time, I
do have a few disclaimer. Over here, and I'm
going to just click on Control A and Control C to copy. So Control A to select all
and control C to copy. And now I will just
cancel this one. Let's come here,
and let's click on Control V to copy right
over here back again. Okay, So you guys can see now the size
is quite different. And now let's
change the color of the text to black itself. Okay? So now I'll just decrease the color right over here. And at the same time, you guys can see how it actually looks. Okay? So if you do
want to come here, and now this is five, and what you can basically do
is you guys can come here. And if you do want to change this one's color
to white as well, that is also quite visible. Okay. So now let's place it. And what you guys can do is, let's place right over here. And now let's just move this
thing up onto the sides. Okay? So let's just come here, and this is in one line itself. Okay? So for me, the
first option will be let me just put this one
over here in one side. Let's come here, and let's
just take this text. And let's just put this one
right over here in one side. Okay. So let me just place
this one right over here. Okay? So once you do have
this particular thing, now, the first thing is, if you do want to make it to
come this one in one line, let's I will just start
it right from here. Let's decrease the
size up a little bit. Let's come here from here. Now I want it to drag. Okay, so at the first point, let's add up a key frame. So from here, now let's go
down Okay, under position. And over here, now
let's add a key frame. Okay. So once I do have
added a pedicular keyframe. Now let's come down. Let's go to this last
keyframe right over here. Let's click on shift. Okay, and over here, now, let's just move this
one up accordingly. Okay. So over here,
you guys can see. Now, you guys can
just click on shift. And now this is basically
moving in on a straight line. Okay. So let's come let's
just move this one up. Let's move this all
up right over here. Again, let's come here. And lastly, let's come to
this particular point again. And lastly, let's make it back. Okay? So let's see how
it actually looks. So here you guys can see the total duration
is quite fast. Okay? So if I come here
and at the same way, let's come and let's take
this one right over here. Let's play, and this
one is going very fast. Okay? If you don't want it to go fast, let's try to take some video, which is actually more
accurate and more big. For that, now again, let's click on
Import over here and you guys can see what is the
total duration of the video, and this one is
around 45 degrees. Let's come here. Let's place it. Let's click on Open. Let's select this video, let's delete this one, and now let's take
this one over here. Control V. Let's
take this video. Let's bring this video
right over here. And I will just come here. And now I will just take this
particular text somewhere. Let's go this particular text. And what I'm going
to do is let's place it right over here. Let's put this text, and let's increase the
size from here as well. Let's bring this
key frame at last. Okay, so I'll just put out this particular
keyframe on last. Let's come here.
Let's get this video. Let's delete this
particular video. And now at the same time, what I'm going to do
is, let's come here. You guys can just place it
right over here back again. Otherwise, let's
select this one. And what you guys can do
is let's click on shift. Okay, so you guys can see. So over here now, if I just play, this is how
it will basically move. Okay? That also
it is quite fast. Okay? So this is
how you guys can actually work with these videos, but now if you do want
to change out the color, instead of white color, let me just take
out a black color. Otherwise, if you do want to
give this one a background, guys can come here, let's
select a white color. But now let's come down. And from here, now let's
select the background option. And yeah, this particular
background looks great. And also, if you want to
increase the width and stuff. You guys can come here, and you guys can basically
increase the width. And if you do want to change
the X axis and the y offset, you guys can also do that. Okay? So now let's come here, control Z, control Z again. And now let's just
play this thing out. So here you guys can see
this is how you guys can actually have this
particular titles. Okay? So at the same time, let's select this
particular text. And from here, let's say if
I just delete this much. Let's say if I just delete
this much from here, and now let me just play. You guys can see the
speed will get a easier. Here you guys can see. Now, the speed will be
decreased to a lot extent. Over here, now let's come here. Let's select this
particular place and play this thing up. And here you guys can see, now it will be a lot faster. So here you guys
will be able to see now once it gets played. So let's come here. Play this one. Otherwise,
let's select this one again. Let's bring this
particular playhead. Let's come here, and you guys can actually increase
the size as well. So from here now, if you do want to select
some shortcut things, Okay So let's come here. Let's go down. Let's just
delete this whole thing up. And from here, let's apply
this one and now white color. And for the background, I will just take this
particular color. Okay. So now let's
go at the starting. And over here, you guys can actually pay this
one up as well. Okay. So for that, now, if you do want
to increase it, you guys can come here, and you guys can just increase
this ones in size as well. So let's come here, and let's just put
this one as in. So let's come here. And if you do want to move, you guys can basically
move this one as well. Okay, so let's come here. And for the text option, let's select this text box. And slowly, you guys can just
move this thing up as well. Let's go with 20 Seven. Okay. So
once you put on 27, let's come here,
and you guys can just decrease the
whole thing out. Okay? So you guys can come here, and you guys can
just decrease it. Otherwise, let's delete
the whole thing. And from here, again, let's go to my note pad. Okay. So let's come here, let's search for the note pad. So let's search. And I already do have the
note pad right over here. But from here, what
I want to do is, I just want a small part of it. Okay? Let's say control
C. Let's go to CP Cut. Let's go to text. Let's add a default text
box. Let's come here. Let's increase the size. Let's increase the size
from here as well. And let's double click. Ctrol V. And what you
can do is you guys can just give this
one up black color. Okay. And now, let
me just decrease the font size. So
let's say five. And now let me just bring
this one down as well. Okay? So let me just
place it right over here. And also under background, let me just give this one
up a black background. So let's go with
background and over here. Now, let's give this one
up a white background. Okay, white background
looks good. So I'll just go at the starting. Okay Let's come here
and now sift ad. Let's come here for
the text.'s place it and now let's just move
this one onto the sides. Okay? So let's come here. Let's just place it
over here on the sides. Let's go to the position option. Let's add up a key frame. And once you're done,
let's select this one. And now let's click on shift. And now you guys can just
move this thing one up. Okay? So let's say
you do want to move this one onto
the right hand side. You guys can actually do that. Okay? Let's come here. Otherwise, let's bring
it right over here. And after that, let's bring
my playhead at the last. And now let's increase the x axis or let's decrease
the x axis from here. Okay. So let's decrease the
X axis right from here. And now let's select this. Let's click on shift. Okay. So I'll just
select this one. And now I'll just
click on shift, and I do want to move this
one onto the x axis. Okay. So let's say I will
just come here. And now I will just move
this one towards the x axis. So let's come here. And from here, now I can just
move this one all around. Okay? So let's say, I will just come here. I will just move
this thing along, so you guys can come here, and you guys can
just move this all along in one particular line. Okay? So you guys can just
use this particular option. So let me just place it. Let's take this particular text, and you guys can just move
this around over here. Let me just play it. Maybe it
won't be exactly the same. Here you guys can see how it actually moves around over here, and slowly, you
guys can see this is how this text
basically moves. Okay? So yeah, I hope you guys to have
understood this class on how you can actually put up
this kind of sliding text. So see you all in the
next chapter till then, take care and goodbye, everyone.
13. Cloning: Hello, everyone, and
welcome you over to another chapter of
the Advanced Cap cut for Video editing. So now we are on our
Chapter number 12, where I'll be showing you guys
about cloning in CAP cut. Okay? So if you do have any one object into
your particular frame, how you will be able to clone that and how you'll be able to place that thing exactly
over here on your screen. So we'll be learning about
all of that over here. So let's not waste time, and let's get started. So here, as you guys can see, now I'm here in the work
space of the CAP cut. First thing, first, let's click
on Import, and over here, I'll be showing
you guys a few of the different ways of how
you can actually do that. Okay? So Using control, let's select both
three of these videos. Let's take this video as well. Let's open it up
right over here. Okay? So this is one way of how you will be able to
basically clone. And the first thing
is over here, you guys can see that
I do have this video, and over here, you guys
can see that I do have this particular video
right over here as well. Okay? So to import this one, let's click this one, and let's drag this one down
over here onto the frame. And after that, again, let's click onto the plus sign, and another one of this
will basically get added. Okay. So it will just take
some time right over here. Okay. So let's come. So, the interface is opened
again. Let's come here. Let's just select this. Let's click on Alt, and let's duplicate and place this one right on top itself. Okay? So over here, both are the same video, but now what I'm going to do is, I'm going to come
right over here. And from here, now I will
just go to remove BG. And after that, I will just
click on Auto removal, which will only remove
the human figures. I'll just click on auto removal right over here and it
is getting processed. I'll just wait for
it to get it done. So here you guys can see, the auto cut is basically
over right here. Okay? So now, if I do want to move this
thing up a little bit, and also at the same time, if I do want to decrease
the size up a little bit, I can come here, and
basically I can do that. Okay? So let's come here and
overhe you guys can see. Now, if I just play this
thing up, let's say, if I just play this one, here you guys can see
how it actually works. Okay. So at the same time, now, again, what
I'm going to do is, I'm going to take
and click on Alt and keep this same thing
on top right over here. And also, what I'm going to
do is I'm going to come here, and over here, now
I'm going to decrease the size up a
little bit as well. Okay? So let me just
place it right over here. If we do want to increase
the size a little bit, just increase it over
here back again. Okay? Now, let's come here, and you guys can see
how it actually works. From here, let's just
place it right over here. And now, what I'm going to do is let's say how
it actually looks. So here you guys can
see that both do have some different
moves right over here. Let's say I will just here
at this particular place, I want to come right
over here back again. Okay? So now let me
just click on shift. Let me place my timeline or let me place this
playhead over here. And now, what I'm going to do
is I'm going to come here, and I'm going to
basically split. Okay? So if you don't
want to split it, you guys can come here, and you guys can
basically split it, or if you do want
to delete the left, you guys can just delete
from all the left as well. Okay? So if I just
go delete left, let's come here, and
over here, also, I'll just go with delete left. Okay? So let's come here. Let's place it right
over here back again. And at the same time,
let's come here. And now, what I'm going to do
is, I'm going to come here. And now I'm going to
go with delete right. Okay. So let's go
with delete right. Let's select this
one, and let's delete the right side from here as well So now, if I just
play this thing here, you guys can see how
it actually looks. So if you do want to increase the size and stuff a little bit, you guys can come here, and you guys can just increase it quite a bit right over here. Let's play this one up again. So let's come here, and you guys can see
how it actually looks. Okay? So here, this
is one way of how you can actually clone
all of this video up. Okay. So now, for this one, also, what I can do
is, let's come here. And from here, now, let's apply different
kind of effects. Okay? So over here, under effects, what I'm going to do
is let's come here, and let's apply some of this
footage over here as well. Let's go with the age glow. Okay? So I will just come here. And I will just put this age glow option
over here as well. Okay. So here you guys can see that how it actually looks. Okay, if you do want
to glow your ages. So let's delete this one. And also, if you do want to
have this lightning effect, you guys can come here, and you guys can just have this lightning effect
once in a while. Okay? So let's come here. And over here,
let's click on At. And now let's place
it right over here. So here you guys can
check the coloring, the filters, the globe. What is going to be the speed. Let's decrease eight to 30. Okay? So the same way, let's come here, and
let's go with 30. Let's click on Enter, and here now let's play. So here you guys can see. And also, now I will
just add some musics. So for audio, let's go
to the audio first. Let's go to sound effects. And over here, I will firize
or search for lighting. Okay? So over here, it is getting loaded, and let's hear those
things out first. Okay. Let's download
this as well, this one. So this one as well. Let's go with Thunder. And here you also, you guys can see the resources is being loaded. Let's go here. So let's bring this one
right over here again. Okay? So let's come here, let's decrease the size. Let's decrease the size
from here as well. Maybe let's keep it
somewhere right here. And now let's increase the size. And what I'm going to do
is, I'm going to come here. Let's stream this one down, and let's this down as well. Now, if I come here
and if I just play this So let's play
this one again. And over here, let's
place this one. Or let's place it. So yeah, this one
kind of looks good. Let's go with old, and let's place it right
over here back again. Okay. So Yeah, this one
kind of looks good. Otherwise, if you do
want to decrease it, you guys can come here, and you guys can
decrease it as well. So the same goes with this. Okay. Let's come here and let's decrease it
from here as well. So once you're done,
let's come here. Let's just decrease
the spacing over here. And now let's go to
music, and from here, you guys can just search pop. And let's play one
pop song over here. Okay? So let's
take this one out. So I'll just place
it right over here, and now shift Z to Zoom to fit over here in the timeline.
Let me just keep it. Then shift Z over
here back again. Okay? So this is
one way of how you can actually clone your video. This is how you guys
can actually clone. Also, depending on your footage, so many things happen. So let's go to Import, and let's say you do have
a footage quite like this. Okay, so I'll just
take out this footage, then shift Z to Zoom to fit
over here in the timeline. And what I'm going to do is, let's go with 12 seconds. Let's come here.
Let's click on Old. And what I'm going
to do is I'm going to come here and let me bling my playhead over to
this particular place. And now what I'm going to do is I can basically crop as well. Okay. So if you do want to crop, in that particular case, here you guys can see I do
have this resize option. So here on top, I do have this crop
option over here. So let's come here. And from here, let's click
on to the crop option. And from the scrop option, you guys can see that
how it actually looks. Let's play it right over here. Let's click on Conform. And now what you guys can do is let's keep this
one right over here. And now you guys
can just flip it. Okay. So now using
this mirror option, you guys can see that I do have just flipped
this one as well. And at the same time,
let's click on crop. Okay, and you guys can just
increase this as well. Okay, so let's go with this one. Let's click on conform. And after that, let's
bring it right over here. Okay. So if you do want
to increase in size, let's come here, and you
guys can also do that. So let's come right over here. And if you do want to
increase it in size, you guys can also do
that right over here. So let's take this
particular frame, and at the same time, you guys can just increase this as well. Okay. Now if I just play
this particular video, let's say, if I come. Here and you guys can see that the video
also looks great. So the same will,
let's come here. Let's just place it. And what I'm going to do is I will just skip
right over here. Let's select this frame. And from here, now I
want to delete the left. Okay, now I will
play this one. Here. You guys can see that
how it actually works. So here you guys can just clone this thing
quite accordingly. Okay? So let's go to Audio and let's search for motivation. Okay? So I'll just
search for motivation. Let's click on Enter and that particular
file. I will get. So let's just play this one. So I'll just come
here and I'll just play this particular music. So I will just click on B. Okay. So I do have
this razor. Over here. Now, let's click on A, and let's select this part. Let's select delete, and
this is being applied. Okay. So for that, now again, let's
select all this three. Now let's move it
up right over here, and you guys can
see. I will plate. Sir. So, yeah. I hope you guys to have
understood this class on how you can basically
work right over here. And also now select
both of this. Then right click, and let's create a compound
clip right over here. And let's choose a transition
to put in between. Let's go with transition. And over here, now you guys can just go with a
dissolve option. So let's click on, so let's select dissolve and now let's select
it right over here. Let's go with 1 minute duration. So let's play this. So yeah, I hope this
class was clear. Let's go to export now, and let's export this thing. Okay? So let's name
this one as cloning, and I'll just click on export. So I'll just wait for it
to get exported first. So yeah, this one is
being downloaded. Again, let's cancel this one. And now let's go to
my resource file. Let's go to Dektop
and from here, let's go to my resource file. I do have the cloding file, and let's view it
in large icons. Let's p. So, yeah, I hope this class
was clear for you, how you can actually clo
in two different ways. So, I hope to see you
all in the next chapter.
14. Removing a green screen: Hello, everyone, and
welcome you all to another chapter of
the Advanced Capital for video editing Tutorial. So now we are on our
Chapter number 13, where I'll be showing you guys about removing a green screen. So if you do have
any kind of video which you have a green
screen with, okay? So how you will be
able to remove that, and how you will be able to put out a different kind of
background to that as well. We'll be learning over here. So let's not waste time, and let's get started. So over here, as you
guys can see that now I'm here in the interface
of the cap cut. So first thing, first, let's click on Import over here, and let's take up
any kind of video in which basically I
do have green screen. Okay? So let's take this particular video
right over here. And from here now
let's click on Open. Okay. So I did have
opened up this video. Let's bring this one over here
in my particular timeline, Shift Z, to Zoom to fit over here in the
timeline over here. Okay. And now let's come
here and let's try to remove the background or remove the green
screen over here. So, first one, we have sat
that auto removal option, which only actually
suggests the human figures. But in few cases, let's say, if you do have a lot of icons right over here in
a green screen. So in that case, how you
will be able to do that? So in that case, make
sure to ono chroma key. And afterwards, once you have
selected the chroma gree, here you guys can see that you do have a eye dropper tool. Okay? So, let's come here. Let's take your
eye dropper tool, and you guys can basically
select things out. Let's I'll just
select this place. And once you are done, you guys can just come here, and you guys can see now your color picker
is basically on. You guys can come here
and you guys can select what is going to
be the intensity. If you just put out
more intensity, it will become all dark. But for me, let's
go with 30. Okay? So I'll just click
on 30 over here. And if you do want to
give out any shadows, you guys can give that as well. Okay. So once this particular
thing is basically done. The next thing is you
guys can come here. And let's just place
this thing up. And what you're going to do is you are going to come here, and you're going to basically
get out a background. So let's say I want to open
out this background as well. And now I want to import this background right
over here, okay? So now I am not able to see that cutout because
this particular thing is basically on top. I'll just keep this
particular background underneath this
chroma key video. And now here you guys can see. If I just play this thing out, you guys can see how
it actually looks. So the same way, let's go to stock materials and
under stock materials, if I just search for background And if I
just click on Enter, you guys can see
that I do have a lot of background over here as well. Okay, let's check this one out. Let's check this. Let's
check this out as well. Okay. So from here, let's take out this
particular video, and if you do want to
increase the size, you guys can come here and
basically increase it as well. So let's come here. Let's just place this thing. And let's play it. And here, this is how
it actually looks. Otherwise, I can just put out, do I want videos or not? Okay? So under videos, you guys can see that I do have this particular
options right over here. Okay? So over here, I only do have the black
background over here. Okay? So here. You guys can see I do
have this one as well. Okay, otherwise, you
guys can just take this one from here as well. But for now, let's
go with this one. So let's take this thing, and let's delete this
one right over here. So once you're done, a, let's just play this one. And here, if you want to add
different kind of effects. Let's go to the effects
option, and over here, you guys can see that there
are a lot of effects. Okay? So let's come here. Let's place this effect
from here to here. Okay. Let's play this one, and this is how it
actually looks. Okay. So for that, now, let me just place
it right over here. And also we can use
different kind of effects. Okay. So let's come here. Otherwise, let's
select this one. Otherwise, let's
go with this one. So let's come here. Let's put out this
effect over here. And again, let's come down, and here you guys can see that I will just put at
the starting of the frame. Okay. So for the
starting of the frame, and now I do want to close down. Okay. So let's go with this one. Okay, so you guys can come here and place this one right
over here as well. Okay, so now let's
play And here, you guys can see this
particular effect. Okay. And after that, here you guys will be able to see this particular effect now. And also, lastly, you guys will see how
it actually looks. So yeah, this one is done. Now, let's add up a music. Let's go to audio. And from here, now let's
search for electric. Okay? So I'm trying
to search for some electric music over here, and it is being loading
into my resource. So now let's play a
few of this thing up. So now let's drop
this thing down. And let's just
decrease the timing. Shift Z to zoom to
fit over here in the timeline and
shift or control Z. Let's come here back again. Now, shift to Zoom to fit
over here in the timeline. Let's come here, and
at the same time, let's increase the
size accordingly. Yeah, let's play this. B So, yeah, I hope this class
was clear on how you can actually remove
the background and replace it with something else, put on different effects and also a different audio as well. So yeah, I hope to see you
all in any other chapter. Okay? I hope this whole
tutorial on CAPCut was clear. We do have covered all
the advanced features which are available,
like most of it. So there are a lot of things
also to explore in CAPCut. Once you move deeper or whilst
you keep on practicing, you guys will be able to
explore a lot more things with the features which I have showed you guys throughout
this tutorial. So take care, everyone. See you all in any
other tutorial.
15. Class project 1 - Create a simple mask: Hello, everyone. So now, this is the time for
our class project, and this one is
Class Project one, which is create a
simple mask in CAP Cut. So first, I'll be showing
you guys the steps, what all you need to follow. Then we'll move on to CAP Cut, and let's see how this
is basically done. So first, let's see what are the steps that we
need to follow over here. So over here on my screen,
as you guys can see, the name of the class project, is create a simple
mass in CP cut. So well, I do have a description
and outcome as well. So for me, I will directly
go onto the steps. So the step one is
create a new project. Step two is import your videos
into the project panel. Step three, move the footages to the timeline and go to the
properties of the footage. Step four, go to
the masking option. And step five is
select the mask type accordingly and manage
all the values. Step six is export the file and make sure to upload it
in our project panel. So now by using this step, we will go into CAPCut, and let's see how to achieve the result of a simple
mask in CAPCut. So over here, as
you guys can see, this is the home
page of the cap cut. So the step one is,
create a new project. Let's click over here, which will create my interface. So once you're done, let's
click on to the Import option. And from here, what you guys
can basically do is you guys can basically import all
these kind of videos. Okay? So let's say I want
to come right over here. Okay. Let's take this one. And afterwards, you guys
can just export this one. Okay. Let's say I
will come here, and I will click on Control and select that
particular footage. And I will just click on Open. So over here, you guys can see I do have both of these videos. So the first thing is, I want to keep this one, k as the background. And on top of this one, I'll just take out
this particular video of this particular guy. Okay, so I will just import
it right over here on top. Okay. And once you're done, let's place both of
this accordingly. Let's select the down layer. And now let's just
decrease the size. And what you can do now is
you guys can come here. Let's say on top of this
one I want to now mask. So once I've selected
the top layer, and over here under video, let's go and let's
select the mask option. Under mask option, you guys can see that I do have
different options. Like how how I do on a mask. Do I want to do the
horizontal masking? Do I want to do the
mirror masking over here, or do I want to mask
it in a circle or in a rectangle or in a heart
shape or in a star shape? So I do have all of this option. From here, let's take
the mirror option. And now let's place
it right over here. Okay. And if you just
play this thing up, you guys can see how
it actually looks. Okay? So this is how
you guys can actually use this particular
mask right over here. And now afterwards,
you guys can see if you do want to give
this thing up a rotation, if you want to change the
position of the mask, you guys can come
here and do that. And lastly, let's come here. Let's check out the feather. Okay. So basically, feather
is this picular place. Let's say if I just come here, here you guys can see this
particular cut is quite deep. So in that case, now
let's come here, and from here, let's try
to increase the feather. Let's go with 12. I'll just take out
a feather of 12. So now after this, if
you play the video, you guys can see the feather
basically works quite well. Okay? So this is how
you can basically use this particular feather and use this masking option as well. And at the same time,
let's go to these filters, and let's try to put out some
filters over here as well. Okay? So here you guys can see, there are a lot of these
filters which you can use. If you do want to
search more filters, you guys can come here
and you can basically search a lot of filters
over here as well. Okay, let me just
take this bad bunny. And now I'm going to put out this particular filter
right over here, at this particular point. And now again, let's
go to effects, and let's try to put out different kind of effects
over here as well. Okay, so let's take
this one and let's see how it will look
onto my footage. Okay. So now I will come here. Let's click onto this ad option. And now in most of
these places, okay? So from here, I do want to add. So now, if I just
play this thing, you guys can see how
it actually looks. Okay. Otherwise, you guys can just place this from
the beginning as well. So yeah, this one
kind of looks good. And once you're done,
let's add up a audio. Okay? So let's select
the audio from here. And let's type dance. And here, they'll be showing me different kind of audios from
which I need to pick one. Okay? So let's take this
particular song right over here. C. Let's take this one. And you guys can
just take those. And now let's put
this vertical audio right over here and shift. And now let's stream
this do right over here. And now again, shift Z. And let's play
this one up, okay? Yeah, this one kind
of looks good. The last thing is,
let's click on Export and make sure
to export this file. So I'll just name
this one as glass, and I'll export it.
16. Class project 2 - Clone a human or an object: Hello, everyone. So now, this is the time for
our class project, and this class project two, where I'll be showing you
guys how you can clone a human or an object in CPCut. So we'll be learning
about all of that right over here into
this particular chapter. So first, let's go and see what are the steps we
need to follow first. So over here, as
you guys can see, the name of the class
project is clone a human or an object in cap cut. So for that, I do have a
description and outcome. But for me, I will directly go on to the steps that
we need to follow. So Step one, create
a new project. Step two, import your videos
into the project panel. Step three, import your
footages in the timeline. Step four, duplicate
your footage and remove the background
of your footage. Step five, apply the footage
of the same frame properly. Step six, export the file and upload it in our project panel. So now let's move on and let's see how you will
do that in CP Cut. So over here, as
you guys can see, now I'm here in the
home page of CAP Cut. So first thing, first, let's click on Create Project, and over here, I will have
this particular interface. Okay? So once you have this particular interface,
the next thing is, let's click on Import and
you guys can see that I do have all these
footages right over here. Okay. And what I can do is, let's take this footage. Otherwise, let's go with this particular
footage over here. And now let's open this up. Okay. So now once I do have
this particular footage, right over here, let's import this footage onto the timeline. And once you have imported
this particular footage, you guys will see
the total duration of the footage right over here, which is 15 seconds
and five frames. And after that, just move
your playhead accordingly, and you see how that works. Now let's click on lt
and let's duplicate it, and let's place it
right over here on top. Let's take out this footage, and now the next thing is let's go to the
remove BG option, and I will select the removal. Let's come here and let's go back and let's click
on auto removal. Here you guys can see
this particular thing is getting processed. So I'll just wait
for this one to basically get processed
that we can work. Here you guys can see the
auto cut is being applied. Okay? So if I do want
to see this one, let's come here, let's
take this footage. And now here you guys can see this is how it actually looks. Okay? So you guys can come here, and you guys can basically move this one somewhat over here. And at the same time,
you guys can just decrease its size quite a bit. Let's say I will just
put it right over here. And if you do want me to play, you guys can see this
ccular video is being played right over here as well. Okay? At the same time, now let's click on Alt, and let's duplicate the
other part right over here. And let's take this one, and over here now, let's decrease the size, and let me just place
it right over here. And after that, let's place it in this particular gapping. And what I'm going to do is, let's come here right now. Let's click on B. Okay. So now I will
just click on shift, and I will just directly cut. And now again,
I'll just click on shift to cut out all the
frames. So I'll just come here. Now again, I will just click
A to take my selection tool. Now, with A, I will just
select this particular parts, and let's click on delete. And the same way,
right over here, I will just click onto the delete key to delete all
those things accordingly. So now let's place
it right over here. Let's place this one
over here as well, and let's see how
it actually looks. So here you guys can see that how both of these
things basically look. You guys can see that I do have cloned these
attempts right over here and also resize
them accordingly. Okay. So let's say, if I don't want
to just duplicate this one. Let's this one. Let's
delete this as well. And now let's click on Import. And from here, now I do want to import some different images. Okay? So from here
now if I just come to this particular
option, let's say, a. So I'll just take this one. And if I just open this up, you guys can see, let me just
import it right over here. And at the same time, if I just try to place this one, or let's say let's go to import. And now I want to take more. Let's take this
one. Let's click on Open and over here,
let's delete this one. Let's bring this particular
video right over here. And afterwards, let's
go to remove BG. Let's go to auto removal. Okay. So over here, you guys can see that it is being processed
over here as well. So I'll just wait for it to remove the
background as well. So at the same time,
let's come here. And now, the background is
basically being removed. And what I can do is now I can just resize this accordingly. Okay? So let's come
here and let me just put this one
right over here. Okay. Let me just place
this somewhere over here, and you guys can see
that it will get played. Okay? So here, this is
how it actually looks. So if you just come here
and now let's play this. And this one kinda looks good. If you do want to increase
the size a bit more. Okay, you guys can come here, and you guys can just increase the size up a bit more as well. So let's come here. Let's just decrease this one. Let's place it right over here. And let's play this one up. And yeah, this one
kind of looks great. Okay. And once you're done, let's go to audio. Okay. So from the audio option, we guys can just get
any kind of audio, and we can just download this. Let's go with this
one right over here. Okay. So this one is
getting downloaded. And here, now, if you
I will just come here. And what I'm going to do is, let me just place it, and
I will just select B. Let's put a cut over here. Let's click on A for
the selection tool. Let's select this. Let's
delete this particular part. Shift Z. And now, the next thing, what I'm
going to do is t come here. Let's click on Export, and you guys can just name the file and export
file accordingly. So I'll be waiting for
you guys to send me a past project that I can
check those and get back
 Issac Murmu, Graphics Design Expert