Transcripts
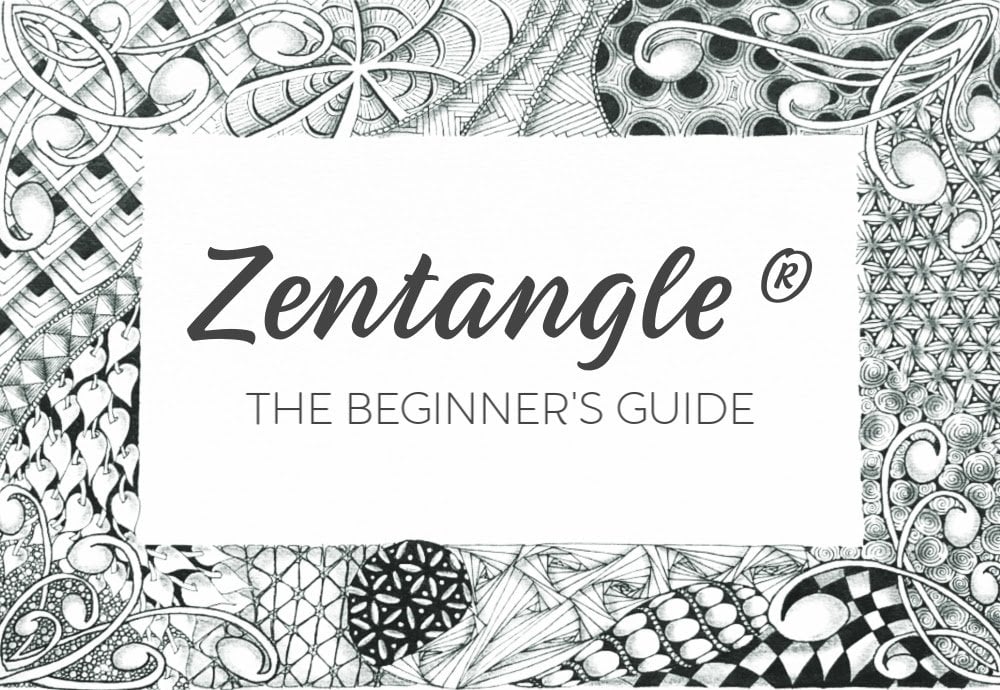
1. Intro: Are you ready to push past that traditional techniques of this entangled drawing method? Are you ready to explore new tools and tangles? Well then this class is right for you. Hi, I'm Martha Arrington and I'm a certified as entangled teacher, artist and educator. When I'm not teaching elementary school students art, I'm at home creating patterns. Then tangled drawings and mixed media work with gouache and watercolor. We'll be reversing the roles in this class and exploring the steps of creating Zen tinkle tiles using white ink on black paper. Black tiles are a fun aspect of creating Zen tingle or we'll be learning how to work with gel pens, white charcoal pencil to create some layering. And we'll also be working with tangles that lend themselves to very interesting results on the black paper. When you finish with this class, you'll have several unique send tangled drawings that you can add to your Zen tingle collection. This class is for anyone comfortable with the basics entangle techniques, as well as familiar with at least three or four tingles. If you're not, you might want to consider going back and watching one of my intro classes. It's a great way to get a good foundation to this entangled drawing method.
2. Supplies: Hey all, let's talk about the tools and materials that you'll be using for this class. Most importantly, is going to be the black is entangled tile. So this is a 3.5 inch square cotton archival piece of black paper. Really lovely paper to draw on. Of course, you're welcome to use any black paper that you have. If you want to just cut it down to a 3.5 inch square. But if you do go with traditionals entangled tile, you can purchase it from the company directly, or I believe they sell on Amazon as well. We'll also be using white jelly roll pens. I've used a few other white pens before universal, I believe it's one of my favorites, but I will say that over time, the Jelly Roll holds up color a little bit better than the unit ball. So this is also the traditional pen at disentangle family company uses in their methodology. So three sizes, I believe we only use two today, but if you wanted to get a set, could. So I have white jelly roll pens and sizes of 508 and 10 of 5 being the smallest. Weight is medium. And then the 10 is the widest abroad us to. We won't be using the 10 today, just the 05 and 08. But the tennis good to have if you ever have a large area to coloring, helps it go a lot faster. Two types of pencils, one being just a regular graphite pencil and he kind of number two pencil will do. And then a white charcoal pencil. We use the generals company. You can get all the supplies Zen tangles website or on Amazon. But if you go to any art supply store, you can purchase, you should be able to find just a white charcoal pencil. And then The last item is going to be a tortilla ion. Now this is something that we use can disentangle to create shading and blend in the pencil into the paper. It's the last step of the process, are close to the last step of the process. Now I have a tortilla that I designate for my graphite pencil. And I only use it to blend graphite. And then I had a tortilla on that I designate to only using with my white charcoal pencil. It's up to you if you want to do SU, two separate ones, but I would highly recommend it. If you don't want to go to the story, you want to go ahead and dive in and you don't have an extra tortilla. Just take a paper towel folded up and you can use that to create a little nib like this, and you can use that to blend in, not a problem. Oh, there is a bonus tingle at the end of this class that I added on. And that bonus tangle is done on this little mini tile that is called a De Zhu tile and it's a two inch square flat piece of paper. Again, you don't have to buy these materials from the company. You can just use any black paper that you have. If you want to just cut them down to a 3.5 inch square and then a two inch square. And welcome to do that. One bit of advice. So if you're using a non traditional black paper, just test out your pen, whichever pen that you're using on the back or somewhere in conspicuous so that you can just kinda get a feel to how the materials work together. With all that being said. If you want to do this class traditionally with black ink on white paper, if you're welcome to do so. So if you already have invested in weights, entangled tiles, and you don't have any black one. You can follow along all of the lessons using black ink on white paper. That is perfectly fine. So don't feel like you have to go out and buy extra materials. All of these tables can be done with any sort of pen or paper that you have. All right, so let's get started.
3. Warm-Up: So let's get started with our first tile. This is just going to be a warm-up tile to get you familiar with the Gelly Roll pen, especially if you're not used to using it. We're just going to use a black tile, just a traditional black is entangled tile. I'm going to use the 05 Jelly Roll pen. I'm also going to use a graphite pencil, a white charcoal pencil for some shading, and a tortilla. And I just wanted to let you all know that I keep to tortilla ions. And one I designate for my white charcoal pencil. And one I can tell it's for when I am shading with graphite, when I'm usually doing the black ink on white title. So I do mark this one with the white so that I make sure to remember that this one is used for my white charcoal pencil. If you don't have access to an extract or tian, you can just use a folded piece of paper towel and not we'll shade just as well. It's going to move everything to the side except It's my graphite pencil and lifestyle. Let's go ahead and take a few deep breaths and come into this practice with some gratitude, something that we're grateful for today. And then we'll go ahead and draw four dots like we traditionally do on disentangle tile. But instead of creating a border, we are actually going to draw from upset corner to opposite corner, just a straight line. And then we'll do the other corners so that you'll have an x going through your title. And then we'll set that graphite pencil to the side and pick up our Jelly Roll. Again, I'm using the 05 size. That's a very fine tip. And what I'd like for you to do first is to just practice a little bit on the back. And the biggest piece of advice I can give you for using the white jelly roll pens is less pressure is better. So it flows a little bit more evenly and smoothly. The lighter the pressure. So just kinda get used to that by drawing a few marks on the back here. Or you can just designate a tile floor, prefer practicing. All right. So let's go ahead and turn it over. And in the center of this tile, using the graphite lines as guidelines, I'm going to do a very small square. So just for simple straight lines into a square, the corners of the square are meeting at the graphite. So that's what helps me keep it lined up. And I'm actually going to go into the center and do a smaller one. All right. So I've done three and I'm going to do one more. I'm going to start turning my tile as opposed to contort in my arm or my hand. Let's just allows me to draw more comfortably. And now that I have four of these drawn, I'm going to do another layer of Foursquare's, could be three. But I'm going to use this outside corner as my guide of where where I should stop. So I'm going to start here in the middle of these two graphite lines. And I'm going to draw so that my line hits the top of that last corner of the square we just did. And then I'm going to turn my tile. I'm going to do the same thing on this side. So that line is touching the corner of the last square that I drew. And sometimes you might draw a little further and it will intersect. We're just not going to worry about that because there's no mistakes. And then we'll turn it one last time. And we have a square. And what we'll do now is we will draw some smaller squares inside here. Obviously, we won't be able to see all of the squares because they will lie underneath the first set. So I'm just drawing parallel to this outside edge of the square. And it looks like I'm only going to be able to get three squares drawn, as opposed to 1234 that I started. So this first layer has four squares. Then this second layer, I'm only seeing three and that's fine. Okay, So that last one was tricky for me to show you another way. You can start here in the middle to draw the edge of your next set of squares if that'll help you line it up better. So I'm going to start and I'll end right at my graphite line and then draw this direction ending at my graphite line. In a turn, my tile start in the middle, go to the right, and then I'll go to the left and intersect with the line I just drew. So that can help you if you're feeling a little uncomfortable about going all the way from left to right and they're not meeting up with that corner. But again, if it doesn't, don't worry about it. Okay, and now we're going to repeat the same steps that we did previously. Drawing smaller squares that are lying behind a last set that we did. And I'm using my graphite lines, those original graphite x that I drew as my guidelines of where the corners of that square are. Always remembering to breathe and to rotate your tile. And I believe I'll be able to get one last little corner. So this one will have four squares. There is no right or wrong to that. If you have three, you have three. If you have four, you have for what we're doing with this tire was just getting familiar with our tool. We've never used it before. All right, so that's 1234 layers. Let's see if we can get another layer of squares and we're just going to continue on until we get to the edge of the paper. So I'm just going to stop and do a quick count on each corner. And 1234512345123451234 or five. Alright? So I do have symmetry here. All right, This will, we're getting close to the edge. So let's see here, this last one. You're going to come across and we might not see the corner. I'm going to have you draw all the way to the edge. All right, in here we are as a final step, we are going to fill these in. So I'm going to start here on this side and I'm going to draw a parallel line to the edge of the paper, stopping at. Corner and just continue on. And I will see you all at the end. All right. So I finished up. I just wanted to show you all something that's happened on my tile. There's not really room for another little corner here. There seems to be room here. And I'm going to go ahead and just draw that. Even though this side won't be symmetrical to this side, not going to worry about that. And there we have it. The completed drawing portion and now we're just going to add some shading. Okay, So I'm going to use the white charcoal pencil. And I'm going to just lightly draw a little bit of a white line around the outside square. The very first one that we did. And I'm going to continue on the outsides where of all the different layers that we did. The tortilla on that I've designated for the white charcoal pencil. I'm just smoothing the charcoal pencil, which is kinda rubbing it out so that it blends into the fibers of the paper. And it really softens it up a little bit. And you get this really cool kinda billowing effect. And it really accentuates those layers of squares that we drew. You can always go back and add another layer of white on top. If you find that it's just not bold enough for you, can just go right on top of what you've already seen. The tortilla and just go right back on top. You see that's a lot brighter. So up to you personal preference. And there we go. Our warm-up title for our white ink on black paper. Very cool.
4. Tile 1: I hope you all enjoyed your first warm-up tile using the white Jelly Roll pen. We're now going to move on to a more traditional style is entangled tile. That was a mouthful. So we're going to be using a traditional black is entangled child. And I'll have a graphite pencil for just a moment. A white charcoal pencil, a tortilla that's designated for my white charcoal, and then an 05 Jelly Roll pen in 08 Jelly Roll pen. So a few more supplies than with the warm up. First we're going to start out with just the graphite and the black tile. Alright, so let's take a deep breath and pick up our graphite pencil. And we're going to add four dots near the corners of our paper, of our tile. And then we're going to connect those dots together with lines, creating a border. The next step is to create or to draw a string that will divide the space into smaller spaces that we can fill in with different tables. So I'm going to start here on the left, and I'm going to do a large loop and then come down to the other side. And I would like for you to do this loop because we're going to do a tingle that lens well to the shape, this kind of teardrop or a raindrop shape. Okay. Can put your pencil to the side. Just like before. Let's flip this tile over and just give our pen a nice little, a few marks or two with it, I should say. Just take it, get it flowing, get it going. Oh crap. Turn it back over. We're going to start here in this left corner. And we're going to start by just drawing a series of parallel lines and why you're going to have the slightest curve. And then the name of this tangle is John Cole. And if you've taken any of my classes before, my workshops before, you know, sin tangles have, the tangles have very strange names every once and awhile. I know that story behind how they were. They remained unfortunately for this one, I do not. We're now going to draw a zigzag line across these parallel lines that we just did. I'm just going to start here in the middle. So by a zigzag, I'm going to go up and down, up and down. So I'm going to go up to this line and then down to the neck, and then up and then down. And then I won't see the rest of that one. And I want to create a series of parallel zigzag lines to what I just drew. Up and down and up and down and up and down. Always drawing what you can see. And you're stopping at that string that you drew earlier. So you won't see all of those exact line in certain areas. Come up here to the top. Continuous. There we go. And then I'm going to get the Gelly Roll pen. It's a little thicker and we're going to create a checkerboard pattern. And this is pretty common within the Zen table or collection of tangles. There are several tangles that take this approach. But I'm one of the reasons why I chose that 08 pen for this portion of the table is because it's thicker, it's wider, it's broader. It's going to color a lot faster than that bow five did. I've just chosen one of these spaces to start coloring. And then I'm going to skip. The one next to it. And then below that one, I will begin to color again. And I fill that in right? There you have it. Just a simple black, white, black, white pattern. We will add a little bit more dimension with this when we do our shading at the end, right onto this next section is teardrops section. We are going to fill this in with the PRC tangle. So I'm going to grab my 005 Jelly Roll and I'm going to create a few wavy, slightly curved, I should say not wavy but slightly curved lines and then a parallel line right next to it. That's going to go from the left side of this teardrop to the right side. And then I'm gonna come down a little ways and do another set. These are pretty close together. These parallel curved lines. We're going to look like they just wrap this this form. You'll see I go a little bit outside of the graphite line and curve it around. And then I think I have space for one more. Now we're going to fill in these large areas with a series of orbs. So starting here at the top, I'm gonna do a really large and all of a sudden my pen has stopped working. So I'm going to grab that little practice one that I have and I just want to get it flowing again. That happens from time to time. All right, Back to my orbs. I'm going to start here at the top. I'm going to go down and I'm going to touch that lie, can even draw on top of it a little bit. And then I'm going to go to the left and I'm gonna make it look like they're kinda squished in here. So they don't need to be perfect circles. In fact, you might not even see one side of the orb. So it looks like it is behind this larger one in the center. And I'm going to go all the way to the edge with the orbs. So my next section, I'm going to do the same thing. I'm going to start in the middle with one large orb from the top to the bottom line. And then I'm going to draw a series of Forbes to the left and right of it. And they can get a little bit smaller. Just stop here and they're just kind of getting squeezed in, are pushed into that space. Now I'm going to go back. And then these bands that were created in the beginning with those two parallel lines, I'm just going to create a series of very, very small circles. Okay? So we have filled in those bands with the circles, and now we're actually going to go back. And between those large orbs that we drew, we are going to color in the spaces between them with solid wait. And there we get done with our tangle. We'll come back and shade it in a little bit later. All right, What can I do this section down here with the tingle echo wisdom? And we're going to first start off with a curved line that loops from side to side, kind of reminds me of old-fashion candy. The way the ribbons with Les. When we go ahead and just start putting it down. And you also will see what I mean. I'm just going to start on one edge of the space. And I'm going to loop going, I'm going to go back to the left and loop back to the right. Look to the left. My loops are getting bigger depending on the space that I have in that section. Some are big, some are small. I'm going to come all the way down and get even smaller until I get to the bottom corner. So very much like a ribbon or like, I don't know, taffy, I believe was the candy that kinda looks like this segment. Not remembering exactly. Anyway. So we've done our curved line and now we're gonna go back inside between the, between the ribbons. And we are just going to aura. That's a word that we use a lot in Zen tangle, but we're just going to aura around the inside of that space. So I'm just kind of mimicking or drawing right next to what is already there. And then I'm drawing back into the center. I'm going to show you on a larger scale. So let's say that this was our loop. We want to fill in this area. So we are just mimicking and Lang lines right next to what is already there. So if we had this much space, this is what we would see inside. But there's not a lot of room for something so big. So they are just going to be on a much smaller scale. But I wanted to show you all of that. And this is a nice little balance. So we have this very curvy line that we started out with. And then this line tends to be a little bit more geometric. And if you need to go ahead and turn it, and I've decided to turn it so that my hand doesn't lay on top of a white IQ and case that white ink is taking a little bit longer to dry. Don't want to lay my hands on it and risk smearing that beak. Can, there we go. Echo is very cool. And for our last tangle, we are going to do Diane. And that's, it looks a lot like a floor of a flower. So I'm going to start here in this corner, this little crevice here where these different spaces meat. And I'm just going to draw a slightly curved line to the outside of my tile. And we're going to just go outside of this graphite order that we usually stay within the confines of. We're just going to go draw all the way out to the edge. And then we are going to cross this line and with a perpendicular line. And then we're going to draw two more lines right in the middle of the spaces we just created. So in the end, four lines. And you should have eight spaces, 12345678. And then inside each of these eight pie pieces, if you will, we're just going to draw a little bit of a curve. And then the next space, a little curve. And then I will do the same thing, just radiating and filling up between these lines that we started out with. And so I don't have any more space over here. But I will continue to fill out here. All right. I will I'll stop. And that's that until we add some white charcoal to it. Now comes the shading. So go ahead and grab your white charcoal pencil and your tortilla that you've designated for white charcoal. And we will just stick with the die on since we just finished that went up and this initial struggle, really simple shading technique. I want you to either do the left of these lines that we drew at the very beginning of this table or draw to the right of them are shade to the right. So I'm going to shade on the left side of this line. Chart my tile, here's the line, shade on the left. You want to shade on the right, that's fine. I would just say just pick a side and stick with it all the way around. And now that tortilla, we're just going to blend that charcoal into the paper, soften it up, create this really cool kind of glowing effect and really adds dimension to this, to this table. So in a traditionals entangled tile, when you're using black ink on white paper. And then you're going back with a graphite pencil to add some shading. You know, you're creating shadows. But since we're using white, we're creating a highlight and we're really bringing to the front this area that we're, we've added the white charcoal pencil to. Ok. And there we go. Easy-peasy on that one. Let's go to echo ASM next. And for that one, we are just going to add a little bit of shading inside of those little raindrop or teardrops bases. So just a little bit of a curve right there on the end. Little bit of curve of some of these are small. Just use just the tip of that pencil to get in there. And then take that torch eon blended in. And that'll make it look more three-dimensional, more like a round form. So cool. This is such a fun, easy tango. I don't do it very often. I always am intimidated by the first step of the kinda the ribbon that you draw. But once it's down, it never seemed as hard as what I originally thought. Okay. Now on to we'll go over the park because we're just gonna do something very similar. We're going to just make these or slip more three-dimensional so be consistent on where you put your charcoal pencil. So if you want to at it in the bottom right section of the orb, do so if you want to add it in the top-left section, do it the same on each of the orbs so you have some consistency. So I'm gonna do mine in the bottom right side of the or, or MSA. And then I'll take my tortilla and just blend it. And then we get 0. And then our last one, we'll go back to John Cole. And we are going to shade a few of these blank spaces. So like if this is a column, you're going to choose to shade a column and then skip a column and leave it black. So essentially we're going to have three different colors. We're going to have black, white, and gray. So I'll do this column with some shading. I'll just lightly put in some charcoal. I'm going to skip this column or row, however you're referring to it, and then go onto the next one. So I'll skip this one and I have a tiny one right over here. Then with my tortilla ion. Blend that in C, you have this third, third color, if you will, or third value. So we have black, we have white, and then we have Ray. Very cool. And there we go. And so we are done with this tile. Looks so cool. I want to go ahead and sign my tile. So I'm gonna get my 005 and then somewhere I want to find an ink conspicuous place to write my initials, also known as a chop incenting girl. So I'm going to just do mine down here in the corner. So I just do my first initial and I connect it with my last. There we go. And then I want to turn over my tile and sign it. And David, and there we go. Our completed tile using four different tangles. Looks really awesome and hope you all enjoyed, enjoyed creating it.
5. Tile 2: All right, y'all, we are going to get started on our final tile. Got my black tile, my graphite pencil, my tortillas and white charcoal pencil 05 and 08, Jelly Roll. Go ahead and take a couple deep breaths. And start with those four corners and memory. And it connects those four corners with lines to create a border. We are not going to create a string inside. So you are done with your graphite for awhile. I suggest just watching me do this for a moment because it can look a little bit tricky. There's gonna be some layering, overlapping, et cetera. So I'm gonna start down here in the corner and I'm going to just do a really broad curved line. And I'm going to come down and I'm going to create almost like this little pod on the end. And then I'm going to come back parallel. So it's almost like I've created a stem. And then this little pod on the end. And then where I stopped, I'm actually going to go back out and create another one. When I get to this line, I'm going to stop, pick up my pen, jump over and do the same things. Pod might be a little bit smaller and then come back parallel. And then stop right in the middle. And then I'm going to come back out to the left and do the same thing. When I get to this stem, if you will, stop, hop over and come back and stop, and then come up here to this little corner here that was created. I will start close to this bottom area. I create my little pod. Come back. I'm going to go up here, filling in this empty space. And then back down. Now I could come back to the right. That's kinda the method I did last time. What I'm actually going to go, there's this empty space here that I think I want to fill in. So I'm going to come up and to the left, like so. And then there's this empty space here that I want to fill. So I'm going to do a set of three like I did before. I'm coming down to where I started, and then I'm going back and out the opposite direction, down into this little crevice area. And then I'm going to come back and this is just going to be well small. And so I've had, I have three sets in year. I have this large, one small and we did and then this other small end. And I probably have space for another one over here on the left side. Much smaller than before. The next thing we're gonna do is create some auras. So up here, I have my graphite and border, and I'm going to use that as a guide. And I'm just going to start down here close to this, Luca. And I'm just going to trace right on top of that border. And I'm going to turn my tile, continue to trace this direction. But right before I get to that next MOOC, I'm going to stop and I'm going to aura around it and come into this section and start to fill in this space. This is a little tiny, so I'm going to not go into this crevice here, but just continue on around this MOOC. And now I'm back to where I began. I do not want to connect that line. Instead, I just want to go back and continue to aura. So most of these spaces have been closed up now and there's a lot of little smaller separate spaces. And so when that happens, we just finish off this little section. Essentially you start a new little ora. I need fill it in. So here we go, Even if it's just a couple lines. Alright, so I've done this section, this corner. Here's another part of my original border, so I'm going to order this space. Now if you took some of my previous classes or workshops, one of the first tangles that I ever taught was the crescent moon. And crescent moon uses this aura and one of the reasons why it's entangled teachers teach it at the very beginning of his entangle practice is so that you get comfortable with this. Because it is something that we do frequently. Alright, so I'm gonna do this last section here that's open to the graphite quarter. I'm going to do this little section here. And this section on the side here. And there is still a section, but we're now going to aura that. All right, so we started off with the MOOC, a tangle, and then we order the border areas. And this center section is still there. So a lot of black in DSpace. So we are now going to fill that in with little orbs. Just little circles or circles, or can be less intimidating circle. But I like to just start by randomly filling in a few and then going back and starting to have them touch and fill in, you starts to create this really cool texture. All right, so I have that large section done. Then I have this small space and they get that filled in with some orbs. I have this small space over here, maybe a little bit here. So there we go. There is your second time. We use the MOOC untangle and then we just ordered in some of the empty spaces on the outside border. And then this center section we filled in with some orbs. Very cool. We're going to add some shading to it. So go ahead and grab your charcoal pencil. And we're going to just create a little bit of a highlight on the ends of these mucus. Just adding a little bit of this charcoal. We're going to just make these a little bit more three-dimensional. When we make this table. And then grab your tortilla, start to blend that. And I missed one or some charcoal. Charcoal on my torch eons. I didn't have to add anymore. And we need to sign it. I'm gonna come down here in this bottom corner. Just type my initials, also known as my chalk. Then you're also welcome to sign and date the back so that you know when you did it. Congratulations on your second winding on black tile.
6. Bonus: How about a bonus tile? You all, I thought I will pull out my B's you tiles. And these are little mini tiles, if you will. Here's the traditional size. You can see the difference. And I'm just gonna do a quick little mano tangles. So just one tangle on this piece of paper, and this one is called singer. And so it's a lot of fun, real simple SQL want to go and make sure my ink is flowing. Turn it over. And I'm going to start with just a simple curved line. And on top of that curve line, I'm not make it a little pod or a little orb and fill it in. And then above that, I'm going to do a series of curved lines that are going to get shorter and shorter until they end and just a little dot. And then I'm gonna do another one and just cross those stems or lines. And again, a little, or and some curved lines that progressively gets smaller. And I like to kinda changed the direction of mine. This one, you're going to have hanging upside down. One come out here to the side. Just a nice variety, play around to different sizes, different directions. There is the Zener table.
7. Final Thoughts: All right, you all have just completed. The white on black tiles Isn't table class. And I hope you enjoyed yourselves and I hope it was a nice little change from the more traditional method if you're more familiar with that. I enjoy these Jelly Roll pens a lot. So I always enjoyed the, using the white ink on the black tiles. It's a lot of fun for me. So we started off with this really fun more MCH title with just drawing a bunch of squares, but layering them in this really cool way, adding some highlight here with the charcoal pencil. And then we moved into more of a traditional Zen tinkle tile, which you are border. We added a string and then we did four different tables inside of it. So we did that. Jump will tangle, echo, wisdom, and die on very cool tangles. And of course, we added some different values using that charcoal pencil. And then we finished it off with a title, the main star being the MOOC, a tingle, a very cool table. And then we added some oring and some orbs here in the center to kind of balance about really cool effect. And then for fun, I threw in a little bonus tile of the zinc, zinc or tangle. So you all have just added 123456 official tangles into your xin tangle encyclopedia, if you will. So you can now reference these and recreate these and lots of different patterns play around with using the MOOC and the PRC and the Zener. Tables together can be really, really interesting. Mix and match these and a variety of ways you don't have to just stop here. Think of this instead is kind of jumping off point. So that's what's so cool about a Zen tangle class when you take it. Or is entangle workshop is that you're just building and you're adding tangles into your little library. And then you can go back and choose all these different tangles and put them together in new and different ways every time you sit down. So I really hope that you enjoyed, enjoyed this class. Just as a reminder, all of the tiles that we did today can be drawn on the white paper with black ink. So it's not necessary to do the white ink on black paper. It's just another method. Another little fun possibility that you can try out, but you certainly can do the same tangles, same tiles on the more traditional method with black ink on white paper.
8. Outro: Well, that's it, everyone. We have reached the end of our class waiting on black tiles and nice little variation from the traditionals and tangled drawing method. I hope you enjoyed it. I cannot wait to see is entangled drawings that you've created. So please snap a pic of your creations and post them in the cost of project section. And if you have any questions or comments, you're welcome to post that there as well. And just one little thing before I go. I just want to remind you all that you can take all the tangles that you have learned in today's class and you can put them together in a new way. You don't always have to do them exactly as a class teaches them. Essentially, you've added to your library of tangles and now you can create hundreds of variations of entangled drawings. So even a tangle that you've learned in another class, you could put together with some of the tingles that we learned today. So I would love to see some of those as well. Just a little extra reminder. Again. Thank you so much for taking this class. And until I see you again, happy tingling.
 Martha Arrington, artist | educator | czt