Transcripts
1. Welcome!: Hi, friend. Welcome to class on Julia. Artist and water column maker based in Italy. Have you ever wanted to paint with wash, but never even tried because you were afraid of screen up or doing it all wrong? Well, don't worry, my friend. I got your back. Stay with me for a minute. Now walk you through all the basic that you must know to begin painting with wash and create your first beautiful floral composition. Okay. I can't wait to get started, so let's dive right in. See you in the next video.
2. Materials: Hey, welcome back for this class. You will need some basic supplies. Dupes of wash. I happen to the own this brand of goulash, which is a student. Great pains, by the way I purchase it to try my hand at a new medium. Before investing a kidney and 1/2 in supplies, I wasn't sure I was going to really use or enjoy off course. If you have access to artists, great, it's even better. But let me give you a tip. Do you know what the best our supply is? It's the one you actually have also didn't have to buy all these colors, you can get away with a primary. Try it and a white I highly recommend shoes in cyan, magenta and yellow. For this class, you get much broader greens and purples, a palette you near the surface to mix your colors. This is a simple ceramic plate, but you can use a plastic pallet. Otri provided its white to get maximum cholera courtesy. You can let your worst dry on the palate. Some watercolor paper wash is a water based medium, so it makes complete sense to be using a paper that handles well buckets of water. Please make sure that your papers weight is at least 300 GSM that where you'll avoid warping and buckling. I have here different brands and they all work well with wash some brushes. I have several shapes and sizes. You can use them all to get different strokes and effect. But since I'm a lazy person, I'm just going to choose a good all rounder. And with all with plus one brush, my best tape is bigger round brush with a good point of tape. This way you can trace very fine lines even with a medium size brush. Jazz off water Most people use one some years to I am so geek and lazy. I use three 14 cool colors one for warm colors, one for clean water being washn opaque medium. Your water will get dirty in no time. Black ink in something toe. Apply it. You are totally free to choose Here you can use whatever you want. Ah, glass burn a neighbor or detailer brush. This are just some of the options you have. I will be using this pocket brushed by Penta because lazy remember, you will also need some pain this tape in a rock or paper tower to clean your brush and absorb excess water. There you go. Now you're ready to begin our practice.
3. Basic techniques: in this section would make ourselves better acquainted with wash. We're going to squeeze a little bit off paint on our pilot. When you were five years old, you would just stop the brush and you were ready to go. Uh, now that good right toe about the streak Innis. We can add a drop off water and dilute our pains. I see the change of consistency. No, that's better. Wash. It's the love child off acrylics and watercolors. It can be used very thick, and it will behave somewhat like Oh, prolix. But it has almost the same for mother off water colors. It can be diluted with more water to obtain light and less opaque washes off color and they reactivated. Let's try to mix all callers to do so. You put a bit off a second color near the 1st 1 at the drop of water, and then you mix them with your brush. It's a simple as that you see what are standing violet off God here. This is why I suggested jusen, Cyan and Magenta s primaries. If this sounds a little confusing, don't worry. I'm already planning my next lost about color theory in which I'll analyze different primary. Try it's and compare them on the base of the new colors you can obtain from them. Okay, now back to work, lazybones. Suppose you wanna lighter violet more like a lavender. With wash. You achieve lighter tens by mixing the saturated colors with white. Now let's learn two years full techniques that you can use while painting with wash, blending and layering. Blending with watercolors is fairly easy. You put water on the paper that the colors next to each other and just let them work their magic. Well, wash. Let's a little more convincing. You put the colors on the paper, and then you work them back and forth until you are satisfied with the result. You can reach a perfect, homogeneous Grady int or live a few streaks. It entirely depends on what your paintings tire is and what effect you're aiming for. Layering is when you put a fresh collar on top of a collar that's completely dried like base. You must be quick and careful tow. Avoid reactivating the underneath layer or else you get a mixed off two collars. It's always safer to lay a thicker paint on top of a gelatin wash. So you have covered the background almost completely. - You see what I'm doing here? Now you can see the background anymore, and the colors have blended. Hey, this can work to your advantage to. We have just discovered a really cool feature of wash. It's a very forgiving medium, and you have the opportunity to cover all tweak your mistakes. Should they happen in the next video, we'll learn how to paint the actual leaves and flowers for our final project.
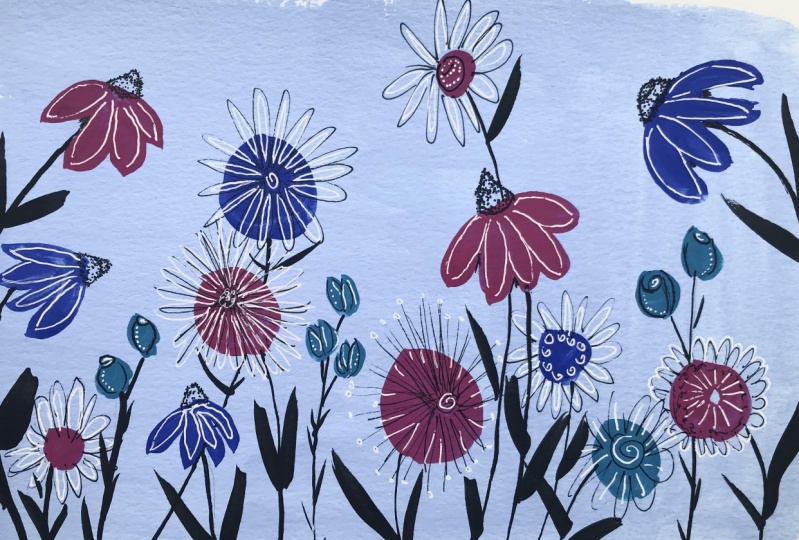
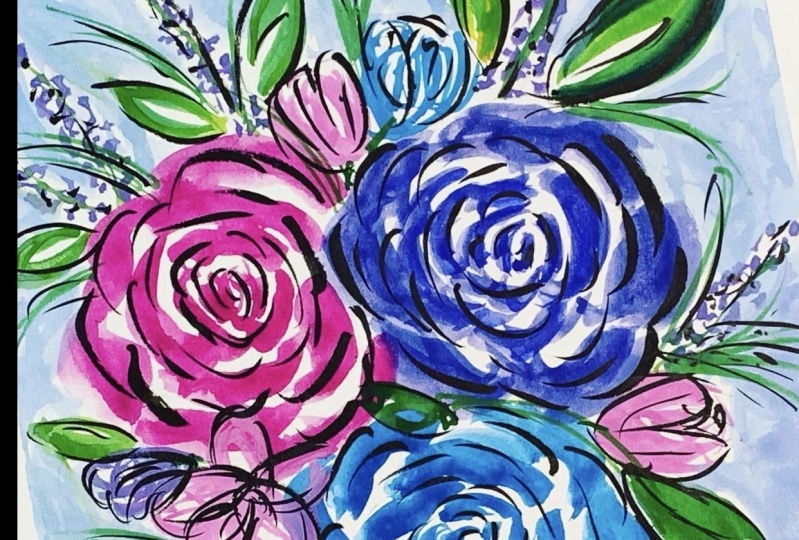
4. Leaves and Flowers: Okay, my friend. Now you're ready to learn some off a basic shapes. You need to paint your floor composition. Let's dive in. Okay. When your rush is nice and loaded, you go. And for our leave my pressure. More pressure Like pressure on lift. That would be very well, a leaf on its own. Let's do it again. Light brush. More pressure. Light for sure. Lift. You see, I made a mistake here. No problem. You can go with the point and make your shape perfect. There it is. Let's do it one more time. Like Russia. More partial life for show and lift. My favorite leave shape is a lift made with two strokes, one on to Dragon first and second. There it is. You can also use theme long brush strokes to make filler leaves like this like grass. Don't worry about being perfect, because nature is not perfect. So if you do wonky tying off stroke there, it seems like rest. All right, rates up. No, let's learn to make some simple flower shape that's begin with a five petal shape. Okay, one to three U. For fine. 30 days. You can feel in the pedals or not, it goes with your personal preference. Anyway, if you leave some white streak in the middle of the pedals, it will let interest and depth to your flower. I don't see the difference. Then one of the most popular flowers in paintings in gardens. Let's painter roles. You make a little see mark, okay? And then you go around around, building the pedals as you go. When you reach the outward pedals, they will become Ficker and bigger. And then you have, Ah, beautiful, whimsical rose. Okay, let's make another rose nickel. See marks and then around and around on around we go. You can wiggle your brush like this and make a very big open. Bittles. There's no rush. You can take your time, work it and maybe lower the bit much of center because it's usually the darkest part off rose. Okay, there iss very important shape for floor composition. Our butts. Let's try and make some. That's very simple. You just paint a kind of cup and you're done stones. Okay, I believe and work on the leaf, and we have a standalone flower, something very lose and whimsical. You can also paint in a bouquet are fillers. Fillers are little, almost flowers or hints of flowers that fill the empty space in your composition and happy to make your overall peace more balance. But given interest and lightness lazy tape, don't fuss off for being realistic. Here you can get away with simply painting a few blocks of colors here and there because our brain is generally well trained in recognizing flower shapes, some dots cost them and you're done.
5. Outlining: Now that you campaign some basic shapes, let's spice things up a bit. It's done to Rocky Rink, my friend. Sure thing. Flowers are really elegant and delegated Nice, but I miss some fun here and there. So how about we take our glorious black ink and highlight some of our flowers and leaves? Let's take those little leaves, How cute they are truck placing our black outline around them and see them transform. He can be free and careless, making things or thick lines. Whatever floats your boat, use your creativity. You can add black lives on top of pillars. You can add darts or other shapes. If at your gym flowers you can add outline to the petals. Who are adding the center or even go crazy at Ed are double outline the radia the better. You don't have to outline every single flower or leaf, sometimes even outlining the main flowers off. A composition is enough to really make them pop. And this, my friend, is the end off our practice session. Feel free to upload your progress in the project salary to show off and receive a little love from your fellow students.
6. Final Project: First of all, you must frame your paper with a painter's tape, and then it's gets time. I'm not usually s catching person, remember? Very lazy. But I think that this time for your sake, I'll make an effort. All place. Let's say you rose here. Another rose here. Another rose here, a flower here, some buds around here, some leaves. Okay, around here. And, uh, little bays here. Okay? And that's our rough sketch. If you're, um, word that remarks off a pencil will show up. Well, don't. Because wash is more opaque than watercolor. And the pencil marks should be completely covered. I'm gonna leave them here so you can see them at all times. You can go ahead and raise them and make them barely visible. If you don't like to work with our sketch underneath, OK, Now it's time to begin painting. I usually begin with a bigger ones the road days, because this will give me oh, cans off. Final outcome. That's place. A big fuck goes over here. Okay, I'm going a little five battle flower over here and I'm going to layer it on top of the rules is okay. Don't worry. Will hold. Line it later, maybe a bottle or two off. Hey, what do you put the feelers all around your main flowers? I will be placing somebody's in the corners and then some fillers and leaves all around to make a special frame from a big, colorful roses For the vase. I simply used whatever color I have years to for the flowers so that the composition appears cohesive. I had plenty of white to keep the illusion of reflection at the water inside the glass vase . - Same thing for the background. Use the colors you have and what we're down a lot to paint with. How much effort and a nice what a call. A like effect. When your brushes completely dried, you can go ahead and at the outline you can just let go and have fun. There's no right or wrong. You can just be free and play around like you were a kid. Be surprised off what you can do to your squash underneath the nice. At this stage, I found that it's better if you go with a bit of a haste. Don't overthink it. Don't stop too much. Just let your brush dance well I get this Looks like a heart. Now we're almost done. The last step in Very important. I couldn't stress it enough. It's signing. You'll work even if it suck because it's yours and you can be proud of it. I am proud of you. The very, very last step is the peeling. I love this part. Almost done. One more side. There you go. Okay. It's amazing, right?
7. Thank You!: and okay, my friend, I want to thank you from the bottom of my heart for staying with me all this time and taking this class. Now, if you want to share your project in the project gallery, I would be delighted. Don't forget to like and comment your fellow students other project because this is a community and that's what we do. Feel free to pass your projector even on other social platforms like Facebook or Instagram . You can find me at Mama Kin, right? Please tuck me in your work so I can come and give you a huge jug and cheer you up because you did a great job. Remember, toe always kick practicing practice, practice, practice. It's the best way to improve in any art in any skill that you put your mind into mastering . And most of all, have fun. There's no right. There's no wrong. Please keep on painting and keep on having fun. Now, if you like this class, please, please, please give me a review. It means so much to me and know that I am already working on my next plus, Please follow May to keep updated on my next class and I hope to see you So, my friend, by
 Giulia Nava, Watercolor maker @brillanzacolours