Transcripts
1. Sunflower Intro: Hi, guys. I'm Esther, better known as Esther
Peck at Instagram. I'm a professional watercolrist, and I specialize in
watercolor flowers. Today, I'm teaching
watercolor sunflower. They are bright, cheerful and symbolize positivity,
joy, and resilience. I will be teaching
you three sunflowers, one flunter and two side views. This is a basic to
intermediate class, as I will be guiding you
closely from colors that we use suitable brushes to
drawing sunflowers and layout, creating interesting
textures, adding depth and highlights for more realistic
sunflowers and leaves. You can paint these sunflowers
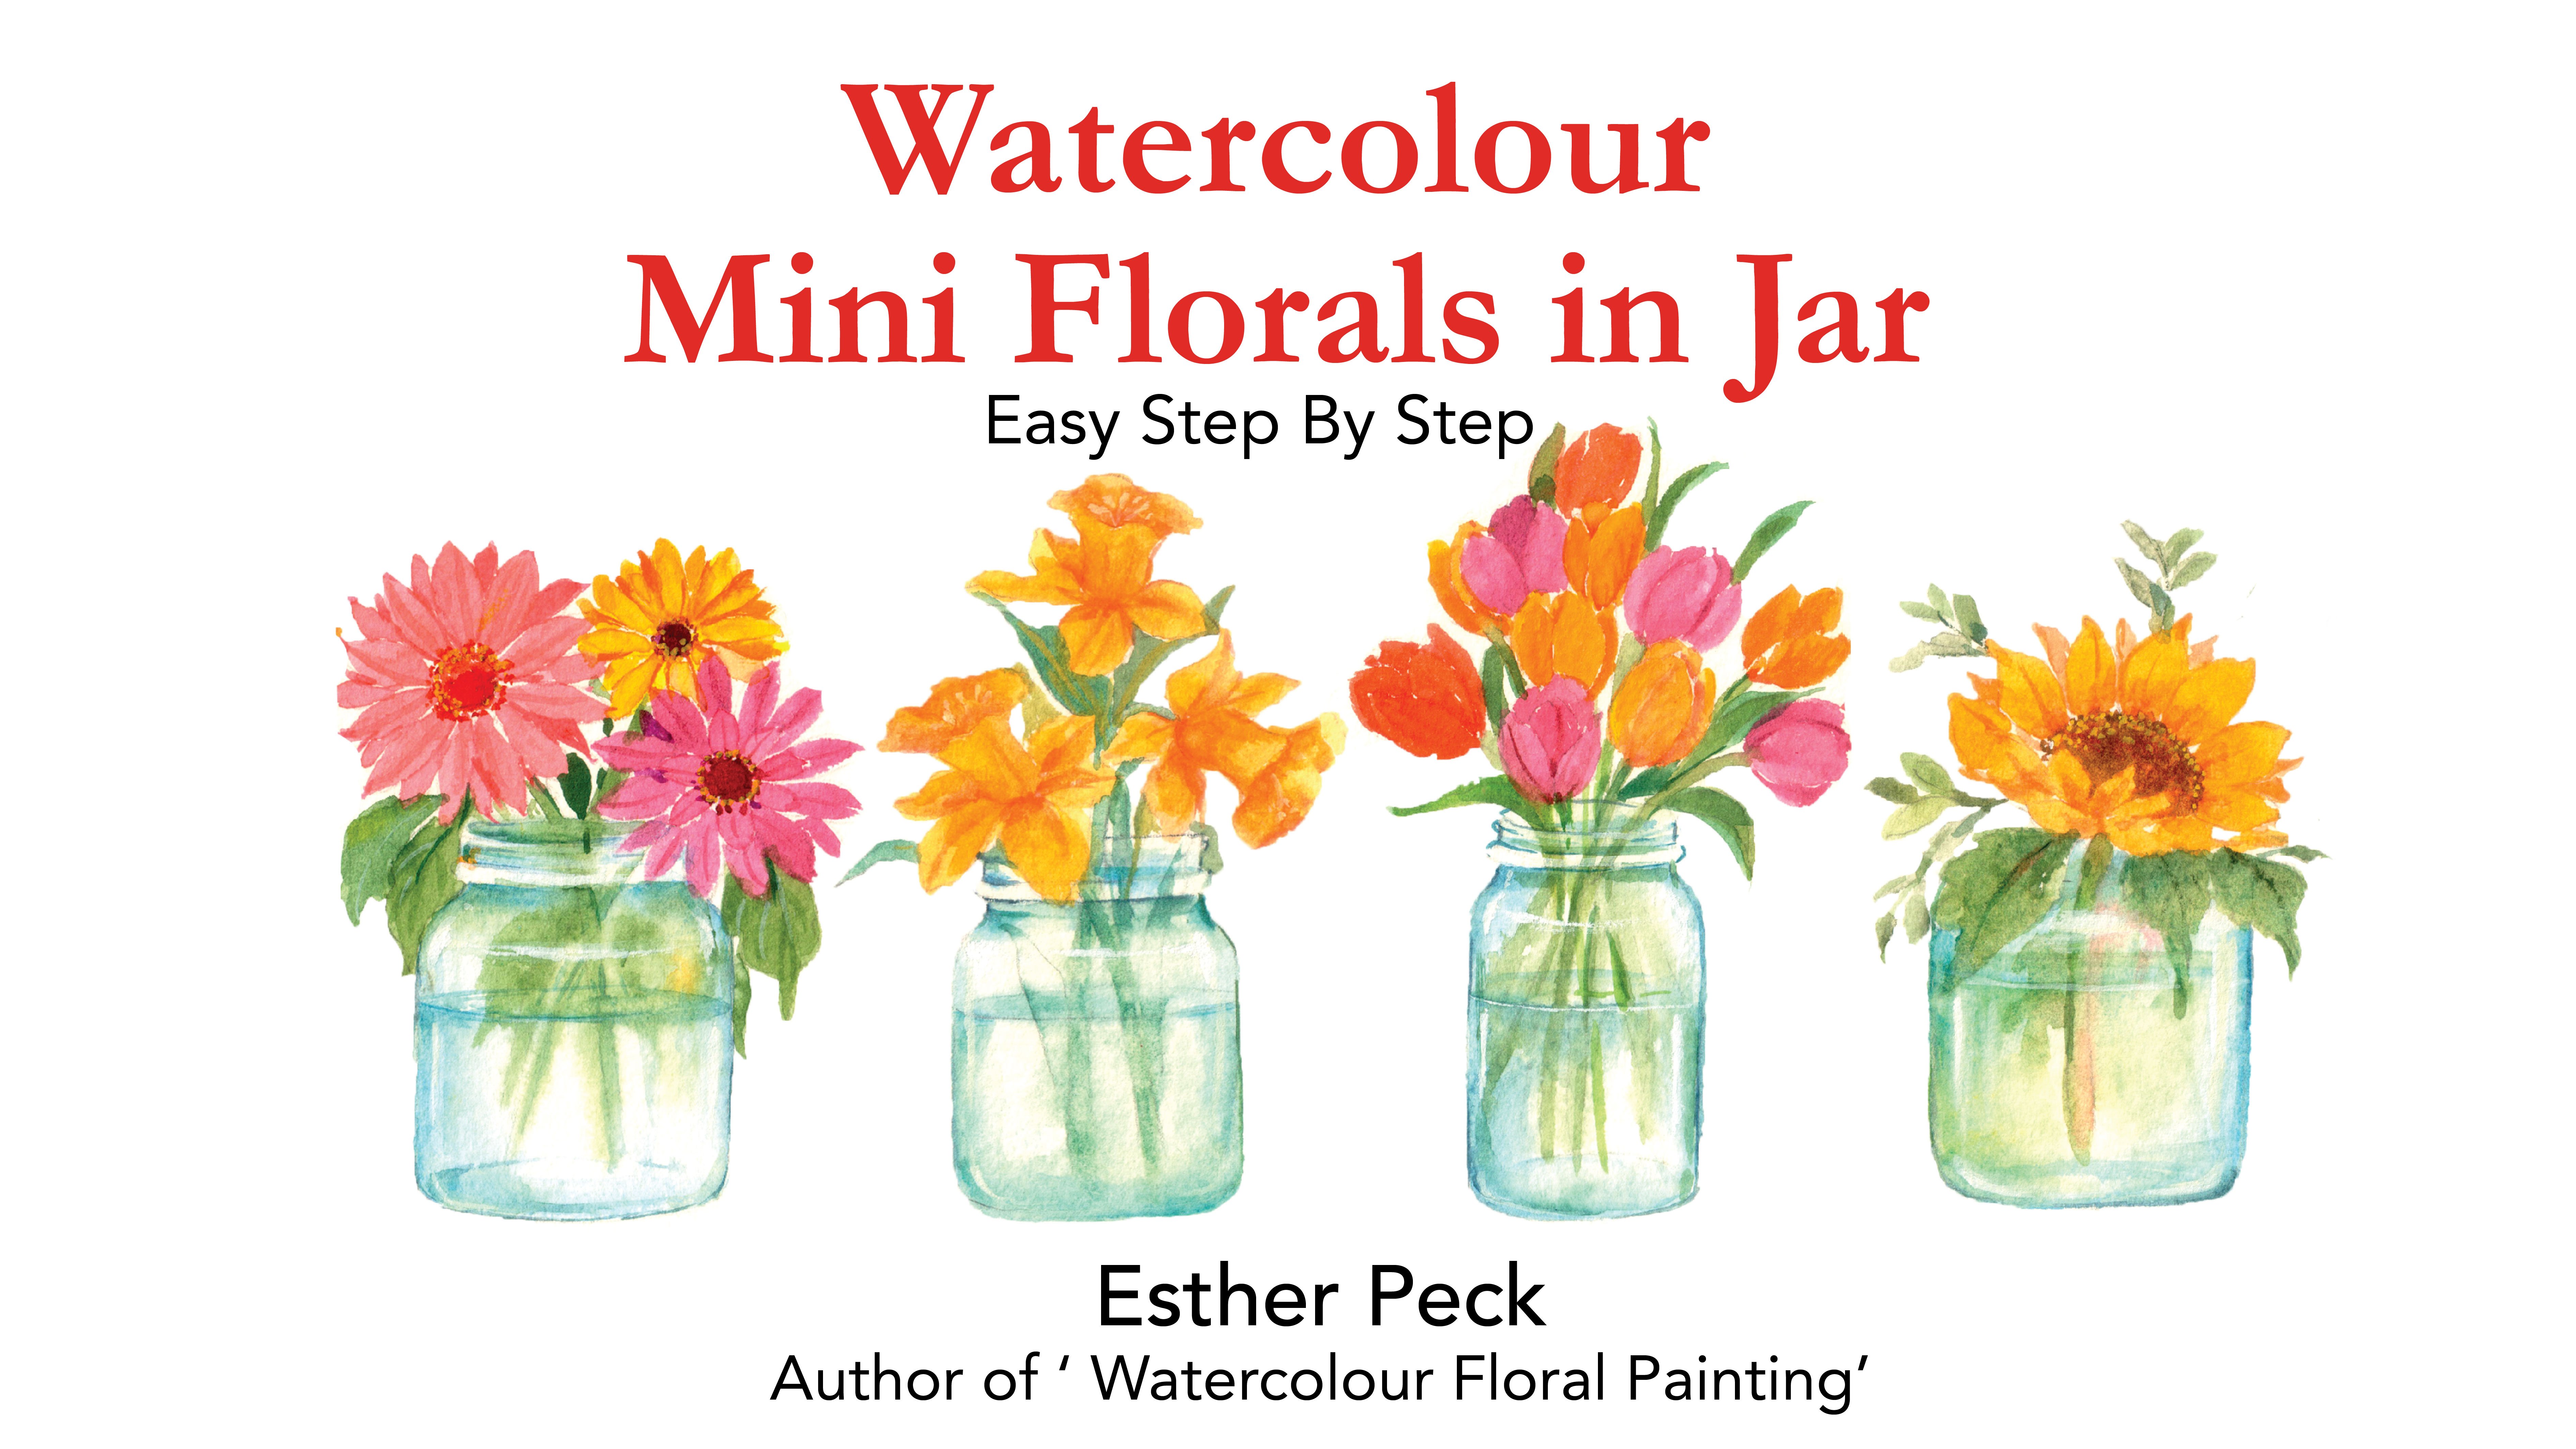
as single stone inside a jar or paint with sunset
or sunrise backgrounds. I hope you'll join
my class and create sunflowers of your
own. See you soon.
2. 1 Sunflowers Paintings: Hi, welcome back. Let me show you a very
short introduction of what I have done
before in the past. I did this three
to four years ago. Looks a little bit different
from the current one. I mean the species and
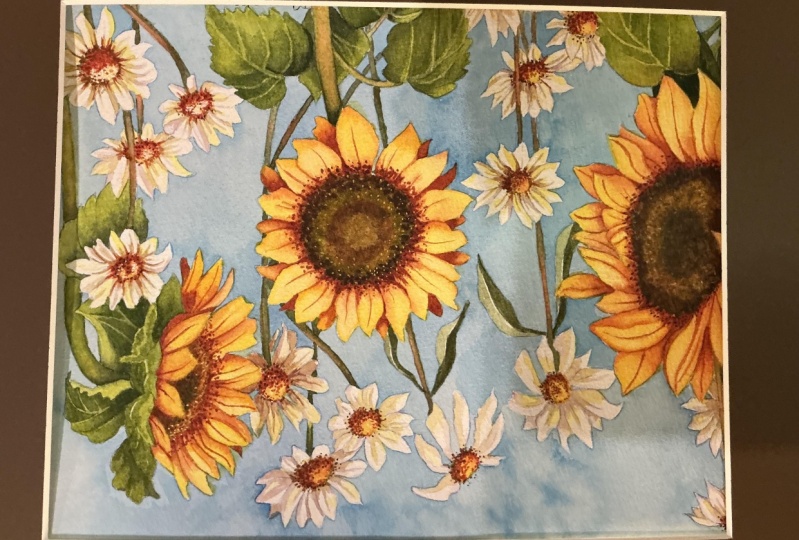
also the sunflower. So can you see the progress? This is another piece also
two to three years ago, but I have some references
of some flower like this, some flower with
quite a big center. So they are quite different
from the first one. And these are the paintings
that I have done before. Sunflowers are
bright and cheerful, and they symbolize positivity,
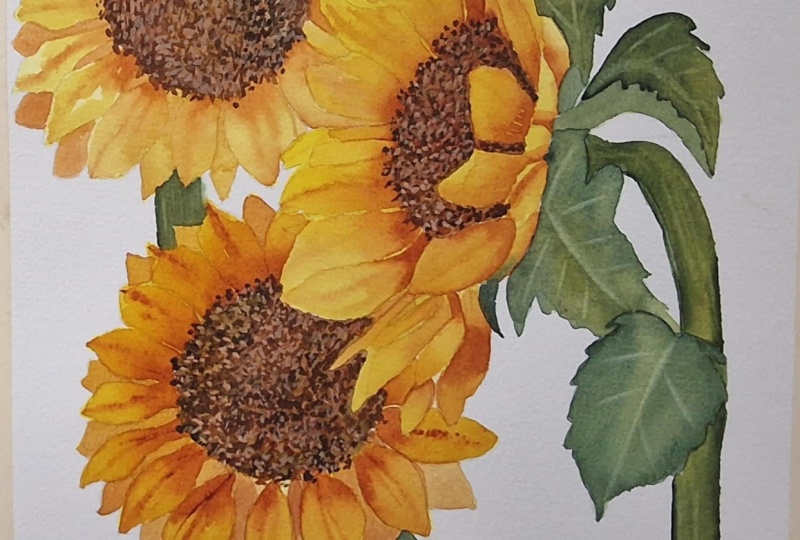
joy, and resilience. When I design these
three sunflowers, I have three angles, the frontal, and the
sides like this. This has a lot of wavy petals, so I came up with this design. What I'm going to teach you
today will be sunflowers, and I'm following
the step by step of the PDF attachment which
I have given to you. So let's get started.
3. 2 Art Supplies: As usual, we like to prepare by getting ready the art
surprise that we need. I'm using 100% cotton paper, Sabino, 300 gram, and copressed. The paints I'm using is
chemical hoodm aquaria, and I'll be using
these few colors. You will see that in
my attachment file, six watercolors and two gouache for the center of the sunflower. For the brushes, I'll
be switching in between Heritage six and
eight round brushes for the petals and
for the details, it will be heritage number two. I will need the half inch
angular shader or flat brush. That is for the center
of the sunflower. I will show you so that you will decide whether you want
to have this brush ready. For shading this portion, you can either use an half
inch angular or flat brush depending on what
brush you have. And also, I use Princeton
select Deer foot brush. If I'm painting a big
sunflower like this, I need a three
eighth inch brush. If I'm painting a smaller
sunflower like this, I will need a one quarter
inch deer foot brush. And, of course, don't
forget the two glasses of water which are so
essential for watercolor. One for washing your brushes and one to get clean
water from there. And I also like to
have a clean palette like this for blending. Actually, I already have another palette
with paint already. There's a space here, but I like to have a cleaner
mixing palette to stand by. We are ready to
get started. Let's
4. 3 Drawing Sunflowers : First of all, I'm showing you how to draw
these sunflowers. Basically, the
sunflowers that I have painted are free hand
for the frontal view, but for the side view, I will have to draw
out the design, we have to draw all the petals like this before you paint them. I'm going to show you
my composition first. I'm following this
composition of my bigger sunflower
being the focal point. It will probably be
bigger than this. In the center of
the A three paper, I will position the
front of sunflower. My plan now is to paint
one side of the painting. And for today's class, I will teach only how to
draw these three sunflowers. And this side we will not deal with because that will
be too much to paint. And for the daisies, we are not able to teach in this class, but I have it on another
Skillshare online class. So I hope you'll go there. So without further ado, let me plan the class. As I plan and draw,
I will show you. Basically, they are all in
my PDF file attachments. You need to follow the
sizing accordingly. Let's look at the sunflowers that I bought from the market. You can see that actually the center of the
sunflower is very big, so you have to adjust the sizes. If you prefer a smaller center, you can draw it smaller. With a bit of study, we will go back to our
drawing and layout. My layout is having the
frontal sunflower in the center of my A
three art paper. So it is somewhere here. It will be better
for me to follow the measurements so that
it is easier to work on. So I'll be following this
5. 4 Leaf strokes and Stippling: Well, before going
into painting, let's look at the
color sweaches. So I have prepared my pins here. I know that I'm going to
paint a lot of petals, so I'm well prepared
with a lot of pints and my sweaches already. I'm going to teach you how
to paint the petals first, how to be more effective
in painting these so that you will not
be going through different steps
and realize that, oops, it's not quite correct. So I have my paint
prepared in this way. I have lemon yellow and
cadenum yellow mixed. Not too much lemon yellow. My paint will be leaning
more towards cadnum yellow. We also need a little bit
of vermiion at the side. You will see that the color
is very intense and strong. Okay, let's look at the
sunflower which I have bought. I'm so glad that today I
managed to get this sunflower. Look at the colors. They're so gorgeous. So, okay, I'm ready to show you. And I'm going to use
Heritage Round six now. I always talk about leaf stroke. I'm showing you what
a leaf stroke is. So here it goes. This is a leaf stroke. And we also discussed earlier that these sunflower
petals are quite short, so we don't have to pull
too long. Keep it short. First of all, I like you to practice painting
Leaves stroke like this. You need to warm up
with your round brush. And I'd like you to
paint two of it, one this way, and
another stroke this way. Okay, so we get a petal. Oh, my goodness. I have one
petal that dropped out. I did not pull it up, I
drop off from the flower, so you can see it is
really almost this size. Well, so we practice again. One stroke. Two stroke
join to form a petal, and we have vermiion
here, so we get a bit. And while the paint
is still wet, I like to paint it this way, like strokes because
I want you to observe that these petals actually has some
vertical lines. So you will get
something like this. And while the paints
are still semi wet, I'm going to blend the lines
onto the petals lightly. I like the lines to look subtle. Can you see some
light on the petals? Let's do this again as I need you to practice about
15 minutes later. One stroke, two stroke, and I'm adding a little more
water so my color is not as intense and for the vermiion, add water for a less
intense value, too. And while it is still wet, I add the lines lightly. Then I wash my brush and
tap off the excess water, and I blend it very lightly. The lines are very subtle. They are not meant
to be obvious. Let's see my painting again. Sometimes I like to
show the details and a little bit more
with more obvious lines. Let's look at our
real sunflower. The lines tend to
show when there is a shadow that cast and
where there's some folds, the lines will be more obvious. Now, I'll show you how to
use a deer foot brush. First of all, we need to wet it. Make sure that it is not too
dry nor dripping with water. When it is wet, I can
pick up the pain easier. If the brush is totally dry, it's hard to pick up the pain. So let me show you stipping round a little bit of
the doughnut look. Let's continue to go round. You can practice a little bit. We will talk more about
this in our lessons later. In my worksheet,
I mentioned that we go around steepling this way. There you go, you can just turn your paper
if you have to. And there are some of you who don't have
a dear foot brush. You need not be overly concerned because if you
don't have a dear foot brush, I would suggest that
you use a round brush. But of course, to be honest, the effect is not as nice. And you need to pin
it this way all over. So finally, it should
look this way. After I stippled the
center with brown, I stippled yellow gushed over. So let's take about 15
minutes to practice this and come back to learn how to paint the sunflower. I see you again.
6. 5 Painting the Sunflowers Petals: I'm glad that you
are back so soon. So we are all ready and have done our leaf
stroke practices. I'm going to start painting straightaway and painting
the frontal sunflower first. You can see that the ends
of the petals are sharp, but they are inside, so we can't really see
the sharp ends of it. So when you paint,
there's no sharp end. So I'm using a round number six. So now we paint one
and two stroke. This is the sharp end
that goes inside. I'm painting the
frontal petals first. And earlier on, I mentioned
that when it is still wet, we can add on the lines, you don't have to paint
on all the petals. Or you can actually
paint six petals, then you paint the lines while the paints
are still semi wet. Because if you will to add
the lines after two petals, the paints might be still too wet and the lines
will disappear. So we are working on the
fifth petals, which is good. I think I'm getting
the sizes correct. I will keep the sizes
of the petals a little irregular for
more interesting looks. You don't have to turn the paper if you're comfortable doing it. But if it feels awkward, just turn the paper a little to a comfortable
angle to paint. You don't have to be like, Oh, as the Peck said
that two strokes, then I have to keep
to two strokes. Not necessarily that way. Sometime after painting, I
like the petals to look wider. So you can see that
the earlier lines disappear as the paints
were a little too wet. So now I will paint over again as the paint
is semi wet now. It's so fun painting
sunflower again as it makes me so happy with its
sunny and cheery colors. Anyway, don't have to be
overly concerned about the disappearing lines as we will be shading the
petals again and again. Let's turn the paper to
a comfortable angle. Let's come again. 18,
I have 18 petals. While waiting for it to dry, I'm just adding more shading. You'll find that when
the paint is semi dry, the lines look more
natural and subtle. I have finished the
frontal sunflower and now I will move to the
side view A flower. Because it is side view, the petals are
narrower and thinner. You can refer to my PDF
painting to check the sizes. When it comes to the center, you can see that the
petals got thicker again. This is something to take note. I'm adding the verminon
shading over here. Let us just continue from here. Remember that we have
more frontal petals and side petals
that are narrower. These are the petals that are wider and will need
to press more, and this is narrower. Sometimes my stroke goes inward as it is
easier to control, you can try that too. And I add on the shading while the paints are semi
wet to give depths. Now, the paints are
slightly more semi dry, so I should add on
the erminont lines. And they really look good. So referring to my design again, you see that these three
petals that are behind the frontal sunflower are
slightly smaller and narrower. So now we add on
the profile petals and the small back
petals as well. You can try painting
the strokes inward. They are easier to handle so that you need not to
turn your paper frequently. Now we add the shades and the vermillion lines as the
paints should be semi dry. So you see that the
colors are very good. Capum yellow is a very
close color to sunflower, and I only need to add a little vermilion to get
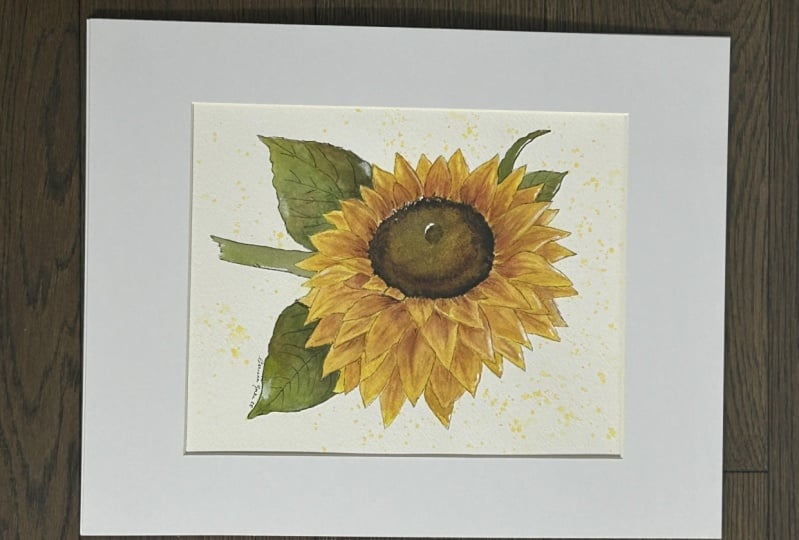
the right color for this. It is really not difficult
to paint this sunflower. For beginner, I suggest that you try the frontal
sunflower first, paint a single store. It will really be a good
gift to cheer up a friend. Okay, just a few more
petals to finish. You'll see that it's not
exactly a two strokes petal. Sometimes you paint
it bigger with an additional stroke
for a plumber petal. The petals here, I
want it to be a bit darker as they are behind
the frontal sunflower. Times you might need ocher
or brown for more depth. Well, so we have
finished the petals and moved on to the
bigger sunflower. So this is the biggest
sunflower side B. I'm going to use
Heritage Round A. Earlier on, I had drawn this
interesting turn petal, adding on the sheets while
the pins are still wet. So now I'm adding on
more depth again. And I also mentioned that if you have to turn your
paper, just do so. And adding that to
these petals again, as you can see
that sometimes you have to work two
to three rounds. We do have some smaller petals that add interest
to this sunflower. And the same sequence of adding
vermiium for depth again. Any petal that is
behind another petal, we give more shading. Add on vermil again for more shading and the
vertical lines too. Earlier on, I show
you the real petals, and the colors are really
name yellow, and it's orangy. Theise sunflowers that I painted are leaning
towards orange. But if you really don't
like too much orange, you can add a little
lemon yellow. These two petals has a little
bit more lemon yellow. Yeah, you can see that as
they are nearer to us. As these petals
are nearer to us, we also like the petals to
be bigger and brighter. I'm back to the
sequence of adding vermilion lines while the
paints are still semi wet. By now, we should
have seen and learned that when the paints are semi dry and you add on the lines, they will look
natural and subtle. Now I'm painting the petal
that's turning in front and this petal that adding in the
shading at the same time. And this petal that is behind, I will paint inwards and add shadings of vermilion
as I finish it. Um, so let's check again
and adding on lines again. So you can see from my
original big painting and postcard that we can see
the lines quite clearly, and we can see from the
petals the lines are subtle. It's interesting
to have this line. If I like to have more shading, I can add a little bun umbrella to the vermillion just a bit, and I'm still using
a number eight. So let's add on more distinctive
lines for the tiles. O so finally, we are moving to the back petals and I'll do a
mixture color first. I'm going to mix vermilion into cadnum yellow and a
little burnt umber. It's just a shape darker. Try to mix a fair bit so that they are enough for
all the back petals. Now and then we
probably will add a little bit of vermilion or burnt umber to make it
slightly darker on some areas. And we like to create
the back petals in this way as shown
in my painting, a little wavy like this. We are going to work on it now. I will switch to
round number six again as the back petals
are much smaller. The insides are also darker in shape and I mentioned
that we will paint it freehand and make
it a little more wavy and you see from this
that they have sharp tips too. But the color difference is
not exactly that different. But still, there's a shape, so we need to take note. Sometimes I like
to add more shades in between the petals
in order to show the separation of the
petals. But just watch out. Not every petal needs
to be so dark in shape. Now, back to the back petals
with the wavy strokes. In between when the
petals are very close, I will draw a thin value line to show the different petals. So you can see that
these are all joined up, and I need to define the petals with the
thin like value lines. Okay, so now we have finished
the frontal sunflower. I'm using around
six brush again, wavy back petals and drawing out the lines
at the same time. Remember the three
color mix again, cabin yellow, tinge of vermillion and bent
umber for these petals. And for these spec petals, you can't apply the stroke techniques that you
learned earlier. Just draw the interesting shapes that are also sharp and wavy. By the way, if you think brush
size six is still too big, switch to size four if
you have or size two. I will add on more petals
to make it a fuller look. And I think we are nearly done
for these two sunflowers. I'm quite excited to
show you the last one. So for the last sunflower, I will switch back to round eight as it is a much
bigger sunflower. This back petals, as we
had painted earlier, we paint them with
the tucker mix at the shades at the same time
and the separation lines too. We can't just let have
frontal petals like this. We need to have variety
of interesting petals. You see my petal is
turning this way. It's a lot easier to paint
on the drawn petals. If not, it will be
a little bit more difficult to imagine
where the petals go. And so for behind
we add more shape. These small darker back petals
add a lot of interest to the sunflower and notice that they are facing
different angles, as you can refer to the PDF attachment for
free hand drawing. Let's check on the petals again. For this in between petals
and the smaller back petals, we need to paint a darker shade. Let me see we are finishing
almost all the back petals. So the inside of the
in between petals, I need to add more
shades. Let's see. I add a little vermillion so that the colors will
not look too dull. Yeah, they look a lot brighter
and prettier, of course. And not forgetting
our lines again, as the paints are semi wet, they will show subtle lines. Let's just look
through to see if we have all the
back petals done. Yes, I think I have
them all done. Well, I'm pretty happy
with the effect. Okay, for this special
petal that is folded, I will create a fold like this. So if you have a fold like this, add shading and keep the fold as cadnium
color, keep it clean. There's a little bit of pin. I will clean the fold a
little with my clean brush. Also, I wanted to
make the tip sharper, and now I add on the lines. For this turn inward petal, I need to add a sheet, turn in like this, and I'll just use a clean wash brush
to blend it lightly. So this petal is done. So we have finished
painting the sunflowers. I hope you enjoy this class.
7. 6 Stippling the centre of the Sunflowers: Let's move on to our stippling. We will need two brushes. We mentioned earlier, one for smaller area and another
for the bigger area. In my earlier lesson, I taught you how to play with
the deer foot brush. Whether your brush is new or not, you have
to wet it first. So you pat it lightly on your kitchen towel checking
that it is not too wet. Earlier on, I have this paint prepared and we can
just pick up the paint. Let me show you as the
paint is a little wet, it will look this way. Let's dimple the bigger
sunflower first. Trust me, this is the easiest. Simple around the
edges carefully, and for the center portion, you can just stipple to
fill up the white spaces. I'm using the three inch brush, and later for the smaller area, I will need the one
quarter inch brush. So now to go near the petals, making sure not to
stipple on them. So let's just be
careful stippling since my brush still
have the paints, I will work on the frontal
sunflower, stepping it round. Let's do it slowly. The
paints are a little wet, so be careful not
to stipple out. Turn the paper to a
comfortable angle so that it's easier to stipple. A deer foot brush is a
good brush to invest, as you can use it
to paint foliage, trees, and even animals. We are using the
toe of the brush to create more textures,
as you can see. Now, I'll go back to
the big sunflower, and I will simple again. What I think you can do is this portion is quite
difficult to work on, and it will be easier
if you use around number six to paint and
fill up the spaces. Because to stipple
near the petals, you might accidentally
go over them. So by painting these corners, it is a lot easier to
handle than stippling. Next, we work on the
side view a sunflower. I will use round number six to fill up the odd corners
and edges again. The bristles of the
deer foot brush is too big and you can't
reach these corners, and they might mess up. Well, I trust that you
will take my suggestion. Going back to the big sunflower, picking up paints on the toe of the deer foot brush and
stipple for more texture. This is our second round. Turn the paper so
that you can stipple better and creating the
textures that you need. Again, for this area, I need to go over again
to show more texture. Well, I think we have finished. I will let them dry
for a short while. Now back to the
frontal sunflower. I will stipple a second
round for more texture. Quickly moving to the
side a sunflower again with the toe facing outwards so that it will create
a nice texture. I'm using a smaller one
quarter inch brush now. I will fill up some of
the uneven patches too. Well, it's not finished yet. Come back for my next
lesson for highlights. See you again.
8. 7 Stalks, Stems and Highlights: Welcome back. We are
going to paint the stems, stock, and leaves
of the sunflower. The colors that I've
chosen is a mix of chronium oxide green
and lemon yellow. The color is very similar
to the real sunflower stem. Don't you think so? I use round number eight to paint this stem, which is very thick. I also paint the sepals
with the same green mix, and these are the leaf strokes. For the shading, I
paint with a mix of perilin green and
chronium oxide green. We call this a darker green mix. Now I paint the side B sunflower stop with the lighter green mix. While the paint is still wet, I add on shadings of the darker color mix on
both sides of the stem. This will create
a three D effect. I love these textures that
was created on this stem. It looks a little hairy. The stems are actually
still semi wet, and I'm adding some lines on both the sunflowers with
reference to my sunflower. It helps me to study the
details of the stems. I'm painting the leaves soon, and I'm getting
ready my heritage flat tan for the lifting
out of the paints. As I have drawn the
leaves earlier, I'm painting with
the light green mix, and I'm very careful
with the tooth edges of the sunflower that they
are not being missed. While the paint is still wet, I add on paralleling green mix. This is wet on wet technique. The area behind the
sunflower will have more shading and it will
take a while to dry. And I will not lift
out the paint so soon. I'm also adding on a
little light lubent umber. Wow, I love these gradients. While waiting for the
leaf to be semi wet, I paint another leaf. This yellow and green is analogous colors on
the color wheel. They are pleasing to the eyes. Now I'm adding on palling
green on this leaf. So I'm using the heritage ten
to leave out the mid rib, and sometimes we have to
go over a second time. And turning to an angle, I left out the pains
for the veins, making sure that they
are not too strict, so they are following the
control of the leaves. I'm going over again
to lift out more pins. Well, this is called
lifting out pins technique, which explains
itself that pain is removed from the paper
to create highlights. I'm painting the third leaf with the light green mix and adding paralleling
green for shading. For this smaller leaf, I will add on a stop and paint the leaf and add the
shading at the same time. I love the brooms here. It adds interest to
the leaf texture. Taking note that I'm holding the number ten flat
brush perpendicularly. I lifted out the pins for
the mid rib, and the veins. Now I work on more
details for this leaf, adding on more shedes of parling green and also
creating more veins. Right, I will teach you how to paint this leaf that has a fold. Painting it with a darker shade of paraling green
and chro ofside green on the inside and drop more paralleling
green again while it is wet. Wait for it to dry. In painting,
we need to be patient. Now we go back to stippling. The center of the
sunflowers are dry by now. I load the deer foot brush with yellow gush and stipple around the edge of
the brown center. You can see the
difference, I'm sure. We will come back
again for this in our next lesson. See you then.
9. 8 Highlights and Shadings: Welcome back. Continuing from the center of the sunflower, we are working on
the highlights now. I have a mix of yellow
and white gouache. I'm using a round number six to paint on the
center of the petals. Woah is an opaque
watercolor paint, and by adding this layer of lighter yellow on the
petals of the sunflower, it creates a more
brilliant shine. You don't have to paint
over every portion of the petals only on the parts
that you want to highlight. I mentioned that this
is my focal flower, so this is the sunflower
that I would like to highlight more
and give details. I like to show the
sharp tip of the petals here. Let's work on this. We mentioned in our earlier
lessons that petals nearer to us will be larger and brighter. I'm adding the highlights in
the center of the petals. So now I work on the
smaller frontal sunflower. Don't you think that
it really brightens up the whole sunflower?
Yes, I think so. I know it looks very
fun painting this. Trust me, it is really. I hope you will try the
frontal sunflower for a start. Yeah, let's move to the
site view a sunflower. Highlighting on the
petals are essential. But as these two sunflower behind are not my focal flowers, I will not giving
that much details. Now I'm working
on the shading of the sunflower petals to give depth for a
more three D effect. I'm loading brush on only
half of my damp brush. I'm not sure if you
can see this clearly, but the shadings are showing. I'm adding in a bit more umbra and verminium for a
more vibrant color. As you can see, the sharp tip of the angular brush is
good for shading here. The shadings give more depth. And I will be
shading also behind the first layer of the
petals so that they will look more three D. I'm sure you can see the difference before and after shading, right? I'm loving it. Add more sheets if you need to for more depth. Let's check at some
of these details. Oh, well, I think I might
miss out on white holes here and I should be filling
it up with cadmium yellow. Yeah, it looks more
natural this way. Let's move to our side
view a sunflower, shading it with a mix of
vermilion and burnt umber. It looks so much nicer with the shading
that adapts to it. And you can see that the sharp
tip of the angular brush allows me to go in between
narrow corners to shade. This frontal sunflower is
flat without the shading. So I'm going to do some magic. I'm shading with
the same mix again. Can you see the
difference again? And I add more burnt umber with vermilion again
for more shades. Turning the paper to a
more comfortable angle to shade if you need to. Wow, this looks good too. So now, do you remember the leaf that I had left
unfinished in the earlier class? I haven't forget it. I was
just waiting for it to dry. So we are going to paint the lighter green mix and
adding shadings below. I'm adding some
smaller leaves here, free hand painting with
my brush loaded with chromium oxide green and
paraling green for shading. And I'll be adding
another leaf again. Also cranium oxide green and
paraline green for shading. So I have finished for now. Do come back for my next
lesson for wrap up.
10. 9 Wrapping Up: Welcome back. Let's
do a wrap up. When we are finishing, we need to check through
our painting. Most of the time, I
let my painting sit. We say that we let our food sit, allow it to stand
at room temperature after being removed from oven. But for my painting, I
let it sit at my easer. I will study if I like
to improve on it. If there's any part missing
that I need to touch up. So even when I'm looking
at my painting now, I saw something that I need
to improve, like this dm. The shading disappear, and I have to add on
more shadings of paraline green and also add on a stalk for this leaf
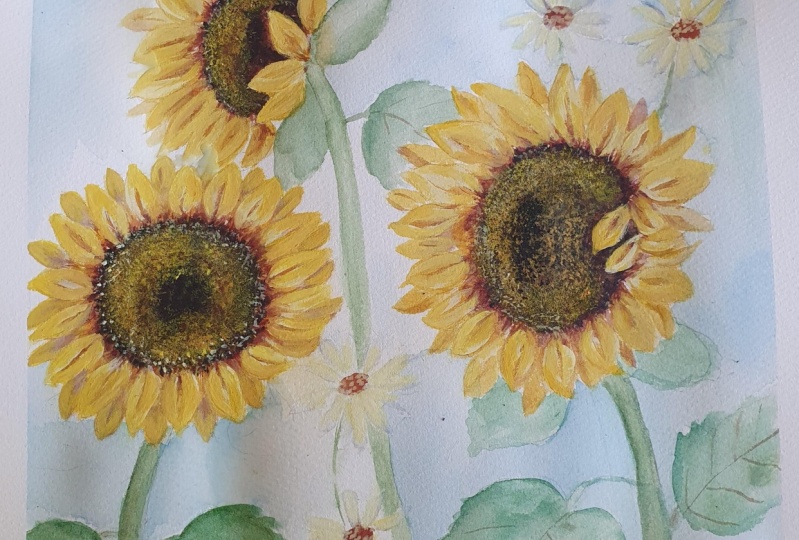
and adding shade to it. Mm. So I have two leaves here. So going back to
my own reference, the cut that I'm selling, I have three sunflowers. I mentioned that I can't teach
the daisies in this class, as it will be too long, but I do have an online
class also at Skillshare, called filler Flors and leaves as daisies
are filler flowers, and that is my most
popular class. So please go in to
check on that class. So for this painting,
I will finish painting two other sunflowers and
filler daisies on my own, and it will be
considered complete. Looking at it again,
the big sunflower is my main focal flower in these three sunflowers
floral composition. And because I painted them
with different angles, it makes this painting
very interesting instead of just painting
a frontal sunflower only. And I hope that you enjoy this class and go and
create more sunflowers
 Esther Peck, Educator, Author