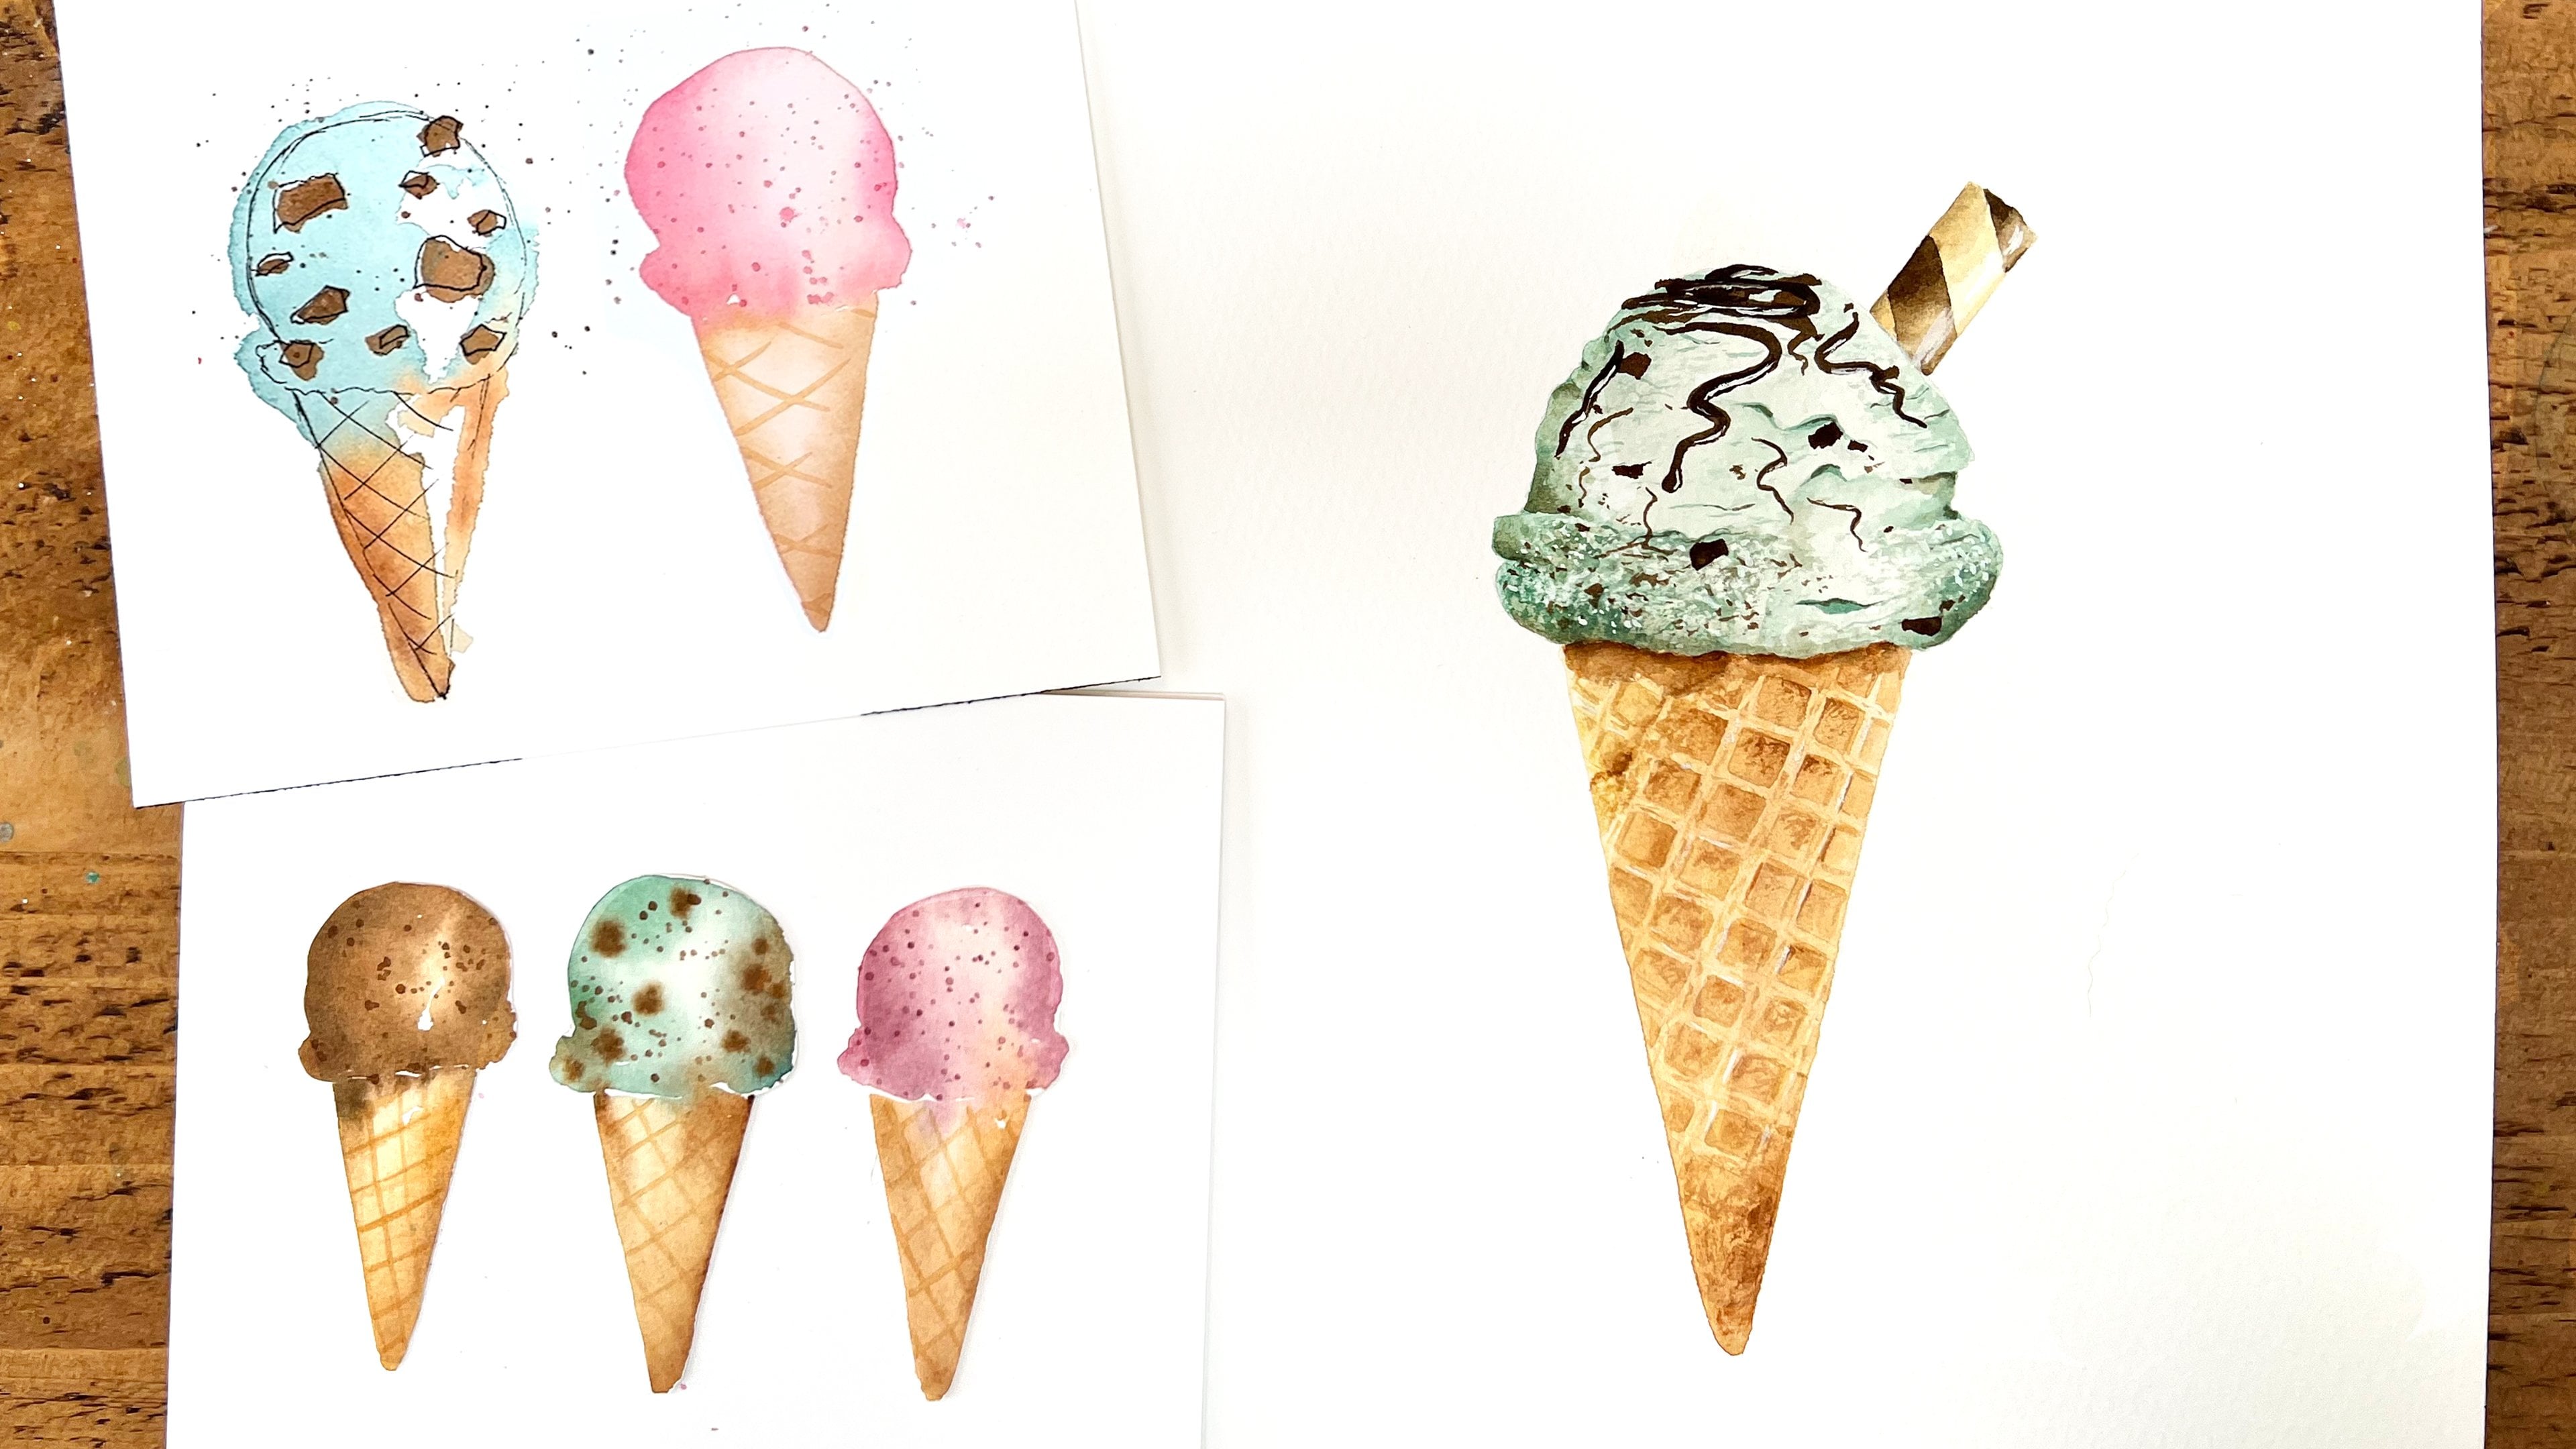
Transcripts
1. Introduction: In this class, we are going
to be making very simple, very fun and easy
Christmas cards. We'll start by painting
some washes and patterns, and then we'll cut out some
shapes to make baubles, Christmas trees, and presents. I'll show you how to add very simple yet effective patterns and embellishments to these on your cards to make
them beautiful. This is such a fun and low
pressure way to explore your water colors
and create something that you can share with
family and friends. It allows you to play
with different colors, techniques, brush
strokes and patterns. Name is Sharon Stevens, and I am an artist and author, and my goal is to inspire
and encourage you to create regularly in simple
ways for joy and relaxation. I am the author of two books, Watercolor for the
Soul and How to paint it and have over 20 classes
here on Skillshare. I hope you're as excited to make these simple and
fun cards as I am. So let's get started.
2. Supplies: For the supplies in this class, you will need
watercolor supplies. So for the paints, I recommend using your favorite
festiive colors. You can use any
colors you choose. I will be using Windsor Newton
professional watercolors, permanent sap green, indigo, Windsor lemon, permanent
rose, and burnt umber. These will allow me
to mix a range of greens and add in some
reds and browns, as well. And indigo is also a really
lovely, deep winter color. My paper, I will be using a
block of Saunders Waterford, which is nine by 12 " and
300 GSM or 140 pounds. And this will give
me enough space to paint plenty of patterns. You need brushes, and I will be using two fairly large brushes, and these are around
sizes five and eight, and these are both
Princeton brushes. You will also need water, and it's also good to
keep a paper ton handy to take excess water or paint
away from your brush. So it's also good to have a
decent palette to mix in. I like to put my paints
around the edge so I have plenty of space to mix a variety of colors in the
middle of the palette. For the extras to
make the cards, you will need either some
ready made card blanks or some card to make your own. I'll be using quite small cards. These blanks are a seven, and they are 250 GSM. So this folds in half
and makes this size. You'll need a pencil, some scissors, and a ruler, and I'll also be using
some circle punches for the B Bles which
are 2 " and 3 ". And I love using these for
circle gift tags as well. So if you think you'll
use them enough, I definitely think they're
worth investing in. I use mine so much
and they're so much easier than cutting out
the circles by hand. You'll also want some glue
or some double sided tape. I'll be using this crafters
companion roller tape to stick my patterned shapes
to my card blanks. For the embellishments
and extra patterns, I will be using an opaque white, which is doctor PH Martin's
bleed proof white. I'll also be using my
favorite white pen, which is a unibL signal, broad white gel pen. I'll be using a
gold pen as well, which again is a unib pen. And then also a couple of black fine liners,
and these are tombo. I'll be using size
one and size three. And I'll also be using a brown pen to color in some
of the trunks of the trees. And this is a tombo
pen size 879.
3. Painting Part 1: Okay, so I've divided
my paper into quarters. So it's worth just spending
a couple of minutes thinking about the shapes that you'll be cutting out and the
sizes that you want. So I know that my circle
punches for the Bubles are going to be 5 centimeters
and 7.5 centimeters. So I know I've got
plenty of space within each of these
sections for those. My Christmas trees
are going to be about 6 centimeters high because I'm using
quite small cards. So again, I'll have
plenty of space to cut lots of different
trees out of here. So if you're making
bigger cards, you might just want to make
your sections a bit bigger. So in this first section, we're just going to
paint some blocks of color in this first section
and the second section. So these will be for the
trees and for the present. So we want a variety of colours
that work well together. So I'm going to do some
different greens in this one. And then in this
one, I'm going to do some reds and more kind of
brownie orange colours. So on my palette, I've
got my Winsor lemon, my permanent sap green, my indigo, and then up
in this top left corner, I've got my permanent rose
next to my burnt umber, and mixing those together is going to make a nice browny red, which is quite festiv. So I'm going to start by making a yellowy green for one of these flat washes by mixing this Windsor lemon with
the permanent sap green. So I'm going to fill
about a quarter of this. Okay, so now I'm
going to just use the sap green so it's
more of a darker green. And I'm using my
size eight here, so it's quite a nice big brush to get me a decent
amount of coverage. I'm using most of the space, so going up to the edge. Okay. Now I'm going
to mix a bluey green. So mixing in I'll
keep that there. It's nice dark green with a permanent sap green
and the indigo. It's a lovely
forest green mixes. I'm not worried about making these washes really neat
because any kind of patches or variations in darkness are just going to
add a nice bit of texture. So now I'm going to go
back over to this indigo. It's got a little bit of
the permanent ac green in. I might add a bit more. I'm gonna wash off my
brush and just add a little bit of
this Winsor lemon. Mix that in. Really well. Add a bit more water. And then use this in this
last corner here. Okay, so now I'm
going to move on to some reds and maybe
browns and oranges. We'll see. So just mixing the burnt umber with
a bit of permanent rose. Okay. I'm going to add a bit more permanent
raisin this time to make it a bit more pinky red. Okay. I think this time, I'm
going to go for I'm gonna pull out some of this burnt umber and I'm going to
add a lot of water to it, so it's quite pale. Let's see if I can get a nice
pale, almost creamy color. Okay. And then I'm just going to add a bit of the winds lemon to this pink to make
it a bit redder. Look, we've got
these lovely kind of bleeds as they're
touching each other, this one coming down here. And these will just add some
just really lovely effects to your cards. Okay, so we've done
the first swatches. Now we want to do
some bigger blocks of color with lots of
variations in values, lots of bleeds, lots of texture. So I want to start
with the indigo. I know I've got a bit
of green mixed in here. I'm just going to try and
paint pull this out above it, I just want to stick
mostly to the indigo. I'm not too particular
about this. So I'm just filling up my
paintbrush with the indigo. I'm just going to start at
the top. Pull this across. And now I'm just going
to go and fill my brush full of water and then just add this in so we can get
some nice pale areas. And you see these
drop this water in, it will push that paint back and giving you some nice
background, some nice texture. And I know we often
want to avoid that, but in these patterns, it's kind of just nice to just play and see what the
paint wants to do. And see the effects
that we can make. So I'm just adding in some dark. I'm not kind of being too precise or worrying
about where it's going, and then I'll go back to
picking up some more. Be careful not to let this
drip onto your other blocks. You see here, you can leave these little patches
of white of the paper, which can be really nice. I can add a really nice effect. Okay, I'm going to go and
pick up some more paint now. Add this in. You'll see here you've got this contrast and this
lovely bled coming up here. Once you pull that out
and cut these out, it can look almost like
mountains or lakes or forests. It's really gorgeous effects. Okay. So I think
that's not enough. I don't want to overwork that. So in this last one, I want to mix some of the
indigo with some greens. So I have some nice blends
between the two colors. I've already got this green
kind of mixed on my palate. I don't want it to be too dark, so I'm going to
start at the top. I see this nice bluy green here, and then I'm going to add
some water underneath it. I'm actually going to move my water over here
because otherwise, I'm going to carry
it over and drop splatters all over my pad. I'm just loading
up lots of water here so that creates
a nice soft blend. So now I'm going to go back into this darker blue
and add this in. You can see my brush, I'm
working quite quickly, just kind of natural. I'm not overthinking where
I'm putting these strokes. I'm going to go
for the green now, add some of this in. What do you find
is nice, though, is when you do have
the lighter areas, so it's not too dark. I also gives it that contrast. And you'll find
that you can create kind of very different
looking pieces like trees or bore balls
from the same piece. So if I cut out this area, that would look quite different to this darker area down here. All right, I'm just
going to add in a little bit of darker. Yeah, I don't want
to overwork this, so okay. I'm happy with that. Okay, so I'm going
to let this dry, and then I'll remove
it from the pad, and then we'll paint some more
patterns on the next page.
4. Painting Part 2: Okay, so I've divided
my page into quarters again so we can create four
more patterns for our cards. So the first one
that we're going to do is we're going
to paint stripes. And I don't want you to
worry if you think, Oh, I can't paint in a
straight line because this isn't about being
neat or perfect. These lines aren't even
particularly straight. They're a bit wobbly
and some of them are touching in places
so that the paint is bleeding in and it just creates these lovely soft bleed
and lovely effects. So this one here is actually painted with a size five brush. So it's quite small, and these ones are painted
with a larger brush. So depending on how thick
you want your lines, it can create quite
a different effect. So I'm going to go with
a size eight brush, and I'm going to be using blues and greens and adding
in a little brown, as well. So again, we're just using the variety of greens
that are on our palette. So just pick a green at
random and then start. So it's just a line
all the way across. And again, it's
just a quick line. Doesn't have to be perfect. It doesn't have to be neat. And then what I'm going to do
is just paint another one. I'm going to move the paint
brush up a little bit, bring it down so you can tell you can see it
touched it there, and the paint has bled in. I just pick another green
now and do this again. Might overlap. You can see it's not very neat,
which is nice. It's gonna have a lovely effect. I'm going for a brighter
yellowy green now. And then I'm going to use
a little bit of my bone umber and add some brown. Okay. Go back to
the bluey green. And then you can just I'm gonna press down a
little bit harder now. So I've got some thicker lines. You can vary the lines as you go along and
just play around. I'm just going to bring a
bit of this yellow over to the indigo to make more
of that foresty green. Then going back to this brown. You can see I'm varying
the width of these lines. You can make this much neater. That's not the effect
I'm going for here, but there are so many
ways that you can do this, which will look lovely. K. You can see I'm being
much less careful than I normally am about mixing the colors on my
palette as well, because we're just kind of creating lots of different
variations on it, and I'm not too
worried about it. Okay, so I brought that
down right to the bottom. Okay, in this next
one, we are going to be painting more strokes. You can make them
slightly curved. You can just do lines. I'll show a couple of examples. So this one is with
the size five brush. And this one is quite thicker, less defined with the
size eight brush. These actually don't
look like much. But once you cut them
out, they look really, really lovely,
especially as the trees. So again, just pick
one of your greens, and it can be kind of straight
line or more of a curve. And you can see that my brush
isn't completely loaded, so it's starting to have a dry brush effect
towards the end, which is adding some
lovely texture. So just play with
creating lots of strokes. So I'm using my size
five again here. So these aren't too thick. I'm not pressing too hard. I want a nice variety
of greens in here. So I'm making sure
to pick up lots of different values,
different tones. I'm going to add
some more brighter yellowy green ones in. And then I'm going to go
for some dark greens, and I'm going to press down a little bit more
for some of these. A lot of these patterns,
you'll find you'll get, you know, some bits, which
may not work so well, but some bits you have all
these like accidental bleeds or kind of patterns which
just kind of evolve. So you're not
purposely trying to create it to look like
something particular. Kind of playing and
seeing what happens. So I'm just I'm gonna leave
plenty of white spaces, but I just don't want
them to be too big, as my Christmas trees
are quite small. Okay. So, this one's done. So we're going to do
one more together, and then I'll leave you
with this final section to design your own
if you want to. So, this last one,
we are just going to create some random marks, random shapes, see
how it evolves. I'll show you a
couple of what I've done with blues and greens. So it's really just
kind of playing, but you can just kind of make it up as you
go along, really. So I'm going back to my
bigger size eight brush. I'm going to start with
some kind of pale indigo, and it has got a touch
of the yellow in, so it is a little bit greener. So I'm just going to paint
some random marks with this. And then I'm going
to go to the green and adding some in here. Do some yellower patches
down the bottom. I want this bottom to look
a little bit different. I'm just gonna play
around and see and maybe add some more dots. I'm just pressing down now. Quick marks to see what happens. And then I'm just
gonna drop in some of that darker blue green. So it bleeds into the wet
patches that are already there. In some of this, I might
actually add in a little bit of that reddy brown just to see. I'm not sure if it will work. So I'm only going to do
it in a little patch. I'm not convinced about it. But it might work. You
never know. We'll see. I'm gonna go for
some more blue here. Do some more lines. Okay, not going
to overwork this. You can see I've got some
quite different areas here. I think these two will end
up looking quite different. So we'll see what they look
like once we've cut them up. Okay, feel free to fill in your own section with
a different design. You can paint some neater
lines, thinner lines, choose a different
colour for any of these, do some different washes. It's completely up to
you. And I'll see you in the next video once
your paintings have dried.
5. Baubles: Okay, so now that our
paintings are dry, we can trim these down. We're going to focus
on Bubles first, so I'm just going to put
these blocks of color aside, which we can use later for
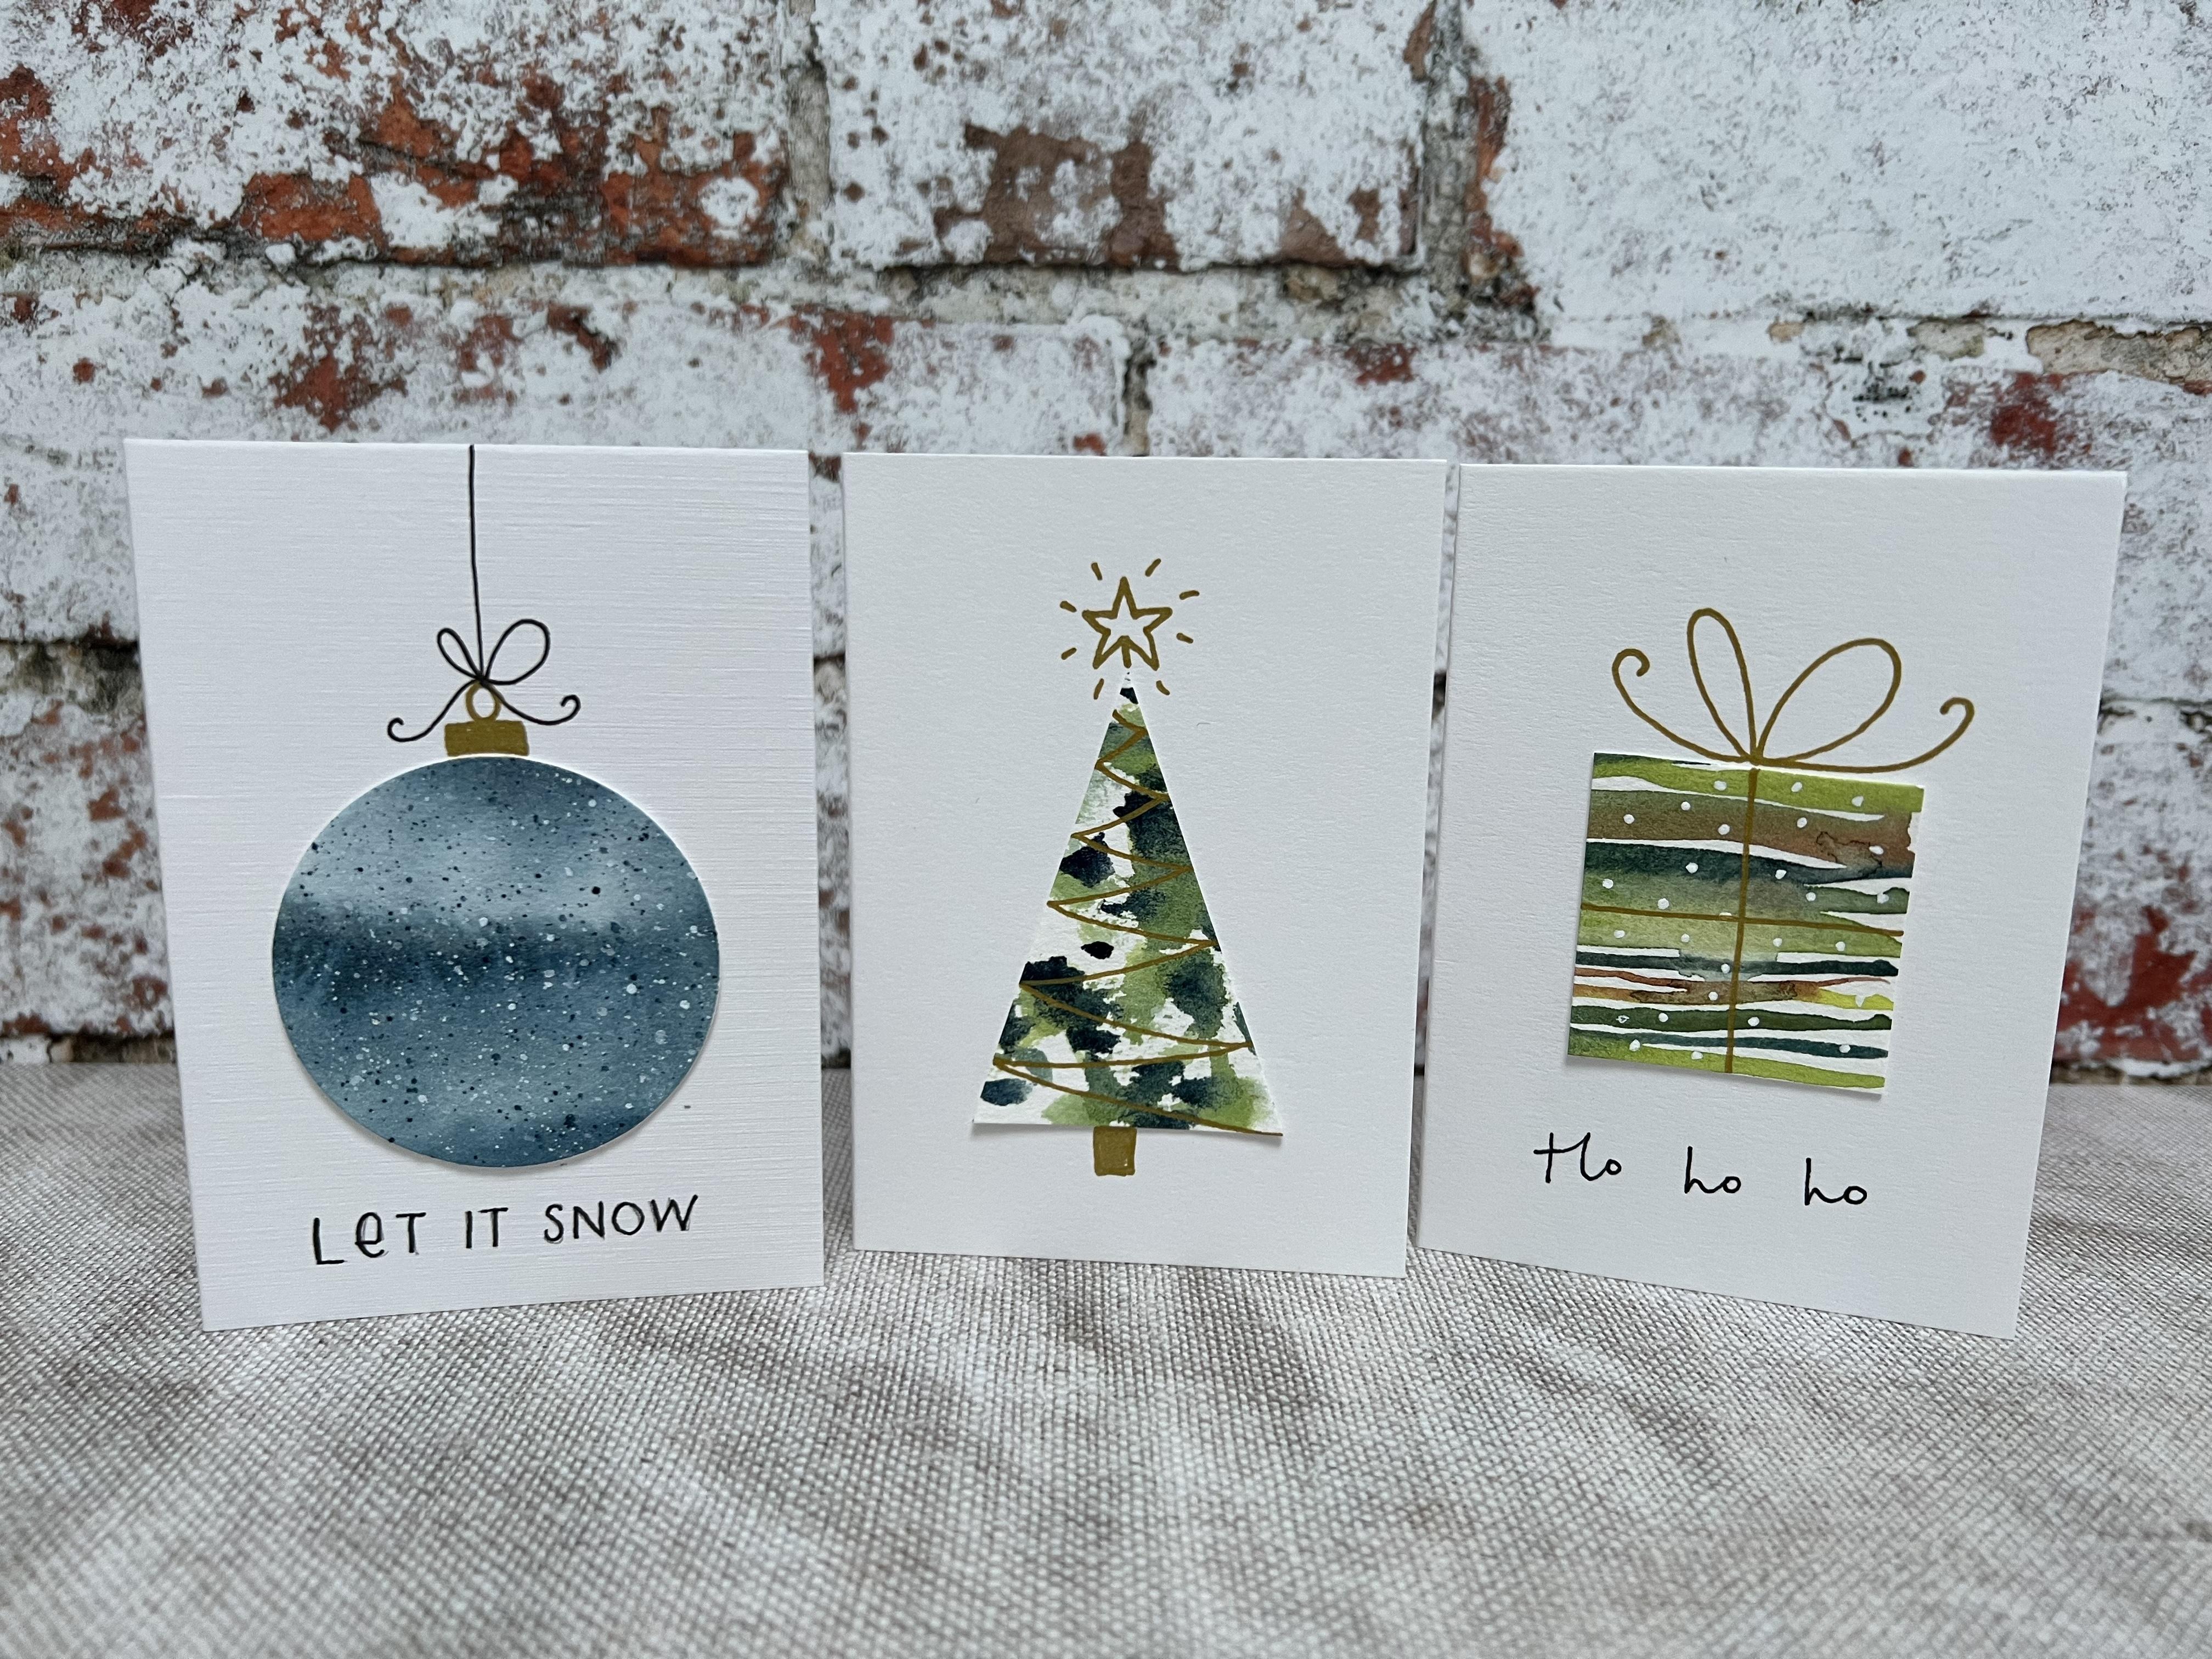
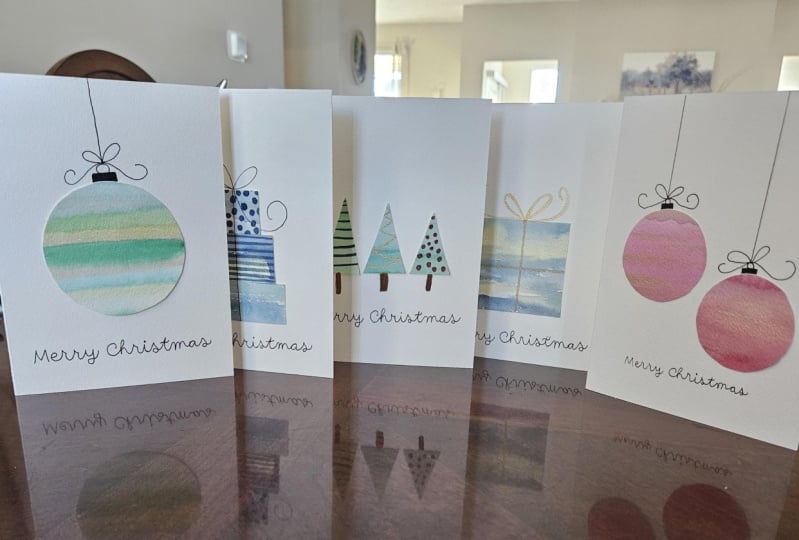
the trees and presents, and we will use these patterns. Here are some examples of some Buble card that
I've already made. You can see there are lots of different ways that you can
add patterns onto these. You can add simple
lines and dots. You can make them more
curved to try and give that three D effect or
just keep it two dots. You can add some
splatters which we'll be doing to one of
them in this video, or you can make the patterns
a little bit bolder. So for the baubles,
I like to use my three inch punch
and my two inch punch. So that's 5 centimeters
and 7.5 centimeters. So what we can do is you can
get a bit of scrap paper or printer paper and punch a hole and then using
these patterns, so we'll take this one first. You can just start
to have a look at what kind of areas you
might want to punch out. Or you can just do it randomly
and get a nice surprise. But especially for these washes, it can be quite nice
to pick an area. So I'm going to go
for this corner. Okay, so here are some examples. So this is a greenwash, and this just has kind of
a delicate white splatter, which I used the
doctor PH Martin for. This has a more bolder pattern. And again, with these, these
are all bolder patterns. This is another
one with splatter, and this is a mix of white
and then blue and dark green. And then these have some
dots and lines and dots. So these are using
my white CignoPen. So I think for this one, I'm
just going to grab my pen, and I'm just going to
draw some dots on it. You can choose whichever
pattern you like. Okay, so now I'm going to grab my card template and position this probably
just below center. I want to leave some space for a little bit of writing there. And then what I'm going
to do is I'm going to draw the top of the Buble. So I've got some examples here. I like to keep it
really nice and simple. But it's quite nice if you draw some different examples and play around in your sketchbook because then you can just hold your bob up to them and see
what it would look like. So these two are just
with black pens. It's got a bit of gold, and then it's got a bit
more gold detail, then this one's colored in. So just going to decide. I think I might go for the black plain
black for this one. I'm going to stick
this down first. Just using my roller tape. You can use glue, whatever
glue or tape you have. So I want the stripes
to go horizontally, so I'm just going to
position it there. And then I'm going to use my
size one Tombo fine liner. Add in that top bit of
the bauble and a circle. And then this string, which will go all
the way to the top, and then I'm going
to add in a bow. With some strings coming down. Then I'm just going
to add some detail, some lines into this top bit. Okay, so if you want
to add some lettering, I'll do a video at the end of the class for how we can
add the lettering in. So I'm just going
to fold that over. And there's our first card made. It's so simple, especially
once you've got your patterns, it literally just
takes a couple of minutes to finish off these. So let's do another Buble. So let's have a look.
We've got the stripes, which would be nice
or maybe the blue. So maybe we'll do one with the stripes and one
with this blue. Okay, for this one, I think the gold would probably
work quite well. Yeah, it goes nicely
with those colors. So I'll stick this one. I don't think I need any
patterns with this one. This, these stripes are
enough on their own. Although you could try
it with some white dots. I'm sure that would look nice. Okay, so using my gold pen, I'm just going to
add a rectangle that top and color it in. Then add that circle. And then I'll just
draw the black line for the string all the way to the top and then
add a small bow. Okay. And then
finally, for this one, I think I'll add
some white splatters or maybe a mix of splatters. Okay, so to add the splatters, just make sure you've
got some printer paper or scrap paper underneath. What we're going to do
is we're going to add some white splatters and
some indigo splatters. So just like these two, you can see they've got
a nice delicate, fine spray on them, okay? So I am going to grab
my paint brushes. I've got my doctor
PH Martin blue proof white on my palett, so I'm just going
to coat my brush in the white, my fine brush. And then I'm just
going to tap it against my larger brush. You can see it's coming off. I'm going to add a
little bit more water, which will make it come
off a little bit easier. And then I'm going to
wash my brush and add in some indigo to my brush
for the darker splatters. Okay. Now we can
wait for those to dry and then we can
add them to our cards. Okay, so I think I'll go for
the gold chopper, as well. It gives a nice
contrast to the blue. So just check this is dry. Sometimes these can take a
little longer than you expect, especially if there's
kind of a blob of water, so just be very careful
because it'll be easy to smudge and ruin them. Decide which way
round you want it. So I want that
stripe going across. Looks nice. Leaving enough space for some lettering
at the bottom. And then with my gold pen, I'm going to add in that top of the borbll and that circle. Then using the black pen to
draw the string and the bow. So we have three very simple, very beautiful Christmas
cards already, and that took us next to no time to add these
onto the cards. Well, add some lettering
in the later video. We'll move on now
to Christmas trees. So gather your patterns up and we'll start cutting
out some triangles.
6. Christmas Trees Part 1: Okay, so now we're moving
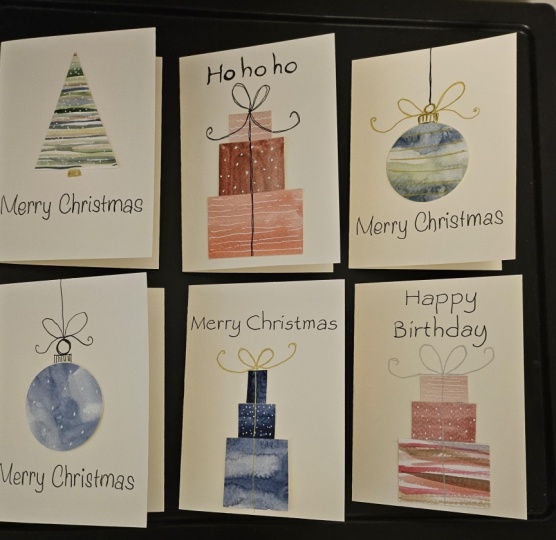
on to Christmas trees. I wanted to first show you some examples of ones
I've made before. So, this one is some stripes
with some splatters on. And then this one is more of
that random pattern that we did at the end with some
gold curves on them. This one has three
different sizes. So these cars are lovely
on their side as well. And then this one uses the block colors
and then some patterns. So you can make so
many different designs out of the Christmas trees and out the patterns we've created. So let's get started. Okay, so these are the
patterns that I want to use. So let's start with
the block colors, and we'll cut out some
triangles with these. So I'm just going to grab
my pencil and ruler, and I'm just going to draw
a line along this base. So when I'm using
these plot colors, I probably want the
Christmas trees to be a little bit smaller. And these cards are quite small, so I'm just going
for trees that are around 4 centimeters
or 5 centimeters. And they're about 3
centimeters in width. So I'm going to measure
three across and then six. I'm going to go
to 4.5 for these. Okay. So this is the
base of the first tree, which is 3 centimeters. So the middle of the
top point will be 1.5. And then we want to go
along again 3 centimeters because this bit here will be
the base of a second tree. So it'll be
alternating triangles. We'll do another three here. So I'm just going
to cut this out. You can draw the
lines if you like, for each tree, but I
just prefer to cut them. So I'm just going to start
at this first dot here, if you can see it, and cut all the way to
this dot up here. And I'll cut along this
line as well. Okay. So I'm going to start at
the tip of this tree, and I can see I've got
a marking just there. So I'm going to cut
all the way to that. And that will be the
top of this tree. So starting at this marking, I'm going to cut
to the top there. I've got another
marking up there. And then I'll cut
down to the corner. Okay, so now I should have four trees in
this yellow green. So we can do the same
for these other greens. And we can make some of them
a bit taller or a bit wider. So I think for this
bottom one here, go to trim this a bit more. So there's no white areas. I'm going to keep
this as three wide. So I'll start from
the right edge. So put that six, go to three. So, these were 4.5, so I'm going to go to
5 centimeters high. I'll just about make
it five in this block. I'll draw a line across there. Oh. Okay, so I've got
these two bases here. So I want to go. So I've
got three across there, so I want to start with 1.5, so that will be the
top of this tree. And I want to go three
for another base. And then if I can fit that on, I'll go three for another base. Then I can cut these out. Okay, so just continue
cutting out the rest of the greens in your
triangles and then we can play around with
some combinations. Okay, so for this green, I'm going to make them the same size as the lighter green, which again, is 3
centimeters by 4.5. Okay, so let's just get rid
of all this scrap paper. Tidy our desk as we go. Okay, so now we have all
of these triangles of different greens
and we can look at how we could put them together, which would work quite nicely. So now we can add some patterns. So using my white pen, I'm just going to add
a variety of patterns, and these can be simple lines, or they can be dots. You can vary the gaps
between the lines. I just add some
dots to this one. You can add some splatters
like we did for the Buble. Or you can add some dashes. I'm going to add some
kind of wavy lines. Lots of Us. Okay, so just grab your
card template, then. Let me just play
around with these. So I think overlapping
would look best for these. Okay, I don't think there'll be enough room for writing on
this one, which is fine. So I'm going to
start by sticking down those two back ones first, so the top one can overlap. Check. That one's going to be a little bit lower
than the other two, so it looks like it's
slightly closer. Okay. Now you can add in a small bucket just with
a pen with your gold. I'm going to use a brown. I've got this brown
pen. Just going to add a little rectangle or square
at the bottom of each one and color it in. Okay. Okay. And there's our first card. So we've got all these
trees so we can carry on playing around with
different patterns. So this one's got
some smaller dots. It's got diagonal
lines or curves. These are closer
together and bigger, or you can try dashes or some curved lines
from side to side. Okay, I'm going to put
these to one side for now and we can have a look at some other trees that we can make with these patterns
that we've got here.
7. Christmas Trees Part 2: So I want to try these stretch I think this is going
to look really lovely. So I want a bigger
tree for this one. So I want it to be about 6
centimeters high so it can take up that whole
page on its own. Right. So I want this to
be 4 centimeters wide. 6 centimeters tall. I'm just doing this roughly. So I'm going for 2
centimeters in the middle, which will be the point,
and then I'll cut it out. So I think I'm going to add some white splatters
to this one. I think it will make it
look lovely and festive. So I'm just going to
grab my white paper and move these out the way so
they don't get splattered on. Pick up more of that white
paint that's on my palette, and then just tap the brush. Okay, I'm going to leave that to dry before we add
it to our card, so I'll push this to one
side and we can have a look at another
one while we wait. So just have a look
at these patterns, see if there's anything
that you want to try out that particularly
appeals to you. I quite like this area here. But yeah, I'm going to cut
out one of each, I think. Then we'll have a look at
what we can do with them. So again, I'm going to make it 4 centimeters by 6 centimeters
high because I want it to stand alone on
that single card. So all I need is
the width marked, the height marked, and then the midpoint marked where
the tip of the tree will be. So that's 4 centimeters, 6 centimeters, and
then 2 centimeters in. Okay. And I'm going to do
the same for this, but because it's
got a white board, I need to trim this down first. Okay, so again, we're
going 4 centimeters. 6 centimeters high. And then that midpoint, half four is two,
where the tip will be. And then I'm just going to
line my scissors up from the corner to that
midpoint there. And if you feel more comfortable doing so
draw the triangle out. I just want to keep it simple and have as few pencil
lines as possible. So this actually looks a lot nicer than I
thought it would. This looks lovely.
So I'm wondering whether I could use
the white splatter. We've already tried
that. So what I'm going to do is
I'm going to use my gold pen and do some curve lines going from
side to side on this one. Okay. So those two are ready and waiting to dry so we can
add them to our cards. And then just deciding if I need to do anything
with this one. So we could add I don't think there's
enough color on there to add white to it. We could add some
darker splatters, or we could add
some baubles to it. So I might try that.
So I'm going to grab my small paint brush, pull my palette back in. And then I'm going
to go for this red, this reddy brown that's still on my palette Just
add some circles. Okay. I'll leave
that one to dry. The one thing I find about doing things like this is you're
constantly cutting things out, constantly grabbing your
paints, or your pens. It's very easy to
get in a bit of a muddle and a big mess. So every so often, you
just kind of need to have a pause and have it look tidy, throw those scraps
away or just pile up the remaining kind of
patterns and things just to keep yourself a bit more organized so you can find
what you're looking for. Okay, so I'm going to
move this to one side. So we've got a card
template here. I'm going for this first one, which I think is really lovely. I'm really
happy with this one. You never know how
they're gonna turn out. And I was never sure, but I think the gold will look
really nice with this, maybe a gold star. I want to leave some space. Do I want to leave
some space of writing? Um, yeah, I think I will. I'm gonna add the tape on the back and then
stick this down. I won't go for a
star for this one. I think I'll just go for the writing at the
bottom and the trunk. I'm gonna press that down. And then with my gold pen, I'm just going to add a
rectangle at the bottom in the gold for the trunk. And we'll come back to this
in the lettering one to add a nice little
greeting at the bottom. I think that is actually
one of my favorites. That's turned out really lovely. Okay, so next, we have this one, another one which I wasn't
expecting to like as much. So I think maybe we won't put
any greetings on this one, so I can move it down,
and then we have space for a start at the top. So again, we can either
do that in black or gold. So we've already used
the gold in this one, so I might continue with that. So I'm going to do I'm just going to do the outline
of the trunk for this one, and then I'm going to do
a little start on top. I'm going to start with the
point upwards and then go across for the side
ones and in and across. You'll see that
when it comes in, it doesn't quite go into
kind of the center. It's more meets a diagonal line downward
line from the top bet. So then we'll go
down, up, down up. And then we can add some
little lines coming out. I'm going to add a little
perch for the top. And do I want to color that in? Yes, I might colour it in, yes. Okay. So that one is finished. I'm really happy with that
one. I think it's so cute. Okay, so for this final
one with the red baubles, we can stick this on. Need to decide whether
we want a greeting. I think, yes, I'm going to do a greeting. I'll stick it on. I'm going to leave some
space at the bottom. Okay. I'm going to use the
black pen to do a trunk. I'm going to make this kind
of a longer rectangle. Can you just colour that in. I'm going to leave
the star because I don't want that too
close to the top. So leave that as it is. And then add some
lettering at the end. Okay, so these are the four cards that I've
made in this class. So hopefully you've
made something similar, and you're just as
happy with yours. Okay, so now grab
your patterns again and we can look at
making some presents.
8. Presents: For the presents, we're just
going to keep it really simple and cut out
squares or rectangles. We can use a single square,
like in these ones, just adding a simple bow and maybe some ribbon with just a simple cross and
then the lettering. Or we can cut out
multiple squares, and these ones get slightly
smaller actually go towards the top and
add in that bow. Again, we can look
at different ways to add patterns
to these squares. So we've got some simple dots here because the
stripes are enough, I haven't added anything. And then I've just
tried out some different patterns
on each of these. So here's another one with
just a single square with that delicate spray of
the opaque white paint. And then here are a couple of other designs where the presents are lined up next to each other. So these are really simple. They're not going to take
us long to make at all, but there's lots of different
options for what we can do, and you can play around and think of other designs as well. So for my cards,
I'm going to grab my pinky brown squares for a stack of presents
and then go for the bolder stripes for a
square single present. So let's start with
a single present. So having a look at
the size of my card, I want it to sit in the middle here. I
don't want it too big. So this is about
the size I want it. And this is roughly
3.5 centimetres. But I'm not going
to measure it out. You can draw it out if you
want to to make it more exact. I'm just going to
cut this freehand. Because there's some
bolder stripes here, I think I could
probably get away with adding a little bit of pattern. So I'm going to add
some white dots to this one and see what
that looks like. So with each pattern
that you cut out, it's worth having a look
and just kind of making your own judgment for each
one to see what you think would work best and kind
of don't overthink it. It's all about, you
know, experimenting. Okay, so I'm happy with that. I'll give that pen
a minute to dry, and then I'll tape it down. So I'm sticking this
roughly in the center. So I've got space for a bow at the top and then
writing underneath. So I'm going to use
my gold pen because I think the gold pen goes really
nicely with these colors, and I'm just going to draw two big loops in the center,
slightly different sizes. So you can see this
one's a bit bigger, and then I'm going to do two strings coming off,
curving at the end. And then I'll just draw
a line down the center. And one across. Okay, so really simple. That didn't take
long at all, but I think it looks really lovely. I'm going to add some lettering, so I'll do that in
the last video. So now I'm going to grab
my block of colors, and we can cut out some
different size squares and then play around making some
stacks of presents. So I think I'll keep
the darker ones a bit larger so they can
sit at the bottom, and then the strength
of colors can fade a bit as we go up the stack. Okay. I think I quite like
this color for the bottom, so I'm going to make this a little bit bigger than this one. I trim this off. Just grabbing my card template to make sure these aren't going to be too big. Okay. They're a little big. I might just trim them
down a little bit. Okay. And then I'm going
to go for this paler one. And this is going to be a
smaller one for the top. Okay. I want to add
a bow in the top, so I'm going to make
this bottom one a bit smaller, again. I'm not going to add
writing on this one, but I do want it to have enough space around the edge so it doesn't look
too kind of crammed. I think this is still a bit big. Okay, that makes a better size. Okay, so now we've
got our squares. We can play around with some
patterns to add to them. So I'm going to use my white pen because I think
it's going to look nice and soft against these
kind of pinks and browns. And I'm just going to do
some different lines or dots or zigzags and see what works. It can be quite nice to
just cut out a range of these squares, do your patterns, and then kind of play
around to see what looks good together once
you've already finished them. So the lines look quite
nice next to the dots. So I'll do the dots
in the middle. And then in the top
one, I'll do something a bit more line based again. So maybe maybe some waves. Okay. So now we can
stick these down. Okay, so now I'm going to grab my black pen and draw
on my bow at the top. And I'm going to have the
strings coming down over the present and then
around the edge. And I always try and make these slightly different lengths so they don't look too uniform. And then I'm going
to add a line for this ribbon all the way
down to the bottom, and that will just tie
it in together nicely. So again, really simple. That didn't take
very long at all, but it still looks really cute. So two really simple, really effective present cards. And we have lots of these
squares of patterns left. So we'll keep all of these, and we can continue to play around and make
some other designs.
9. Adding Lettering: So now we have made our cards. We can add some lettering if we have enough space, if
we've left some space. So I like to have a few go
to greetings for my cards, and I have written some
out here on my grid pad, and this just helps me
work out the spacing. So for example, I've
drawn a line here. So from this edge to this
line is the width of my card. So then I can play around with different greetings
within this space. So I can center this ho ho ho. And then I can letter it
out in pencil first if I want to or just go
straight ahead in pen, knowing where it should
start and finish. This is a bit tight. So this
one that's a bit smaller, which would work quite well
with this one, I think. I do like to have
the let it snow greetings when I've
got these flatters on. I think they look
quite nice together. So you can see I've tried some really simple different
styles of lettering here, so a bit more flowing or a
bit more block lettering. And then here I've measured out the spacing if the
card is on its side. So again, I can try
out these lettering, see how much they
fill the space, and then center it to the card, replicate them with pencil
and then go over them. Okay. So for this one, I want to add let it snow. What I want is, I think I
want this kind of lettering, but as let it snow. So I'm going to draw this out. I've used one width,
one line for this. I'm using one square as the gap, and each letter is a bit
smaller than one of the blocks. So it's quite useful to
use dot paper or a grid, and it will just help give you a guide for how big
your letters will be. Okay, so I'm just going
to line it up roughly in the center and then I can mark where I kind of
want these letters to be. I'm going over it
in pencil first, but you can just do this in
pen if you're more confident. Another way to do it is to actually do the lettering on
your card templates first, and that'll give you a good
guide for where to actually place the bubbles or the
trees or the presents. And also, if you make a
mistake with the lettering, then you don't have to kind of worry about
ruining the card. Okay, so I'm happy with
the positioning of that. I'm going to use my size three TomboFne
liner and just go over it. Okay. And once that pen's dried, I'll just rub out that pencil. Okay, so I'm going to grab another card now.
This Christmas tree. And I think I'm going to go for merry
Christmas for this one. I'm going to do this
straight into pen. So I'm going to do
it quite slowly because I want to make sure that my letters line up with this because this is
nice and central. Okay. Okay, I'm happy with that. So it's not really
fancy lettering, but I think with these cards, because they're so simple, it doesn't need anything fancy. So let's do one more. For this present, I'm going to do the ho ho ho at the top. I'm going to put
this on the table to make sure I've
got a flat surface. So again, lining it up so the ho ho ho looks
to be in the center, and then lining this H up. And the last one. Okay.
I'm happy with that. Okay, so I hope these
simple lettering tips have been helpful for you. In the final video, I'm
just going to share a few more tips for
making your cards.
10. Final Tips & Conclusion: Okay, so now I
just want to share a few final tips for you. With your patterns, you can
try out different designs. Candles are another great
one and really simple. You just need to cut
out some rectangles and then line them up. I like to use different size rectangles next to each other, and then just simply add
the flame with your pen. There are so many
different colors you could use or different patterns. The great thing
about this method, is that it allows you to
experiment with watercolor. Even if you're a
complete beginner, it lets you practice
those techniques, try out different brushstrokes, try out different
combinations of paints. So most importantly, just have fun with it and experiment. So here you can see, I've
tried out different circles, and I've painted them
next to each other, so they blend in together
with different colors, this looks really nice when
you cut it out for a borble. Make the most of your patterns. So I like to keep
waste to a minimum, and you can keep all of the
smaller bits of patterns. Even these small areas can be used for presents or candles. So don't throw this away. Cut out any bits that
you haven't used, and then you can use them later
on if you come back to it and want to kind of play
around with different shapes. Keep all your little
bits together. I like to keep any scraps or leftover shapes that I haven't yet used in these
little wallets. So when I want to
come back to them, I know where to find them, and they're all organized. So I have one for the
triangles for the trees, one for the squares and
rectangles for the presents, and then and also the candles, and then one for the
circles for the baubles. So next time I'll
be making my cards, I can just bring them all out and then see what inspires me. Okay, I really hope you've
enjoyed this class and had some fun in this
low pressure way of playing with our paints
and making these cards. I would really love to see your work and your own designs. So please do share
your work with me. Just head to the
Projects and Resources tab and click Create a Project. You can upload
your image and add a project title and description. Your feedback always
means so much to me, so please do leave me a review. These are so encouraging for
me to see and read and also really helpful for
other students who may be thinking about
taking the class. You're on Instagram, you
can tag me in any work you share at Sharon
Stevens Design. And if you would like to
see more of my classes, just head to my profile. I've lots more classes
on Skillshare, both in doodling
and in watercolor. And if you love watercolor, I now have two watercolor
books out great for beginners, watercolor for the soul, and my new book How to Paint it. Once again, thank
you so much for watching and Happy painting.
 Sharone Stevens, Watercolour, Illustration & Lettering