Transcripts
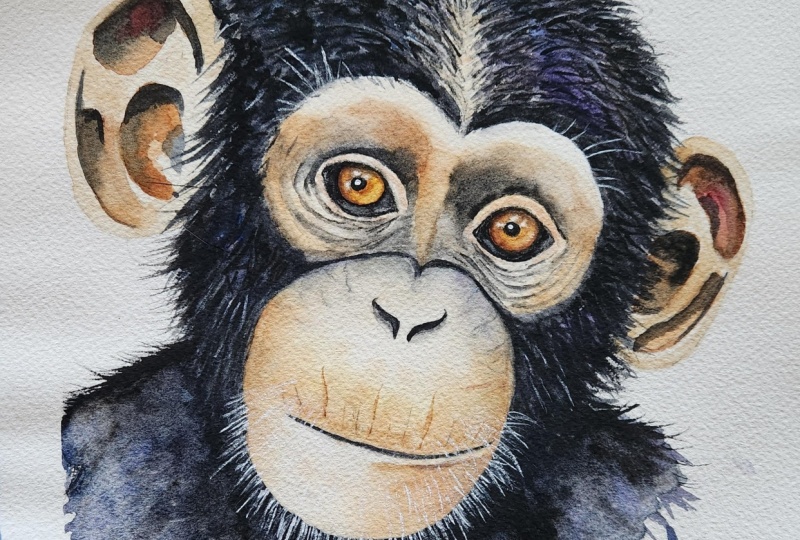
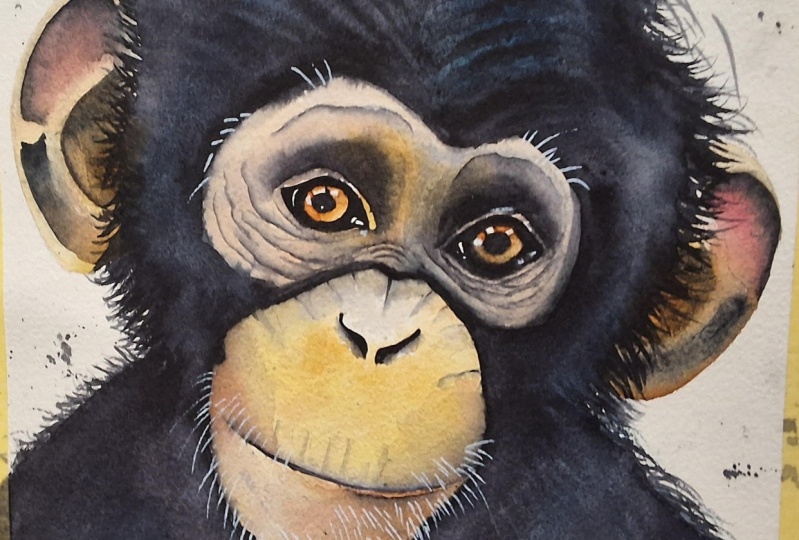
1. INTRODUCTION: Hello, and welcome. Today, we're going
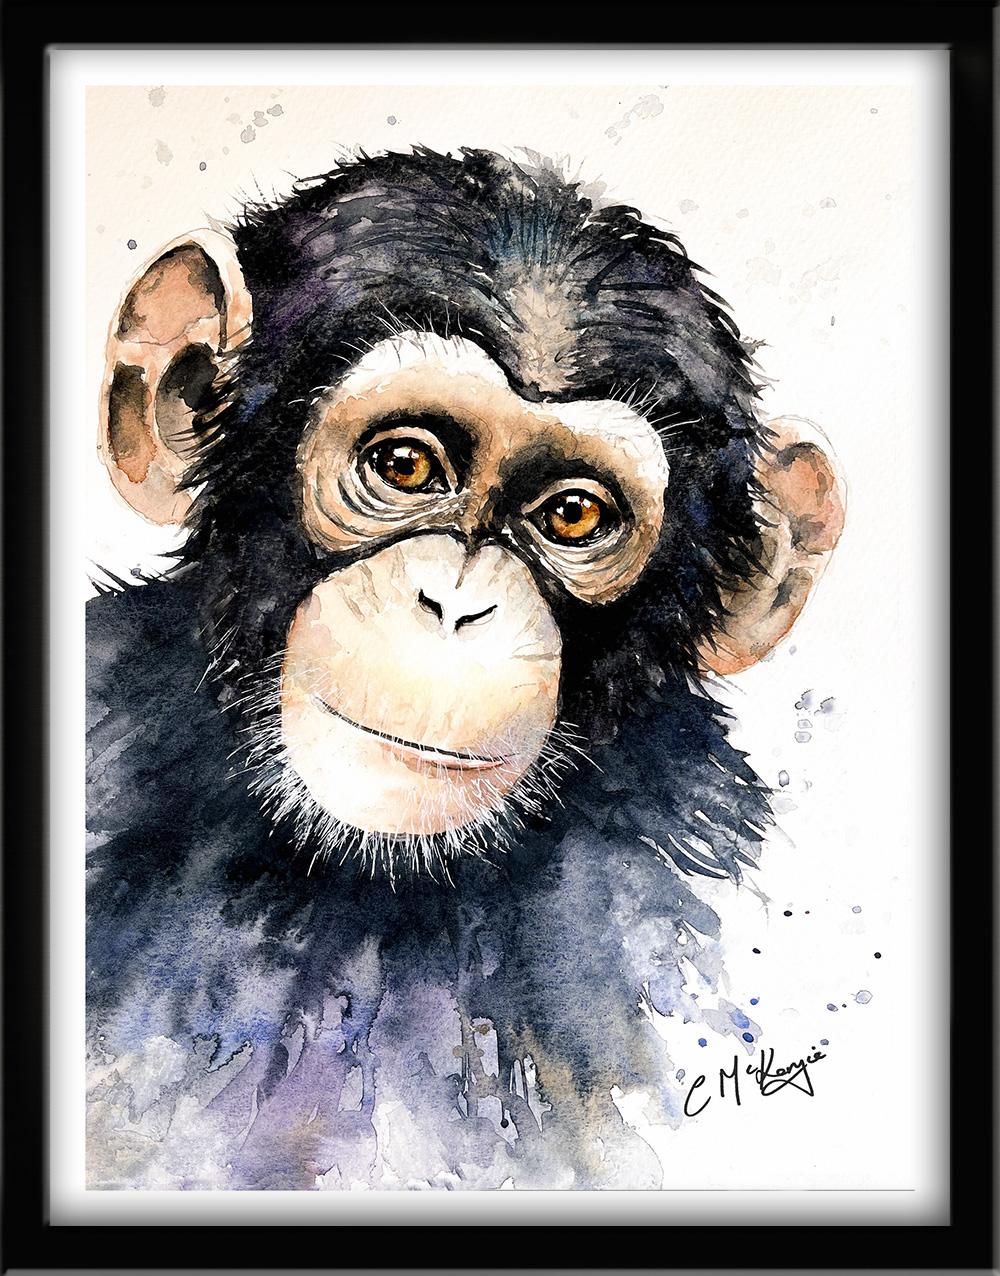
to be painting this charming little
chimpanzee in watercolor, focusing on expression,
texture, and tonal depth. We'll work step by step, beginning with the
skin tones and then building layers
of fur and detail. You'll learn how to mix believable skin colors,
paint expressive eyes, and use loose painty brushwork
to suggest hair and fur, all without overworking
the painting. And by the end of the class, you'll have a set of
techniques that you can apply to other wildlife
and animal paintings. It's suitable for all levels, including beginners because I'm going to be guiding you
every step of the way. And I'll be sharing all
the techniques, tips, and tricks that I use in
my own professional work. I've included a copy
of the drawing in the project resources section so that you can download
it and trace it, and then not worry
about the drawing because this is a
painting class. I am a professional artist, author, and tutor,
and over the years, I've sold a lot of work
across the world and helped hundreds of people to
learn more about watercolor. You can see examples of
my work on my website. My style leans towards
impressionistic and contemporary rather
than photorealistic. I like to explore loose approaches that bring
out the colour, light, and essence
of my subjects. I've tried to
replicate this across all the many other videos
that I have on Skillshare. I'd love to see your
own finished painting, which you can upload through the project and resources tab. I'll give you some
personal feedback on it, and you'll be able to
see the artwork of other students and
get their support. At the end of the class, you'll have your own beautiful artwork to be very proud of. So let's swizzle our brushes and get on with the painting.
2. Materials, Drawing. Paint watercolor Skin tones wet-on-dry-wet. Blend & soften. Tonal values.: We'll be painting a variety of textures from the
soft facial features, expressive eyes, and wiry fur. For this class, these are the colors and materials
that I'm using, but do feel free to use
any that you already have. For information on brushes
and paper, et cetera, do check out the basic
materials document that I've added to the
project resources section. As you can see, I've taken a few liberties with the
reference photograph, and that's the great
thing about creating art. You paint with your
memories, senses, and imagination, as well as
what your eyes literally see. I've included a copy
of the drawing in the project resources section so that you can download
it and trace it, and then not worry
about the drawing because this is a
painting class. Mixing skin tones in watercolor
is more about layering transparent colors
than trying to mix a perfect color in one go. So I'm using three
transparent colors, quinacridone gold, permanent
rose, and cobot blue. I've got a very watery mix about the consistency of tea
for the lightest tone. Thickened it up a
little bit with extra paint for the medium tone, and then an even thicker mix for the dark tone with a little
bit more cobalt blue added. For each of those mixers, start off with your quinacridone
gold or another yellow, and then add some
pink, not too much, just touch some in to
see how that mixes, and a small touch, a little tiny bit of cobalt blue just to dull
that color down a bit. And then test it out on a bit of scrap paper before you start applying it to the
actual painting. And you can mix
three separate pools of light, medium, dark, or you could mix a
big pool as I have done in my palette that
you can see on the right, where the more
watery consistency is over on the right hand side, the dark tone is over
on the left hand side with more pigment and
thicker paint less water. And in the middle, you've
got the medium tone. I've just painted his ears
with the lightest tone, and I've painted wet
on dry wet paint on dry paper because
they're only small shapes, and I'm going to go back to them later to add the shading. However, this section
that I'm now painting, the top part of his
face is a bigger shape, and I'm going to add a
couple of different tones. So in order to have those colors blending softly together
and avoiding hard edges, I have pre wet the whole of this top part of his
face with clean water. This is known as the
wet on wet technique, where you get much less control, but you do get softer blends. And while that light
tone is still wet, I'm now going into my mid tone flesh
color and adding a little bit of that down that left hand side of his face. And that will help to give
a three D rounded effect. Because the mid tone paint is a little bit thicker
than the light tone, you can see that it's blended nicely together with
the light tone, but it hasn't spread
right across that area. I'm doing the same thing on this right hand
side of his face. I pre wet it with clean water, and now I'm dropping in
some of that light tone, just going around the
eye very carefully. I am painting his eyelids, but I'm not going
anywhere inside the eye. Now, the area just above his forehead is actually
quite sparse of hair, so I'm adding a little bit of this flesh color up into the
head from the brow bone. And I've just used the light
colored tone for that. The brow bones themselves
are quite prominent, and because they stick
out over the eye, they will catch the light more. So they need to be very light
tone or even unpainted. While that light
tone is still wet, I'm adding in a little bit of my medium tone just as I did before this time down
the right hand side of his face to give that
rounded appearance. And I'm also using it to add a little bit of darker
colour in the eye sockets. I'm going to leave that area
sit for a while and see how the paint settles and go on to do the lower
part of his face. Now, whereas the eye
sockets are receding, this part of his face
is coming forward. The nose and mouth area and chin are a little bit
of a large egg shape. You can use that same process to achieve that three
D roundedness here. Again, I've pre wet the area
before adding the paint, and putting the dark
and medium tones on the left and right
sides of the shape first. I've got a little pool of very watery quin gold
mixed in my palette, and I'm using that now to paint the top part just
above his mouth. And that's softening
and blending nicely into the darker tones
at left and right side. The skin of chimps is a
slightly mottled texture. And so I'm using the
quin gold as a base, and then I'm going to drop
in some little touches here and there of my light
and medium skin colors. And I think you can see
that that's given me that mottled appearance
that I wanted to achieve. But I've kept it quite subtle touching the colors
together with the tip of my brush because I
don't want it to look like he's got chicken
pox or measles. And then for the lower
part of this area, I am using my medium
and dark tones, particularly over on
the right hand side, which is more in shadow. And notice that by swishing this just
below his lower lip, I'm not actually
painting the lip, but because there's a
shadow now beneath it, the viewer's eye automatically recognizes that
there's a lip there. And then for the top
part of this area, I'm going to take
a little bit of my medium toned skin color and add a little bit more
cobalt blue into it. So it's quite gray. It's more gray, but it's
still quite watery. I don't want to dark
gray here, a very light, pale gray color, just going
over the top above his nose. Just the same way
that the top of an neg recedes backwards
as it curves around, then hopefully this gray color is going to help the top of his muzzle nose area also to recede backwards
towards the eyes. What we're trying to
do here is to use the different tones
and different colors to kind of sculpt the
paint so that what is a two D flat piece of paper appears to be
three D and rounded. I've just added a
little bit more of my darker skin color
over the top of his lip, so that's helped to curve that area downwards
into the mouth. Watercolor does tend to dry about 20 to 30% lighter than
when you first put it on. So as the paint is starting to dry and it's going
a bit too light, I'm adding little bits of darker color touching in
here and there where needed. Along with a tiny stroke of watery pink just
below his bottom lip. Now, if you remember, I
painted the ears wet on dry, wet paint on dry paper, and whilst we've been
painting his face, those ears have started to dry because there hasn't been
as much water on them. So I can go back into
the ear now and add some more shading to separate
out the different parts. The chimps ears are
similar to humans, but one big difference
is that unlike our ears, which have a very fleshy lobe, their lobes are
actually quite flat. I've used my medium
and art tones to add some paint to the areas in
between the bony structures. I'd already mixed a black with some ultramarine burnt umber
and a touch of Mars black. And I've got a separate pull just to burnt umber on its own. And while this second wash
of color is still wet, I've touched in
first sunburnt umber in the areas that need to be darkened and then added in my black color over the top. So it's given me a little bit of a transition between the
brown and the black. Now, importantly,
the black mix is a little bit thicker than
the skin flesh tones, so it shouldn't spread right across the areas that
I've just painted. You still want some
of those skin colors, the flesh colors to be visible. If it does start
to spread too far, you can just use the
thirsty brush to lift off any of the black
color that's spread too far. And if it hadn't spread
far enough, again, you can use a wet brush to kind of teeth two
colors together. And then I'm just going to paint a little bit
of the permanent rose in the top part of his ear because the ears
are protruding out, so the light will be
kind of coming through them and giving them this
more rosy appearance. And now I'm repeating the same process on the ear
at the right hand side. Chimps are one of the few
animals with self awareness. In mirror tests, they'll inspect the faces or even
check out spots of paint on the bodies
showing that they understand the reflection
is actually them. If you've ever watched
chimps playing, you'll see how much they actually laugh when they're
tickled or playing, pount when they're upset, and even comfort each
other with hugs or pats. Their emotional range really
does feel strikingly human. They're also incredibly
good at using tools from fishing termites with sticks to using leaves as sponges
for drinking water. They are natural
problem solvers. Family and friendship are really vital to
chimp communities. The grooming sessions
aren't just for hygiene, but also for building trust
and social connection. And just like our youngsters,
they play pretend. You'll often see young chimps
treat sticks like dolls, carrying them around like
human children with toys. They have a lot of imagination and a real nurturing instinct. I'm pretty happy now with how the second layer of color
has worked on the ears. I don't need to go into any more detail because
they're not the main focus. I'm not going to put a
second layer of colour on the face yet because I
want to get the hair and the dark fur
on so that I can make a better judgment of
where the contrast should be. So I think I'll
call the ears done now and move on to
the next section, which will be the
dark hair and fur.
3. Hair & Fur. Mix a rich black to paint the hair & fur with expressive brushstrokes.: I've topped up my black mix of painting my palette
with more umber, ultramarine, a little
bit of mas black, and also added some indigo. I need a nice big pull because I'm going to be
painting a lot of black. I'm hoping to avoid running out and having to mix some
more while I'm painting. And to the right
of that black mix, you can see that I've got
a much more watery watered down black color with a
little bit more indigo added. And that's because
just as we needed some tonal variation
in the skin, we also need some
tonal variation in the hair and the fur. We don't want it all to be
one big flat black color. If you look at your own
hair in the mirror, you'll see that there
are light areas, medium, and dark
areas in that, too. Now, black can be a rather
uninteresting flat color. So to start with, I've pre wet the central area of the head and dropped some
cobalt blue in it. I've also added a few little
touches of the cobalt blue around the left and right sides of the head, where his hair is. And then I'm using
my water down black. It's a bluey, indigo gray color and painting around the left
side of his head with that. Notice how I'm using the brush strokes and
following the contours of his head and bringing my brushstrokes down in the direction that
the hair is growing. And there's a little line
of hair growing across the nose area from one side
of the head to the other. Although I'm using
a large brush, it's got quite a good tip, so I'm able to do larger and smaller
areas with this brush. If you have your brush
is more rounded, you might need to change to a smaller brush
where you're just going over that area
above his nose. And even here, I'm varying the amount of paint that
I put on in some places, leaving tiny little
gaps in others, trying to get some
variation of tone, even in this first layer. I put a small amount of
black just below his chin, but I don't want that
to dry to a hard line. So before it does, I've got a wet brush, and I'm just softening
and blending that edge, taking it down into the body. And then I can go back to finish off the rest of his head, just taking the hair line
down above the brow bones. Again, I'm using
directional brushstrokes, thinking about which
way the hairs are growing and following the
contours accordingly. And importantly, I'm leaving
that little tiny sort of triangular area of flesh
color just above his browbne. I'm leaving that not painted
with the dark color. So we've got some flesh showing through the hairs on
this top head section. Before this gray
black color dries, I'm adding in some more blue. This time I'm using
some ultramarine. I think it needs a little bit of a stronger blue to liven it up. I think I'll add a little
bit of purple as well, just to give it that
extra boost of color. I'm working quite quickly
because I want to add some of my stronger black onto this
layer before it dries. If you're not such a fast worker and you want to take
it a bit slower, what you could do would be to work one side of
the head at a time. And that will give
you more time to work into this first wet
layer before it dries. I've switched to a smaller
brush because I don't want to obliterate all the light
color that I've just put on. I want now a variety of shades, a variety of tones. So I've got some really
dark black going in just behind the ear
where it'll be in shadow. But I'm also hitting and missing into these areas
with my small brush, again, just flicking out that color in the direction
that the hair is growing. It's a repetitive process, so I'm going to let you
watch the video along now, and you'll see how I build up the hair around his head
with this darker colour. But I'll pop back on if there's anything else that
I need to explain. The M The
4. Skin - 2nd Layer & Facial Features; paint wrinkles in skin; paint the eyes, nose and mouth: To paint the eyes, I'm using a small brush with
a very good point. It's a synthetic sable brush. So unlike the natural hair ones, which I personally
find a little bit too soft and floppy to control, the synthetic hair brushes have a little bit more spring
and robustness to them. And you can see that the hairs are quite short, which again, I personally find
helps me to get more control over where
the paint is going. I've painted both of the irises with some
watery quin gold, working carefully around those little highlight
shapes and the pupil. Then while that quin
gold is still wet, I'm touching in some burnt
sienna around the outer edge. As the birtsiena moves towards the middle of the
eye, it gets lighter. So I get a lovely range
of the birtsienna outside and some lovely golden glints coming from the quin
gold beneath it. Again, I'm painting around those little shapes
that are going to be the white
highlights in the eye, being very careful
not to go over them. However, if you do
accidentally go over them, you can always paint in some
highlights later on when everything's dry with
some white gouache or white acrylic or ink. But nothing is ever as white
as the white of the paper. So if you can manage to leave those little fiddly
shapes unpainted, that's really going
to give some zing and sparkle to your
painting later on. It doesn't matter if
you go over the pupil because that's going to be
painted black later on. I've rinsed my brush in clean water so there's
no paint on it, and I'm just going to lift
a little bit of that paint off the right hand
side of each eye, which helps to give
them that glassy look. To paint the eye sockets
and the wrinkles, I'm using my little
micro mini brush. It's another synthetic brush, but the bristles
are a little bit firmer than the last one I used. So it's ideal for getting into all these creases and wrinkles. I've added a little bit of burnt umber to my watery black mix, and I've just painted around the socket and then taking that into the shape that I've
drawn for the socket recess. And then as it moves up
towards the brow bone, I'm just warming it up a little
bit with some birtsienna. And then with a
clean damp brush, I'm just softening and blending that edge so it disappears
into the brow bone. I'm adding a little bit more of the Bertsiena color
down that left hand side and kind of smudging it in so that I don't get hard edges, keeping
everything wet. Although I've started
off wet on dry, as I keep putting on more paint, obviously, it's wet on wet. And now I'm adding
some even darker color into the eye socket area. And with everything
nice and wet, I can use my dark black to
go around the socket area. And because it is
all nice and wet, that dark black will
just soften and blend into the colours
that I've just put on. And then I'm going to
follow pretty much the same process
for this right eye. So starting with my brown
black in the crease, taking that color up into the shadow recess area
of the eye socket, taking it a little
bit down this time over the nose and
under the right eye. And then adding a little bit of Bert sienna to warm
it up as I did before and blending and
softening those colors together. Then again, whilst everything
is still nice and wet, being brave and putting that dark black into
the socket crease. If you're a bit nervous about painting the eyes and you've
not done them before, you could always
draw the eye out on a piece of scrap paper and just practice doing the eye first before you do it on
this actual painting. Like most things, the
more that you practice, the easier it will become
because you get familiar with the way that your paints behave different paints with
different amounts of water, how they blend and
soften into each other, and how they dry, of course, which is always an
important part. One of the most
important techniques that you can develop
is the art of looking, just taking the time to observe and notice how
things really appear. Studying those little details
and where the light falls, where the tones change, where you might get an
unexpected shaft of color. I do sometimes think I spend more time looking
than actual painting. And if you have a really
good look at wrinkles, you'll see that even they
have a little shadow, they have some
variation in tone. So we need to bear that in mind now whilst we're painting them. And strangely enough, I'm
painting the shadow first. So I've just used the brown black colour or the light black colour
to go into the wrinkles, just painting kind
of a smudgy line, not a dead straight line, and not a really dark line. So this is going to
act as the shadow. I'm taking these
wiggly lines over the bridge of his nose to join that shaded area on the right. And then to accentuate
those wrinkles, give them a bit of depth, I'm just dropping in little
touches of my dark black. You don't need to add the black all the way across each wrinkle. Just add a little
bit here and there and have that
variety in between. You don't want these wrinkles to look as though
they're stuck on. What we're trying to achieve
is that they are kind of sinking in to the
underlying skin color. So I'm using the tip
of my brush to add a few little smudges to the
wrinkles here and there. Now, the top and bottom eyelids are looking a bit
stark and unnatural. So I'm adding a little bit of shading darker colour
to those as well. And now I'm moving
over to complete the right eye and the wrinkles on the
right side of his face. A a I'm going to leave everything to dry for about four or 5 minutes before I come back
to it and finish the eyes off with my
very dark black color. I'm starting on the left eye
again and using my micro mini because it gives me that little bit more
control with the brush, using the dark black
to go around the iris. And I'm also using the black on the inner side of the
top and bottom eyelid. Because the iris is in shade at the top from
the upper eyelid, that little area there will
also need to be a little bit darker in order to avoid a
kind of unnatural stair. So I'm just adding
a little bit of shading just underneath
that top eyelid. And I'm also making the left side of this left eye a little bit
darker than the right. Mm. Then with a
clean damp brush, I'm just going to smudge some
of that black color that I've already got on
over the white area, so give it a more gray look because the whites of the
eyes are not really white. If you look very closely, even at your own eye, you'll see that they're not pure white. There is some tinting
of that area as well. And, of course, the last
bit of detail here is to paint the pupil with my
very strong black color. Again, I'm being very
careful not to go into those tiny white
highlight shapes. And then repeating
that process over on the right hand side for
the right eye, again, using the black underneath
the upper and lower lid, and then using the
tip of my brush to smudge some gray over
the white of the eye. And going around the outside of the iris just as I did over
on the left hand side. I do usually advise people to work as quickly as
they can with watercolor, because if you work too slowly, you're in danger of fiddling
and overworking it. Having said that, when
it comes to the eyes, I do think this is the time
when you should slow down and take care to get all the
detail in the right places. Because we've got
the darkest dark, which is our black pupil, right next to the whitest white, which is the
highlight in the eye, this is where the viewer's eye
will immediately be drawn. There is a saying that the eyes are the window of the soul, and I do think
that actually they can make or break
a good painting. Just a few little
touches here and there, and I think the eyes
are now finished, and I'm ready to go on to
the bottom part of his face. I'm using my strong black
mix to, first of all, paint the top part
of the two nostrils, following that curve
around, as you can see. So I'm still using the
point of micro mini brush. And then I'm going
to rinse my brush, clean it so it hasn't got any
paint and just drag some of that black down into the
shadow beneath the nostril. And again, adding that
lighter tone forme shadow stops it looking as if the nostrils have just
been stuck on as it were. Then using my watery black, my paler black, which is more of a gray,
really, a dark gray. I'm adding some of
the wrinkles that occur around the
outside of his muzzle. Now, the important thing
here is that you don't want these wrinkles to be exactly
the same all the way around. So you want them to be
different thicknesses, some wider than others. You want them to be
a different tone, so some darker or
lighter than others, and you don't want them all to be the same distance apart. So you don't want to,
like, a row of soldiers. So just keep the variety going with these wrinkles
around the muzzle. And as previously, I
am using the tip of my brush to kind of just smudge or blend them in to
the underlying color. I'm doing exactly the same thing with the wrinkles
above his mouth. So varying the tone, varying the distance
between them, the length of them
and smudging them in into the underlying wash again to give them a more
natural appearance. I'm also adding a
little bit more of the dark flesh color to this
area just above his lip, just to get that tonal variation
where it curves around. And I'm just stroking some of the darker flesh color
below the lower lip. I've added a little bit of pink to it for that small area, and then just the dark
flesh color coming down on the right
side of his chin. I'm using the dark black
to paint a line between the upper and lower lip and softening that in with a damp
brush at both ends of it. I'm continuing to add some more shadow shading
to this right hand side, I don't feel it's got
enough definition. I'm using my dark flesh color, which I've actually
added a little bit of my dark gray color to, so darkened it even further. Also dropped in a touch of
the purple and cobalt blue, as well, just to liven
those shadows up a bit. And I'm now adding
some shadow color to the left hand side as well. So I'm accentuating this kind of egg shape that we've got
on this part of his face. And again, I'm adding
little touches of blue and purple into that shadow color
because they don't have to be just a plain gray color. There is warmth in shadows
or sometimes coolness, so it livens them up to keep
them a little bit colourful. This is where you need
to just stand back for a moment and assess
your own painting. In my case, I think
because I've put this extra shadow and shading and bit of
color on the muzzle, the ears are a
little bit too pale. So I'm now going to add some shading and some drops of color into the ears, as well. So I've got a more
cohesive look. And this is the thing
with watercolor. It does quite often dry much lighter than when
you first put it on. So you do need to
go back and just add a little bit more color
or shading here and there. As long as you leave the
layers to dry in between and use a soft brush that doesn't disturb
the underlying layer, you can carry on adding
layers multiple times. Obviously, if you
do overdo that, you're going to end
up with a muddy look, so it's just really
down to experience and a judgmental eye as
to when to actually stop. Well, that only took
me a minute or two, and I think that the
extra shading and color has given me a
more balanced look across all of the skin areas. So it's time to sit on
my hands now and have a little break before
painting the rest of his fur.
5. Paint the body hair in a loose abstract way; use spatter technique to suggest an abstract background: We've got quite a bit
of detail in the face, and that's where the
viewer's eye will go. That will be where the
main focus will be. So I'm going to paint the body in a rather
abstract and loose fashion. I'm starting off
with the dark black and running that all the way
along underneath his chin. And then I'm dragging
that very dark color down into his body area. Now that I've got that
definition below his chin, I can switch to
my lighter black, my dark gray really
with the indigo in it, and bring that color
down in towards the right and left
sides of his body. Now, I have actually
raised my board up. I've put a small box
underneath the top of it, and that's giving
me a downward tilt, so the paint should naturally flow down towards
the bottom of the paper. If it doesn't, you can just pick it up and give
it a good old shake, encourage the paint
to flow downwards. And to ensure that
the colors are in keeping with the
dark hair on his head, I'm also dropping into
this mix some cobalt blue, some cerulean and some purple, adding that quite random
really here and there, and letting the color mix into the dark gray
and the black. I'm going to be adding more
and more water so that as that color flows down towards
the bottom of the paper, it becomes much lighter
and more abstract. I'm going to let you
watch the video run now for the next 5
minutes or so as you watch me build up this
loose abstract impression of fur on his little body. The There are various products you can use for white
hairs and whiskers. Here's a few of the ones
that I've tried and kept. The artistro small nibbed acrylic paint pin
is one that I use. For an even finer line art and fly white gelpin is
one of my favorites. Similarly, Cigna's Nibal gel pen is another good option
for fine lines. The jelly roll pen
is a cheaper option, but not quite as white
as the last two. But then you don't always want something to be
absolutely bright white. Windsor Newton's
designer gouache is the best opaque white gouache
that I've come across. It does tend to dry lighter, so you might have to put
on several applications. However, on the plus side, it behaves a little bit like watercolor in that
you can lift it off. Any cheap white acrylic paint will do or some
white acrylic ink. Of course, they are
more permanent, so once on, you
can't remove them. My absolute favorite is doctor PH Martin's
bleed proof white. It really is the whitest
white I've come across. To apply the paints or ink, I use a fine pointed Chinese
brush or a glass pin. If you don't have those,
you could either use an unwound paper clip
or a cocktail stick, anything with a
fine point, really. Here, I'm using my glass pen to apply doctor PH Martin's
bleed proof white. Now, I have added a
tiny bit of water to it just to keep it a
little bit more fluid. The beauty of a glass
pen is that it holds more ink paint than a
traditional dip pen, so I don't have to keep dipping
it in the paint as often. I'm working my way
around his chin, and you can see that the
little hairs that I'm painting on are longer in
some places than others. They are more wispy, so they're not absolutely
dead straight. Some are a bit
whiter than others, and some are grouped
in little clusters. As well as the
whiskers on his chin, he does also have some growing from just above
his top lip line. Of course, where you've got
the lighter tone paint, the white hairs are not
going to show up very much. They'll show up a
lot where you've got dark paint dark tone underneath. As I'm painting these whiskers, I'm also varying the pressure
that I apply to my pin. Some lines are crisp, others are broken or fading, because real whiskers
are not uniform. I'm adding a few longer whiskers that are emerging
from his brow bone. Now, you certainly
don't need as many up here as you do on the muzzle. So just a few from the
brow bone will do. There are good
reasons why chimps have such a lot of
hair on the chins. It actually helps shield
sensitive skin from the sun, scratches and insect bites, and that's very useful because chimps spend a lot
of time outdoors. It's also part of their
individual identity. Chin hair patterns vary, and that helps chimps to
recognize each other visually. And just like humans, the beard becomes fuller
or whiter with age, and that can signal maturity or social status
within the group. Interestingly, they also help to define their expressions. When the chimp calls out
or laughs or grimaces, those little hairs
catch the light. So they help to subtly
highlight movement and emotion. Now, if you find
you've gone a bit overboard with putting
these little hairs on, you can just dip your brush into some black paint and add a little bit of that in
and amongst the hairs. As always, there comes a
point when you know you're fiddling too much and in danger of overworking
the painting. I've got quite attached to this little fellow, as
I've been painting him. So I'm going to call him Tanna after the River
Tanner in Kenya, which means gentle but
full of life and movement. And I'd really love to
know what you call yours. I do hope you've enjoyed this painting and that
you've learned some tips and techniques along the
way that you can incorporate into
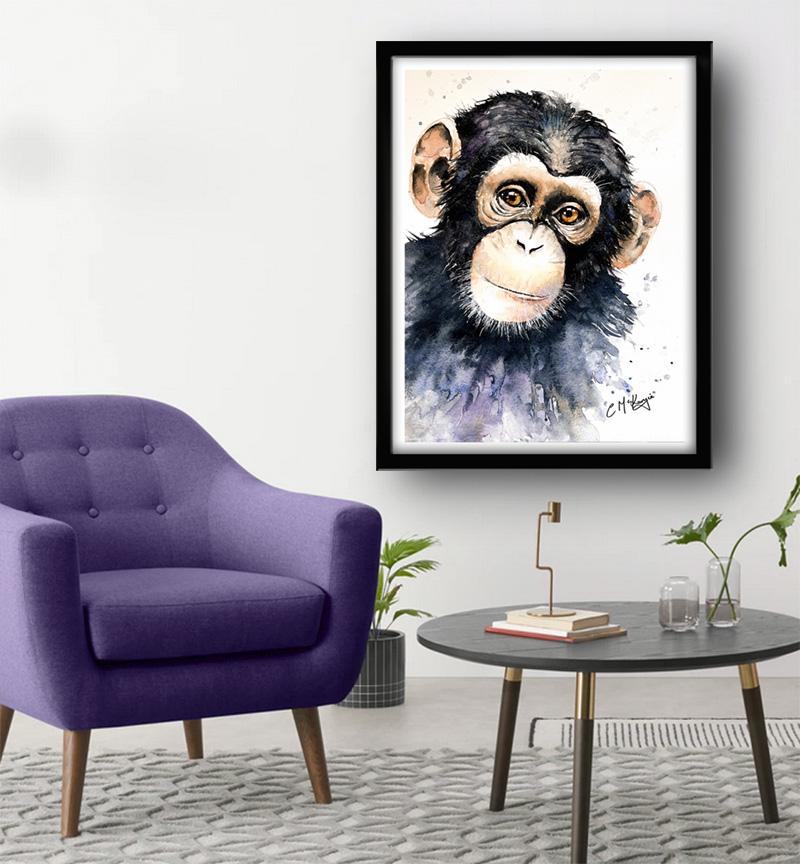
your own paintings. And why not pop it into
a mount and a frame, and you'll be amazed how good
it looks when you do that? If you've enjoyed this class, it might encourage you to look at some of my other videos. I've got lots of lovely
subjects loaded with more tips and techniques to help you with your own
exciting art journey. I'd really love to see your
own finished painting, which you can upload to
the your project section. And if you could
just take a moment to leave me a short review, that also would be really great. In the meantime, thank
you for joining me, and I look forward
to seeing you next time Happy painting. I
6. FINAL THOUGHTS: Well done on completing the painting of our
gorgeous little chimpanzee. We've covered quite a
few different techniques as you've been following
alongside of me. Instead of just copying
the reference photos, we've used them in a more
loose and imaginative way. We use the wet on dry technique, putting wet paint on dry paper, then we use the wet
on wet technique, putting wet paint on wet paper, and we use different
skin tones and tonal values to add structure
to the face and head. We used additional layers of color to add richness and depth. And we went from using big brush strokes for
spontaneity and vigor to using small brush
strokes when we needed to paint the tiny
details of the eyes. And we finished off with a very loose abstract
approach to his body, keeping the main
focus on his face. Now, don't forget to upload your own painting through the
project and resources tab. After all your hard work,
I'd really love to see it, and I'll be sure to give
you some personal feedback. And if you've
enjoyed this video, do have a look at my other
classes on Skillshare, which are packed
with more tips and techniques to help you
on your own art journey. If you click the follow button, you'll be able to follow me, and then you'll be the first
to know when you upload a new video or any
exciting updates. And if you could
just take a moment to leave me a short review, that also would be really great. In the meantime, thank
you for joining me, and I look forward to seeing you next time, Happy painting.
 Carrie McKenzie, creating painted visions