Transcripts
1. Welcome: Let's paint some beautiful birds. Trees together. How low My grand friends Jessica Sanders here, welcome to my channel in this class for any level, will be painting some beautiful birch trees in a really quick and easy way. We'll be using an unusual tool for watercolor, a palette knife so we'll start with the warm up. Will practice a lot of different ways to use the palette knife, then will do ingredient wash, practice some negative shaped painting and mixed a warm and cool grey for our birch trees. I'll demonstrate for you six different paintings in this class, and each painting will take on Lee 5 to 15 minutes. The most complex paintings class took me about 20 minutes to complete. It's such a fun and easy technique anyone can do It will create loose, impressionistic kind of abstract birch trees. We're going to keep an experimental on exploratory attitude through the whole process, and by the end of this course you'll have paintings that you created that are beautiful or fun and easy, so hope you'll join me for this exciting birth. C class. Let's get started by talking about the supplies
2. Supplies: Let's chat about the supplies for this class, so you'll need basic watercolor supplies. You'll need water color paint. You'll need water and the cloth. You'll need a variety of brushes. I'll talk a little bit more about these in a minute, and you'll need watercolor paper. I'm also using in this class a product called Brush O, which are watercolor crystals. Now there are other brands besides Russia, but they're just watercolor crystals. This is sort of an optional supply, because you may not have this, but there are a couple of projects in this class that use this. But if you don't have it, you can still do most. The projects. Most of the paintings in this class, any kind of paint. Like I said, this happens to be Mission Gold. That's what I use most of the time for my classes. I may also use, um, Daniel Smith or Ingraham those air also my other fun favorites. But for the most part, whatever kind of water color paint you have will work for this class. Choose some favorite colors to set that aside, and let's talk about the paper for just a minute. So an important part of this class is the paper now I'm using for for some of the paintings I'm using would be creative watercolor paper book, you can see it has spiral bound. It doesn't have to be this particular one. The important part is that you choose paper that is £140 or 300 GS. In paper, it helps if it is 100% cotton. This one is 100% cotton. It helps if it's that, but it doesn't have to be that so. A cancer in Excel something justice has a little bit of texture, but the important part really is the £140.300 GSM cold press. So that's the kind of paper I'll be using. I have a couple of different sizes. I have this book. I have some sizes like this. You can see I on one side. Slowing is your paper has texture. Don't use hot press for this class. It's not going to work very well. Next, let's talk about the paint brushes Now. I have a variety of brushes here, plus one extra brush thes air just for adding water and painting. You can use whatever size you have. I have this number 12 Princeton, Neptune. I have a flat, 3/4 inch plant Princeton, Neptune, and I think I sign a painting with this so you don't need this many brushes, but it's kind of nice to have them. And then I have this other brush with just just a inexpensive little bamboo brushed with soft bristles. And the purpose of this brush is not for watercolor painting. The purpose of this brush is, too. Brush off the excess brush O from the paper so you'll see that in the glass. Now this class is primarily about experimenting with a palette knife and painting birch trees. So I have a couple of different palette knives. I'm using the metal one in the class, but if you have plastic, you can use that Lorca's well, also the shape. As long as it has one edge and a tip your good. It doesn't have to be perfectly pointed or anything like that. Just experiment with yours. The other thing is, if you don't have a palette knife, you could always use a card like an old credit card or a key card. This one I have trimmed with scissors to just to get a few different edges. But this would work as well, so you would be able to load this up with watercolor paper and paint your trees. So, as I said in the intro, this is an experimental class a little bit and and I hope that you'll experiment and play in the joy. And also it's super fast and easy to paint birth trees. So these are our supplies. Let's get started with a warm up.
3. Warmup 1: already, my friends, let's do a little warm up and playing to just get ready to paint birth trees. Now, I'll be honest with you. This is probably going to be the longest lesson in this entire class because painting birth traces simple and easy and really fun. But it does take a little bit of warming up. Just get familiar with what you're doing, so we're going to talk about how to use our palette knife. We're going to talk about how to create a Grady in wash negative shaped painting and mixing great a specific way to mix Great start by talking about our palette knife. Now what's looking our palette knife first, So I have a fairly pointed, although it's not sharp. Tip on. My my palette knife is well used, You can see has old paint built upon it. I've used it for acrylic. I've used it for watercolor, so this is not a brand new tool. Also, if yours is brain knew, you may need to wash it with something that will take any oily residue off of it. Some soap, like a dish soap that would take it off any oily residue as it may resist the water color if you don't do that. So this palette knife has this curved handle, which is really nice. Keeps you from putting your hand into the paint with a flat one. Some of them have straight handles. It will be a little bit harder to do this class, but you can do it. So this is flexible. You can see that it will move, and it has this edge, this edge in the point. It also has these, but you don't really use those. So that's just where it goes up to the handle. That part is not really useful, except it's out of the way. Right. So we have this edge primarily that will be using. We have the tip and we have the bottom in the top. We can use all of those 12345 parts of this palette knife to paint our trees, and they all have a little bit different effect on our paper. So let's accept a little paint and I'll show you what we'll do know. Depending on how you makes your paint, you have more or less color in your birch tree, right? It will be deeper, darker value or lighter value. Just gonna add a little water here. I'm using this tray. You need an area that's big enough for you. Use your palette knife in. So if it doesn't fit in your water color palette, you could get a little plate or a little flat plate, or this kind of trade for the mixing and picking up your paint with the palette knife. So let's just start color. Would you like to start with? I often use blues, but you know, let's do some fall colors. So let's do yellow. And I'm going to actually mix up more than one color in this area because often in the paintings will be having more than one color and kind of mixing it together just to create more interest. So let's do yellow and notice. It's a fairly thick mixture. Okay, if I add more water, it's going to be lighter. If I add less water, it's going to be thicker. It's going to move less and is going to be darker. I have a darker value. Let's do some up ra hot pink and this yellow Now, one thing to know about mixing colors is If you don't want neutrals, then don't mix opposites on the color will, so you wouldn't mix yellow with purple that are blue with orange, that sort of thing if you don't want neutral colors. So this is going to give us nice, bright colors and it's going to have some of the pink and some of the yellow mixed in. It's just going to be fun, right? So I'm going to take my palette knife and I want to use 1st 1st off, I just want to use the edge. Now the angle that you use matter actually going to pick up more than one color and they're going to mix on my palette night. So I think you can see there how their multiple colors and then when I use it on my paper may not have enough big enough piece of paper here. I'm going to tilt that side that I loaded down on the paper and I won't see. I think I will have to just make big tree here, so I'm going to press it down and I have this at an angle to the paper. That's about 60 degrees. You can tilt it. Mawr or less. You'll need to practice with your palette knife, slide the edge up, tilt it and pull it over in a little bit of an arc ing motion. So let me just draw an arrow so you can see that I moved my palette knife up, and then I moved it over in an R King motion to create that shape. Now for these trees, I want to leave a lot of white space, and so I will just repeat that same thing again. So I haven't more in a straight angle than I tip it. Then I pull it over and it will pull the paint over. Now I want to do the other side, so that means I have to do the other side of the palette knife. I have to flip it over. So I just said it next to hear Slide up and I can pull over again. However, I like and switch back and forth, and it's okay if you don't have little lines here that's going to make it blend into the background. But if you want, you can just go back and forth and connect it and slide and move. Now, typically are trees will have bigger bottom. Smaller top if you notice the texture of the paper is catching and showing. When there's not much paint on the palette knife, you see more texture of the paper. It's almost like a dry brush effect, so it's perfectly fine to leave gaps and white areas. That's actually exactly what we want. So we talked a little bit about the angle, tipping it in different angles, and we have not talked about the pressure. So depending on how much pressure you put on your palette knife when you tip it, this is going to change the effect a little. So if I do really lightly, I get that. But if I press down a little bit more, I'll get more paint on the paper and less of a puddle. So keep that in mind. Practice a little bit about how much pressure you feel like you need for your painting. Your paper will be a little different than mine. Unless you have the exact same paper. They're all a little different, so you just keep working back and forth and adding that and changing up the pressure if you need to. Now I talked about using the side, and I talked about tipping it at an angle, which you can change as you need to. But if you hold it flat, it's going to give you a slightly different effect. So I loaded up with paint and let me hold it flat. So you get a really strong mark when you have lots of paint on there. When you hold it flat Now you could tap it. I'm already talking about motionless. Don't talk about that yet. Okay, so we've talked about the angle. We talked about the pressure. Yeah, let's talk about the motion so you could load it up and just tap it and you'll get different effects, right? The main part of the motion, other than the sliding and the pulling over, is using the tip to create branches. So let's create a branch notice. I have quite a bit of paint on my palette knife. I'm going to tip it over on the edge. It ran right in there, had at an angle away from me because my branches are going up now. I have a little bit of delay, most my paints going, so I don't know how this is going to actually show up, but put a little bit of pressure on their sea mines, bending just a little and to a little bit of a jerky motion. Go load of your paint. However you need to and do it again. You can pull back. You can move it forward. You can flip it over. Do what you're a palette. Knife works best. Everyone's maybe a little different. So practice a little bit with your palette knife, and you can do that. Make nice branches with It's really a lot of fun. There's nothing you can do is sort of scribble with the tip and make some grasses or full luck with tip again. You're going to be making sort of like dresses that way. This is where I did most of that kind of thing, where you know you might press down and pull it across something like that. Just have fun and plate and enjoy the process. And I did, like, screw scribbling kind of thing and just moving in all kinds around because, you know, in a forest there's no rhyme or reason, really, how all of those bushes and brush go right so you can do that sort of thing and just wiggle your palette knife around and laid down color, and depending on the angle you're holding it at, it will do different things. Right. When I'm making branches, I usually do one main branch, and then I'll go back to where there's a turn and come out from there and make a new bridge again. We're not going for hyper realism here. We're going for fun, and we're going for exploration, right? So the amount of water we used a lot of water. We used a little on the edge. So all of that affects your painting. You'll make puddles. You can also just tap it on the side. Right. Slide it on the side. Okay. I'm sorry. I'm playing, and I need to actually move. All right. So those are a lot of ways to use your palette knife with watercolor, and I think it's really fun and unexpected and super easy and fast to do. You could also dip your palette knife in water and pick up, pick up water, and then move the water around and let the pain flow out kind of thing. So lots of things you can do. Just play with your palette knife. Truth twisted. Turn it, Tippett! Move. It changed the angle. Change the motion. Do a smooth, fluid motion doing scratchy motion. Try all different kinds of things and just play with it and see how you like using it. It's a lot of fun. Okay, next, let's talk about a Grady Int wash.
4. Warmup 2: Okay. Next, let's talk about a Grady int wash. In order to do our great wash, we're going to use a brush. We're not going to use Palatinate. And because I have this small area, I'm going to use a smaller brush. You can use your bigger brush. I used a bigger brush in the actual class. So let me turn this a little bit because I'm right handed. I needed to go toward where I am. So make your paintings work for you. That's the lesson in it. And I will use the same color. And I'm going to start with a very the dark, the dark part of the color. Right. Gonna start with the dark color for your Grady in wash, and you just start at painting across. We're gonna be painting a background this way and work your way down a little bit. Dip your brush in the water, tap off excess and then go down a little bit more and dip your brush this time. Swirl it. Top that off. You don't want too much water. Keep going down. Notice how it's getting lighter and lighter. So wash my brush a little more this time top it off and you can get down all the way to almost white. You can get all the way to what if you want to, and you can always tip it. So I have a few lines in here. So all I have to do is just go back while it's still wet. Can work my way down in that wash that I created, and it will even out the color. Remember, in this class, we're not going for perfect. We're going for loose, fun and free. If you're wash isn't perfect, it doesn't matter. It's the back around. It doesn't have to be this perfect gradation from very dark. Two very light. It just doesn't have to be. So don't worry about it. Don't sweat it. Put your wash in the background and then we'll pay the trees over it. So next on our list is negative shaped painting and four negative shape painting. We've talked about it before, but just as a review will talk about it again, it means painting around the object. So I have some trees. Just scratch Aly Scratch Aly drawn here. Here's a tree. Here's a tree. There's a little tree and If I want to do negative shape painting, I'm going to paint in between Right now. That's a solid kind of color. Let's try it with our palette knife. Actually, that's a nice, solid color you can get with your brush. But we're going to actually do negative shape painting with our palette knife. So all you do pick up some pain and instead of going on top of the tree, you get beside it facing away and you're gonna make it. Move your palette knife more flat to create bigger swatches. Now, when we do our negative shape painting, we're not going for a perfect flat background or anything like that. We wanted to be a mess, basically. So pull it across. If you go over your trees. Doesn't matter. If you go over a little, it's just gonna bring them into put it all tied together. So another thing we do while we're doing this negative shape painting is bring that color over onto the tree a little bit in a little swatch, and I'm just doing that with the tip of my palate knife and usually in a little curved area which would just tie our trees into the background. Okay, so that's negative shape painting with a palette knife right now. Last but not least, we will be using gray. I've been using really bright colors, maybe because gray, but let's mix up a little bit of gray here and all you need for gray is an ultra marine blue. If you don't have a great paint, you might have a great pain. So ultra marine blue or indigo would work. And you need a brown like a burnt sienna, a reddish brown. So we mix those together. That's a little purple E. So I'll pick up a little bit more blue and mixed that in. Now it needs more round. I'll just work back and forth until I get the color. I want, actually really like that. Brown. It's really nice. I'm looking for more of a gray color, so this is how you make sure colors. You just experiment, all right, so I'm making with this combination of colors, it's a purple e gray. If you want to be, you know, more Blue Grey. You had a little more blue right. He could use a little different color of of, um, he's a little different color brown, um, or reddish brown. So, depending on the kind of gray you want, just try mixing. I like to add a little bit of into Go into Goes nice to add to it. Soc now actually have. Really. It's a black. It's nice and dark, but if I add more water to its great, this is a nice blue grey, which is kind of what we use in the class. So you can mix burnt sienna and ultra marine blue or a colors that are similar a blue and around to get a great you can also makes complementary colors. But this is what I use for this, and I actually got a blueberry, and I'm good with that. If I want to be a little warmer, pick up a little more brown. There's another darker, more neutral gray. This one's more blue. This one's a little warmer and morning trouble. Okay, so that's easy. Way to make spray. Ultra Marine Blue and burnt Sienna. All right, so practice this warm up, try out the palette knife. Try out the great wash negative shaped painting with your palette knife and mixing grace, and then move on to the fun and fantastic and easy paintings
5. Blue Birch Practice Painting: Let's get started by painting some blue birch trees. Now this is a practice painting. It was my first attempt and using the palette knife, and I thought it would be great to share this with you so we could chat about issues, concerns and a little bit of what I learned along the way. So the first step is to mix and paint colors with water, So I chose a meridian teal range of blues. I have Peacock and I have Indian thrown and I'm creating sort of a mid density mix, so it's sort of like milk, right? It's not too much water and not too little water. And now that I have my colors out, I can take my palette knife and experiment a little bit. I wanted to use kind of all the colors at once, so I picked all of that up on both sides of my palette time. Now let's take that directly to the paper, going to tilt my palette knife just a little bit. So it's at an angle, say, a 60 degree angle to my paper in relation to my paper, slide it up and over to create that shape just like we talked about in the warm up. Now, as I said, this was my first attempt to trying it. I was learning as I go and deciding. Well, do I need to pick up more paint now? Which side of the palette knife and my trees are? A little bit walkie, so you can see it started out small, and now it's about twice a bigot. The bottom. But that's OK. It's not going to hurt anything. Trees, air naturally, bigger at the bottom, right? So I'm not going to sweat over small stuff like that. I'm not going to worry about it. I'm probably going to do that multiple times while I'm painting these birch trees, and it's no problem at all. Now let's try and create some branches. Now I experiment it, as I said, trying to figure out what worked best, and it changes based on the type of paper you have. So I used the back of my palette knife did in the paint. I used the front of my palette knife dipped in the paint and tipping the palette knife different angles to see which one would work for this paper and for these little limbs. Then I just continued. I started adding a second tree and I'll add 1/3 Trias well, and I'm working back and forth between the paint and the paper, picking up paint, adding it as I need it. I'm trying to leave plenty of white space on my trees since birch trees are white and I'm also going to add a little bit of sort of scratchy grasses at the bottom, which is pretty fun to do for if you ask me. I actually really love hearing the scratching nous of the palette knife on the paper. It's kind of cool, and you can make some pointy shapes and some rounded shapes this way. Now I'm working intuitively and loosely. It's the idea of birch trees. This is not hyper realism or anything like that. This is loose, expressive painting, and actually working with the palette knife is feels very expressive, so I hope that when you try it, you'll feel that way too. Now I'm not going to limit myself to just a palette knife and only a palette knife. There's the reason to do that, so I bring in my brush and soften things up as I needed. I feel like there's some will shadows on this snow in the snow area, and the brush added just the right touch for that. Now, as far as the composition goes, I went for sort of a clump of trees. They could be spaced differently. There are all kinds of compositions you could go for, but a clump of trees is usually nice, and I'm leaving some extra white space on the page where if I wanted to, I could turn this type of painting into a greeting card or something like that. I continue to experiment. I dipped my talent knife in water. I used to pick up the pain. I used the flat side of my palette night. I used the edge and the tip. I used all of those things in this painting. Plus, I used a brush. So don't try and limit yourself, be willing, toe open and explore and practice and see what happens now. I signed this painting thinking I was finished and I realized I could splatter on here. That would be perfect. And so I picked up my brush into some light little splattering as values control as I get right there. So take the time to practice and share that practice in the project section with me. I can't wait to see it.
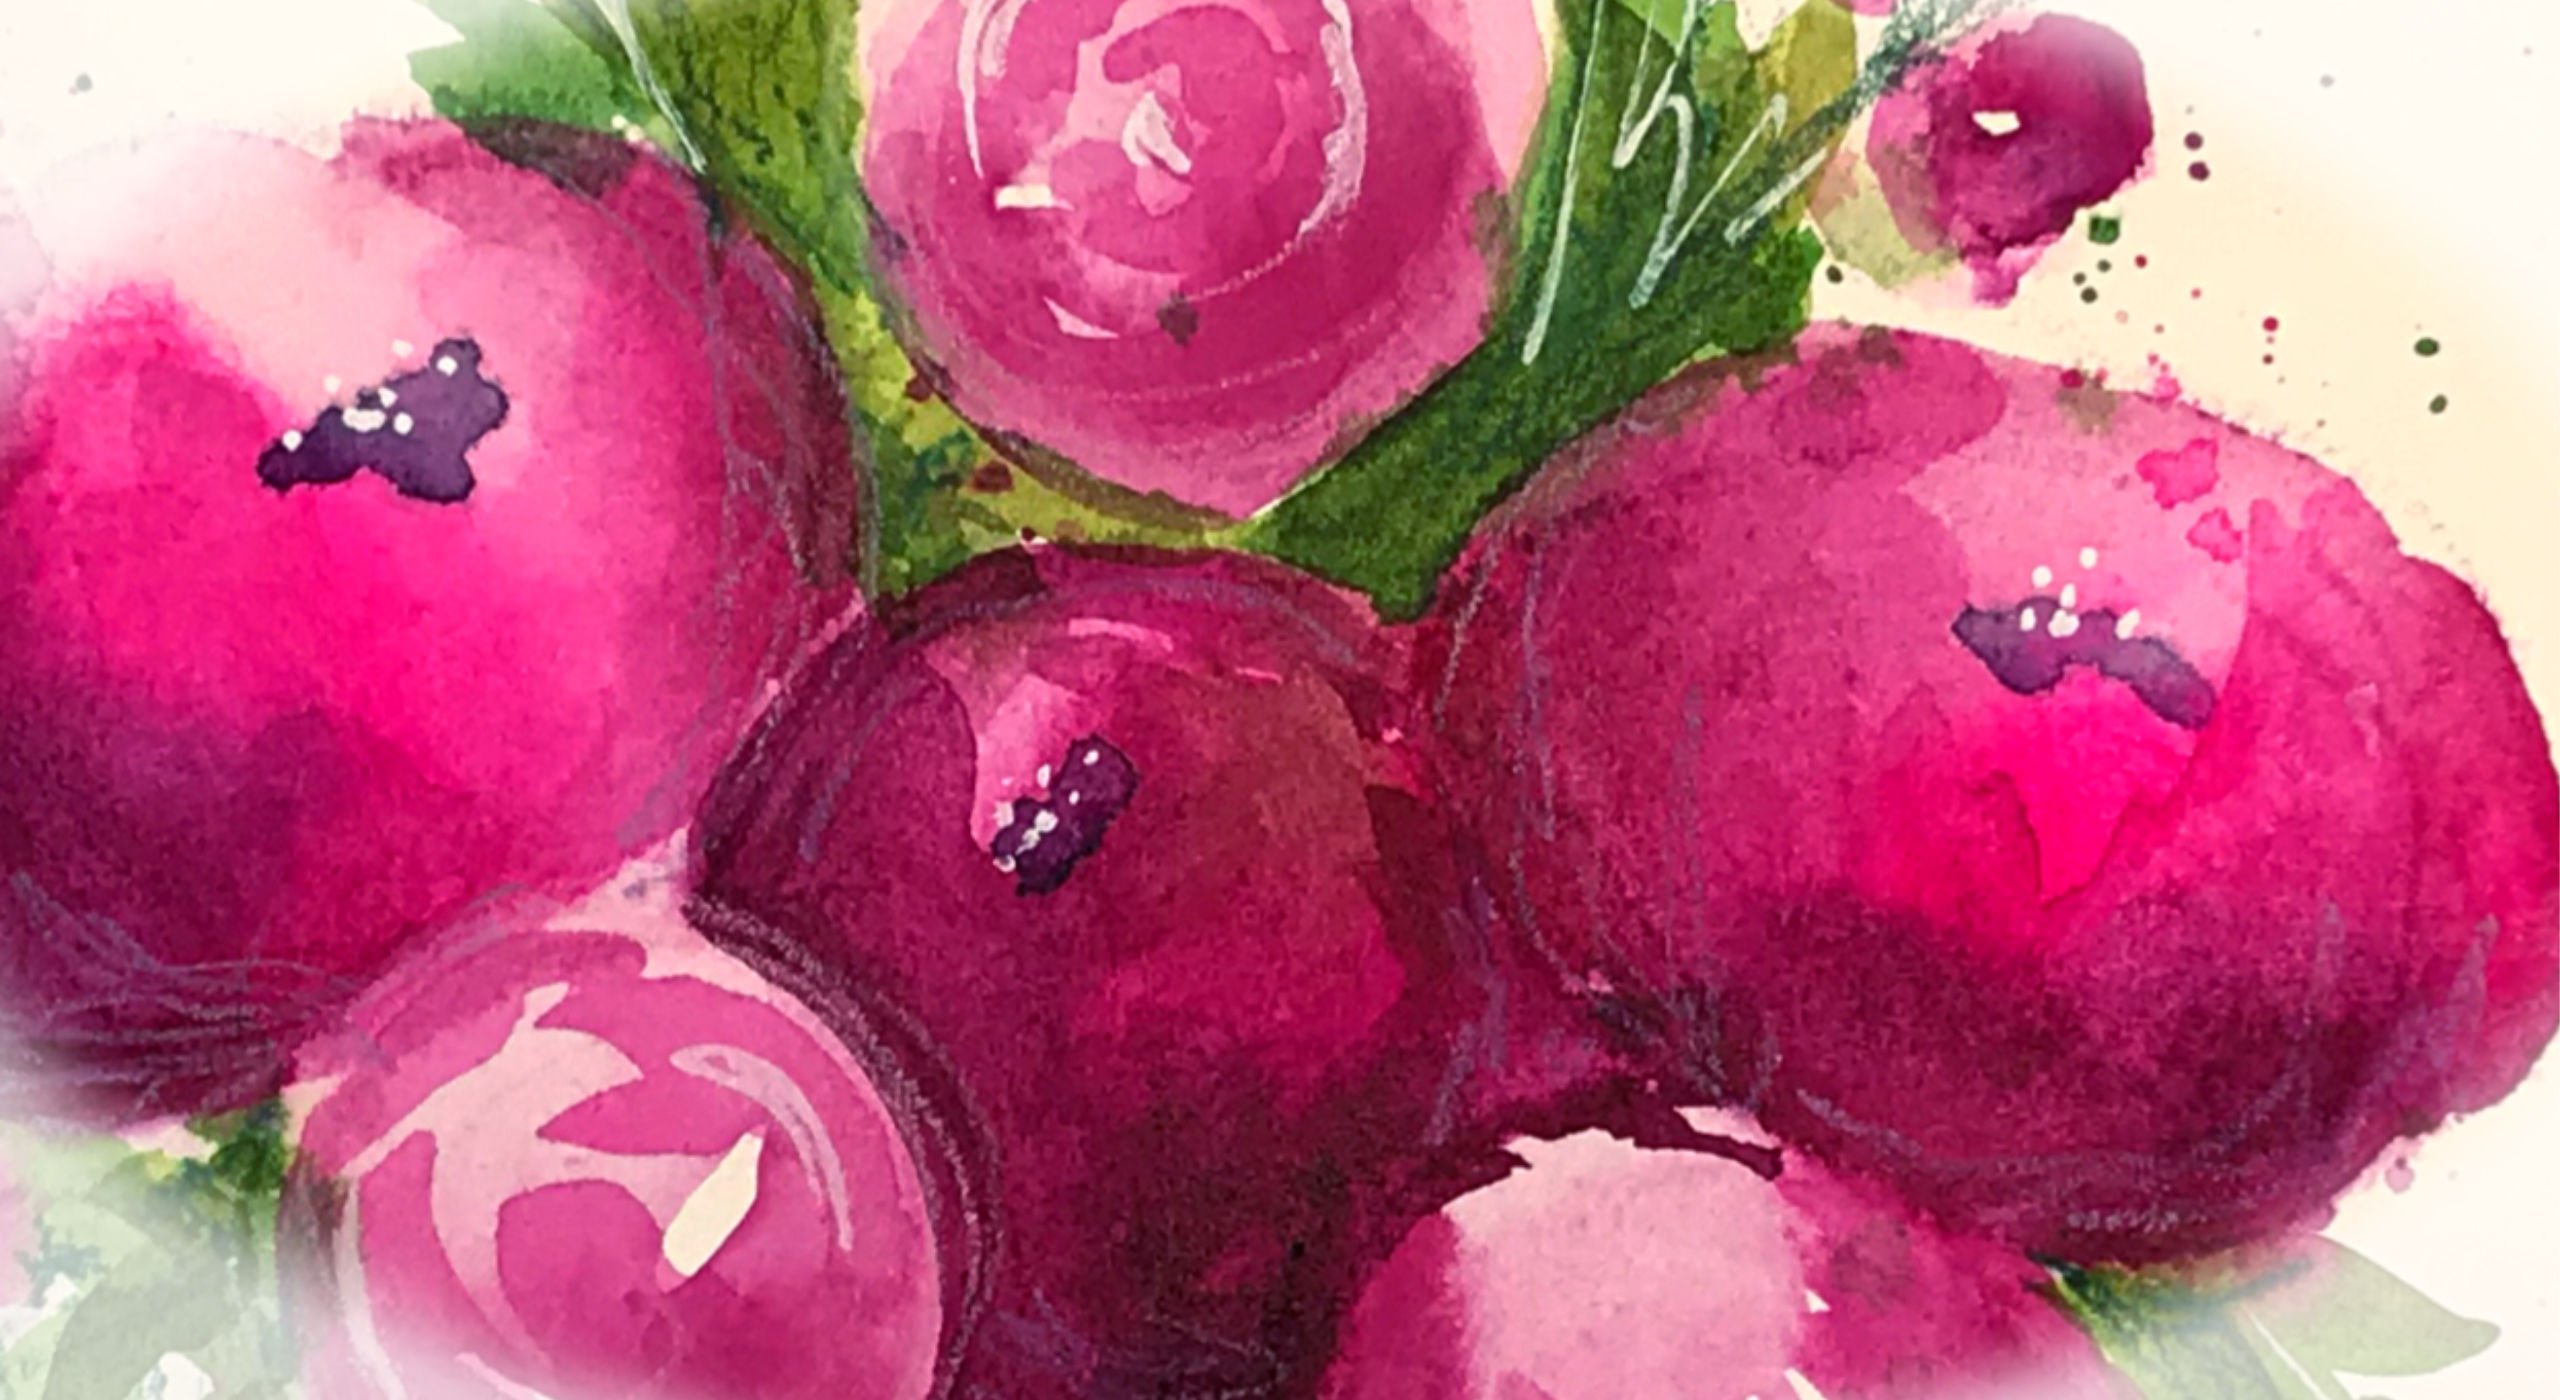
6. Purple Birch: foreign next birds trees. Let's experiment with color a little bit. I feel this is the kind of painting you could use any color, depending on what type of feeling or emotion you would like to evoke, or if you just want to have fun playing with color. So I've created a puddle of purple and a puddle of pink hot pink opera. It's beautiful, and I'm picking up both of those colors at once on my palette knife and repeating the same process of sliding my palette knife along the paper and then pulling it over to create that birch tree texture and then just creating tree shapes. Now they're larger, the bottom smaller at the top, and this tree happens to branch off and go in different directions, so you can really get creative with this. As I said, it's loose and exploration, and it's fun, and we have the idea of trees. But you can really take off with an experiment and try different combinations and looks not only of color but also of your layout in your composition. The little branches are really fun to create, and I kind of just try and use a jerky motion when I'm doing that because it creates a more natural looking French, It's not. What's the word I'm looking for? It's not too smooth like branches and real life are bumpy and rugged kind of thing least in this case. And I think it's a lot of fun to make those branches so you can work back and forth between picking up your paint and putting it on the paper, and you're going to get different effects, depending on how much paint you actually get on your palette knife and how you tilt and move your palette knife. So keep those things in mind when you're creating. But just remember just to relax and enjoy it. Enjoy the process. Be in the moment to experience it. Thes paintings take on Lee about 5 to 10 maybe 15 minutes if you get really complicated, not including drying time. And so they're really easy to sort of a good, good way to experiment. They're easy to experiment with because they don't take a lot of time, and there are a lot of fun to do. So now my trees were mostly created, and I'm going to work a little bit on the bottom area and going to add some grasses, just that scratching motion with the tip of the knife, sometimes the side of the ninth. Some of them will be curved over and some will be more straight. And then I want to dark in the bottom of the trees a little bit. I'm still thinking the idea of snow here. This is still a pretty cool color palette. I love these purples and pinks and how they're mixing on the painting, but it still gives me that really cool feel. So I think it's a good idea toe have, like a snowy type of base. When you feel it's necessary to create some lighter, softer effects. That's a good time to grab your brush. Dampen it, wet it a little bit. You can add splatters. You can soften colors, and you can create nice soft effects. You can even drop in more color if you wanted to. Wherever the painting is wet, so I will work back and forth between my brush in my palette knife, where I feel like I need moral lines. I could go back in with my palette knife and create those shapes and dark in some edges and overlap and that sort of thing. Just keep playing. There's a tree in the background, see pretty cool. So that's our purple tree. I hope you will experiment with color, pick your favorite and try it out and see how it turns out. Now let's move on to the next lesson.
7. Gray Birch with Gradient Background: Let's take our birch trees to the next level by adding a background. We're going to start with a simple Grady in background. I've chosen a light blue Great. It has lots of water. It's a very loose, watery mix. It will be very nice and lights. So we're going to create that hombre kind of background, working from dark to light by adding water as we go down the page and you can even tip and move the page if you want to. Doesn't have to be perfect. Just needs to be a light color, so let that layer dry before you move onto the next layer. Now I'm using the same grey, which is blue mixed with birth Seanna and just a little bit less water this time, so it will be darker. I'm using the same technique of sliding the edge of my palette knife up along the paper, thin, tilting and pulling it over and trying to create an irregular shaped tree not perfectly straight, but curved a little. And the more flat I have my palette knife, the more texture that I pick up from the pig. No, I'm just adding branches, given using the tip of my palette knife moving in an irregular way, trying not to make it to smooth. I don't even have to try it sort of naturally does that because of the texture of the cold press paper. It sort of just skips along a little bit, and that's very helpful when making these branches the next tree. I want a little bit lighter. So I just added a little bit of water to my palate with my brush and then used my palette knife to just makes that a little. And there we go back to creating those trees again when I add the water and basically creating a lighter value of the same color. And so that's going to make that tree sort of move more into the background. At least that's what I'm thinking is I'm painting it now. Sometimes it doesn't work out that way. And like I said, this is a loose, free, fun style of painting. And if that painting that tree ended up in the front, well, it's just a lighter color tree, and I'm perfectly OK with that, and I hope you will be too, so you can just continue to work back and forth between creating your trees and creating your branches, darkening areas By dropping instant paint, you can drop in paint with a palette knife. It's just kind of small drops. And wherever I convict the branches to the tree, I usually have that area just a little bit darker. Seems to be had a little bit of realism to it. Not that we're that concerned about it being realistic, right? But it's kind of a nice shadow effect kind of fun to do you to now. One thing to notice is because we're skipping over parts of the paper that gravy in background is showing through our trees, and that's perfectly fine. That's kind of what we want. And we could go back later with, like Wash to add some snowy effect if we want to. And in fact, I will do that for this painting. But it's OK if that background shines through everything. This painting will be connection in that way, and it sort of creates some continuity and just that sense of that sense of softness that we're going for with this nice soft background and nice soft trees, just a feeling of serenity. There and again, I feel like this piece feels like a winter kind of day of maybe a snowy kind of day. It's definitely not a bright, sunny day, right, so picking your colors will affect the mood and the atmosphere of your painting. So I picked up some water with my brush, and I'm adding in a little bit of shadow with very watery, just a tiniest touch of color of that gray. And it just creates a nice shadow effects again, going for that softness. And then I'm using the palette knife to add in a little bit more definition to the tree trunk. Now we'll let that dry. And then let's add some snowy effects with white wash, so squeezed out a little bit of whitewash and watered it down with my brush just a little. And now I'm going to use my palette knife to drag that across. It creates some lovely snowy white texture effects on my great trees. I'm also adding some down to the bottom, creating some white marks and some snow account of texture by using the flat part of my palette knife, and that's going to wrap up this painting, so hope You'll also try creating the Grady in background paintings, trees on top and adding a little snow. It makes it so fun to crank these birch trees. Now let's move on to the next lesson.
8. Brusho Birch 1: Now let's get really experimental and use of brush o crystals for our trees on dry watercolor paper. I'm sprinkling Russia crystals there. The gray ones and inside the grey are the multi colors like we talked about earlier, and I put a little bit more crystals at the bottom than I did at the top of the page. To create the weight of the darkness nearer the bottom, dip your palette knife in clean water and use that to activate the color. Crystals on the page were using the same motion as before, sliding the palette knife up on its edge and then tilting it a little to make the flat marks go across the tree and you can see it's just magic. Look at that. So for this, rather than dip your palette knife into paint, we're just going to dip it into water and continue the process, scraping and moving across. Now, if you drop drips on the page wherever you drop any drips, it's going to activate the crystals because we've sprinkled them all over haphazardly, and that just contributes to the loose feeling and look of this. Have quite a bit of water on your palette knife. You're really going to see the paint, move and flow into that water, and you'll see those colors separate. You'll see blues and reds and yellows, and it is so, so, so pretty. And in areas where the color is sort of mix is completely, that's where you'll get the dark grays and the light, grays and all together, like your visual perception will see. This mostly is great. But they'll have those small pops of color, which at a lot of interest, some continuing, repeating the same process, working back and forth between the trees, the grass, the limbs. I will use the brush to soften things up a little bit and add some splattering. Wow, you can really see that color. Isn't it gorgeous? Got some oranges and blues and greens and yellows. It's just amazing. I love Russia, Can you tell? Especially the gray? For some reason, it's my favorite. When I'm splattering, I'm just splattering on water. Keep in mind the crystals on the page will activate, so you want to do that sort of lightly. That way you can see what's happening in observe as you go. As I'm observing, I noticed that I want to define the edges of the trees a little bit more, make them stand out from the background, and I still haven't added those branches yet. So I'm going to work on that part now. In this case, I did wet my palette knife with water, and then I'm putting the tip of it into the edge of the tree where there's color and I'm pulling that color out so that color gets transferred into the branches of the background. And if you happen to activate a color fissile one of doing that bonus, you get even more color in the branches. It is such an interesting kind of painting to do so. Continue toe adds little details. The little grasses to find the edges a little bit more again, it's all the same process. It's just we're using water instead of dipping our palette knife in paint. So once you complete this painting, you will need toe, let it dry, and then you can brush off with a soft, dry brush, the excess brush o crystals without activating them, or just tap it off over a trash can or something like that just to get off those little crystals, but if you drip water on it, those will be activated to any point in time. So trying just brushed them off nicely, and that is it. We've painted another birch tree painting, and this one only took about five minutes as well. All right, let's move on to the next project.
9. Brusho Birches 2: it's painting with brush. Oh, I decided to experiment a little more with different colors, so I have crimson here that I'm going to paint with. And then after this, I'm going to try the yellow Oakar. Now they again have a mixture of colored crystals in there, so they'll have a mix of colors, and I just wanted to see how they would turn out and how they would look. So this is a video that I've sped up because we've already gone over the process of doing it. I just thought you might like to see the different colors and action and see how they kind of turned out. So I will turn on some music and let you watch the rest of this video, and I'll see you in the next lesson.
10. Next Level Birch Part 1: Okay, We've learned a lot about simple ways. Painted birch tree. So let's take it to the next level for this painting. We're going to start with a sketch of our trees because we're going to do some negative shape painting for the background as you're sketching. Remember, our goal is loose free painting and sketching so holder pencil loosely make very sketchy loose lines. You can even draw in some little branches of where you think you might want them. Those may get covered up later. Doesn't matter. Just lay out your trees in a nice, pleasing composition. Make different sizes, leaving some space in between for the background, which is what we're going to be working on right after we've been sketching. And keep in mind that your pencil lines are going to show. I'm sketching very lightly and loosely, but these lines are still going to show in my painting. If you can try to leave them there, try not to erase because they're going to add character in history to your painting. Three Trees is enough for me, but feel free to add more to your painting if you like. Now let's get our appellate knife and our paints, and we're going to paint the background instead of the trees. This time. That's right. You heard me correctly. We're doing negative shaped painting for the background of our trees. And like we talked about in the warm up, that means we're painting around the trees. Right now. We're not painting on the trees. That's when we drew them in the first place, so it will be easy to paint around them now. If you overlap your tree a little bit like I did just there. Don't worry about it. It's no problem. It's going to create a nice continuity between the background and the trees. By the time we're finished, we will use very similar technique that we did to paint the trees. Earlier, we will load a pallet dive with paint, and then we can go down the edge of the tree and pull the pain across outside of the tree. But this time, when we pull the pain across, you want your palette knife to be more flat to spread the paint a little more evenly. Now we're still going for blotchy kind of effect. We want to leave some white in the background so don't cover everything up at this point. I started with a light blue, and I'm going to add in some green as I go down towards the bottom for the idea that maybe there's some greenery in the background. But I kind of have a blue sky and sort of green grass there. So it's going to be more of a sunny effect and the swatches of color that we're creating. They're going to have a little less texture. They're going to be bigger blotches of color now. Part of this is that we'll get the idea that there's some trees in the background. That's great. That's perfect because these trees are not standing alone in some meadow there, usually in a whole big grove of trees. So that's pretty cool effect that you get. So continue with your palette knife to add your color. Work your way across little by little, dropping in more pain and more color. I sort of work for more blue, two more blue screen at the top and then more green at the bottom. Fill in each section, little by little on each side of the tree, so you could avoid having any kind of hard lines that you don't want in the painting once you've completed that part of the background while everything still wet Aiken scratching some grass just like we did before with the tip of the palette knife. Also, while you're paint is still wet, let's bring some of those background colors onto our trees. So I'm just going to take the tip of my palette knife and sort of make strokes across the trees that are like the texture of a birch tree or in Aspen tree. I'm just doing it here. They're a little bit. I don't want to be too much, but it's going to tie everything together in our painting. As I'm doing this, I'm sort of thinking about where I'm placing them to sort of balance out the look of trees and balance out the painting itself. All right, the last thing I want to add before I let this completely dry and paint the trees. It's a little bit of greenery at the top, so I'm just again using my palette knife. I'm picking up a nice, limey green kind of paint. It's a very spring me green, and I'm putting it in different areas, watching overlapping where I have the blue and over, lapping at the bottom and creating some grass to. And it's OK if it gets on my trees a little bit, too, because that would be just like a leak overlapping your treat. So the load your palette knife with your color and then tap it onto the page to create that leafy effect. Now, once you finish with this, let this painting dry completely before you move onto the next step.
11. Next Level Birch Part 2: Let's continue with our next level birch trees. We're going to start by using the Witten went technique, and so I'm taking a brush and, um, wedding on Lee the trees. In some places, I'm not going completely to the right side of the edge, but I'm leaving a little bit of white space now. May come back later and work on that, but for now, that's what I'm doing. I have noticed that I had a bit of a puddle there. I don't really want a puddle, so went back in with thirsty brush and cleaned up a little bit of that water. I just want enough water toe wet the paper. I don't want a big puddle on the paper for the next step. I'm just taking my brush O and I'm sprinkling it lightly on the paper, concentrating mawr at the bottom of the tree, unless at the top. Now, as the brush O hits the water, it's going to spread and move and create beautiful texture, and you can always move that around a little bit with your brush. You could also tap some of it off or remove it a little bit if you needed to, Or you could just leave that lovely texture. I'm trying to touch the trees as little as possible with my brush, I am creating some shadow down at the bottom by pulling out some of that gray color and you notice as I use my brush on it, it does mixed together. I don't really want that toe happen on the trees very much so. I'm trying to stay away and keep my brush away from the trees themselves. When I do use the brush on the tree, I'm just using it to touch up the edge and define it just a little bit. Now I'm OK with it. Blending they're because going to create a nice blind so that I can see the edge of the trade and differentiate that from the background. Keep in mind you can use your palette knife to do this. I just happen to have the brush in hand, and I also feel it gives you just a little bit more control over where I'm placing the brush. Before you go on to the next step, Be sure and dry, or let your painting drugs. Once it's completely dry, then you can take a soft brush and brush off the brush. Oh, that's between the trees. We don't really want the brush O in those areas for the next step. Okay, lets splatter on some leaves. I started out by tapping that I quickly rose. I could just splatter, and that would be a lot of fun and create a lot of visual texture. Going to add some leaves at the top in orange, yellow and green and also at the bottom. I may even add a little bit of red. I also throw in a little here and there by the sides of the trees, just to add a little idea that there some leaves in other areas, so splatter to your heart's content. And then I'll be back with the next step. Now, just like in our previous paintings, were going to use our palette knife toe. Add some branches. I've dip the tip of my palette night into some dark green paint. I thought that would look nice here. It's going to look almost black and not very green, and then I'm going to even go through those wet splatters. No problem. It just creates a really interesting colors and while I have that pain in my palette knife out, I'm going to add some more deeper, darker colors to the grassy area in the background at the base of trees. And I'll also just continue making some more branches until I really enjoy out. This painting is looking. - Oh , okay, Sign it, let it dry and we're done. I've really enjoyed this and I hope you've enjoyed it, too. Next, let's talk about your project.
12. Project and Thank You: So for your project, I would like for you to first do the warm up. Play around with your palette knife. See what kind of marks you can make. See what kind of angles you need to hold it at. Tap it, move it. We will do all the warm of things with your palette knife and tried the great washed the negative shape. And try mixing agre with your colors and see how it works out for you. Just try the warm up. That would be a great place to start and sort of get those creative juices flowing, keeping that attitude of experimentation and exploring as you paint. Once you've done the warm up, then you can move on to some of the birch tree paintings. As I said before there, simple, quick and easy. Most of these air done in less than 10 minutes, and then the main next level painting actually took about 15 to 20 million. New to painting dry, creating a simple birch tree with your palette knife. No need to worry about a background. Just play around with it and try it. You can try your favorite colors. You could try cold colors warm colors. You can use the colors that I used totally up to you, and then you can move on to creating ingredient background. Let that dry in the paint, birch trees on top of it. You can try brah show. If you have our shell, that's a lot of fun. And then you could do the next level painting, which has a lot of different techniques. It's a lot of fun to paint and also uses watercolor and Russia. So that is your project. Just pick what or pick two or three. Start with the warm up and you will be golden. Thank you so much for joining me for this class. I really appreciate it. I can't wait to see your paintings. And don't forget to help me out by leaving a review. Ask your questions if you need to. I'm happy to answer Thanks so much. I'll see you very scene. But by
13. Bonus Sketchbook Flip: hanging. My wonderful friends, my love, these students. I thought we could do a quick sort of sort of like a flip like a journal flip. And I would share with you some of the paintings that I did for in preparation and for practice of these birch trees not included in as a specific lesson for the class. But I just thought it might be something you'd like to see so that I would share. So here is the very first birch tree painting that I did practicing with the palette knife . And I do share this one in class and talk with you about it, but I just thought you might like to see the end result. I did add some whitewash to it in places and said this one was a lot of fun, a lot of experimenting, and I learned a lot from doing it. I think it's interesting how this edge almost looks like it's the background, and I could have probably just used a paintbrush and pulled that out, and it would look like the tree was completely white there. So that's something that I noticed about it rather than that looking like this little section C rather than this little part looking like the edge of the tree. It looks more like it's part of the background, which is kind of cool. I mean, that could be a fun effect. All right, so next is more color experiments. Now, this one I also did in the class with the purple and blue got a little bit more crazy with their then this one. I also showed you in the class, but after the class, I added a little bit of brush into because I really liked the effect. Now I painted this one after I did my brush o experiments. So this is the first brush o experiment that I did and I loved it. I loved the pops of color that air in here. And I shared this one with you also in the class. Look at that. It just turned out so pretty. I just loved it so much. And that's also why added the brush to the gray one. Although in the lesson I don't do that. So these are ones you've already seen before. You've seen this yellow one, which is also brush o. Then I went a little while with the brush up and got all these colors. And, um, yeah, I didn't really like this one too much. It could be because of the background, Grady. And though I don't know and I think also you could experiment with having it dark on the bottom and go up lighter. That might be interesting to, but I didn't try that yet. Then I did the red energon, some gray over it, and I was not happy with this one. It all. I like the composition of it, but I don't like the color and how it turned out. So that was an experiment. I tried some light, watery colors that's like a light pink and a light blue and me like that. I think it's fun to have the different colors of branches in here purple. We've looked up now. I also tried it on Strathmore Watercolor card of nuts with these are on the actual card itself. This is watercolor paper. It's pre made card. And so I tried it with the birth show. I tried it with, like a pink and yellow paints. Now I like the color combination for both of them, but what I didn't like was the texture of the paper. It did didn't work well for this process. It's too smooth. So that's one reason why I emphasized in the class that you really need the £140 cold press papers so that it has a nice fun texture. But I did try it. And these air okay, they're just not my favorite right and see this original. Then I got out my sketchbook also, and that has the paper in it, and I painted this one. This one was done with Daniel Smith colors. I think that's a couple of granulated colors. Blood stone, genuine, I think. And a blue. It must be a I think that's an ended thrown blue, and this one turned out really pretty. And then I also added Wash to this one in areas. This one is very subdued at very neutral, and I thought, OK, let's play with color. What's try? Create atmosphere and I love this one. This is this golden sunny color. I also used some granulated in color here. Some Daniel Smith hematite believe hematite and just played with the color and with the values so less water, more water nice and light in the background and I just kept going and I had a lot of fun. If there any of these that you see that you would like me to create a second birch tree class, I'm considering doing that with a few different techniques that I used in this particular class. So here is another one that I tried. I wanted to have trees in the background. I used a really light blue and teal color and some green, as you can see and just painted some really like light in the background. And then this one, which is much more focused in the front, and I think it made a really nice composition. I thought it was really pretty and soft, and my grandson did this. I have one little grandson and a plate time, which has nothing to do with the class. And then this was our sort of master painting. I guess you might call it that. We did the next level painting from the class, and so you can see how I did background, just as I did in the class and how it all turned out. So this has been a lot of fun playing with birth trees. Like I said, I have even more ideas. So if you're interested in seeing other class, be sure and let me know you can, you know, message me on Instagram or put it in the comments. In any case, I'll see it and I I will consider doing that. So thanks so much for joining me for this class. I really appreciate it and I'll see you very soon. Bye.
 Jessica Sanders, Artist | Designer