Transcripts
1. What is This Class About?: A blooming they to you today, you're going to
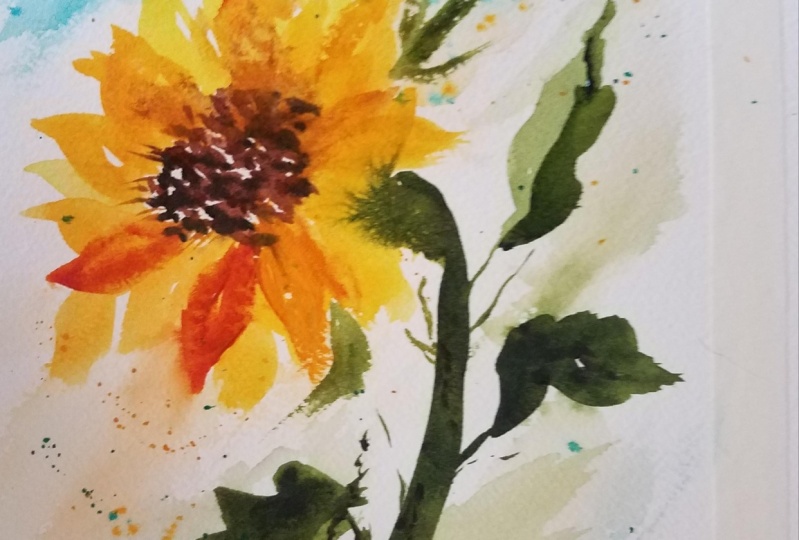
Paint sunflowers. This flower reminds
me of summer with their captivating and
vibrant yellow petals. In this class, we will try
to capture the essence of this beautiful
sunflower in three ways. Are going to embrace a
loose watercolor style, allowing the paint naturally
flow and blend on the paper. Higher in humans, jolly and
I'm a watercolor artist on Light indicator and a
Skillshare teacher. I haven't Fading for
about nine years already. And Arthur balls around painting loose
watercolor florals. I love how I'm able to make a creative interpretation of
nature and put it on paper. My classes focus
on breaking down difficult watercolor
techniques in three easy steps for beginners. This class, we're first
going to delve into the watercolor supplies
that you need. Next, we're going to Observe
a Sunflower and look at the different
characteristics that define it. Any will choose colors that will make a
Sunflower stand out. This class, we'll cover the
essential brushwork Drills. Are there to Paint a loose
style of leaves and petals. You will discover how
the applied pressure in your brush to create expressive
and Organic Brushstrokes. We will cover different
watercolor techniques such as Wet on Dry, Wet on Wet, Fading, glazing or Layering, and
also how to add splatters. All the brushwork drills and watercolor techniques
can also be applied to painting
other flowers. As this class aims for you to develop your own artistic style. By the end of the class, you will be able to pay three sunflower
paintings where you will learn how bad a Dreamy Background
using Fading technique, how the Add Layer Petals and also add white
details using Gouache and how to pay and
Expressive Sunflower Bouquet using different
floral perspective. This class is suitable
for beginners or experienced artists who want to unlock their creativity and learn a loose watercolor style, make it easier for you. I'll be providing a
Downloadable Sketch that you can print on watercolor paper so you can practice some more. Let's unleash your
creativity and watch your sunflower
paintings come to life. Let's get started.
2. Class Project Overview: Hi there. So before we start, I'll be sharing a quick
overview of the class. We will first discuss the
materials that we need, including the list of Colors. You will have a
limited color palette since we're just
painting a Sunflower. Next, we'll proceed through
brushwork drills where I will teach you basic strokes to
form petals and leaves. After that, we will talk about different watercolor techniques. I will be sharing how to apply these techniques to painting
a loose style of Sunflower. All the projects are
about ten to 11 min long, so it's very easy to slide
it into your schedule. Alright, now let's
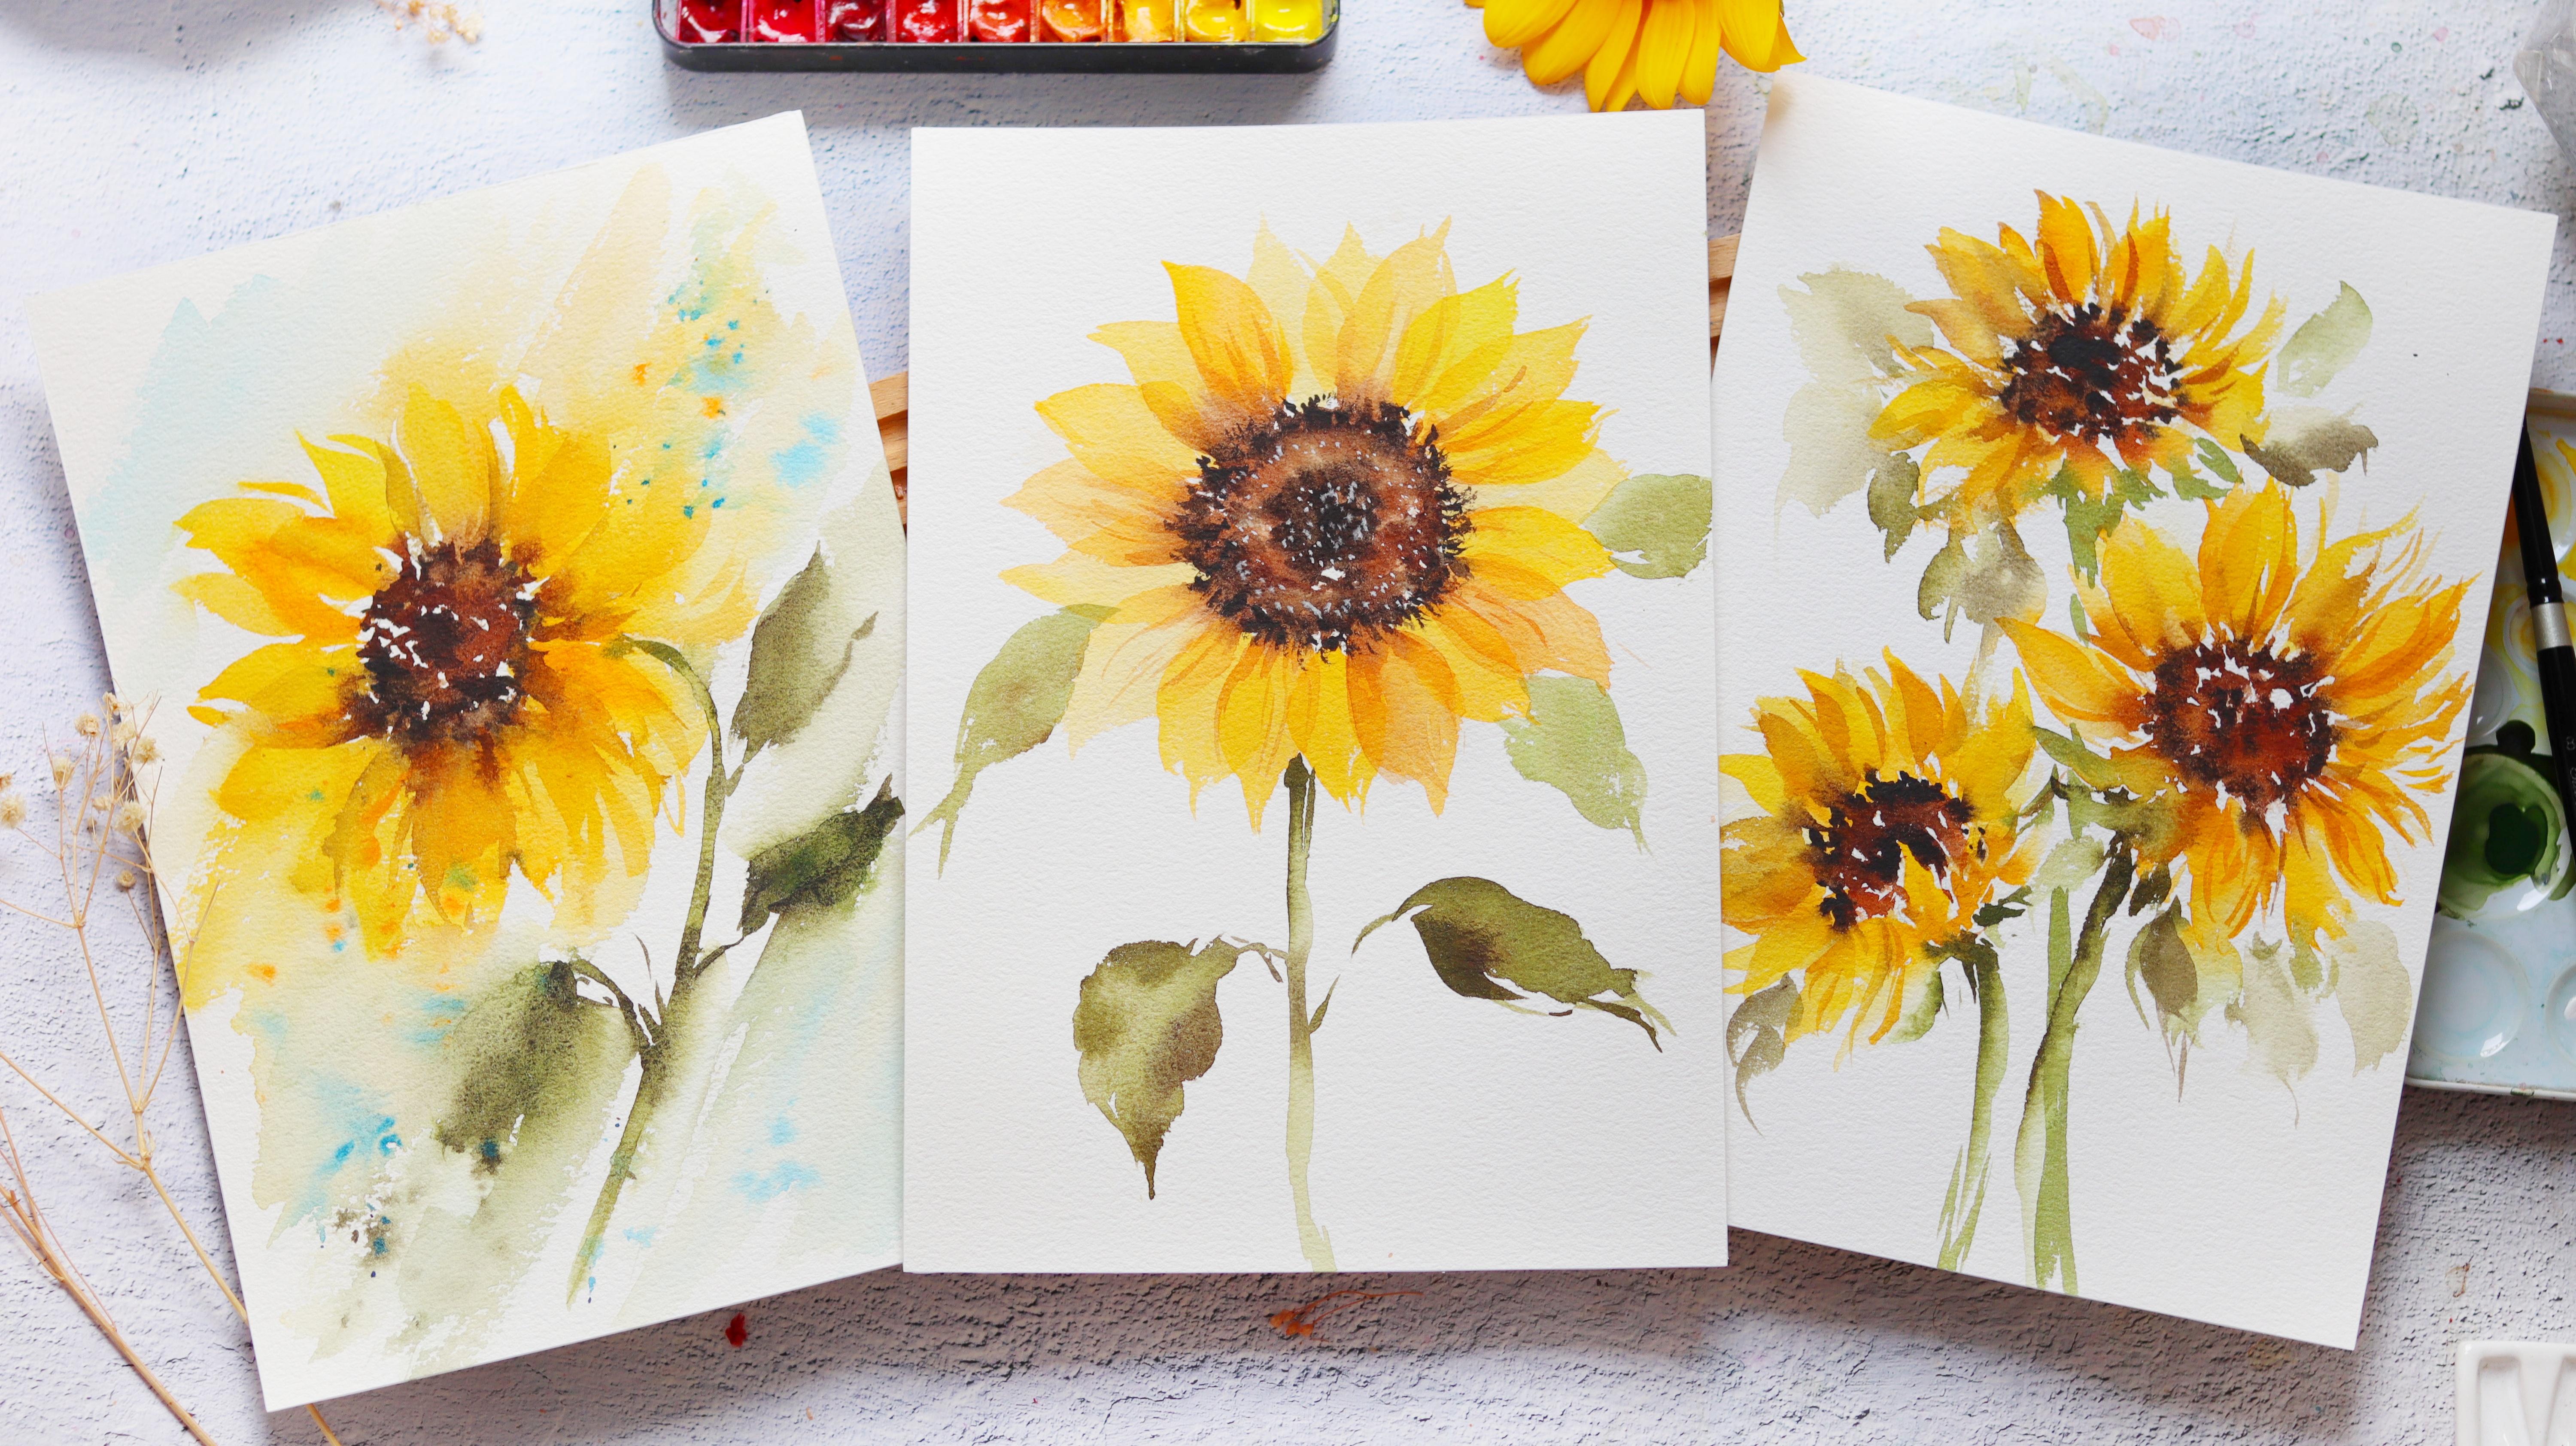
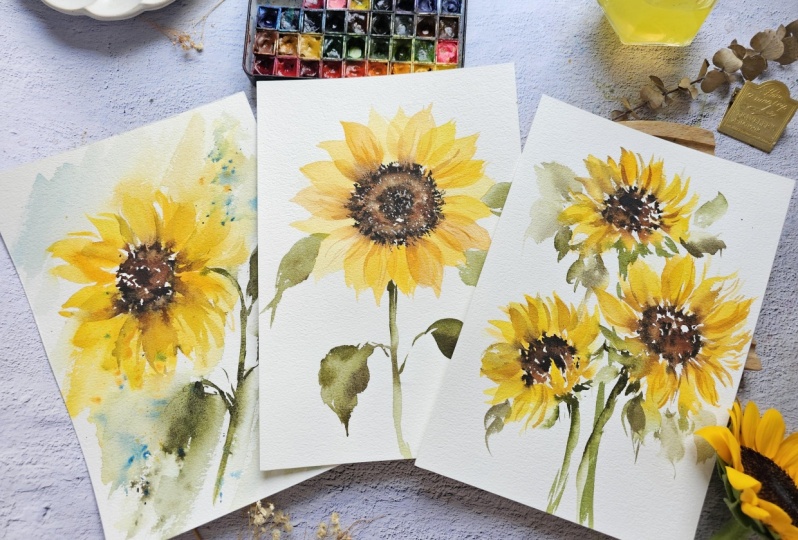
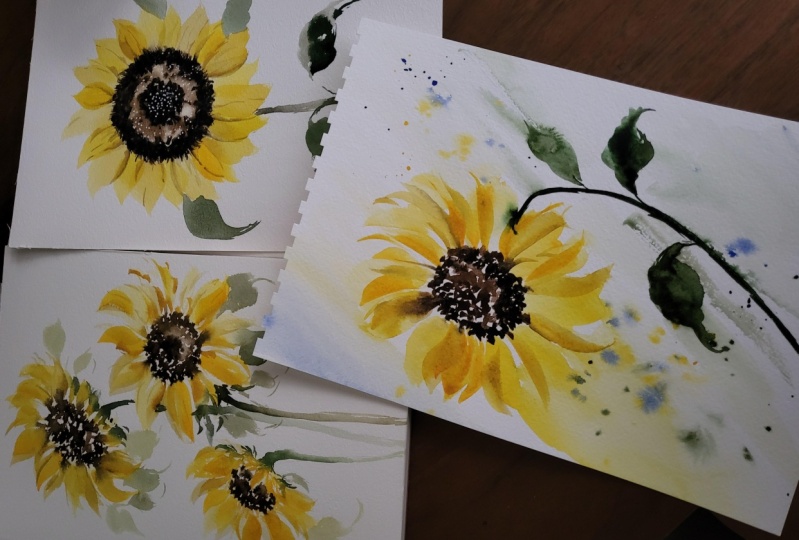
proceed to our Projects. The first project
we will paint is a Dreamy Sunflower painting. This is a loose watercolor
style with a faded background. And we'll be adding
some splatters. And we're also going to
do a feeding technique. For the second project, we're going to do a
Layer, Petals Sunflower. For this one, we're going to
do a Layering techniques. So we are going to do first Layer Petals and then we're
going to paint on top of it. We're also going to
add white details using Gouache in the center. We're going to do a
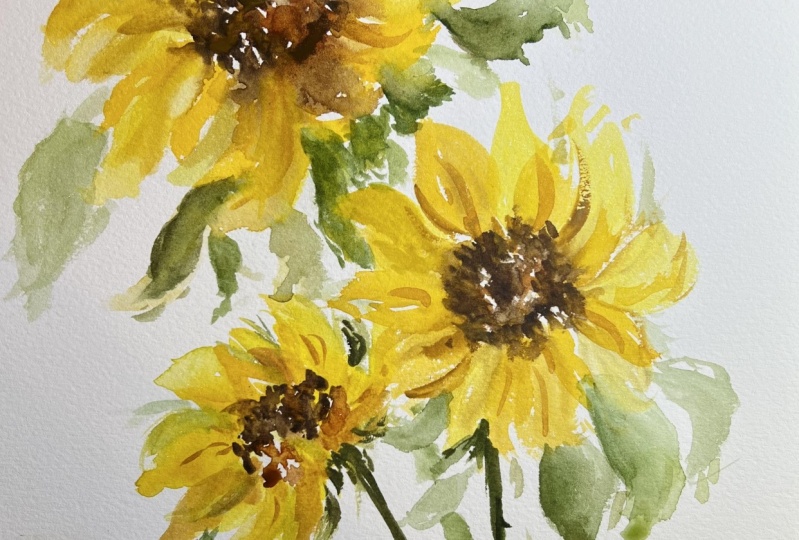
Sunflower Bouquet. So we're going to do three
sunflowers in one painting. And these sunflowers
are going to be facing in different angles. So as you can see
at the bottom left, there is one Sunflower
that is at an angle. I'm going to teach you how to
paint that, make it easier. I also decided to paint
simpler leaves for the class so that we can just
focus on the flower alone. So for this Sunflower Bouquet, we're also going to try and do some dancing with
their Brush are going to do Strokes where the brush to create
these nice wispy petals. After the project videos, I have included the tutorial on how to print this
downloadable sketches. You can see right here. This is going to be very helpful if you want to
practice some more. I hope that you are excited
to try out this class. Okay, so now let's move
on to the next video.
3. Supplies That We Need: Alright, so before we start, Let's talk about the
materials that we need. We're going to use
100% cotton paper. This is called the Baohong
Artist Grade Watercolor paper. There are different
versions relating use the cold press paper
and 300 GSM thickness. So this is in your
watercolor block form. You can see that all sides are glued except for this part. That's how you will
take out the sheet of paper by sliding it off
using a palette knife. So let me show you
what it looks like up close so you can see
some texture on the paper. This is one of the projects
that we will be doing. But on the right, this is their student
grade version which is called the
Baohong Academy. So right here you can definitely
see the big difference. No, Baohong Academy
has a smoother texture and the paint look
a little bit flat. But on the Artist Grade version, it has more depth. But both types of paper are
okay to use in this class. So don't worry if we don't have an artist grade paper right now. Now for the brush, we're going to use a Silver
Brush, Black Velvet. And this is inside 6.8. So when looking
for a round brush, you want them brush
that can hold its point even if
you dip it in water. Also because you're
repeating loose florals, you want a brush that can
absorb a lot of water as well. This is just a preference,
but in general, I like a brush with
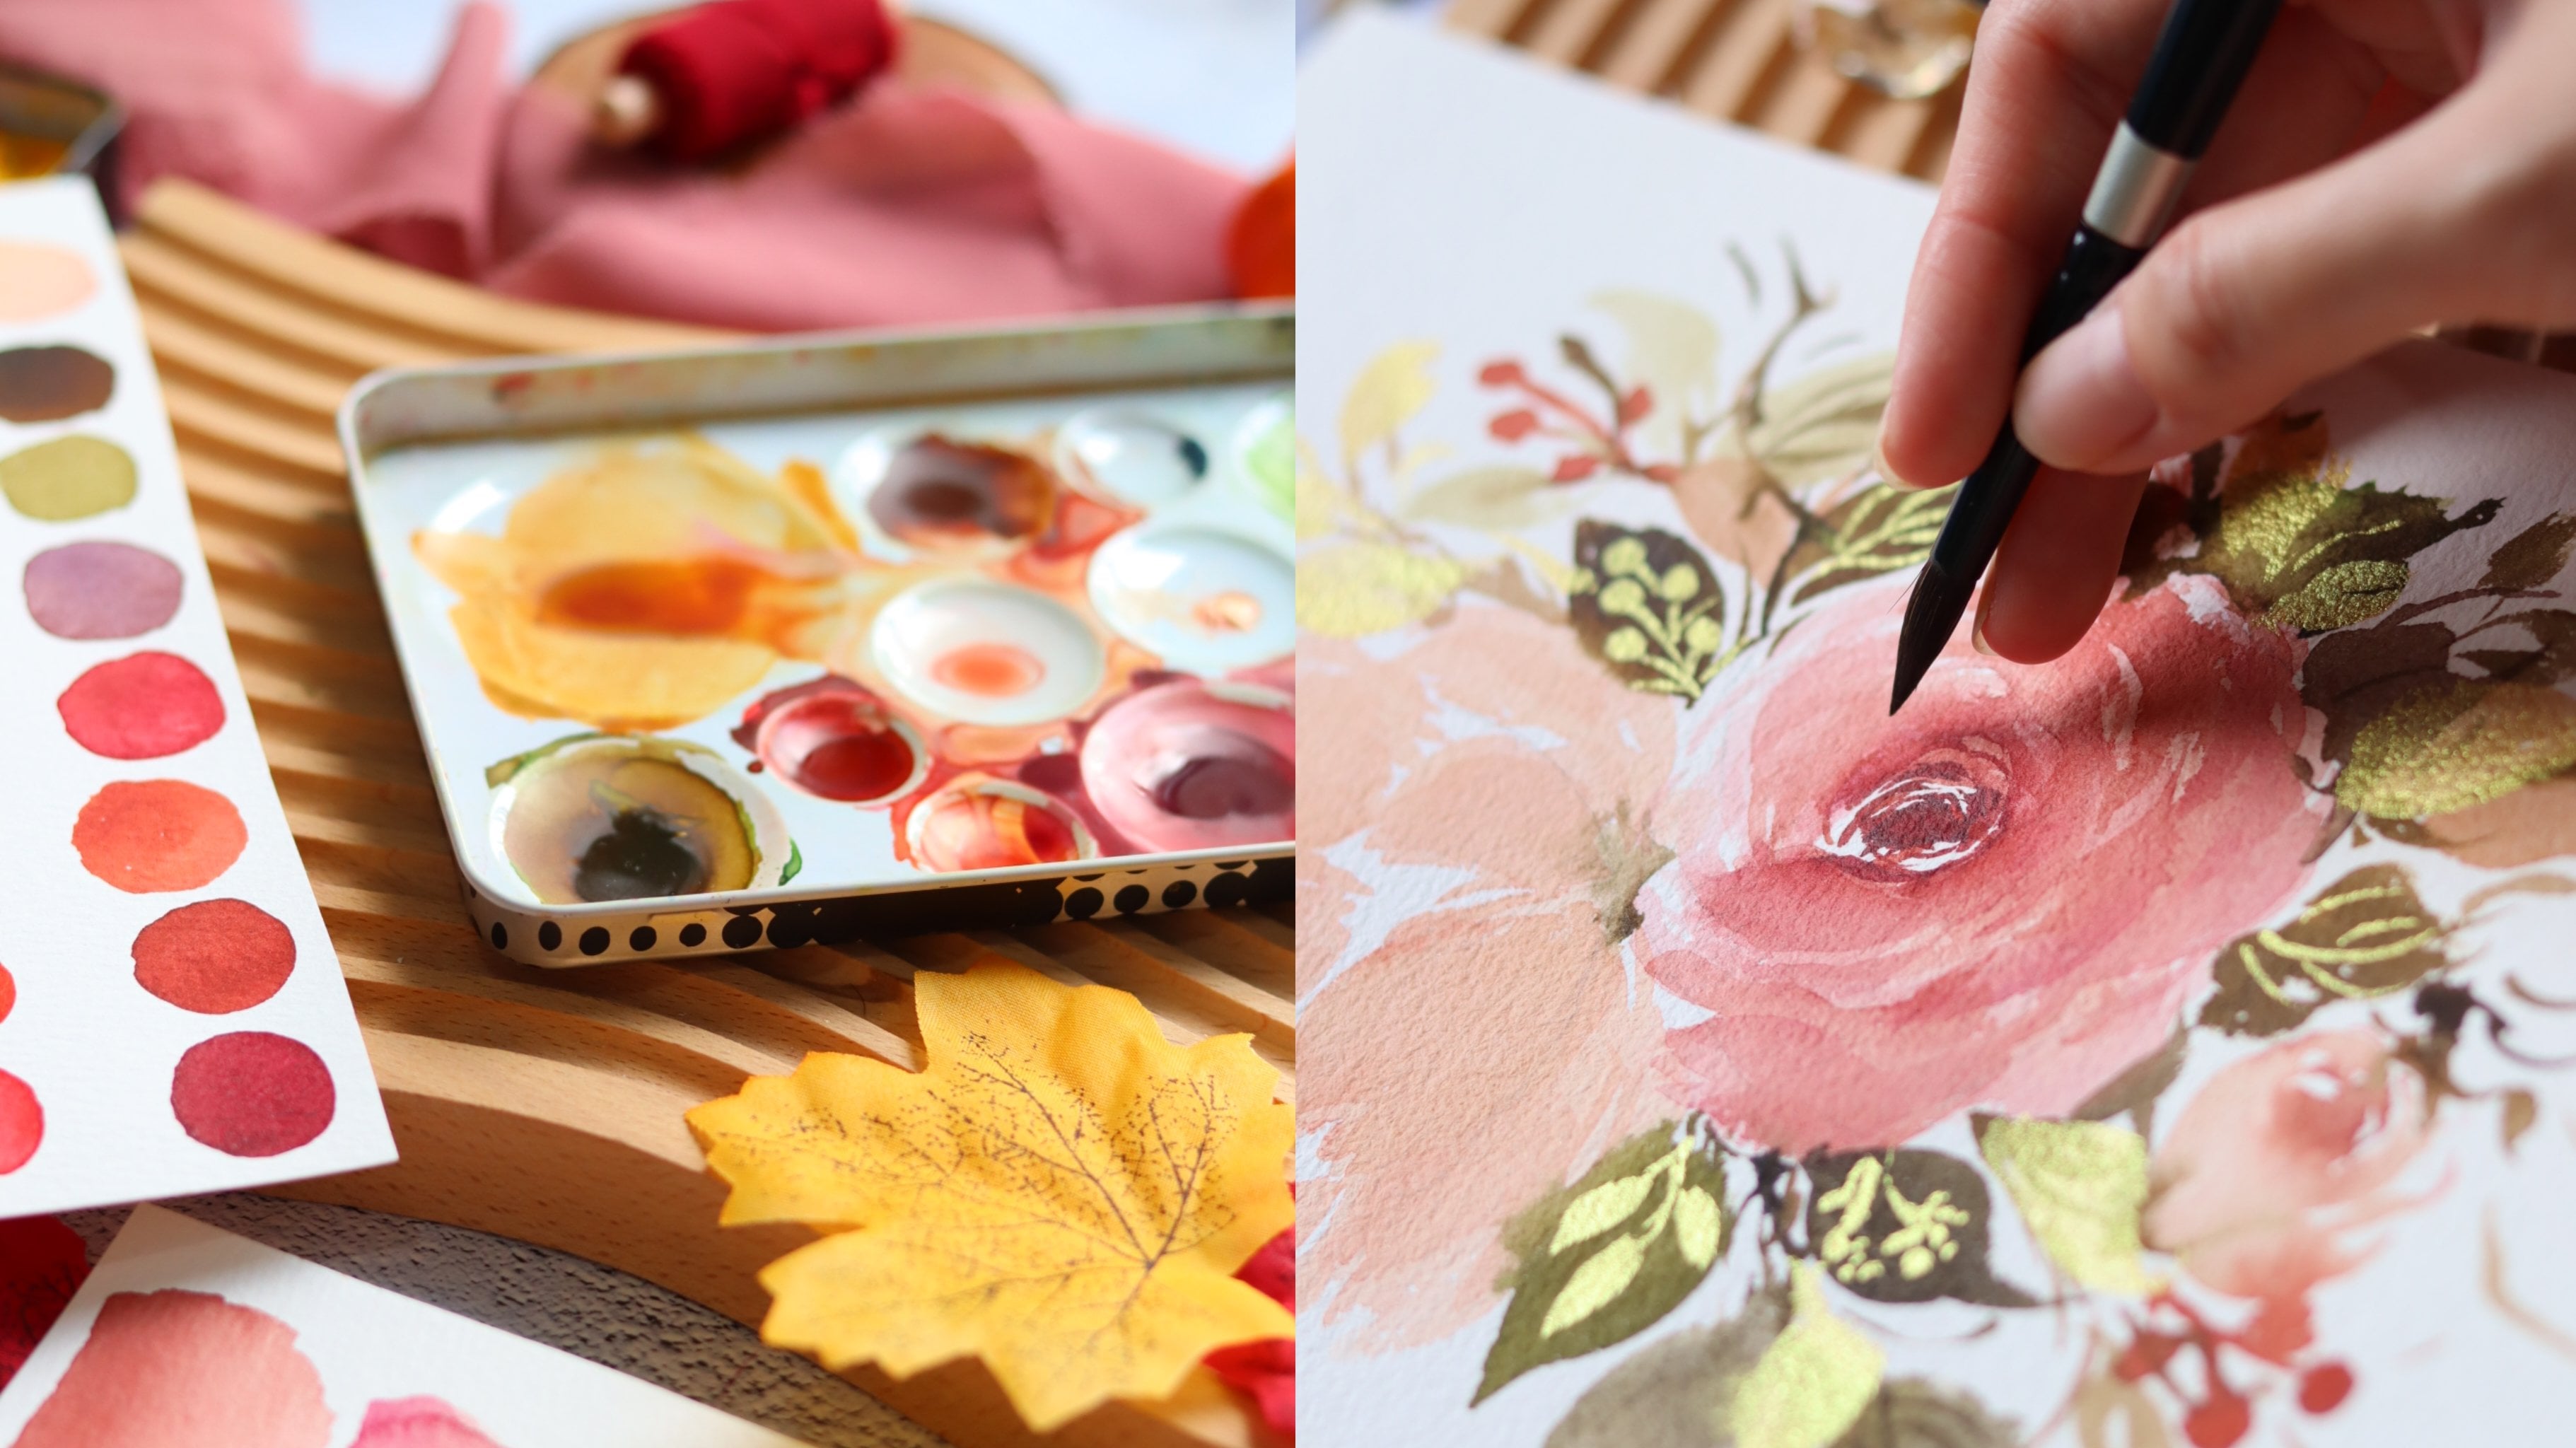
bristles that are soft and can follow my flow. I would suggest using a brush that you are comfortable with. Now for the paints in
using my Shinhan PWC. If you've been taking
my classes for awhile now you know that
this is my favorite. And this is a Korean
Artist Grade brand, a competent tubes like this. So I would just pour it into smaller half pans like this so that it's more
convenient to use. And when I finished
up my paints, I can just refill
it just like this. So for the colors in this class, I will be including it right
before we start our project. We'll be using limited
color since they're just going to focus
on sunflowers alone. Now, to add depth
to our paydays, we can use Gouache. So this is White Gouache
from the brand whole vein. It's initiate Permanent white. If you don't have Gouache, you can use posterior paint or even any white
pen that you have. This has been a staple
in my Art Supplies ever since I discovered adding
white details in my paintings. Next, we need a ceramic palette, or any ordinary
ceramic plate is okay. For this one on the right, this is just the lid
of my watercolor, thin, and it's from
the brand core. For those of you asking, this is the tin can of the
core watercolor brand, but they changed the paint
inside. Shinhan PwC. Next, we need pencil to sketch in case you need to
sketch before you paint. Then you also need paper towel and also a glass of clean water. You can also use two jars, one for dirty paint and
then one for a clean brush. Alright, so that's it. Now let's move on
to the next video.
4. List of Colors: Alright, so here the colors that we will
use for the class, it's going to be a
limited color palette since we're just going
to pay sunflowers. So first we need
Permanent Yellow Light. So I'm using the
brand Shinhan PWC. If you're using a
different brand, definitely you can use any
yellow in your palette. Next, I need a deeper yellow, so I'm using Permanent
Yellow Deep. But if you don't
have this color, you can just mix
orange and yellow. I'm also going to occasionally
use Yellow Orange. So you can see I'm using
different yellows here because I want the sunflowers to have
a more interesting look. Because if I use just one
color is going to look flat. I'm also using Yellow
Ochre for some shadows, which we are going to
use in the last project. Next, we also need Burnt
Sienna and also Burnt umber. We're going to use
these two colors for the center of the Sunflower. Now to add depth, we also need a
darker brown color, so I'm using the color Sepia. But if you don't have this, just add a little bit
of black, your brown. Now for the leaves and stem, I'm going to use Sap Green, this is my favorite green color, but they usually add a little
bit of brown to my Sap, green to make it
look more earthy. Next, we're going to
use Cerulean blue. So you're probably wondering where are we going to use this? So this is for the
background of this project. I just feel like it complements
the yellow very well, so it's a nice addition
to this palette. Here, the colors that we
will be using in the class. This is a little
bit more extensive, but if you have a
limited palette just used to Loose and
you'll be fine. Then just use two
browns and one green. Then for the blue, you
can skip that if we don't like adding blue
to your paintings. But I still suggest that you try adding that Cerulean
blue because it really makes the painting or a Sunflower pop up even more. Alright, so that's it. Now let's move on
to the next video.
5. Let's Observe a Sunflower: Before we start the class, I thought that there
will be nice to analyze the Anatomy
of this Sunflower. Some so happy that I
was able to get one. So the center, it
looks a little bit fuzzy and we're going to try
and mimic that in the class. Then for the petals, you can see that
they're all Layered. So that's why we have a project where we're going to
do Layered petals. In one of the projects, we're going to Paint
a Sunflower that is on its side or at an angle, just like what you're
looking at right now. You can see this
petal on the side. It almost looks like it's
on top of this brown part. We're going to try and learn
how to paint that today. Now, let me just show you the painting that
I'm referring to. So this is what it looks like when T this flower
on the left side. So you have petals that are facing us and they're going
to try to paint that. It also see some of the petals have kind of like
veins or folds. And we're also going to try
and paint that later on. And really excited
for you guys to try different approaches to
painting this flower. So for some, we're going to start from the center going out. And for some projects
where the start from the Petals going into
that center brown part. The petals here look short. There are varieties
were in the petals are a bit longer and
looks more wispy. So we're going to try
and also paint that. Though worry, because
I'm gonna put some reference
photos that you can download in the
Resources section, and you can use that to
paint on your own as well. Alright, now let's move
on to the next video.
6. Brushwork Drills: In this lesson, we're going to learn different
Brushstrokes that we will be using in Painting
different parts of a Sunflower. Okay, so I'm using
Permanent Yellow Light. We're going to be
different Petals, Strokes, just like
in this project. I'm going to show
you how you can add some movement to your petals. Let's do an S stroke. So it is like
painting a letter S, but you're doing it
on the opposite way. K. So we're going to start with a light pressure and
then you need to slowly press your brush towards the middle
part of the stroke. And you can see right here, I'm doing a compound stroke, so I need to Strokes
to complete one Petal. It is best to vary the shape of the petals just like
what I'm doing here, you can see some are just lines that they attach
to the mean Petal. One Petal is composed
of different strokes, as you can see right here, I just keep adding until I'm
satisfied with the shape. And as I add those Strokes, I make sure that
there is movement. There's like a letter
S stroke there. Try to practice this stroke that is facing in
different directions. You want petals
facing on the right, facing on the left. And also you can start from the top or start from the bottom. You can do some really
quick strokes like this to create more movement. It also gives that
wispy effect of stroke. Okay, So for this
project you can see the petals are
more structured. Start at the top and just
slowly press our brush. One on the left and another
one on the right until we form this petal shape that
you are seeing right now. So what we want here
is a pointy tip. This very important. You can start from the
bottom as well going up. So even if this petal is
a bit more structured, there is still movement
that you can see in the tips of the petals. You can see some of
them are curved. Later on it will be
teaching you how to Layer those Petals. Alright, so we're
done with the Petals. Now let's move on to painting
these Expressive leaves. I'm going to show you
how to achieve that. You use any green
pea that you have. This is just a mixture
of Sap Green and Sepia. That's why it's a bit dark. Started with a
light pressure and then press your brush onto the paper and wiggle
it Towards the end. Try to drag and lift the
create that pointy tip. Next you can add some lines
in different Strokes on the other part of the leaf so that it will look more organic. Okay, now let's start from
the right to the left, going to slide right here and
just slowly press my brush and we go then lift
towards the end. Now we can try to add more volume by adding more
strokes on the sides. It doesn't have to
be just one stroke. Those mini strokes
on the sides of the leaves really make
a huge difference. So another tip is
to hold your brush towards the end of the handle. This will help you pay more loosely because you
have less control. So now let's try it out. Okay, so you can see I'm
doing the same technique, but it is looser and
easier for me to move. I hope that you
can also try this out and maybe it
will work for you. Now, if you want more
control over your brush, you can try to hold
it near the bristles. You can also try to
pay the leaf from the tip going to the stem, so you're going backwards. This will also produce an interesting effect
on your leaves. I would say that you need to
really experiment and also practice these drills in order for you to get
comfortable with painting. You see your brush. When it comes to brushwork, what is important for me
is to vary the pressure. So for example, we started
the light pressure and then just slowly press
your brush on the paper. You can wiggle it for
more volume and movement. And then next you add some
character to that Leaf by adding some lines. There you go. You have a nice Expressive Leaf. If you want a more
structured leaves, then you don't need
to wiggle your brush. And after painting it, it will look like this. So this one has a nice
curve and it doesn't have that jagged edge compared to the other leaves
that we painted. Of course, this can
be a preference, so I'm showing you
different options. Okay, Now let's move on to
the center of the Sunflower. This is going to be easy. We just need a brown paint. I'm using Burnt umber. So you're just going to
do adulting techniques. So just tap your brush onto the paper to create
these small dots. And I would suggest using
different pressures. You can see that some dots
or smaller, some are bigger. We can also try to smudge the center and combine
some of the dots. And when you are okay with
the size of the center, we are just going to add CPI. This is a dark brown color. I'm going to add this towards the sides and also the center. If you don't have CPI, you can just add Black or
mix your brown and black together with a clean brush. You can also try to live some areas just to give
it more dimensions. I kept the center dark and the sides are a
little bit lighter. Okay, So that's it. Now let's move on to learning different techniques that
we will use in this class
7. Watercolor Techniques: Okay, So if you haven't
watching my classes for awhile, then you can skip
this part because you're already familiar
with these techniques. But if you're new to watercolor, please keep on watching. So in this lesson we're going to learn different
watercolor techniques that we will apply to
painting sunflowers. Alright, now let's start
with a Wet on Dry, Wet on Dry me just means we have a wet brush and you're
painting on dry paper. This technique will
produce crisp edges. As you can see, you have
really defined Petal here. Okay, So while we have
paint right here, I'm going to go through
the layering technique and you're just going to
Paint several Petals. The reason why we're
painting it now is because we need to
wait for it to dry. So you will understand
later on why. But for now let's just paint
some petals right here. And I want to paint
it side-by-side, just leave a small space
in-between the Petals. Alright, so you can use
any color that you want. I'm just using Permanent
Yellow Light since we're painting the petals of the
Sunflower for this Techniques, this is the layering technique
that we will be doing. So you can still see
the layer underneath, even if you painted
on top of the petals. Let's move on to Wet on Wet. It means that we're painting on a wet surface and at the
same time our brush is wet. So right here I just
painted an area with water. And then now we're going
to drop some paint and you can see how soft that looks. Now for the Sunflower, we're also going to use this
technique for this center. This you can see I am tapping my brush and just
forming a circle. This is gonna be the
center of the Sunflower, just like how we practice
in the previous lesson. Then you're going to add a
dark area and the mucin Sepia. So this is an example of
a wet on wet technique and then just wanted
to show you guys how you can apply this technique. So this is nice
because you can see the two colors are
blending really well. And you don't see
any harsh edges. If you're painting, for example, a Petal with two colors, you need to use a wet
on wet technique so that two colors will
blend seamlessly. Alright, now let's move on to the technique called Fading. In order to demonstrate
this technique, we're going to pay the
small flower right here. And I'm going to do a
Sunflower like painting. So we have the center. Then next we're going to
paint some small petals. So you've probably
heard the word Fading in previous classes. I use this technique for
the petals of the rows. By right now, we're going to
use it for something else. So let's just finish up this
flower and add more petals. Okay, So while the
flower is still damp, we are going to grab our
brush with some clean water. And right now I'm
going to fade away the outer part of the
petals. Just like this. We're just blurring out the
edges of some of the Petals, not all of them. So by doing this, you
get that Dreamy effect. And it looks like this flower is feeding
into the background. When you're doing
this, it's important that the flower is still wet so that you can blur out
the edges of the Petals. Now, this is an example
of one of the projects. You can see the
faded background. And in this project we're going to apply the
feeding technique. Let's move on to the
layering technique. So right here are
petals are already dry. That is very important. Now let's grab
some yellow paint. We don't want this
to be too dark. You want the translucent color. So we're going to paint it
in-between the two petals. So you can see right here that the first layer
is still visible. So that is the effect that we want for the layering technique. Now let's do another one. So I can use a different color. So right here you can see it's
a bit more yellow, orange. And that's okay. Now, doing this
technique will give more volume to the flower. Let's rewind to. The last technique is called
the splattering technique. And right, I'm going to
grab some scrap papers and cover the other
areas of this paper. You can use any color. I'm using just yellow
paint and I'm just going to tap my
brush just like so. And I can achieve that
nice splatter effect. You can also tap your brush onto your finger just
like what I'm doing. You can see this
letters here are very defined and it's a nice effect. But another way to do this is to Splatter it on Wet surface. And so I'm going to
show you that now. We're just going
to wet this area and then I'm going to grab some more paint and put some
splatters on top of it. So you can immediately
see the difference that this part on the right
has a softer Splatter. So in this painting you can see that some of the splatters
look more defined. Some look Alyssa bit faded. So this is a nice way to add
texture to your background. Okay, hope that you
enjoyed learning all the simple techniques
that we will be applied to painting Sunflower. Now let's dive
painting our Projects
8. Project 1: Dreamy Sunflower: Before we start here, the colors that we will use, Permanent Yellow Light,
Permanent Yellow Deep. Or you can use
Yellow, Orange next, Burnt umber, sap, green, Sepia, and Cerulean blue. Okay, so we're going
to learn how to paint this Dreamy Sunflower
and expressive style of painting Sunflower
with a faded background. First, we need to just
lightly sketch as an oval and that will be the
center of the Sunflower. Now this will be our guide. So after that, Let's
grab some paint. I'm using Burnt umber. Let's mix up pigmented mixture. And next I'm going to just
dab my brush onto the paper. Let's just do a tab. Emotions is super easy. You can change the
sizes of each dot. So some are smaller,
some are bigger. You can even smudge some areas just like
what I'm doing here. You can see the sides of this
oval isn't really perfect. So you want those fuzzy
texture around the edges. Okay, next, let's grab Sepia. This is a dark brown
color with a print it I'm just all
around this oval. And also in the center you
can see I'm just lightly tapping my brush and using just the tip of the brush
to apply this color. We wanted the petals, Let's make Permanent
Yellow Light. And also a little bit of
that Permanent Yellow Deep. We can start with
one color first, I'm using Permanent Yellow
Light and you're just going to drag our brush stroke. Next we can alternate the US, the Permanent Yellow
Deep so that you have two colors for the petals. You can see that I'm trying
to make my brush and dance so that we have more
movement for the petals. That Round center is
still a little bit wet. That's why you can
see that it is slowly moving into the yellow petals so they are sort of blending. And that's something
that we also want so that they will look very seamless and the
center won't look detach. Okay, let's just add
some more petals. And I'm also leaving
some spaces in-between my petals so that it
doesn't look too chunky. This is going to be a
Sunflower that is on its side. You can see on the right side, I put shorter petals, but on the left side
the petals are longer. Alright, for the stem, I'm going to use Sap
Green and Burnt Umber. The create this nice
earthy green color. We're going to do a curved line. Now this looks a little thin. I'm going in and just adding
more thickness to the stem. So you can grab this
darker green color and put some dots in the stamps. You can see that it just
creates this beautiful depth. That dark brown color is a
mix of Sap Green and Sepia. Next, Let's paint some leaves. I'm going to start
on the right side and just try to wiggle my brush AND gate that
pointy tip towards the end. This is very similar to
the exercises we did earlier in order to prepare
for feeding this project. And while the leaves
are where you can go ahead and drop in a darker area, you Sepia, or any dark
green color in your palate. Okay, so looking
at this Sunflower, it needs a little
bit more petals, are going to go back in and
just extend some areas. So that Brown Center is
still a little bit Wet. What we want is to drag
it a little bit more into the petals and that will give
it that Expressive Style. Now we can try and separate
some of the petals by adding some Permanent Yellow Deep
or a yellow orange color will do and Add that
in-between the petals. This is the final part. We are just going to grab a clean water and fade
away the outer petals. The petals here are still wet. That's why when you
try to fade it, you can see that it
almost this appears. You can see that I'm
doing the brush stroke diagonally across the page. Now, we don't want to
blur out all the details. So you can see I'm leaving some parts of the leaves as is. So we still want to see what the entire
flower looks like. We just want it to fade a
little bit into the background. Right here I have Cerulean blue. This is a diluted mixture. I'm just going to add it towards the upper and lower
part of this painting. This is a very beautiful
color that will complement the Yellow Sunflower. Next, grab a yellow
orange color or the Permanent Yellow Deep and do some splatters all around. Now, this is looking
really good. They think this part can be
extended a little bit more. So we're going to
add more pathos. So just trust your instinct
if something feels off, try to adjust it on your own. I'm going to make Sap
Green and Sepia to be this dark green color and add some more splatters
for more contrast. So you can see I'm trying to Splatter it on areas that are still wet and it looks
a little bit soft. If you don't like some
of the splatters, you can go ahead and fade away just like what
I'm doing here. So next let's add
this blue paint. This is Cerulean blue
and add some splatters. I love mixing blue and yellow in one painting because they just compliment each
other really well. You can definitely
experiment and Add colors that
feels right for you. Feel free to just express
your creative freedom. Next, I'm gonna go ahead and just add more details
to some of the leaves. You can see that the
background is still a little bit Wet and as I'm
adding these details, it looks quite soft. And that's because we're working on a wet on wet technique. Doing a wet on wet
technique really gives that Expressive, Dreamy look. Let me just cover up
this Sunflower so that it doesn't get too
much blue splatters. Think can also grab a
scrap paper to protect some areas you don't want
splatters to get on. Okay, It's looking very good. Once the painting
is already dry, we can add some
finishing touches. I feel like we can
deepen the center and give it more depth by
adding a dark color. This is Sepia. So I'm going to go back in
and do a tapping motion. I'm adding this
towards the edges. Remember to use just
the tip of your brush so that you can get
those nice small dots. Because he did Fading technique. Some of the petals look too clustered or they have combined together and we
need to separate them. I'm just using a mixture of
Permanent Yellow Light and Permanent Yellow Deep to
add some more Strokes. So I want to separate
some of the petals. The same time we
can drag some of that sepia color into the
petals. You can see it. There are darker areas that will give it a
nice expressive look. Again, you drag from the
center of the Sunflower going out and create some
nice wispy strokes. You can also use Yellow, Orange for this part. I'm trying to just
extend some areas. You can also grab a little
bit of brown in your palette. You can immediately notice
the huge difference. So now it has more detail
because of what we added. But at the same time, be careful in adding
these details because we don't
want to overdo this, is still wanted to
look very loose. Now, it's a good time to take a photo of your
painting and look at it from your phone
so that you can see it from a
different perspective. It's good way to gauge on areas that you need
to add. Right here. I'm just adding some more
yellow towards the top part. Okay, so we're adding some
more sepia towards the edges, but they added too much paint. And you can see that it looks like it's floating
already in the center. Let's show you how to
absorb the excess paint. Now we want our brush to
absorb this axis paint. And she's going to let my
brush roll on its side. So by doing this technique, we're also trying
to blend some of the colors on the paper. I'm doing this
technique because I want it to look subtle. If I tried to dab my
brush onto those areas, I'm going to lift all the paint. But that's not what
I want to happen. So don't forget to dab your paintbrush in a tissue
paper from time-to-time. Okay. I think it's
looking really good. That's the end the fire project. Congratulations for finishing
this Dreamy Sunflower. I hope to see your project in the project gallery
section of the class. Now let's move on to
our next project.
9. Project 2: Layered Sunflower: Before we start here, the colors that we will use, Permanent Yellow Light
Permanent Yellow, Deep Yellow, Orange, Burnt
Sienna, Burnt umber, sap, green Sepia, and
also White Gouache. For the second project, we are going to do a
Layered style of Sunflower, and I'm excited for you to
try it. So let's start. Hey, so first I'm
going to show you this reference
photo that you can also find in the
Resources section. And when they use that as a reference for this
painting today. First, we need to draw a circle. Just lightly draw this
part because you don't want a lot of pencil
marks and your painting. And this is gonna be our
guide for the center. Next, we're going to prepare
the colors for the petals. I'm going to use three colors, so we have Permanent
Yellow Light, Permanent Yellow,
Deep Yellow, Orange. So you can definitely just use two colors if you don't have a lot of variety
in your palette. Okay, so we're going to paint some nice petals right here. You can see it's a little
bit more structured compared to the first Sunflower
that we did. And you want spaces in between our petals so that we can
do some layering later on. Also as we paint the petals, try to change the
direction of the tips. So you can see
some of the petals here have tips that are
facing on the left. Some are facing on the right. And that's because we
want some movement in the petals so that it
doesn't look too flat. The spaces in-between the petals are About half centimeter. And you can also
change the values, which means that
some are lighter, some are darker in color. So you don't really
have to start from the line that we drew. You can extend the Petal
going inside this circle. This style is going to be a little bit different
because we're painting the petals first
and not the center. We're doing it the
other way around. So it's always
interesting to paint flowers with
different approaches. Okay, so that's the
last set of Petals. Now we're going to wait for this first layer to fully dry. Now tied to touch it. And if it feels cool, then it means that the paint
is still a little bit Wet. For the second layer, we
want the translucent paint, which means that we need to
add more water to our paint. Now I'm going to add a Petal in-between these
two first layers. So when you get the
right consistency for the second layer, you can still see the
first layer underneath. Now, if your mixture
is too pigmented, then you won't see the color or the petals
underneath anymore. And there won't be any
Layering going on. I'm going to add a little
bit of Burnt Sienna to my yellow so that I can
have a different shade. That turned out to dark. That's why I added a
little bit more water. Alright, let's do it
up close so that you can see the Layering better. So you can see, I'm trying to also paint the petals that's extending towards the inner part of that circle
drawing that we did. Okay, Let's just finish
up all the petals. You remember that you
can also just add water, like what I'm doing here to
create a translucent layer. Okay, It's looking really good. Now I'm going to
grab a little bit of brain Sienna and thin it down. I'm going to add
some of that color towards the base of the Petals, and that will give these
Petals more definition. As I'm doing this to petals
are still a little bit, ****. That's why you can see
that it looks a very soft as I add this
Burnt Sienna color. Doing this will give the
sand Flower more depth. It will push down the
center because you added some shadow towards
the base of the Petals. Now let's just paint the
center with clean water. So you can see here, water is already there D,
but that's okay. You can still use it. Next I'm gonna grab some Burnt umber and they're going to add it
towards the sides first. And just lightly tap your
brush onto the paper. And you can see that there
are beautiful blooms. It means that the
strokes are very soft because we're painting
on Wet, on Wet style. So I'm going to add
some more color. You can see that the
brown colors also mixing a little bit
with the yellow petals. And that will create a
very beautiful effect. I don't want to color the
entire center which is Burnt. Umber. I want to leave some
white spaces as well. Alright, so it looks
a little pale. That's why we're
going to add Sepia. And you're going to add it
towards the edges first. Then we don't want
to overdo this. That's why I'm doing
a tapping motion and just adding this color
little by little. You can also add it towards the center part
of the Sunflower. We don't want a very
watery mixture. Because if you paint
with a watery mixture, it will spread all
over the place. So make sure that you
control the amount of water in your paint mixture. Now we can try to add
some fuzzy texture towards the sides of the center. Alright, so for the stem, I'm going to make Sap
Green and Burnt umber into create this nice
earthy green color. And you're going to just
pay a straight line. Now let's rinse our brush
and just continue adding this line that we get
that blurred effect. So you can see that the
top part is darker, the lower part is lighter. Now let's start painting the leaves so you
can see I'm just trying to wiggle my
brush and extended. We're also adding
movement to the leaves. By adding some lines. You can go ahead and add some more character
to the leaves, just adding some
darker brown areas. And then next we can add some leaves behind the
sunflower as well. Doing this will help make the
Sunflower pop up even more. We're adding the leaves
in-between the petals. It's now time to add some
details to the petals. I'm using this mixture of Burnt Sienna and
Permanent Yellow Light. So you can just add any brown, your yellows, and that
will be good to use. Now we're going to
add some thin lines as veins for the petals. This is also a good way to separate some of the
petals from each other. So you can see that
some of the Strokes, I put it on the sides of the petals to make
it look more defined. Alright, so now I
can see it up close. I'm also trying to drag some of that brown
color from the center. Going into the Petal. Just use the tip of the brush, create these thin strokes. We don't want to overdo
this because we still want, again, we still want this
to look quite loose. The centers a little bit. Try already, I'm going to grab Sepia and add some more details. We're going to do a
tapping technique. Again. I'm also going to add some
more color towards the center, just to give it more
depth and more contrasts. This looks really good. And later on we can try
to fade away some of the strokes that are too dark. You can rinse your brush
and tap the excess water. And now we can just try to smudge or fade
away some Strokes. Now wait for the
center to fully dry. And next we're going to
add my favorite part, which is adding
the white details. So we're going to
use White Gouache. Make sure that the mixture
is really pigmented. Let's put some small
dots in the center. Now we can also add
few dots towards the sides of this center. Now we're onto some
finishing touches. So I'm using just
Sepia and adding some small lines were small stroke stores the
sides of the center, giving it the fuzzy look. It's looking create places
the end of our project. I hope that you enjoyed Fading
this Layered Sunflower. Now let's move on to
our next project, which is the last
project for the class
10. Project 3: Expressive Sunflower Bouquet: Here are the colors
that we will use. Permanent Yellow Light,
Permanent Yellow, Deep Yellow, Ochre, Sap green print
on where N Sepia. Alright, so for
our last project, we're going to pay this expressive style
of Sunflower Bouquet. Don't forget to download the reference photo
in the Projects and Resources section of the
class. Okay, let's start. So this is a page from the book called The
Flower Color Guide, will put it in the
Resources section as well. So you can see that
the sunflowers here have a more pointed tip Petal. This flower here is on its side, and I'm going to just draw
an oval here and one petals. So I will explain that later on. But next, we're
just going to also draw the centers of
the other sunflowers just as a guide so that we know where to paint on it later on. To start, we're going
to prepare our paints. I'm going to use
Permanent Yellow Light. Next, let's grab
Permanent Yellow Deep. So it's always nice
to use two yellows. Let's start with the
bottom sunflower that is on its side. Our approach here is
to paint the petals. First, I'm going to grab
some Permanent Yellow Light. And Let's paint one
petal right here. I'm trying to copy from
the reference photo. Next, let's paint short petals. So on this side
of the Sunflower, this is gonna be
shorter because it's, it's at an angle
and it's near us. And then the petals that are further away or
behind the center, it's going to be longer. So you can try to
switch the colors, use Permanent Yellow Deep alternated with the
Permanent Yellow Light. Or you can rinse
your brush to create a lighter yellow color
like what I'm doing now. Also try to mimic the
shape of the petals. You can see I'm painting for a loose style and I am holding my brush towards
the end of the handle, the Create really
Organic Strokes. So you want to add some
movement to the Petals. Now to add some shadow, I'm using yellow ocher and I'm adding it in between the petals. You can see at this
mixture is quite thick. It's very concentrated. Hey, it looks really good. Now let's make some greens. I'm gonna make Sap
Green and brand on birth Grade at
earthy green color. And you're going to
paint the sepals. So you can see the
reference photos. There are sepals
sticking out just near the petals,
just right there. And then we're going
to also add a stem. Now let's rinse our
brush and fade away the stem so that we have a
dark and a lighter area. Okay, Let's wait for that Dry. Next, let's move on to the second sunflower
I'm using Burnt umber. And for this flower we are going to start with the center. I'm just going to tap my
brush onto the paper, create these small dots. And I'm also going to
lightly smudge my brush, add some water just to make
it look a little bit faded. Next, let's add some petals. So I'm going to grab Permanent
Yellow Light and just do some strokes to create
these nice wispy petals. The center is still
a little bit wet. You can see that is bleeding
into the yellow petals. We also want our Petals to
have spaces in between them. So you can see some
whitespaces right now. Now we want this to
look expressive. That's why we don't want the petals to be too
close to each other. Also, we want the petals
to have a pointy tips. Now we can grab
Permanent Yellow Deep or you can grab yellow, orange color and just start
Layering some petals. I'm doing this to add more depth so that the
Flower won't look flat. Next is grab yellow ocher. Just like as we did in
the first Sunflower. We're going to use this
to add more definition. So I'm adding it in
between the petals. Okay, now let's grab
Sepia and we'd add it towards the sides of the
center and in the middle. So again, we're adding
this to add more depth. You can grab some greens
and add some samples. Here. It should be near the Petals. We want the short strokes, they look like leaves. Now let's add a stem, just going to rinse my brush and fade away the bottom part So this looks really good. It looks like a
two tone the stem. And you can also start
adding some leaves. Try to sway your brush to
create dancing leaves. Keys were on the third
and last flower. In our approach here is to
start in the center as well, using the same Burnt umber and doing the tapping technique. So just try to use the tip of
the brush to tap some dots. And then you can try to
smudge some areas as well. For the petals are going to use Permanent Yellow Light and
just do some leather Strokes. It is best to look at the
reference photo so that you can see how you will be
adding the Petals. Now, this flower is
also a little bit. So we want the top petals to be longer and then the bottom
petals are gonna be shorter. In Michigan team also trying to move that Brown Center
into the petals. So it will look more expressive. You want that those two
colors to blend together. Now this flower is still wet. We're going to grab Sepia, am going to add it
towards the sides of the center and
also in the middle. So we have to do this
while the center is still wet so that the
colors will blend together. Next, let's grab our green
and I'm going to add the stem and some
sepals as well. I'm holding the brush towards
the middle so that I have a looser way of painting
petals and leaves. Okay, let's look at
the reference photo again and we're going to start adding the center of the
first Sunflower that we did. I'm using just Burnt umber and I'm just doing the
tapping technique again. But this time you can see that the petals are already dry. Now, if you want
a lighter center, you can also use burnt sienna. You can see the
difference in the color. I'm adding Burnt
Sienna right now. It's also nice to use two brands in the center
if you prefer it. As I'm adding the center, I'm trying not to paint
on the folded Petal. We want that to be
prominent so that the people who sees this painting will know
that this is a Sunflower. That's it, that is on its side. I'm going to add a darker
area around this Petal. Okay, now let's add
some more details. I'm going to use
Permanent Yellow Deep, so we want a slightly
darker yellow in the same adding this, that brown color is just
moving into the yellow petals. That's very, very nice. It will look more
expressive that way. You can also just like
the grab some color from the center to make it
flow into the petals. But also we have to be
careful because you don't want the petals
to turn brown. You just want a
subtle brown color. All right, let's give
this part more in depth. I'm going to use
Permanent Yellow Deep. And I will add a little
bit of burnt sienna. Now you can just
add brown to any of the yellows in your palate. And we're going to use this, add some veins or shadows of
the folds in each Bethel. This is definitely going to add more character
to the Sunflower. Just add a few thin lines. So you can see that
some are short lines, some are longer lines. So again, for this part, do not overdo it. We don't want too
many details as we want this to still
look very loose. We can also add
some more details. In the third Sunflower. You can see I'm trying
to use the tip of the brush and brush from
the center going out. So we are grabbing a
little bit of that brown. It's now time to add
some more leaves. And just as a youth
near the petals, while some of the
petals are still wet, you can grab a dark green
color and just drop it in the leaves and it will give
away nice loose effect. Okay, So I waited for this, this flower to dry before
adding another layer. Next, let's just
grab a little bit of that brown and just add a few more veins coming
from the center going out. Okay, so that's it. That was very fast. We were able to paint three
sunflowers in about 11 min. I hope that you enjoy this
project and they hope to see your work in the project
gallery section of the class. Now let's move on to the next
with USA share how to Print the Downloadable
sketches that could be useful for you to practice
11. How to Print the Downloadable Sketch: All right, let's
talk about how to print the downloadable sketch. Number one, you need to
download the PDF file in the projects and resources
section of the class. This file will contain
three projects. We're going to print
on watercolor paper, you need the paper that is about 200 GSM thickness or
even thinner than that. Again see right
here, I can really bend the paper because
it's quite thin and it's only a
student rate paper since we're just going to
use this for practice. Now, the PDF file
will be printed on a letter size paper
or 8.5 by 11 ". Now, it's difficult to find a watercolor paper in this size, so I have my nine by
12 inch paper here. And I just tried to
measure the letter size. As you can see, I have
some pencil marks here, and I'm just going to simply
cut it to a letter size. I'm just using my scissors
here, but of course, you can use a nice cutter
to have a clean cut. All right. Now I have
three sheets here, and now we're going to
load them in our printer. Okay, so this printer is
called the HP six five series. All right. So this is
what we printed earlier. You can see that it is
quite light in color, and I really did that on
purpose because I want you to be able to also add some
details on your own. This is the original
painting and the downloadable
sketch side by side. This is going to be helpful if you want to practice because you already have a guide right here and you can
just paint on it. Let me do a simple demo here. I'm just painting the petals. If you feel intimidated
by starting this class, you can definitely start with
painting over this sketch. The best part is that you
can do this again and again because you can
print multiple pages. The goal is just to guide you here as you start
paintings on flowers. But after some time, I do encourage you to try painting it on your
own without a guide. You can also try to
practice painting some brushwork drills like
this expressive leaf. I hope that this
video was helpful. Now let's move on
to the next video.
12. Let's Wrap Up!: You have reached the
end of the class. Thank you so much for watching. To sum up everything that
we learned, your practice, different Petal and Leaf Strokes through
brushwork drills. We also learned different
watercolor techniques that you can apply to painting
other flowers. At the end of the class, we have three captivating
sunflower paintings. Now for your class project, you can follow the paintings
that we did in the class. Or you can get a separate reference photo and paint your sunflower
in your own style. You can also find
downloadable sketches in the Projects and
Resources section. You can download that, print it on watercolor
paper and practice on it. The goal of this class
is also to expose you to different loose
watercolor style. So I hope that you enjoyed that. I hope to see your projects in their project gallery
section of the class. Just take a photo of your
painting and upload it there. So under the tab section of the class you can see
Projects and resources. Just click Create Project
and upload your project. I'd be happy to give a feedback and words of
encouragement to you. You can also tag me on
instagram and use this hashtag. My Instagram account
is Joly Poa. I would greatly appreciate if you could leave a review for the class on how this class help you in your watercolor journey. If you would like, Learn More
watercolor floral classes, then here are my recommendation. Don't forget the
click the Follow button somewhere up here. So that's you'll be notified every time I upload a new class. That's it. I will see you
in the next class. Bye
 Joly Poa, Watercolor Artist