Transcripts
1. Introduction: Boom, boom, boom,
boom, boom, boom. In this watercolor
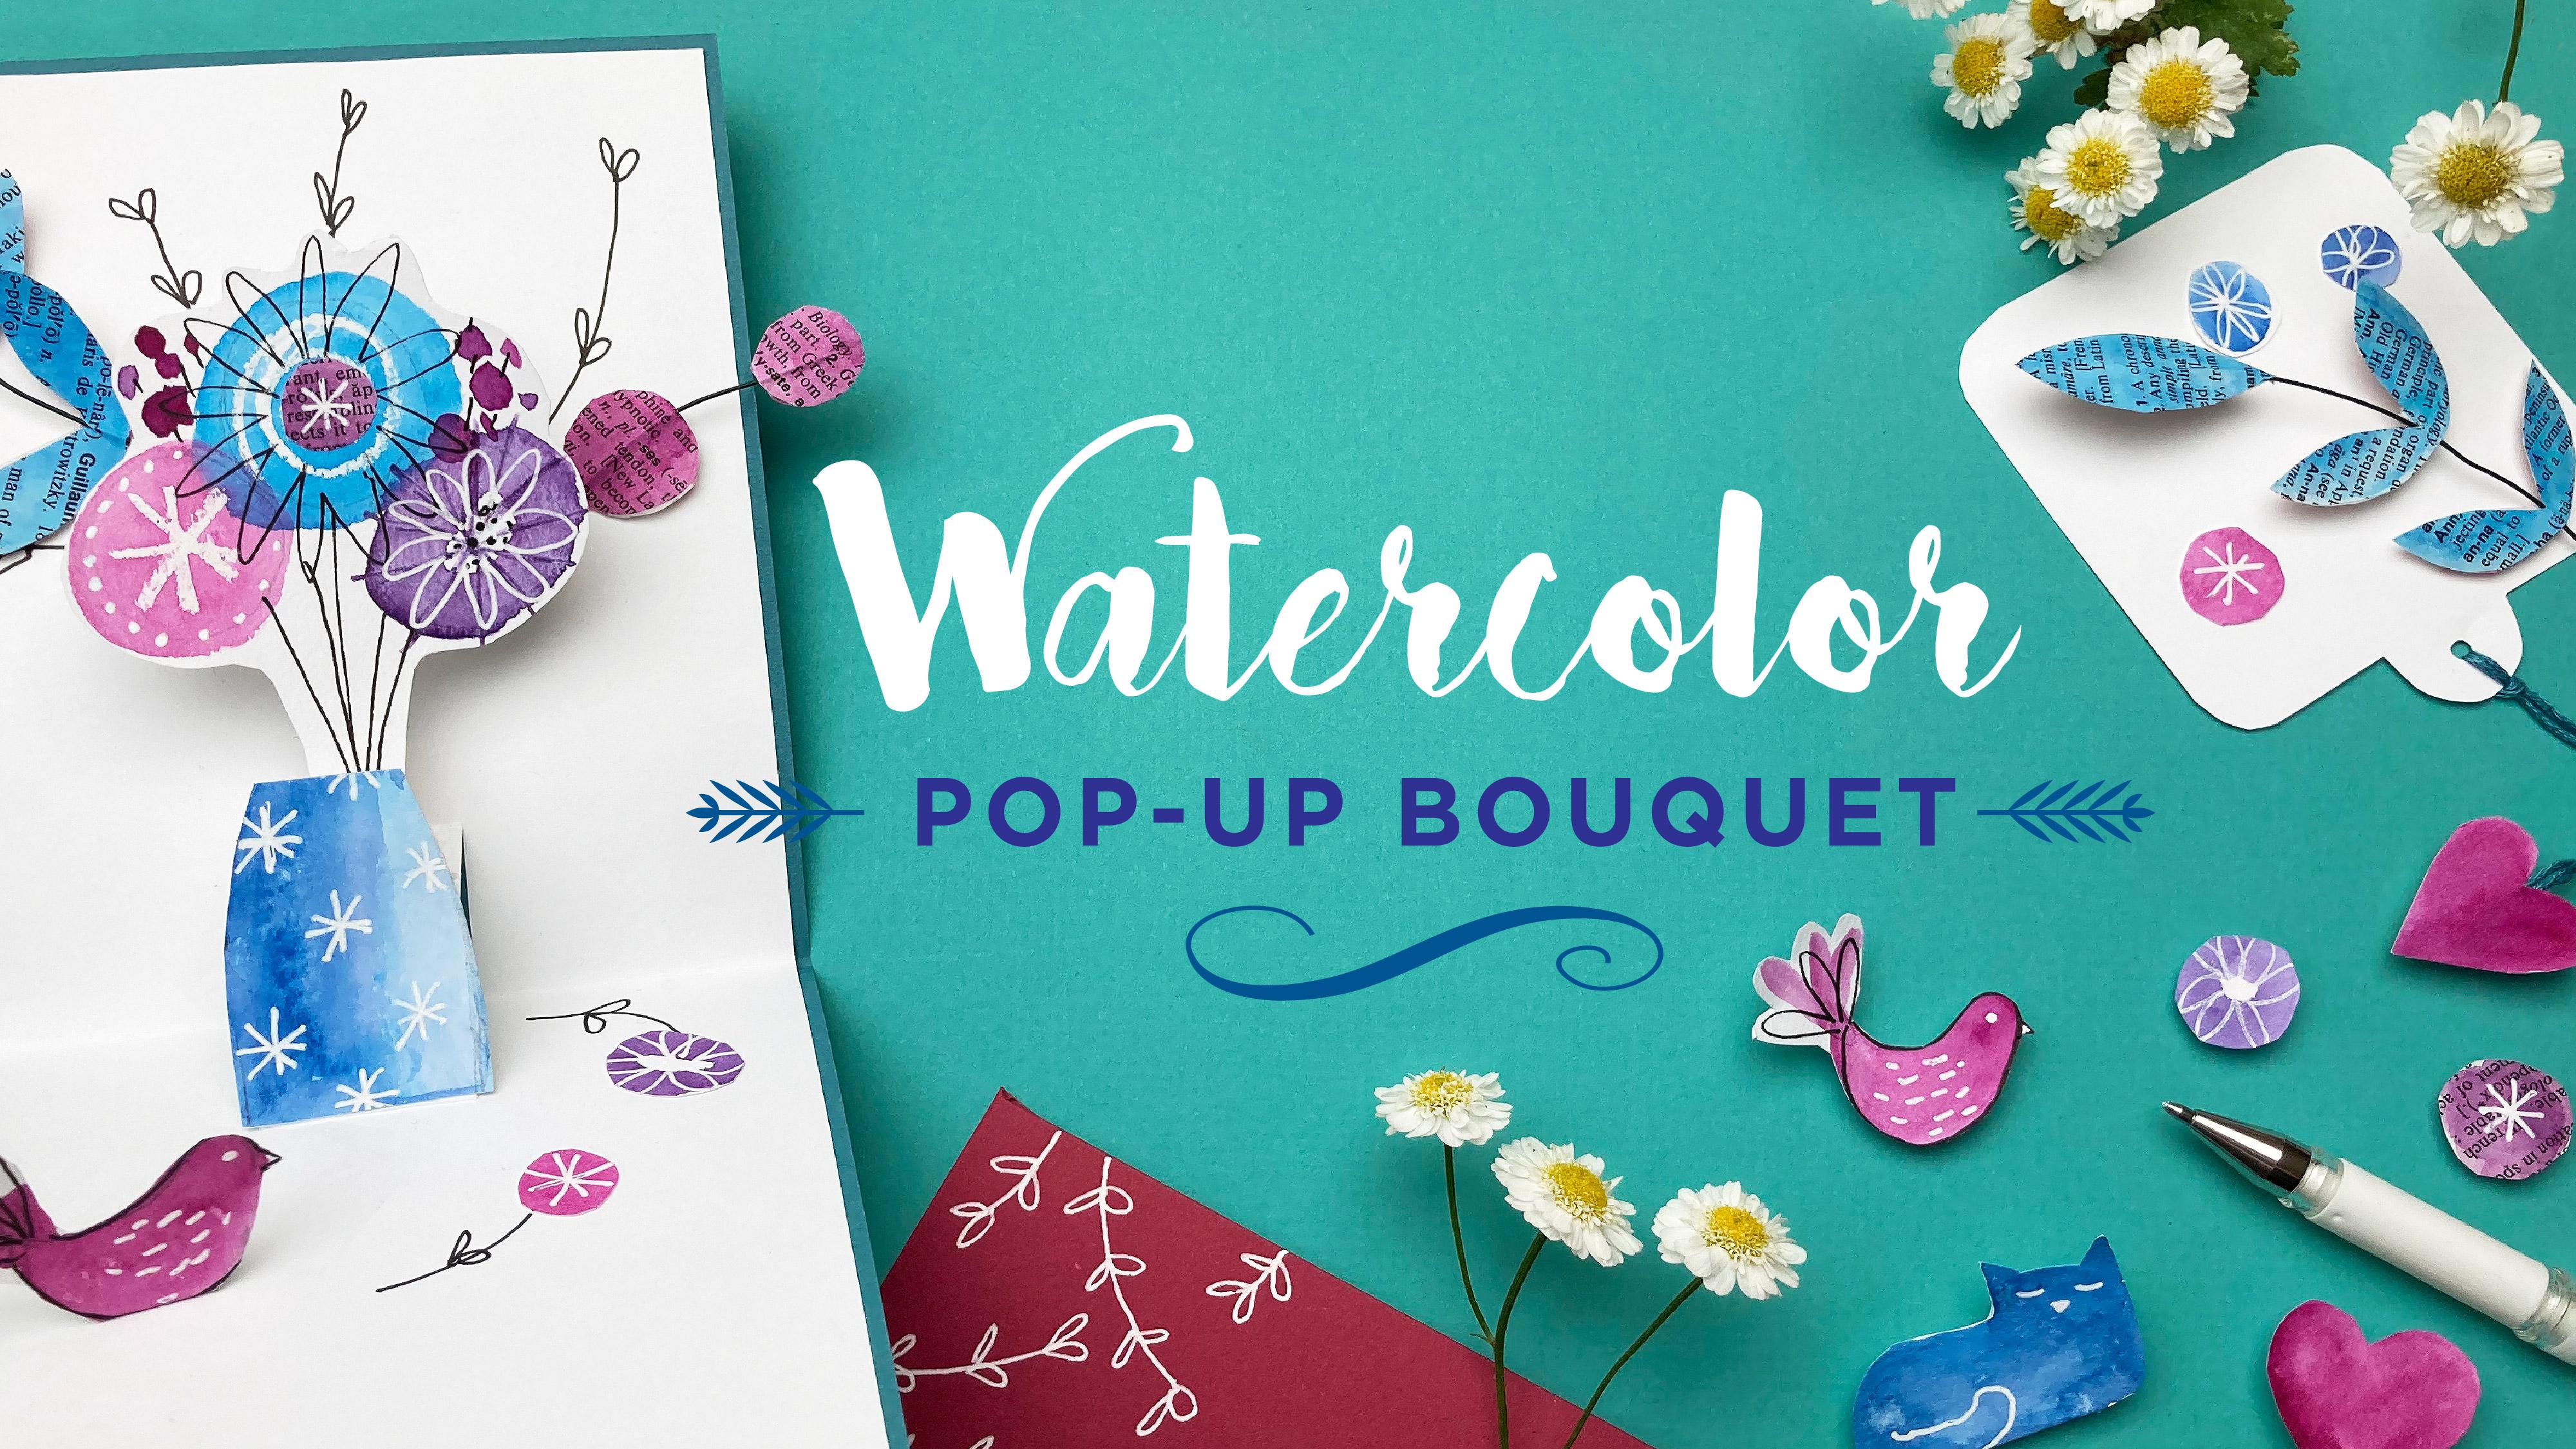
pop up bouquet class, you will learn how to create a simple watercolor bouquet using resist and mixed
media techniques. We will add on simple foliage in the background with
collage and floral wire. We will also add a
personal touch by creating those sweet
little characters and objects to
your floral scene. We will then create
our own envelope and also a little personal ink tag to write your wish or message. So I hope you can join me and create a stunning bouquet of everlasting flowers
that you can send in the mail to make
somebody happy. At pen.
2. Materials: All right, let's go over the material. You'll need to make your little card, so you'll need some scissors and you'll need a white crayon. Just any brand. You'll need some washi tape. I can also use painting tape if you want. Are you a pencil and an eraser? Then you'll need a A, uh, cutting mat and a Exacto knife. Then you'll need a like a black marker. I used this one. I really like it. The unique pin fine line and it 0.6 then. I also like to use this uni. It's a unit ball signal broad in white. It's really great, and the white is really opaque, and it works great on everything. A glue stick. You'll need some floral wire that you can get that in any hardware store, and I don't know if they sell a small quantities of it. But that's pretty inexpensive, and you'll get 100 feet so or meters now 100 feet, so you'll have for a while. You can make a lot of cards of that. Um, you'll need some DMC thread or any kind of threat. Uh, just about a six inch of it so you don't need that much. You'll need a little ruler and some water color. Any kind of watercolor, I would say. Just pick two or three colors. Maximum. I'm using those three colors from Rebecca Humphrey and but you can use any brand that you want and then also Ah, a brush. I use a water brush, but you can use any kind of brush that has, uh, a little bit of a pointy tip. And then you'll need a hole punch. You'll need to pieces off paper in nine by 12. It could be construction paper. The one I'm using here is Cason Pastel paper. Uh, really kind of like the colors that they have in there. But you can use any kind of, you know, card stock for that. And then I use a piece of white card stock 40 inside. You'll need a piece of a full page of any kind that you want, and you need some mixed media paper. You can use watercolor paper, but, uh, you know, this works really well and it's not too thick to work. So I really like this brand so you can get yourself a little little pad of that and you're ready to go
3. Watercolor : Okay, So we're going to start to paint our little walk watercolor bouquet, and, uh, you don't need a pencil eraser. Some scissors. Uh, a crayon. Quite crayon. Your black marker, your white Unipol signal a skewer and a ruler. And your pad of mixed me, uh, paper, Uh, some sheet of book, page or newspaper. I'm not newspaper, but I guess he could use newspaper. But I use a dictionary page and then the some water to mix your water color. I'm gonna use thes beautiful colors. I love I love her So luscious. I love these. Made by Rebecca Humphrey. She's also teach your own skill share. She makes thes handmade watercolors, and they're amazing s I'm gonna use the cobalt and the science and the clinic. We don't magenta. Yes, but it's OK. All right. So I'm going to start by, um, kind of draw. I'm gonna draw my little bouquet. Uh, let's see. I want to do, like, about three in the three flowers. Okay. Very simple. And then I'm wanted to be about three inches tall. So here. And I need to leave a little tab area that I'm going to fold underneath, so I'm gonna use Make it about 1/2 inch. So that kind of gives me an idea of how I want Teoh how I want to do that. So I look here? Yeah, that's about three inches. So that's for that. And then for my little vase I'm going to do, uh, about an inch square. I'm just gonna measure this because that's kind of the shape that is gonna be resting on when I glue it to my little pop up pop up area. So I just wanna I wanted to be bigger than this, so I'm gonna make my little shape for a vase here. Could be very simple. Very basic. Okay? And I want it about inch and 1/2 tall and you can make it bigger. And then when you it's time to cut, you can make it smaller. So okay. And do you anything I'm gonna put on there is a little bird just gonna put this little shaped like that very basic. And I don't worry too much about how it looks right now, because I'm just gonna put some blobs. I want to make a little heart. Look, I'm gonna put some blobs and then I will come back and cut it so I can always tweet. I'm going to raise some of the lines and then I want to start painting. So one thing I forgot to tell you and you need to use a brush. I use a, um, water brush because I relight this brush is nice and pointy here. They're all start mixing my color here. I'm gonna use I think I want to start with the, uh, kind of the pink look at that. So pretty. Oh, so pretty. So I usually try it on a piece of paper to see if that's kind of the, um it's kind of the tone that I'm looking for the value. So I'm gonna go in here and just do a little star and then on this one here, I'm gonna do a spiral. And so I'm going to go in and fill this in. Very simple. They're simple shape, and then I'm going to go in with this other color here. I'm gonna mix do a mix of this cobalt with a little bit of that science because it just loved the color that it creates. Oh, so pretty like that so I'm gonna add a little water, because that's a little bit too much. There's so much pigment and these watercolors, it's crazy. It's amazing. Okay, so now I'm gonna fill this in, Gorgeous. All right. And then for the next one here, I'm just gonna create make a little kind of a little doughnut, um, doughnut shape here, and I'm gonna make those two colors together. Let's see if it's different enough. You want need a little bit more of the red? The magenta? Look at that. Oh, my God. It's still pretty such a nice, beautiful purple. So I'm gonna dio this kind of doughnut shape here, okay? And I want to use for this one. I want to use a lot of water because what I'm trying to do here is come in with my skewer. That all you rolled away on and then I'm just gonna come in and bring the paint in the metal. I really like how it looks. Okay, you can go out if you want. Very cute. Okay, So I have made my three flowers, and now I'm going to go and do my little vase. So for the vase, I'm just gonna use, um, the Scient again. I'm gonna use with the Cobalt. Yeah. So I'm just going to fill this in. I went out some details later on this I'm not really worried about. You know how it's going to look, I'm coming. Tried to do, like, make it a little darker on one side so that it's you get a little bit of a dimension. All right, on that, I want to go, and I'm gonna do my little bird. And for that one, I'm gonna use the magenta, this color just gonna fill it in, and then I'm gonna do my little heart and there I'm gonna just make some shapes here because you'll see, I'm gonna use some, um, some flowers. You just You can just fill this page with different things because he can use him again. I'm just going to use a different colors that I have in here. Okay. Oh, and I think I'm gonna do I think is I'm gonna add a little bit of this color here just to add some little flowers to fill up. Filled at book a little bit. They go relax too, if you want. So what? That's for that. We're just gonna let this dry for now. And then I'm going to use, um I'm gonna make my shapes for my, uh, for this part here and this one. So I'm gonna use I'm just gonna do a circle with this color here. Oops. I didn't wash with my brush. It's nice, but I kind of want this color. So I'm going to go back and mixed this again the cobalt on. Just try it. It's very pretty. So I'm just going to dio Circle, and this is about an inch and 1/2 and then I'm gonna do a lease shape. And then the last thing I'm gonna do is some little circles again. Some of the use those I'm gonna make maybe three of them or four, You know, as many as you want. But I want to make one that's a little, um, bigger. And one that's a little smaller, different size, so you can have something to choose from. So now we're gonna let this dry, and then we're gonna add some details because the when it's dry, I'm gonna erase the my lines. Most of my lions. I want to see if I can erase some of them. Okay, that's good enough. And I'm gonna add some details, So here, I'm gonna add, um, just draw a flower here. Mm. And then I'm gonna add some thoughts here, and then with my white, I'm gonna add dots here and then withdrawal of flour here. Okay? And then here, I'm just gonna do it all around with the's just because I might want to use him for something And here, okay. And then, uh, here for the little vase. I'm just gonna add some little stars, like a little pattern of little stars. Just keep it super simple. And for my little bird, I'm just gonna add an eye and some little feather like things. And, um, when the draw this little feathers here, no beak. Okay. So for my little bird, because he's gonna be standing, I'm gonna just draw where I need to cut here, give myself about half an inch. We can rest on something in the pop up, and and I'm gonna draw just my, uh, Stems. So I'm gonna start here, maybe, like, add some stems here for my little bouquet things. Okay. And then I'm going Thio added just a little bit of collage piece because I want this to tie in together with my little circles that I'm going to do in the next video. So I'm just gonna add this little circle here just with Houston right here. And then I add a little start. So it all comes together. I think I'm good with my flowers. And then, uh, I'm just going to start cutting all these pieces that I'm gonna use. So I'm gonna cut this, and then I'm gonna fold it. Okay, so in this so bonus video, I'm going to show you out to add a little fun element to personalize your card so you can make yourself a whole bunch of these. I'm just gonna go ahead and, um, just start painting. Um, there's gonna be a little book. When we were paint that pretty roughly
4. Foliage: Okay, so now I cut up all my pieces, and I'm gonna work on making my little stem like that little stem here and that one. So for that, I'm going to use my floral wire, and I'm gonna use a piece about mm about nine inches. And that's really easy to cut with just regular sisters. And what I'll do is I'm gonna fold it in half, but not really in half. I'm gonna leave. I'm gonna have a shorter piece and the longer piece kind of like this, and I'm just gonna fold it here and, um, kind of bended outside outward, like, done. Okay, So here's my piece. And then what I'm gonna do now is I'm going to make my little ah lease. So for that, I'm gonna use some washi tape. You can also use regular painting tape or any kind of tape that you have around the house. But I kind of like using this one, cause it's pretty cute. And it's polka dot who doesn't like coconuts. So I'm gonna start with this one because it's very easy, and I'm gonna dio All I'm going to do is, um put this here and put on top and you'll see. I'm just going to cut around it after that. And the other one I'm using the smaller one here and a little slightly bigger one over here . Okay? And the washing tape doesn't need Teoh. I'm gonna use my little scissors for that, cause it's gonna be a little easier. The washing tape does need to cover the whole thing, so it just keeps it there, Okay? And then same here. And you can also re trim it when you cut it like that. So Okay, so now have one side, and I'm gonna do decide now. So for this one, the end is easy. We're just gonna do this. Leave here, Okay? Like that. Same here. I'm just gonna cut it. Oh, this really get stuck to your scissors. You gotta keep cleaning the washing tape. Okay? I'm gonna trim it a little bit smaller now to do my other leas. My other two sets of leave here. What I'm gonna do is take this piece, that my circle. I'm gonna cut it in half, and then I'm just going to create my little leaf like that as one piece. Okay, Here's once and same with this one, Actually, if you want, you can cut him together, just fold it in half or just put him on top of each other and and cut him. But I just do him think that one of the time because they look more, um, organic that way. And same thing I want to put this year on and like that, and I'm going to do my other one right on. The neat. Very sticky. It's very sticky. Uh, all right. Okay. Again. It doesn't need to cover the whole thing. You just need to cover here in the middle. And then I'm just going to cut the rest of it like I did with the other one. It's a little tricky when you get to this area here, but it doesn't have to be perfect. It's okay if it looks funky. They looks handmade because it is group. And the only thing that's a little harder is just this area here. But just go in like, as esque close as you can to the wire here. And there's this pool. Okay. See, that's kind of cute. You can actually use them like one on one side. and one on the other side. If you want. I'm just gonna use him all the same color. But that's the nice thing about the washing tape. It's like you can use it in different kind of washi tape and have different patterns that you can use. Okay, so now I have this piece, and now we're ready to put our current together. So there's a lot of things you can do with your four years. You can take your wire and do some little spirals like that. You can use different colors. This is just painting tape that I used for that and you can use you could make yourself little flowers. I mean, we can do long leaves like that. So the sky's the limit. Really, You can just go with it and be creative. Have fun with your foliage
5. Pop-Up: No. But for this next step, we're gonna take our piece of card stock. That's 8/2 11 and you just cut it in half. So it's gonna be four and 1/4 by 11th. And so you can keep that once for another card are you can also use it to do our little inside card that we're gonna do later. So you just go ahead and fold it in half, okay? And I we don't have do a little invitation for a pop up. So you go in and about, uh, let's go. It is foreign. 1/4 so half way would be to and 18 And I want to make this about an inch wide and an inch call. And then So this is gonna be where my I'm going to cut. Put your lines in here. I see. But there. So what I'm gonna do is just cut to this line and then you fold it and you might want to press down a little bit. What? Your ruler. Okay. And then you open it up and you push this part out. You might want increase it a little bit, because this is like your papa area. OK, so now that we have that, um, the other thing we need to do is we need to make a little slipped right up here. Where we gonna be able to put our, uh, this little wire here? We're gonna have to put it in here. So you just make that little slip here the way we're putting this together, Think we're gonna have this bouquet. We're gonna have this here, and then we're gonna have that in the back, so it's gonna be kind of like one, two and three. Okay, So what I want to do is I want to add some full his you. So I'm just gonna go ahead and dried first before I've put everything together. So I'm just gonna It's kind of like that. You can be pretty free form with that. I'm gonna go here. I'm gonna make just three of those one straight up would be longer. Okay. All right. So I have that done. I'm just gonna take my little piece that I made here, and I'm just gonna put it in that little slit, and then I'm just gonna glue it that blew it. But I'm just gonna put a piece of, um Why she tape or any kind of tape in the back here. Okay. And this is gonna be hidden because we're gonna put a lot of piece of paper on that. So I wouldn't worry too much about that. Okay, so now I have that done. You can curve it if you want whichever way you want. And you can play with that too. Afterwards, I'm gonna kind of put in that space here where there's not much going on. Okay. All right. So I have that. And now I'm going to do, um, my little bouquet. But my with this little bouquet, I kind of wanna have something. If I just put it like that, it's gonna be a little flimsy. So I'm gonna put like something in the back so I can glue it together. So I'm gonna use just a little piece of a little piece of your paper. You're mixing your paper is fine and just folded like a Z. Do you see like that And make that about half inch. Yeah. So I just made this. This is Z you see Like that. And I'm going to stick glue it on the back of actually, a better idea would have been to put the glue on this one. Not there, but ah, you do whatever you want. OK, you know what? He could dio to make it stick while you're doing all of that. Maybe he put the piece of washi tape and then you can always take it out. I want to put that there so it stays together, OK, And then I'm gonna see how I'm gonna put this find a like in this street angle like that. Okay, Now I'm going to glue that this is the trickiest part. But once you've done that, you're good. Okay, so now I am gonna put it, make sure it's straight. See? So easy. No. And then you're gonna want to make sure that it falls properly. So good. See, I might have to put another piece of tape in here because Okay, so I'm kind of testing it to see if it's when I fold it. If it opens up properly. So do you see how this works? And I have this little piece in the back that gives it a little bit of body for the last thing that I need to do now. Nothing I need to do is to put my vase and this. You just glue it on crazy. You just blue right here. And you want the bottom to be flat because it's gonna But right here against a bottom. And, you know, if you feel like it's too tall, just drop it too. Okay, so now I have most of my pieces. Um, the last thing I'm gonna add on this is I want to kind of ad diesel flowers like they fell down from the bouquet. So I'm just gonna do like I did for this one here. So I'm gonna add one here and another one there, and I'm gonna do that, and then I'm gonna add a little stem to it. You? Very simple. And there you go. I like to little flowers in the last thing that we do is we put the little bird. So I'm just going to glue the bottom little tab here and just put him whichever way you want. He was gonna put him here. So now we have or level. Okay, So for this part, we're gonna put a piece of paper colored paper in the background. So I you take your piece of nine by 12 caller paper, you just cut it in half. So I just split in half. So it's about 4.5 by 12 and I'm gonna blew it on and I'll cut the top. I'll cut the top after. So what I'm doing here and I'm just gonna blue. I'm gonna leave it open here. So I just want to glue this area in this area and the whole back because I want to leave it open because we're gonna add a little something in there later. Just take you glue stick. And for this area here, you just want Teoh do the edge here and around where it and just those two edges and then this area, you can just do the whole thing. Okay, so now just center it. Now I'm going to cut this little thing. Last little piece here. I'm gonna fold it to see how it works. When would this little bird I'll just fold it down like that's and then I fold my card. Thanks for that. So beautiful. And you can play with these, you know, because it just wired and you can even add. I mean, if you feel like adding another one here right now, just do it. Why not your card? You could do whatever you want. There you go. So now we're gonna work on the little card that goes inside here.
6. Pull Out Card: So now we're gonna work on the pullout card. And remember that little heart that we made? We're gonna use that and we gonna use a piece of, um, card stock, and then we're gonna use a piece of bread CMC thread about six inches long. So, um, what we're going to do first, is we gonna measure a square. But actually, we do 3.5 by three. And that's 3.5. Yes, by three. Uh, and then you want to measure the half here? I think that because when I want to do is I want to me I can You can use the top of your, um stick. Lucic, what I want to do is kind of go right in the middle here, and I want to trace a around shape. So if you want to be more precise, it can go and measure. Okay, this is right in the middle, and then take this and just trace it. Traister shape when I'm ready to cut this piece. And you can use the back of it because it all of your lines on it. But I always like Teoh do round corners, so I have a whole around corner punch that I use all the time. But for this, you could just do it. My hand. Here's a little card. Then what I'm gonna do is punch. Ah, hole in the middle. Here, you can use a hole punch. Um, I'm gonna use this little Japanese punch, and you can just do it with some scissors or just regular hole punches. Fine. And I'm gonna make a little pull with this little heart here. So first, what I want to do use a piece of washi tape. I love what she tape. It's awesome, except that it's really sticky. It's just sticks everywhere. I have it all over my, my, my scissors. OK, so I want to make us a loop and then put it here. Should stick to that. And then I want to put my heart right in there, and you can do all that and just glue with a glue stick and put something else on the back . You don't have to use washing team like for the other one that I made here. I just used um I just need a glue stick, and I put something on the back so I think it's crazy. Okay, so now I have this cute little hard thing, and what I'm gonna do is just make my little pool here, push it through, and because I'm on camera, I won't be able to do it. I did it. I did it. Okay. Like that. Just like a little hang tag. It's basically like a little Hancock. And then he could put a little message there, And then you take the card and you just put it in here. Oh, you know where we forgot to do? We forgot to do. I guess you could just leave it like that because it's pretty cute. You could leave it like that. But the other thing you could do is you can just cut this little indentation here, so I would just dio measure it. Kind of in the middle, which is 4.5. Ah, two and 1/4. And then trace your shape here. I don't and then just cut it. So then when you put a little piece in here, you'll see it sticking out. See how easy it is like that. So that's actually kind of cute and an easy way to do that would be to download my ill hand out. And I would give you a scale of all the shapes and the hank to pull out tag. So you might wanna add something on the back here to make it stand more straight. So if you remember, we had this little piece left over when you when we cut it at the end here. So take this piece and fold it in half. And then, um, someone fall it like that and what you're gonna do is just tape it, use your washi tape, a little piece of washing tape and just tape it to the back. And then when you open it up, it's just gonna give you this little stand like that, So hard to see. But can you see how, um, it just gives it a little support?
7. Envelope: so I'm gonna show you how to make a little envelope to fit your car. Then you can use any regular envelope, anything that fits your card. But you can also make your own envelope. So for this one, I just use something that was kind of compatible with my color. So I use this is my background. So I kind of want to go with the other color and kind of the color of the water color that I use in there. And I just printed that you can find us in the project and Resource section and then I, uh, printed it on card stock so I can make myself a little templates. And then what I did is I just use that on my piece or any piece of material or construction paper. And then I, um I traced it, so I traced it, and then I cut it, and then what I'm going to do is just kind of score the court the edges here, and you can use anything for that. You can use a ruler, anything that would kind of make a little indentations, tell the easier and make a cleaner a cleaner fold If you want to know more about envelopes , you can take my three little antelope's skill share class. It's another little our does your class, and I show you in that class to make three different kinds of antelopes. And then I'll also show you in that class how to make your own and the logoglu, which you can re moist in. So that's kind of really fun class if you want to learn how to do that. And so I have my envelope. So I'm just gonna glue it when a glue stick s o What elected you is kind of ad Cem. A few flourish a little bit of foliage in the corner of my envelope, and it's pretty simple. I just add a few here and there just in the corner over there. Um and then, uh, and I put my address just right in the middle there. So now we're ready to take our little card and put it into our envelope. So I put it will be the washing tape here to close it, but you can just glue it if you want. So I'm gonna grab my little card and then I'm gonna I grabbed my little poor card and write a message, right, Because I'm sending it to somebody. So I'm going to say I love you. I love you, Lucy. What up? So then I just push this little card inside here, okay? And then I fold it When I fold it, The bird goes down this way, and then I push it into my absolute. And I don't mind if this stuff is guys taking out. I just move it up and just put it in like that little heart and close it address that would address it. Put a stamp on it, put in the mail and way.
8. Thank You: Thank you so much for taking my class. I can't wait to see a little pop up card and please share them in the project section below . And don't forget to follow me on skill share. And you can also follow me on Instagram on Lea Si lo and I can't wait to see you in my next class. Have you go?
 Lucie Duclos, Design + Mixed Media