Transcripts
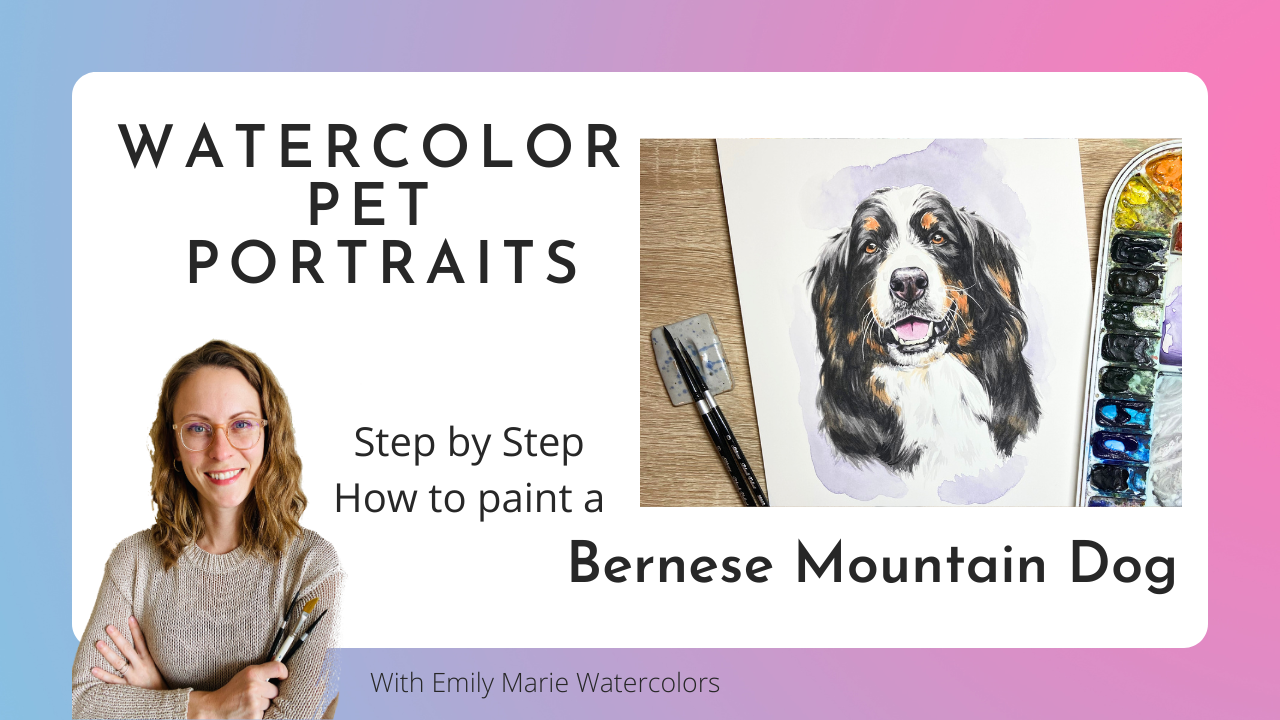
1. Intro: Hello, and welcome.
My name is Emily, and I am the artist behind
Emily Marie Watercolors. Welcome to my home studio
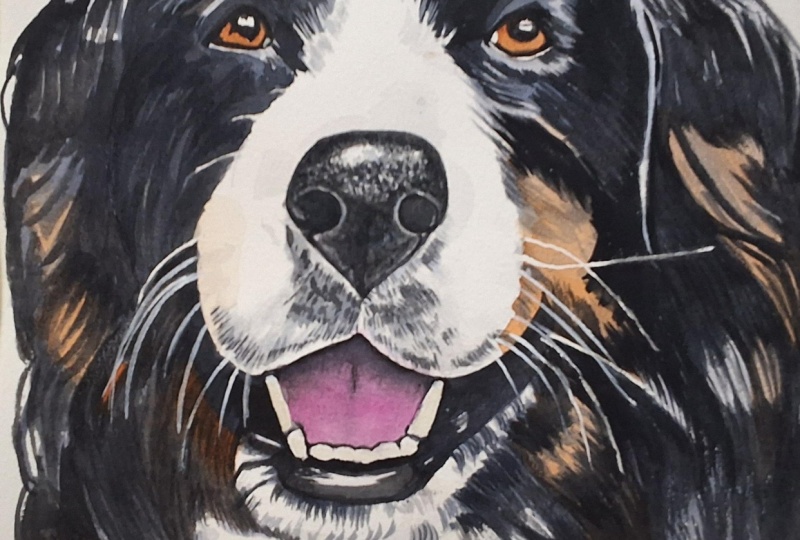
here in Madison, Wisconsin. In this tutorial, you'll
learn to paint Tiga the Bernice Mountain
Dog, using watercolors. As a watercolor artist, I have found a passion for
painting pet portraits. If you already know the
basics of watercolor, painting pet portraits can
be a great way to turn your hobby into a part time
or even full time career. My style is characterized by adding details to
the mouth, nose, and eyes, but not
getting caught up in painting every
single hair or curl. Included in this tutorial is a color reference photo of
Tiga the Bernice Mountain Dog, as well as a black and white
template that you can use to trace the outlines instead of sketching
it on your own. After explaining the supplies you'll need for this tutorial, I'll guide you through
painting Tiga layer by layer. I'll show you a combination of real time video and time lapses so that you can see
the whole process from start to finish. We'll end with adding a
colorful splash behind our dogs and finishing our piece up
using a black micron pen. As an added bonus, I've even included a quick
guide with step by step pictures so that
you have an easy way to see how all these
layers come together. So grab your supplies, and let's get ready to paint. Don't forget to upload any
questions that you have, and I'll try my best to answer them along the way.
Let's get started.
2. Supplies: Alright, so let's
start off by talking supplies that you'll
need for this tutorial. The very first thing that you'll need is, of course, paper. So in your resources guide, you can find in a black
and white outline of Tiger, the Bernese
Mountain dog. I recommend that you if you're
going to trace it using a tracing light or a window that you printed out on a regular sized
sheet of paper, and then tape it behind
your watercolor paper, you can either then
face it on the window and trace what you see
or on your light box. Otherwise, you can always
use the template and use an online device app like DaVinci I to trace
them using your phone. Once you have that, we can talk about paper
choice for watercolor paper. So I do like using arches hot pressed paper
for my pet portraits. I like using the
hundred 40 pound paper, and I usually buy arches hot pressed in
this A three size block. And then what I'll do
is I will cut them, cut each page into 28 by tens. So this is our
eight by ten sheet. Now, I like using
hot press paper for my pet portraits because
it's easy to sketch on, and so I like to use it for tracing my fine
lines and outlines. I also prefer hot press
if I'm going to use any sort of black outliner
pen at the very end. And if I'm doing something
intricate like whiskers and using a calligraphy pen
for masking my whiskers, it's usually easier
to do that on a hot press paper
versus a cold press. If you do prefer working on a cold pressed paper,
you are more than welcome. Just know that you might have a few more challenges because of the rougher texture
of your paper. Alright, so let's talk brushes. So for your brushes, you can choose whatever
round size brush that you prefer to
work with at home. The brushes that you'll see
me use in this tutorial are black velvet brushes
by Silver Limited. I'm using either
size four or a size six for the majority
of my tutorial. I will also use a slightly smaller size
of this black velvet. So I have a size
zero for when I'm doing some of my fine
detail in the eye area. All of them are round brushes. Like I said, you can
choose whatever brand that you like to use and
that you have at home. Just try to keep it
somewhere in between that two to eight or
two to six size brush. Then we'll look at
to prep your paper. So when we are prepping our
paper with masking fluid, I like using Windsor and
Newton masking fluid. I do show you in this
tutorial how to use a nib on a calligraphy brush
with your masculine fluid. You might need to
mix a little water, just a few drops of water
in to get it watery enough. And if you do not have a calligraphy pen and you don't
like using masking fluid, you are more than welcome
to use a white guash after you paint for the whiskers or the white
highlights of the eyes. I recommend a bleed proof wife white from doctor PH Martin. Now, if you're doing whiskers, I do recommend using
a rigor brush. This is also known
as a script brush. It'll give you a really nice, fine line, but also
enough liquid. It'll hold enough liquid on here for those nice long whiskers. Similarly, at the
end of the tutorial, you'll see me using
a black micron pen. I'm using a size three.
You can use a size two. This is just to add some of the extra dark details
around the eye section. And then, of course,
in order to paint, you will need a cup of water. Sometimes I like
working with two cups of water in case
one gets too dirty, then I can switch
it out right away, and I don't have to worry
about running to the sink. You'll also need
a paper towel or a clean cloth that we'll use for lifting and for
drying off our brush. Alright, so after you have your template traced onto
your watercolor paper, you might want to think about taping it down onto
a flat surface. In the tutorial, I am using this plastic corrugated board. I just found this at Michael's. It's a plastic corrugated
poster board size that I cut into workable sections. And then I did tape my paper down onto this
corrugated plastic. I used green frog
tape in the tutorial, so the brand name is frog tape. You can also use other tapes. There's a really
good watercolor tape called Kiwi Hub, and it's white. You can find it on Amazon. That one is also a
really good one. I tend to use either frog tape or that white kiwi hub tape. Instead of blue painter's tape, I find it doesn't rip off onto my paper quite as easily as
the blue painter's tape. Alright, and last,
let's talk about our colors or water colors that we'll use for
this tutorial. I am using all
Daniel Smith colors around the outside
of my palette. I do have some pans from a
company called Art Philosophy. However, I do have kind of their equivalent
in Daniel Smith. And so let's talk about
the colors that we use. You can find a full color
palette for painting Tiga in the resources
section below this video. On the left hand side, I have the name of the pigment that I
used in the tutorial. And underneath in parentheses are some possible substitutions. If you don't have
that color at home, the color is shown
in the center, and then on the right hand side, it answers the question of
where is this color used? So you can kind of peek at this before we get
started just to have an idea about where
you're going to be seeing the colors
throughout the tutorial. Lastly, before we get started, I do suggest that you take
a peek at the step by step quick guide that's included in the resources tab
below this video. It's just a few
different pictures along the process
of painting Taiga. And it'll really
give you a sense of where we start and where we
finish and how we get there. It'll just kind of get
your brain thinking of the different layers before
you watch the video.
3. Applying your Masking fluid: So the first step
that we need to take before we start
painting is to apply masking fluid to the whiskers and to the highlights
of the eyes. It might be helpful for
you to practice this step, especially if you're
using a calligraphy pen. So I sometimes will like to water down my masking fluid with a little bit of water before I try this out with
my calligraphy pen. And I do want to test it on a scratch
sheet of paper first. I might need to take some of that masking fluid off
with a paper towel and then redo it every
once in a while just because it tends to
dry a little bit quicker on that calligraphy pen. But when I use this pen, it gives me some really
nice, fine lines. You can also use other
things afterwards. If you don't want to
use masking fluid, I'll talk about those
in a little bit. When you are done with
your calligraphy pen, just make sure
that you clean off the nib really nice and
well with a paper towel, just to keep it nice for the next time
you want to use it. And then I'm going to switch to an old brush for the white
highlights of the eyes. You could also use
your calligraphy pen, though, for this stage,
too, if you would like, remember that if you are using a brush to add any masking
fluid to your painting, make sure that you're using
an old brush that you don't care if it gets ruined
by the masking fluid. There are tips out there
that people swear by, like putting some soap
on your brush to let it dry before you use
the masking fluid, and then it's
easier to wash off. I just end up using a really
bad brush all the time, and I just that's the only brush I use for my masking fluid. So here in the eye section, all I'm going to add that masking fluid too is
to the white of the eye, a little bit in the
inside corner of the eye. And then I did add just a little tiny bit of masking fluid underneath the eye on that eyelid that's
underneath the eye. That also is optional
for you, though. If you prefer to keep that
open just with paint, you wouldn't have to add
masculine fluid in that section. And then I'll come down
and I'll mask the teeth. Now, for the teeth, the two large canines
on either side, I do want to mask
those individually. The little mini teeth
in the front here, I can connect those teeth. Remember that if you
just add little dots in those teeth in the front and
you don't connect the teeth, any black from the lip there
is going to show through. So check out your reference
photo and see if you want any black lines in
between your teeth or if you'd prefer to connect
them and kind of have more one long white highlight instead of individual teeth.
4. First layer of Iris, tongue, nose and mouth: Alright, so now for the
watercolors section, we're going to start with
our lightest colors first. So for that, I
always like to paint the irises of the eyes
and the tongues first. Right now I'm mixing
some water into a color by art philosophy.
It's called maple. You can also use quinacridone burnt orange for this or any
other brand of burnt orange. Of course, I had
to make sure that my masking fluid was dry because I'm going to be painting on
top of that masking fluid. And when I paint my first layer of wet
on dry, afterwards, I will drop in a little bit
more concentrated pigment, just to get that maple
color dark enough. Now I'm not worrying
about painting around the section of the
pupil of the eye because, remember, I can always add
that black layer on top. So now that the
iris color is done, I'll move on to the tongue. I'm mixing quinacromgenta
with some water. Any magenta color
will work well, although I find quinacrido
magenta is kind of my go to color for tongues and
any pinks in the ears. I do want it watered
down because same thing, I'll be painting
the first layer wet on dry and then dropping in some more
concentrated pigment at that top of the tongue, where it enters into the mouth, just to give it a
little bit of darkness. Before it dries, I'll lift up a little bit of color along
the tip of the tongue there. If your color has
dried too quickly, you're not allowed to
lift any highlights from the tip of the tongue,
don't worry about that. You can always lift once
the entire tongue is dry just by re wetting your brush and scrubbing at the end of that
tongue just slightly. We'll move on to the
first layer of the nose. So I've mixed a water
down shadow violet. So this is a warm gray color. It is a granulating
color, which I do like. So some of the grains of the pigment are going
to naturally separate. You're going to see different
colors within this pigment. And what I my goal
for the first layer of the nose is to just
get a base layer, leaving the highlights a
little bit lighter and um adding dropping in a little bit of darker
color if I'm able to. But for sure, trying to
keep those highlights open. So you notice at the
top of the nose there, I left I completely
left that open, and now I'll go back and pull. I'll lift up some highlights from underneath the nostrils. Usually, when you take
a peek at dog noses, you'll notice immediately under the nostril is lighter in color. So I like to lift that
instead of leave it open just because I don't
want those hard edges under the nostrils like that. So lifting tends to
leave softer edges. Alright, so now I'll remix my colors so that the
colors don't separate, and I'll look back at that highlight in the
top of the nose. I'll start by giving it
a little bit of texture. So around the outer
edge of that highlight, I'm going to dot some of that shadow violet
around the outer edge. Now, you might notice
as you're doing this that the color might
look a lot darker. That's because the first layer that you painted
has started to dry. We will kind of blend that out. So what you'll notice me doing in the rest
of this video is my brush will be going down towards where my paper towel is, and I'm I'm actually removing some of the liquid each
time my brush moves down. And what that does is
it softens up then that edge because I'm using
less pigment with each pass. So I'll continue to
kind of work on it, making sure to preserve
that highlight, but also making sure that I give it a
little bit of texture. Now, we'll move on
to the first layer of the mouth of that
dark area of the mouth. I'm adding a little
bit more shadow violet to my color just to make it
a little bit more opaque. And I'm making sure
that the tongue, the pink of the tongue is dry. So I'll start out on one side
of the mouth, either side. My goal here once again, is to just lay down some of that pigment and to
preserve the highlights. So I notice on this
right side of the mouth there's a few highlights
in that black area. I'm going to try to
preserve a little a few of those highlights just because the mouth area is
large enough to do so. If I were painting this
in a five by seven, instead of an eight by ten, I would not have the space to
preserve those highlights, or instead, I might try lifting the highlight
instead of leaving it open. So it really all depends on the size that you're working and how much detail you really
want to add to your portrait. If you don't have the chance to leave these highlights open, it's not going to worsen the
quality of your painting. I'll pull that shadow violet all the way over to the
other side of the mouth. I am painting all the
way up to the teeth. In fact, I'm painting on top of the masking fluid to
make sure that all the curves there of the teeth that dark color goes in
between those curves. I'll come up to the
left side and I'll do the exact same thing on the
left side of this mouth. And now I know it's
a little bit more challenging to see exactly where the mouth ends because
with the reference photo, that side of the mouth
is actually quite dark. I am basically guessing. I'm using the right
side as a guide, so it's going to be
about the same height, since the face isn't
tilted at all. And I also can tell that
there's a little bit of brown. And so that's kind
of the edge of the mouth that I can notice. Now, if the tongue is dry, you can continue to pull that shadow violet up into
the mouth on top of the pink. If the pink of the tongue
is not dry enough yet, I would wait and do
this step later on when you're doing the
first layer of fur. So here, for the
tongue, as you can see, I want to make sure to
emphasize that dark triangle in the mouth and that
it's also kind of coming to a point where that center line
in the tongue is. I am reminding myself, though, that this is not my
darkest layer that I will go back and I will add
more layers after this. This is just to help me place colors where
they need to go. With the lower lip of all
of our dogs that we paint, there tends to be a
little hot dog shape of highlight on that lip. So at the very top of that
hot dog shape highlight, you're going to have
your dark colors, and at the bottom, it's
going to be dark as well. So I left that highlight and now I'm grabbing a
little bit of water. I'm tapping the
excess water off of my brush because I don't
want a soaking wet brush. And then I am softening up
that edge of the highlight. I'll lift up any sort of pigment if it went
all over the place, because I don't need it to
be a bright white highlight, but I also don't want
it to be a hard edge.
5. First layer of Gray, Part 1: So now we are starting with
the first layer of fur. So this step is obviously
going to be a lot longer than the first few steps. For any sort of
multi colored dogs, I do like to start with whatever color is
more predominant. So with any sort of
black and brown dogs, whether you're
painting a Rottweiler or a Bernese Mountain Dog, I do strongly suggest that you start with the black fur first, and then you add your
colored sections of orange. Simply because if you start
with your orange first, I've noticed with myself and with any of my
students that we tend to add too much pigment with the orange and our
orange has become too dark. And so we then have to overcompensate and have
our blacks go even darker. If we start with our blacks, we can still maintain
those nice highlights, and then we can gradually add some orange to the sections
that we leave open. Um, I have mixed right now a shadow violet with
quite a bit of water because, of course, my first
layer needs to be nice and transparent and
it's extremely watery. So I'm starting in sections. I'm starting on this left ear, and my goal here is not to have any sort of um, fur strokes. So I'm not painting
individual fur. I'm getting down the
solid color first. Now, of course, I
do need to paint individual fur strokes when I come to the edge of the ear. So as you notice,
I'm trying to paint some little wispies where I see them on my
reference photo. And as I'm looking at my
reference photo, of course, I am kind of painting
fur like strokes, but you'll notice that they're
all connecting, really. The only sections that
I'm going to leave open and where I'm not gonna fill it with color are any sections where I need
to add orange on top. So the section that I
notice where there's the most amount of orange is this middle section
of the ear here. And so I'm going to paint all of my strokes
kind of at this diagonal. I'm keeping them light, but I'm also keeping
a little bit of white from the paper
kind of shining through. And then before it dries, I can go back and
kind of edit and see, did I leave too much room? Do I need to close any of
those white spaces off, or does it look good
the way that it is? I'm also not trying to paint too large of
a section at once, because I obviously
with watercolors, it dries very quickly. And so I'm doing my best to
kind of work in sections. Now, of course, as I come
to the section where the black and white fur connect the white
fur on the chest, I am going to have to
paint negatively here. So I'm keeping my color
very watered down. And I'm using these up
and down brush strokes. So I'm moving my hand
both up and down. And I'm trying to add
a little bit of shape. This neckline area. Now,
I know that there's a bandana covering that section
in the reference photo. The client did send me
an additional picture. So I'm using that second
picture to kind of get a little bit more shape to
the lower left ear there. And so the only section
that I'm really focused on adding these little wispy hairs is going to be on the edges. So the outer edge
and the inner edge. So knowing where to stop that
hair line in your painting, when you're only
painting, the bust of your dog can be a
little challenging. When your dog is looking
at you straight on, like Taiga is looking
at us straight on. And also when there's a
white section to the chest, I tend to make the chest
area a little triangular, so it'll come to
a downward point. And that point is going to mimic the smile and open mouth. So as you notice, I kind of left that left side of the body, angling in at a downward angle. And I'm going to do the same
thing on the right side, angle that down and in. So it comes to a nice
triangular point. Alright. We'll do the same
thing on this right side. Remember that we're using a very watered down
shadow violet, and we're only focusing
really on adding some of these wispy hairs along the
edges of the ears and chest, along the outer edge, and
then along the inner edge. And the section that I want to keep white for the paper is going to be that little chunk of brown that you see kind of
in the middle of the ear. Alright. Well, I'm looking at my reference photo
and my painting. I'm noticing that it's
feeling a little lopsided. It almost feels like there's more black fur on the left
side versus the right side. And so I'm going to try to curve out this right
side a little bit more. So I don't think I came
in quite far enough. Even if I did come in far
enough, um, occasionally, I do make little
corrections like this just to keep a painting even enough. And so I'm still keeping this
little fluff of white hair, but I'm kind of decreasing
the fluff a little bit. So I'm trying to balance out the painting
just a little bit more. Most of the time, when clients
send us reference photos, they are not perfect. And especially with
long hair dogs, some of these hairs are going
in every which direction. And so sometimes as artists, we can take little um, little steps like this,
just to make the painting, overall, a little bit
more pleasing to look at.
6. First layer of Gray, Part 2: Alright, I mixed up a little bit more of that shadow
violet with water, and I'll start on now this left side of
the face above the eye. And here's where I'm going
to have to keep my brush pretty light when I get to the section where the gray
is touching the white. I am going to have to
paint negatively here, and this is where
more than the ears, more than the neck this section here is where
you really want to be careful that this first layer of
color that you lay down is truly a watered down gray. If you have too dark
of this first layer, particularly where the black fur meets up with the white fur, it's going to have
too much contrast between that white and black. And so having more
transparent gray here is really going to help. Oh Alright, so I'm going to
continue painting along this upper arch above
that orange eyebrow. Now, when I have too much
pigment on my brush and I'm getting close to this section of fur
that has white in it, I might touch my brush
to my paper towel, and that's going to
release a little bit of the pigment just
so that I have a lighter amount
of color to paint this edge between that's
running along the white. So right now, I'll grab a little bit darker of pigment since I'm going
closer to the inside. Then I'll continue
doing the same thing. I'll dab my brush
to release some of that darkness and paint some of the lighter tones
towards the center. Now, once I get to this
section just above the eye where this
orange eyebrow is, I'm going to treat
that orange section as if it were white. So I don't want to add any
sort of shadow on top of that. And I also want to make
sure that my edges are don't have a crazy
amount of contrast to them. So if you can see right now, I trying to give that
general arch shape first, and then coming all
the way to the eye, and everything else just
gets one solid coat of gray, particularly on this
left hand side, which is so dark. I'll continue painting
under the eye. Once again, I am just
making sure that my brush strokes are following
the shape of the hairs, particularly around
the muzzle here. So I'm kind of arching and curving these hairs
that are coming into the bridge of the nose
and then rounding them around the muzzle there. And then once again, on
this left hand side, just by where the smile line is, I'm noticing a little
bit more orange. And so I'll try to keep a
little bit of paper space there to leave some of
that paper open so that I can drop in a
layer of orange later on. Alright, we'll paint it the same way on the right
side of the face. I'm going to speed
up this process in a second here because the
thing that I just want you to focus on is
kind of the shape of my brush strokes and how it lightens wherever it
connects to the white fur. Now, one last thing
before we continue on, I do want to make notice that this first layer of
color is not going to be uniformly even. So there might be sections
where it's a little darker. You might be able to
see brush strokes, and that's okay
because remember, this is the first layer. So part of why we paint
a first layer of color underneath what's
meant to be darker is yes to leave that
color for highlights, but also to train our brains
to understand kind of where these colors
are laid and how the hairs are falling
around the head. And so it's not going to be a perfect layer and just
know that you know, this first layer, all those imperfections
might bother you, but know that we are going
to be adding layers on top.
7. Painting the White Fur: Let's move on to
painting the white fur. In order to paint white fur, I like to dilute the shadow violet that I'm using with quite
a bit of water. The consistency that I'm
looking for is going to be mainly just dark enough
to stain the paper. I want it to be light
enough that, um, I can easily take it off
with a paper towel if I add a shadow in a spot that I suddenly don't think it
looks good there anymore. And so I have my shadow
violet really watered down, and I'm painting it very
sparsingly in the white area. I want to avoid trying to make
that white fur look muddy. And so I only added a little hint of shadow at the top triangle
of the forehead. And now I'm adding
a little bit of darker shadows around
the bridge of the nose, particularly on the
top of the nose here. And then I'm noticing
where these white furs are coming out of the
little corner of the eyes. And so I'm adding a
little bit more shadow there and kind of
touching it up, making it blend into that
dark for a little bit better. Now, if you don't have
shadow violet at home, you can always use
whatever gray color that you used for the
black of the fur and just water it down
a little bit more. The reason why I'm
using the same color is I do want some color
harmony in my painting. So because I'm using
the same color, it's automatically going
to connect the painting. If I were to mix my own a whole new gray for
the white of the fur, it might not connect as
well with the black fur. So I'll continue adding some lighter shadows along
the outer edge of the mouth, particularly in that
mouth area where the hairs are coming
out of the cheeks. Don't forget that you can
always wet your brush and lift up any of your shadows that got a little bit too dark
by using a wet brush, scrub out that
area a little bit, and then use your paper towel, press down and lift up a
little bit of that pigment. So as we move on to the
chin and the chest, I am switching out the
reference photo that I'm using. The client sent me
multiple reference photos, but really liked the
facial expression in the yellow bandana photo. But since it covers
up a lot of the chest and they wanted a painting
without that bandana, I'm deciding to use a different reference
photo to help me with some of the white
fur in the chest area. So when I look at
this reference photo, the first thing I
notice is that there's a lot of there's a lot going on. There's a lot of shadows. You can see a lot of
individual hairs on the chest. And so sometimes when I'm painting, particularly
white areas, I like to squint my eyes
at the reference photo, and that helps me to pick out where are the darkest shadows. And that's the only space
that I'm going to paint. I'm not so if you notice
I'm painting kind of these almost triangular
little chunks where I see those tufts kind of coming
out of the chest area. If I end up doing more more of the lines and the shadows that I see
in the reference photo, in my opinion, it ends up
just looking like dirty fur. So I do want to be
very cautious to leave a lot of that white
paper shining through, or otherwise, you run
the risk of having your white fur look like they just ran through
a mud puddle. Now, as I look back at
my reference photo, I notice there's a
few sections that are just a little darker
than the others. So I'm just going to go
in right away and drop in a second layer of that same
consistency of shadow violet. So it's just making a few of those little tufts a
little bit darker. It seems like most of
those tufts have dried. So this is a second
wet on dry layer. If certain areas are still
wet, that's okay, too. This step you can also
leave till later, but I just noticed a few sections needed
to be a little darker. Alright, moving back to that
original reference photo, I'm taking a peek at the chin
now and noticing that there is a little bit darker of
tufts coming under the chin. It just kind of
helps to separate the chin out a little bit more. So I'm using this first
reference photo to help me add a little darker tones to
that left side of the chin. Now, this part is
a little tedious, but overall, it does
make a difference, in my opinion, when
you're painting the chin area of particularly
pets who have longer hair. So I am going to make some texture in
this chin by creating some vertical hash marks that's coming from
both the bottom of the chin upward and from
that lower lip downward. Now, these little hash marks are just pointing at each other. They're not necessarily
connecting all the way. I do want to still leave
that highlight in between, but I do want to make an illusion that there are these little hairs that are
coming out of the chin. Now, if you have a
short haired dog, you might not need to add so
much texture in this area. But with the long haired
dogs that you can definitely tell that
this texture marking in the chin area
really does make a big difference. So
8. Painting the White Fur: the Nose Area: Alright, now moving on to the section between the
nose and the mouth. I am going to add more shadow violet to that section that I've
been using on my palette. I do want it to be a
little bit more opaque than what I did for what
I used for the white fur. For a lot of dogs, actually, the section between the
nose and the mouth right in the center there is where the hairs are going
to be the darkest. Now, with Bernie's mountain dogs because they
have long hair, I'm using these hash marks, and my hash marks are gonna naturally have more
of a diagonal. It's going to
follow the curve of that mouth as I go outward. And one other important thing to note is at the lip line where you see I'm
painting right now, I don't want my color to extend all the way to the
lower to that lip. So I do want a little section of white right where it
connects to the tongue. The reason being is if I paint that darkness all the way to where the pink
of the tongue is, then suddenly you lose the
dimensionality of the lip. So I do need to leave that
highlight at the bottom. Now, you notice that where
I painted the tongue, I didn't leave any of those
white hairs sticking out. I feel that makes my
paintings look too busy, and so I'd rather
add the texture and the hair in this in between part in between
the nose and the mouth, rather than negatively painting those white hair sticking
out into the tongue area. You noticed then after I finished painting
this little section, I'm obviously doing
half at a time. And then before it dries, I did drop in more of that shadow violet directly from the pan, so
highly concentrated, closer to the center of that,
between the nose and mouth, just to get that center
area slightly darker. So
9. Second Layer of Gray, Part 1: So now that we have the
first layer done on all sections of our
Bernice Mountain dog, now we're going to start
on the second layer of the dark fur. So I'm adding a little
more shadow violet to this kind of puddle that we've been
working with so far. I want to mix more
of a medium opacity, still quite watered
down, though. And I'm using shadow violet instead of black for
my second layer. Simply because I
want to continue to add a little bit more
warmth to my painting. And so I tend to have my
second and third layers be shadow violet if I if I need a third layer
of shadow violet, and then the last layer
is going to be black. That's just the way that I enjoy adding extra
color to my painting. However, if you would rather use a watered down black
for the second layer, that is acceptable, as well. Now as I'm looking at
my reference photo and deciding where to paint
this second layer, I want to first determine where the
lightest highlights are. So on this left ear, I'm noticing where
those lightest grays are at the tip top of the ear. I do want to keep that first
layer shining through. I'm working vertically
from top to bottom here, and I'm still filling in certain sections
where I'm noticing that the black is
extremely dark, but I do want to try to keep
those highlights visible. And I also want to try to keep the sections where there's
some orange shining through. I still want to keep those sections a little
lighter as well. So Now, I personally find that the
hardest part about painting pet portraits is
figuring out how to section my paintings. So obviously, you need to section them in smaller sections so that you can paint the
area before your edge is dry. So here, you'll notice
that I'm kind of moving into the face area,
that side of the cheek. Because when I look at
the reference photo, I'm noticing that there's just
a really solid dark area. There's not a very distinct edge between the ear and the cheek, at least in that
lower cheek section. And so I don't want
a hard edge there. And that's why I'm bringing that second layer
over around the eye first. And then I'll continue
moving down the edge. So you might notice as I'm painting that I'm
there might not be quite a set of rules that I necessarily follow as far as which
section I paint first. And sometimes, if I'm noticing a certain section
in my reference photo, my hand will just go
there and I'll add that little section and
then continue moving along. So I'm not doing
the full face here, the full left side of the face, but just kind of above the
eye there below the eye, and then next to the nose. And after I finish
with that section, then I'll continue down
the rest of the ear. Now, as I start painting on the left side of the neck area, I do want to note
that I am loosely following this other reference
photo that my client sent, but I'm also kind of making
it up in a certain sense just based off of making the painting flow a
little bit better. So on this lower left hand
side in the reference photo, you'll notice that some
of these hairs are actually kind of pointing
outward to the left, and I am creating a little highlight of these hairs that
are curving inward. So right now, you're noticing that there's
a little bit of, like, almost a C curve, and that curve is following that lower curve that
e set of the hair. And what it's doing
is it's bringing your eye from the ear down, and it's following that
shape of the chest and bringing it down to that point that we made with
the white hair. I'm going to do the same
thing on the right hand side, and this is just an artistic
freedom that I sometimes do in my paintings
just based off of what looks visibly pleasing. So once again, Um, if this is something that
bothers you and you want the portrait to look exactly
like your reference photo, you can definitely
make the hairs stick out the way that the
reference photo is showing, or you can use your artistic
freedom as an artist and kind of give them
a brush their hair, if you will, with your paint
brush to kind of give it a little bit more of
a circular shape so that it looks a little
bit more pleasing. Alright, so now I'll move
on to the section of this left section of the face
that I didn't get to yet, which is right above the eye. I'm starting in the corner
inside corner of the eye, as that's the darkest part that I'm noticing on
the forehead here. And I do notice that
that dark section curves around the eye follows
the same curve of the eye, and it also follows
the same curve as that orange eyebrow. I'll add a second layer to add a little bit more
depth to the section between the nose and the mouth. And I'm looking for where
the darkest shadows here. I don't want to blend these out. So once again, I'm using
little tiny hash marks and keeping a layer of highlight
along the bottom of the lip.
10. Second Layer of Gray, Part 2: Alright. Now I'll take
a peek at the mouth, so I'll do a second layer of this shadow violet along some of the darkest
sections of the mouth. Of course, around
the teeth here. That edge in between the
teeth is quite dark. Also, the edge between
the tongue and the teeth is also quite dark, and so I'll add another
layer of that shadow violet. And then I'll work on
the section of the lips in between the nose
and the mouth. Alright, so up until now, I've been showing you these videos in real time
as I'm painting them. Now for painting
this right section of the second layer
of the black fur, I am going to
slightly speed it up. You'll still be able to
see my brush strokes, but it won't be in real time. I'll be slightly sped up. So if you miss certain brush
strokes and you're wanting to kind of see where exactly I'm I'm adding those strokes. I would recommend that you
rewind the tutorial and rewatch that certain section if it becomes a little
too fast for you. However, I'm using the
very same techniques that I did for the
left side of the face, where I'm still trying
to keep some of those lighter highlights
of the black fur open, and I'm trying to make my brush strokes follow
the curve of the face, around the curve of the eyes, around the curves of the cheeks, and then of course, around
the curves of the ears.
11. Black around the Eyes and Nose: Alright. At this stage, I do like to add a
little bit more detail to the eyes and nose, simply because we don't have any dark colors in
the eyes or nose yet. I am watering down a
little bit of lunar black. This is a granulating color that I use for most of my
pet portraits instead of something like a lamp black or a different more mat
colored black I do like the granulating
function of lunar black, especially for fur, but you can use really any
black that you have. I am still using my size four brush here. My
size four round. If you have a size zero, size one brush that
you prefer to use instead for these fine
details around the eye, feel free to use that instead. So my black is pretty
opaque at this point, although I'm still adding it
to water so that I can lift it in case I put it
down in the wrong spot. I'm starting by outlining
around the eye first, leaving just a little section of white in the inside
corner of the eye. And now I'll start painting
the pupil of the eye. Most of the time, the pupil of our pet portraits is
actually going to touch with the upper eyelid and
then that pupil should connect with the highlight that we painted using
our masking fluid. So for the second
layer of the nose, I actually did switch back to my shadow violet for the
second layer of the nose. However, if you had
wanted to continue on with that watered
down lunar black, you can definitely
do this second layer with the watered
down lunar black. So for the second
layer of my nose, this is the layer that I'm going to define the nostril shape. And so most of the dog
nostrils that you will paint, you'll follow this curve
around to the left side. It'll curve down and
around and loop around. That shape, even if it's not apparent in
your reference photo, is what dog noses are
going to look like. So I do sometimes edit my reference photos to
show that curved shape. Now, along with that nostril, then we'll also define
the lower V of the nose. I'll paint and define
that lower edge, and I'll also define the little center line down
the center of the nose. Just like with the
second layer of our black fur on
the face and ears, we want to make sure that
this second layer of of shadow violet on the nose
is slightly more opaque, but still transparent enough. If you're painting at
home and you're noticing that it's looking like there's too much contrast
between your layers, it probably means that
your second layer that you're painting is
too opaque and you need to add more water to that layer so that it doesn't
have so much contrast. It is really hard to find the
right transparency between layers because we do need there to be enough
difference in each layer, but we don't want it
to be too much of a difference because too
much contrast between our layer opacities is
going to create a painting that looks off and the layers won't look like
they're connecting at all. Alright, moving
back to the nose. So I am adding a little bit of texture
to the top of the nose. I'm using I'm dotting that nose, giving it a little texture
using the edge of my brush, but I'm trying to keep the highlight on the
top of the nose clean. I'll define this right nostril, and then the second layer
of the nose will be done.
12. Glazing the Orange Fur Patches: So before I add any more black
to the regular fur coat, I am going to add
those brown patches that you see on your
Bernese Mountain dog. The reason being is that
I want to make sure that these brown patches blend in seamlessly between the
gray and the black. If I were to wait till the end and add the black
patches after the black, I might have some brown kind of shining on top of that black, and I want it kind of
set inside the fur. So I mixed up a watered down. This is a maple color
by art philosophy, but quinocradone burnt orange by Daniel Smith is pretty
much the same color. I'm still watering it down, and I am adding my first
layer and then dropping in any darker orange where it needs to be
a little bit darker. I'm also lifting the edges. I don't want my edges to be really hard edges where it's
overlapping with the gray. So I'm drying my brush, and I'm kind of lifting
some of those edges and helping it to blend
in a little bit better. Alright, I am going to
speed up this section. Mainly, I want you
to notice where exactly I'm putting this brown. So you'll notice that I'm also layering some of this
brown underneath, especially on the
left hand side, kind of under the ear where it starts to
come to the chest. And even in the
white of the chest, I can also see some of
these brown undertones. So I do want to layer it in those areas
where I see those browns, making sure that
I'm not layering over all of the gray because, obviously, most of that gray is going to be
turning into black. Once again, you'll see I'm
dropping in some darker, more opaque orange when
in the sections is already wet in those
areas where it's just a little more
intensive and orange. Know that this is
not the last step. So if my orange is
not dark enough, I can always add another
layer after my black. This is once again just a way to kind of
seamlessly blend in that orange without making
it stand out too much.
13. Layer of Black, Part 1: Now we're ready for our
first layer of black. Now, this might be the
only layer that you paint. You'll notice that
this is the only layer of black that I'm gonna
paint on the fur. I just might go into a few sections a
second time while I'm there and just add
a second layer of black just to make
it that much darker. The black that I'm
using is lunar black. It is a granulating
color from Daniel Smith, and you'll notice that I'm still adding water to this black. I don't want to be using black
directly from my palette, except for when I need
it extremely opaque, like for the centers of the eyes or the center
of the nostril. Otherwise, if I'm painting
fur and black fur, particularly, at least
in larger areas, I'm going to use it
mixed with water. I am going to be making
sure that I'm leaving those under two layers to shine
through in certain areas. So when you see the highlight
at the top of the left ear, you can see the
lightest highlight and also that middle gray color. And then I'm going to add the black only where I
see the darkest shadows. Now, because I already
added that orange, I can paint on top of
the gray and the orange, and my black is
acting as kind of the color that's combining it all together and
making it look nice. Now, like I said, I'm still using my
reference photo to make sure that my hairs are going in
the right direction. However, I'm not trying to paint every single
hair that I see. That also means that
in the darkest areas, particularly here in the center between the ear and the face, I am not painting
individual strands, but I'm painting
larger swaths of that black using the
large edge of my brush. And then where those
black that black fur is then coming into the orange or coming into a lighter gray, that's where then I use the
tip of my brush to add then those fur kind of flex and get those fur strokes that are
moving in the right direction. And Now, here on the cheek, you'll be able to see why I
add that brown that orange brown in between the gray
and the black layers because right now I'm using my black
and it's still watered down. I have a very light touch. I am going slightly
over that brown area, and you notice that that brown
is still shining through partially because I'm having a really light touch
with my brush, and also partially because I'm
using a granulating color. So this black isn't
as opaque as, like, a lamp black is. And then when I get
to the mouth area, then instead of
having a light touch, then I'm going to make sure
that I'm loading more paint in those darkest areas of the mouth where it's
really dark black. Now, for the eyebrow
above the eye, usually the eyebrow, there's a dark kind of emo eyeliner
right on top of the eye. So I already have that
dark emo eyeliner on top of the eye.
I did that earlier. Then above that Emo eyeliner, there's kind of a tuft of highlight where there's
this kind of eyebrow. And so that tuft the highlight, I do want to leave with
that lighter shade of gray. And then on the
inside of the eye, it tends to be really dark. So there's a dark
section of fur there. Now, this dark section with
Bernie Mountain dogs and with other brown and black
dogs like Rottweiler, that orange eyebrow butts up right against
the darkest black in the center corner of the eye. So I do want to be
careful to make sure that my black is going
on top of that orange, and I have little tiny strands of fur that are
kind of coming into the center by the
nose and then also onto that orange eyebrow. Alright, taking a
closer peek at the eye. Now, I had done this
in black earlier, but I'm just going
to do another layer of black where I
noticed the darkest. And so that would be kind of
the ring around the eye and then a little bit in the center as well as in
the pupil of the eye.
14. Layer of Black, Part 2: Alright, moving on to the mouth. So here, the darkest
sections of our dogs when we're painting
them is always going to be the corners of the mouth, where the mouth is especially
if the mouth is open. And then it's also going
to be the darkest along that line from under the
mouth through the tongue. Now, remember in our
reference photo, when we were painting the gray, I did not leave any sort of of those little gray or white hairs there in the mouth. I just had a solid, clean line, and I'm still going to do
that with the black. So I have the solid black line now in the center of the mouth. And I'm also going to
outline around the teeth. Now, remember I have that
masking fluid on the teeth, so I can get a really nice, fine black edge all the
way around the lip. Remembering that this lower lip here does have a
highlight on it, so I don't need to bring my
black into that highlight. I'm just going to bring the
black around the outside. It's kind of like a hot
dog shape of a lower lip. And then I'll also add some
black on that right side of the mouth where it's the darkest where it goes
back in that smile line. Alright, so I'm
going to speed up the video a little bit
for showing you the painting the fur on the
lower left side of the face. So here we're working
on the lower portion of the ear that kind of
morphs into the body. Now, with the reference photo, it wasn't very obvious
where the ear stopped. And so I don't really
think I need to add a very clear definition
of where the ear ends, although you might
be able to say where those little tiny hairs are sticking out
in the lower left, that could be where
the ear ends. Main thing I want
you to watch in this portion of the
video is where you have these larger areas
of black is where I'm using the edge of my brush
for a larger brush stroke. And then in the sections that are butting up against the white or in the sections
where I want to leave some of that
brown shining through, I'm going to use more of
the point of my brush and making sure that
I'm still moving my brush strokes
in the direction of the hairs and where I see these hairs
moving in my reference photo. Now, here after I added
all of my darkest shadows, I realized that I
really don't like how intense this highlight
is on the left hand side. And so I just grabbed a
little water in my brush, and I'm blending in with using a wet brush on top
of that area on the left, just to kind of blend in
that highlight a little bit. That's the really nice
thing about lunar black is that it does
lift really easily. So I can lift it just with
water, kind of move it around. Although that's also
kind of the challenging, frustrating part about
Lunar black is that it can move on you as you're painting. Alright. Moving on to the nose, we'll add our final
layer of black. So I remixed a little bit
more lunar black with water. I always like to start with the nostrils when I'm
painting the black layer just because I know that my darkest darks are going to be in the
center of that nostril. And then from the nostril, I'll kind of move outwards. I might end up going around
the edge of the nose, the top edge, and that bottom
V is usually the darkest. And then you'll notice as I'm painting the center
of the nose that I might add a little bit of texture using the
edge of my brush, some little dots there along the top of the nose
just to add a little texture. Alright, so now that I have some of the darkest areas here, I might start some texture dots along the top of the nose. And to do this, I might dab my paper towel a little
bit to release some of that liquid so that my
dots aren't quite as dark. And so you might
notice me dabbing to kind of control the amount of liquid
that's in my brush. All right, so now that I
have some texture laid down, now I'm going to
start on the area between the nose and the mouth. So I'll grab a little
bit more water, water down just a
little bit more. And now I'm going to start towards the center
of the nose here. That's where it's going
to be the darkest. And then as I move
outward on the mouth, my the space between the dots are going to grow
further and further apart, and that's going to create the
illusion that it's getting lighter as you move outward
from the center of the mouth. Now, I am noticing that along the mouth line along the
bottom of the mouth, that it is a little bit darker. And so I'm going along and I'm adding some of these hash marks. Now, keep in mind, just like for my gray layer, I'm not adding these
gray hash marks, covering the bottom
of that lip there. There's still a highlight
on the bottom of the lip. That's going to give
it that three D shape. And I'll do the same thing
on the right hand side. So I have these little
hash mark lines. I'm not covering up all of
the gray that's underneath, but I'm just adding
to the darkest spots. All right. And now I dab my brush on my paper
towel to dry it off. And now I'm using a dry
brush to kind of soak up any of those dots along
the edge that got too dark. So you'll notice quite often that it's a fine balance
of adding the color, water down, and then drying
off my brush and using my brush like a
sponge and kind of adjusting the wetness after
I lay it down on the paper.
15. Layer of Black, Part 3: Alright, little kind
of extra pro tip here. Make sure that you're adding the slightest amount of black
around those canine teeth, a really tiny sliver. You do want those teeth to
stand out a little bit, but you don't want them
to stand out too much, so your line shouldn't
be that thick. Okay, so now that I have talked through the real time video
on the left side of the face, I'm actually going to
speed it up and allow you to watch it in a sped up version
on this right hand side. So it's all the same tips and tricks that I did
for the left hand side, just mirrored on the right. Oh
16. Color Corrections: Alright, so the last step
that we have before we add our colorful splash
in the background are any color corrections
or adjustments. So this is I consider
this the very last step. I take a peek at the reference
photo with what I painted. And right now I'm going
in with lunar black again and making those sections that are extremely dark,
a little bit darker. It also helps to add another layer to these
darkest areas of lunar black simply because since it's a granulating color, I might need another
layer to kind of to kind of even out
the tone a little bit. So I'm going through
with that lunar black, and I'm just making any adjustments when I'm looking up at the
reference photo. I can also use a water down lunar black to kind of
tone down any colors. So right now, I'm adding a
little bit of lunar black in the eye just to tone down the corner of
the eye a little bit, so it's not so
intensive a color. And then I might also use that lunar black mixed with a little bit of water to tone down some of the browns. If the browns are getting too light or too light in color,
I can tone that down. I'm adding a little bit of
brown to the nose right now, just to kind of correct
the color a little bit, it turned out a little bit
too dark black for me. So this section of the video
is sped up a little bit. It's not really about adding extra brush strokes
at this moment. It's just about adding, dark black to the darkest
spots and adjusting color.
17. Colorful Splash in the Background: Now that our painting is done, we can add a colorful splash. Now, this is optional, but I do like to add
colorful splashes behind my pet portraits just
to add a little extra color. So I'm starting out
with some water. I do want a water down color. I'm mixing carbazol
violet with indigo. I like to add indigo to some of my brighter colors just to tone that brightness
down a little bit. If it's too bright, adding indigo just kind of softens the
color a little bit. Now, with this colorful
splash in the background, I am going to use a
wet on wet technique. So what I'm going to do
is I will wash my brush, and then I will wet the area
that I want to add color to using water first
and clean water. So if your water is dirty
from your painting, I would suggest getting
a new glass of water. Now remember that, of course, anywhere that you
touch this water, too, it is going to that color
is going to go there. So I am starting with the top of the head where it is
really light and white because I know that I want a
colorful background to kind of help that white portion
of the head to stand out. Now I'm not bringing the water all the way to the
edge of my paper. I am keeping it as this
kind of blob of water, and then I'll drop in my
color on top of that. Now, I do try to have the darkest color
closest to the head. And then as I come
outwards from the head, I might add water or
I might lift some of that color to make an edge
that isn't quite as dark. Now, of course, I do have to work section by section here, or otherwise, my water will dry too quickly before I'm
able to put the paint in. So I tend to chunk the
colorful background into three to four
sections or more. And so, after I finish with
that top little section, now I'm going to work
on some of the edges. And, of course, since
my Bernee Mountain dog is quite a large dog, I don't have a ton of
room around the edges, so I just kind of trying to fill in the
space a little bit, leave some of the sections popping out, particularly
those sections, especially when you're painting dogs that have really fluffy, long fur around the edge. Sometimes it's hard
to paint in between those long little
tiny tufts of hair. And so you'll notice that on the upper corners of the ears, I'm leaving those sections open, and I'm just making sure
that my purple is fading out into the white background. And that's going to do
a few things for me. One, it's going to
kind of even out the shape of my
overall painting. And two, it's gonna
make it so that I don't have to paint in between
those little tiny hairs, which is important
because if I had to paint in between
the tiny hairs, most likely, I'm not going to
be able to get up so close, and there'll always
be a little bit of a white edge or I might
paint on top of the hair. And so sometimes it's just
better to leave it out.
18. Final Details: So I let my painting dry, and I did take off the
masking fluid from the eyes. So the highlights of the eyes, the teeth, and the whiskers. And so I'm going to go back
in, especially with the eyes, and I'm using a micron pen here, which is a waterproof black pen. This is a size 03. I'm using this pen
just to kind of help outline the eye here, the highlight of the eye to
make it a little bit smaller. Usually, with my masking fluid, my masking fluid tends to make highlights that are
too large for the eye. And so sometimes I'll come
back with a micron pen. Sometimes I'll go in with
paint and cover it with paint. It just all depends on how
dark the pupil of the eye is and how much of a
change I need to add. So because this is
kind of minor changes, I decided to go in with
a micron pen instead. Now, for the teeth, I
am also going to use the micron pen to slightly
outline and kind of reshape, particularly the tip of the teeth and kind of into
the center a little bit. I do not want to use my micron pen to outline
every single tooth. So you notice that the
teeth in the front, you can't really see a line individually separating
those teeth. I don't want to separate them. Otherwise, it looks a
little too cartoonish. I'm switching over
to a Si Zero brush, and with this Si zero brush, I'll go back into some of the more detailed
sections, like the eyes, nose and mouth, and
I'll add any sort of finer details that
I might be missing. So here, I'm outlining where this pupil is connecting to
the highlight of the eye. I'm going to go back
into the highlights and separate those
two highlights out. I noticed that it's in
my reference photo, it's pretty much two highlights that are budding up
against each other. So I'm going to separate
those two using paint. Now I'm doing this
with paint instead of the micron pen because it's
a lot easier to control. I'm not using as dark of a line. In the center of
these highlights, I want it more of a
gradual line there. And then I'll come
in with a little bit of yellow and very
a lot of water. And this yellow, I might mix with a little
bit of the black, so it's kind of a dull yellow. I'll go in and I'll just
add a little bit of a shadow on the teeth so they're
not so bright and white. Usually, the shadow
I'm adding is on one of the edges
of the teeth, as well as along the
bottom of the tooth. And I do want to make
sure that I keep one side of that tooth
open without any color. So it's nice, bright and white. Usually, along the base
of the teeth, though, I will add a little bit
of this shadow color. Just so that it tones down the brightness of the teeth a little bit because as we know, dog teeth are not bright white. The last section of
masking fluid that I am going to adjust are the whiskers here,
the white whiskers. Now, when I pull off the white whiskers on this
Bernese Mountain dog, they are very, very
white and bright, and to me, they stick out
a little bit too much. So I washed my brush. I mixed a very,
very light black. And now I'm just going over
not all of the whiskers, but the majority of them, I am going over with this very, very light wash of black, just to tone them down a
little bit so that they're not so bright and white. No, I am noticing that
on the chest here, there's a few areas that
are a little too light still after it's
dried completely. So I'm going to go
back in with some of that lunar black and add
another layer of lunar black. Now, with watercolors, it's very challenging
to know when to stop. I often have to
give myself kind of time limits or let it dry
completely overnight, go back to it the next day, and then limit myself
as to the number of kind of fixes that
I make mainly because, you know, you could
spend hours and hours making small tiny changes. Sometimes it's helpful to take a step back from your
painting and look at it from a distance and look for the lightest colors
and the darkest colors. Do you have those lightest
and darkest colors accurate? And then everything else
in between section, maybe you don't worry
about quite as much. So I am often trying to keep myself
from overworking a piece, and it's hard to give
advice on this topic just because I think so many of us do struggle
with where to stop. So I try to, of course, do just
like what I said, limit myself, but also look for those lightest and
darkest values. And then once I hit those
lightest and darkest values, I say this is good for me. Make sure you let
it dry overnight, take the tape off,
and you are done.
 Emily Marie Watercolors, Watercolor Artist and Dog Lover