Transcripts
1. Watercolor - Let's Paint Dog Fur Vol 1!: Hi and welcome back to
another Skillshare class. My name is Mary Evelyn, and in today's class
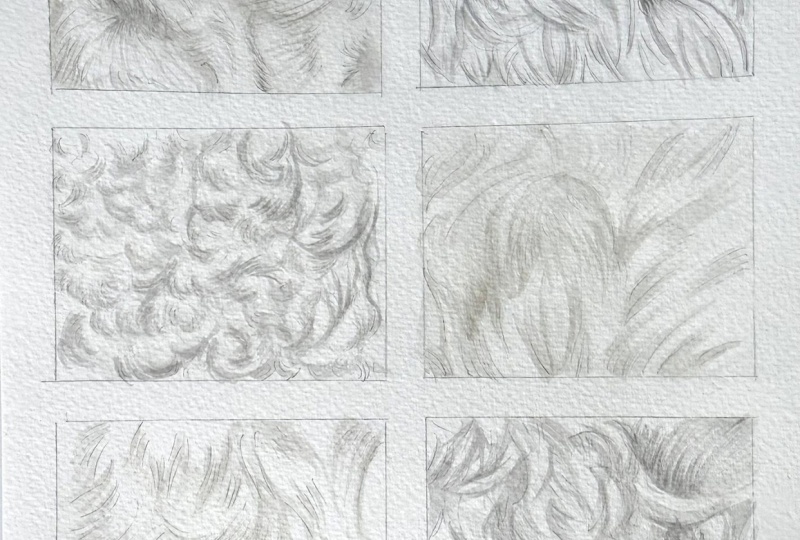
I want to walk you through six small lessons on painting White Fur
or a light-colored fur. We're gonna go over how I prefer to paint light
colored animals. So I'm going to
take you through, we've got our quick
guide so that you can just jump right
in and get started. We're going to end up with six different variations of how to paint different
links of fur. And it's really just
a great way for you to just get comfortable with brushstrokes and playing really just experimental
and getting comfortable. And I would love to hear
any questions you may have. And if you'll post those
in the discussion, I'll get back with
you as soon as they can. You've got this. And as always, remember to
give yourself grace to grow. It's all learning
process. So let's go
2. Materials Used: For this project, we are
going to need are two paints. Does not have to be
these exact colors. You can just use any black
that you've got because we're just gonna do a really watered down version of that. And then this buff
titanium does not have to be the Buff Titanium. It can also be a color that is watered down to
create a cream color. We're going to need are printouts which
are handy to have. Just our quick guide that
I've come up with for us. You can choose whether
or not you would like to try to outline the photos versus outlining the outlines that
I've created for you. I think I'm gonna go with
this one for this class, make it a little easier on us. You're going to want
your graphite paper as well as your
Watercolor paper, so that we can set that on
top and do our transfer. I've picked out two types
of brushes and 180 script. I thought this might be
kinda nice for some of our really fine details and
of course are faithful. Number four, and these are both Master's Touch
from Hobby Lobby. And then of course,
some paper towels. I've got my palette with my to paint colors on it with some room to do some mixing. Then a pen, of course, to transfer our outline
to our paper. And I do typically use a colored gel pen or
something just so I can see where the
outlines are at and what I've done as far
as transferring. And finally, last thing, we needed some water and I
have that off to the side. So without further ado,
let's get started.
3. Transfer: Okay, and what I
did is just mark some little boxes around where I'm gonna go just to get myself a little more guidance. You could put some
washi tape in-between these boxes or some
masking tape to give yourself some space in between. What I want to do is just
generally follow the lines. You do not have
to follow them to the T. It is more
of a guideline, not an exact format, but we want to just go with
the direction of the Fur. I like to check on occasion and make sure my paper
is behaving itself. Now that we have
our transfer done, you just want to double-check. I'm going to move my paper now. You can always masking
tape your paper to your watercolor paper
to make sure it stays put. So we've got all of
our pieces here. You can take a kneaded eraser or a little bit of an eraser. If you need these lines a bit
lighter, that could help, especially when you're
doing White Fur if you're transferring
with graphite paper, do a little bit of testing
before you transfer, just in case it's
a little too dark, is brand-new graphite paper ends up transferring very dark, which is very hard to lift depending on what type
of graphite paper it is. So just be mindful that
you could always do the Old Faithful
of taking a pencil and coloring the back of this outline page and then laying it down
and transferring it. And that's pencil on
watercolor paper, which is a little
easier to erase. Something to think about for this as we're moving forward. So we are going to
start this tutorial off with our Short White Fur. Let's go
4. Painting Short White Fur: For our first lesson,
we're going to start with our first box, and that's gonna be
our shorter hair from pretty much
all the other hairs were working with longer curly. But we're going to start
with the shorter one. We're gonna be working with
light layers and watered down black beginning by adding
paint strokes wet, on dry. So what I typically like to do is I like
to do a little bit of mark-making which we
achieved with the graphite. And like I said, we can
definitely lighten those up. But what I wanna do over
here is create a wash. That's a really, really
watered down version of just a little
bit of that black. And I can go ahead and
put some over here in this little well and
out here to the side. If you want a little darker, I'm just I'm just barely
snagging some of that pigment. If I want it a
little more opaque. The thing with the buff titanium is it does have white in it, which is going to create a
little bit more opaqueness or more of a gray versus the transparents with
that peach black. Again, you can use whatever
paint color you'd like. And what I might have done. Let's see. Go ahead and just start
with some mark making. And what my theory is here
is that I'm starting where I added the line work and I'm pulling from that
point and moving out. And then I'm just going to get a little bit of water, my brush, tapping off the excess here so I can control and maintain
when I have in my rush, I feel like it's too much. Go over and dab. And you're almost
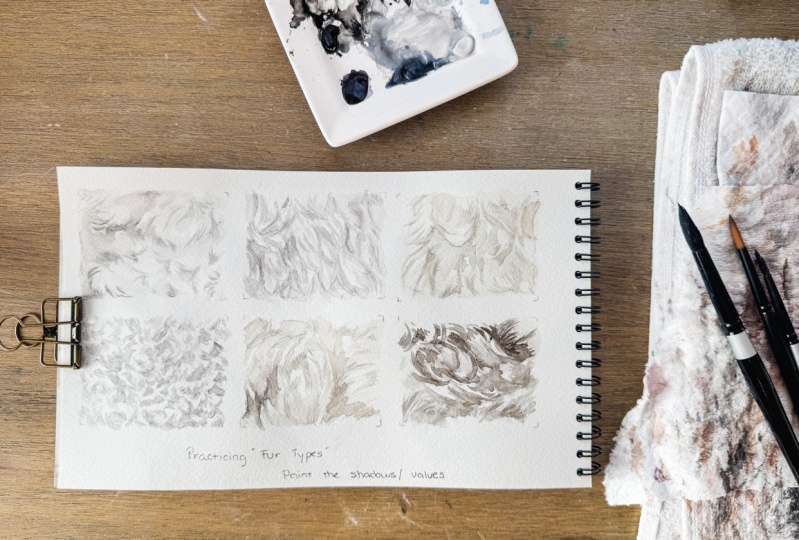
feathering out this Paint. Now, here's the thing
with painting White Fur. You're not actually
painting White Fur. You are painting the shadows. If you can. Keep your mind in
that perspective, I think that it will
have a little easier go with the idea of
painting White Fur. And I understand
here that my lines, my graphite lines are
actually pretty dark. So if I want to remedy
that just a little bit, I can take a little bit of
a darker approach to this. And if I want to
blend that down, all I've gotta do is
pull my paint down a little bit and do a bit of a
wash. Little bit of a wash. I would recommend taking your eraser over your
graphite transfer. Once you are done with that, I think it will help me
take a little bit of buff titanium and
run it through. Now, this is also how we would
approach doing Retriever. If it took like a
golden retriever. And I do have a
tutorial for that. So if you want to
check that out, might be of benefit. But I think for the
sake of recording here, it's probably best
that you do see the lines because
sometimes I've done some classes where the lines have been so light
that I'm not so sure that they're even
visible on the camera. So at least this
way we get more of an idea of what
we're looking for. But when it comes to painting
pets with White Fur, really all we're doing is
going in and adding shadows. One thing to keep in mind when painting fur is if you feel like you've
put too much on, feel free to get
a little piece of your paper towel so that you can kinda
dab up a little bit. You want to pull up
some of that pigment. And then Cl, I'm
kinda feathering it in a little bit more water. But really I'm just working
with a gray scale here. And you could do this piece
entirely with this watered down peach black again, or whichever black you prefer. I think in a way that
would work as well. So now at the ebb and flow of this particular piece of fur, I went through different dogs and picked different pieces. I think this one
was from a chest. And so there's a little
bit of curve this way. There's curve up. It gets a little
darker over here. So if you even wanted to
put a water-based down, see how there's it's just barely barely a little
bit of gray there. If I wanted to go ahead
and put a wash down first and take some of that. Adenine. Take a little bit more and see how that kinda
blends into those pieces. And I can let that dry and then go in and feather that
out just a little bit. And my goal with each of
these lessons is repetition Getting familiar
with your brush, getting familiar with
how much pigment goes in your brush, how much water goes
in your brush. And really just
repetition of practicing. Because that is the
way that I found. It's maybe not the way, but the way I've found to really get control
over Watercolor, because I think that's
probably the biggest thing I hear from people with watercolor is that they feel like
they have no control. And we actually do have control, but it's like any other
thing we do out there. You've got to practice
because I think you become familiar even if the results aren't coming up
the way you want. I think it's a lot
of experimenting. Okay, so I'm going to
add just a little bit of buff titanium here just to warm this Fur up
just a little bit. You can take different
brushes if you feel like you need finer lines, you can use that smaller
brush if you choose. So right now, or
just kinda working with where do we see depth? And if you'll have your
Reference Photo near you as we're Going along of
the actual picture. Not the painted version or
the outline, but the photo. You're going to see where
the darks hit a little bit more than those lighter tones. But just thinking your mind, we're just painting shadows. That's all we're doing. We're just practicing
really painting shadows, which is a cool concept. So again, this part is fairly
dry and I'm just taking the base of those lines
and I'm just making them a little bit softer up at the top. Same thing here. Start with those lines. I typically try to
get a tip on my line. So I start with a fine line and I tried to end
with a fine line. The middle part can be
a little bit bigger. You've probably seen
like calligraphers when they push down on the pin. That's how they make
such pretty lettering as they push down or it's
really thin and they push down and the lettering gets wider and then
it's finished you, they flourish it with
a lighter touch. So it's really the
same type of thing. If you need to do a warm-up, always feel free to do a warm
up with some scrap paper. Or if you're doing
this and you have a little bit bigger piece
of watercolor paper, practice your tones
up at the very top. I follow a lot of artists
that actually will do little color squares up at the top to see
their colors before they add it to the final piece. People that do pet
portraits and, and things like that. So yeah. Okay, So I think I'm gonna
leave this first one as it is. I kinda like the depth to it. If you ever feel like
you go too dark, you all know my favorite
go-to is that white gel pen. And those are also found. You'll see me mention
those many times and so my other lessons. Alright, let's move
on to number two.
5. Painting Wavy White Fur: Okay, We are working
with a little bit of a longer string your hair. So I'm gonna come
over here and mix up a little bit more of a
watered down black here. Again, if you want to do
a little bit of this, come over here and Polson
buff titanium mix the two. Just so you have a gray, a little bit more of an
opaque gray, that's fine. We're going to use
wet on dry technique to build layers from light to gray to
dark, deeper tones. So when I approach for, I typically like to
kinda dig into it. So you start with this
really light base. We're going to need to
get in there and show the shadows to
create this longer, Wavy your hair when it comes
to these little pieces here. So let's just say start
at the base here. I want that base to be darker
and then I actually want the top part to be a
little bit darker. I want to get my brush wiped
off here with some water, dab it on the paper towel and
then I'm actually going to take a little bit of that off. And I'm going to blend
that in just a bit. Same thing here must start at the top. It's going to be dark. And then as it comes
towards this bottom area, I'm I make it a
little bit darker. Okay. You-all kind of, again, get the feel of the brush, get the flow, get the
idea of curvature. And this is part of what I love about curly or Long wavy hair, is this little bit of curve
we've got going on the back. So kind of the
swoop and the down. Swoop, down. Okay. Even if you really wanted to go through and lightly add in some base areas to all of
this you could and then go back with a little bit
darker on top just like that, you could certainly
go that route. But I'm hoping I will spark an idea or show you something just a little bit
different that makes you go, Oh, why didn't think
about it that way? We're trying to
showcase shadows here. Not necessarily Paint White Fur. In general, we are
painting light White Fur, but we're we're
painting the shadows. So you can take it like
I said, darker, deeper. If you feel like one piece might have a little darker behind it, you can add that we'll see
like this piece right here almost goes underneath
that other piece. Or maybe it whips up and around. This area here can be much darker than the piece
that's laying on top of it, the pieces under it. If that makes sense, I
hope that makes sense. In my brain, these things
make sense and then sometimes I present them on paper and doesn't always translate how Mary Evelyn
thinks it should translate. But this is also how I address a lot of floral
painting with petals. Because you have so many layers. You have layers
on top of layers. And you're painting
the shadows to create depth and to create a 3D
effect versus a 2D effect. And I don't want anyone to think that they have to be perfect
at this the first time. It will, if I was to do
this three or five times, each one would look a little bit different and that's okay. I don't think there's
any problem with that. I like it to be the
idea of the fur. I'm not necessarily showing you how to do anything
photorealistic. That's not my goal. We could certainly
spend hours upon hours working on this
type of project. But I don't think that's exactly what we wanna
do at the moment. When you get really into these types of practices
with painting, you might discover
that you really like get deep diving into
all those details. But for now, I just
want to give you the idea of the shape and the flow and what
we're doing here. So if we go here and
I'm going a little bit deeper on one side and a little bit deeper
on the other side. And maybe a few of them
are dark in-between that. Let's say this section
down here is really dark. I think as you go, you're gonna see the ebb and flow of what the Fur is doing. Yeah. Just wanted to give you
a little up-close and that then we're going
to finish this off. Same way. And if you want to add
some warmth to that, you can let it dry and then add some of that buff titanium. Or if you've got some
sort of a yellow tone, you can water that down and
do a glaze over the top. And you can always take this deeper if you wanted to as well. So any of those little areas
that you think might have an extra deep shadow, go for it. Just experiment. You
can't go wrong with this. Only thing you can do to go
wrong with it as not to try. I'm sure none of you have
ever heard that before. We're going to end on that. I want you to practice
that even if you need to do it a
couple of times over, that would be great. And we're going to move on to a little bit of a
type of Poodle hair. And I'm gonna show you
how I do those curls.
6. Painting White Poodle Fur : We're moving on to number three, a Poodle type here. You're going to mix. I seem to like the combination of
the two of these here. But whatever you do, you
could stick with just one. You could do this
with Payne's gray. You could do it with a lot of different tones and
just experiment with the wash to see what you
like with the Poodle here, you're gonna notice
the outlining that I did is almost like little sees, like as in cat, back-and-forth, back-and-forth versus
more of a squiggle. He might think of
more of a squiggle when you're looking
at the Photo. So what I typically like to do, it's pretty much
how we just did it, except it's a smaller motion. So you're just taking
that little almost going back-and-forth with the brush. And it's almost like each one goes in and out of each other. You can do a few
squiggles like you can go almost like a like an S shape, which I think is totally fine. And once you've worked
on Poodle hair, a few times, You kinda
get into a rhythm. You find what you like about it. And then how you want
to interpret that. Because I think
that's important with Art as to interpret. So for me, it's almost
just like little, little c's are like little,
little swoopy motion. So that makes sense. Let's just do little
swooping motions. So again, I tend to be really light handed with
the tip of my brush. Now, I'm still using
this number four. So what I could do
is I could switch over to the smaller one. Let's see what that does. Let's kind of experiment
with that one and see if we can get a little bit
of a different result. Yeah. So you've
got smaller lines. It's going to work a
little differently. And really with Poodle here, I am just looking for
an interpretation. It's not going to
be an exact match. I think that's where artists
get a little caught up with for now when it comes to eyes
and features of the face. You all know, I think it's
very important to get those right when
it comes to fur. I just think having the basic understanding down is step one to becoming a
better Pet Portrait artist. I don't think it needs
to be hyper-focused. I would say the face would
be more hyper-focused. And so you're just
going to continue going back-and-forth,
back-and-forth. Small, small, small, small. Again, it's that
idea of you start the top of the curve kind of dark and you in
the bottom of it, kind of dark and that's what
gives you that illusion of a curl. I hope
that makes sense. Okay, so dark, same thing here. So we've got like
this, this one here, kinda goes up and
over, just like that. So this bottom one here, it's going to come out and
we're going to go down. Now this one has almost
that S shape to it. So it's almost like
here and down and then it encounters another curl here. But it's going to
end right there. Okay, Then top of curl, wrap it. And then you're just going
from curl, curl on these. You don't want him
to get too big. Because with Poodle
here it's really tight, tight little curls. So even if you just need to step back a little bit
and okay, what am I? What am I, what am I
trying to accomplish here? Little a little bitty curls. Now, you will probably notice
on the original image, we've got some almost
squiggles is as I would say, if you noticed, like
the Fur is almost Bent, I would say there's
a place for that. As far as like if you
take here dark, dark, dark, then just kinda
curl the back part of it. I think would be great. So top part, dark, dark, dark. Then you've got these
little swoops in C. And just continue like that. You're getting those
little pieces in. But you're starting to create these tighter curls as
you're going along. And then if you feel
like some of it's not as dark as you want,
just go back over it. You could technically go back over any of these pieces
that you've done, create a deeper, darker area. The Poodle here I will say, takes a bit longer. Tighter the curls. You're still doing the
same amount of work. You're just not covering as much as the bigger, longer curls. Yeah. I got a little bit too
big on that corner there. Come back in. Okay. So kinda getting
down to the wire on this one in here's a
little wet on wet section. So if you wanted to deepen
some of those curls, you just come in and add a little bit more of
that wash in there, you could just drop that in. Yeah, anywhere where
you see that you might want to add maybe
a little depth. You just come down to
the bottom curl area. So again, that's the
beginning of Poodle curls. You can take this deeper. I would encourage experimenting with the squiggles for sure. Because some of the
dogs that I've seen, their fur tends to lean
more towards that look. Instead of these across
and under curls, these little C-shaped
curls that could go on top over under
that type of thing. So I would encourage you to
go over that one a few times. Alright, let's move on.
7. Painting Soft Wavy White Fur: This one based on the
photo is a little softer. So it really essentially
is like this first one. It's just a little softer, a little longer than that one. That's part of why I picked it. Kinda give us a
broad perspective of the different types of fur. I am gonna move back to my
number four brush though. I tend to like this one for these longer curls
and I'm going to mix again just a
little bit of each. Come over here and mix the two. And maybe a little bit more
of this titanium buff. Now, if you're
really into colors, I don't know that it's
coming across on camera, but I'm thinking my black has a little bit of
a blue base to it. And then you've got
your Buff Titanium, which has a little
is a yellow base. So in my visual here it's kind of coming
across not quite green, but it looks like it
has a tinges of that. So be mindful when
you're mixing colors, you may go, Oh, well
why did that mix? Well, there may be a reason. Okay. Now on this one, again,
these are kind of PFK-1. So there's a piece of
fur here that kinda goes up and over in here. So that's on top here. We've got on the bottom here. So what I'm doing is
laying in a base, I guess if that makes sense. So again, same concept. Starting at the bottom. Top, they're going to be darker. They're just going to be darker. The top of your curl or wave
is going to be highlighted. Essentially. If you ever study
here, just someone, like if someone has some
really pretty curly hair, notice starting noticing how the highlights hit,
where they hit. If you have curly hair yourself, go look in a mirror and
maybe shine some light in different points and see
how the hair reacts. That's also a great practice just to see where that lands. Now, I'm noticing with the photo here that I kinda wanted to
just do like a light wash. There's some parts here that
are lighter than others. And I think I think my initial outlining here
kinda got away from that. That's okay too. Sometimes if I want a soft
blend of a dark to light, I'll do a wet on wet and then
get those tones in there. Since this is kind of in a box, the edges are just
gonna be hard on here. And then just Soft. But again, this is really
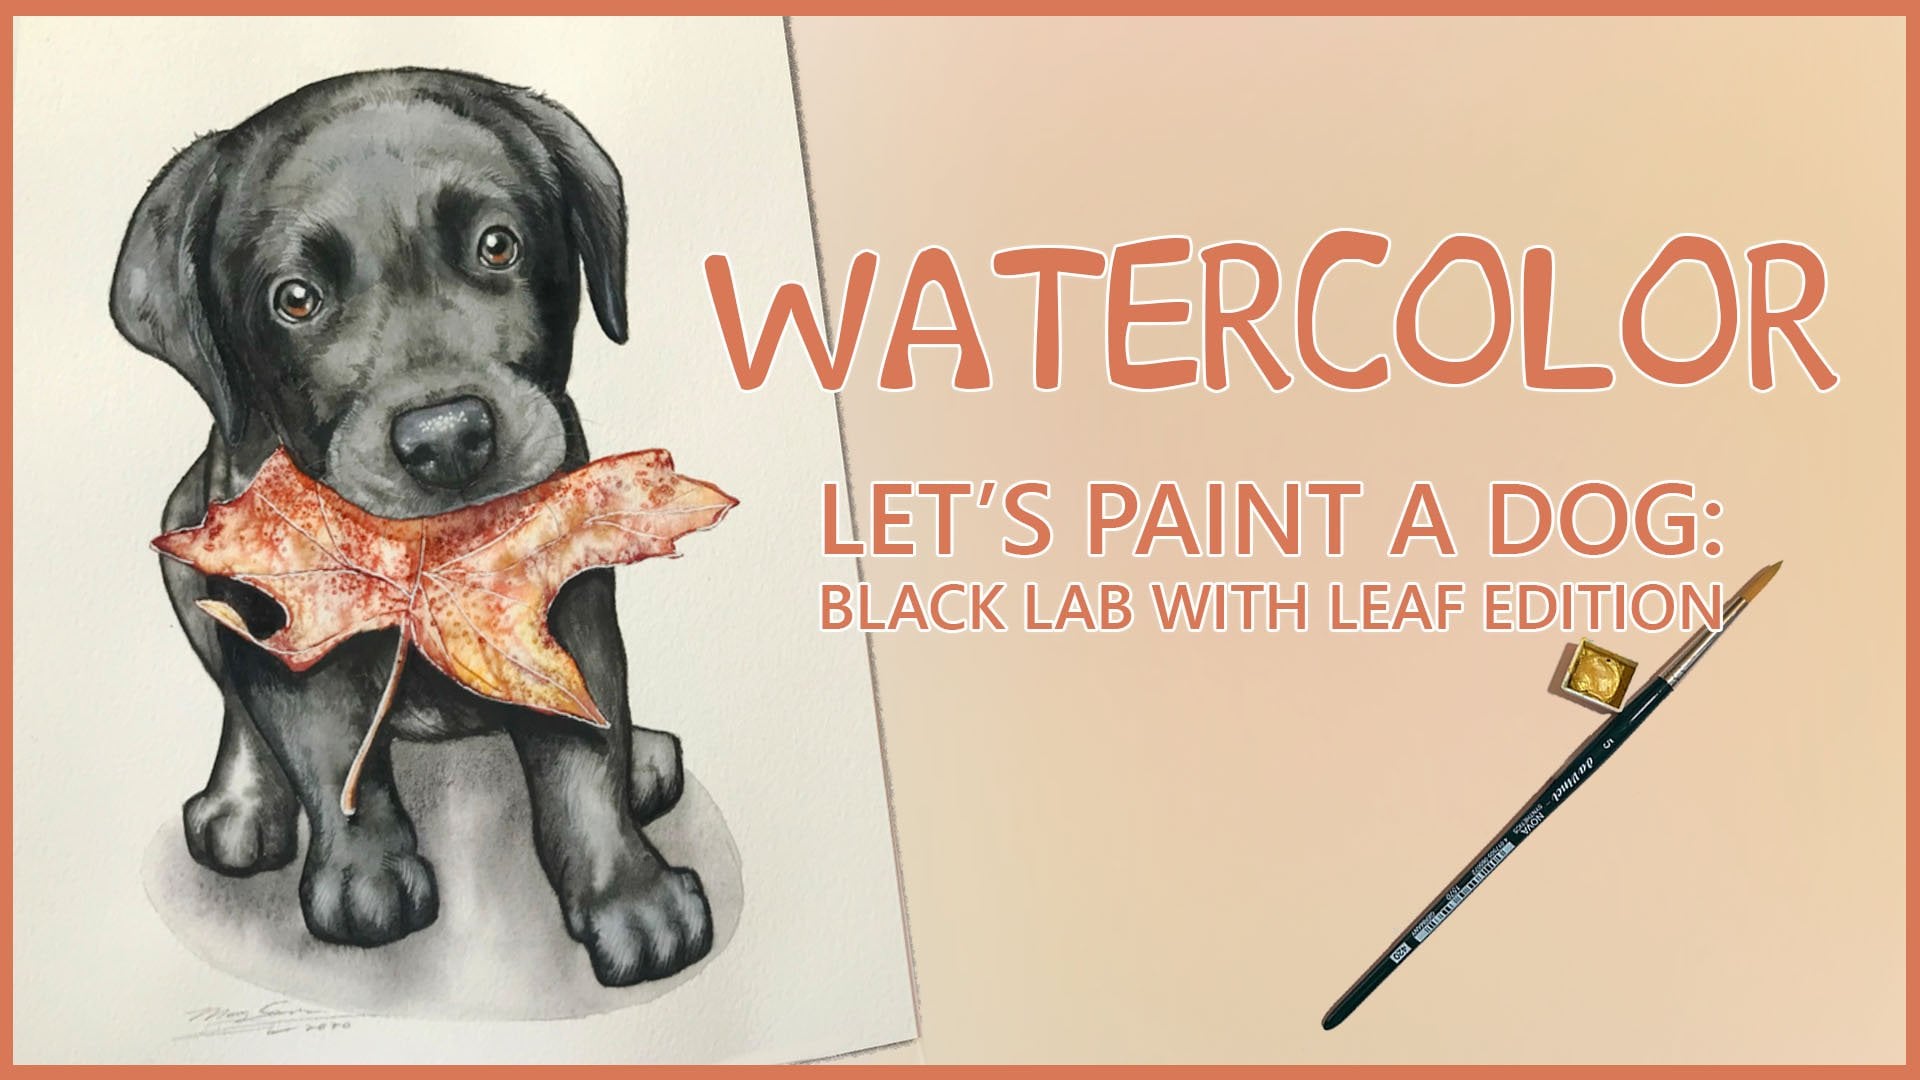
just experimental phase. I am going to be offering. We're gonna do a White, mostly white bagel with
some partially brown ears. I think they have big
speckles on them. And I'm hoping that will also
help you understand what the whites and how
the shadowing works. Or shading. Shadowing. Shadowing sounds cooler. Let's go with shadowing. Okay, and then if
you want to pick up a little bit over here, you can with that paper towel. And I do have this a little bit creamy color just because I mixed more. This go around. Particular one now
I'm looking at, I'm like actually kinda
darker because it has the little part
that kind of is in, in front of the layer behind it. Make sense at all? If you want to maintain
your highlights, you want to go that route. So I'll say Fur, want to take some of that up? Tick paper towel and dab away. Now if you have picked up
some white gouache as well, you could always go
back in and add it. I do know that if whitewash
is not on top of a color, it doesn't quite read as white as the white
of the paper does. So that's something to bear
in mind as you're doing this. Yeah, we'll just say
challenge yourself on these. Two, either interpret the
outlining or to look over the initial photos and see how that brings your painting to life as far as the
shape and the size. Add depth as you want. On this one. You might even add another
tone if you have a brown, you might even experiment
with a little bit of a light sepia color for
some of the shading. That might work pretty well. We're gonna move on
to the next one.
8. Painting Long White Fur: Let's move on to number five. We are going to just do the
same type of technique. Let's see. Do light brushstrokes
to begin with, smooth sweeping motions are
needed for this type of fur. Remember Paint shadows. So I'm going to
bring that up again. Paint shadows. So if you're doing this
and you're like, Oh, that seems really dark. Wash off your brush, dab it off on paper towel, and do a little
bit of scrubbing. Give it a softness to it. And you oh, okay. Well, that's better. Okay. So again, sweeping motions. Think sweeping motions. It helps. Give yourself visualization
of what you're doing. Sweeping motions. And again, if you need
to soften it out, just do a little
bit of scrubbing. I know we kinda moved
on from this one, but as this one is drying, I could definitely see going
back into it once it's dried and add a
little more depth if you want those
fur layers to pop. On. This one is still going with that buff titanium
and the peach black, but I almost want to do
a little bit more of the peach black on this one. Again, you could
experiment with Payne's gray and see how
that works for you. But again, bottom of
the curl, it's darker. Top of the curl is darker. And we're just going
back-and-forth, back and forth on this. And I'm just beer, cheerleader. As you go through these
warm-up slash practice, give yourself a little,
little confidence booster. You know, you have it in you. And on this for whatever
reason interpretation, I feel like I get a little
wild with the curls. So this one really looks
like it goes down, folds down like a piece of ribbon almost, and goes across. I'm not sure that that's
exactly the way it is, but in my brain, that's how it turned out. So welcome to my brain. Okay. So again, if you
feel like that's too dark, just wash off your
brush and fade it out. I actually, I'm going to fade
that out a little bit and I'm a scrub it and then take my paper towel and do that. So this one's a little bit
of a shorter feel like a little bit of a
shorter practice. Just because you can take
it, you can take a deep, you could take it a
little bit lighter. You could outline with a little bit of
watercolor pencils. I've seen me do that if you've
done my tutorials before, you know that I like to finish off with watercolor pencils. So that is something also
to keep in your mind. You could finish off the
edges with an actual pencil. That is also an option. So I wanted to keep this
Sweet, Short and sweet. So maybe you might
pick one of these as a warm-up and just roll with it and just see where
that leads you. Something. Just to keep in mind, we're just working through the
motions of the firm. So let's move on to number six.
9. Painting Curled White Fur: Okay, on number six, we're actually getting
into a little bit darker. I kinda wanted to
get a little more bold with the contrast here. So especially on this area, we're looking at a
deeper contrast. So okay, so that's
where that swooping. And then I'm actually
going to take from that and I'm going to pull, pull the bottom
of this curl out. I hope you can kinda visually
understand what that, what that's creating
as far as a shape. And if you want, you gotta
be careful about your washes because sometimes they get a little crazy pants
and then you go, what did I just do? So we've created that curve. Like that's gonna go. I don't know how to
show you with my hands, but that's curve. There's a curve. If you need to add
to the top of it. Wet on wet technique, you now have that shape. So I'm going to
continue on down here. Just creating those
curves if I want, I've got wet on wet right
now to create a softness. Now this particular picture
I snagged just because I really like this
little corollary here. I think it's cool. You're trying to create
a nice little curl. And there's actually
a piece of fur that comes on top of that. Then trying to think there is a piece of
fur that kinda comes up and over here, but we're going to blend that in just a little bit, dab it. So as if that piece goes
under C and this is, this has become
lighter as it's dried. So that's something you
might want to monitor as well as your painting as you go. Oh, well, I thought
I had it just right. Well, by the time it dries, it might be a little different. So keep that in mind. All good things to
be thinking about. Can base, base, base, base. If you want to soften that up. Like I probably still have hope little bit too
dark and my brush. Just gonna pull that
up, up, up, up. And then we've got these, these bits here
like this little, this little piece
here, swoops down. So this is gonna be
the darker area here. And we're going to
have here, here, here. And then this is
actually a little bit of a curl here that starts over here because they're not actually included. There's what I like
about this one to users, this little crazy
little swoop here. So it kinda has this little
almost S shape to it. If you will keep in mind. I've said it several times. Each time we go through this painting shadows,
painting shadows. That's what you're looking for. When you're, when you're
studying the Photo, you're looking for shadows. You're looking for those
areas that you can add. A shadow too. You can keep that
area nice and soft in like can we kind of a tone? Dab, dab. Again. Some of these areas I could
get really particular about. But we might be here for awhile. So I really am just
trying to show you the basics of White
Fur painting. Trying to keep it simple, encouraging, easy to follow. Like I said, if you want to take your areas where you want to add a little
bit more depth to them. You can certainly go there. So like this top one
if we wanted to add. So it kinda looks like there's this curl here on
top of that curl. And then this one wraps around. You've got this nice
highlight here. Then we've got some
more depths over here. Because there's a piece of
fur wrapped around like that and there's one
coming from over here. There's a lot going on. I'm sure looking at the photo, you're going what is happening? Focus on the shadows. I'm gonna come over
here and give us a little console close-up. So again, go to the base
of where the curls are at. Here's that little swoopy, that little S shape their go to the side
here just like that. Up. You can always add to this can create more
depth and more depth. If you feel like that curl there is coming
out from that one, you can create more depth. But if you don't
feel like that's the case, then don't do it. Says your painting up
to do what you want. I'm just here to facilitate a little encouragement
and guidance for you. So hopefully that has given you some ideas on what to do
to create some depth, some shape, some
texture on all things. For White Fur, gray
For cream colored. All the Fun things. Experiments is you could take a fine liner and outline
the edges of fur to, to create a more
illustrative look or a graphic design
field to this. So I would love to
see your experiments with all of these practices and be looking forward to
our next class very soon where you can implement these techniques into
a full painting. Happy Painting. Keep going, believing in yourself and just
keep moving forward. We'll see you next time.
10. Share Your Projects!: Congratulations, you've finished
all six of your lessons. I hope you enjoyed the process, gave you something
to think about, got the gears turning
maybe a little bit. And hopefully you have a nice completed
sheet for me to see. I would love to
see these photos. Feel free to upload them in our discussion so that
I can get back with you on a critique if
you would like it. So I do hope you
remembered to do what the sign says
behind me here. And we'll be getting to
our next lesson soon. Alright, thanks
 Mary Evelyn Tucker, Full Time Artist & Coffee Aficionado