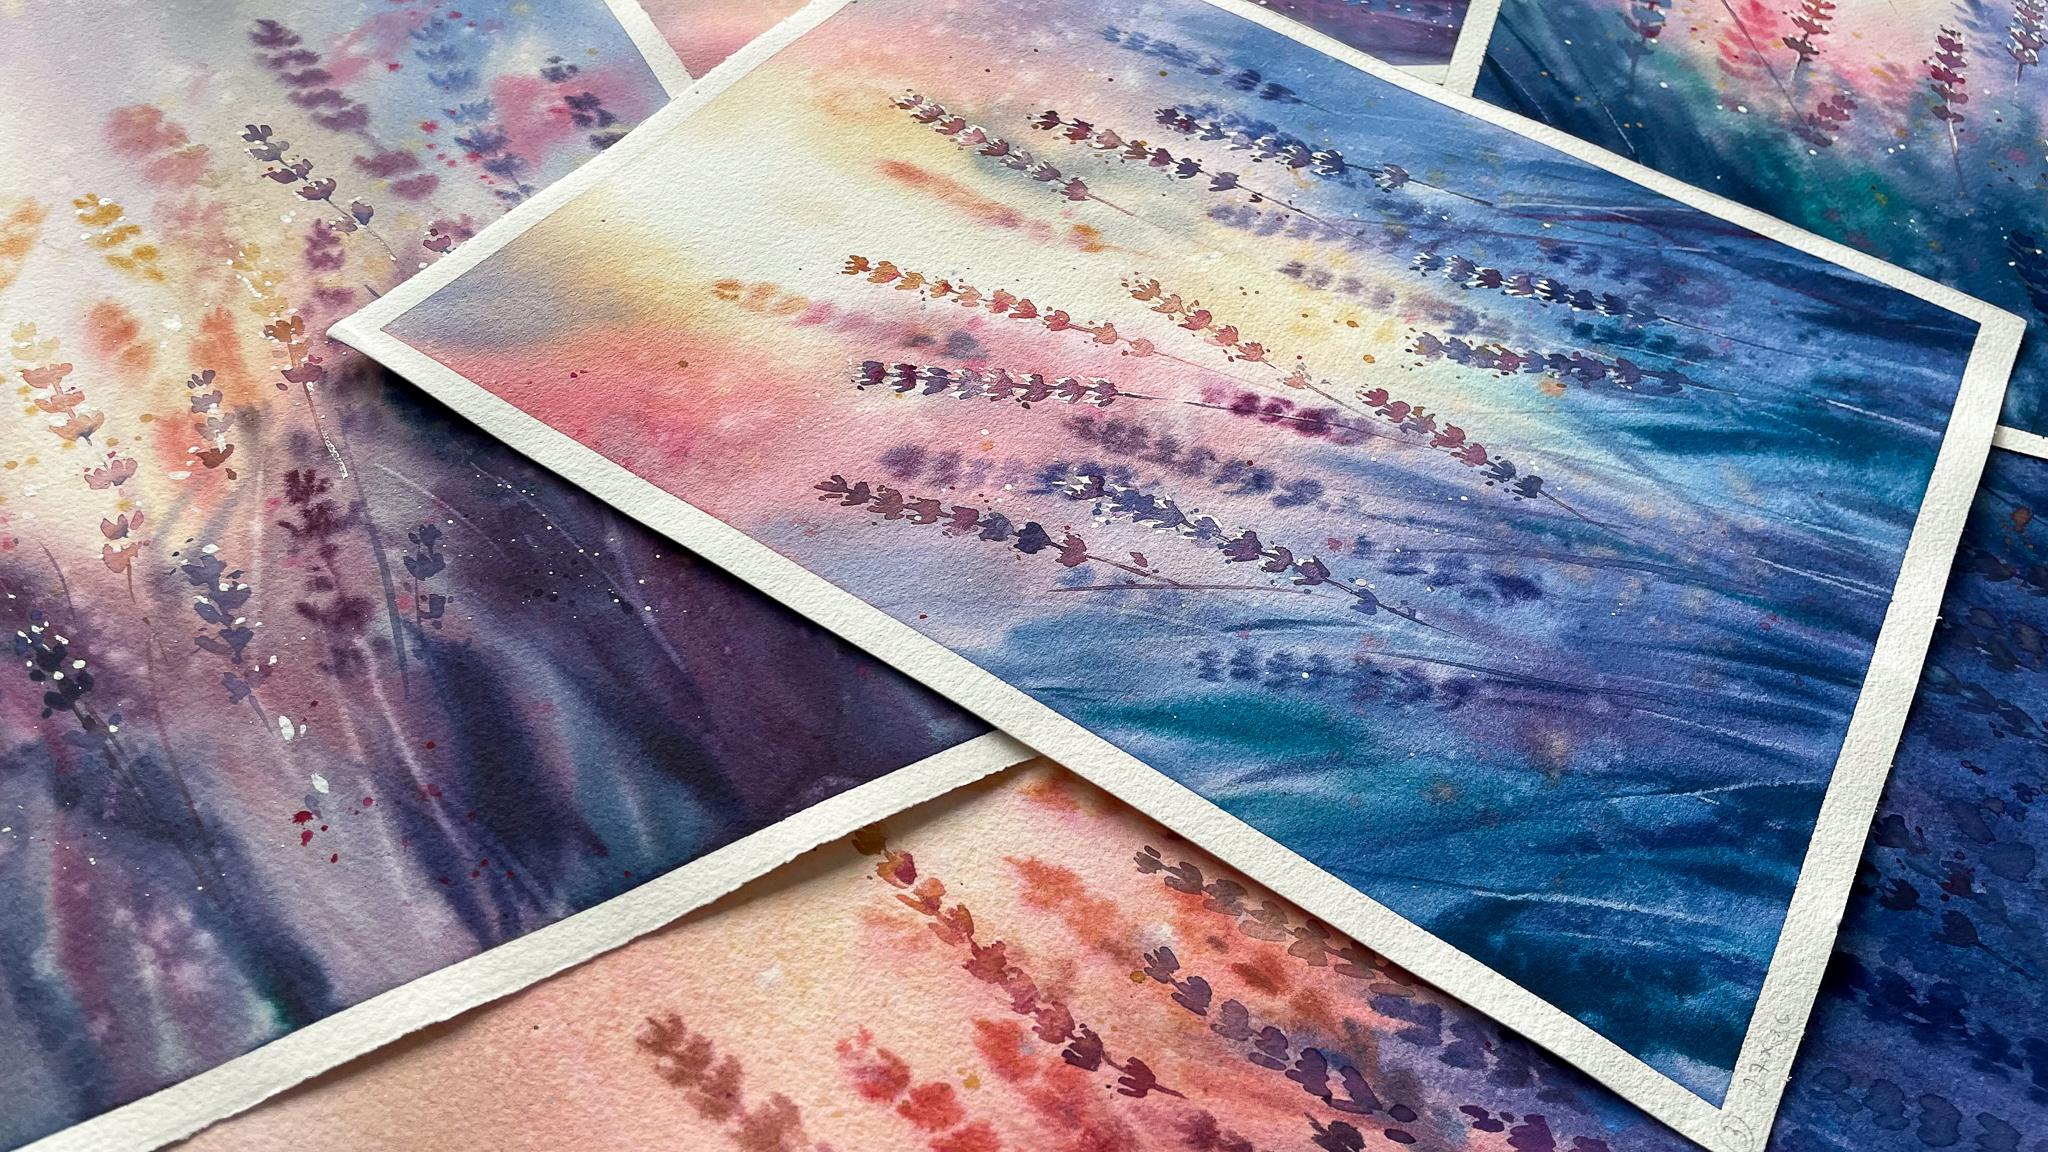
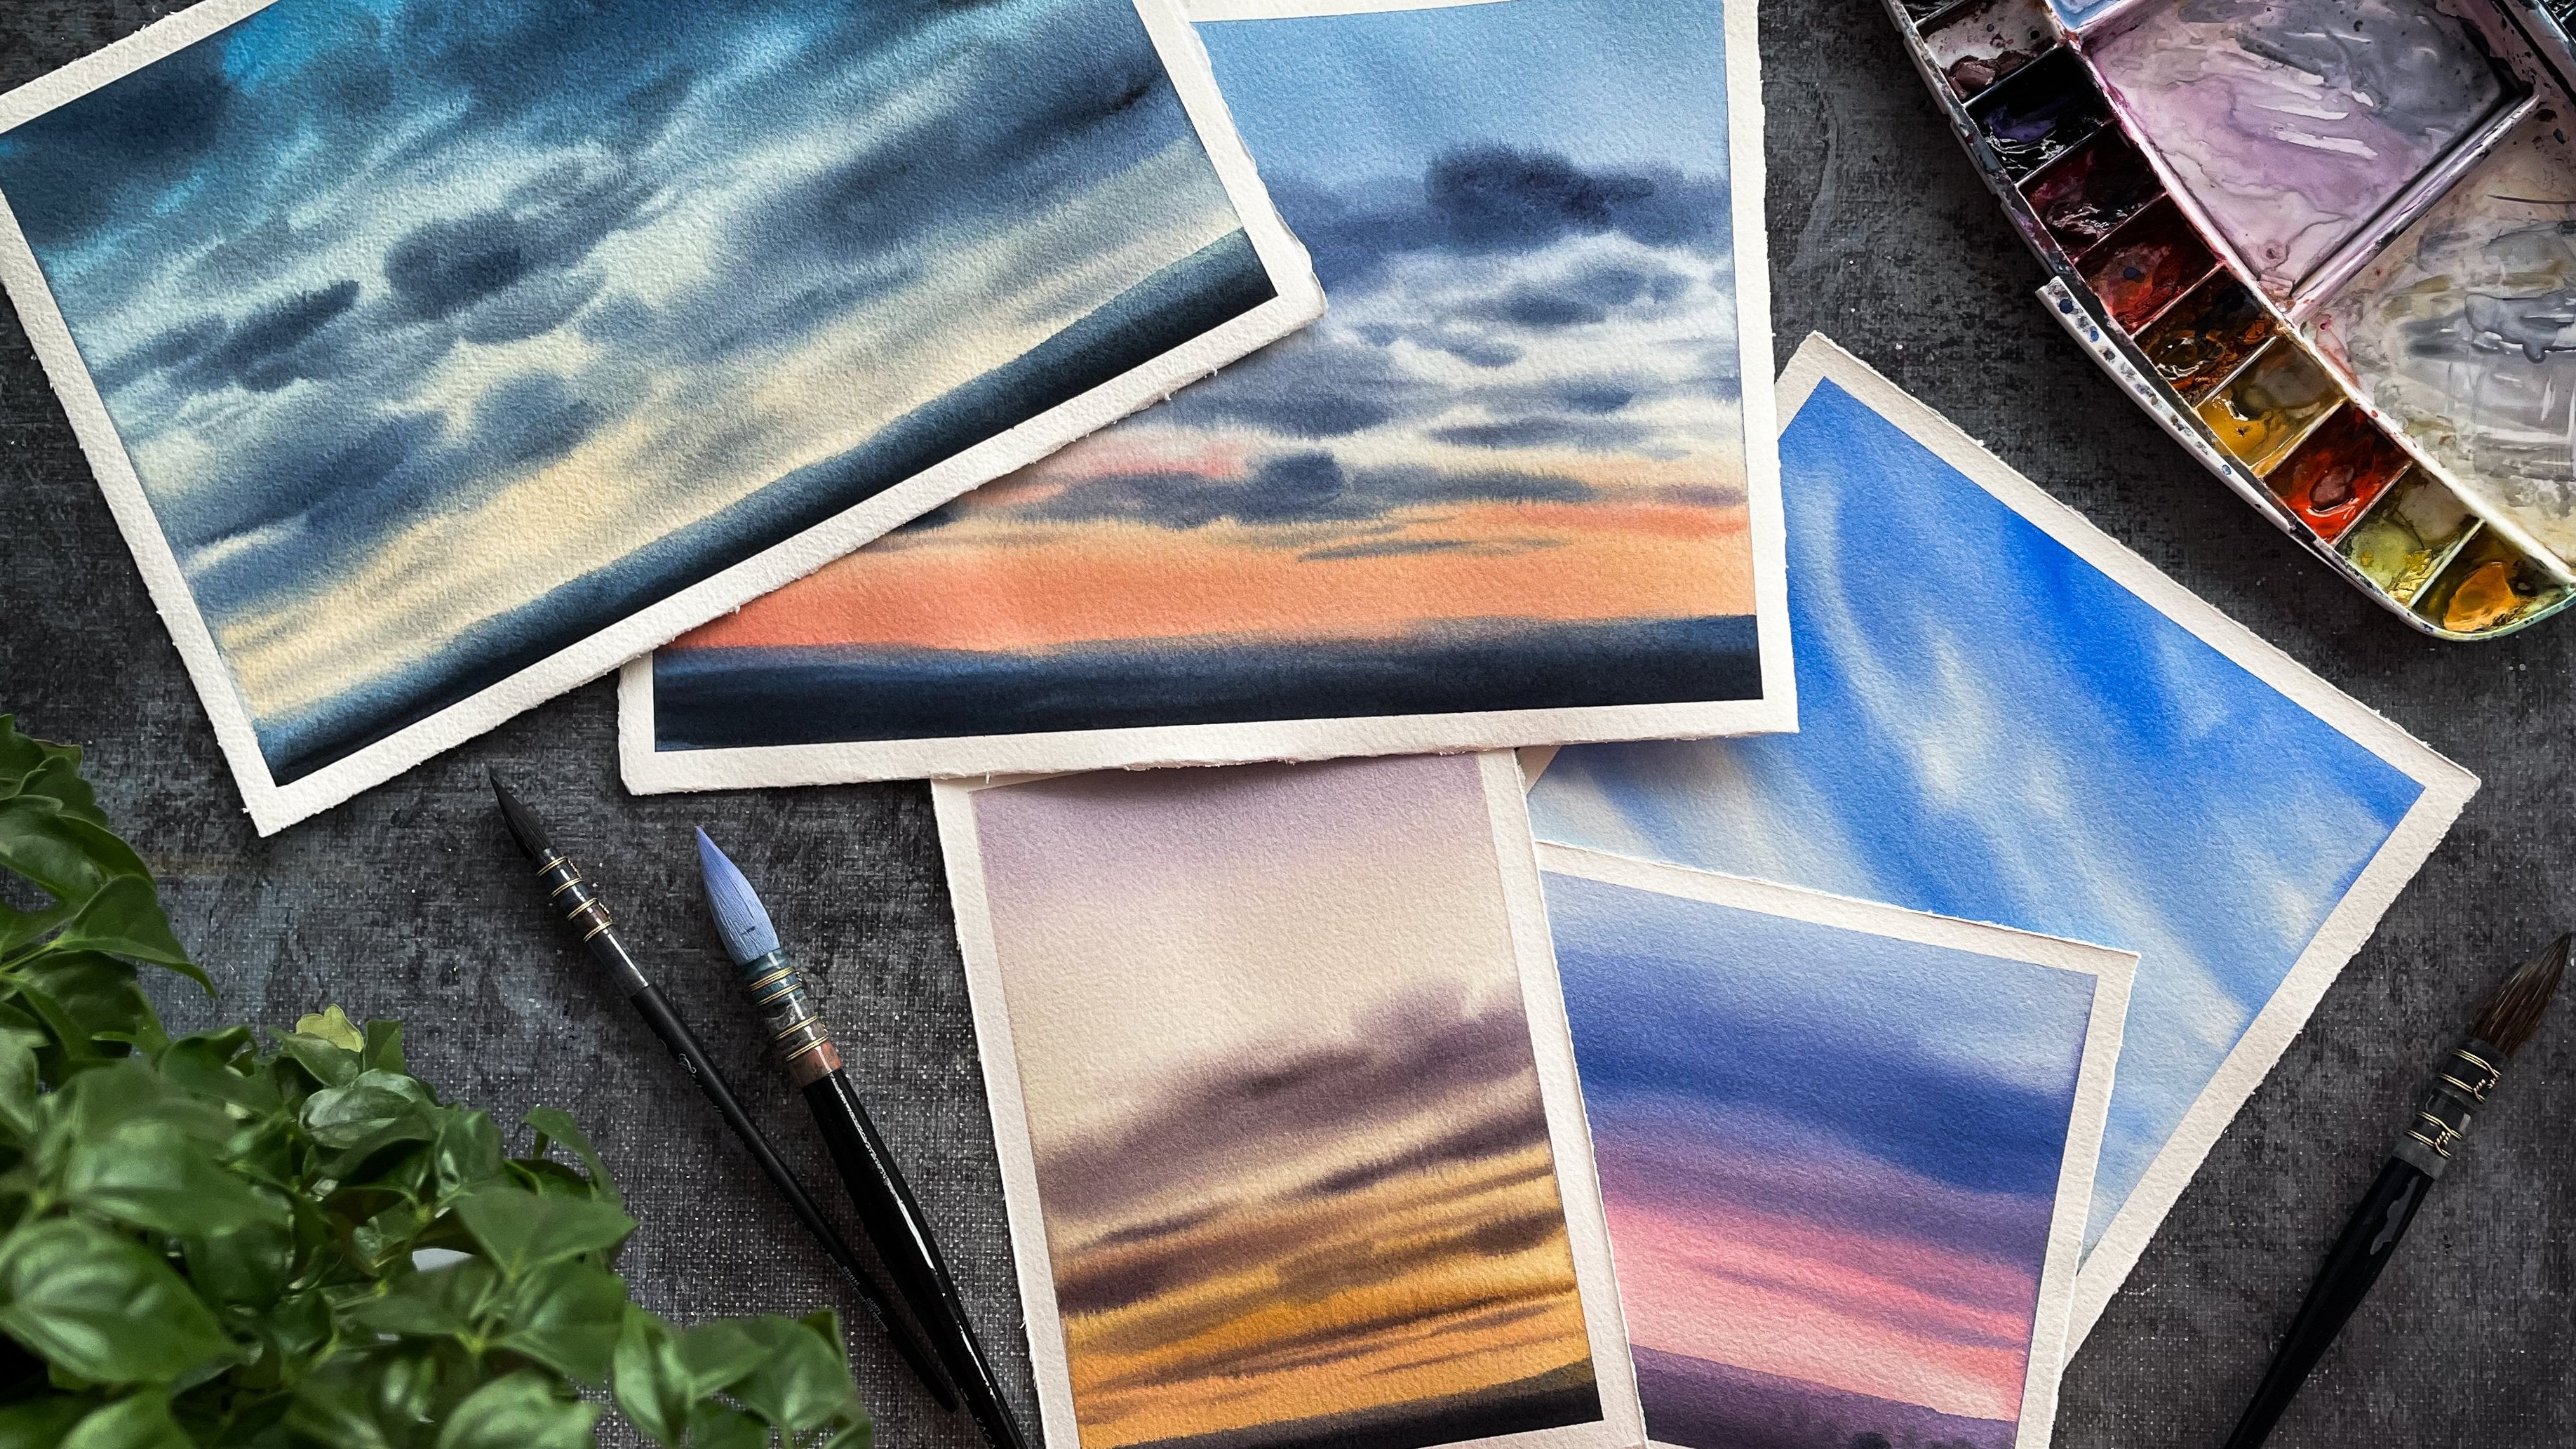
Transcripts
1. About the class: Are you a beginner in
watercolors and looking for a nice occasion to
discover new tricks. Or you unexperienced
watercolor is to seek into refers
to the basics. Here on the right track. Hi everyone. I'm erasing them over a watercolor
artist and instructor. In this video tutorial, I invite you to paint
with me in watercolor live under Picture using
several different techniques. To begin, we will
talk about one of my favorite color
combinations and you will see why all these colors
work well together. Next, you will
discover how applying masking fluid serves to create a backlighting
effect on flowers. You don't have this special
liquid, no problem. I will explain how you can do a similar plot without using it. And of course, you will discover a step-by-step demonstration of the picture creation process. During our practice, we will pay particular attention to water and pigment
quantity control. I'll also explain to
you my technique of creating simple and
lose lavender flowers, both on wet, on dry paper. Lastly, you will
learn what helps to make a nice light
effects in the painting. So in the end, you will be able to
combine several techniques in your own colorful
a vendor painting. Join the class and
enjoy what occurs.
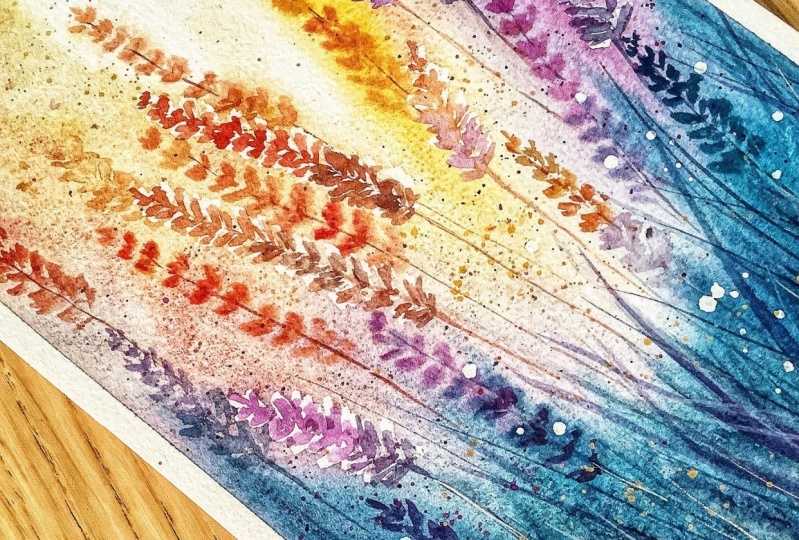
2. Masking fluid: Here I suggest you to
use a masking fluid to create this kind of glowing
edge of the vendor flowers. Not for all of them,
but for a few. Some of them, especially
in the shadows, they will be just painted
on the dry surface. And there are some that
will be done on wet. And on some of them we will have this white outline done
with the masking fluid. Another, maybe not. Everyone has it and it's okay. Those of you who don't have it, you just skip this step and go straight to the
work on the wet. But nevertheless, I
wanted to show you how it can be applied
to the real piece. So let's try it. I took cotton paper,
300 grams density, and I stuck it to the board
with the masking tape. And it's of course still dry. And to start, I will
apply masking fluid on the areas where I will draw
the eliminated flowers. My masking fluid is in
the bottle like this. Then I myosin my brush and I add a little bit of
liquid soap here. You also can actually
use just regular solid. So I lightly solve
this brush too, so that the hair inside
our field with it, this will help to
protect the brush. Now, I'm going to
put the liquid on the brush and draw
the future flowers. I plan that the light
from the sun will be somewhere in this area. Here will be the main
focus of my attention. So in the same area, I will probably begin to bend the vendor Florida. It's enough just to touch
the paper with a brush. I, I don't really
draw each line. I just drew prints like this. First, I mean the
Florida themselves. And then I add a
thin line of a stem, not apply the liquid to thinly and not to
seek they either, that it doesn't take
too long to dry. I already have my first flower and I'm going to keep it up. I will try to do it a
little faster to save time. You can also add dogs
like this next to it. There are different kinds of
the vendor you can search on the internet and choose
the one you like the most. I usually draw them like this. It's a little bit styled. Now we'll just keep
drawing my flowers. So I drove a little
bit more somewhere. I'll little bit less aware. You don't have to paint
them all the same length. If you don't have masking
fluid, it's not a big deal. Just skip this
step, I remind you. Next, I will tell you how you can still add light
to the picture. I also really like to add random splatter drops like this. You can make those with
masking fluid as well. So this plots will stay white
after we apply the paint. And I especially like
them near the flowers. But don't make too many of them. And I'll add another
little flower here somewhere. I added the beginning
of the tweaks, but I didn't paint the rest. And immediately after this
work, once you've finished, please wash your brush in
purpose not to damage it. It's important to let the
masking liquid to dry. Now, you will see
that the fluid that I use changes the
color from milking green to clear green
when it dries. It may be a little bit
different for yours, in any case, just dried well
before you start painting.
3. Color palette: While the masking
fluid is drying, I'll prepare the colors I take for this this
synthetic brush. I already know my
pallets well and that these colors will
go well together. But I recommend you
not to skip this step, especially if you're
just a beginner painter. Mix the colors with each
other to see what effect it has and to avoid unpleasant surprises in
the process of work. So I take Naples yellow
for the light parts, kinda krypton while it rose. And you can replace
it with magenta or another quiet called pink color. And it will give a nice
peachy hue mixed altogether. I'm going to use them
in this light part. Then I take ultramarine blue, it gives a beautiful
purple with this pink. Or you can even use a
pre-made purple if you want. I will also probably use my favorite inventory
and blue in some places. And also some turquoise color. Even mixed with pink, it will give a beautiful color. It will not form a brown
but a grayish blue hue. And you can replace it actually with emerald green for example. You can also use something
else instead of Naples yellow. But just check how it mixes with other colors before you
will start working. I will also use one of those
two light blue colors, either red, blue or Cerulean. And don't be afraid to experiment even if you have
the most basic palette, just choose called
shades of each color. And then there will be less risk of getting
dirty colors in the mix.
4. Background layer: The background consists of soft transitions and
printing colors. And in order to get this effect, the paper needs to
be pretty moist. And to do this, you can take a big
brush or uses prayer, or come up with your
own way if you want. I will do it with a
wide natural brush. I will speed up the video
so you will not divorce. But keep in mind that this process can take
a pretty long time. I removed the drapes on
the sides of my paper. Then I take a square
brush and immediately start working on the wet
with the background. One of the main
goals and working on this background is not
to lose the white, because white paper is the lightest thing that
we can get in watercolor. And it gives us a
sense of luminosity. Even if you paint
everything pale yellow, it won't be as
glowing because it reduces the contrast in tone. So we tried to give
this pattern painted. You can have it here or here, but makes sure that you keep
some white blank paper. You see these things spread pretty quickly because
I use a lot of water. And the paint here is they're immobile and we'll use that. Now again, two of the tablet
to help the colors blend. I now add the light
blue paint to my mix. You see I checked
all my paint mixes before I started and I'm
already confident and know that even if I now add my light blue
button next to the yellow, I want get any ugly green color, but quite a beautiful shape. That's why I like this palette
so much for this subject. Next, I mix the ultramarine and these opaque paint so that the tone of the
bottom will be thicker. Now I'm trying to cover the entire surface
of the paper with at least a little paint to keep the whole surface evenly wet. This will allow me to
work longer on the wet. I put warm colors
around the light. And as I move away
from the light source, all the colors will get cooler. I still leave some
white spots here and there for an
extra glow effect. We'll see if I'll keep them and let the paint flow
and mix freely. And I will continue to add more denser pains at
the bottom parts. I now take turquoise, blue and I can also
add being why not? I want to darken
everything a little bit. Verbal also means as well. It took quiz or
even emerald color. So I do the tablets to let the
paint flow down like this. And work with us grill brush to have a lot of
liquid on the paper. Slowly I begin to add pressure movements in the
direction of the leaves growth. And all my flowers are pointing like this
in this direction. I tried to stick to this
direction in the grass as well. I remove excess water from here so it doesn't flow back in. I take more turquoise
now to make the paint a little bit greener. And during all this time and constantly watching the
state of the paper. Here, the surface of
the paper is now evenly shiny and it's not dry yet. And I want to have
time to paint on the wet here and Tobago to add some flowers in
the background here. While the bottom will still be wet because I just painted here. So now I will do the
flowers and top first.
5. Background flowers on wet: Alright, while the
vitamin is still wet enough and the top
will soon be dry, I will paint the
flowers in this part. I take a smaller
brush and start with the area where I started
to do the background. There are warm shades here. For the white or
yellow background. I'll take almost pure yellow. Or also I can add a
little bit of pink to it. I use a small synthetic
brush so there's not too much water in it and
it doesn't bleed too much. And just in case I leave a little extra water on the
napkin touching it like this. And in the same way as I did
with the masking liquid, I'll paint with the color now. If it spreads a lot, it means that there is too
much liquid on the brush. I will change this shade of
painting a little by little. And I will paint the
beginning of the future stem. In this light area, I
will add another flower where the background
is completely wide. I will take more yellow
paint and as it goes down, I will make it more pink to match the color of
the background. The background becomes
colder and darker. I also make the flower
itself cooler and darker. It's not necessarily bad, it does give the
effect of light. Then I take thicker colors. This time there will be more blue because the green shades I used for the grass
and now I make flowers. And the vendor flowers
are rather purple. Lavender color. In areas
with cold backgrounds, my flowers will be dark
and almost purple as well. I make sure that the
paper in the areas where I'm working is still shiny. If the paper is already dried, this stage don't do
anything in those areas, the effect won't work. And you might get the fact that flowers not being
painted in time, but not the good flowers. Better. We add
details and flowers later with a second
layer on dry paper, rather than just
ruined beautiful south background
that we just made. And I continue in that manner, I will speed up the
process so you don't get bored the whole time. The paper in the areas where
I'm painting stays shiny. And if I see dry areas, I just don't touch them. I'm constantly changing shades to make the picture
more interesting. Now I can add details
that look like stamps. Notice where I start
to draw this line. It starts from the
outside of the paper. I usually try to make
the colors darker so the air with delights
is more contrasting. To get the effect of glow, just leave the white
lie is not enough. We actually also need to
create some very dark zones. Notice that the direction of the blades of grass
mostly goes like this. But I do sometimes some of them differently to make
them look more natural. But I don't cross all of them. In the places where the paint
is already starting to dry, but it's not shiny, but still a little bit wet. At this stage, I like to add some splashes of clean water. And at this stage the paint is already a little
fixed in the paper, but it's still movable. So when I add drops of water, they make the pigment move to
the boundaries of this job. And in the areas
where the light is, they add this kind of magic. You can do the same
even below if you want. I also will add some yellow
droplets at the bottom. And the top as well. I use a thing, synthetic
round brush for that. Now we can add pink
as well. Why not? I purposely waited
for the paper to dry so that the effect
would be noticeable. If the paper is very wet, the paint will just flow
back onto the drops. And if the paper is too dry, you just want to see
the effects clause if you work with clean water. So just practice and
overtime you will understand at what point you
need to add these drugs. Some of the dots and details can be done manually, of course. You can also try adding a lights grass effect with the barely damp brush
and clean water. The principle is the
same as with the drops. The clean water will push the pigment and
give light lines. The purpose of all these effects is just to diversify the area. Try not to make them choose
systematic and variety, shape, and size of the details. You can also add dark drips. I'm going to add some dark
shadows here and there. A long hair brush also can
be used here. Why not? It's important that the
dry your paper gets the dry your brush
should become as well. Here I almost don't draw sticks. All the graphic elements. I, I keep them for
the bottom parts. The last thing you can add is to scratch a few lines with an
old bank card, for example. It looks especially spectacular
on a dark background. For these, the papers
should also be at an intermediate
stage of drying. In the paper is very wet, the paint will flow
back into this trips. So just try it. And now I can dry my paper
and proceed to the next step.
6. Removing mask: Now that the first layer
is completely dry, I need to remove
the masking layer. I use the side of
my fingernail to do this and I don't
scrape like this, but try not to damage the paper. You can also do this with
an eraser if you want. And I'm doing it by hand today. At this stage, we see if we succeeded to create
the glow effect. Now little white elements
will only reinforce it. I removed the remains and
they check that there is nothing left and we can
move to the next step.
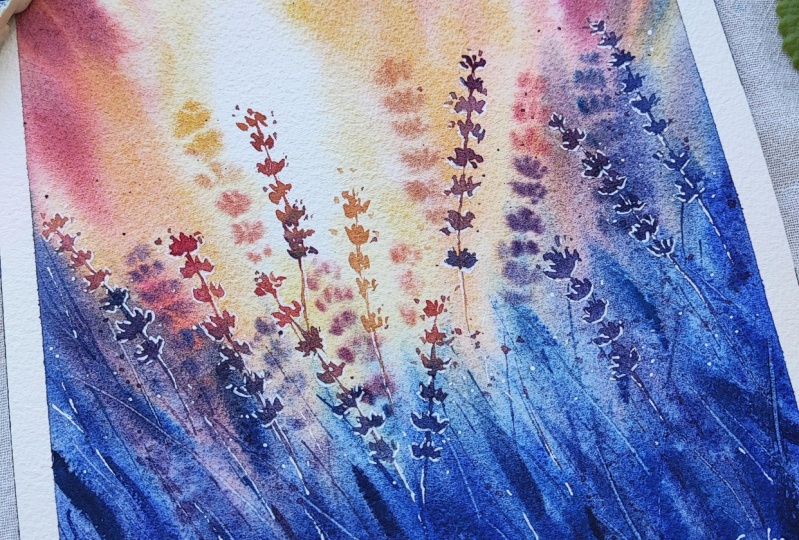
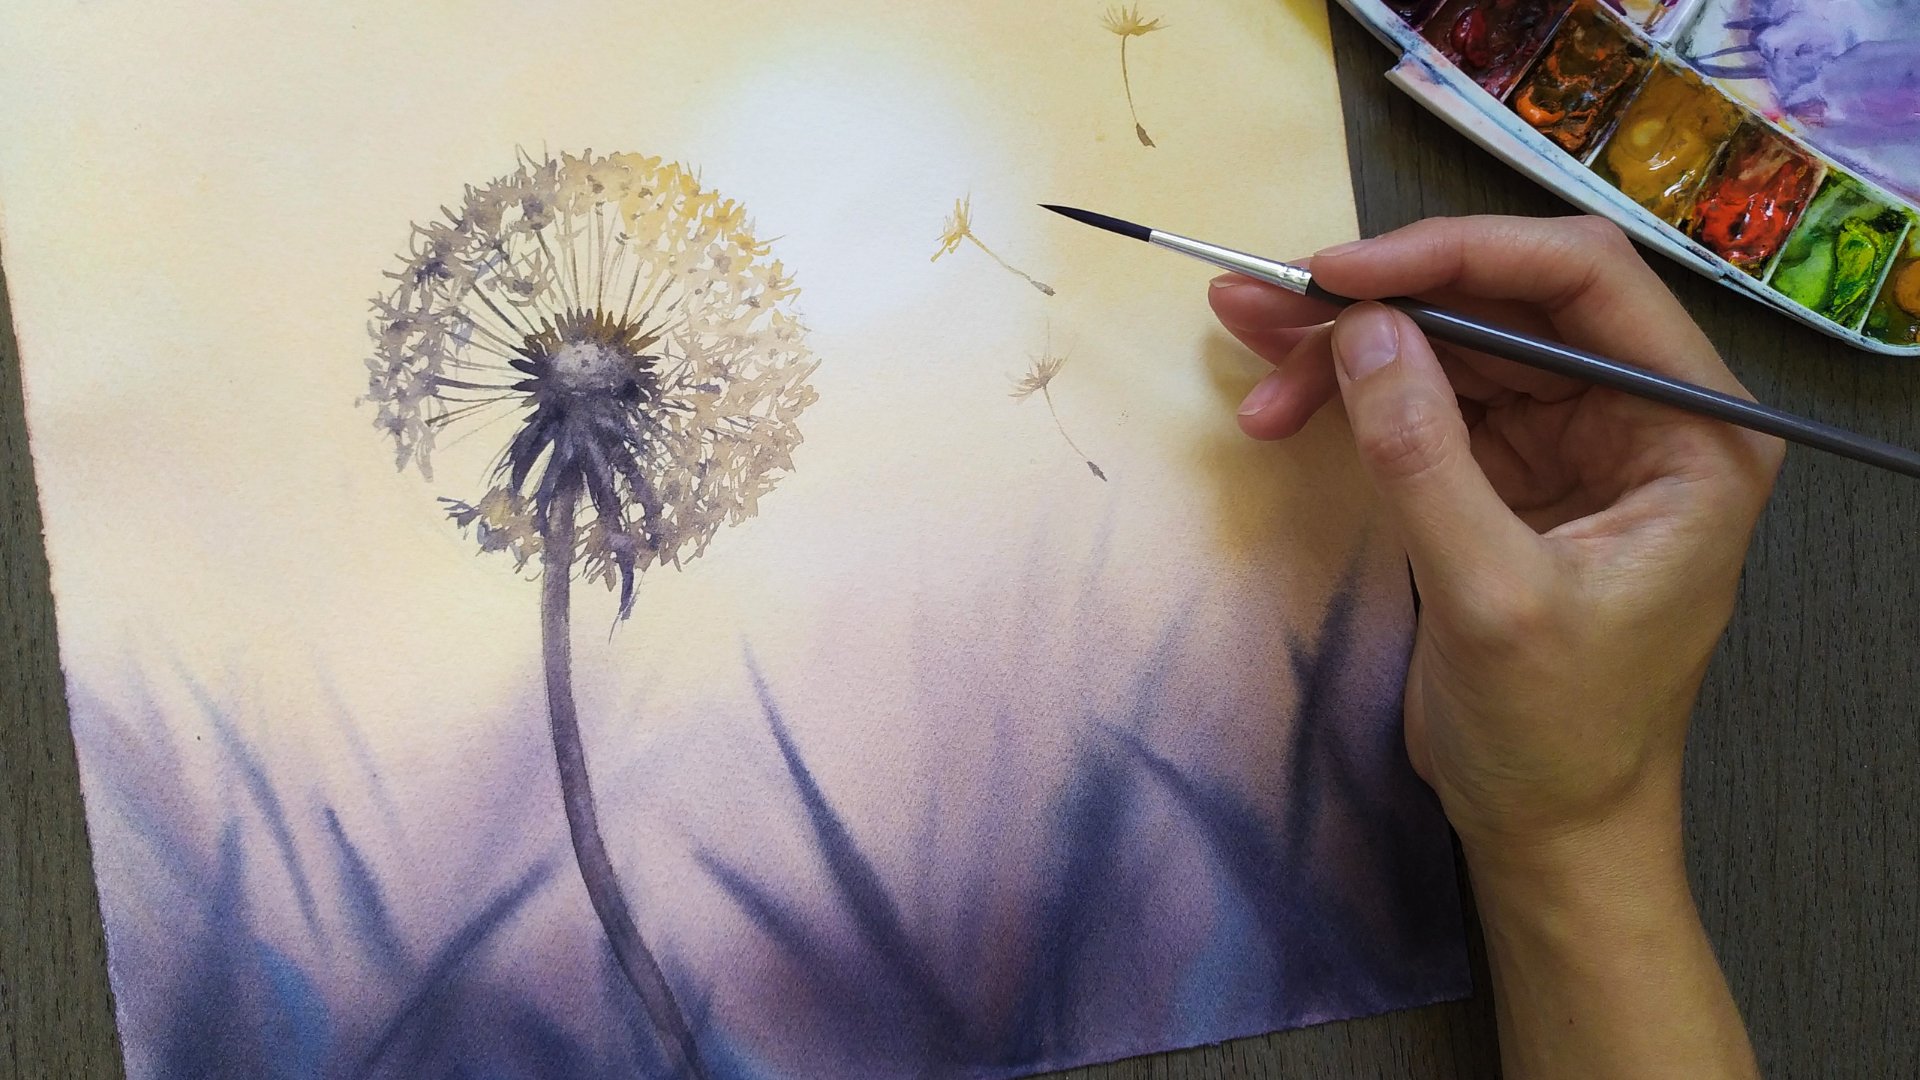
7. Highlighted flowers on dry: Now my task is to
add a shadow part on top of my flowers
with a light outline. Let's get started. I take
a synthetic brush for this job here as well. And in the previous step, I will follow the background. The background is light. The flowers will be
lighter and warmer. And the further down
the flowers will be, the cooler and darker
will be those colors. The paint will be quite
thick but still liquid. See how much water
I put on the brush. This method allows
you to get parts of different colors that look
like a single watercolor spot. It's not necessarily bad debts the technique I use
for the subject. And to achieve this, I take enough liquid
on the brush. I start with a mixture
of yellow and pink. I leave the white
counter on the back. It's not very visible on this
first flower yet because it's already on a
white background. But you will see it
further on next flowers. Here are the top I
left a white outline. We can add some more details. You may think now that these
are very dark details, but in fact here it's just
too big drop of liquid. And when it dries, it will become much wider
and much more transparent. Somewhere you can touch
up the paint a little bit with a napkin or
even add drops of paint on a different
color to make the flower looks more
interesting like that. And I add a few
details next to it. Now with a thin brush, I make the beginning
of this Tam. I do not pass it all
the way through. It disappears somewhere
in the grass. And in the same
way I continued to work with the rest
of my flowers. I tried to constantly change
the hue a little bit. In doing so, I use all
the same colors that I used for the background
except for the truck quiz. Of course. You see when the
background is colder, I make the flower
color and color. First it was pinkish
and then blue. So I added color shades
to the flower as well. And that's how I'm gone and
do all the other flowers. Sometimes I collect some paint from scenarios with napkins. As usual, I'll speed up
the process for you. And still I get the shape
of the flower is just by touching my paper
with the brush. It's also important to pay attention to the
direction of the line in order to properly compose the
white details on the stems. If the light is on
the right here, I will put the highlights
on the right side. On this side, it will be on
the left side accordingly. And as usual, I will also
add a little more paint of a different shade and remove
a little bit some Payne's. There's not that
much left to do. In the warm area. I'll take a warmer,
lighter shade of paints. Next, there is one
last flower left here. And if you didn't
use masking fluid, you are actually doing
the same thing but just on the background and
without white outlines, you will get tweaks
and flowers like this. I'll show you how to do
them in the next step.
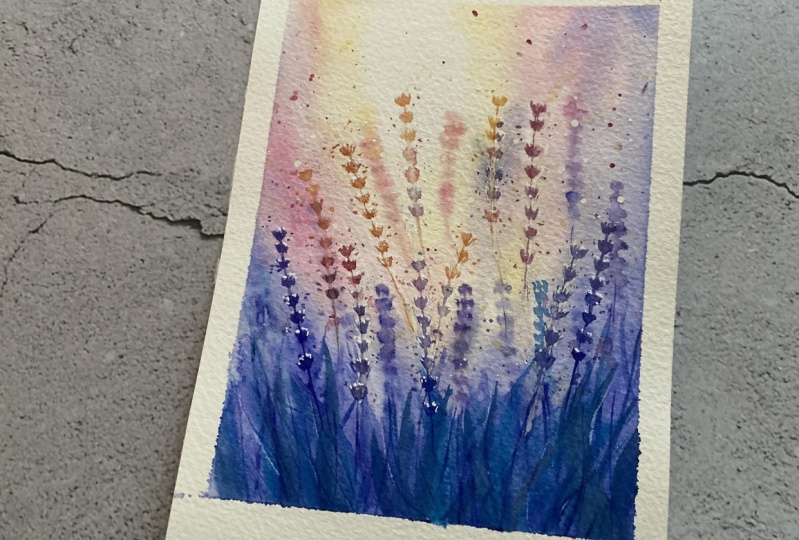
8. "Ghost" flowers: Now all the flowers with
contrasting light are done. But there are still
places where I would have added some more flowers
like here or maybe here. And I'll show you how you
can apply this technique. If you didn't use masking fluid. I mix quite dark but still
liquid paint is usual. Let's make it pink because I
will paint here and let's, let's make them somewhere
here. For example. If you don't have
any reserves areas, you can just paint, you're on the vendor this way. So let's make a stem line. Then you can take some
paint off somewhere and then it's on details as
we did in previous step. And now add some
blue flowers now and managed to do quite a lot of flowers in the first
and the second stage. So now I will not
do a lot of them. But you do based on your
own situation, alright? In general, you can take
the paint even more diluted than the flowers
will be semi-transparent. And I call them ghost flowers. Here you see, for example, they seems dark to you but
ended up quite translucent. And the same way here. You can take the paint off
a little bit as usual. I'm still using the same color. I did not add any new shades in order to
keep the color harmony. I'm looking at the
painting from afar, wondering if there's
anything else to add. I think that I just
can move to the end of our painting session. So now I'm adding just a
couple more contrasting twigs with some light
strokes of a thin brush. I don't need them too many. And I'm going to make a little transparent to me here as well. And you see, by the way, this brush works well too. You just need to use
enough of a liquid.
9. Final touches: Alright, I add some
bright jobs on dry. In some places there are ones
that I don't really like, so I clean them
up with a napkin. The same can be done
with yellow color. Here in the middle, for example. You don't need too many of them just to add a little variety. And now I take the gouache. It can be in a jar or in a
tube like mine, for example. I squish them out here on
the side of the palette. I have just a little
bit of water. It doesn't need a lot actually because then the paint
will lose its opacity. And I don't need that. Some small details on
my flowers that don't have white outlines to x
and th, the light on them. I can also sprinkle gouache, but it can be quite
challenging to do it if the paint is too thick. So if you don't
have masking fluid, you can add ly details with gouache or even white watercolor from the tube, for example. You can add some
lights to the stems. And of course, the
most important thing is to stop in time. I'm going to drive
the painting now. Before you take off the tape, make sure that your
painting is dry. The sheet will be flat
and warm to the touch. And the same temperature
as your desk. If it's still wet, it
could be wavy if we take the tape off too early. Now I'm removing the tape. And that no vendor
piece we made. I hope that the lesson was useful for you with
this technique, you can do a lot of
different subjects on fields and flowers of
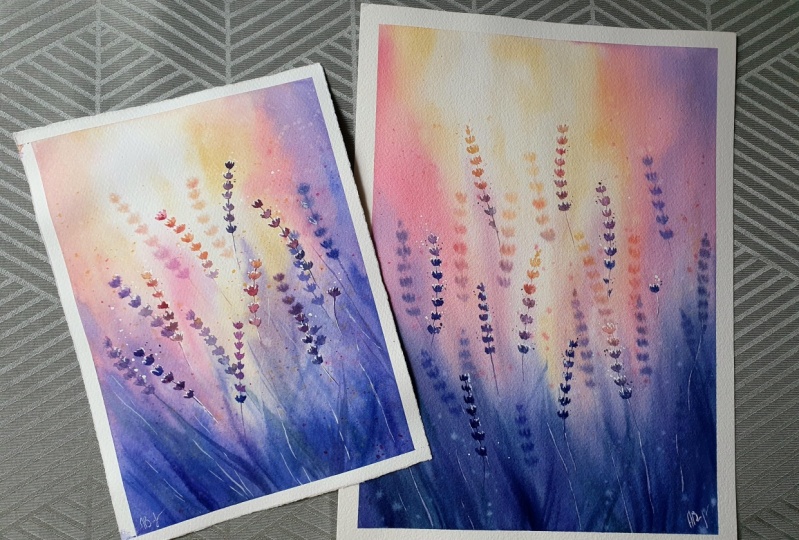
different formats. Also you saw why and how this
color palette works well, and why doesn't
get dirty shades. So don't be afraid to experiment and apply it to other subjects. And of course, don't hesitate to share your
work and feedback in the project section
on the left side and on your Instagram profile, tag me so I can see
your projects as well. I wish you the best of
luck in your practice. Thanks for watching this lesson. See you next time. Bye-bye.
 Maria Smirnova, Watercolor artist and author