Transcripts
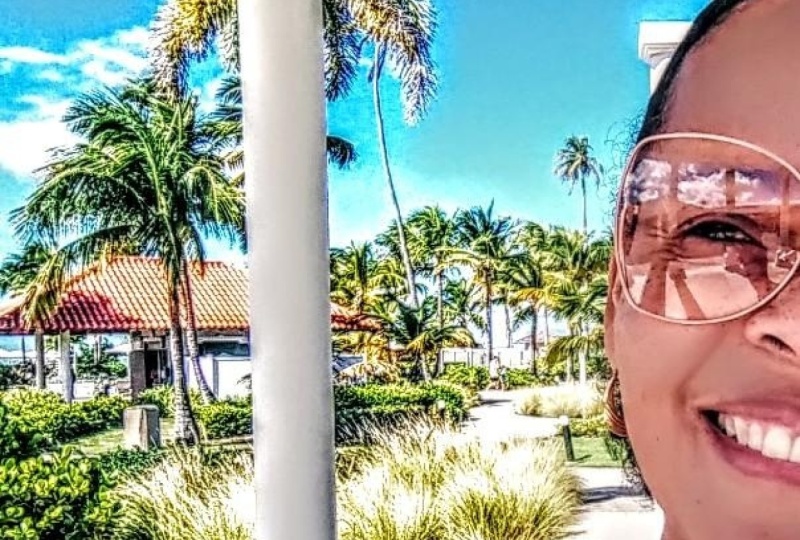
1. Introduction: Taking self portraits that are meaningful to you, can potentially change your life. Hi, I'm Jessica. I work as a psychotherapist and a visual poet in Stockholm Sweden. For many years I worked as a portrait photographer and a writer. I took commission work, editorial work, commercial work. I wrote about personal health and science. I never looked at myself in any way through the camera. I never even took a selfie. Then one day I just had an idea that maybe turn the camera towards myself. I wasn't quite sure where this was going or where it was even coming from, but 15 years of creative work had taught me to listen. When these ideas come flying into my head, just take it, do something with it, and see what happens. In this class, I want to invite you to connect deeply with yourself, through self-portrait photography and visual poetry. There will be a guided mindfulness meditation, a clear structure, to how you can craft your personal theme, and how you can write a poem. The images that came out of this photoshoot, they change the trajectory of my photography, and they even changed my personal life. It takes some courage to share these kind of images, but I'm here to guide you and support you, and I will be vulnerable next to you. I will share my process, I will let you know my theme, and I will share my writing a poem with you. Remember, you don't have to be perfect. You don't even have to be good. Just be personal and be true. It is fun, meaningful, and it has the potential to change your life, or at least how you look at yourself today. So come with me and create your own visual poem.
2. What You Will Create: In this class, you will create your own visual poem. Even though it might seem overwhelming at this point, all creative processes, they start with a lot of excitement and a lot of resistance. Remember, we will keep it simple, we'll keep it fun, and we'll do it together. There are six essential steps you need to take in order to create this poem. You will craft your theme and make it personal. You'll prepare and plan your shoot. In this lesson, we'll talk gear and location, cloths, lighting, all those kind of fun decisions you need to make. You'll take the shot, and I'll show you how I usually do it. But also, we'll go through some basic posing techniques and some mind techniques to set yourself in the mood that you're trying to portray for these very specific types of self-portraits. Then you'll create your image in the post-processing. Here you will make some personal choices and some creative choices that will set the tone for your image. Then you'll add a few words. This can seem like a very complicated process. I mean, poetry sounds so grand, doesn't it? But just one word can be your poetry. I'll show you some simple techniques to make it easy and fun to write your own poem, and then we'll share. It is an essential part of the process, and I will keep coming back to this, how and why it is. I will encourage you and invite you to share all along this process. Remember, most creative processes, if not all, start with a lot of excitement and a lot of resistance, and no wonder there are so many choices to be made at this point, so many questions that we really don't have the answers to yet. We might be looking at other people's work, and we see their end product and go, "Wow, I just can't do that. It's too much. It's too big." But those images, the work that we're now comparing ourselves to, they also started with excitement and resistance. Then what happens is you take one tiny step, you take another tiny step, and slowly but surely, you will build, you will craft your image. Decide on just one small task, even if it's picking up your camera and placing it in front of you so you can see it. These things matter. So come with me to the next lesson, and here I will guide you through a mindfulness meditation. This is what I start all my projects with and what I keep returning to when I feel overwhelmed or when it just gets out of hand. It connects me deeply to myself and to the initial theme that I want to portray. Let's head on over to our meditation.
3. A Guided Mindfulness Practice: To connect deeply with ourselves, we need to engage our whole brain. This mindfulness exercise is designed to help you do that. So find a comfortable seat. You can sit on a chair with your feet on the ground. Or you can find a spot in the sofa with your legs crossed. You can lie down. Just find a place where you feel relaxed and that where you won't be disturbed for the next five minutes. Make sure that your posture is relaxed and upright. If you feel like it, you can close your eyes, or you can just soften the gaze. Turn it a little in towards yourself. Loosen that focus on the outside world. Turn your attention towards the tip of your nose, and on your next in-breath, follow that breath up above your head. Hold your breath for just a short while, and breathe out. Follow the breath all the way through the spine, through the legs, and down into your feet, or you can feel them being heavy, resting towards the ground or the chair. Just keep breathing slowly and softly. No need to alter the breath in any way. Just keep breathing. Know that you're breathing in, know that you're breathing out. At this point, you have nowhere to go, but here. Nothing to do, but this. You can repeat the first breathing exercise. Return with your inner case to the tip of the nose, breathe in softly. Follow the breath up above your head. Stay there for a short while, and then breathe out and follow the breath all the way through the spine, through the legs, and down into your feet, or you can feel them being heavy towards the surface. Keep breathing slowly, softly. Now I would just guide you quickly through some awareness of the body. You just follow my notch. Don't have to experience anything in particular. Just flow with me. Your right-hand thumb, first finger, second finger, third finger, little finger, palm of the right-hand, top of the right-hand, lower arm, upper arm, the right waist, the right thigh, the right calf, the right heel, the right foot, the left hand thumb, first finger, second finger, third finger, little finger, palm of the left-hand, top of the left-hand, lower arm, upper arm, left waist, left thigh, left calf, left heel, left foot, the whole right leg, the whole left leg. Lower back, upper back. The back of your head, the top of your head, your right eye, your left eye, the space between your eyes, your nose, your mouth, your cheek, your throat, your torso, your whole body, your whole body. Keep breathing. Know that you're breathing in, know that you're breathing out, and just sit with a few questions that we will keep exploring later on, but for now, don't think too much about them, just bring them into your system. What is interesting to me today? How is this personal to me? How do I feel about it? How is my body responding when I bring this into my system? What is my experience of this? If you don't feel clearly at this point what it is that you want to bring into fruition your image, you might have one answer to all these questions, which is, I don't know, I feel nothing. That's an answer too. Don't be afraid of any type of answer. You just keep asking the question. You stay with it for awhile. If anyone wants to explore this a little further and perhaps stay with the mindfulness exercise a little longer, I will post the version that is 10-15 minutes in the resource section of this class. If you have any questions at all whatsoever, just feel free to reach out. I will answer your questions to the best of my ability.
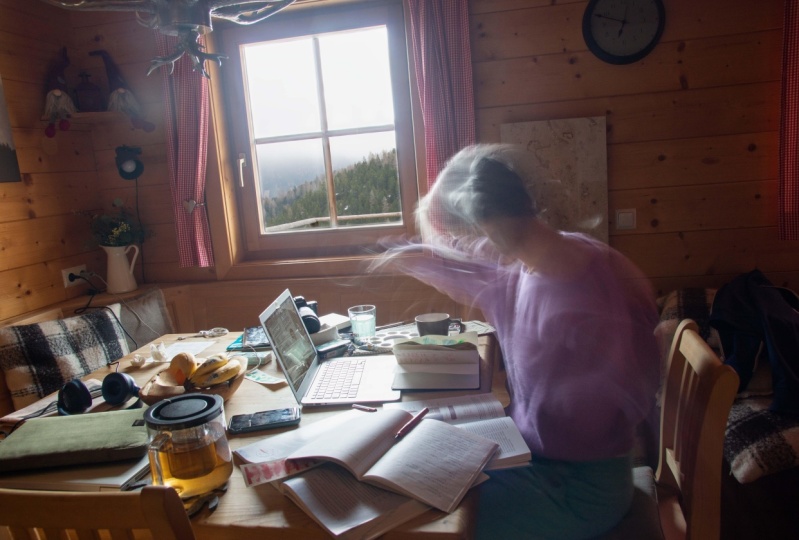
4. Prepare and Plan Your Image: It is time now to craft your theme. We asked a few questions during the mindfulness meditation and we're going to bring these questions into a more structured lay out. Start planning our image by filling out some answers to these questions. If you remember the first question was, what is interesting to me today? I feel some energy moving into my system and I think it's quite interesting. I have a concept of waiting, I want to keep exploring and actually also some loneliness. How is this personal to me? Well, I feel my energy rising, I feel some creativity and a lot of new ideas coming back. But also moving my body, I want to move my body again. I haven't been doing that for quite some time. I don't want to wait anymore. That's a strong message. Now, I need to explore that further. This loneliness I want to make it my choice. The loneliness will create more space for opportunities to make arch. How do I feel about it? Yeah, well, this comes up for me, I feel hopeful. I feel empowered and actually I do feel curious. I wonder where this will bring me now. There's a lot of movement in this to be explored in my image I think. My personal experience of these themes, while I have been feeling quite low in energy for a while, I think my life has been too busy. There has been no room to create arch. This affects me all the time. I've been too tired from a lot of things going on to engage more fully with myself, with my art, with my friends, and just in general with I think my inner life and my own needs. I want to really explore this. I want to explore my own wishes and desires, and I want to look curiously about this journey. I mean, our whole life is just a dynamic journey of developments all the time. This return of energy to both body, heart, and mind it's a game changer, I think so. It's very interesting, and that's where I'm going to start focusing. I want to explore the theme or the concept of taking action and creating space and creating art and showing up. The way I'm thinking about this now I'm just sketching out a visual idea. I want to return to the kitchen scene. I've been taking a few images there where I've been exploring this waiting the loneliness that I've been experiencing, and I want to go back. I want to bring some more energy into that scene and I want to do that by adding some color and some movement to the image. I'm getting an idea of maybe creating movement through plates and glasses falling off the table. We'll see what happens. That thought of clearing the table to let new beginning seemed to create some curiosity and maybe show my face. How do we now take this out into actually preparing for an image that I want to return to the kitchen, I want to bring some more energy by adding color and movement into the images, and I want to visualize clearing the table to show new beginning. My intention with this is to do this visualize new energy. I also want to visualize the making of new space, and I want to show some movement. The location is the kitchen and at the table, I don't need to be more specific than that. When it comes to light, I use daylight and I use natural light. I basically never bring any other types of light into my scenes. I might use a reflector to ease some shadows, but that's about it. I'm not too bothered if it's sunlight or a gray, foggy day. I'm just going to create the scene from the light I have. The previous image was a little intimate. I was actually shooting it with no make up in my nightgown. This time I want to add some makeup and I don't want it to feel as intimate to me or the viewer, so I'm also going to put on some of work outfit and I might put my hair up. Not too many accessories, I mean jewelry or watches or anything that will personalize this image. I'm just going to stay away from that for this time. I will need to set the table for two and I think what might be important here is to add some flowers and maybe a cloth to add some color and some texture. I just want it to feel more alive. I think the flowers will be quite important. Also I'm going to have to find some plates and cups that can actually take being sacrifice to do this. I don't need a lot of gear. I have a DSLR camera. I'm going to use what I have. I use a zoom lens it's a 24-70. I usually get by with this. I don't need a lot more. If you have a phone that's going to work for you too. This is what I have so I'm just going to use that. I have an intervalometer. This allows me to take a lot of pictures in a row and not have to run back and forth. But I used to do that before too, I just run back and forth with my 10 second timer, and it worked out to you. I'm going to bring my reflector to the set and see if I need it. This is it. This is now my plan for the photo shoot and I'm just going to go and collect all the stuff. I'm going to set up the scene, then I'm going to take the shot. Come with me to the next lesson where we'll actually take the shot.
5. Take the Shot: Finally, it's time to take the shot, prepare your gear and your seeing. I work with a DSLR. You can use your smart phone or any type of camera that allows you to shoot from a distance. For myself portraits, I used a 10 second timer, or I use an intervalometer. Just use what you have. This class is all about personal expression and finding your story, not technical brilliance. Personally, I spend a lot of time and preparation, go through my gear, making sure that the batteries are charged, that I have everything in place in my bag, and that all details are in place. Now, that being said, I once hiked for an hour at 4:00 AM through a really dark woodland just to get to my perfect spot, to find that perfect sunrise for an image I had envisioned in my mind for weeks. I arrived at my spot only to realize that I left my tripod in my car. The choice between going back and making it work anyway was quite easy. I find some rocks. I put my camera there. I don't even want to think about how close to the water that was. But it all worked out in the end, and then I'm quite happy with the image. Choose your outfit carefully. Pay close attention to how the style and the colors add to your story. For this shot, I wanted something that I might wear to work. Mind you, I work in primary care, not in a corporate world, so my choices could still be quite informal. I also wanted to add color and vibrance to bring energy and the story of resilience, of action and hope to the image. Those are my main themes and I want everything in the image to bring something to that story. To prepare your scene, make sure to study how it looks through the camera. Take test shots. I take several tests shots and I always go back and change, because there's so many things I miss in the beginning. Even after all this time, I start off by thinking I have it all figured out. I take a few test shots and I realize I have to change half of it. Usually it's about moving things and removing things. Give this time. When you care about your scene, you care about your story. Be deliberate in what you show. For instance, I wanted to get rid of all visible signs of an active family life for this image. I removed the toaster, the breadcrumbs, the dogs toys, the kids wall art, and then I took a test shot, I've removed some more. I also wanted to tell the story of feeling alive, obsessed for life and a new energy. I brought in lots of greenery and flowers, flowers with color, flowers that were abundantly alive. I brought in tulips that I think represents spring, which is the rebirth of energy in a way. In psychotherapy, we always talk about the changes we go through in life. I once heard someone say that all change starts with a winter. I think it's so true. I think the previous images that I'm now building upon, they were a lot about the winter in me. This image, it brings a feeling of spring, so spring flowers seemed appropriate. This is also the time to make final choices about light and to bring in some reflectors or some extra light if you need it, and if it's available to you. Be mindful of angles, how you hold your head, your spine, even how you point your toes matter. It brings direction, intention, movement, and it makes the image dynamic and interesting. For instance, in this image you can see that my body, even though I'm lying down, if you study my body posture, it's tense. Both my fingers and my arms, my legs, definitely my toes, they have direction, they have movement even though it's very still. Consider the difference in this image where my posture is more relaxed. Both could work. It's just up to you to know what it is that you want to express and bring that into your image. When it comes to posing, remember we all want to look good, especially on camera. But for this story, beauty is not interesting. We want to get to know you, who you are, and how you are. At least in this moment, we want to care about you. Don't fear being vulnerable. Return to your breath, return to your intention. Return to your story. Connect with the story and the emotion it tells. Be curious about yourself. When you deepen your own understanding of yourself and share this through your art, we instantly connect to both you and ourselves. Relax. You are about to create a beautiful gift to the rest of us. Give yourself time to relax into the situation. It's not trawl to be self-aware in front of the camera with practice. By focusing more on studying your angles, your light, your emotional expression, your posture, all the details, you will start to see beyond yourself, and start noticing the story. This is a potentially transformative, I would even say life-changing way of looking at yourself. Go easy on yourself. Breath, have fun, and always take an extra shot when you think you're done. This is when you are the most relaxed and sometimes after an hour of shooting, this is where it actually happens. Even though we prepare and plan and do everything in our power, once we're there in front of the camera, whatever we do, sometimes it just goes completely in the opposite direction. Look, who stole my autofocus? There you go, I love this image, I love my little boy. Next up, we'll talk about some creative choices to be made in post-processing. After that, we'll go on to add some words. You're almost there, keep going. You've got this.
6. Creative Choices in Post Processing: In this lesson, I will talk some about a few creative choices you most likely have to make in post-processing. Use the software or app you're most familiar with. To me, this is Lightroom. First, I examine the light. In this image, the windows are slightly overexposed and my face a bit underexposed. The creative choice that I have to make is, will I keep it like this. I think when I look at it at this point that I'm going to keep the windows, but I'm going to change the exposure on my face. I also noticed some areas where there is reflections and light where I don't want to draw attention like the door behind me and the right corner of the table. I'm quite happy with the saturated colors in this image, but I want to do something about the skin tones in my face. I also want to brighten the tulips so that they become more apparent to the eye. I will probably keep some warm tones in the flowers and the blue tablecloth, but I might make the shadows a bit cooler. I think a nice contrast with cool shadows and some warm details and maybe a little warm skin tone as well, often adds a nice effect without having to bring a lot of contrast into the image. You go back to your theme. This is where you will find clues to the emotional tone that you now want to bring out in the post-processing. Since I want energy, I will keep the color saturated, and I will even add some clarity, and some pink tones to the flowers to bring them out even further. But I also want to add some drama. To me, this is a pivotal moment in my life and I'm telling a story about change. I don't want to just look like woman throwing plates off the table. For this, I will adjust the details, the sunlight on the wall, the doorknob showing, and the plate visually competing with the corner of the cloth just because there is spillover light there. Spillover light is something that we all have to deal with when we are working with natural light, so just learn how to look for these details and change them to your preference. Once you're happy with your image, you can save it as a JPEG and post it, or you hang on just a little bit further until you have written your poem. Next, we will do that. Come on, it's time to get your pen and paper right in our final lesson before sharing, adding words, and writing a poem.
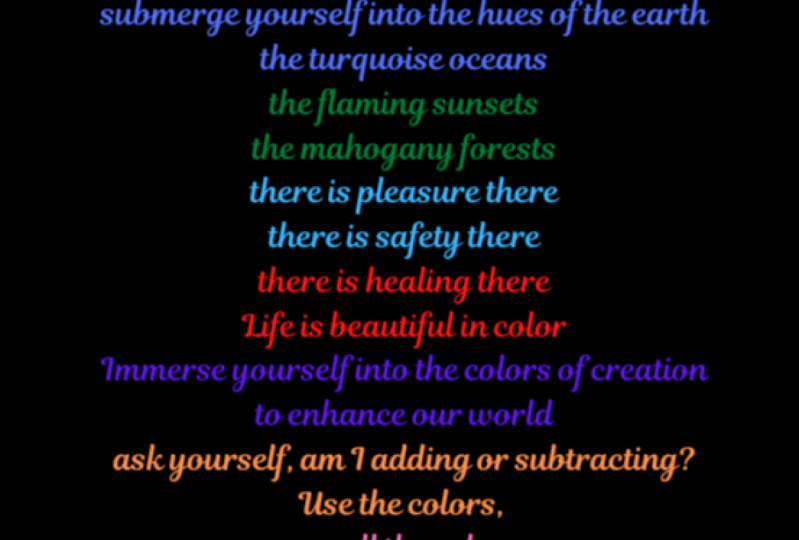
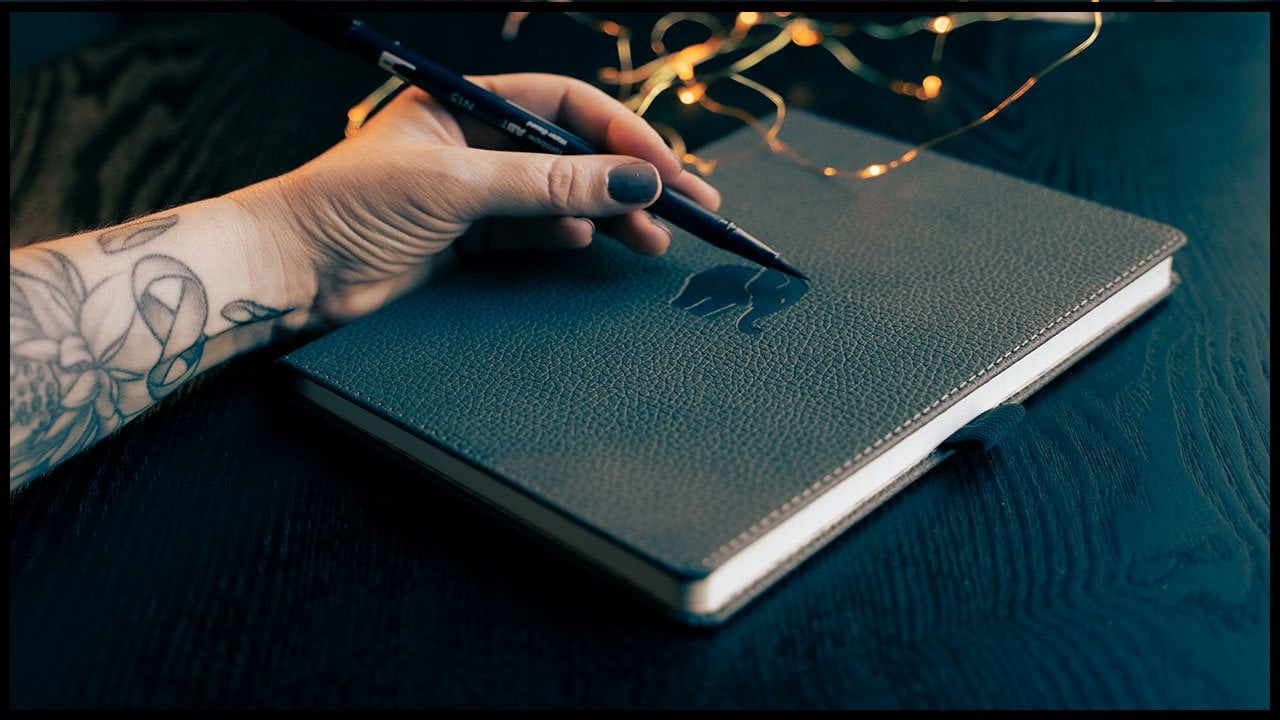
7. Write Your Poem: It's time to get your pen and paper and start writing a poem. It does sound so grand, doesn't it? But it really is easy. First of all, it's easy because you draw from your personal experience. You go back to what we did when we crafted our theme. There you will have some words already. You can even use one of those, add it next to your image and you're done, you have a poem. All our words therefore is to further enhance the emotional thing that you want to bring out with your image and these theme it comes from you. There is no right or wrong. It's just right. Everything is right. It can't be good or bad, it's just good. Everything is good. If you are true and you draw from your personal experience, you're already there. Just right. There is a simple exercise that you can do where you set your alarm for a few minutes and your free write whatever comes out of your hand. The important thing here is to get your hand going and flowing on the pages. Not to be too cognitive about it, not stop to think. Then when you are done, maybe you wrote two pages and you will draw two words out of this. But those words, they would have come from another place in you that is not so cognitive. You connect with other parts of your brain than your frontal lobes and something else comes out of it. Maybe something that is going on in your emotional system. But you're not thinking consciously about it at this point. It's a very interesting and rewarding exercise both to your creation, your process, and your urge, and to yourself as well. When I create these self portraits and the poems that go with them, my inspiration comes from a French philosopher Albert Camus and he wrote, "But above all, in order to be never try to seem." We instinctively know when someone or someone's work comes from this place of being, not trying to seem like someone. It's very attractive and it's very safe, it's very calming to our human nervous system. That's why we are so instinctively drawn to it. It's also why it's so incredibly healing to do this type of work ourselves. I'm now going to start with my own poem. I took the image and I'm going to try to bring that energy and the feeling that I wanted to portray into some words. We'll see how it goes. When you start, try to grab our attention immediately. You can start with words like; listen, look, now I know. Try to reflect on your image and give us a broader picture or deeper picture of what you want to express with it. Is it more drama? Is it more of a soft touch? Is it something personal that you're going through and you want to let us know to give the image even more context? Once you put these two together, they will create a whole image in the image so to speak. The image is one, the poem is one and together they create something entirely different. When you create your poem, have your image in mind. The words that you are now creating, they can enhance or they can contrast your image. If you feel like you don't know where to go with this and you're hesitating a little bit. Take your image out, put some words next to it, and just give it a try. See what happens, see what your emotional response is, and go with that, trust your instinct. I think I've got something. This time, I did a combination of free writing and actually just deciding to do it. No waiting for inspiration today. But we'll see what happens when I put this next to my image. Look at your image, take a few breaths. Go back to your drawing board and look at the theme you created before you took your image. Do some free writing, set the alarm for two, three, four minutes and just write whatever comes out of your hand. Don't be too cognitive about this. Trust yourself. Read some if you want some inspiration. I love reading other people's work. Sometimes I get inspired by it immediately. Sometimes when I'm walking the dog or when I'm doing my t-shirts, all of a sudden, this comes into my head and I have to stop and write it down. Once you prime yourself with the key that you want to write something, and you want to write something based on your theme, your brain is already in work and you can trust the process. The next lesson is our final lesson, where I will tell you more about how you share, but also why, why this is such a transformative process for us. A little bit about what we have been doing with the mindfulness practice, with the crafting of our personal theme, taking the image and then adding some words to it. I will tell you more about this and I wish you the best of luck bringing this all together. See you soon.
8. Share Your Work and Final Thoughts: Congratulations, you have now created your own visual poem. It's time to share, and you can do this in one of two ways. You can either upload your image as a JPEG and then add your poem in the description, or you can put them together, you can add the image and the poem and create one image out of this, save it as a PDF or JPEG, if you do this in Photoshop, and then you upload them as one. Whatever you choose works. This is your art, your creation, you know what to do. You can get huge benefits from taking personal self-portraits. Initially, I made the claim that it can potentially change your life. A brief explanation to how this is comes through the analogy of the jar. By connecting deeply with yourself through mindfulness meditation, and then go on to craft a personal, meaningful self-portrait out of that, it can help you to reflect on internal events in a new way. Before, you might have had access to a limited set of thoughts and feelings, as if you had your head in a glass jar, where you could see only what was in that jar. Through the practice of detached mindfulness and by creating a calm inner state, it is as if you pull your head out of that jar, and all of a sudden, you can see that there are other jars, new emotions, new thoughts, and from that new possibilities to behave in a different way. The beautiful thing with this practice is that the more you notice, the more you notice, it's a source that just keeps on giving. Thank you for coming along this far. I really hope I got you at least a little interested in looking at yourself through the lens of your camera and maybe even adding pen to paper and creating a poem. It will be so interesting to see what you have created. In the future, I hope to create more Skillshare classes combining these two topics that I feel so passionate about, psychology and creativity. So please follow me here if you want to know when the next class is happening. If you want to connect with me on Instagram, I will be so happy to hear your ideas and to see what you're creating. Again, thank you for taking this class. See you soon.
 Jessica Agert, Self Reflection & Slow Productivity