Transcripts
1. Introduction: Today we're learning about
Fusion in Davinci Resolve. It's really an amazing tool
to have in your tool belt, and it's not a
tool that a lot of other videographers
have with Fusion. If you can really take your
video projects above and beyond what is up, I'm Marcel Patilo and today's
class is all about Fusion. Probably the most powerful
tool in Davinci resolve, used for compositing
VFX and animation. And while there are
several important stages to creating any great film, TV show or commercial when
it comes to post production, a lot of projects like
comedies dramas and even thrillers just go to
edit and then audio mixing, color grading, and then
they go to export. But I'm a huge fan of films
like Interstellar Dune, The Matrix, and films that really take you to
a whole other world. But to build that
whole other world, they have to use a lot of
compositing VFX and animation. While I definitely
don't consider myself a VFX artist by any means, I've always loved
modern graphic design mixed with organic animations. And it's something
that I lean into all the time to create
animated titles, lower thirds or lyric videos. This is also a great
place to start when learning the
basics of Fusion. In this class, we'll be breaking down the UI, the Node workflow. It uses some commonly used
tools and how they work. I will also show you
how to make smooth, organic animations out of the
design elements we create, as well as go over
some three D tracking to implement a logo
into three D space. I hope you all are
excited about diving into Fusion and learning all
that it's capable of. When you're ready, I'll see
you all in the next lesson.
2. Getting Started: Welcome to the next lesson. Again, my name is Marcel
and I love shooting, editing, coloring,
and even animating. I have a Youtube channel
called The Modern Filmmaker, where I get to teach
my favorite techniques and connect with other creatives
from around the world. One of the first things I
started doing when working in Da Vinci Resolve was building
graphics and animations. I wanted to learn as much
as possible about Resolve. And so when I didn't have
material to work with, I would just jump into Fusion
and start playing around. And now I've been
doing it for years and have created hundreds of titles, lower thirds and
graphic animations. And today we'll be
doing just that as we create a simple
title graphic, as we learn the
workflow infusion. And then we'll dive
into animating it in a way that feels natural
and organic to the viewer. When it comes to preparing
your workspace and mindset, just have Diventure resolve, ready, and be prepared to learn a new workflow when it comes
to the node structure. Because the node structure
in fusion can be quite overwhelming and a
little complex at first. But the more you get used to
it, the easier it becomes. Stay patient with yourself
and keep an open mind. This is an extremely
powerful tool. But the more you
learn about Fusion, the more that you'll
become a unique asset in the video production world. In this project, we'll
create some basic shapes, we'll add a title and then fully animate all those
graphic elements. We'll also be doing some
three D tracking as we add a logo into a video in three D space, which
will be pretty sick. I'll share my assets with you in the resource tab down below. Or if you want, you can
use your own material. Remember to share your
projects with everybody in the gallery down below so we can all comment on
each other's work, gain inspiration, and grow
as creatives together. In this project, you just
need your computer devient, you resolve, and a
lot of creativity. So find a space
that works for you. Get comfortable, and I'll see
you all in the next lesson.
3. Getting Comfortable with the Node Workflow: Welcome to the next
lesson where we'll dive into the UI of Fusion, which is kind of complex, but it's really not that bad. And you'll see that
it's actually pretty simple and it makes
a lot of sense. I used after effects for years, but I really prefer the
node workflow in fusion. It's a lot easier to see all the elements that
you're working with. And there's some
things that it does that just are really, really intelligent and I
love working in Fusion. So if we dive into the edit tab, I just want to show you guys
some things that I worked up so you could see the power of fusion and what
it can really do. So this is actually
a fusion composition right here of the Earth. And if I play through this,
you can see that I've got it slightly spinning as
the light comes across. And as the light comes across, it actually reveals the Earth's atmosphere
or the Earth's surface, while kind of diminishing these night lights and revealing the night lights
on the other side. If I were to jump into this fusion composition by right clicking an open
fusion composition, this is what that
node tree looks like. Which I know may seem
a little intimidating. But it's actually a lot
more simple than it looks. As well as this next
thing I want to show you, which was a lyric
video I worked on. And it simulates these particles in real time in three D space, kind of revealing these texts. And then they kind of break apart as these
particles kind of fly away and new particles come in to make a new word
or a new phrase. And then lastly, even these kind of three D titles that are a little bit more simple but very compelling
things like this can really enhance your
videos and give you another tool in your tool belt that clients won't even expect. And the fact that
you can provide shooting or editing
and coloring, or sound design along with
complex animations like this, can really take you and your
career to a whole new level. Let's jump into Fusion and
start with the basics. One thing I like to do
is in our media pool, in the edit tab I'll write Click and then go New
Fusion Composition. Then we'll just name
this graphic title. And we're at frame rate of 29.9 That's what
our timeline is in, you know, you can
make animations in 60 frames a second or
24 frames a second. It really just depends on
the need that you have. But me, I like to make most of my animations at 30 frames a second or 29.9 just to get
that maximum smoothness. Some people like to animate
at 60 frames a second. That will garnish a lot
more computer power. Because that means every
second you have to render 60 frames of animation. So I like to do a little in
between instead of 24 or 60, just a nice 29.9 or 30.
And then we'll hit Create. And then we can drag this in
to our fusion composition. And one reason I'd
like to make it that way because we could bring in a fusion composition into our
time line from the effects. But the thing is, if
we were to bring this in and then do a bunch of work in this
fusion composition, and then for some
reason, let's say we delete our time line. Now that whole animation we build is gone. It's
not in the media pool. So that's why I like to
create it in the media pool. That way it stays
in the media pool. Just like this Earth here,
it's in the media pool. So I can always click
on that and get back to all this work that I did
to create this Earth. So let's go back to our edit
tab and then we can go into our graphic title
and double click on our graphic title to
jump into Fusion. So right now we have a
blank slate, very blank. This is our media out. Very important and
the way Fusion works, it almost runs parallel
with our edit tab. It's a little
confusing at first, but this is almost
like a tunnel. And everything that you put in this tunnel and then connect to this media out comes
back into our timeline. So if we were to add this
graphic title to our timeline, of course you're going to
see nothing right now. But if we right click and
go to open Infusion page. Now anything we
pipe through here, it's almost like the
edit tab dips down into Fusion and then as you
put it into the media out, it comes back out
into our timeline. So this will make a little bit more sense here in a moment. But if I were to bring in, let's say a background,
that's usually, I always start
with a background, so I'm just going to click on the background of
our node window. This is like our node
world right here. And this would be our preview
window and world up here. I will click Background, and then I will connect our background output
to our media out. And now you're understanding
a little bit more what I meant about when you plug
in things to our media out. Everything has to go
through the media out to be seen in the edit tab. And if we go to
the edit tab now, now we see a black background. If we come back in to
Fusion open in Fusion page, we can add more
stuff, more shapes. Now a background also determines what the resolution of our fusion composition is. So if I were just to
have put in a logo, it would have made the
fusion composition whatever resolution
that logo is, which a lot of time
is not what you want, especially if you want to cover your whole time line resolution. So by making a background now, our fusion composition is the same resolution
as our timeline. And from here, we'll
need to use a merge. There's a few tools
that we'll be using here and I'll
kind of go through them as we use them to kind of create a better understanding
of how they work. And I don't want to bombard
you by going through every single tool here
that you might not use. So here is the Merge tool, and the way that Fusion
works is through Merges. That's how you connect
one thing to the next. Right now we've got the background connected
to the media out, but how do we connect
something else to this list of elements here? We'll have to use a merge and then we'll pipe in this merge. And then right now we
have the background connected to the
foreground of the merge. And this green triangle you're
seeing is the foreground. To connect something next
we'll need to pipe in something to the foreground
of this merge to move on. What we'll do is create
another background. And I like to do
this in almost like a layer type workflow. Which you don't have to do it this way in Fusion, but to me, because every other element of venture resolve works in like a track based layer
based workflow, I like to do it the
same in here to kind of keep my mind in
that same place. From here with the background, our background two selected. I'll click on the merge again, and then we'll move this
merge over and we'll connect it to our merge one, the foreground of our merge one. Now we have let's say the background and we
can rename this merge one if we had two to layer one. And then we can label
this merge two with F two to layer two. And I hope that helps you
understand a little bit. Now you can click in on your mouse wheel to move
around this node window, or you can hold control and
use your mouse wheel to zoom in and out of
this node window. And that's one reason
I like it more than just your regular
layer workflow. Because in some compositing programs where you use layers, you end up with, you
know, let's say you have ten or 20 plus layers. I mean, now you're
scrolling up and down constantly to get
to different layers and things almost
get a little messy. But with this, you
can label everything. And even when I zoom out, I could see a pretty
big node tree here. And I can still see each label which is really important
and really cool. So when you guys feel ready, definitely play around with the UI effusion because it can seem very overwhelming and it kind of takes baby steps
to get used to it. But I promised you by the end of this you'll feel a lot more comfortable and
you'll learn kind of where the fun is in fusion. So continue to mess around
and when you feel ready, meet me in the next lesson.
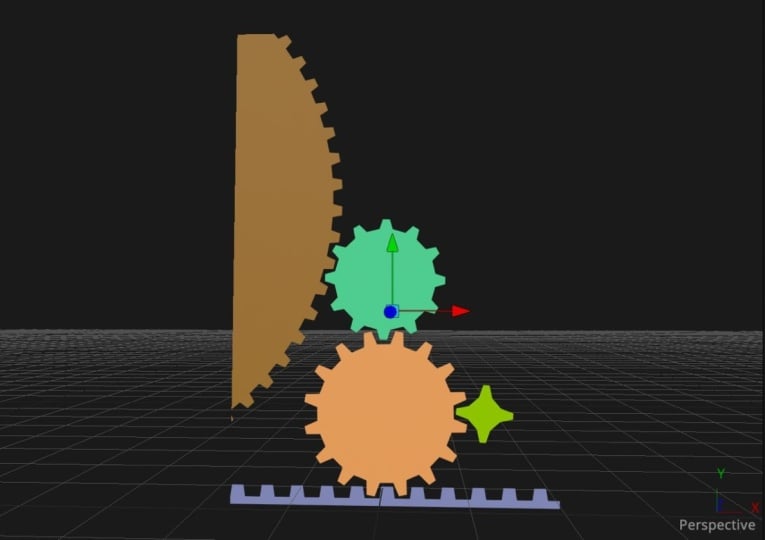
4. Working with Nodes: Welcome to the next
lesson where we'll create some basic shapes
just so we can get a little bit more comfortable with that Node workflow
that Fusion uses. And now we'll create
our first shape, and we'll do this with a mask. And this may seem a little odd at first because
there actually are no shapes in the tools except for when you get
to three D workflow. But in two D there are no
shapes, but there are masks. And that's for a reason
which I'll show you later that is very intuitive and makes things a lot easier
in the long run. So if I click this, I could create a few
different shapes. I could create a square. And let's make this background
white so we can see it. Or if I get rid of
this rectangle, I could also click on this
circle and make an ellipse. For now, I'm going to
actually make a custom shape. One thing I'm going to do first is go to our background node. And move the alpha all the way down so it becomes
completely transparent. Then from there I'll
click on our background two and go to our polygon mask. Click on this. The blue triangle
is a mask input. You can't really
input anything into here other than something
you want to use as a mask. A mask is something to give the program parameters of where we want to see
this background. With our polygon selected, we can make a
triangle shape here. And I'm going to use the grid. That's why I moved our alpha, the background down so we
couldn't see it at all. Now we're using
that to determine the resolution of this
fusion composition, but we don't really
need to see it at the moment with our
polygon selected. I'm going to click, let's
say up here on our grid. Then I'll click down here, just trying to make a good
triangle shape over here. And we can clean this
up here in a second. If we don't do it perfectly
in the beginning, then I'll connect our shape here at the top, back
to the beginning. This is a little bit of
a lopsided triangle, but that's all right. Because I can take this
handle at the end here and we can move this around
to really perfect things, and that looks pretty solid. I'm happy with
that. That'll work. We're going to build out
a graphical template as we work through these
nodes and what they can do. But first, let's
label these so we don't lose track of
what everything is. This one will be if we
press F, let's say Shape. And then we can go to
our background to hit F and make this shape color. Before we move on, let me
show you a bit about masks. To the right, you have an
inspector like you have in the edit tab or like you have in the fair light tab
where you have parameters for each
node with the shape. You have levels which determine
how much you're seeing, almost like an
opacity or a gain. And then you have
the edge softness, which could make edges softer depending on what
you want to do. You have border width, which will give you a little
border in or out. You have invert, which you
could make the shape a mask that cuts out the shape or makes the background the shape that it is
like we've done here. Or you have solid, which if
you click off solid now, you can have just the border. And what's really cool is you
can lengthen that border. And you can even animate that to make an animation
out of the shape. If you wanted to reveal the
shape by animating that in, you could use key
frames to do that, which is really nice, but let's make that
a solid for now. And then you have
positioning parameters. You have size, and then
you have rotation on x, y, and z basis. You can click this little
dot at the bottom of each of these parameters to reset
it back to default, which is what I'm
going to do now. This, I'll just go back to 0.5 because that's where the
x was to begin with. If we move our border with back because I don't want
that rounded edge. And then we will continue to create some more shapes to make our next shape that's
going to be a part of our overall graphic
background here. I'm going to select
this whole layer two with the shape,
color and the shape. Hit Control C, and then
click on the background. Hit Control V, and that'll
give us a shape one, shape, color one, and layer 21. And then we can connect this to the foreground of our layer two. We'll move this down and
then we'll start using some transforms to position where these different
shapes will be. We use transforms
for various reasons. They're easier to
animate than masks, as well as some other
things that we'll see down the line if I click
on Shape color zero. And then go to our transform, which is this button here
in the middle of our menu. Now we can move this around
however we please in Y, X, and Even Pivot. And we can control the
size here as well. Aspect ratio. And a lot of great
parameters there. I'm going to leave this one
in the center and then make a new transform
in our shape one. I'm going to rotate this with
the angle to 180 degrees, putting it right upside down. Then we'll move this
to the top right. Now I'm just being abstract, I'm just flowing to create
some graphical element here. Then our bottom transform, our bottom shape
with a transform. I'll move this over
to the left a bit. Going back to our transform two, I'll bring up the size, and I almost want these
to come together. I think I'm going
to actually move this size up quite
a bit to here. I'll move this over,
and then we'll take our original transform one. We'll move this over to here. I like that. That's a good look. Then we'll change some
of the colors here. I'm going to go to
our shape color, and we'll make this one black. I'll go to our second shape
color, our shape color one. And we'll make this, let's
say a gray, light gray hit. Okay? And then we will make
some more shapes again. If we select our layer two with the transform two and the shape color
one in shape one. Hit Control and then
click on the background. Hit control V to paste. We can pipe that into, we can pipe our new merge into the foreground
of our last merge. Then now we should
have three shapes. I'm going to click
on the transform 21, so we can move this around. I'm actually going to move
this towards the center. Move the size down. I'm just purely
being creative here. Then I'll go to our color. I'm going to make
this black as well. And then back to our
mask for this shape. And I'm going to hit off solid and actually give a tiny border. Boom. So we have
something like that. And then we'll make
one more shape, grabbing that whole
layer tree here, hit control V and pipe
it into our other merge. We will make our
mask solid again, get rid of the border. We're going to flip
this one around in the transform back to upright. We will change the shape
color to a light gray, but a little darker than
our other light gray. I actually want this one to be behind this black triangle, which is very important. What I'll do is
grab all of these. I'll disconnect it from
the merge underneath. I'll move it over,
grab all of these. Move them, then I'll move this back down and
we'll connect our layer two to the foreground
of our layer 21 on one and then connect
this to our layer one. Now this is underneath
everything else, I'm actually going to
move the mask, this time. I'm going to move the size
up and reposition it. I'll move the size down. I like that. That's a very
abstract graphic design shape. And then one last thing
I'm going to do is take our background and move
this to white snowy, fully covered the screen shapes with the background and a
few other things to go over. Here it is in the middle. You have a few options
for background. You have text here,
you have a paint tool. You have a color corrector, so you can do color
correction in fusion. It doesn't just have to
be in the color tab. You also have contrast in color curves as
well as hue curves. Contrast, like I said,
in brightness and blur. And then you get into your merge your channel bullion
matt controls which are a bit advanced. You have resize and transform. Then you have various mask layers like we
went over earlier. The rectangle, the ellipse, the polygon, and
the best blinds. And from there you
have some emitters for particles like
that's what you would use to do the
particle simulation I showed you guys earlier. As well as three D
shapes which are a whole other world which I love and hopefully in the
future we can get into that. Definitely play around with
what just happened here. Play around with the
shapes you're using. Try to create something different than what
I created here. You're more than welcome to
copy exactly what I did, but try to create something new. Because you might do something
way cooler than I did. So once you feel
comfortable and ready, let's jump into the next lesson. We'll bring in a title, and then we'll animate
these graphics in a way where they
reveal that title. And I'll see you all there.
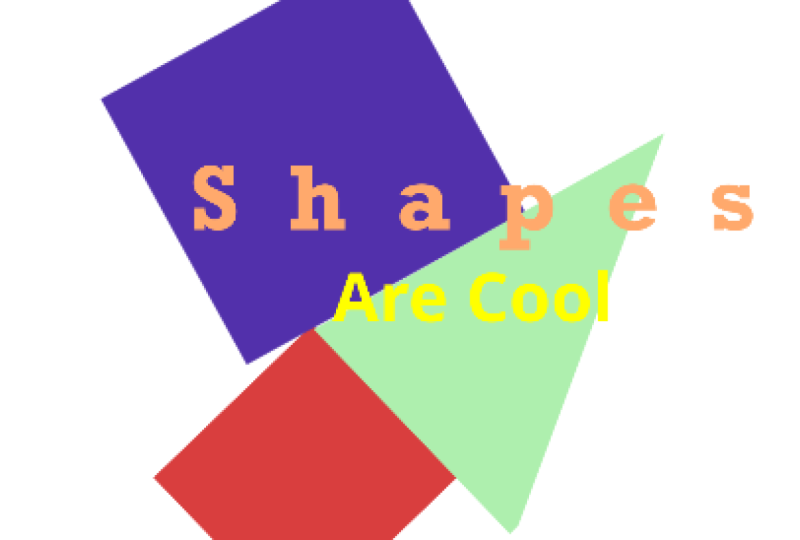
5. Creating a Title Animation: Welcome to our next lesson. In our last lesson, we built
out the graphic template that will turn into
our text animation. In this lesson, we're
actually going to build out the text and then
animate the text in. Before we animate all
the elements into place. Within Fusion, we have
our four triangle layers. All we need to do
from here is add in our text and then
animate it into place. I'm going to make another merge. Our merge tool is right here. And then we'll
slide this up here just to give it some space. We'll connect it
to the foreground of the merge underneath it, which is titled layer 2111. Then we'll go to the text
and we'll add a text node. We'll connect this to the
foreground of our merge one. The text tool
infusion is just like the text plus tool
in the edit tab. It's no different. It has
all the same parameters. We have layout
where we can change the sizing and the
position of the text. We have transform, we
have shading here. We can do a lot of
advanced shading, which is really cool
to play around with. Definitely play around with
that, because you'll find some interesting results
without ruining anything. A lot of things you
may play around with and it may break
your animation. But the shading is
a really fun one because you can make gradients. You can also have text outline instead of a full solid text. And you can do a lot of
other cool things like that. And then we have
images and settings. We'll go back to our
original text option and write in Fusion. And I'm just going to
choose a font I like. I really like the Goth and font. It's one I see myself going
back to over and over again. I'll change the
tracking and move this up to give us more spacing. I'm a real modern type of guy, hence the modern
filmmaker on Youtube. My text I usually
like in this style, a nice bold fat but very
solid straight lines with some spacing in
between each character. And then I'm actually
going to make another text to put a little bit of a
description underneath Fusion. I'll click on the
Background Text Tool, and then I'll connect
this to our Foreground. Then I'll click in,
let's say Composite, then X VFX, then
X Space Animate. Almost like a little promo for Fusion itself. Then
I'll go to Layout. And I'll move the
position down a bit, going back to text, and I'll
shrink this in the size. Then I'll come up
here and instead of bold and open sands, I'll change this to
our original font that we used up top, Gotham. I'll change this to light
and make it a smaller. That looks good, but just
thinking creatively here, maybe I'll make it
a little smaller. And then again up the tracking to make it a little bit more
of a modern style, I like that this is pretty much what our end result will be once everything
animates into place. This is what we'll
see at the end. But for now, we're
just going to animate the text in from line to line. We'll take our first text, then we'll go up to
the spline editor. This is primarily
where you're going to animate your key frames and your text and
anything infusion. Big fan of the spline editor, it's very helpful to have
you see nothing here yet because we have not
made any key frames to tell the spline editor, hey, this is what we're
trying to animate. With our text selected,
we can go over a layout. And then we can hit
this Keyframe button on the side of center. And you see that now
in this blind editor, we have text one layout,
center displacement. And then let me go back to
the very beginning and I'll go to our X in center. And I'll move this, let's say to the left,
completely off screen. This button here in
this blind editor will pretty much zoom to fit
whatever you have selected. That way you can see
everything that's going on because that will
happen pretty often. What you just saw happen where the blinds go out of
the blind window. All you have to do is do zoom to fit and everything will shrink down into the allotted space that you have for you to view. Then from here, I'm going to select this last
keyframe and hit, and that'll smoothen it out. Let me just show you what that looks like if I do not do that. If I just animate
this from here. It's sterile. It just slides
in and hits its in place. But if I select this hit
to smoothen that out, then I can play it. It slows down,
making a much more organic, natural
feeling animation. We can make this look
even more smooth and more appealing by taking this
handle and moving it out. But we'll need to grab this and then hold Alt, and
then pull it out. Now just so you see what
happens if I don't hold Alt. I'll control Z to undo. And then if I don't hold
Alt and just move this out, you're seeing that this
is getting off center. And that's very easy
to do with the mouse. And if it gets off center, then it might do something
weird in the animation. Like it could go further past. Let's say if I move this up. You see it had a bounce there, which sometimes you
might want that balance. You're trying to simulate
a certain animation that was the type
that would bounce. This could make a lot of sense, but in this instance, we
don't want to balance. We really just want
it to smoothly slide right into place. Let me undo this, and then I'll grab
this handle, hold Alt, and we'll bring this across maybe to ten. Let's
take a look at that. We could even drag our
last key frame out to 25. Or maybe in 25-40 making a little bit slower and a little
bit more natural feeling. Maybe I'll move this
back out a little bit. Just fine tune things here. Now we'll do the same
thing with our text two, that's our composite V
effect animate below fusion. If I go to layout, let's say we do this a little offset from the other animation. This one will end at, let's say in 40-45 Maybe at 42, frame 42, I'll click on the key frame for
the center position. And then I'll come back
to maybe frame three. Let's move this all the way
off the screen to the right, and we'll hit our zoom to fit. So now we can see you also
have the zoom tools here. Zoom up and zoom horizontally. But the zoom to fit seems to work like a charm every time. Let me select our last
keyframe and hit. Now these keyframes are
getting jumbled together. One thing I can do is
turn off text one. This will lock text one. So now I can still see it, but I can't really control
it. I can't select it. If I click it again, then this will turn
it off completely. Let's do that again
and just go to its lock position to
where I can see it. But I can't actually
move it that way. I can fade out our smooth
similar to our first one. Again, if I hold this handle, hold all and pull out, we can draw almost
like a duplicate. Like a copy of that first one. And now we know we're getting
a very similar animation, but at a different time
within the timeline. If I press play,
that's pretty nice. It's very important to
try out new things. If you're not feeling something, maybe change it a little bit. And then you may say, you know, I don't like that as much. And that's how
you'll know though. That's the only way you can
find out what really works. And that's how you can
gain experience and know what will work in the future
and what to replicate. Because if you
don't try it, then you really will not know. So let me actually make this
offset a little bigger. Boom, I love that. Play around with your text. Animate it, however
you would like. You could come in from the top or come in from the bottom, Just depending on how
you have the x and the y center parameters
changed and keyframed. I like coming in from the side, but sometimes I
love coming in from the top and sometimes I love
coming from the bottom. It really depends on what you're feeling like and
what your animation and your graphical template
looks like and lends to you. Take your time, get comfortable,
and when you're ready, we'll see you in the
next lesson where we'll animate the rest of
the graphical elements. So it all comes in together.
6. Exploring Advanced Animation Tools: As. Welcome back to
our next lesson. In our last lesson, we
implemented some text and we animated those
texts onto the screen. Now in this lesson, we're
actually be animating the rest of the graphical
elements onto the screen, revealing the text in a really cool way that I think the viewer is going to
feel very compelled by. If we just look back at
what we have so far, we have the text coming
in. And that's not bad. I mean it's kind of cool if this was the background
that was staying on screen and this
wasn't to animate on screen or to animate off,
that could be enough. But let's make this a little bit more extravagant by bringing everything onto the screen to
create something together. If we come down to
our background, which would be our
background, no one, we need to add a transform so we can move this around
because the background by itself does not
have any transform or moving properties. We'll add a transform to this background node
transform button here. We'll click this. Then from here we'll
go to keyframe, let's say 20 and make a keyframe
in our center position. And then we'll come
back to frame zero. And we'll slide our y
center position down. Then in our spline editor, we can hit the zoom to fit and then you'll need to make
sure that your text one and text two layers in the
spline editor are either in deactivated mode so you
can see them but you can't change them or they're
just completely off. We don't really
need to see them, but it is helpful to see them. Let's leave them there, but
just make them deactivated. Just like I described
in the last lesson, we'll zoom to fit again, so all of the blinds
that we have so far will be viewable
on the screen. If we look at this now, again, this background sliding onto the screen isn't very smooth. We'll need to take
this last keyframe in the spline editor of our
background or our transform, three for our
background and hit S. Then we'll hold this handle, hold alt, and slide
this to the left. Let's see what this looks
like. Yeah, that's nice. I love that. That
one can be quick. Now, one thing I'm noticing is I may want to move the
text over a bit. Let me lock these texts, make them active
and able to edit. And I'll hit these zoom to fit and I'll grab all of
these key frames. Now the transform is inactive, so I cannot change
those parameters. At the moment, I can
scoot these to the right. I'm thinking through how the other animations
will play out. Sometimes that happens, this
is a big tinkering game. You know, you may move one thing and then you think,
you know what? Based on how I move that, maybe I should move this that way. So that's kind of what I'm
going through in my head as I'm thinking about how this animation is
going to play out. This isn't something
that I was like, oh, this for sure is
going to be a thing. I kind of wanted to come
into this thinking fresh, thinking creatively,
kind of showing you guys how I think
of my process. Because if I planned this
out and did this animation over and over again before
I taught it to you guys, then it would be
more of a lesson on the buttons I'm pressing
than my mindset. But if I come in here with seemingly no plan and want
to create something cool, then I can kind of talk
out with you guys what I'm thinking as I make these
little intricate changes. So with this in mind now,
we'll play this back, that feels nice and it'll
feel even nicer when we have these other triangles come onto the screen in an
offset little way. If I go to our
background triangle, which is this bottom layer. And I just know that because
obviously we just did it. But at the same time, this
layer is on the bottom. It's under this one,
it's under this one, and it's definitely
under this one. Based on when I made it, I know that this one
is on the bottom of our layers because all
of these are going to the foreground
of the one before it being the front of
the one before it, almost on top like layers. Everything above layer 2111
is going on top of 2111. So if I go to the
transform of that node, let's say I come to 23, make a key frame in the center
point of that transform. Go back to the
beginning. Actually, let me go to frame two. And then I'll move the
y center position down. All right, that looks good,
but it looks a little wonky because we don't
have the's going. If I grab our last key
frame for the transform, 211, we can hit
smoothing that out. Click the handle, hold it
with Olt. Move it across. That's nice. I like that. I'm actually going to
move the first key frame over just a bit,
maybe one frame. Yeah, that feels better. It feels a little bit
more intentional. You don't want something to feel like an accident
or feel awkward. You want to feel intentional. And like it was
purposely done to make a smooth motion based on
how the background moves, This feels a lot better. All right, let's go
to our next shape, which would be this
black triangle right in front of
the big triangle. And we'll go to transform one. We'll go to frame 25 and make a key frame in the transform. And then we'll come
back to maybe frame five and make a key frame there. And then we'll move
it off screen with the Y position in the center. Now again, let's
deactivate the rest of the spline so we do not move anything around that we
don't want to move around. And then we'll grab
this last keyframe. Hit hold the handle, hold Alt. Move this across. Boom. Trying to line this
up with the other splines. Everything's moving
at the same motion, just at different,
slightly different times. Now, if I play this back, oh yeah, that's so cool. The background is in the back. And if you have a
background back here and you have something
closer to the camera, and then you have another
element closer to the camera. If everything moves up together, you're going to
see them move with a parallax at a slightly
different motion in time. Especially if they're
different sizes, they're going to cause
a bit of a different, almost like a wave like motion. Yeah, that looks great. Actually, let's move in our
big gray square at the top. With transform two,
we'll go to frame 27. We'll make a key frame there. And then we'll go
back to frame six. We'll move the y position up
to where that's off screen. Then we'll need to
deactivate transform one, so we can only edit
our transform two. Press just smoothing it out. Grab the handle, hold
all. Move it across. Yeah, man, that's Maybe we'll grab this handle and
move it out a little bit more. Maybe we'll move this
last key frame back. One frame, yeah. Great. Then we'll go to our last triangle which
would be transform 21. We'll make a key
frame maybe at 30, it comes in a little later
than the other ones. Maybe we'll go to frame eight. Make a keyframe there
in the center position, then move this up, boom. Now we'll need to
deactivate transform two and then grab the handle or the key
frame for transform 21, press S and then
hold the handle. Hold all, move this across. Oh yeah, that's sick,
that's so nasty. So if I move this last key frame over to the right,
maybe two frames. I almost want that
to be more dramatic, like this last one
comes out of nowhere, really completing the
look. Yeah, I love that. All right, so now
we'll need to work on revealing the text
with our animation. We really only need two
triangles to do this, the black triangle and the gray triangle coming
down from the top. Our black triangle
is right here. And what we'll do to do
this is use masking. But what makes this a little
confusing is I can't. Let's say I could move this transform into
the mask of text one. But right now it's
hiding text two, which is confusing because
it's only the mask right here. It's hiding the second
half of fusion. Because we're not using this gray triangle
to mask the mask, is only here in this
black triangle. We can't connect two
nodes to one mask. Unfortunately, we can
make one or the other. But we can't just directly plug two nodes into one mask
unless we use a merge. In this situation, we'll take a merge from the tool
bar, move this over, and we'll connect
the transform from the black triangle
to the foreground. Doesn't really matter. You can do foreground
or background. And then we'll take our big
triangle that's hanging down. And we'll take the output of that transform and put
it in the foreground. And then we will take the
output of this merge. And now we can
connect that output to both masks as this
comes up and comes across. Now you're saying it starts as it enters the black triangle. And these words are
starting as they enter this gray triangle. Love that. Another thing. That could be another thing that could be done because
this is sick already. But let's say you wanted to make a text animation
over a video. All you would need
to do, because of how we have it built out, is you could make
this background black and move the
alpha all the way down. Now if you had some video
playing underneath this, you could easily just
have this animate while the video is playing
in the background. Now that we've made
a very smooth, elegant animation, I'm
pretty proud of this. I hope you guys are
feeling this because I think this is
pretty dope and I see myself using this
in the future for somebody I don't know who, but
I'll use it for something. But you guys take your time and mess around with the tools
that I showed you here. Maybe move things
in from the right instead of the top and bottom, or move things in from the
left or even diagonally, whatever you think
would be cool. Because again, what makes
you special is what you think would make great
creative decisions. And that's what makes
us all different and all assets to the video
production community. And I'd love to look in the gallery down below
when we're all done. And look at what you
guys did and think like, man, why didn't I
think about that? So try whatever you would like. If there's anything I
didn't touch on that, you may be curious
about, give it a shot. You never know how
it'll turn out. And when you're ready, I'll see you all in
the next lesson, we'll go over three D
camera tracking and add a logo to video in three D
space. I'll see you all there.
7. Tracking: So welcome to the next lesson. I'm proud that you guys
have made it this far. We've learned a
lot of cool stuff. How to animate, how
to create graphics, and create shapes and fusion. We've gotten a lot
more comfortable with the fusion work space
and the node workflow, which can seem pretty
overwhelming at first. But I hope at this
point you guys feel a little bit more
comfortable diving into that fusion tab. And so next we'll go through three D camera tracking which
is actually pretty simple. You know, obviously
Davinci Resolve is a very powerful program that is really set up to do
powerful things to make your job or my
job a lot easier. So the first thing we'll
do is just grab in the clip that we need to
use to make this track. And as always, you know, we have material down
below the resource tab. You guys can use the
same footage that I'm using or you can use your own footage and
just kind of follow along and take from the tips
and the techniques that I use in the tool and track on your own for the
footage that you have. But I do highly
suggest that you use the material that
we provided just so you can gain a good sense of why I'm doing what I'm
doing for this clip. And that could help expand your mind on what to
do when it comes to different types of clips outside of the one that
we'll be using today. So I'm just going to delete this audio track just
because we don't need it. And I'm just a little bit of overthinking and I
don't like to see stuff that I don't need to use. I'm going to Alt
and click on this, and then we can delete that. Then with this clip selected, it's just this clip
of A Beautiful Car. The first thing I'm going to
do is stabilize this clip. It's a little shaky, which of course is
not going to help when the computer tries
to track the camera. First, I'll just
click on this clip, go over to our inspector, come down to stabilize, and then with perspective, we will stabilize this shot and see the result that we get. It's good. I'm getting
a little warping at the top and I'm going to come back and under perspective
I'm going to get a similarity and hit stabilize. That worked a good bit better. Maybe I'll pull the smooth up a bit and then stabilize again, even smoother, but
I'm going to try translation as I've
mentioned in other classes, go through the different
modes of stabilization. It's very important because you never know what's
going to garnish you, the best result given the footage and the camera movement that
you have to work with. We'll stabilize one more time
with translation selected. No, that's not
better. We'll go to similarity and stabilize again. Then we'll right click and we'll say Open
Infusion Composition. Now just like before, we have our media in going
to our media out and now our media we know
is just the video clip. And as always this is just
a tunnel. Nothing changes. Even though we're using
a video clip instead of graphical elements,
nothing changes. It's all the same
Workflow infusion. We'll close this spline
window from here. We'll hit control Spacebar
to open our tool selector. Now like I showed you before, you could go in
the effects tab up here and go through
all the tools, But this is just a
quick keyboard shortcut to get to all the
tools in one list. And there's a searchable bar
here where you can just type in camera and get easily
to the camera tracker. And then we'll add,
and then we'll add this right in between
our media and media out. There's a few parameters here on the right side that
we need to look at. In the track option, it's just asking us
detection threshold, how much do we want to detect? And the more you have it detect, the harder that's going
to be on your computer. Depending on the
clip you're using, you may have to
detect more depending on the complexity of
the clip you have. But the default selection for
me will be fine If you have a more complex
composition or footage, you can turn this up to
the max or somewhere in between to find a
better tracking option. And then from there
we're going to go down here to bi directional tracking. This is going to say track it forward and then
track it backwards. And that's just to get the best, most fine tuned track available. Let's select that. And
then we'll hit auto track. And we'll see it do its thing and you see these little dots. It's creating these dots in
the places that it can track. And it's tracking
off of contrast. Obviously the computer
doesn't know and the program doesn't know exactly
what is in this footage, but it kind of goes off
of a lot of things. Ai being one of them
to determine where the contrast is and where things are going within the scene. A lot like the stabilization. The stabilization
does the same thing. It uses AI during
different modes. Perspective similarity,
translation to find out what the clip might
be doing and resolves. Really good at
kind of predicting and fine tuning and seeing
what is in the clip. And now if we play this back, we can see that we have these points that are
pretty well tracked, some of them are a little
bit more scattered. And some of them the
program is like, I'm not really sure
I'm tracking here. While other tracking points like this one right here stays almost the entire time as
well as this one here. And so there are enough tracking points
that are staying in the exact same place for
us to get a good track. Then if we come over to
our next option within our list under camera tracker
one and we go to camera. This is going to
ask us what camera we're using and what ****, what millimeter
**** we were using. Hopefully you have
that information. If you don't, you can kind of play around with those options. But I know that I was using the 17 35 cannon ****
at 17 millimeters, so I'm going to type in 17, then we'll come
down to film gait. And I was using the
black magic Six K. So we're going to go
to Pocket Cinema six K. And then from there
we can go over to the next option as
well, which is solve. And this is just telling
the tracker based on the tracking information you
already have and based on the camera and the **** that I told you I used for this clip. Now solve this equation to give me accurate
tracking points. So if I click Solve, it'll now go through its processing,
which is pretty quick. And now it's solved
our simulation of which camera we had in which position based on the
tracking points we had. And now if we go over to Export, which is the next option,
we can click Port. And now it's going to
throw a bunch more things on the node tree. These are three D properties, These are the first time, if this is your
first time infusion, these are the first
time that you're seeing the three D options that
we did not get into. Some of these are from
this right hand side of the tool menu in the
middle of the screen. What we have here
is a three D merge, which the three D merge is different than
the two D merge. So keep that in mind.
All three D elements, or all three D
nodes will need to go through a three D merge. All two nodes will need to
go through a two D merge. We have a camera three D, we have a point cloud and that point cloud is
the tracking data. And we have the ground plane. And the ground plane is where resolve thinks the
center point is. Now we know that the center
point is right here. The ground is right here. And it goes up this way a bit, and it comes down this way, but the center point
is right here. And so from here
we'll need to plug in a few more nodes to make our logo visible to the three D world and to
implement it into our scene. So here we have a
camera track render, which every three D
composition infusion will need a three D render. And this is a three D render, but it's titled
camera tracker render because it came off of
the camera tracker. Don't get overwhelmed by
this. Don't overthink it. Just kind of let the
program do what it does. I know at first this is like, I'm not sure what
all this means, but sometimes you don't need to know exactly what
everything means. You just need to
know that it works. And if it doesn't work, then you can try again. But all this is very simple, especially with the composition that we have built out here. So one thing I'll need to
make within our merge, which is we'll have to connect
everything to the merge, our logo to the merge. And we can't just connect
our logo to the merge. And I just broaden our
logo and it made a media into just another piece of media for us to plug
into our no tree. And if I tried to plug
this into the merge, nothing's going to happen
because it's a two D media in, this is just a two D logo. We'll need to make a
three D background and then project this
on the background. I know that sounds complex, but it's actually super simple. We'll just hit the three
D background image plane, then we can connect
our media in two to our image plane and then
connect our image plane, three D into our merge
three D. As simple as that. One other thing you can do
which we haven't needed yet, but it can be very helpful if we click this dual monitor
button up here, you see that has two
little rectangles. If we click this, we have
two preview screens. Now this one is going
from the media out one, this one's going to nothing yet. How this is indicated at
the moment is you see these two dots at the bottom
of the media out the two, the second dot is
filled in with white, meaning this is going
to the main output, our main preview window. Let's say if we move this
media in or this image plane, three D. If we move this
in to our first preview, we can now see that
preview window. We can see just that image
plane, which is really cool. And you see that indicated in these two dots at the bottom
of the image plane, three D, that our first dot is
filled in with white, indicating that this is
going to preview screen 11. Way we can move around
this three D plane in our preview screen. One is if we hold Alt and then click into our mouse wheel
and then move around. And now we can look
all around this. We have a whole
three D world built out here for us to use
which is pretty sick. And one thing we're
noticing is that it's not showing up in our
main screen yet. And that's because
we'll need to plug in our three D render
our camera tracker. One render into our media out and we'll need this
instead of our camera tracker. We actually don't need
our camera tracker anymore, we just need This three D render into
our media out, boom. Now if we go back to
our preview screen two and just make
this full screen, now you see that we
have an image plane. We can see the
tracking data and we can see our logo sitting
here in the middle. The only thing we'll
need to do from here is move our image to sit
where we want to sit. Me personally, I want to
sit right above the car. I'm going to go to transform in our image plane three D.
Then we can use our x, y, and z properties
to move this. X will move it horizontally, Y will move it vertically. And z will move it in Z space, meaning from front to back. If we move our Y up, we can set it about right
here, Maybe move it over. So it seems a little
bit more centered with the building
and the vehicle. Then if we play this back, you'll see that the logo is sitting perfectly in three
D space right over the car. It's rendering as it goes. We're not seeing it
play back very smooth. But there's some
things you can do to make sure that it does. If we go up to playback, there's a few things
here, a few options. If you go to time line
proxy resolution, we could turn this down to half or a quarter,
But if we do that, then things are going to
look really crappy and we can see what we're doing,
but it doesn't look great. One thing I'm going to do is
get rid of our image plane. To get rid of this image plane, we'll just need to deconnect
our ground plane. Boom. Now it's gone. Now we can
come back to the beginning, check out what we have here. That looks pretty sick now
when you render it out, it will happen in this timeline is in four K. So if I were
to export it from here, it would actually
come out in full four K. Now another
option you could choose now you need to have
a computer with a graphics card with
enough video memory, and a computer itself
with enough memory as well to hold render cache. But you could try turning
the fusion memory cache on to cache those frames
all the way through. Now depending on
the resolution and your computer, that
might not work, It may only hold
the render cache for so long before
it needs to delete the render cache to hold the other frames that
it needs to take in. But this is a great option if you just need
to see what you're doing in real time just
to make sure that like, hey, this is a good track
right now, we're seeing that. Now if I go back to timeline proxy resolution and
full you can see that. We can see it in great quality. Even though it stutters a bit, we can still see what
we're doing and we can see that the
track is amazing. And now we can render it out, or go on to color this
clip and then render it out and see the full
thing in full resolution. So this is camera tracking
in Da Vinci resolve. Now, there's a lot
you can do with this, so play around with this. You know, try it
on some different clips with some
different things. You know, maybe if you have a clip with a billboard in it, you can try to replace
the billboard. Or if you have, you know, something, just something
completely different, you can try something that
I may not even thought of and really create
a really cool result. Now, I love this and I know
when I show this to Bronson, he's gonna be like,
oh my gosh dude, how did you get my logo
to sit above the car? I'm gonna be like,
it's magic dude. But you do whatever
you can to impress clients that you need to or just have fun just
to impress yourself, because that's half the
fun too, is when you pull off something really
dope and you're like, wow, that's actually
pretty sick. I'm proud of myself and
just get comfortable with the UI because
fusion is wild and its powers are
almost endless and there's no right or wrong,
there's just creativity. So I'll see you in the next
lesson once you're ready, where we'll go over some final
thoughts for this class.
8. Final Thoughts: Congratulations.
I'm so proud of you all for making it to the
end of the Fusion class. And as I said in the
beginning, Fusion is a huge tool for you to
hold in your tool belt. You have no idea how
many clients ask me for a title animation or
for a graphic animation, or hey, could you track
my logo on this thing? And now you all know how to
do three camera tracking, you know how to
animate and fusion. And you know a little bit
about graphic design. So make sure to share
your projects in the gallery down below so we all can see
each other's work. Get inspired and comment. Leave a little feedback so we can grow as creatives together. And definitely remember, there's no right or wrong,
there's only creativity. And I'll see you all
in the next one.
 Marcel Patillo, YouTuber, Filmmaker