Transcripts
1. Course Introduction: Hello, guys, this
is Calcifi welcome to V effect short
course A After Effects. So in this course, you will be able to learn how to create Channel
disintegration particles, V effects, how to create
superpower effect, and how to track camera for adding T in life action footage. I will be to have
you in this course. Thanks for joining us. Mm.
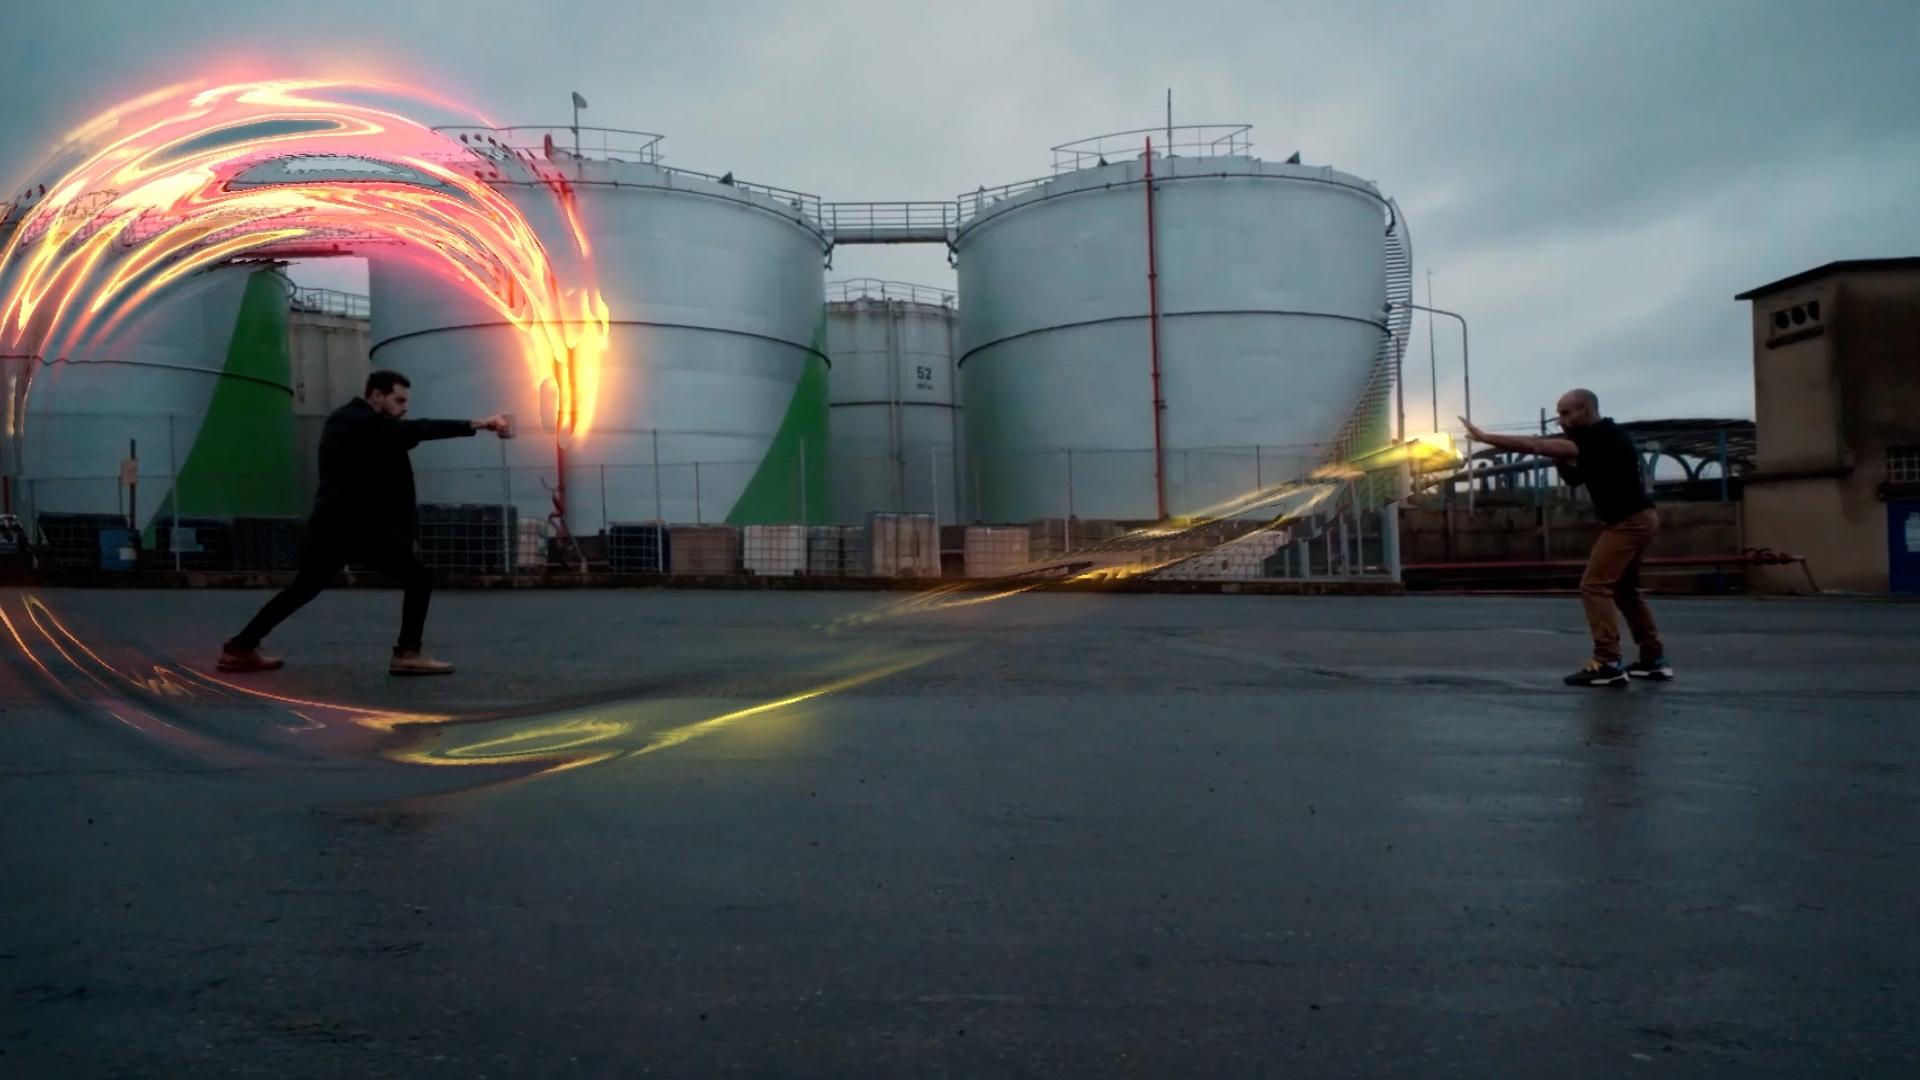
2. Create Fire Shoot by LoopFlow Plugin: Hello, guys, we'll
come once again. Today, I'm going to
show you how to create superpower effect on
life action footage. So let's start. Select your footage, press Control lead to
duplicate and right click. Right here, map. And select map
player, go to EFC. Apply loop flow effect. So first, change
across base point into and go to
Loop flow turn on. Sit 24 and go to mask one. Before going to mask one, Let's create mask on footage, select pain two, and click here. Click here and once again, and once again here. Let's control a little
bit. Laate this. Select again your layer and create Control your mask like this. Control and control. Boy guys, and now select again the
layer and go to Musk. Apply Musk and go to Musk. Select the mask to,
and go to animation and go to animation
across speed there. Animation speed noise. Yeah. Expand this. So right here the ft or
fixed rates, like a 200, and right here, six, right here, 17, and
hold old, click here. So right time, stall ten. Okay. Let's clay now and select
again, select again map. So let's apply box blur effect, double click and make
four, then turn off. Right click, create a
new adjustment layer and apply effect
displacement map, double click and
go to first layer, select map layer, and go to source select
effects and map. Change displacement
rate into 1600. And now play Not that. Let's apply the power screte
the color of the power. Slick again the map, hold
control D to duplicate, and right click
chainmn to color. Write color, then select
turn on, make isolate. First, select box blur to cut and turn off
show background, go to flow, turn off, and go to eteral noise. Make change, whole
shift, make more rates. Play now, not bad, and go to displacement map, Ma later way down. Play, not bad. Select again, the layer, apply Color rama, double click, and go to Color
rama output cycle. Apply the golden one. So if you need to
change the colors, double click, weight
of it brighter. Double click, make
more brighter, and double click,
M orange color. And now select color
control plus B, paste the box blur and make 2.5. Right here, glow effect. Then double click,
make glow like this. So if you need to
apply, once again, double click here, to
make more brighter. Looking good. Let's play now. So let's change Later with
noise the scale. Makes. Let's play a game. Press space, good turn off isolate and change to
add, let's play now. Once again. So
there is the power. Select again and double click on glow effect, make more brighter. If you need to change
the color of the power, so write AP, double
click, change from here. Play a game. Not that let's change to fire effect. Play a game Haris. Okay, guys, thank
you for watching. This was about how to create Superpower effect on
life action footage. Thanks for watching.
Have a good time, and good luck all of you.
3. Create Streak Light by Particular: Hello, guys. Welcome back. This is litty, and welcome
to another VFX torium. Click on new composition and import footage
like this video. So now, I need to create
light straight light there. Right click, make
precompose, sorry. First, right click,
go to T, free Stram, and then go to
composition setting, and change to zero. Zero. Change duration into 10 seconds. Click Okay before clicking
right there, footage, enter and now lock your
video, turn off the audio. So I need to create
straight light coming from behind this and being back to bed this Martin or H and moving from
the camera scene. For creating line streak, create first light, select
to point and name emeter. Very important to
create light streak. The light name must be emeter and change
the color to white, c and k. Okay, slick the light and
move there and press P for the position and move
a little bit more far. Move more far lights, and move x xs there. Stop batch go to second two. So now move your light to
left side xisle bit here, and go to second
four and move again. Little way down, and
go to second six. Plan involve down
there, more near. Select light. Go to second eight more near coming out and go to second
ten coming like this, and moving from camera. Out of camera and walls well. Now make curve, go to bend, select convert, start from here, take a look, select this point, curve and curve curve and make curve like this. Let's select the
move toole arrange. Good. I now time to create a new
solid right there particles enter apply particular play in on particles, solid, go to em and
change em type to lights, and then go to emtter
size take play. F over there your
particle lines. Change. We last it to zero, zero, zero, zero, p zero. Take a that your light is coming and moving from
the camera scene lights. D and make more particles. Go to particle
expand the option, and then change particle
type to strac late. Select strace late,
and then make a little bit more he size for
the particle, not too much. Little with a small change to
ten and go to size of life. Select second graph, select
this point, make more smooth. Let's say, not bad play, not bad. Select the particles again
and go to opacity over life, expand slick second graph, change the color of particle, make warm color, click. And now, change opacity rate to little it of make into 3%, and go to effect and press, right and glow effect. Apply on particles, make brighter and change
the color a little bit more and d. Not
too much, little bit. Good. Click Okay. Apply more light The lost
light of fire light like this. Good. Let's play. That's the light that
is coming. Let's zone. Plano moving behind that
boy and coming from behind the mounting and crossing from front
of the camera. Ts. Guys. So if you need to add another effect or plug
in their right flick, go to new create them on the new solid and right light and go to effects and go to Vp, select optical players,
change to track light, and press F four, turn on the mode, select head. And now p in Good. So select the light, and go to optical
players option, click on Option, select a different lins
flare far on that light. Let's see which one
is looking good. How about this? Not bad. If we hide some
extra details of the lights. Let's see. Hide. Click. And now looks good. Good clean now. The the light is coming
and moving down behind and coming back and
crossing from the camera. Let's select light, hold
control on keyboard, select particles, slate light, and right click,
make a precompose, and right there,
light, strike enter. Okay you guys go to select
at now, I need to make select, go to select
pin, start from here. And there and there. Take a look close, and press M, change
mask to subtract. Let's play now,
moving behind that b and coming from there. So how to control select again, press M M, select mask
pad, select the move to. Close close and close
and close and clothes. Then make a little bit father, make little bit fa
and move behind of the mountain and
coming and cross. Cross. Let's make five person for the fader. Five is enough. Let's play a in.
Cross from there. There is a little
bit more problem. Double click here, so
the light turn off. Let's see, p not that press space to render again. Okay, guys, I have an idea. Go to light straight, turn on, and play now. The main problem is the mask. S, press mask. Set point and this pine. And move this point
up there and move this point here and
move this point there. Zooming make equal into stright line on the
scope black color. Sit there. So make little strike line and
move this well here. The wall, little
up, and move it up. Okay. Let's play now. There's the lightest
coming behind that boy and coming behind the heels and moving front of the camera. This rights we can say shades Shades looking perfect. So in final, play That the light is
coming and will be down and crossing
front of the camera. Light straight. If you need to make
long light line, go to live seconds. Me long lights like this. Let's go back to footage
and take a look. There. Not bad. Select your light straight, go to effects right at E, double click and you
can change the color. I can change the
color like this. So if you need to change
the color like this or this, poor like this. Double click select particle
and main capacity to five, go back to the footage in five, select your footage
and go right curve. Double make b to more real estate light, select the light, and let's
control select this point. We make up play now, and now, not bad. Let's play. No, but. Okay, guys, thank
you for watching. This was about how to create light streak in the
afterfa, animated light. You can use it in TVs, advertisements, and
thanks for watching. Have a good time. Good
luck, all of you.
4. Create Thanos Disintergration Particles VFX: Hey, what's up this is if and welcome to another very
exciting tutorial. In this tutorial, I
want to show you how to create this integration
VFfX scene. So how to change a character
in particles. Let's start. First, click on
composition from footage because we are working
on VFfX scene. So let's find our footage. Double click here.
Select this one. Take a look when the
character is coming here and then waiting and now
changing to disintegration. It move, you must create
your composition, press control plus K.
Change to 15 seconds. Erase, 15 seconds, click. Okay. Now, I need to create the first scene
and one another layer, press control plus D, duplicate, select this
scene, right click. So change to what? Time, freeze frame. Change to freeze frame and move it and and change
this son to this sin. Select this one and
go to composition, Save framers file, save
into Ds cub, name it. Environment. Enter and render. Okay, go to Photoshop and edit this photoshop file
in a W phot Shop and bring or import
in after effects. Again. Click on Open and go to desktop,
select the environment. Okay, guys, let's remove
the character and another scene just select or
save the character in Ping. Now, I need to press Control J. Need two layers and
turn off this one. Select the background,
and Zoom in, go to T, select object selection, and
create eso object selection, and wait for the result. Okay guys, press control
plus j to copy a new layer, and then slick the first one, press Dlate to the late, select the first one
background layer, and then go to where. Okay. Select again the caracter
and wait for the result. Go to select menu and go to modify make expanded
selection into 15, So if we need to expand, not too much e. Let's control
z and change to expand in five pixels and go back to edit and select
content feel direct. Okay. Okay, and now the
character is removed. So select again the
background and press. Sorry, select both, right click. So Merge layers, and
then select booth. Go to layer and go to export
select the first layer, Save to P&G, select the
second layer, save to JP, and click on Export equality, set to high quality, and click Export to desktop, then select a new layer and
write our source folder. Double click, and save there. Manimis. Now go to afterpas. Take a look. This one is double click. Let's import first. Go to folder, select
boat, Import. Select the background,
press old change, and then select the
character, drop there. And then select the background, press T, change the opacity, select the character,
press old Pold brack by pressing bracket. Okay now select again, move the character over there. Zooming take a look, set the character fix on copy. Okay, guys. Now let's play. Changing to disintegration. How to do this, take a look
zooming, set to start, select the layer,
and cut like this. And then select press make full opacity
and now play again, freeze After seven second, after seven second, I need to change the character
into particles. L et's start. So select these two layers, and right click, make precompose and change
it to back out. Enter. Okay. Go zoom out. Play, freeze, and
select the first layer. First, right click, change to, precompose movile attributes, and right here, the boy Enter. Once again, make precompose movile
attributes, right there. The boy wipe and click. Okay. And now, double
click on Composition, right click, create
a new black solid. Click Okay. Select, black solid, and
go to effects and press. Right there, CC light swept. Select and drop there. Now change direction to zero and change H technician
to zero, H techne. Let's zoom in move
there and press ef, turn on the track
mat, select the boy, make black solid and change from the light
reception to cut out. Take a look. The boy is changing
into particles Lights. Press control plus r to create
ruler turn on the ruler, and the particles start from
where take start from 950. There you can see 950, the particles changing
from the 950. And now, Stopwatch center. So after 8 seconds, one, two, three, in 3 seconds. The boy is changing
into particles. To the end. Let's play. The first step, go
back to your final C. Go to setting,
composition setting, right there, final C. Enter and now go to project. Select the final, select
the be wipe right click. You can press Console plus d
to create duplicate or go to edit duplicate and
right click, rename it, right here, by collar wipe, and drop the binear
wipe up there. Select this composition
by linear wp, double click and
select the black, solid the lt and select the bi. Apply the linear p
transition on bicomposition. And now, clean. Let me start from the 950. Double click, create
a new solid for test. Take a look, start from here
and make fa fa like this. Hold control and keyboard,
make more further. Start from the 8 seconds. Take a go to by wi. H second, 15 frames. Go back to bi eight
second, 15 frame. Where is the bi linear wide, H second, 15 frame, Stopwatch, go to 11 second, and move it to the end. Now, double click
the white solid. Play now. Let's say, starting from the eight
second 15 frames. Good. Go back to final
C. Select the by wy, turn on the treat switch. Press for, if you need to show the switch
and right click, create a new slid
and right there, particles enter
and go to effect. Go to trap, select,
particular, and wait. Okay, guys. There is a particle. Go to emeter, and go to select layer and go
to layer emeter, select the by y, and set the scene, Zoom in and make
too much particles. Click here, M zero, 1 million particles, and
change velocity to zero, zero, zero, zero, and zero. Go back to particles, change the particles
into three and make 15 percentage
of the random size. Go to physic, ier and win x, move to left side, and move little bit up
and go to turbul field, make noisy affect wind. So now, slick the particles, press control plus D
to create, duplicate, and go to particles, make to 12 small particles, 1.5 and change random sets to another different particles. Slick again the particle. Press control was
d to create more, and now go to physix and go to ndix, start from here. Select the first particle, go back to particle, change the size in two. Select again, press control,
make more particles, select the first one contro
and go back to particle size, make 1.5 and change the random sets in
different positions. Let's select again,
press controly, once again, and
select the first one, go to rein derm, motion blurr and turn
on the motion blaer. Now, select from the light Select the first
one up to by wy, right click, M one precompose right there,
particles enter. Slick the particles. Double click and select the
first particle right there, glow effect, double click,
Matle bit brightness. Double click again. So select both
glow, go to hit it, copy, and select all
particles paste. Select again and go to turn on. Motion blur, go to motion blur. Expand Mhm bl, turn on. Okay. But you can turn on
the mush bler from there to. Turn on the all Muschm
blur switches and go back to final call. Take a look. There is the little bit
problem from the glow effect. Go back to particles and you
can de some glow effects. From there. Because by or the
character is color is dark, not brighter. Let's see again. Let's remove some
another blow effects the light and the l. Let's see, the light. I think uh. Let's play from the C, press space to render and waiting for results. L et's play. So start from 6 seconds. Take a look, the
cameras stop and the character is going to sky. The character is going to a sky. So if we need to control
more the glow effects, go back to particles, select again, remove
the glow effects. Let's see. Let's find
there the late glow two, glow, and Let's see not bad. I think once again, I
need to render for final. Go to first edit, perch all cache and memory. Take a look about memory. Memory percentage is
change from 90% into 17%. Let's render again,
press space and wait. L et's get to our
particle composition to starting from where
to starting from eight. Select articles, cut up there and go back to it, purge all cache, apply, and let's render again. Okay, guys. Let's play for final result. Train come to 12
seconds and wait. Let's see. No. Take a look. Okay, guys, thank
you for watching. This was about how to
create this integration or change character from
life action footage into particles for
your V vaccines. Have a good time, and
good luck all of you.
5. 3D Tracking To Add 3D Model on Live Action Footeage: So this is Calcite, and welcome to the most important
tracking tricks today in Adobe After Effects and using by element
three D. First, create a new composition
Front footage. Click here and go to download Video selling
Video front camera. So, I need to track the camera, not the position, not
to the motion tracking. I need to track the
camera movement, but not all the video link. I need to track in 10 seconds. Take a treme Calm and go
to composition Tremco. The most important
point is you must precompose your
video after editing. Right click here and precompose. Move all attributes, right
here, footage, enter. And now time to apply the
Treaty camera tracker. Go to effects. And right here, Treaty
camera tracker. Drag and drop here and
wait for the result. Okay. This is the result of
treaty camera tracking. Take a look which track
point survive from start to end of the
video. Which point. Let's find together. I think this point is perfect. Select and right click, create null and camera
both in one click. Because you need the camera
for Tat camera control, and you need track null for
the point of the street. And now, time to add your
Treaty model or Treaty product. Press Control plus Y on keyboard and right
ear element three, enter, and go to effect and
go to videocplet, elem. And now, go to Scene Set Up. Click here, and wait for the
set up of element treaty. Dn. Oh, select your
favorite models. I think select from Halloween. How about this one? W
Grabton. Click. Ok. Okay, expand the group one parameter and expand
particle replicatn, and select your layer track one, press B for the position. Sel your element treaty solid. Don't turn on the treaty switch because our paging is treaty. So now, take a copy
from position one, press Control plus C on
keyboard, and paste. Contras copy paste and
contras copy paste. Let's play now. Not that. Okay. And now, time to add some
shadows, select element treaty, go to particle, change the particle size and
move it up there. And let's play.
Play in the match. D. Not bad. Yeah, Barb. So expand Rinder setting
and go to lighting, change 360 degree for the light. If you need to control custom, expand the rotation
and control like this. So if you need to look more
realistic visualization. I was at the shadow for the
ground of the gravel stone. Select again your
element three D, and go to where S set up. Create a new clan a black plan. Go to click here and
select the plan. Scale up the size. So change it to group two
to control individual. Click. Okay, and then select
a game two group two, expand the group two and then expand the
particular replicator. Let's copy paste from
group one control C copy. Per control C copy, and Ps control C
copy and paste here. Let's move it down. Down the stone Ls. Let's rotate a little
bit by x axis. Hold control on keyboard. Slowly, rotate 15 degree. So let's rotate in
group two rotation. 15 dig and go back to see Set U. Apply the match shadow matrio on the plan to turn on the shadow. So go to press its, go to physical, and find the
match shadow, apply here. And click Okay. So go back to render set, Expand and ambient occ, turn on and vel A O. There is the shadow
on the ground. So if you need to control it, Control from cops shadow, control for the quality, 32, so control the radius and. Et's play a game
to see the result. Let's into Chat. So the main point
about to create the effects or visual effects to a treaty model on
life action footage. Even supply the environal
reflection on stool. How to do this first turn off the element three D
and go to composition, go to sa frame as file. Select your disk and then go to change the output module to JPA. Okay. Okay. So go back to your final column and select again the
Elin treat go to W, sin set up and apply the
environment on your model. Click here and go to Disktp, select this environment
image. Okay. Let's play a game. Oh,
you guys, take a look. We have applied the environmental
reflection on the tune. So if you need to control it, go to lighting, go to
rotation, control. Control. So turn on blur during animation camera
movement to see better result. Play now. Oh, guys, thank
you for watching. Have a good time. Good
luck, all of you.
6. How To Create Ground Cracks On Street Live Action Footage: Hello, guys. Welcome again, and welcome to
another VFX project. In this project, in this video, I want to show you how to create cracks VFX on this Landscape. So let's start first. You will track your video. Select your video and
go to M Tracking, select Mh tracking,
and track camera. Wait. So after camera
Trey tracking, play your video and find the point which is shooting
from start to end of video. Select this point
and right click, create a null and camera. There we have null
and Trey camera. So after this, go to
project, double click, select one of these
crackings, not bad. Double click and
put to composition. Let's press as for the scale
down the size and wolf head. Then pirent link, press a four to show the parent link
to the null object. And select again, whole shift press plus on
keyboard change mode. So I think overlays better. Let's play out,
press space, Okay. B O video is tracked by camera. We can't parent link. We must active what? We must active three D
switch, press a four. Turn on the three D switch. Don't parent link because
our tracking is three D, not a two D. And then
press for the rotation, the rotate and move it up. So let's play again. So press T for the past t and
stopwatch. Take a look. When the cracks is coming. I think this is not good. Select again. Select your video, cracks
video and go to effects. Click on effect and
press, write the linear. Len your wipe, select and
apply on the crap video. Okay. And now make
Sater Stopwatch. We go to few seconds. Play now. We're good. Make more fatter. Play now. Go on. So if you need to create this
crack ground into seconds, eight, nine, 10
seconds, select again. Select, so press Control D, Control plus D, right click. T freeze frame. So cut up to there and
create more layers, press plus on keyboard to sit. Good. Let's play again. So I need to start from
here and up there. M trim con from the 4
seconds to 11 seconds. Play again. See the result. There's the final result. Do gate, you can
apply another one. Double click. This
is another sample. So let me see, Crag two and press alt
to replace directly. Press apply there. And play again. This is
the sample of the cracks. Play. Fit play now. So press control Zing. Ladies, so. Just turn on the video playing. Everything is looking good. So let's turn off the
salon and play now. Movies, thank you for watching. This was about the
drowned cracks. In after effects.
Thanks for watching. Have a good time. Good luck.
7. Create Fireball With Explosion: So today, I want to
show you how to create VFX fireball and wet explosion
and ndescape cracks. We must import our video by clicking to new
composition from footage and going to select
this footage. So, this is the big simple
I need to track first, select the video and
go to work based. Much and Tracking,
click on track camera. So this is the result
of camera t. And now, I need just two tracking points. This is the first
point. Right click, create a new solid. So create solid in camera, and select this point, right click, create just solid. So right click,
create a new light, select the light type to point, and the color must be white, intensity 100%, and
change the name, emitter for particular plaging. Click. Okay. Let's
eimate the light. Select this track solid one. Press P, select this one, press P. I need to
animate from second four. Press P for the emor light. Select the first one, press
Control C copy, paste here. Now going to track solid second, select the position press
Control plus C copy. In 1 second. I want to animate my light. Stopwatch from second four, Stopwatch, going to second five, Copy and paste here. Plea now, No bed. Now select the first key frame, zoom out and move it up, Lattle bit, move far and here. So play now not bad. Right click, M easy ease for a smooth ending
of the light. So now time to create the fire. Create a new composition. And right here, fire set press
it size 400, 400 pixels. So change 0.5 seconds. Click. Okay, and
double click here. Let's go to find five. Plag ins, annual
explosions. Let's see. Next, and next. A label is good, slit the level and drop
to fire composition. Move it to center. So set
from the start from there, scale down the size, set to center So I think go to second three, press T for the P t, M zero. Go back to final con, press control plus k, and right here final. Okay. So drop the
fire composition to final con and create
another new solid. Write the name part.
Enter and go to effects, go to trap partic and
wait for the result. So theories are particular select and go to me
change to lights. And next, go to second
five, Stopwatch particles, press page down for one
frame change to zero. Now, change mor size to zero, press tab, zero,
zero, zero, and zero. Okay, change light
intensity to none and go to go to particles and go to sphere, change to a spray. Now go to spray control, select fire, and change time sampling
to start a bird stretch. Look, guys, first, turn
off the particles. I need more particle. Not too much a little
bit down the size and change the size of the
particles. Change to. And now go back to rotation. Make rotation between these
particles, M rotation. So change blend to add. Let's select the screen. Now go back to life second, Cange to into two, change to one. Okay. Let's change again.
Add lighting. The lighting is not bad. Looks good. Select the
particles, press F four, and change to Olay, let's select again to normal. And change second, 0.5 So 0.7. Good. Let's render. Turn off the sound and tram com, start from second three, and end of second
sex and play again. Okay, guys. So select your particular and go to
rendering Muhion blur. Turn on the Muhion blur. Next, let's import the
other footage of explosive. By going to project,
double click. We go to desktop, and there we have explosion and their charge, import
select explosive. Move there. So let's select
And I This track solid, copy the position and
select explosion footage. Press turn on the treaty switch, next, go to material options, exit light, turn off
turn off exit light. Press P, pace here, and move up. Press W for the rotate, rotate. Press V for theol or selection set here, press S, the scale le
the size and set there. Okay guys, now, I need to set this explosion when the
fireball hit to the ground, change the quality
quarter for fast working Take a look a little
bit, go to backward. Press page down, moves one frame one by one frame,
one frame wall. So now set the explosion. So play now, the to myth. Hey, Tug. Let's
set their charge, and drop the composition. First, go to option, turn on the treating,
go to material option, accept light, turn off, and close, select position
of the explosion clip, press control plus C, copy and control
plus V, paste here. And move their charge. Sit right there, press
W for the rotate, rotate, and move here. Okay, Move behind of explosion. Sit here. Select cut your layer like this and fit
your composition screen. Render worse again. I think let's move their
behind of the fire. Behind of the fire,
s. Play again. L et's create the fire
sheds lights and shades. Create a new solid by pressing
control plus y and select the color and write
the name Shad. Okay, turn off and create caps there and create by p, select mask these places. Mask these places turn on again and press pale shift
key with plus on keyboard. Press M. Select all
three s, make feather, press T, and select all close move sheets
top of the video. Press, a little bit more
and who shift with change. Press V, select again. Select shades, move move here. Make more father. Let's animate from start change a pacty zero
and move forward, make brighter and brighter. So make and we make of Okay, guys, let's import ground cracks for
better results, we move it down of the video. So Press scale down the size, turn on the three
D, and move there. Close open again, go
to marial option. Accept lights turn off, and clo press S for the scale
down the size, move hair. So press changed overly. So after changed over, out, D did Let's render
our final project. Press space. This is the final
result of this project. And don't forget. By
going to second five, Stopwatch particular
particle seconds and move by page down in
one frame, change to zero. And then you can test your
final project like this. Thanks for watching.
Have a good time. Good luck, all of you.
 Khalil Sediqi, Yes I'm a Digital Arts Instructor