Transcripts
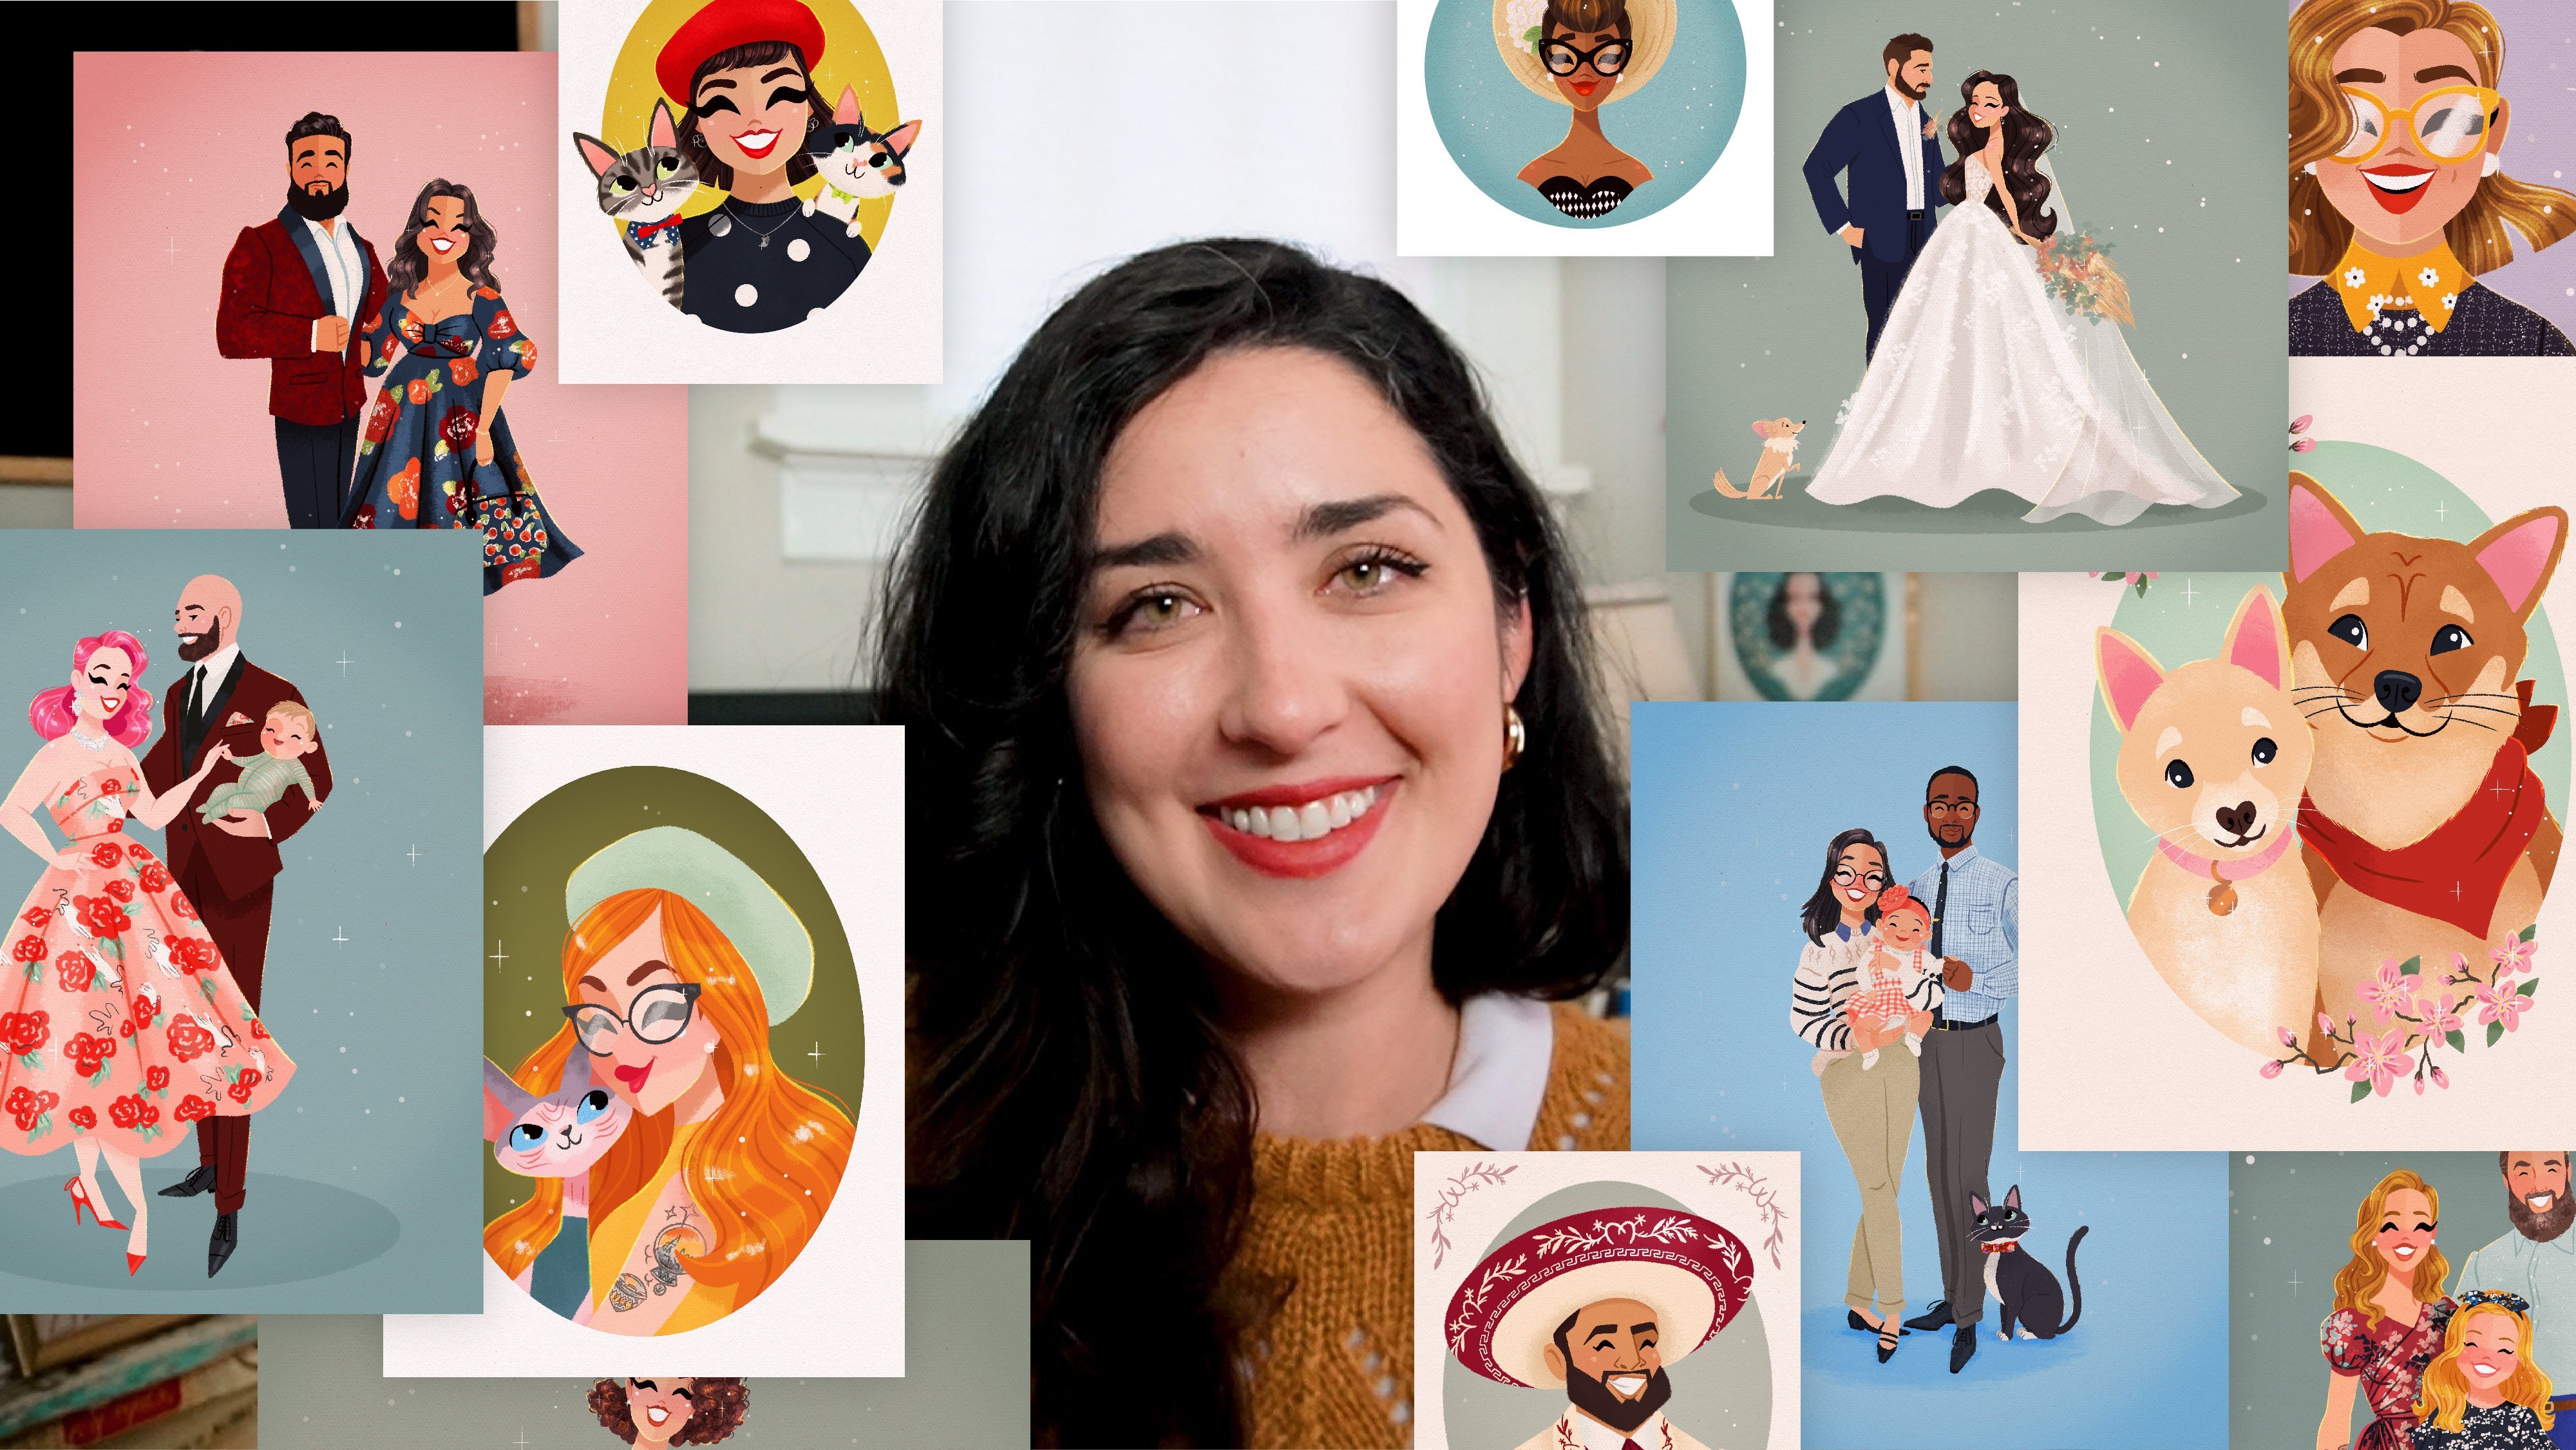
1. Welcome, Darling!: Hi, lovely. As I'm shea, I'm an illustrator based
in Atlanta, Georgia. I do a ton of Character
Art and my style mixes a vintage vibe
with modern values. And in this class, I'm going to share clever
ways to incorporate some Vintage Touches into
your own characters, in Your Own Distinct Art Style. So why incorporate Vintage
Touches into Your Art? Well, using a vintage Style Makes Your Art
feel nostalgic and can tag on the heartstrings and create all these
warm, fuzzy feelings. A lot of times there's
shared nostalgia. If you were born
in a certain era, maybe something makes you feel like you were a
little kid again. Or maybe you just are
an old soul and you love all things
that feel vintage. Now I do want to be clear
and say that there are some vintage things out in the world that are
really, really negative. But to help nip that in the bud, I personally try
and be as inclusive and positive and my
Art style as possible. And that could range from
Drawing People of all ages, body shapes, ethnicities,
orientations, what have you? It's just important to be as aware of this as
possible and to be intentional about
drawing all types of beautiful humans. What
we gonna learn about? Well, I'm going to share
different ways to help you analyze why Art feels like
it's up a certain era. I'm going to share
tools that can help Your Art feel vintage. And I have a really
Fun drawing challenge if I do say so myself, that is going to
help you to create a piece of artwork that
you were delighted with. We're also going to talk a
little bit about drawing the human figure and finding
your own unique style. So there's lots of
good little glimmers here for artists of all levels. What tools do you need? Well, you can do either
traditional or digital. I personally will be
using my iPad Pro and the app Procreate to show
examples of my own work. But really all of the
principles can totally apply to you if you were just
using traditional media. Okay, the last little thing is that I think learning
should be Fun. And sometimes that means that
you have to pace yourself. So at any point in
time with this class, if you just need to take a
break and pause my face, that is totally okay. I'm not offended at all. Do what you need to do to
feel refreshed and recharged. I am so excited to dig into this creative exercise with
you and I'll see you in class
2. Class Project: One of the best ways
to learn a new skill is to practice it
with a project, but to get rid of the whole
scary blank canvas fear, I've come up with
some Fun drawing prompts for you four
different decades. I would recommend just
starting out with one decade, whichever one inspires
you the most. The goal is to create one unique character using the categories from
the drawing prompt. So I'll be sharing the drawing prompts and just
a little bit and also include them in the class
resources section for you. One thing I really want you
to do is to share your work. I know it is so tempting to
only share your work when it feels perfect and
polished and finished. The benefit of being here on Skillshare is that we can
share all the ugly stuff. We can share the Process work in the hopes of getting feedback. I can give feedback
all chime in, but other students in this
class can also give feedback. And I think all of
our work will become stronger for it when you are ready to share
on social media, I would love it if you would use the hashtag
VintageVisageChallenge. The reason for this is so
that I can find your artwork. I can comment on it, I can like it. I can share it. I think it's just
gonna be another way to help build some
more community. I'm going to be doing
this drawing challenge right alongside you. I'm going to just start with one decade as per my
own recommendation, but I'll keep
working through this and this will be
an ongoing thing. So in the next section, I will share those
drawing Prompts.
3. Drawing Prompts: Get excited. Here are
the drawing prompts. I have got eight different
decades for you to choose from as you create your vintage
massage Illustration. Starting out with the 1920s, we've got Cloche Hat, Palm Fronds and Jade Green. 1930s will be Feathers,
Champagne and Lilac. 1940s Gloves,
Moonlight, Burgundy, 1950s Pearls, Polka
Dots and Mint. And then 1960s or Ribbon,
Bouffant, Powder Blue, 1970s Braids, Roller Skates, Orange, like the color orange or an orange, orange,
that's fine too. 1980s Gradient, Neon
Pink Sunglasses. And then last but not least, we have 1990s Platforms, Freckles and a rainbow color
palette. Think Lisa Frank. So hopefully some of
these decades and Prompts got you excited
to start drawing. But if not, that's okay. I'm going to be sharing
ways to get inspired and find inspiration in
just a little bit. But first, I want to talk
about some big ideas on how to incorporate a vintage
vibe into your artwork.
4. What Makes it Vintage?: What makes something
vintage in loose terms, Vintage is essentially
something from the past. It can be from any decade, that's not the current decade. Artistically, there
are several ways that you can bring a vintage
vibe into your work. You could try and
create something that feels
authentically vintage. Let's say that you
fully lean into a 1920s Art Deco aesthetic. So the subject matter fuels of that time as well as
the artistic style. Or you could combine
different aspects from different decades that resonate with your taste and style. So let's say that you love that 1920s Art Deco gland vibe, but you also love some of the floral patterns
from the '60s. You can match them
up together and create something totally unique. Or you could add
Modern subject matter to your artwork to make Your Art feel more relevant and relatable while still maintaining
a vintage aesthetic. Maybe you would draw
a modern-day person in a vintage setting, or maybe you have a very
modern illustration style, but you draw a vintage
subject matter. Maybe you have a very
minimal style, for instance, but you do your own spin on a vintage travel
poster from the 1880s. These are just some
big overarching ideas of how you can incorporate
vintage into your work. But if you are a visual person, which I highly
suspect that you are, my recommendation is
to start looking for vintage items at
artifacts and objects so that you can kinda get
yourself into that world and see which items really resonate with your
taste and your Style. You're going to become a
vintage Detective of sorts. And in the next section, I'm going to be
sharing how to look at vintage Art in which visual
cues to keep a lookout for
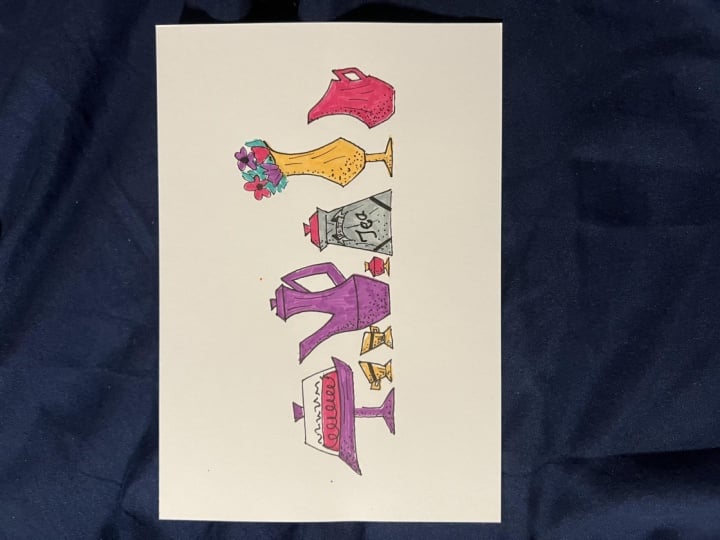
5. Vintage Detective: Some of the best places to find vintage ephemera
are vintage stores, antique stores,
and flea markets. I think it's so Fun to
personally hunt for vintage treasures
and actually be able to pick them up
and look at them. Just in real life. I learned a lot that
way personally. And I'll take pictures of the items so that I can
reference them later. But I fully recognize that that is not a
Fun experience for everybody or you might not have the opportunity to go to
those types of stores. You can always use the
Internet to look up vintage items to sites like
the Library of Congress, Pinterest, Flickr, and the CSA archives are
some of my favorite go-tos. Take unsafe pictures
of items that just bring you a
sense of delight. And it doesn't even have
to be vintage artwork. It could be random items like a perfume bottle or
rusty parts of machinery is just anything that has made you smile and stop
for a bit and look. Take a picture, save it. I don't want you to get
overwhelmed in this phase, which is an easy thing to do, especially if you go
into a vintage store and it's chock full
of so much stuff. So I'm gonna give you some
very specific visual cues to look out for. First one would
be color palette. Are there any colors that
you keep being drawn to? So for instance,
you'll find a lot of Mint and peaches in the 1950s, but you might find a
lot more rusty oranges and browns in the 1970s. The next one to look
at is linework. Are they're thin, elegant lines, or maybe they are chunky or dotted or just a
little bit messy. Is the artwork actually
outlined completely or is there just only a
little bit of outline? Two of my favorite artists, irritate and Barbie, or they
outline all of their work, but the outline is a
lighter color than the inside fill rather than a black outline
like you would see. And maybe 101 Dalmatian. Another one to look
out for is shading. So is there flat shading, smooth shading, maybe
it's a hybrid of both. For instance, in the 1950s, you'll find a lot of
flat shading for some of those iconic mid-century
illustration. That's because a lot of
those were made for print. They were either
going to be used in newspapers or advertisements, where there was a limited
number of ink colors that could be used and it forces the Style to be a
bit more minimal. But if you look at
1940s movie posters, you'll see that there's a ton of smooth shading on the
character's faces, almost like an oil painting. The next one to look out
for is shape language. So are the shapes
Angular and choppy, or are they smooth and
curvilinear and very fluid? Look at the 1970s, for example, there are so many wavy and
flowy and psychadelic kind of lines that really have
defined that decade. The next one I want
you to look out for is textures and patterns. So if you're looking
at your vintage Art, try and think about what the
function of that Art was. Was it being used in a book, wasn't used on a
vintage matchbox. With vintage match
boxes, for example, they have a ton of
texture because it was probably a thicker paper
type that needed to be used. And then there's also, the line work isn't very clean. There's a lot of heavy ink
bleed and that's probably because It's the ink being
printed on a very small size. So it just can't
be quite as crisp. So if you're thinking
about the context of why the Art was made and
what it was serving. That might really
explain why you're seeing certain
textures or patterns. Another example of texture is halftone patterns that were
used in mid-century Art. Which halftone pattern
is basically just add a sense of depth
and visual interests by using patterns of dots to create the appearance
of colors and shade. Another example of how
you can add texture to your work is
using crosshatching. So look at vintage
Victorian etchings and engravings to see how people were able to use
cross hatching to create a sense of depth and
more visual interest. So keep an eye out for
these key concepts. We've got color, line work, shading, shape, language
and textures and pattern. You've been gathering a lot of information and
research and images. So the next step is
to create a Moodboard so that you can organize
your visual thoughts
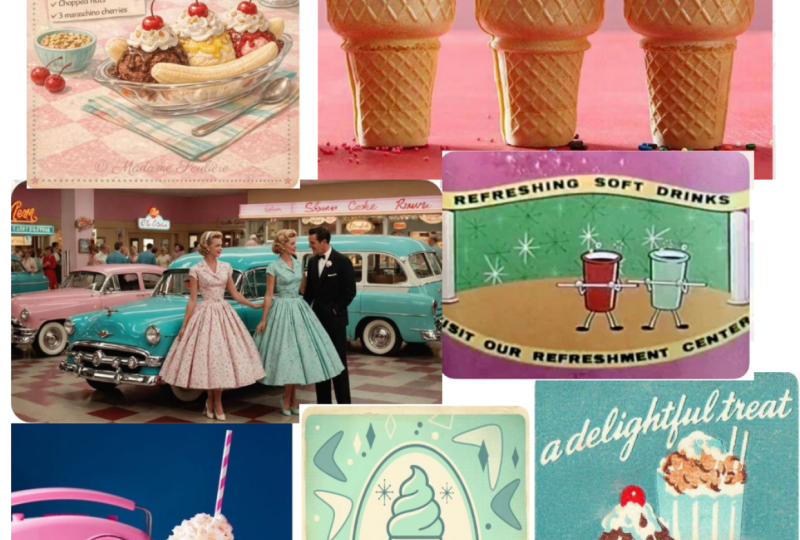
6. Making a Moodboard: So which decade is currently
inspiring you the most? For me, it's the 1960s. I'm just loving that energy and the prompt for that is Ribbon, Bouffant and Powder Blue. So what are some more things
to look for it you've already been collecting a
lot of visual research, but I think now it's
time to hone it in and focus on your
specific decades. So whichever decade
you've chosen and those three categories that are within that drawing prompt, really trying to hone
in your search to make sure that those three categories are very present in your Moodboard and totally immerse yourself in that decade. Even listening to music from that time can really help
you get into the zone. Here's everything I
gathered from my Moodboard. It's not even that many photos. You don't have to collect
thousands of images. The point of the Moodboard
is just to get you excited to start
drawing and to find clever ways of combining
multiple elements into one unique illustration
with sketches, I start out by making
just rough sketches of different aspects I
like from my Moodboard. So Powder Blue eye shadow was
really popular at the time. I like how playful
they were with color and makeup in the 1960s using two different shades of pink lipstick for the
upper and lower lip. Also, there was a baby
doll movement and fashion with short little
A-Frame dresses types, enlarge BOS, which I want
to try and incorporate. I really liked the
idea of adding accessories to the
Bouffant hairstyle. And there's also just tons of super fund chunky
costume, jewelry. Everything is so extra, and I am here for it. As you sketch, you can either
copied the images by just free handing it or you can trace over them to really
learn from them. But ultimately we are
going to try and push you into your own unique style and put your own spin
on it to give it this freshness and something that is completely
original to you. And I will be
talking about how to find your own style
and a later section. But first, I want to
talk about Drawing People and friendly reminder.
You can take a break. You can pause this class, get up, stretch, go outside, take a walk through all the
good things and then come back when you're feeling
rest and recharge
7. Drawing People: When it comes to drawing People, I'm a little old
school because I firmly believe that
it really helps to learn how to draw humans realistically before you
jump into simplifying them into characters
to meet How can I simplify something if I don't understand how the
real thing looks? So let's say I want to
simplify and I will, I need to understand
the different elements that make up an AI, which is the lashes, the lid, the iris, the pupil. Before I can decide which
elements I wanted to take out or simplify as humans, we're also very familiar
with what humans look like. And we're pretty hypercritical
and we can know when something feels off when
drawing in a simple style, every mark on the paper matters. So you want to make sure that everything
feels intentional. One of the best ways to practice figure drawing is in-person. In the same way that
I like to go to vintage stores to actually see items in 3D space
and a real live space. I think it also helps with
figure drawing because you're taking 3D
information that you can see in front of you
and translating it into 2D information on
a piece of paper. We're on a tablet. So maybe your local
community college would have some figure
drawing classes. Or if not, treat a
friend of coffee and just draw them while
you're on your coffee date. Or you can just go
to a busy store or even maybe an airport and just sit down and start
drawing People. Another option, if, you know, figure drawing classes or
drawing a friend in person. If that's just not
an option for you, you can go to the Internet, you can find photos online. There's a website
called Quit poses.com, which is really helpful
for understanding how to draw different poses and
different body types. So there are other ways that
you can be practicing this. You can actually
directly trace over a photograph to really help
you understand proportions. If you aren't able
to freehand it yet, just take whatever little
baby steps you need to learn how to draw humans and
understand proportions. Then once you've
got that dialed in, I think you'll be ready
to start minimizing and simplifying your Style when you can nail drawing a
human realistically, it's going to put you
in a really good spot when you're drawing in a more
minimal illustration style. And it's also going
to help set you apart from other illustrators.
8. Finding YOUR Style: Okay, so let's say that you've
got Drawing People down, but you don't have your
own unique drawing style. What's great about pooling from vintage inspiration
is that there are tons of artists who've
come before you and that you can study from
and learn from. Let's say that you chose the 1920s as you're
drawing prompt, find several artists from that time period and
really analyze their work. Why do you like their style? What appeals to you
about the piece and how does it make you feel? Is it the color, the style, the story, the line work, the emotion that conveys. Just really deeply analyze
the artwork and try and pick apart exactly why you like
certain pieces of it. And over time you'll
just be making all these little mental notes and you can start incorporating different elements of other Art into your own work and start creating something
interesting and unique and original to just you. How can you actually
practice this? Let's say there's two
artists you like. You really liked the
work of irritate, who was a fashion
illustrator from the 1920s. He's got beautiful
androgynous characters, delicate line work. He combines jewel
tones with pastels, very Distinct and stunning, and a very flat style as well. But maybe you also really liked the artwork of
tomorrow, Dylan Pekah. And she's got really,
really high contrast, minimal background,
very angular shapes and highly stylized female subjects. So these two artists couldn't be any more different
from each other. But take aspects
that you like from Tamara and take aspects that you like from airtight
and try and create something interesting
and unique from that. Well, you can also do to really help grow your technical skills is to actually copy
the Art of the master. Now this isn't for your
own personal gain, it's just so that you
can become so deeply familiar with how
they create and how they made the artwork that it's just a part of you All
in all when you are analyzing other artists and
you're taking bits and bobs from pieces of their
Art that you find successful or that
resonate with you. You're slowly starting to
develop your own sense of taste and style and you're learning more technical
skills as well. And Actionable step would be to copy the artwork
from the masters, but use a different
medium for us. So for irritate, he has these very tenuous flowing
lines and maybe you do a cut paper technique
which is gonna be a little bit choppier
and angular, harsher lines, which will
be an interesting contrast. And you might learn
something from that, or you could do a totally
different subject matters. So maybe you take
tomorrow's style, but you draw animals instead
of the human female figure. So just have FUN
making stuff and throwing things at the
wall to see what sticks. It does not have to be pretty, you don't have to show anybody these weird little experiments. But you really are
going to be learning so much by drawing and practicing and really
analyzing Art consistently. Eventually you can do an
audit on your own work. You can have more of a bird's
eye view and see what are the things that are
tying your work together is that the
colors that you're using, the subject matter,
emotions, the setting. Once you have enough
artwork made, you're going to be
able to start finding that thread that connects
everything together. So just look closely at Your Art and try and find
these consistencies. I know that was a lot
of big brain thinking. It's just going to take time inconsistency to help
develop your own style. It has taken me years
and years to figure out mine and it's ever-changing
and ever evolving. In the next section,
I'm going to share my process with you as I create my little 1960s
inspired Character
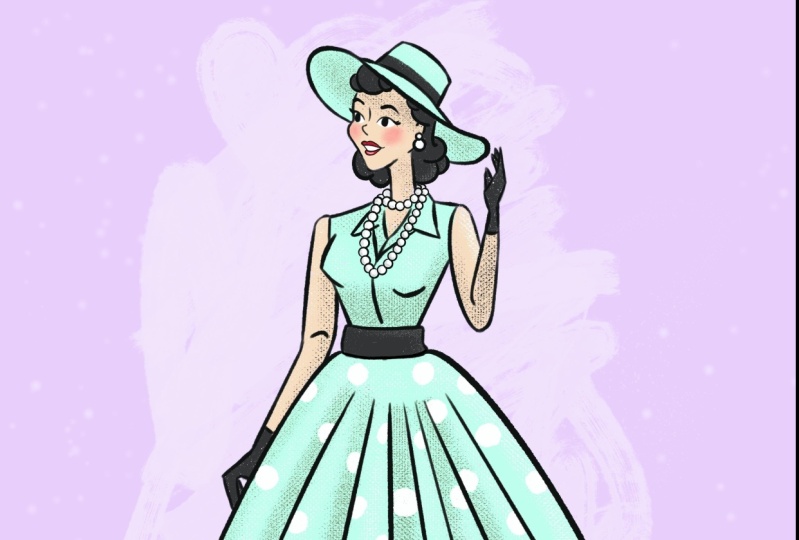
9. A Peek into the Process: I like to start out with
a super rough sketch, and this can be the
happiest thing ever. The point is just to start
drawing something and get something down on
the page to get rid of the daunting blank canvas. Using a soft brush
really helps me also to not get too
precious with this. And just to keep it very loose before spending any time
cleaning up the sketch, I just want to get a general
sense of how my colors are going to be playing together
through color blocking, will I use just solid shapes? Maybe it would be
helpful for me to keep some line work to help
differentiate between colors. Just a quick guide
to help me think of how the final piece
will look without spending too much time
painstakingly cleaning up the Art. I'm good with a
color blocking and now I'm going to take
the time to tighten up the Art and create a
super clean sketch that will be my guide
for the final artwork. And you don't always
have to do this. You can jump straight into the final Art if that's
better for your process. Although for me
spending time with this sketch helps
me to edit myself and make sure I feel really good about the proportions
and layout. Even flipping the
canvas vertically is a good way to make sure the facial proportions
feel correct. And I actually ended up liking the way that
it felt when I had flipped it vertically versus the first way it started
in my rough sketch. So you just kinda learn a lot by cleaning up
your own artwork. Now it also takes me awhile
to color in my artwork. So cleaning up the sketch will really just make my life so, so much easier in the long run. Now that we feel good
about the clean sketch, it's time to begin finalizing the artwork by adding all
the colors and textures. I like to keep my rough
color study handy so that I can easily
pick out colors. And speaking of colors, I personally love using a lot
of layers and my artwork. This is because I might want to change the colors down the road. So maybe I'll even
sell this Art Print in multiple color palettes
using a lot of layers really just helps me
to keep my options open. And I'm also going a little Rogan some areas from
the clean sketch. It's not too late to change
your mind in this face. I am grateful that I've got
the clean sketch as a guide. If you have any questions about techniques I'm
using in Procreate, please comment below and I'm totally happy to answer them. I just love coming up with original characters is
such a Fun way to invent your own little world and create the loveliness that you
wish existed in real life. And it's also so Fun to think of creating
little storylines. Who she winking at, what party is she going to? How long did it take
her to do her hair? Talking about this as making me so genuinely excited to see what you create and I cannot wait
to see your illustrations, so please share them
in the class projects
10. Texture Tips: You may have noticed
that I add a lot of texture to my Art and
that's because I want my Art to feel tactile
and real and tangible. For digital artists, you can get really great texture brushes in either Procreate or Photoshop. There are a lot of
texture brushes that come included with Procreate, but I've also bought several
and I'll share some of my favorites in the
class resources section. If you're using Photoshop, there is a really great
brush pack called Kyle Mega Pak brushes and that comes included with
Adobe Creative Cloud. You could even create your
own textures in real life. So you could do some
ink splatters or some thick paint strokes
or my personal favorite, you could scan in cool
types of paper if you add paper texture to
the top layer of your artwork and set your
blending mode to Multiply. It is just going to add
the loveliest sense of texture and depth and warmth. And it will just make
your heart sing. And you could either
scan and some paper or find an image online
friendly reminder, you don't have to
make it perfect. Vintage Art was made by humans. And I think as we live in a
world of AI generated Art, our humanness is becoming
more important than ever. Lean into the wonky ***** like maybe your lines
aren't perfectly straight. Maybe the colors aren't
perfectly filled in. Be intentional about
making it look like a human did it because
humans are awesome.
11. We Did It!: Welcome to the end of the class. We made it and I genuinely cannot wait to see the
beautiful Art that you create. So please, please share your
work here on Skillshare. I want to see everything. I wanted to see
your mood boards, I want to see your sketches and I want to see the
finished project. I just really want
to be involved. So please let me,
I also would love to see all of your
stuff on social media. So again, use the hashtag VintageVisageChallenge
over on Instagram. You can even tag me at
designed by shea so that I can just make sure
to see your work and we can be friends on social. Thank you so much for
taking time out of your day to spend time with
me and take this class. And I genuinely hope that
you have found it helpful. Is there anything else that
you would like to learn from me or do you
have any questions? You can totally
comment them below, or you can find me on social at designed by shea, stays broccoli
 Shea O'Connor, Illustrator & Designer