Transcripts
1. Course Introduction: Hi, my name is Amir. I'm a content creator
and I have been making tech videos for
the past five years. My main channel is
called reviews PKA, where I make videos and
my native language, which has an overtime. I have been able to build up
an audience for my content. My goal with my
content has always been to deliver the best
quality that I can. So the quality of my
camera work, my audio, my lighting, and
the overall quality of my finished video. It has literally taken me
years of toil and struggled research and
practice to build up my skills as a video
content creator. And in this course,
I've tried to boil down what has taken
me years to learn, to hopefully give someone who's fresh in the game and easy to digest introduction
into the world of video production
as a content creator, while designing this course, I've tried to touch on
all the things that I think are important to know
as a beginner in this field. Everything from cameras and lenses and lighting
and microphones, and what sort of
software you should use. Along with a whole bunch of other mindset elements
that you need to have if you're going
to produce videos regularly and consistently
as a content creator. Now this course won't make
you of pro overnight. No course ever will, but it will give you a good foundation into the
basics of video production, which you can then
use as a roadmap for more advanced learning in
the future as we go along, I'll also share some
pro tips with you, which are nuggets of information that I've
gathered through the years from my own
research and trial and error. If you or someone looking to start producing videos
for social media, or someone who's just recently
started for someone who's just interested
and wants to check out what radio
production is all about. Then I invite you to check out my course and I hope
to see you there.
2. Mindset of a Content Creator: Hi everyone and welcome. I am really glad that you decided to take this
course with me. And I hope that you'll
walk away with it with a whole bunch of information
that took me years together. Now I've designed this course as a foundation course where
the two assumptions are that you are a beginner video producer with little or no knowledge
of video production. And that as a content creator, you are working alone. This is important because as
a one man or one woman army, you have to do everything. You are the director, the camera man, The editor, and everything in between. So instead of having in-depth, expansive knowledge of all the different areas
of radio production. You need to know just enough
about everything to be able to produce your videos
by yourself regularly. In traditional video
or film production, there are entire teams
working in different areas. But as a solo content creator
making videos on YouTube, Facebook, or TikTok, you'll
be working by yourself. So it's really important
that you're not too bogged down in any one area. Now, since this is a foundation
course for beginners, it'll build your
foundation or your base, but it's up to you to
build on it further. You will learn the
basics of everything that I think you need
to know on day one. And then you can
choose which areas you want to pursue for further
learning in the future. And that's also very important. You need to be able to
supplement your own knowledge through research and
through watching tutorials. You can pretty much learn
anything on the Internet these days by using resources like
Skillshare and YouTube. I'm also a self-taught
content creator. I never went to any film
school or anything like that. Now with new or budding
content creators, the biggest flaw that I see is this obsession
with viral videos. Every content creator
craves that video that just pops you uploaded get
lots of views instantly, make lots of money, get lots of subscribers. But it's very important
to understand that as a successful content creator
or social media influencer, you need to look at
this as a marathon and not a sprint if you're
constantly chasing viral videos. And I think you're setting
yourself up for disappointment because for the vast majority
of content creators, viral videos are very rare. I know of only a couple
of YouTubers were able to get every video to pop. Like Mr. Beast, who has a ton
of experience and hundreds of thousands of
dollars to spend on each video. He basically has the
viral formula down to a T. But for the vast
majority of us, It's grind season homemade. Now I'm not saying
that viral videos are not desirable or that
they don't have value. They can be very
valuable in giving you a windfall and also giving
you a boost for the future. But in my opinion, it's very important
to keep your focus on your consistency and on
your long-term game. The longer you're consistent, the more chances you have of eventually making
something that goes viral. Think of your content
like fishnets. The more content you have out, the more fishnets you have, and the more chances you have
of catching a big fat one. Now as a case study,
I want to talk about a social media
influencer who really inspired me to get
into this work. I'm talking about
Marcus Brown Lee, aka MK Ph.D. also makes
tech videos like me. If you check out Mark as
this channel right now, he's got over 16
million subscribers, gets millions of
views on each video. And he's considered by many as the king of tech
content on YouTube, the absolute gold standard. But check out his journey.
Marquez has been making content for the last 13 years. To date, he's uploaded
1,500 videos. And in an interview
he said that on his 100th video upload, he had a whopping 73 subscribers and he was still
grinding forward, which is very telling of
Marquez is mindset at the time. And that's not all when Mark has applied for monetization on YouTube's partner program is first application was rejected. You had to wait six months
and then apply again. Rejected, waited six months, got rejected again, then
waited six months again, and then applied and
finally got monetized so he could make money from his content. Think
about it for a second. It took him two years just to be able to
earn money from ads, but he stuck to his guns, embraced the grind
and kept working. Of course, now when
you look at it, he's in the best part
making lots of money. He's hailed everywhere as
a great content creator. But the journey
that he took takes grit and the right mindset. Mark has didn't
give up when he was faced with what many would
call disappointment. He kept on grinding on. And if you want to
make content on social media and develop
your influence than you, my friend, need to
be ready to face disappointment with
a winning attitude. Another way that you
need consistency in your content is that many channels now
have a set deadline, certain days of the
week that they upload. Some even have same
time, same day approach. And the benefit of that is
that your followers and subscribers know when
to expect your content. It's very challenging
to pull off. I myself struggled with it, but you need to have
consistency on some level, once a week, one video and two weeks or one
video and a month, but it has a schedule and
then try to stick to it. If you're consistency is
all over the place and your subscribers don't know
when to expect your content. You keep taking sporadic
outbreaks all the time. It will diminish your
social media influence and you will also
get fewer views. Trust me, I've seen it
happened to my own channel. So I know what I'm
talking about, which leads me to my next mindset element that you need to keep an eye on your performance and hold yourself accountable. Numbers always matter. Forget people who say that numbers and earnings
don't matter. Because if you're doing
anything professionally, your performance will matter. If you're a salesman, it
matters how much you've sold. If you're a sportsman, it measures how many goals
are points you scored. If you want to be professional, then you have to keep an
eye on your performance. And for video content, you'll need to look
at your analytics. They'll be a separate class
on some important analytics that you can use to keep
yourself accountable. But for now, keep in mind that accountability is key if
you want to perform well. But it's also very important. Not get obsessed
with the numbers. You need to conserve your energy and put it into your work. It can be very demoralizing
and sap your energy right out when you keep looking
at your numbers and they're not growing as fast
as you want them to. I'm also guilty of this. In the beginning. I used to check my subscriber counts multiple times a day. Every video that I uploaded, I would keep refreshing that page to see
whether views went. But over time,
I've realized that it's a lot of wasted energy. I don't do that anymore. I checked my analytics
a few times a week. I tried to enjoy the journey and the process of creating content and learning about how
I can make it better. It's very important to
improve your skill over time. And usually it shows in your work if you look at
your favorite YouTubers, if you see the first
videos and now you'll see a huge improvement and how
they do, what they do. And if you don't improve
your work over time, you will plateau and stagnate. So always look to constantly
improve your content over time and do things
like taking this course. And also seek feedback from your audience on what they like, what they dislike, and try to figure out what
works and what doesn't. And so you need to
have the mindset that you're nurturing
and community, it's important to engage with your audience, ask
them questions, encourage them to participate by commenting, sharing,
and subscribing. And over time they'll
come to love your work. They'll start loving you. They'll start trusting
you and becoming part of that community rather
than just viewers. And then as time goes on from
a commercial perspective, a big community behind
you will turn you and your social media platform into a brand look to develop
your brand over time. Now obviously, there's
a whole bunch of other mindset elements that you need to have as
a content creator. But these are some that I personally think
are very important for beginners to keep in mind. Now in our next class, things are going to start
getting a little spicy and we're going to
start talking about actual video production, starting with the equipment
that you'll need. See you there.
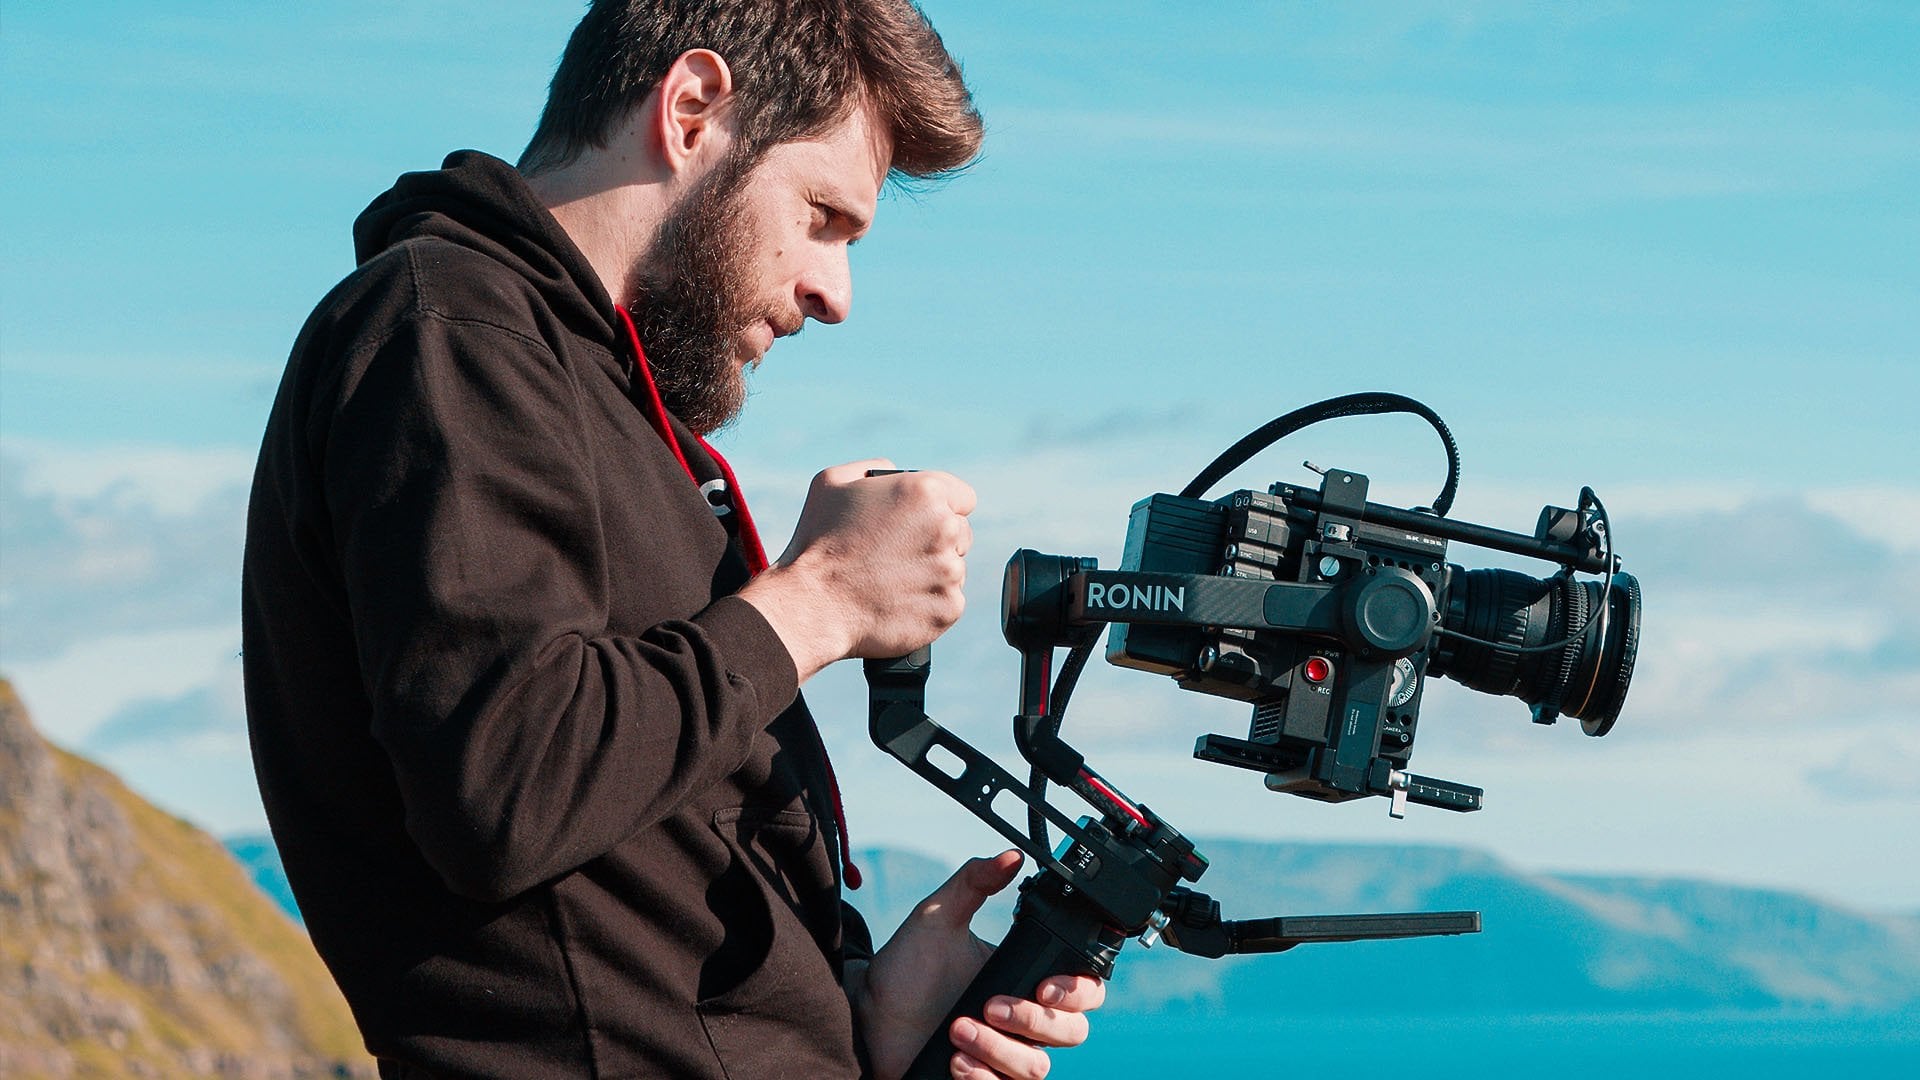
3. Gear and Equipment: What's up, guys, glad
to have you back. And in this class we're gonna
be talking about the tools, the equipment that you'll need to start
producing your videos, and also the equipment
that will add more production value to
your content in the future. It's very important
to understand that while equipment and gear can be very helpful and useful for you to
produce videos with. You cannot let it become
a barrier to entry. Every now and then
people come up to me and asked
me this question, how do I start if I don't have all this equipment was supposed
to start making videos. And the best answer to that
is start with what you have. Everyone has a phone these days. And as a tech
reviewer, I can tell you that phones these days have very capable cameras and very
decent processing power. I personally know concentrators who started their channels with just their
phone and now they have huge social
media following. Then you also have to
understand that tools and skill go hand in hand,
one without the other. It's pretty much useless. There's no point owning so much equipment that you
don't even know how to use. And also keep in
mind that building up and arsenal takes time. Your favorite YouTuber
has spent a long time in getting all of the cool gear that they now have
in their closet. But since this is a class
on video production, we will go through
some of the gear that you need to know about. The first one, of
course, is the camera. Like I said, even a phone
camera will do to begin with. But if you're able to invest and want to invest in a good camera, then there are lots of
options in the market. We will discuss this in more detail in our
class on cameras, but investing money and
time to learn how to use a really good camera can do wonders to your
production quality. And the second piece of
equipment or lenses, with most DSLRs and
mirrorless cameras, you have interchangeable lenses, will have a whole class
dedicated to lenses also. Then there are external
microphones and of course there's gonna be
a class on microphones. But for now, just know
that the built-in mic in your phone or your camera won't get you very good results. And audio quality is
very, very important. A lot of people even
believed that if you're watching a video which
looks really bad, but the audio is really good, you're more likely to stick on. Whereas if the video
looks really good, but the audio is very dim
or echoey or very noisy, you're more likely to get
turned off and bounce away. Then we have lighting, which
is again super important, and you'll need at
least one light source. This can be a lab lying
around your house or a big window where you can get
really nice natural light, but you will need at least one and preferably more than
one lighting sources. We're going to have
a class on this as well where I'm going to
discuss this in more detail. But for now, just know that the more light sources you have, especially movable
light sources, the more control you'll have on how your video
actually ends up looking, then you need a computer to
post-process your video on. This can be the computer
in your pocket, I E, or phone. I told you that phones these days have become really good. And we will talk a bit more about the different
ecosystems like Windows and Mac in our class on
video editing software. Then of course, along
with the computer, you'll need some sort
of recording media like SD cards or
external hard drives. And here we have a pro tip. Always use an external desk for copying and
editing your videos. These are called Scratch Disks, and the idea is that
you don't want to scratch the disk in your
laptop or your computer, because if that fails, it's going to break
your computer. Whereas if this one fails is just an external desk
and I can get a new one, which brings us to the
next item on our list of production equipment,
video editing software. Now, like I said
before, we will have an entire class
talking about the different video editing software that are available for you. But as a beginner, you should know that you're going
to need some sort of software to bring
your recorded clips into and then stitch them
together and add effects, text and sound, and
then be able to render it all out
in a final file. But to recap some of the basic equipment we just spoke about, you lead a camera, you'll need a microphone, you'll need some
lighting sources. You lead a computer, recording media like SD
cards and hard drives, and you'll need some software. Then there's also
additional equipment that you don't necessarily
need on day one. And sum over it is very
advanced equipment. You might probably
never need it, but still we're going to talk
about some of these things. So the first one is a tripod. This is very basic, but a tripod helps you
to place your camera anywhere and keeps it
stable while you record. And the next few items on
this list are definitely for more advanced users
who know the basics. Overdue production fairly well. So we have fluid heads, which lets you pan left and
right and tilt up and down. Sliders, which let you slide your camera from side-to-side. Gimbels, which
enable you to mount a camera or a phone for
really good stabilization. This type of gear
lets you record interesting movements and
interesting perspectives. And we're going to
touch on all of these inner class on
the basics of B-roll. Then there's other
motion equipment like Dali's Gibbs cranes, et cetera. But most content creators
will never need these. So while this list
is very exhausting, it's by no means exhaustive. There's a whole bunch
of other equipment you can also think about. But the important key factor from this class that I
want you to take away is that it's important to not
get fixated on this list. You might need all of
these things or you might need none of these things will
actually leave the camera, but you might need very
few of these things. I don't want this class
to discourage you or make it look very daunting to get
into video production. The point of telling you all
of these things is to make sure that you
understand what sort of equipment people
normally use for video production
and also to give you something to
look forward to. If you really want to get into a high-quality professional
video production, then these are the things
that you might plan on getting on later
in your career. So in our next class
we're gonna be talking about video production workflow. It's gonna be interesting. See you in the next one.
4. Production Workflow & Key Questions: Video production
workflow refers to the entire process by which
you produce your videos. You should have a
fairly clear idea about what sort of production workflow
you're going to have. Because there's a lot of
moving parts in this process. There's cameras and SD cards and hard drives and
computers and software. And so it helps to have
at least a mental map of what sort of process you are going to be using to
produce these videos. Having a good
workflow can help you identify bottlenecks
and your production. And it can also help you in
achieving a certain level of efficiency and quickness in your work turnaround times. So broadly, your video
production workflow will have three stages. Preproduction,
where you think up an idea, do your research. You could maybe write a script if that's how you want to do it. And this is when you also get your equipment ready to shoot. So basically everything
you do before you start recording your
video is pre-production. This is followed by the
production stage where you go ahead and actually
record your video. And then there's
post-production where you process and edit and then
render your final video. So when someone says they
will fix it in post, it basically means that they're going to do that thing after the video has been recorded and it's in the editing process. Here's an example of what a basic video production
workflow looks like. Now before you start
producing your videos, you need to think
about how you're going to design your workflow. But there are a number
of key questions that you want to ask
yourself right in the beginning because they're
going to have an impact on what sort of production workflow you're going
to need in e.g. are you going to
have a script or are you going to
go off the cuff? If you're one of
those single take ninjas who goes
off the cuff than the pre-production
and post-production workflow seems to be much, much simpler than someone like me who has a
script and there's a whole research phase
and then Script and fact checking and then post-production editing
is a bit of a nightmare. Then there's also a bunch of
other technical questions like what format will you be
recording and publishing it? Because these will have some
bearing on your workflow and how you need to design
it for video production, the three main formats are
raw, Flores and H.264. Again, there's a bunch of
other formats as well, but these three are the one
I've come across the most. So raw is a very heavy format which stores a lot
of information, but also needs lots of storage space and computer
processing power, but it gives you lots
of options in post. So pros and advanced users
really love raw video. Then we have progress, which was made by Apple, and it's a fairly
data heavy format, but it gives you
very good quality. And it's currently preferred by most mainstream
video editors like Final Cut Pro and most prosumer
cameras also supported. Then we have H.264, which is what most
social media platforms like YouTube prefer. It's a very compressed
format because these files need to
be small in size. But because it's compressed, it needs a lot of
processing power to produce whatever format you
decide to record and then publish in is going to have
a bearing on what sort of workflow and what sort of infrastructure you're going
to need to have in place. Another question is, what's your video resolution gonna be? Higher resolution videos
need more storage space and more computing power and will likely add steps
to your workflow. So the main
resolutions or forget, which is now what most high-quality
content creators used for platforms like
YouTube and Facebook. Then we have 14, 40 P, which is also known as Quad HD. It's four times the
resolution of ten ADP has the name cord. Then we have ten ADP, which is also known as full HD. And I would recommend you to
start at ten ADP, full HD, because most content right
now is consumed on phones. And most phones will not be able to do above
full HD anywhere. Even my analytics
show me that 80 to 90% of my audience watches
my videos on their phone. By the way, fun fact, even
the course are watching right now is in full HD. I'm recording
everything in six good, but then down scaling
all the way to full HD so you can tell how good the quality of full HD is. And then below this is
720 p, also known as HD. You can go for 720 p if you
have limited resources. But I would not
recommend it since the low-resolution could affect the quality of your video, then we have aspect ratios, which basically tells you the relationship
between your videos, horizontal width and
vertical height. The most common one right now is 16 by nine for long-form videos. And this is what your
TV normally shows. But increasingly with time
we're seeing 18 by nine come up as an aspect
ratio because it's a bit wider
than 16 by nine. And with 18 by nine, you have thinner black
bars on the sides. And it makes better use
of the screen space available to phone
users do not, however, that with 18 by
nine aspect ratios, if you watch your
content on a normal TV, likely it's going to have
16 by nine aspect ratio. And so you're going to see
bars on the top and bottom, but that's a very
small price to pay. But these aspect ratios only rarely apply for
long-form videos, because increasingly now
we're seeing people go towards shorts and
vertical format videos. For these, you're
going to want to check your social media platforms for the best resolutions
and aspect ratios. And last but not least, let's talk about frame rates. And fundamentally, there are
three main options here. For any, for FBS,
30 FPS, and 60 FPS. 24 FPS is the most
traditional outfit. All of these because they used
to make movies in 24 FPS. And now that legacy has carried
on into the digital age. And 24 FPS is also
considered widely considered to be the most cinematic of all
the frame rates. Then there's 30 FPS, which is now starting
to catch up. We're definitely seeing a lot of TV shows being made in 30 FPS. There's a huge debate
of which one's better. And with 30 FPS, the benefit is that the video feels
a little more smooth, especially where there are
lot of fun camera movements. I personally prefer 30 FPS is my standard frame
rate and fun fact, this class that
you're watching right now is also made in 30 FPS, so you can see how smooth it is. Then there's 60 FPS, which is hands down the
least used of all of these. And it gives the video and ultra smooth feel like
aren't really give you a preview of what it's supposed to look like because
this video is and 30 FPS. If you want to
check it out, go to YouTube and search 60 FPS. You'll see a bunch of videos. Basically 60 FPS will give your video on ultra
smooth field. And even though 60 FPS technically is much
closer to reality, is strange, but it feels
almost artificially smooth. Keep in mind that 60 FPS has twice or more frames than
the other two formats. And so it's going to lead to bigger file sizes and again, infrastructure
and workforce. Now here's a semi-pro type because this isn't hard
what everyone uses, but this is what I use. I record all my
footage in black magic six k row and then I convert
it into six K progress. My final files are
in for K H.264 with an aspect ratio of 18 by nine
and frame rate of 30 FPS. So now I want you to think about what sort of production
workflow you're going to need based on some of the questions that we've
asked in this class, bear in mind that your
production workflow needs to be as
efficient as possible. And it needs to enable you in turning your work around
as quickly as possible. So I think this is enough for video production workflows and what sort of questions
you should be asking. In the next class, we're
going to talk about cameras, and that's going to be
a very interesting one. See you there.
5. Intro To Cameras: Welcome back guys. In this class, we're gonna
be talking about cameras, which brands and ecosystems
are available in the market. Some good options for
content creators. And the next three
classes are gonna be on how to use your cameras. So let's go ahead and
run through some of the options you have
available in the market. The first one is obviously
your phone camera. In the beginning to just start
use what you already have. And most phone
cameras these days, there's a PRO Mode,
which lets you control all the
settings manually. We have a pro tip here for
professional camera work. We want to try and control
everything manually. We don't want to leave
anything to the camera. The more you can control
things manually, the more control you'll
have on your final video and using the camera on your phone when you're
just starting out, it can be a really good
way to learn about the basic functions of
a camera like Exposure, white balance, and focus, which are going to be
our next few classes. And if you decide
to use your phone, then there are some good
free camera apps available, like open cameras, a good one, It's an open-source camera
app for Android phones. And if you want to invest
some money in an app, then checkout filmic
pro for the iPhone, which I've also used on my
phone to record videos. And it lets you control
everything manually. I think it's really maxes out the capabilities of
your phone camera. But if you don't want
to use the camera on your phone and instead
want to buy a camera, then there are options
in the market for DSLR or mirrorless cameras. They're very similar. Dslr stands for digital
single lens reflex. And then a DSLR camera, there's an actual mirror between
the lens and the sensor. This mirror moves when
you use the viewfinder, the light bounces off
of the mirror and then reaches your eye when you
take a photo or a video, this mirror physically
moves out of the way so that light can
fall onto the sensor. Then we have mirrorless cameras, which you guessed it
don't have that mirror. So they're much smaller in size since there's no need to
fit an angular mirror. And that's their
biggest benefit. If you want a more
compact camera, then you should be
looking at mirrorless. Now within these two categories, there are different
sensor types. I'm not really going
to get into too much detail about this because I don't think it matters
to beginners that much. But here are the
different types. So there are crop sensor
cameras like APS-C, micro four-thirds and super 35. And all of these have
different crop factors. Most beginners will likely start with a crop sensor camera, since they're much cheaper than there are also
full-frame cameras, which are typically more expensive since they
have bigger sensors. And I don't want
to burden you with too much information on day one. So as beginners, if you want to look more into it than
you should really research the different
crop factors and how they affect your image. But moving on, we're
now going to talk about specific brands within
the camera space. So in my experience,
I've seen for brands as being the most popular
with content creators. Sony, Canon, Panasonic, and
increasingly black magic. I started off with Canon and then pretty
soon moved to Sony. Sony A65 100 in the background. And now I'm doing
everything on black magic. In fact, this course right now is being recorded
on a black magic six K. But to beginners, I
usually recommend Sony. Sony mirrorless cameras are very popular these days
because of the kind of features that they offer at comparatively lower
prices than canon. And so we've seen the
rise of Sony amongst influencers as their
preferred ecosystem. And I'm using the word ecosystem because all of these
different brands of cameras support different types of lenses and accessories. And usually you're going
especially with lenses. If you buy Sony lenses, it's very likely that
they're not going to work natively on Canon cameras. So it's important to make
an informed decision about which brand you're
going to go with. Because you'll likely
invest a lot of money in building up a whole
library of lenses over time. And these lenses won't natively work with other brands cameras. And we'll talk more about this in our class on
lenses and filters. Then canon is a more
traditionally like brand, offers really awesome
color science. A lot of people that
I know Hughes Cannon do so because of cannons, strong legacy in
the camera market, and also because they're
really liked canon colors. But Canon is generally
seen as being more pricey for any
given feature set. For the longest time, even Sony's entry-level
cameras offered for K. But if you want a cannon, then you had to spend
a little more money. And even now, cannons forget cameras cost a
little more than Sony's. Now with Panasonic, their GA
series is somewhat popular. The GA4GH five and g, h phi of S seem to be very popular amongst
Panasonic lovers. But the lion's share, in my view, seems to be
with Sony and canon. As for black magic, the story is very interesting. We've seen it come up in the
last two to three years with their lineup of four K and
now six kids cinema cameras, which can record raw video and they give you that
film like feel. Even though the cost
of fraction of what mainstream cinema brands
like airy and read cost. So black magic is a
very good option now for more advanced
content creators, indie filmmakers, people
who make documentaries, but most people who go for black magic want
that film that look, I want to recommend
beginners to pick up a black magic because you need to know how to color grade, and post-process the
video you get from it. And you also need beefy
production infrastructure. You need lots of
storage space and advanced knowledge of
how these cameras work. But the quality that you can get out of a black magic camera in two to $3,000 is
just phenomenal. Let's now move on and talk about some camera models
that you can consider. This list is by no
means exhaustive. These are just cameras
that I prefer. Cannons. 90 d is a very decent option, are very versatile camera that won't break
the bank too much. If you're not really
bothered about for k, then you can consider the
older ADD as well casing nice that use these ETDs for a long
time and making his vlogs, if you want to go with Sony than their Alpha series
is really good. A six to 360,400.6500. I made most of my videos in my early days on this A65 100. It's a really good camera
that I'm using to this day. Now if we want to go a
little higher on the Sony, lighter than the a sub three
is also a very good option. It's a full-frame camera
and cost a little more, but it offers very
good picture quality. Many, many YouTubers
still use it. With Panasonic GH
five and g h phi of S are worth considering. And if you want to
jump straight into the deep end and black magic 6k6k G2 and six kip Pro
are very good cameras, but obviously you need to
learn how to use them. So like I said earlier, I wouldn't recommend
these to beginners. Then if we go into the upper
echelons of social media, likes of MK PhD and Jonathan
Morrison used red cameras, which cost tens of
thousands of dollars. But for red, you need
quite a few level ups before you even think of
going down that route. So now that we've talked about the different types and brands of cameras
that are big inertia. Know, I want you to have two key takeaways
from this video. One is that while
choosing your camera, keep in mind that you're
choosing an ecosystem. And the second thing
is that it's very important to know
how to use a camera, which is what we're
going to talk about in the next three classes. The first of which is
going to be on exposure. See you then.
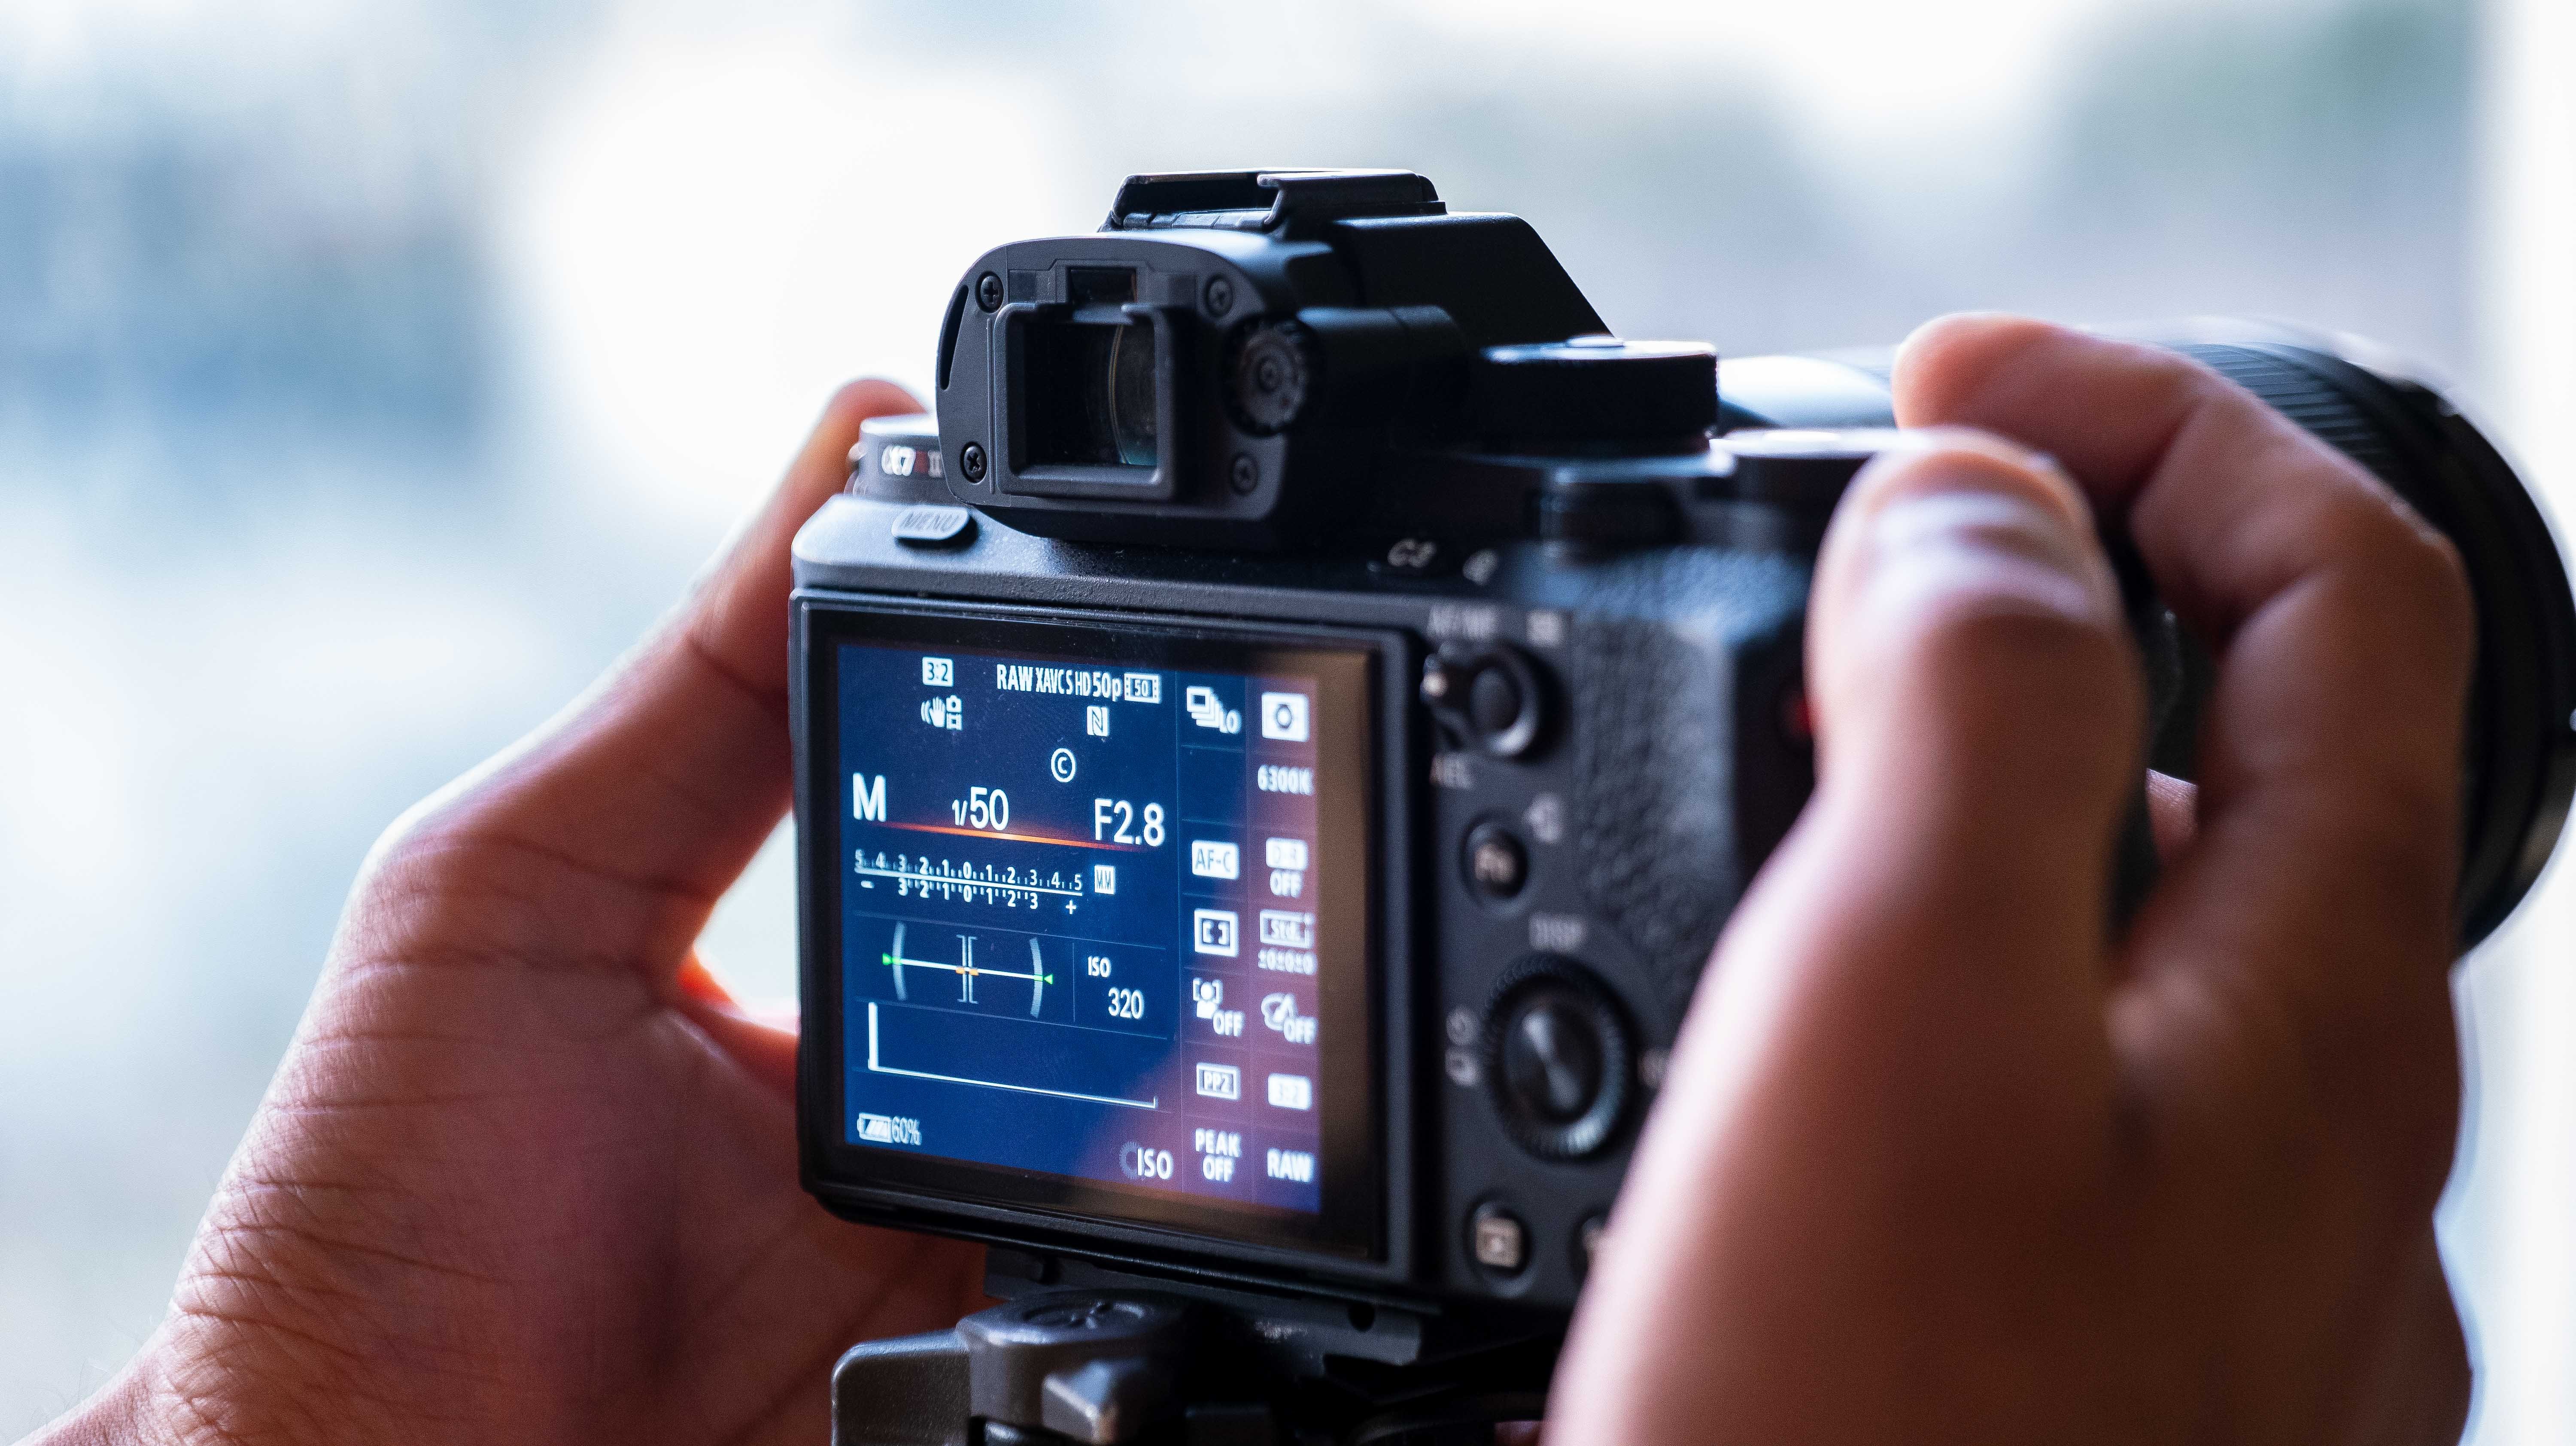
6. Exposure: In this class we're
going to talk about exposure, what it is, and how to get the
right exposure in your videos every time. But first, let's understand the basics of how a
camera actually works. So light enters the
camera through a lens, falls on a sensor at the back of the camera and exposes the
image onto the sensor. This is where the word
exposure comes from. In general, when we
talk about exposure, we mean how bright or
how dark your images. While recording our videos, we want the correct exposure. We don't want our image to be
overexposed and blown out, nor do we want it to be
underexposed and dark. Having the right exposure
is key to ensuring good colors and a pleasant viewing experience
for your audience. Now naturally, the first
thing you can do to adjust your exposure is to adjust the lighting in
your environment. More light will give
you higher exposure. Less light will give
you lower exposure. But that's not always an option. And there are three
key functions in your camera that let
you adjust exposure, ISO, aperture or iris,
and shutter speed. Let's look at these one by one. So ISO basically
means the sensitivity of your camera sensor to
the light falling on it. Typically is denoted by a
number like 100200400800, and it could go up into
the tens of thousands. The higher the sensitivity is, the brighter your image will be. But there's a catch
as ISO increases, it also adds more and more
noise into the image. To appear. Most cameras have an optimum iso level is
also known as native ISO. This is the ISO over the
camera will give you the best balance between
brightness and noise. E.g. in my Sony A65
hundred, it's 800. With my black magic, it's 400. And find my Blackmagic has
dual native ISO 400 for normal lighting and 3,200 for low light or
dark conditions. But the point is, it's worth researching a little
bit and finding out the optimum or native
ISO for your camera, then we have aperture,
also called iris. And this is that hole and your camera's lens when
light enters into it. And this aperture
can be made wider or narrower to control how much light hits
your camera sensor. Typically measured in f-stops
like F 1.82, 0.55, 0.6. And the higher this number goes, the narrower your
aperture opening becomes, the less light goes
into your camera. E.g. if we're talking about F14, which is a wide-open aperture, it's going to let him a
whole bunch of light. When I take a video
with this F1, 0.8 is also a very
wide open aperture. F 5.6 is relatively narrow, and S 16 is basically a pinhole. So obviously at f 1.8, there'll be lots of light
hitting the sensor. Whereas an F 16, you'll
likely need to be out under the sun because very little light is going
to get into your camera. But there's a catch. There's always a catch that Is that changing the aperture on your lens has another
fundamental effect of changing the plane of focus. As you open that aperture, the plane of focus becomes
thinner and thinner. So it's something like f 1.8. You will have a razor thin plane of focus and everything in the background and foreground
will be out of focus, which gives a very cinematic and portrait like
field to your shot. But using such a wide
aperture like F 1.8 or F14 will just let tons of
light into your camera. And so you either need very low-light conditions or you can use something
like an ND filter, which is basically like
sunglasses for your lens. What we're going to
talk more about this in our class on lenses and filters. Now at something like F 16, you will get what is
known as everything focused or infinity
focus because the plane of focus will be so wide that everything in the image is going
to be in focus. This is used in a lot of brightly lit landscape
and scenery shots where there's a lot of light and everything needs
to be in focus. But because this is
a class on exposure, knowing a little bit
about how your aperture works actually lets you control the exposure
in your shot. We have another pro tip here. Use your camera at
the native ISO and prefer lower aperture
settings like F 3.2 and F 2.5 and use F1 0.8 for cinematic shots
with heavy background blur, or what we call bokeh. Now moving on from aperture, Let's talk about
the shutter speed. Shutter speed is measured
in fractions of a second. So at 01:40 eighth of a second, one 50th of a second, one-sixtieth of a second, and it keeps going on and on. Back in the day, cameras used to have physical shutters which would open and close
numerous times every second. Now with digital cameras, we have digital charters. And the more times the shutter opens and closes every second, the less light hits the sensor. In other words, the foster
this shutter speed is, or the larger this lower
denominator number is, the less light will end
up hitting the sensor. But there's always
a catch and you can't really mess
with shutter speed too much because it
starts affecting other aspects of
your video, e.g. if your shutter
speed is too high, it's going to reduce motion blur to the point where your video fields really digital
and sharpened. Then at certain shutter speeds, the lights in your office
will start to flicker. And this happens a lot as slow-mo videos where the
shutter speed is really high. We have another pro tip here. The best shutter speed is when this lower denominator number
is twice your frame rate. For 24 FPS video, you want this to be at or
near one 48th of a second. For 30 FPS video, the best is one-sixtieth
of a second. This is just a generally
held rule of thumb to make sure that there's a natural
level of motion blur, especially in terms of what
sort of stuff we watch on TV. And so the industry standards
seems to work best. Now show the question on
your mind is how will I know if my short is
exposed properly? Well, we have tools for that. The first tools
are your own eyes. You will be able to
see from the chart if it's overexposed
or underexposed. A lot of times you'll be able
to tell by just looking. Then we also have histograms. Most cameras these days are
able to show live histograms. The general rule of thumb here is that if your histogram is too much on the left than your short is slightly underexposed. If it's on the far right, then your short is gonna be
overexposed and you want to keep it just a
little right of center. Another more intuitive tool to manage your exposure
as zebra patterns. Most cameras these
days have this feature built-in where you
can set the levels at which these zebra
patterns show up to tell you which part of your
short is overexposed. And then you can reduce
the brightness of your image by either
dialing the lights down or using ISO aperture and shutter speed to
manage the brightness. And the zebra patterns
are what I use the most in my production on
a day-to-day basis. But if you want
ninja level control, you can use another tool
called false color, which basically color codes everything in your
image to show where it's falling on a
spectrum of underexposed, all the way to overexposed. I think false color
is a little more advanced for most beginners, but if you would like to
learn how to use them, then I would suggest you do
a bit of research on them. So guys, this was our
class on exposure. I hope it gave you enough
of an understanding around exposure to be able to do a bit of research
and learn more. In the next class, we're gonna be talking
about white balance. Let's get it.
7. White Balance: What's up, guys? Welcome
back to another class. And in this one, we're gonna be talking about white balance, which is extremely important when we talk about
video production. Because in order to get good and accurate colors
from your camera, you really need to nail
that white balance. I guess the first question is, what is white balance? White balance is defined
as the process of removing unrealistic color costs so
that objects which appear white in-person are rendered
white in your photo. Let me explain. Every time the lighting in your shooting environment
changes, e.g. if I was to go from this
white fluorescent lighting to maybe yellow
tungsten lighting, I would need to
calibrate my camera according to the lighting
scenario in which I'm shooting. This is to ensure
that the whites in your surroundings
actually look white. And if you don't do this, you're going to have really
weird color costs and your image here you'll see a
really cool blue color cast. And this short, you're seeing
a super warm color cost. And there are also
times when you'll see green or magenta color
costs and your image. And if the color cast on
your image is too strong, then even in post, it's gonna be almost impossible
to get it all out without making your other colors look a little weird or out of whack. So in order to avoid this, we are going to make
sure that you understand how to handle white
balance and your cameras. And if it sounds daunting
or scary to you, trust me, it's very easy to do and only
takes a couple of seconds. Different cameras
have different ways of setting white balance. Now the easiest and most basic way of doing this is of course, using auto white balance, where your camera is going
to look at your entire shard and then tried to set
white balance on its own. But we always prefer to
do everything manually. And the most dependable way
to do this is to go into your camera's settings
for custom white balance. And then literally giving
your camera a frame of reference for what
is white and gray. You can use a white
balance card for this, also known as a gray card. Here I have another one. And with this, what you're doing is you're telling
your camera, hey, this is supposed to be gray as your camera will take this
information in and then adjust how much yellow or blue or green or magenta
the image needs to have in order to show that gray or that white
color correctly. Now in a pinch, you can
also use other things lying around in your studio
or your recording space. I've used a four papers in
the past and even some of my walls to set my white balance when I didn't
have a white balance card. But obviously there's not
gonna be as accurate as a proper gray card or white
balance card would be. But in a pinch, it's much
better to use these to set your white balance than to not set your white
balance at all. Some cameras will also have
the option of manually setting the color temperature of the light and
your surroundings. Usually this is
measured in Kelvins. You have a pro tip here. 3,200 Kelvin is the
color temperature for yellow tungsten bulbs. 5,600 Kelvin is natural
sunlight or daylight. And those bright white
fluorescent indoor lights are usually 6,000 to 6,500
kelvins or beyond. But I still recommend
that you get a white balance card like these. They're not that expensive, probably 15, 20 bucks
for one of these, but the benefits
that you get from them are immense if you set your white balance properly using these most of
your other colors, but also for fall
right into place. And you'll find that in post, your work is gonna be reduced because you're not
going to have to go back and try to save colors
and improve your short. So yeah, Neil, your
white balance, you'll be a happy camper. Now in the next
class we're gonna be talking about focus and the tools that you can use to
nail your focus every time. See you then.
8. Focus: All right, welcome back. So now it's time to
talk about focus, which you might think is a no-brainer and very easy to do. And in some ways it is, but it really helps to know what options you have
when we're talking about focus and how to use focus
to make better videos. Like I said earlier,
we always want to use manual settings on our
cameras as much as possible. Manual control of your camera will teach you how to use
your camera properly and also give you immense control on your overall video and
focus also falls into this. So we're going to
use manual focus wherever possible and
wherever practical. But obviously we have to also
understand that most of you are content creators who
are likely working alone. So when you're
recording yourself, sometimes your camera is
going to be too far away. How do you focus then? These are all questions that
we do have to keep in mind. So let's first talk
about autofocus. It's extremely useful
in situations where you're recording yourself
and working alone. Your face stays in
focus even when you're moving around or if the
camera is moving around. But the biggest drawback
with using autofocus, especially if you're
using a lower price camera and lens setup is focused breathing. I've seen videos where every time the speaker
moves a little bit, the camera hunts for
focus again and again. And obviously this can be very distracting for the viewer. And it also doesn't
give your work that professional field, which is why most
professionals right now will always
prefer manual focus. But there are cameras out there with really
good autofocus, like the Sony and 6,400.6600, both very good cameras
for beginners. They have eye-tracking
autofocus, which locks focus on your eyes. There's also object tracking auto-focus which
locks onto an object. And when the camera is moving, the focus stays locked
onto that object. Then there's canon and they've been shipping their cameras with their awesome dual
pixel autofocus and even the ADD and
the city had those. Those are really good cameras
for content creators. And now we're also
seeing cameras like the Sony A7 R4 with
AI autofocus that uses a fancy algorithms and AI chips to find faces and
then lock focus onto them. And then there's a whole bunch of other mirrorless cameras. Also note that with
mirrorless cameras, not all lenses have auto-focus. So when you buy a lens, make sure your lens has autofocus. Because if your
camera has autofocus, but your lens does it,
It's not going to work. Now let's move on and
talk about manual focus. Now the biggest benefit with
manual focus while recording yourself is that you don't
get any focus breathing. In fact, even in the
short right now, I'm using manual focus. I always use manual
focus and you can see my eyes are in focus and
everything is locked on. But when I'm moving around, the camera is not
changing focus at all. And this can be
really beneficial to the overall look
of your video. Another benefit of manual focusing is that
it's much smoother. So when you're using manual
focus and your product shots, maybe you're taking some B-roll. You'll find that with
many cameras when it's trying to focus or when
it's trying to lock on, it feels really jerky. So it's going to be
out-of-focus and then it's gotta be in-focus. Whereas if you use manual focus, the focus bull is
much smoother and it then gives a much more
cinematic field to your video. But manual focus
has its downsides. The camera is moving or
the subject is moving. The manual focus
becomes very difficult. And it adds to the work
that you'll have to do and you have to
get the focus right, otherwise you could
ruin your short. Then like I said earlier,
if you're recording yourself alone, what do you do? Pro tip. But this
is more of a hack. This is what I
used to do because I used to record myself and I didn't have any help and I
can't really reach my camera. So what I'd do is I'd find
an object and then I'd find the plane where
I feel like my faces. And I put that object
where my face roughly is. And then I go to the camera
and focus on that object. And a lot of times, well, actually every time I was able
to nail focus doing this, what you have to
be careful about is before you start recording, you have to check your
shot and make sure that your focus is sharp enough
for you to go ahead. But this trick can
work very well. Now there is a tool that
you can use to focus better and it comes as a built-in feature
in most cameras, and I use it all the time. It's called focus peaking. Most cameras come with this
feature built-in and focus peaking basically shows you a color on your plane of focus, where the focus is the sharpest. And you can use this
to make sure that you have your focus on
the right spot. Whenever using manual focus, make sure you're
using focus peaking. It's a lifesaver. And here's a pro tip for you
on this one is a pro tip. When focusing on your face, the focus should be
on your eyes because your viewers will be looking at your eyes when
you're talking to them. That's just what we humans do. When we're conversing or
listening to someone, we're more likely to look
right into their eyes. Here's another pro tip for you. When you're recording yourself, make sure that your aperture
is not too wide-open. If you're using an
aperture like F 1.8, you will find that the plane of focus becomes really thin. And then a lot of times
your eyes will be in focus and your nose won't
and stuff like that. So I would suggest
keep your aperture at around f 2.5 or
higher than that. So to conclude this class, if you want to get your
work done quickly, it's probably best
to use autofocus, especially if you have
a good camera that has really fancy AI autofocus
type technologies. But if you're looking to do really good professional world, and I would suggest you learn
how to use manual focus. Once you start getting into it, you will find that it is, it's going to make your
videos look better. So that's it for focus. In the next class,
we're gonna be talking about picture profiles.
9. Picture Profiles: Picture profiles are very important to the overall
look of your video. Now this one is a bit more
advanced for beginners, but I feel like my
students should have at least a basic understanding of what picture profiles are. Most cameras today have
inbuilt picture profiles. Some picture profiles
have more saturation, some are better to
use in low-light. Sum gives you more of a
cinematic desaturated look and some give you
better dynamic range. We've talked about dynamic
range in a minute. Let's first get our heads
around picture profiles. So it's very important
for you to go through your camera
and check out the different picture
profiles to see which one you like the best and which one
suits your shooting style. So when checking your
cameras picture profiles, I want you to pay attention to two things, saturation
and sharpness. And as a general rule of thumb, we want to keep saturation and sharpening on the lower side in your cameras picture profile, very saturated and
sharpen images tend to give a digital
amateur like field. And the downside is
that if you're adding a lot of saturation or
sharpening in camera, then your options and
post get limited. It's really difficult
to D sharpen your image without making the
image look weird. You can take the saturation out, but it's always better to
have this control in post and make your camera to the least amount of work in
terms of post-processing, we want to do all of that
on the computer later. Of course, if you're
looking to make a quick production process and want to turn around
work really quickly. You might want to choose
a picture profile that gives you a reasonably
good looking image. But if you want to take your
game to the next level, that is better to control your picture profile manually and add things like sharpening
and saturation and post. That's what I do. I normally keep my
saturation contrast and sharpness on their lower
settings on my camera. And I always use Sydney or
film type of picture profiles. And then in post I can add
the saturation and sharpness back because it's not already
baked into my footage. It just gives me a
bit more control. Now let's talk about that dynamic range I spoke to you about
in layman's terms, the dynamic range of any camera is how much detail your camera can pull out from the dark and the bright areas
of your image. E.g. in this chart,
if I had used a camera with better
dynamic range, you would see more detail
in the sky outside. Instead, the sky has been
blown out and the details are lost because it's beyond the dynamic range
of this camera. But apart from the
camera itself, picture profiles can
also play a role in getting you better dynamic
range in your shots. And for this, we normally use logarithmic picture
profiles or log profiles. Sony has as log two
and as log three, canon has c log. And you'll find that
most professionals use these log profiles because of that better dynamic
range than the get, and also because of the added control that they
get on their final image. Now out of the camera, the image from a log profile
looks really washed out. Honestly horrible. But once you add the
saturation back and post through a lot or
a color lookup table, you end up getting
better dynamic range. I'll show you the differences
here when I record this short and a standard picture
profile from my camera, all the details outside
the window or blown out. This is all white noise. Now, these details can not be brought back even
through color correction. But when I record the video
with the same settings, but in log profile and
eye color corrected, you can see much more
detail outside the window. Again, remember, the more dynamic range your camera and your
picture profile gives you, the better your videos. We'll look. Then again, log profiles have a big downside in that they need heavy post-processing
and you need to know how to use lots and color
correct your footage, which can add to your workflow. And it'll take you more time and effort to produce your videos. So I'm gonna show
you my footage, how it looks right
out of the camera. I'm using a black magic camera
with their film profile, which is a log profile. So we're gonna go
ahead and take off all of the color
grading we've done. And this is what it looks
like right out of camera. I know it probably
looks really bad. But we're gonna go
ahead and start adding the processing that we do to show you what a difference it makes to be able to
calibrate properly. So here we're going
to add this LUT and convert our log profile to erect several
nine color space. Then we're gonna go ahead
and let's fix that exposure. Let's fix those
skin tones as well, just to get the
skin tones right. And just have a bit of a curve. I want to make sure my
highlight roll-off is good. Then we're going to add a
layer of sharpening just to make sure that everything is
looking as sharp as I want. And let's go ahead and
add a vignette as well. And I think that's
the final look. So this is before
and this is after. And you can see what a
difference it makes. And this is the kind of
control that eventually, if you wanted to be able to do professional work than
you need to look into. And the basis of that is
the picture profile itself. I do think that lets
and log profiles. These are all very
advanced concepts, too advanced for beginners, but I think it's also
important to at least have this knowledge
beforehand so that you know what you need to learn as you move
on in your career, you need to be looking into
lots and picture profiles if you want more control of
the colors in your image. But in the beginning, feel free to use those
built-in picture profiles. Your camera comes with. The next class. We are
going to be talking about lenses and filters that you
can use with their cameras.
10. Lenses and Filters: Now it's time to talk about lenses and filters for
video production is very important to know
at least the basics of lenses and how they
can affect your footage. Because what type of
lens you use will decide the overall
look of your video. And you will need
different sorts of lenses for different situations. And at the end of this class, I'll also share with you guys my lens preferences
for beginners. Now for basic video production, there are two things that you need to know when
it comes to lenses. Focal length and aperture. Focal length is measured
in millimeters. And in simple terms, the
smaller this number is, the more zoomed out that
lens is going to be. So e.g. this photo is from
a 30 millimeter lens, whereas this one is from a more zoomed out or
wide-angle 16 millimeter lens. Wide-angle lenses like these
have a number of benefits. One of which is that you can fit more of your environment and your short also as a
solo video producer, this also means
that you can keep the camera closer to yourself. Now in some lenses, this
focal length is fixed, so 30 mm, 24 mm. This one here is 16
millimeter lens, and these are what we
call prime lenses. But there are also lenses where there's a
range of focal lens. Which type of lens is required will depend
on what's being shot. E.g. the Sigma 18, 35 that I'm using right
now to record this video. These are known as zoom lenses. Here are the different types of lenses that you
should know about. So we have wide-angle lenses, which are normally 18 mm to
24 millimeter focal length. And these wide-angle lenses are more suited for landscapes, architecture, and
indoor videography. Smaller focal lens like 16, 12, 8 mm are known as
ultra-wide lenses. These wide-angle lenses
are also better suited for vlogging because
when you're vlogging the cameras in your hands, it's not too far away. And so a wide-angle lens can help make sure that you're
capturing everything, including yourself and
your surroundings. Then we have portrait lenses. These are normally 50-70 mm, and they also have a
very low aperture. This portrait lenses can produce very flattering results when
used with people because of the blurred background and slimming effect they have
because of the focal length. Then we have telephoto lenses, which start from 70 mm and go all the way up to
hundreds of millimeters. These are used for subjects
that are very far away. So you see these being used by wildlife photographers
and for sports. Then there's macro lenses. They have a very small
minimum focus distance and allow you to get really, really close and capture a small subjects
and minute details. There are also other
types of lenses, but most of them are for specialty shorts and
stylized effects. But for basic video production, I think knowing about these five types is
more than enough, at least in the beginning. Let's now talk about
the aperture or iris. And we briefly spoke about them in our class one
exposure as well. But let's just quickly recap. So the wider your
aperture is, e.g. at 1.8 F14, the more light
will reach your camera sensor. At the same time, your plane of focus will also get thinner. And the more your foreground
and background will go out of focus and get
blurred, which we call bokeh. So just like with focal
length on zoom lenses, every lens also has
arranged for its aperture. And you'll usually see this
in the name of the lens. So sigma 18, 35, F18 means that the
focal length is from 18 mm all the
way up to 35 mm. Minimum aperture is F18. Normally these lenses only mentioned the minimum aperture. So this is f 1.4,
which means that it can go higher to f 2.521, 83.2 and higher, but it
can't go any lower than F14. Another example is the
sigma 30 millimeter F 1.4. So here we have a prime lens
with a fixed focal length of 30 mm and the minimum
aperture is F14. You can go higher, but
not any lower than F14. And guys here we have a pro tip. For cinematic shots, you
should use a lens with a very wide minimum
aperture like F 1.8 or F14, you'll see lots of lenses with narrower F35 or F4
minimum apertures, which means they need
more light and also offer less background blur since they have a wider
plane of focus. Then apart from focal
length and aperture, there are also other things that you should know about lenses. The first is stabilization. There are some lenses
that come with built-in optical
image stabilization. And these are very
useful in stabilizing shots where the
camera is moving, especially if you're
vlogging or something like that where the
camera is moving a lot. You could really use
some good stabilization, but keep in mind that not all lenses come
with stabilization. Similarly, some lenses also have built-in autofocus
capabilities. Others don't. And remember, we spoke about those different ecosystems and camera brands. Well, these lenses
are also part of those ecosystems and all of
them have different mounts. So pretty much every camera
brand at this point has a different type of
mount that it supports. And it's important
to know which mount your camera has before you
go and buy lenses for it. E.g. Sony supports
E mount lenses, whereas Canon cameras support EFF and a few other
types of mounts. Anyone really use an E
mount lens with an EF mounted camera unless you find something like this
and adapter for it. But even these are likely to cut down on the functionality that you can get from your lens. Often the autofocus won't
work quite as well, or you will see some other sorts of performance downgrade. So the key point here is
that if you start using e.g. Sony cameras, over time, you would likely build
up a whole library of lenses for your Sony
cameras with E mounds. And that will be a
significant investment, which will make it
difficult for you to switch your brand's later
on down your career. So let's now move on and
start talking about filters and what sorts of filters you
can use with your lenses. So filter is basically
something like this. It's cruise on at the
end of your lens. There are different types,
so you have UV filters, polarizing filters,
promised filters. But the one that I
want you guys to know about is this ND filter. So these are neutral
density filters. I've already talked
about these in a previous class
where I told you that these are sunglasses. These are like sunglasses for your lenses, The
electric control, the amount of light
hitting your sensor, and allow you to manage the
exposure of your short. If you're in a very
brightly lit environment, often you can't really
control it with. You don't have the option
of cutting down on your ISO or increasing your shirt dispute or
anything like that, then you can use an ND filter. And even in these ND filters, I prefer using
something like this, which is a variable ND filter. And what this allows
you to do is to control the brightness by rotating it and so you can control the
exposure of your short. Another thing to note about
ND filters is that they have a millimeter size ratings. So you need to make sure
that the ND filter that you get fits your lens. Or you might need to get some step-up or
step-down rings to make sure your filter sits
on your lens correctly. And here I have another
pro tip for you guys. For cinematic shots, use a lower aperture setting
of f 1.8 or F14, along with an ND filter, this will give you lots of background blur while
letting you manage the amount of light going into that really wide-open aperture. Usually with wide-open
aperture like F 1.8 and 1.4, it's very easy to overexpose
or blow out your short. Now as promised, I
want to share some of my lens preferences
with you guys. And the first of these is the
lens that I use the most. It's also known as
the YouTubers lens and I'm using it right
now to record this class. This is the sigma 18 to 3,051.8. Hands down my favorite lens. I know people running
their entire channels on just this one lens. It's fairly heavy and not
really suited for vlogging, but in a studio setting, this lens is awesome. Then I also have this sigma
30 mm and the Sigma 16 mm. And both of these offer
very wide apertures, won't really break the bank and also offer very
good image quality. I have the Sony 16
millimeter F2.8 lens. This was very cheap and I got it right at the beginning
when I got my Sony a 6,500. And last but not the least, we have the nifty 50 from my initial canon days can and
50 millimeter F1 0.8 lens. And this was really good
for portrait type shots with intense background blur. A lot of people
prefer it because it doesn't really cost too much and can give you really good results if you know what you're doing. So this was our beginner's
guide to lenses. I think there's enough
in this class for you to research more and
learn more about. In the next class, we're
going to move on from cameras and start talking
about microphones. See you then.
11. Microphones: Alright, let's talk
about microphones. So in the beginning
of this course, I told you guys about
the importance of audio quality and how it can really make or
break your video. I told you that a lot of people believe,
including myself, that audio quality is even more important than the
quality of your image. That's to say that if
you're watching a video where the image quality
is not that great, but the audio quality is good. And you're more likely
to watch that video as opposed to a video where
it looks really good, but the audio quality
is really bad. Perhaps there's a lot
of noise are a lot of echo or the volume
is just really dim, more likely to bounce off. Now we're going to talk
about how to record and process your video
and a separate class. And this one, I want to focus
a bit more on microphones and the different
options that you have as a concentrator. And right at the outset,
the first rule is that we always avoid using
the onboard mic. This is the built-in
mic in your camera, or if you're
recording video with your phone than the
mike on your phone. On-board mics generally tend
to give really poor results. And using an external
microphone can do wonders to the overall
quality of your video. Now in a pinch, you can go ahead and use your phone
as a microphone, so as an audio recorder. But that's only in the
case that you're not recording video with
your phone as well. I suppose if you're a blogger, then you can get
by with doing it. But if you're using the
onboard mic on your phone, then know that a little bit
of noise or a little bit of echo can really destroy
the quality of your audio. So here are some of
the different types of external microphones
that you can consider as a content creator. First on the list
are lavalier mics. These are also called lab mikes and the basically
gone your color like so. Lab mikes are very good for noise rejection and
they're designed to pick up loud sounds because normally they're
very close to your mouth. So if you're recording
in a noisy environment, or perhaps there's lot of wind or echo in
your surroundings, then you might want to
go with a lab Mike. But the big downside with a lab Mike is that they
don't look very good. This could be a
personal preference, but I don't like the
way lab mikes look. They look ugly on your color. And I feel like
they also take away from the immersion
of your video. But for beginners, they're
very easy to work with. You can find one that plugs
right into your phone. So you can connect these lab mice with your phone as well. There are a few low-cost options available BY m1 is a good one. By K one plugs right into
your iPhone than there, cinco SH, a lot of new
content creators use these. Then if you want to go
higher in the price range, maybe have a look
at Rhodes smart lab that gives you a good mix
of price and quality. And then if you want
more premium quality than perhaps you could go for
something like sanitizer. Then moving on, we have
condenser microphones, which are used more
in a studio setting. This condenser microphones
have a capacitor inside them, which lets them pick
up the finest details. They're generally
very sensitive, so you're going to
have to use them in a studio setting where you have acoustic treatment to
reduce the echo and the noise. But generally people who do live streams, voice-overs or vocals, they tend to prefer this
condenser microphones for beginner video producers, Blue Snowball is a
good low-cost option, and this Blue Yeti is
also very popular mic. The road also has some
good ones like the road NT USB and this Blue Yeti
and the road and a USB, they're both USB microphones, so you can connect them
directly to your computer, which is an added
bonus if you want to record audio directly
into your computer. Whereas the scarlet studio Mike came with my focus, right? Scarlet Solo studio
bundle that I got. This one plugs in via XLR cable
into the audio interface. We're gonna get to that as well. But yeah, these are
condenser microphones. Then we have the shotgun mic, which is also a type of
condenser microphone, but they're more directional, kind of like a telescope. And you can point them
into a certain direction and the mike will pick
up more sounds from that direction and
reject sound coming from the sides or
behind the mic. Shotgun mics are really
good for noise rejection. Like I told you, they're
very directional so they'll or reject sounds
coming from other directions, which is why they're used a lot in movies and on TV shows. And Laura, YouTubers
even use them now, I use shotgun mikes
all the time. In fact, the sound that
you're hearing right now is coming through
this shotgun mic, which is the deity S Mike two. This is the V Mike
D3 pro sanitizer. Mgh 416 is a very famous one, but it is a little
expensive for beginners. Roads. And D G series is
also very popular lineup. Then there are
some shotgun mics. They're designed
to be mounted on your camera or even
on your phone. Roads video mike series
is a famous one. And the shotgun mikes come in all sorts of shapes and sizes. This is the Rode video micro. This is one that I suggest to all beginners because you
can mountain on your camera. There's also a version that
connects to your phone, even one for an iPhone. So it's a very popular
microphone and it's very suited for running
guns scenarios. By the way, if you're
wondering what this thing is, this called a dead cat, I have another one here. And these are basically used to cut down on the sound of wind. If you're outside shooting a lot and there's a lot of wind, you'll find that there's
a lot of popping wind sounds or plosives or something coming
in your video, you can put this dead cat
on your mic and we'll cut down the sound of
wind moving on next, we have dynamic microphone, which are mostly
used for podcasts, radio broadcasts, and
voice-overs and vocals. These dynamic mics need
a lot of amplification. They're not sensitive at all. And normally you need to
be very close to them. But the biggest benefit
with dynamic microphones is that they reject noise
really, really well. That's why they're used for radio broadcasts and podcasts, where you have multiple guests all talking at the same time and you don't want one Mike to pick up more than
one person's voice. A very famous dynamic mic is
this one, the shore SM7B. You must have seen it in
a lot of podcasts by now. Then roads part mike is
also very popular now, Samson to you as a good
low priced option. Along with podcasts
and interviews, dynamic microphones
are also very good for voice-overs and vocals. Fun fact, Michael Jackson used ashore SM7B to record
as Thriller album. So these were some of
the different types of mics that you can consider using as
a concentrator. Let's now go ahead and talk about the different
connection types that they use because that's going to determine how you
record your audio. So just briefly, we have
3.5 millimeter jags. They look like headphone jacks. Normally there TRS or TRS. And they can be
plugged directly into your laptop recorder
or some phones. Then we have USB mics,
like I told you earlier, these can be connected
directly to your computer, but the one that most
of you won't know about is the XLR connector. This is what you will find on most progress microphones
and recorders. This deity S2 is an XLR mic. That's short. Sm7b
is also an XLR mic. And to record with
these XLR mics, you normally need phantom power. So you will need
either a recorder or an audio interface that can provide phantom power in order
for these mikes to work. And now some of you
might be wondering what sort of recorders or audio interfaces you
could use with these mikes. So Zoom does a whole bunch of audio recorders that
you can look up to. I'm personally
using the Zoom H5. And alternatively,
you can also use an audio interface that's
hooked up to your computer, like this focused right? Scarlet to Y2 are the Scarlet Solo than
universal audios are. Polar line is also very famous and a lot of
YouTubers use it. I think this is enough of an intro to microphones
for beginners. If you would like to
research further, I would highly suggest you take up anything that's
confusing you in this class and look
it up online and find your answers. Really
going to teach you a lot. In the next class we're
going to talk about lighting and what sorts of tips and tricks you can use to make yourself look
better on camera.
12. Lighting: Having even a basic
understanding of lighting can do wonders to how
your video looks. Now lighting is a huge topic
and as content creators, we want to save as
much time as possible, get things done quickly so we can produce regular content. And so in this class, I'll share just the basics
of lighting stuff that I think you need
to know in order to produce reasonably
good-looking videos. And you can learn
more about this topic on Skillshare and YouTube. But here are the basics. So in our class on
gear and equipment, I said that you need at
least one source of light. And to begin with, this can be natural light through a window. But if you want to improve
the look of your video, you will need more
lighting sources to or ideally at least three. And you can use lamps
around your house to begin with or go out and buy these LED lights with diffusers
are for better results. You can use soft boxes
are diffuser umbrellas. But whatever light
source you use, I think you'll get
very good results. If you understand
three-point lighting. In the three-point
lighting system, there are basically
three types of lights. Key, light, fill, light, hair light, sometimes
also called backlight if the subject
is not a person. And all these three lights
have very specific jobs. The key light is the main and usually the brightest source of light falling on your
face from one side, the fill light is normally on the other side of your face. And as the name suggests, it fills out the shadows
cast by the key light. Normally this fill
light is a little bit dimmer or a bit further
than the key light. And then we have a hair light. This is usually
above your head or sometimes behind the subject, and its main job is
background separation. It separates you from the
background and it introduces a bit more depth into your short by using the
three-point lighting system, your face will look more
flattering and beautiful. Your shot, we'll have a
bit more depth in it, rather than just looking flat
like in this shot where we have just one light
dead center at 12:00. Here we're getting
a very flat sort of look without much depth. Whereas in this short reviews three-point lighting and you can see the difference
for yourself. Here's a pro tip if
you want to learn more about three-point lighting, lookup, Rembrandt, lighting, the user, and lots of
professionally produced interviews, and also those masterclass ads, I'm sure a lot of you
guys must have seen. Now another very
important aspect of lighting that
you need to know about is the difference between hard light
and soft light. And we always want the
softest light possible. Soft light basically
means diffused light. So the light has to pass
through some sort of diffusion, like a softbox or
diffusion cloth or even something like
butter paper or even tissue paper if
you're careful with it. But I need to stress this. If you're using paper, then be very careful. Hot lights and paper obviously
don't mix well together. You've been warned. Now the biggest benefit of using diffused light is that diffused light creates
softer shadows, which makes her face
or any other subject look much more flattering
and beautiful. On the other hand, hard
light typically has no diffusion and it
gives a very harsh look. The shadows that it
costs are very sharp, which unless used for
dramatic effect, looks ugly. And we have another
pro tip here. Always use a big
diffused light source, like a big frosted
window or a softbox. The bigger and more diffused
your light sources, the better you are. Your subject will
look at your video. There are also other
interesting aspects of lighting that you
should know about. One of these is what's
known as a catch light. This is the reflection
of light in your eyes. In most professional videos, you will see this reflection
in the subject's eyes. And while placing your
own light sources, make sure you get a
good catch light in your eyes is going to make
your short look more beautiful and it's going to make it
easier for your viewers to connect to your eyes when
you're talking to them. One more thing to think about, our RGB and colored lights. You can use these colored
lights in your background to make things look a
little more interesting. Maybe spice things up because you could have
just white lights. But if you're making content regularly
than changing things up is going to help
make your videos look a bit more interesting rather
than more monotonous. So yeah, RGB lights are
something to look into as well. But I think the key
takeaway from this class is that you should always prefer
to use diffuse lights. Tried to have as much diffusion as possible in your lights. And also to get well acquainted with the
three-point lighting system. In our next class, I'm going
to be sharing some tips that you can use when
recording yourself. See you then.
13. Tips on Recording Yourself: So folks, now we're ready to
start recording ourselves. And you're probably
thinking finally, but it was very important
to build your foundation on cameras and microphones and lighting and video
production in general, before we actually started
recording ourselves, this stage comes after you're done with all
your pre-production, planning and scripting and getting all your
equipment ready. So after you're done
setting everything up, the first thing
you always want to do is to set your white balance. We've already covered this in
our class on white balance. If you need to
refresh your memory, go ahead and watch
that class again. Then we have a pro tip here. Whenever the lighting
in your short changes, it's best to set the
white balance. Again. Remember that white
balance class, whenever the lighting in
your surroundings changes, it could change how
your camera sees white. Then after you're done
setting your white balance, you want to go ahead
and check your focus. If you're using autofocus,
then there is no issue. But if you're using
manual focus, if you remember our
class on focus, we talked about how
it could be a little difficult for you to
focus on yourself. But I did give you a
trick in that class. You might as well use
it or you could ask someone to help you out
and do the focus for you. Otherwise, you could
just use autofocus. Next is framing. And framing is very important. Good framing not only makes
you look more professional, but it also gives your audience a better viewing experience. And the best and most
basic way to frame your shot is by using
the rule of thirds grid. You can either place herself in the center or on the
left or the right. Center is usually the safest. But what I see a lot
of people getting wrong is the vertical framing. So they either leave too much
space above their head or they're so high up that part of their head is cut out of RAM. So it's best to switch on the
grid on your camera monitor and use the rule of thirds to position yourself in the frame. Then we have camera
placement is very important. Normally you want to
place your camera at or around your eye level. This is because whenever
someone's talking to you, normally they are at your level. It just feels much better for your audience to
connect properly. If your cameras too low, you're going to be looking down, you won't even realize it. And your audience
is probably going to feel like they're
looking up at you. Likewise, if your
camera is too high, you're gonna be looking
up at the camera the whole time and your audience will feel like they're
looking down at you. It just feels a little
bit unnatural to the best and most
natural way of doing it. Have the camera on
your eye level. Then another tip
is to always use a monitor while
recording yourself. These days, many cameras
come with flip out screens where you
can keep an eye on yourself while you
do the recording. Or you can also attach
an external monitor to your camera is always much better to be able
to see yourself. You could be running out of
space on your memory card or your battery could
be running out or you might not
even be recording. So it's best to keep an eye on the information display
of your camera as well. So after we're done
with white balance, focused framing and
camera placement, there's just some final
checks left to do. Make sure your SD card in the camera and that
it has enough space, then you want to
check that your mic is connected securely. If you're using an external mic, which I hope you
will be using also, many prosumer cameras
these days come with a recording limit
around 30 min or so. And so many content
creators like to keep a timer on their phone or on a monitor so
that they can keep an eye on how long they've
been recording for. So yeah, that's pretty much it. Now you're ready to record. So go ahead and make sure you press the record button
because you'd be surprised at how many times I've forgotten to press
the record button. And it could be a
real pain once you realize how fat-free or video that either your audio recorder or your camera's
not even rolling. So these were some
tips on recording yourself and things you might
want to keep an eye on. In our next class, we're
going to talk about recording and processing audio.
14. Audio Recording and Processing: In this class, I'm going to walk you through how you can record your audio and apply some basic processing to
it as quantity craters, you generally have two options. One is to plug a
mic directly into your camera so
that your audio is burned right into
your main file. People usually do this
with lavalier microphones because those can be plugged
straight into most cameras. And the other option
is to record into an external audio
recorder and then synchronizing your audio
video, video and post. Now there are many brands of
audio recorders out there. One of the most
famous one is Zoom. I use the Zoom H5, but they have a range of products
for different budgets. You can also record your audio straight into your computer, connecting a USB microphone to it or using an audio interface, and then on the software
and you can use a free software like Audacity to record and process the audio. My workflow in the
beginning was that I would record my audio
into my Zoom H5 was processed the audio file
in audacity and then sync it with my video in
my video editing software. Now that I know how
to post-process my audio a little better, I just do everything in my
video editing software. But in the beginning, I learned how to do it all in Audacity. Now as a beginner
video producer, there are three things
about your audio that you should know about. First is loudness or volume. So your audio should be loud
enough for your viewers, but it should never
clip. What's clipping? We'll get into that. The second is echo or
reverb shouldn't be too much echo and
your audio echo will kill your
viewer's experience. And it's gonna make
it difficult for your viewer to concentrate
on what you're saying. And the third is noise. Background noise can be very
distracted for your viewers. And if there's too much of it, then your audience
won't be able to focus on what you're saying. So let's first talk
about loudness. Loudness is measured in
decibels denoted by db, and these are always
negative values. So -12 minus six minus
three, et cetera. And the assumption is
that anything above zero is clipping or white noise. So it's very important
that your audio never goes above zero. If it does, then your
audio will start to clip and it'll
sound really bad. And the way you control
loudness is through controlling the gain recorder.
You'll see a gain knob. Your software will also have some features to
control gain width, and gain basically
controls the volume or loudness of your audio. Time. For a pro tip here, whenever
you're recording your audio, it's best to record it
between -12 and -6 db. Try not going above -3 db so
that you have some leeway. Sometimes your voice might
get a little louder. No one talks in the same
volume all the time. And then once you're
done recording, you can always add more gain to your audio and bring up
the volume and post. So let's now move
on and talk about how to post-process your audio once you're done recording it, like I said earlier, we'll use Audacity for this later on. You could do this in your
video editing software or an Adobe Audition if you don't mind
spending more money. For now, we'll
stick towards free. And since we're beginners
who want to do this quickly, we'll just use a
two-step process, amplify and noise reduce. Later on you can add
more processes to this like compressors
and limiters. But for now we'll
keep it simple. With amplification. We're going to increase
the volume of our audio. Remember we kept it
around minus six dB. Now we want to use
the full range of loudness available to us. And in our Udacity is very easy. You just have to go to your
effects panel and loudness. Now after we're done
with amplification, we're going to apply
our noise reduction. Now the way to do this in Audacity is that
you need to give Audacity sample of
your rooms noise. This is called the
noise profile. So when you're recording, there needs to be a few seconds. I do around 5 s where you are silent and there's
only background noise. Or udacity can use this
noise profile to cut down the noise in your
audio is really easy to do. You just have to go ahead
and select this portion of your audio where
you were silent. I eat the noise profile, then go into effects and
noise reduction and click on Get Noise Profile or udacity will then register
this noise profile. Then you go back and
select all your audio. And once again, we're going
to effect noise reduction. Now here you can set how aggressive you want
noise reduction to be. Don't overdo this
if you're gonna make your audio sound
really weird and processed. And then once you're happy
with everything, just click. Okay, now let's see how
much of a difference this amplification and
noise reduction has made. So this is how the audio sounds straight out of the recorder, and this is how it sounds after amplification
and noise reduction. And you can hear how
much of a difference just basic amplification
and noise reduction makes. Before my audio sounded really dull and the volume
was very low. But after doing this, my audio sounds much
fuller and much cleaner. Now, obviously there's much more you can do to your audio. But I just taught you these steps because
as content creators, we want to try and
speed things up, make everything quick and short. But if you don't mind
some extra grind, you can use tools like
an equalizer to adjust the treble and bass and your audio here on the
left is the lower end, or the base frequencies. On the right are the
higher treble frequencies. Everything in the
middle are mids. You can kind of play around with these to make your
audio sound better. Then you have compressors, which are just the dynamic range of your audio and
make it Fuller. You can use my
compressor settings here for your audio if you're
doing voiceovers, if you have a very
specific scenario, you want to use a
compressor and is best to watch some tutorials
on how to use them. Then there are
limiters which you can use to bring up your gain or volume while keeping a limit
on the maximum volume. And a limiter is
going to make sure your audio never clips. This is what my limiter in
Final Cut Pro looks like, and it literally shows you in yellow every time the
audio was going to clip, but the limiter kicked in. But again, you don't want
to overdo the limiter, otherwise it can make
your audio sound a little off balance. So if you wanna do it quickly
than just amplify and noise reduced for a
majority of people, that's gonna be
enough processing to make your audio sound up to par. But if you want to put in more effort and make
your audio sound better than his best to research compressors,
equalizers, and limiters. They're gonna give
you much more control on how you sound in your video. In our next class,
we're going to talk about the basics of B-roll. What is B-roll you ask, well, you'll have to go to
the next class to find out. See you there.
15. Basics of B-Roll: In this class, we're going
to talk about B-roll, its importance and
how to use it to add interesting perspectives
to your videos. B-roll is very important whether you're a blogger
who wants to show something interesting
to their viewers or your reviewer who wants to show a product from
interesting viewpoints. And using B-roll makes her videos more interesting
and engaging because your viewer
doesn't have to keep looking at your face
that entire time. Now I'm not saying you're
not pretty enough, but it can get a little
boring for you viewers. But if you use B-Roll, it can lead to better
audience retention because your viewer can see more of what you're
talking about and also get an interesting
perspective on things. And sometimes B-roll
is absolutely essential in conveying
the information that you're trying to convey. But first things first, why do we call it B-roll? But because the
talking head sequence that you're watching right now, this is known as the arrow, and so everything
else becomes B-roll. So in this project, this is the arrow where I'm
talking to the camera. And this is the B-roll where I'm showing
different shots of the product so that
my audience can better understand what
I'm talking about. Now, there are quite
a few different types of bureau charts
that you can take. Let's talk about some of them. So simple. One is the pen, where the camera is panning from left to right or right to left. For this normally will use a fluid head which
looks like this. It's designed for a camera
to be mounted on it and it lets you get a
really smooth movements. Then there's the tilt,
where the camera is tilting from top to
bottom or bottom to top. Again, we use a fluid for this. Then here's something
a bit more advanced. This is a slide for
which we use a slider. And by using a slider, you can go from one side to the other or from back to front. And these sliding shots can
be very useful in making a boring short look more
dramatic and cinematic. A little bit of movement goes a long way in changing
how your shot looks, then moving on into even
more advanced territory. Here's one of my all
time favorite charts. This is what's called an arc
short or a parallax short. We've just taken by mounting
of fluid head on a slider. So it gives you the
ability to slide and pan and tilt
at the same time. It takes quite a bit of practice to get good at
this because you have to slide and pan at the same time while keeping your subject
at the center of the frame. But when done right, this short is extremely dramatic and it looks
very impressive. Then we have another
type of shot which I really love and
use all the time. This is an overhead chart. I call it a top-down shot, where the camera is
mounted overhead and looking down at a
desk or a countertop. And I think this
perspective especially useful for product videos, cooking videos are
crafty how-to videos. It gives you a viewer a very
clear and close-up look of what you're doing
are talking about. It's time for another
pro tip here. So when doing these
overhead shots, user level app on
your phone to make sure that the camera is
looking straight down. This is to make sure that
your perspective is good. Otherwise, anything with
a straight edge will start to look crooked
and distorted. There are many other
different types of bureau charts that you can take too many to cover in one class. So I would suggest you go
online and do better research, find some tutorials, and learn how to get
some good B-roll. But as a final note, when you're recording
your B-roll, try to make it interesting
with different lighting. Some people use RGB lights and also prompts and
different textures. Also keep in mind that when
you're recording your videos, don't overdo the cinematics. A lot of cinematics and beauty shots do become
distracting after awhile and sometimes also take away from the
story of the video. The story really matters. You can't really substitutes
story for goods cinematics, but don't undo the
cinematics either. They make a huge difference. And when done right, cinematic B-roll can add
interesting perspectives to your video and increase
its production value. In the next class,
we're going to start talking about video editing and specifically what video
editing software you can use. See you then.
16. Video Editing Software: So hopefully by now you have all your video footage
and audio recorded. And now you want to
take it all into a video editing software
to put it together. But whichever editor you choose, they'll all have the following
features or timeline. This is basically the backbone, are the foundation
of your video. While editing, you will
see your entire project on this timeline. You can cut and spliced the
video however you'd like. And you can place
footage, images, texts, and sounds
wherever you want them. And most modern video
editing software will also let you stack layers
on top of one another. Then there are keyframes. With keyframes, you can select any point or different
points in your video and then change
the properties of the object between
those keyframes. E.g. I. Can add a keyframe
here and one here. And then I can add a zoom effect between these two keyframes. Or I can change the opacity and make my video fade to black. The sky is the limit with these, there's a ton of stuff you
can do with keyframes. Then there are
transitions which let you add a transition
between two clips, which is essentially
a fancy effect that will change the scene
from one clip to another. Titles let you add all sorts of text
elements in your video. Then you can add interesting
graphics and animation into your videos to make them more interesting and engaging. We have a pro tip here. Do take some time to
find interesting fonts, graphics, and sounds
for your videos. All these things will add more
richness to your content. You can also install
some very useful plugins from websites like motion vfx.com and
pixel film studios. Now video editing in and of itself is a
very deep subject. I'm not going to be teaching
you how to edit videos or how to use your
video editing software, because I don't know what
software you'll be using. Every software is different, but I will try to give you
some important information about the different
video editing softwares. So hopefully you could make a better decision about which software
suits you the best. And in the next class
I'm gonna be sharing some video editing tips with you guys to help you
make your videos better. Let's talk about some
of the most popular video editing
software out there. There are three in particular, which are the most popular. The first and arguably the most popular is
Adobe Premiere Pro, which you can run on
both Windows and Mac. And it's widely used in industry by professionals
because it's not locked to Windows or Mac
ecosystems and because of all the advanced features
it offers to professionals, Adobe Premiere Pro is a
monthly subscription. You can't buy it went off. So that's a bit of a
financial decision you'll have to make if
you want to use it. But it's biggest upside is that Adobe Premiere Pro
is widely used and recognized in the industry for learning how
to use it can be a very valuable and
transferable skill. Then we have da Vinci
resolve by black magic, which has really seen a surge in popularity in the
last few years, especially because
of black magics. Budget friendly for
k and six k cameras initially was seen as more as a color grading and
color correction tool, but increasingly,
people are using it as a one-stop shop for everything from color
grading to video editing. Again, DaVinci Resolve works on both Windows and Mac,
but in my opinion, it's one of the more
difficult softwares to learn to use because it's just so jam-packed with advanced features
and functionality. There's a free version
available to download, but if you want the full studio, it costs around $295. But the good thing is that it's a one-off and not a
monthly subscription. Now the third one
which I use for my video production is
Apple's Final Cut Pro, which is known for
its ease of use. It's easier to learn
than the other two, and it's also very efficient
and fast because of its optimisation with Apple
software and hardware. In my experience, it
takes less time to render and works much more smoothly
than Adobe Premiere. For the obvious downside
here is that Final Cut Pro is locked inside
Apple's ecosystem, so you'll need a Mac to run it. Final Cut Pro costs
around 300 bucks on the Apple Store to buy it. But again, this is a
one-off expenditure. Then there are a few
other video editing softwares like Sony Vegas Pro, which very few people
use these days. If you go into more amateur
slash beginner territory than wonder shares, fill more and feel
more pro are also good if you just want to dip your toes into the
world of video editing. So apart from these
computer-based video editing softwares, there's also a bunch of options
for phones and tablets. And yes, you can totally edit a video on a phone or
a tablet these days. Here are some options for
Android and iOS that I've seen. For iPhones and iPads, luma fusion is pretty good, but it costs around $30
on Android Fillmore. A goal, Adobe Premiere Rush, our director kind
master. In short. There are quite a few options,
but do take some time to think about which
option is best for you. Because if you're gonna
invest so much energy into learning how
to use a software, then it's better to
choose a software that you're going to continue
to use in the long run, and also one that will give you valuable and
transferable skills. So this was a rundown on the different video editing
software available. And also what sort
of functionality you can expect from most video
editing software out there. I'm going to end this class
here and the next one, I'm going to share some video
editing tips with you guys. And these are the
things that I've picked up over the years. See you in the next class.
17. Video Editing Tips: So now that we have a basic
understanding of video editing software and the
different ecosystems there are. In this class, I'm
going to share some video editing tips
with you guys and tip numero uno or clip number
one is don't overdo it. Because remember, on social
media you need to be able to churn out content very
regularly and consistently. If you overdo the
video editing process, then you're gonna be able
to put up your video's. Done is better than perfect. That's something I
picked up from Casey. Nice that be thorough with
your edit but don't overdo it. Tip number two is that you
need to have a process. It really helps to have
a routine to your edit. My own process is
basically in three steps. Step number one is what I
call a foundation edit, where I take my unedited
raw file, cut it, and remove all the
mistakes and get the basic skeleton are the
foundation of my video ready? Then step two is B-roll
and color correction. This is where I start placing all the B-roll where
it needs to be. And I will also usually do all the color correction I
need to do during this phase. And step number
three is finishing where I check that everything
is where it needs to be. Perhaps I need a text
animation somewhere. Maybe I want some sound
effects somewhere. And I will also check my whites and my skin
tones during this process. After step three, usually all that's left to do is to just
check the whole video a couple of times to make
sure that there aren't any mistakes or factual errors. Number three is used. Jump cuts. Jump cuts are a good way to control the pace of your video. Generally on social media, you need to try
and make sure that the pace of your videos right. If your video is too slow
than people might bounce off. So jump cuts are a
good way of removing those arms and loud
breathing sounds. But don't overdo
the jump cuts to many jump cuts will get
distracting for the peer. To make your jump cuts
and less jarring. You can add a zoom effect
to your jump cuts. Here you can see the difference. This is a plane junkyard and this is a jump
cut with Zoom. And we have another
prototype here. The best type of jump cut
is what's known as a Jacob. Jacob is when audio
from the second clip starts a split second
before the video changes. Jacob, because of how the clips are arranged, it looks like a J, but it's generally
accepted that J cuts are much less jarring than
just a plain jump card. This is what a plane
cut feels like, and this is what
Jacob feels like. Next time you're watching
your favorite YouTuber. Do notice where they're
using these J cards. Once you know what jackets are, you'll start seeing
them everywhere. Tip number four. Don't
overuse transitions. I see a lot of new
content creators overusing their transitions. In the beginning, I was
going to be of the same. Every other short header radial zoom blur
effect going on. But if you look
at professionals, they rarely ever
use transitions. When's the last time
you saw a transition in a movie or TV show
or documentary, use transitions sparingly
and deliberately. It's number five. Always fade sounds out. This is more of a
pet peeve of mine. I see a lot of
YouTubers adding e.g. some music to the
intraoperative, cut it off just abruptly. It sounds really jarring and makes your video
feel very rough. So whenever you
have a sound that's going to discontinue
than just fade it out. Here. Number six. Oh, and
this is a big one. Always use keyboard shortcuts, whichever video editing
software you end up choosing, it's always worth it to learn keyboard shortcuts and also add your own keyboard shortcuts will make your video
editing process much, much faster, especially once
muscle memory kicks in. Number seven and other
big one is watch lots of tutorials for your
video editing software. You'd be surprised at how much you can learn online these days. I mean, you're watching
this course on Skillshare. I myself, I've learned
everything from tutorials and no matter
what your issue is, chances are that someone has had the same or very
similar issue and decided to write about it
or make a video about it. So yeah, watch tutorials. And tip number eight,
which is my last one, is practice, practice, practice. The more you practice, the
better your work will be, and the faster you'll be
at turning projects over. So these are some tips
that hopefully will help you in learning
video editing better. In the next class, we
are going to be talking about color correction
basics. See you there.
18. Color Correction Basics: Alright guys. So now
it's time to talk about color correction
and color grading. And as a video content creator, you should have at least
a basic understanding of the tools at your disposal. In this class, I'll take
you through my process, how I do it as a day in,
day out content creator. And you can pick and choose
how much of this you want to follow if you want to
do all of it or none of it, hopefully this
class will give you a basic understanding of
what color correction is. Now the first thing with color correction
is what we spoke about in our classes on
exposure and white balance. It's very important to have
a good shot to begin with. So the very first thing is,
of course, white balance. If you set your white balance
correctly on your camera, color correction
and color grading will be much easier for you. But if you're starting
with a cool blue or warm yellow sharp, you'd have to correct
that and post. And by the way, that's
not always possible. But if your colors
are just slightly off or it can be fixed in post, that's where color correction and color grading will come in. So what's the difference between color correction
and color grading? Simply put, color
correction is done to correct the colors
in the shot and make them look true to
life or to bring them to a baseline,
unedited look. Color grading, on
the other hand, is more of a stylistic choice. So in movies or YouTube videos, you can see a certain
style of color. Teal orange is a
very famous Look. If you've seen The Matrix, then you'll remember that
when nu is in the matrix, everything has a
green tinge to it. All that is a color grade. If you're interested
in color grading, I would urge you to look
up online and learn more. There is a lot to learn there. But in my video, since
I do product reviews, I tried to give my
videos are true to life. Look, I want my viewers
to see what I'm seeing, exactly how it
looks in real life. And so in this class
we're going to talk mostly about just
color correction. So my first step for
color correction is to check exposure and adjusted. If I need to, I use this
LUMO waveform chart, which shows you the
levels of light in your image from left
to right on the top, our highlights are the
bright and white areas in the middle or the mid tones. Everything between the
highlights and shadows. And at the bottom here are the dark parts of your
image or the shadows. If the highlights go above 100, they will start to get
blown out and become pure white and your image
will get overexposed. If your shadows go below zero, they'll get crushed
and become black. Again, you lose
information and this time the shot will
become underexposed. So you can use this luma
waveform chart to keep an eye on your exposure and adjusted
through the Exposure tab. And we have a product here, keep your highlights 75-95%
and your shadows 10-6%. I usually don't go below 6%. It just makes my video look
really weird and dark. Obviously, this is not
a hard and fast rule. It's just something
that I prefer. And also keep in mind
that you have to have the right exposure in camera when your video is recorded and if it's overexposed
or underexposed, often there's not
much you can do in post because that
data is just gone. It's either white noise or
just crushed black shadows. Then after exposure,
the second thing I check is white balance. Now most of you have probably
set the white balance, right to begin with. But even if you're doing
that a lot of times in post, you started realizing that it
still needs a slight bit of a tweak and there is stuff you
can do to it and post e.g. this shortest still
looking a little cool. Very basic way to fix this is to go in your hue
settings and take some of the blue out from either
your entire short to global, where you can be selective about whether you want
this color to be taken out from the highlights or the midtones are the shadows. By the way, I'm working
in Final Cut Pro here. Now you're going
to adjust this by just playing it by our eyes. But there is a specific tool you can use to adjust
white balance width, which is the RGB Parade. This chart basically shows
you how the three colors, red, green, and blue are
balanced in an image. So what I'll do is I'll
put a mask here on this white area to isolate it. Now this RGB period tells
me which color from red, green, and blue
is more dominant. And my white. And I can then start to
take it out either through my Hue tab or in Final Cut Pro, we have these color
wheels that let me adjust the white balance to make sure
that my whites are white. Now I don't want to
overly complicated this course, especially
for beginners. But if you want to nail
your white balance, you need to learn how
to use an RGB Parade. Now once I'm done with
exposure and white balance, I usually go and
check my skin tones. This is where even more advanced content creators
get things wrong. It's a very subtle thing, but trust me, if your
skin tones are accurate, I believe it makes
her entire video look a bit more polished, a bit more professional, and
the colors just feel right, and it's very easy to do. So we just put a mask on
my face here and isolated, I will use a tool
called a vector scope, which basically shows you which colors are present
in your image. But what we're looking
for here is this line, this is the skin tone line. And all humans skin tones
always fall on this line. Anything lower than
this will have a green hue and anything above this line will make
you look red and sunburn. Here you can see that my
skin tone is a tad green. So how do we adjust it for this? We're going to use hue
saturation curves, which basically lets
you select any color and change its hue
or saturation. In this case, we're only
interested in changing the hue. So I'm going to get this dropper from the Hue vs Hue curve. I'll select my skin
color with the dropper. I can adjust this color to make sure it falls on
the skin tone line. And now you can see
that my face here is looking a lot more natural. So now that my skin tones
are sorted in the end, I just checked the saturation. Saturation basically means
how vibrant colors are. So the higher the saturation
of the colors will pop. But beyond a certain point, the colors will look
too harsh and jarring. You remember we
talked about using desaturated picture
profiles and your cameras. That was because now imposed, we can choose how much
saturation we want. Some people prefer
more saturation and some people have a more
desaturated style and aesthetic. In fact, I have a
pro tip here for those who want a more
cinematic field, tone down the saturation
a little bit. Highly saturated videos tend to feel very digital various at slightly desaturated
look can make your video feel more movie like. Now, as with everything
in video production, color correction is
also very vast field. But as content creators, I would urge you to keep
your processes fairly short. You can use all of these tools, are none of them,
that's up to you. But let's now move
on and talk about some more advanced
concepts around color. And these are more to give
you a roadmap for the future. And the first of
these are Let's or Lookup Tables. And I'll
keep it brief here. But lookup tables are mostly
used to either convert log color profiles into standard color profiles
like rec seven or nine. But lots are also used
for stylizing the video. So remember the
example about Neo in the Matrix and how
everything had a green hue. That's all done with lunch. So you start off with the
baseline image and then apply a lot to get a unique
stylized color grid. Let's are also an important
concept we'll learn about if you want to get your game
to the higher level. But of course, this is
a course for beginners. I don't want to over-complicate
things for you, but if you want to use
some more advanced tools to manage your exposure, then you can use color curves. Color curves give you more
control over your image. And you can select
every specific areas of the image and
change the exposure. And these curves also give you
better highlight roll-off. There are a lot of
different tools that you can learn about when it comes to color correction
and color grading. But hopefully this class gives
you a bit of an insight of what sort of process you can use to make your
videos look better. And hopefully you'll be
able to build off of this knowledge as you learn
more about video production. In the next class, we're
gonna be talking about rendering and
publishing your videos.
19. Rendering and Publishing: So now we're in the final
stages of producing our video. This is the last stage of
our post-production process, and all that is left
to do is to finally render and publish your
video prototype here, most online video platforms
these days prefer H dot two C64 format for
uploads because it's very compressed and produces
smaller file sizes. But because it's so
highly compressed, it takes a lot of work for
your computer to render it. So the main thing to
keep in mind about rendering is that it takes time, especially if you're working
on a high-risk project like a fork, a video, and even more so if you have a lot of effects and
color grades on it. And so obviously, how
fast your video gets rendered depends on how much
power your computer has. So it's worth it
to spend some time in designing a production
workflow so that you don't have to render and
then re-render your video again and again
with my previous laptop, my final project, even
in Final Cut Pro, or take half an hour
to 45 min to render. So every mistake was very costly even with my
beefy mac studio. Now, some projects can take 15 to 20 min to render
a final file out. Now, once we have a
final file rendered, we're gonna go ahead
and upload it. And this is where thumbnails and Search Engine
Optimization comes in. Let's first talk
about the thumbnails. Thumbnails are very
important that the first point of contact between
you and your viewer. So it's important to have an enticing thumbnail
that gets you clicks. There's no set science on
what makes a good thumbnail. Every creator has a
different approach, but be very deliberate
with your thumbnails. The mistake that I made initially
with my YouTube channel was that all my thumbnails
were an afterthought. It was just my video
was ready and I had to make something
and just put it up. It was like a last minute thing. And then over time
I realized that thumbnails are very,
very important. I saw a video where
Marcus Brown Lee said that it's like a really
good amusement park. If the sign sucks, no one's gonna go in. So I think it's
worth it to think about what sort of
thumbnails you want for your content and also research what kind of thumbnails
work in your content niche. I think to keep in mind is that thumbnails are generally very small when people see them on
a list or on their phones. Thumbnails should be designed to convey information
even when it's small. A lot of people prefer having faces and their thumbnails
because supposedly the YouTube algorithm prefers
thumbnails with faces and having a face and
your thumbnail also kind of personalize the content. Keep in mind that many people prefer YouTube and social media because of the non-corporate personality driven aspect of it. Then after the thumbnail, there's usually a title and a description or a
caption for the video. Again, there's no
set science here, but generally the
description helps entice your viewer and also plays into the algorithm of whichever social media
platform you're on. So it's generally
agreed that you want to have some search terms embedded in your title and
description than a lot of platforms will
also let you add tags. These are search
terms that you want your content to be
identified with. Now there's a lot of debate on whether these tags work or not, but I think it's best
practice to have at least a few tags for the search
engine more and more of a time, we're also seeing videos with closed captions and subtitles. And the general belief
is that they help the video in getting
indexed by search engines. Now once all this is done,
the video is uploaded. There's a thumbnail, a title or caption, tags and everything. Now all that's left is to go
ahead and press, Publish. And now your video is
out there forever. Congratulations. You're officially
a content creator, but the story doesn't stop here. After publishing, it's
very important to get some feedback on your videos and track its performance to. In the next class we're
going to talk about the importance of
analytics and how you can use your analytics to make your content
better over time. See you then.
20. Importance of Analytics: If you remember our first-class on the mindset of
a content creator, you'll remember that we spoke
about the importance of accountability and
constantly improving your content over time. And that's literally what
analytics or for the, gives you the ability to track your performance and see if your performance
is not good enough. They keep you accountable
in that you can judge our own performance and see
trends in your performance. And they give you feedback
that you can then use to make your content
better over time. And in the context
of video production, there are four metrics from your analytics that you
want to keep an eye on. Number of views. Watch time, audience retention, and
click-through rate. With views over time, platforms like YouTube
have moved away from using just viewCount to judge
how good your video is. This was especially a problem with clickbait because even if someone came to a video and bounced off in
a second or two, it would still get counted. Whereas now it's more
about watch time. The number of views are widely considered by the
general public and companies and businesses as a very important metric of
how much reach you have. But in the grand
scheme of things, watch time has now become
more important because watch time shows you how long people are
watching your videos. For. Most video-based
platforms want you to keep people on their platform
for as long as possible. And the watch time
of any video is a much better metric than viewCount of how interested people are in
watching your video, then we have audience retention, which is also of
supreme importance as a direct feedback
loop for your content. It looks like this chart, and it basically
shows you two things. One is that it gives you a percentage of your
average viewer retention. So 40 per cent audience
retention means that on average, a viewer is watching 40% of your video
before bouncing off. So naturally, the
higher this number is, the better it is for your video, and the more aggressively
the algorithm is going to push or suggest your
video to other viewers. But the second and even
more insightful piece of information this chart
gives you is that it shows you the specific moments
in your video where people are either bouncing off or
coming back to watch again, where more people
are bouncing off, it looks like a dip and where people are coming
back to watch again, it usually looks like a peak. And this is very
valuable information to know what's working and
what's not working. Because you want to do more
of where you're getting the peaks and less of where
you're getting the tips. I'll share some personal
examples with you here. So back in the day,
I used to have a subscription message in
every one of my videos. And once I started looking
at my audience retention, every time this subscription
message came up, I saw dip and retention where
people were bouncing off. So I just stopped
showing this message and made my audience
retention a little better. Same with intros. I used to have this
animated intro at the start of every video. And I soon realized
that a chunk of people were bouncing off from
it, so I stopped doing it. In fact, I'll just
solve video by Mr. Beast where he was
talking about analytics. And he said that everyone
should go back and check the audience retention for
their last 50 or 100 videos. Write down all the depths
and just stop doing the things that we're making people bounce off
from the videos. So do more of what
makes your retention peak and less of what
makes your retention dip. And the last metric
we'll talk about in this class is
click-through rate, which basically shows you as
a percentage how many times your video was clicked on when presented in front of
a potential viewer. These are called impressions. Again, the higher
this percentage is, the better it is
for your content. And your click-through
rate typically depends on a bunch
of factors like, how strong is your hook, how enticing is your
title and thumbnail? Is it a hot trending
topic or not? And how loyal are your
subscribers to you? This world of analytics is a deep rabbit hole and you
can go as far as you want. But the four metrics
that I talked about in this class are the ones
that I focused on the most, they are absolutely
essential to keep an island. So this was the last proper
class in this course. In the next one, I'm going
to start wrapping things up and we're also going to
talk about a class project. See you then.
21. Class Project and End Note: By now, we have walked
through many of the essential
ingredients required for video production
as a content creator. Now, obviously this
course won't make you a master video producer
from day one. But hopefully it's
given you enough of that basic knowledge or that foundation that you can
hopefully now buildup from. Of course, no single course is ever going to teach you
everything you need to know. You have to go back
and research and practice and nurture
your skill over time. But I think this course was a good distillation
of what I've learned over the past few years
as a content creator. And I've tried to give most of the information that I think every content creator
would benefit from when they're
just starting out. And there's a whole
bunch of stuff that are deliberately left out
from this course because I wanted it to be kind of easy to understand and digest by someone who has no background of video production and
is just starting out. And so I really
want you guys to go ahead and do your own research, find tutorials and
practice this craft of modern-day video
production for social media. Now, since I'm wrapping up, there are a few points that I want you to always remember. A long-term approach. Youtube or any other
social media platform is a marathon, not a sprint. And constant improvement
should be your aim. Refine your skills
with online tutorials. Always remember that
practice makes perfect and be very careful
about copyright issues. Don't use other people's
content without their permission and don't use
copyright protected music. Most social media
platforms are very, very strict about these things. On YouTube, it takes
three copyright strikes to permanently terminate
your channels. So it's years of blood, sweat, and tears gone in an instant. So this was our foundation
course on video production. I hope you learned
a few things that you'll be able to build
over this foundation. And it's going to
help you in beginning your journey as a
video producer. And now there's a class project that I want you guys to do because you can watch me riding the bike as
much as you want, but you will only learn when you try to ride
the bike yourself. I want you to produce a talking
head video of yourself, in which you introduce
yourself and talk about anything that
interests you. The video should follow
these five rules. You should be seated and the cameras should
not be in your hand. This is so that you can follow the other four rules easily. Exposure should be
good with you should not be overexposed
or underexposed. Use external Mike's only know onboard Mike's allowed to
use any number of lights. The three-point lighting system that I taught you guys and include at least two shots
of B-roll and your video. Other than these five, you can follow pretty much
any other concept you learned in this course and
talk about it in the video. Remember, just have fun with it. And once you're done with
your video, you can submit it here for the rest of
the student community. And I hope to see
wonderful video content from all of you
guys in the future. So that's gonna be
it for this course. Thank you so much for taking
this journey with me. You can find me on YouTube, on my main channel which
called reviews speaker. You can also find
me on Instagram. This is amygdala signing off, and I will see you next time. Peace.
 Ameer Dagha, Entrepreneur & Video Content Creator