Transcripts
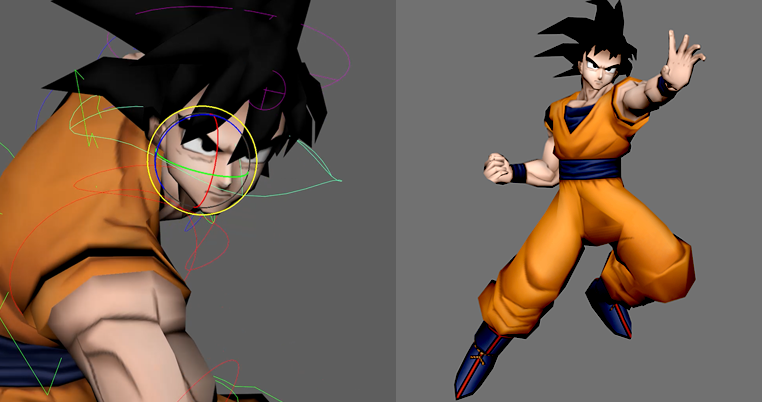
1. Introduction: In any art for mastering
the fundamentals are key to growing as an artist
wants, this is locked down. The canvas is yours to
deliver your message. Imovie, I'm a Senior Animator
in the video game industry, would have 18 years experience. I've worked on AAA titles such as heavily soiled
noticed from Apocalypse, Harry Potter, the
board conspiracy, and a series of lego games. And in this class we're
going to talk about take it. Now we will go through
everything right, from the reference
to the blocking, to display name, to
the policy rallying. And it will conclude
on the class. Whether you're a beginner
or seasoned professional, I believe we can all pick up something from each other
and learn something new. We'll be covering all of
it and we're using Maya. You can use any
software you want. It doesn't matter. The concept is the same. Dynamesh and principles
are the same. If you want to use Blender, 3D Studio Max, use
any one you want. Stop motion. You can
use the traditional. It all applies the same. So without further ado,
let's dive straight in. Start animating. Come with you every
step of the way. So there's no rush to
scale your own pace, really trying to soak
everything and I tried to make this as
simple as possible. So you guys can dive straight
in and have fun animating. Guys. I see at the
end of the video.
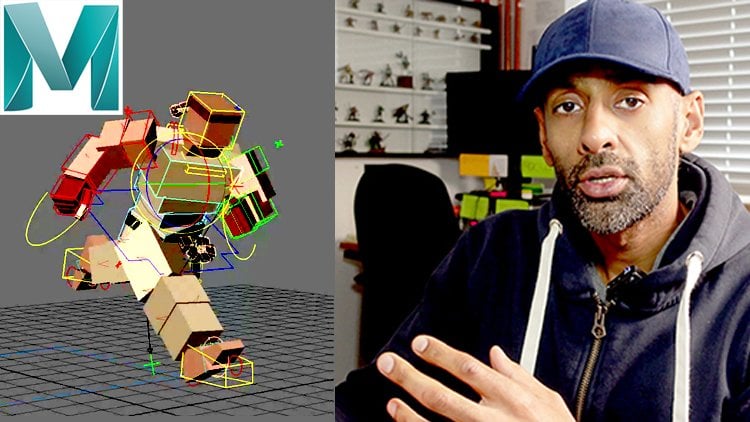
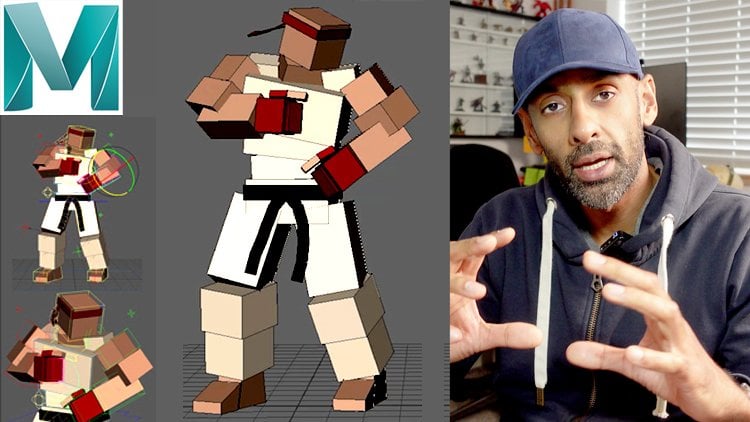
2. First Pass Blocking Take Hit Part 1: Okay guys, so we're always
looking at our reference. So let's start blocking. So here's my reference.
I've got it ready. Let's go through
this first pose. Probably going to be this one. Yeah, okay, so we just
grab everything here. Let's put this at zero.
Everything is keyed. Then we go to frame for I'm
just thinking about the hips. So he's getting hip forward and the energy
is hitting his stomach. So you want to make sure that he's down and his head is
like taking the force, but then his shoulders. Shoulders or you
can translate them higher because it
taken the force. And then his arm is kind of taking it as also want to get those nice curves in this arm. We could change it
by bringing it. In. Contrast, remember,
don't worry about the fingers will do that
the end. Coming in. Raise this up a bit. I think as we don't want to make it look like this twinning. So we're kind of
how we apply this. Bring this in. Okay. In this following arc. Right? Because coming in like that, that wouldn't be bachelors and there's more of a flow them. Yeah, overflow then
what we'll do, we'll just make this
constant as opposed to pose. Next pose. Next
pose is backlight. This is taken it, It's like a parsing position. So what we'll do is we'll
just look at the hips first. The hips are completely
that way, right? So we know the hips
are back that way and facing towards this leg because the weight will be on this
leg and then it will be high. And this way, because
this leg will be in the air, they're not this. Straighten that up a
bit. Bring that out. Make sure it's following
the toe like that. And there's kind of like
this is rotated enough. Yeah, Here, it's kinda
leaning back a bit. And then we want the
other controllers have them lean back. And then the next one is leaning back and
then the top one. But we'll try that. We're trying to get that all mapped out here to balance. This one is coming back there. Now what we can do, I think this is
too much rotation. This one too much. But then the top will
do is rotate this. We want to create that arc. Note that on the back, who's taken a hit. Seamless patterns. It's taken a hit key that I'll just save
this, save your work. Save your work. Okay. We'll do, we'll just again, constant interpolation.
Sometimes doesn't work. You have to select everything, go to flat or Control F, What I press, and then
constant and now it should. I don't know why
it's not doing that. It's very strange. Q and everything. Yeah. I didn't key on everything. Naughty, naughty scapula. Okay. Well, yes, this strange, strange when I press
constant. Anyway. Oh, weird stuff is
happening here. Maybe some minor bug anyway. Got that pose. Then it's going back. And
now there's a step, a step. So there's a step back, right? He's looking down
at the step back. So let's add that too. Is looking down step back. And then I just zero these out. Bring it back. Let's have it as a step here. Still like that. That I can balance ballerina
there. Okay. And then their hips, I can see that it's
going forward. Like this. What we'll do, we'll just rotate
this leg a bit as well because this is all broken, but we'll fix that. We're going to do this
character looking down the leg, this arm comes down,
trying to balance. That's completely off
palette as you can see. So what we do move this food
groups, we move this fluid, moving rather small Becker. And then there's a long day. Leg is slightly bend. This arm is down.
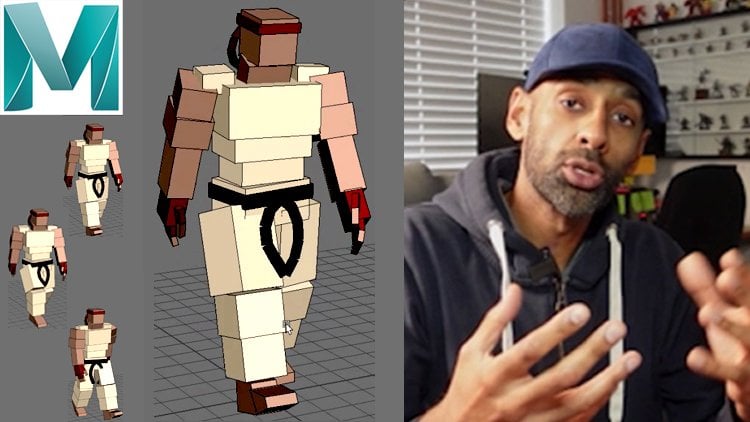
3. Second Pass Blocking Take Hit Part 2: So with this trailer, pose, this poses a bit broken hair, so we try and fix this. I think it's more to
do with the torso. Do love that. Looking down. He learns. Down. Then halfway through,
he comes back. So Dan and then there's a policy position
where he's trying to recover. So then you go back again. Now that is on that foot. The weight will
come on this side, but this foot will go forward. Then what we'll
do with this too, so it is coming back. But now he's looking a loose
food's going to plot this. As I see in the reference, is starting to come forward. Get balanced. This one's
starting to come back. Now. Here you go. So we got that balanced there. Boiling point. So it's like weight
shift, weight shift. Let's just put down constant interpolation
that we will always do. Messing it up, isn't it? Now
what we'll do to save this, okay, Let's do the old trick. I do. Grab the flesh, going to outline
our duplicate it. Duplicate. It creates
another mess inside there. What you wanna do
is press Shift. P, brings it out
of the hierarchy. And as you can see,
you can't translate. You press Control G.
Now you can translate. Now I'm going to use this guide. So as I'm coming back here, this front foot here, which is here, which
is tactful here. I'm just going to match
the front foot with that because I know that's
how it's going to end. All have to do now is if I go to my controls, select
everything, literally. Middle click zero,
bring it to 20, let go of the middle mouse. Middle, middle
click on zero-zero, drag it to where you want 20, and then let go plus s,
a copy of that pose. So as you can see,
it goes back it up because all I'm doing here, I'm just selecting the fee, controls and the hips. I'm just bringing that back. So it kind of matches there. Okay, and now I can just delete
this group, which I made. This one. I can delete it
because that was just a guide. Now. And now if I just play this, I'll just do a constant again. So everything's still even
it's going to mess up. Why is messing up? Okay. Okay. And then he learns
let's save that. Okay, I just restarted Maya and the blocking seems to work. So this is just a very
basic block we're getting the blockings in. Okay? So basic block in there. Now what I can do
is this pose here. If we select everything
with, select everything. And I'll just go in here and just go into my graph editor. And I'll just flatten these
two keys or Control F, or you can use this
flat button here. Now. It's going back quite quickly. So I just want to add,
let's see this here. To this oppose here. Let's key-frame this, move this out so that
it's spaced out as four. So I'm just pulling out
a breakdown in and I'm just having a look at the curves just to
see how it's going. So let's check this
out. So here we can see it's pretty smooth. Now what we're gonna do here, you can see because he's
completely messed up, right? So you got from here. And
then look what's happening. So what you wanna do, basically, delete that motion. First. Select. So we'll
just select these feet. Just copied this fee
on frame 16 to 20. So it's all still. And that's messed up as volume. That's happening. Select that, sorry, 16.20 key that maybe I've got a
translation somewhere else. I don't know about. Yes. Sea level. To delete all that. Sometimes you get
it on the other controls and you
don't want that. Okay, So he comes there. Basically this is just like a lover comes in, like
another breakdown. So as he comes up
with just trying to smooth the way it comes back, obviously, you can
straighten this. Move it to us in balance. Okay? Don't know what happened there. Plus key the first
frame and last, and bring this back. Okay, so kind of
like day, right? Let's take that 24 frame, copy it at 20 is planted. Yeah. Okay, so we've got a bit more smoother transition coming
back and then we can start playing around with
the breakdowns more in the next section. So that's all it is you've got. So if I select everything here, again, just make
sure it's blocked. Now, just make sure our key
everything could each frame. Yeah, So the first 24, right? Let's put it at 24.
So that is basically, we're gonna be
working with this as a base, but that's
what we're doing. And then we can play
with the timing where instantly gets hit, then it goes back,
then you conduct. But as you can see, we've got the main things
and it comes back, there's a weight shift, which
is what we want, right? Want to make sure
everything is going the mechanics of the right way. Then he lands, takes the weight. That way. That might
be a bit extreme. You can always bring that back. And then going back. And then obviously here is
still going that way. And then we learned and then
we can add all the cushions. So that's the blocking done. And then we'll move on to the splenic breakdowns
in this planning. Okay, I'll see you next video.
4. First Pass Splining Take Hit Part 1: Okay, We've got blocking here. I just noticed there's a
bit of a quick change here. So let's try to sort this
out quite a bit there. What we'll do in these
type of situations. What I do is I just kept
the graph editor here. And I'll just look at the poses. Are alright, this pose, there's a massive change right? Between this seems
all good there. And then there's a big
change there, right? Then it goes back. So the first thing I'll
do is I'll get the hips and I'll just check out
the motion trail here. Just to see how far
the hips are going, which we did in the last right. So then what I'll do is
around this area here, from here to here, I'll just flatten that spline
wherever you want to do. I just want to see why
even be the next one. I just want to see the load. Actually what I'll do,
I'll select everything. In fact, limit is let me just delete delete that motion clear. Let me go up in here
and delete that. Let me select everything. I'm going to explain
everything in-between the four keys here just
to see how that works. Yeah, even the
spline that alright. It because there's a big change there from disposed
to dispose as big. So we want to find the
in-between in air. So then we'll go
to the in-between. I think that's fine. Because it's still a nice
curve. What we'll do. Yeah, I don't seem to be
checkout the checkout, the foot comes there. Then we can kind of create. Yeah, that seems a bit. Cleaver, move this back a bit. So there's a bit
more of a curve. We're going to do
this in polishing, been just kind of
doing a bit of polish. Well, just tiny, get the curves. The curves a bit better.
Okay? Alright, so we're just, we're just fine tuning
a little bit there. So we've got a nice
curve coming like that. But I'm thinking the hips. We could move this
back a bit. Yeah. Yeah. Okay, That's fine. Now what we'll do, we'll just
delete these motion trails. Okay, now, in this video, we're just going to
supply and everything. It's going to look
weird, but don't worry, man, we're going to fix it. I'm going to select
everything and go to alt F, which is basically flat,
flat and everything. And then I'm gonna
go in-between, leave the n frames, leave the n keys up, and then it's going to display for all tests as my shortcut. Alright, and now you're
going to see some flow, you don't worry. Flowchart at now,
we're just going to go in and start cleaning up. Let me put this frame t. Let's put a few friends
to play with. Mood. The end frame back to Dewey. So there's a bit of
frames we can play with. Okay, so let's go ahead and we're going to
check out the curves. As you can see, we've already done the curves.
On the top side. We've got the center
of gravity working how we want it go all the way, shifts in the right area
and I just normally go for each axes and
just have a look. Okay, how is this?
These curves look cool. They look alright to
straighten these a bit, have to worry too much. You might even want to delete
some of these as well. No, you can just play with
the spacing like this. But we can do that later too. Alright, so this one right, is where the character
is going back. Okay? So now what we can do it
and we can delete these. You can delete some of these
in-betweens. Let's see. Yeah. That seems a bit
better, isn't it? We're getting the
center working first. And then I'll just start. We're just playing at the
moment. That's all we're doing. So let's check out his foot. Okay. You see how this happens
when the supply and you see all that sliding that's happening because of this. You see this overshoot here. This bit that normally
happens when your spine. So all you do is
you flatten that. Right? And it's still moving,
which is fine. There's some other overshoots. And then there's
rotation to check the other control
just to make sure we haven't accidentally rotated. Because sometimes you
can select those there. You can see flat, Let's just go along
and flatten these. There's a rotation
there which we can see. What we can do here
now is this rotation. Is this representing this. So we can do is number seven, copy that to number
11 and flatten that. And you see it still
see it's not moving. We've gotta be careful
because we don't want we don't want
it to break right? Then. You're going to be,
alright, that's rotating. We need this. As
it's moving back, we need to rotate this. So we'll come back here. We know like as it comes
up, the foot rotate. So we'll just bring
these down to here. What is this? The best way
to do this is 14.5 there. Just select everything
and make that 50 list. Everything's working
out. Working out 15. So it's all the same. Okay. Okay. That doesn't
work because look, that's not, that's not logical. So what we'll do 78, we just put this up
78.8, so it's fixed. We're just kinda have
to as it's coming down. As it comes down there, then we'll rotate left, rotate this, or
don't want it there. We go to rotate here
and move it forward. And then we have mean you
have to sort out all of this. So basically here we need to rotate me to zero, this all out. Zero and inflaton
flattened these. This is where if you look
here, it's all a mess. So what we'll do, let's check out our translation
first on this. Let's get the motion
trail on this, because this is all
over the place. So we'll go ahead. Let's say the trajectories
out for this. There's rotations, know,
there's translations on this. This should be zero. We come
back here, this is zero. What we'll do, we'll get rid of all the animation on this
controlled and how that can, that can affect it too. Okay. So there you see it comes
in, then it goes out. So we need this in the air. The trajectory seems alright. But the rotations are not right. If we look at the rotation
there in why we need to move this down here, 13.8. So let's just copy
that floating 0.8. Okay? Okay. Okay, so what we'll do, we're just
going to sort this out. Then we can just play with
the timing of it there. Or we can do here is
have the character more. Yeah, we need the
character more. That's fine. To have it more the
other way. We need it.
5. Second Pass Splining Take Hit Part 2: More this way, because of
the weight distribution. Didn't look balanced there. This coming up, wait there. Which is fine. The knee is following there. Put the new foreword, their hair right here. This is fine. This in the air. I think they can come
out a bit because you've got Danny can have
more space in the leg. You can see, which is important. Then you see that going in. So we can so we need to
have that Florida did have that back a bit. Abby out a bit as well because we want we want
that bit of a gap. And balance. It comes back following
that path and this path, then this landing, then
lands is falling apart. We kind of getting that puff. Save that. And of course at the end you
can see all this moving. So the rotation,
That's all rotations, if we look here
from here to here, rotation, rotation
is why to go to, why Look, all of that. All we need to do is
I'm going to get here. So when it lands, we basically need to copy
this pose and pose to this pose comes this snap. And then maybe we could even use it a bit with this,
have this come up. And then there's
movement there, right? That's in the translation. So if you look here when
we flatten this, yeah, then when he calls his
movement coming up and down, so that's gonna be that. So just to go over
and check all of these is going to
flatten these all out. Even though rotations, just
to make sure here, see, now that will be solid, see the plant solid. And there's a bit
of a that is this. If you look here, you
can lift this up a bit. We can even make it
closer so that there's not much anyone. Yeah. And then the rest, we can
swap two if you look at the torso and now that
the code is working fine, we've got the rotations. So here's the rotations. They're all messed up here. But look at this, this
is all messed up. So what will do? You can just
delete these in-betweens. Like this. We're just trying to get rid of any redundant keys to
get some clean rotation. Let's check the other
rotations out here. You see, look at all this. That's what the jerkiness
is coming from. So we'll come then. He gets hit. Yeah,
we can delete this. And as he comes down, we can delete this key. Comes up. We can smooth this out. We can even delete these keys. Now if we look starting
to smooth out a bit. But then we have also have this. If you look at this down here, we can smooth this out a bit. Smoother transition. Then we go, we can start playing
around with the torso. Start cleaning this up. Can we just start
breaking these tangents, playing around? Bring this down. Okay, the hips are
still a bit wobbly. So we can just play
around with these keys, delete this middle key. Rotations here as well. We can get rid of these. This middle one. Yes, So the hips are starting to
work a bit better now. We can start adding the
cushioning and all that. Like he's coming back here. Let's go back. Let's go, let's go
straight ahead. Let's go back. Let's follow
this sort of the hips. That's fine. Yeah, this hip is up in the air. That's fine. Makes sense. Okay. You
can just move these out, spline this benign that, that should be fine. Yeah, you're getting
more of a smooth. What we'll do now, we'll
work up the torso. So we've got that working. I'll just save this, save
your work, your work guys. Alright, so now you can see, okay, that's the initial
reactions, so we need that. And then here, this can all, we can get rid of all this because this is
what's jerking it. We can get rid of this and this. So we've got a smooth one there. Same thing with this. Bring this up, then this down. We'll bring this down. We'll bring this up because we get some clean
rotations in there. To essentially delete these will leave the start
because that's the yeah, that's fine. That works fine. Then we go up the second one, check out this torso,
bring this up. Some cleaner rotations in there. That middle one. Just go through the
axes. Clean these up. These rotations that this
jerking things around a bit, just to clean these up there. And now you're starting to
feel a bit more cleaner. Everything stopping
at the same time, we can sort that out. Okay, So we've got
that controller. Is that one? Yeah. Then
there's this one. Yeah. This is the main chest. Again, we'll leave
the start how it is. These notations, right? Work your way down the
axis, things like this. You see, this is
what's causing the not making the animations as transitions into these bits here is cleaning
up the rotations. Then you've got the head. Again, initial, delete that
initial pop in your head to declare that
rotations we were doing cleaning up
the rotation right? Now, the reason why
you see at the end is going, is going back. Because of the hips. If you look at the Y and the
hips, the overshoot there. Over here you see
this overshoot. Overshoot here is what's making it go out to
what you can do. You can ease in to the
last pose like that. Instead of the overshoot
goes in like that, the whole body kind
of gets the arms. What we're going to
do with the arms is we will delete them. We want to supplant
them, will delete them. I will work straight
ahead in them. But overall, you're,
you're you're getting that you're getting that
clean this happening, why? And the weight shifts. So it's feeling
good, feeling there. And then we'll start
at the head and everything in the next
video one by one. But overall you're
getting that nice smooth hips is in back into
the auto position. And then we'll lay
the arms a day. We'll just go, you know, so he's a bit off balance and then he comes back,
then his arms settled. Alright, that's, that will
be in the next video. So stay tuned to that
as COX video guys.
6. First Pass Polishing Take Hit Part 1: A quick video to stop. The full video is later, but I'll be recorded this first half of the tutorial and there was music
in the background. So I'm sorry for that. But basically what I'm
doing here with the arms is there's a full version
of this after this, which works on the right arm. And it's the same principle. Just adding a drag
and coming back using the fingers to kind of add
a kind of a wave effect. So it looks all organic. What I mean by
that is, I'll show you I'll show you what I mean. If I can find a clip, you can see how the hand kind of comes back. That's
what I'm doing. And I'm doing that
by creating these, I'm trying to create
this nice flow. And especially the drug
principle that I'm using, which we'll see in
the next video. But basically if I just this is one that's
working on it at the moment, we've got to get your proper
example from the top. So I'm just creating
these curves basically. So I'm going like that, alright, to the finger because I'm
seeing that it's all connected. Thing, that everything. Then I've got this pose, which I'm going right
from the finger, the line of action going
all the way down, right? And I'm trying to create a
nice flow is low like that. Then the next pose is more
where the arm is both. But that does this. And then obviously
the last pose, I can put more of an angle. Last pose, you got that
line of action going down. Then at the end is
going down and then up. So that's what I'm trying
to get, the overall gist, but you will see on the
right arm of this clip, but the audio was in the backgrounds are
really messed up. The animation then I
apologize for that. But check out the
rest of the video and just apply the same
principle to the left arm. You'll be granted. Guys,
check out the next clip. Alma, coming back. Okay, so when it
comes back again, okay, let's do all these
frames in-between. Oops, wrong one, this one. Okay, so we delete. And then what we'll
do, we will drag. So we'll drag this arm back
so we can break this as well. See, we're breaking this. Comes okay. Let's have it still
showing there. Yeah, that's fine. And then it drags. Will move this a couple of
friends or one frame drugs, still dragging,
still dragging back. Even here, you can have it. Then it kinda goes forward. A bit of a cushion. Cushion there. So we can see here from these cushion coming up and
then it comes back down. Maybe A-frame earlier. Okay. Let's check out
the two upper arm. The upper arm look like,
I think what we can do if we delete
head and the head, Let's go free friends
before the ad. Middle click that
bring it back to 23. Okay, maybe we can
have an overshoot. Let's see. Let's move
this up slightly. Maybe slightly is break these. Okay, Now let's check
it out. The risk now. Alright. So the risk comes back. Comes back. We're still breaking this wrist, so it's still dragging
as it's coming back. But let's have a look
at the silhouette here. We can see the fingers
still coming back. Okay. Do have it coming back. Now. This we can delete this. Okay, so it comes back. We could do is go
to Los few frames. Middle click, bring
it back to 26. So it's hitting
that pose quicker. Let's delete this. Okay, so we've got
this cloud going on. Let's continue to drag back. Maybe have it come up a bit. Back. Whipping, right? So it's easing and we've got some reversals
happening there, right? As you can see in the arms. We're trying to
connect them both. So they're like flowing. That's what we're trying to get. It's easing and what we
can do is easing in. If you look at the
upper book, Let's go. If you look at the upper
leg, upper arm, sorry. I can get my words out that the upper arm is coming
back and it's still there. So what we can do is
maybe bring it back, bring it like this. And then it creates that
little cushion you see. So it's kinda more organic overshoot. And
then let's settle. Quite a common way of bringing the and then you
get that little bit of a width, kinda width. And then when you land, you can see the plant
and really that is hips comes back right? Then what we'll do, we've got the arms all work
in populous, checkout, the checkout, the head. Right? So let's take the controllable. Okay, So the head, we look at the side of you coming into lists. We can really exaggerate
this and bring it down because he's,
he's been hit. So he's taken that force. That contrasts from there today. That change from day to day will be noticeable because it's a popular kind of yeah. So you can feel the you
can feel the impact. So little things like that
will make a huge difference. So it hits, right? He's all over the place. There is a little bit out of
control, but off-balance. But then as it comes back, we could even rotate
him backward like this. Three hits. And even here, he could still be looking back
trying to find placement, is looking back, looking
down on the floor, trying to see if
this foot can land. And then even here we can
just click this to 15, delete this frame,
then bring this, go to 13, middle,
click that to 12. So it's kind of just
holding that post. If you have a look now, okay. And here you can do
just rotate the head a bit more this way. And then we'll delete this one, delete this one to need
those inside of it. Successfully this. Okay, so maybe that might die works better because
it's still going back. But as is looking,
as he's looking, he's coming back and we could
it's coming back to this. This is a bit off balance,
but we'll do that in a bit. Now he can kind of start looking up because it's kind of regaining a bit of
the balance, right? As he comes up. Then you can have their
head kind of drag. So it's kind of like arise
with gaining is balanced. Here. We can just
delay this a bit more. Then it comes down
a little bit more. Land, and then the head
comes down, which is fine. Or we could move this actually will move
that back. Move this one. Snap this to the nearest. Okay, and maybe the head
down is a bit too much, so we'll just have
it up a little. So you can see in here, can bring that
down a little bit. You know what, we drag. We can even rotate
the head up a bit. So you can create
that kind of stretch, but not too much. Again, you feel it will just brush up some
of the banks issues, but we want him to be a bit
of balance here in there. Okay, so we've got that working. Alright guys, so we've got the main mechanics,
everything working with. We'll do another Polish paths. We will work on the hands, fingers here, sorry,
the fingers in here, and on the bit on the balance. But apart from that,
it's getting there. And that's basically
the polishing phase. But I'm going to work on the feet a little bit
more on the knees, the new controls, that
will be the next pass. Second parcel
policy. Right guys. I'll see you next video.
7. Second Pass Polishing Take Hit Part 2: Guys, so this is part two. This would be just little
cleanups we're gonna do. So let's go in straight here. First thing I noticed was
you look at this foot, moves, their moods, but then
look at overshoots, right? So let's check that
out. That's basically the overshoot is this. This is flattened. And now it should
just stay still. There's a bit of
movement there in the white yeah,
another overshoot. So just flatten that, you know, what does
this overshoot here? So let's flatten that. Is one into y as well. Yeah. Yeah. And so we want
that foot to be solid. So we're just kinda, this all happens
when he's blind. You just want to
flatten this out. More solid desi we'll look now. It's solid. But I recommend you
just put this up, break it up and it makes it more natural. I have this coming up as well. And then we learned
maybe quicker. Then what we'll do, we'll
do another pass checkout. The knee, how the knees? Just going frame by frame. We just told you align
the knee with the toe to double-check because otherwise it looks broken. The following
following the knee. Yeah. Okay. And then we'll get the other
other one tip that out. That's cool. There.
Then it comes forward following the
knee, just polishing it. And then what What else we'll do is we'll go straight ahead. So this is the
here what is this? This is the front part
of the head, the back. And that's what we'll
do. A quick way. We can just do this
all straight ahead. So we slept border controls, delete everything in-between. Keep the first and last one. Now. We're going
to do is rotate. So we'll have it go back first. And then it goes back. And then it goes in
fluid down down. And then we'll have it go back. And what we're doing with
ecologists, maintain the shape. We want to make sure that the hair follows
the flow as well. That's what we're
trying to do, is part of the body, right? So and then as it comes back, head comes forward,
down, rotate. I'm going to delete this back, and then back up. And then it's going to
settle. Let's check this out. Now another thing we can do here is select all those
controls we had. If we select the second control. And then we just
cycle that. We'll do. Set empty In-between one
to make it go up by two. The next one, make
that go for one. Whoops, 1234. So it's offset, a bit more of an offset. So what we can do now,
we can go individually. We can go one-by-one and
go right straight ahead. I want this to still go back. Then I wanted to sell.
I don't mind that. Then comes down. You can go the other way. The weighting on this
here is a bit off, but that's kind of the doubt
what we'll do with the end. This feels better. Bit more movement
on it. Okay, So this brings a bit more
life to the character. Now the last thing
we'll do is fingers. And what we'll do with fingers is we will this. We'll do the fingers is I
normally get all the controls. Right. And then let's see, can we rotate? Yes, we can. Okay. What we'll do now, I'll leave the tuns out
by just delete everything between and I just go straight ahead again.
So I'll go here. I'll be like, alright, this hit how the thing is going to react that they're gonna
be waving this way, right? And then as it comes back, naturally, it's going
to wave this way. Then it's carrying on, carrying on its
carillon back that way. Even up. As it comes here, we want to lock an overshoot. We want it to go this way, and then it settles. So if we look at this,
see how this plays out. So you're getting that kind of drag you see with
the fingers as well. Then what you do is then I just get the second
set of controllers. And I would be like Offset one. And then the next
set of controllers offset the in-between keys 12. Okay, now let's see
how that looks. Because that will just break up. See that breaks up the fingers so they come
at different times. Then you can just
turn that down, whatever however you want. And then what I'll
do, I'll just go back to the DC-3
and I'll be like, alright, delete
everything in between. Same thing again, straight
ahead so you come in back. What's happening with the thumb? Let's drag the firm. What's happening
with a farm here? We want it to drag back, then come out and then settle. Even have that. Same
thing with this. What you do is grab that key. Again, move the
in-between keys by one. And the next control
or below moved up by 212. Okay, let's have a look. There. You see a
little bit there. What I would do, I would
change this pose too. Like actually I would
change this second pose. And then have this open parallel and then just copy that
last frame to the start. So it's both the same
flow in a bit better. And then you can scale
that as much as you want. And it's exactly the same
thing for the other side. So again, I'll get
older controls, middle three, everything in between. And then look at the top view. And we want that
drag, drag effect. Here. We see it right? And then as it comes
back, overshoot. You can overshoot and
then settle back. So let's have a look
at that. Then we can start with the eye field. Yeah, you see you could
see that happening. We have the quicker we
can move that back. That is a whip DAY
C. Then if you want, you can also, if you
think that looks good, You can keep it or
we can offshoot. So we can offset so real. So if we go to the
second row of fingers, same thing again, you're
going to graph that I just move it by one. Then we're going to get
a final finding road. Again, move it by 212 and
that will create an offset. So all the fingers
don't come at once. Which I think works
really well and it will just save that. And then the lastly, we're just checking
out controller, the controller
delete everything. And then same thing here. We're looking at
this controller. We want it to drag right? Because it's dragging
the drug principle that as this keeps
dragon as it comes here, is catching up the other
way. So it's going back. And then we could even grab it off. And then it's going to settle. There's something here.
Didn't really flow, did something I think is
this. So let's go back. Let's check these keys are enough to go back and delete
keys as well because then I might even be the
wrist or something. Yeah. That's cool. And then when you get the thumb, just offset the thumb like
we did. The same thing. One. Offset that one too. And then that should. And that's how you do a take it. Polished. If you want. You can go to your motion
trail here, viewport, this hardware and
rendering and go down to add some motion
blur enabled that. Check it out. See how it looks. Could even do a bit more. Doesn't seem to be working. The ambient inclusion on. Anyway. That's how you do it. Take care, See how it
looks in all angles. Main things is the
weight shifts. Shifts of violence against or I guess I'll see
you in the next video.
8. Conclusion: Okay, my friends, so
that is the class. In conclusion, what
would I like to say? Well, there's a few points. Always remember your reference when you're doing something. A little bit reference, even if you have to get up and act. Field await. Do that because it's always good to
have something to go from. Relatives. Do it from your head if you don't it for years and years is different because it built up that library in
your head, right? Same with artists to draw
this study everything. They've got a whole
library in their head us, when you get a bit more
experience, when you, But even the most
experienced animators, they all use reference in
some stage or another. So use reference, break it down. Study the poses, study
the key policies. What are the key poses? Then you put the breakdown
poses and make the key poses, make the animation from going
from one pose to another. Then you can start polishing,
which is blind it. Then we polished
it. Then we added the finger animation,
the hair animation, all these little animations
that add that little bit extra when it comes to
polishing stage, guys. So I hope you enjoyed that. I'll be in the
discussions below. Go over it again,
again, just practice, go through the whole
animation series and just practice, practice. And remember those
tangents, match them up. Yeah, I know I can remind number is very important
because you will. So a classic mistake
where we do, When I first started, when you do a cycle,
it just glitches. Glitches task because
the tangents are matching with the poses
aren't same on both sides. Guys, I'll see you in the next few classes
that we put in. I'm going to go back to
foundations, breaking that down. And I'll print a whole
series of classes and animation fundamentals and very small bite-sized
chunks so we can soak stuff in important
stuff in straight away. Or I'll go to the meantime, happy animating, have
fun and stay healthy.
9. Maya Animation Mastery: Hi, everyone. Congratulations. This
is just something after the conclusion
that I just wanted to put into all my courses. If you're really serious about leveling up
your animations, I have a brand new course
that you can enroll in. It's called Maya
Animation Master. This course, I've redone
it with four K Good Audio, came out in January 2024. And this course is
designed in a way how I would have liked to be taught animation when I started. So It basically gets rid of all the pain pain
pressure points that I had when I
started animation. So I want to get rid of those
frustrations and give you a direct line to what that aha moment was for me when my mentor Steve Gagnon Kati taught
me about animation. Something just clicked, and
I teach that in the course. So if you're interested
in enrolling, you can go to the about
me page where I'll have a link there called
My Animation Mastery, and you can go
through the webinar. Then the course breakdown.
You can check that out. And then if you decide, you can enroll, if
not, that's fine. There's a private
Facebook group. There's a link in there
about me for that as well. You can join that
where we get feedback, and there's a nice
community there. And also, when you enroll, there's a private
Myers Mya animation Mastery inner circle
group where it's just exclusive for students
where we give feedback. So, have a look at that webinar and let me know your
thoughts as well. If not, you can join the Facebook group to
the private group. Obviously, the inner Coco group is for people who have enrolled, students who have enrolled,
but check it out, and it's just for
leveling up, and really, it's got all the
theory and practical, heavy on the practical
stuff, video game stuff. If you want to learn
about how to get a shot from reference to
blocking to splinding, to polished, show real level. It goes
through all of that. And also, I talk a lot about networking and
how to get jobs and context that I have within the industry that I can
ph your work out there so at least it's in the right
hands and people can see and at least consider
you for applications. F of my students who
have already got jobs in the industry going
through the course, so have a look at it. And yeah, let me
know your thoughts. So enjoy your animation journey, stay healthy, and
I'll see you around. I'll be around on the
Internet on YouTube and a giving tutorials as
usual. I'll see you later.
 Opi Chaggar, Senior Animator + YouTuber