Transcripts
1. Camera Stabilization Course Intro: So back in the
day, if you wanted a steady shot on your camera, you actually have to spend
thousands of dollars on bulky camera equipment. Or you had to spend
hours upon hours learning how to properly
use a steady cam. Well, fortunately
for us, the future is now and you can actually get super smooth steady shots by just using
hand-held camera work. There are literally dozens of additional ways you can properly
stabilize your footage, whether shot on a
professional camera or even just your smartphone. And the great thing
is that you can combine many of these
techniques to transform handheld footage into
silky smooth video that looks like
you spent a ton of money on professional
camera again. And that's what we're
doing in this course. We're learning everything we can about how to get smooth footage. We'll start with a few
out-of-the-box, no budget options. We'll discuss the best
types of cameras and lenses to use to
get smooth footage. We'll go over some
basic cheap gear that almost every video
enthusiast already has. Also go over some
professional equipment just so you know the possibilities
of what's out there. And I'll show you the
exact camera settings I use to get the smoothest
footage possible. We'll even dive deep into
the post-production process. Talking about video
filters you can use to smooth things out and gyroscopic metadata and how you can use that to further
smooth your footage. And I'll end the
class by showing you 11 approaches that you can
actually use in tandem. That's all 11 of
these approaches combined to get the
perfect footage. You basically learn
how to transform completely handheld footage into something that looks
super professional. So that sounds good.
Let's get into it.
2. What Makes Cameras Shake?: Maybe silly, but
before we jump into actual techniques on how to
keep camera footage smooth, let's kind of figure
out conceptually, an academically, what exactly
makes camera footage shaky. So if you really think about it, there's six different ways a camera can move
throughout space. So we can physically
move left to right, up and down, forward, back. So it has three dimensions
in space that it can move and you can also turn
three different ways. So we think of pans and
tilts, panning left to right, tilting up and down, and a third way
rolling side-to-side. So if you think about
it, there's really only six different ways a camera or any object
really can move in space. And what we're
trying to do to get cinematic footage
is we're trying to limit the amount of ways
that it can actually move. Most cinematic moves are only 123 of these
moves, not all six. So when we think about a
dolly move, for instance, the cameras just moving one
direction in space along the z-axis for it back or along the x-axis,
left to right. So that's only using one
of these camera movements. And maybe we want to push
in and get a nice tilt on our subject at the end to
show a powerful subject. So that's moving forward
and tilting up as we do, that is using two of
these Movement methods versus the six possibles. So again, for
cinematic movement, we're really trying to isolate all these moves down
just about one to three. And that usually gives us the most cinematic footage possible. If we think about
a movement that's associated with
amateur camera work, we think about when
we're going handheld, if we're walking up and down, the camera is moving along
this y-axis up and down. And that kinda shows off the footsteps usually
isn't what we want. And so instead, if we were to limit that up
and down movement, now suddenly we're just walking forward and it's the
same as a dolly. So we've limited the
up and down movement. We've completely eliminated it, and now we're just moving
along the z-axis in space. So, yeah, that's a
little academic, but try to keep
those things in mind while we learn all
of these techniques. It's also probably worth saying that when it comes
to stabilization, more points of
contact the better. So if you're holding a
camera with one hand, it's very easy for that camera to be moving around when you
hold it with two hands, suddenly you've studied
it a little bit more. If you were to able to
add a third point of contact or even a third and
fourth point of contact, you can get smoother
footage that way. So typically, with
stabilization, the more points of
contact the better and a final guiding principle of camera movement
is the camera wait. So the heavier the camera, the steadier the footage
is inherently going to be. If we think about it
in the real-world, we think of an elephant
is large and moves slowly versus some sort of
bug that's flying around, can able to pivot through
space and move a lot faster. So a camera, just
like anything else, the heavier the camera is, the more force is required
to change trajectory, which means that it's going
to inherently be more stable if you're shooting with
some sort of like point and shoot or a phone, it's clearly going to have
a little bit more jitters than some heavy, bulky camera when it comes
to Cameron, move it. One other thing to
understand is that the closer an object is to
the lens of your camera, the more accentuated that movement is actually
going to be. And when we think of like
going on a road trip, we think of sitting
in the passenger seat and looking out to the side. The mountain in
the far background looks like it's just
barely moving, right? The house in the midground
is moving at a normal speed. And then street signs
and things like that. Cars in the foreground are just moving by
really, really fast. So it's the same with
camera movement. If something is
close to your lens, it's going to look
like it's moving a lot more than if it's farther
away from your lens. And that's just a concept
that we want to know because some of these movements
are a lot smaller. Some of these movements
we're just moving the camera two or 3
ft or one or 2 ft. And for the camera to really
pick up on the movement, we want to make
sure that we place objects in our foreground. So we're seeing that movement. And if we don't do that, if we just move the camera very subtly six to 9 " to the side, we're not really
going to pick up on any movement unless we have
something in the foreground. So again, I like to keep things practical and
pragmatic for you guys. That's just a little bit
of academic information to have in the back of your brain while
you're learning these actual practical steps. So with that, let's actually start to learn these techniques.
3. How to Hold the Camera: Before we get into anything that requires camera movement, Let's talk about different
ways you can hold the camera. That just by holding the camera, you can already take
out some of that shake. So as we said before, the more points of contact, the steady or your
camera can be. Well, when you're
holding your camera, your arms are able to freely
move throughout space. And so essentially
think of if you were putting your
camera on a tripod, but that tripod is not
locked to the ground. I mean, that's why your arms are so to properly hold the camera. In most situations,
what you wanna do is actually kinda lock your
elbows to your side. And so you're thinking
kinda like T-Rex arms here. You're locking your
elbows to your side. You're holding the camera
with two hands here. And what that does is
it allows you to now make really smooth
pans and tilts. Because you're
cutting out a few of those ways that the camera
can move throughout space. So when your arms are
locked to your side here, you're not going to be moving on the z-axis here,
forward and back. You're not going to
be moving up and down unless you're walking. So you've eliminated
the y-axis as well because you're putting
pressure on both sides, you're eliminating the
x-axis left to right. And so really with this term, you're kinda just left
to these pans and tilts. You're not even really
going to roll unless you're kind of rotating to the side. You've kind of narrowed
down to only two of those six movements that allow you to keep your
footage really steady. So when you think
about this stance, this is kind of a base that you can really
use with a lot of these techniques to add just another layer
of stabilization. With that said,
another way to further stabilize your camera is to
add a third point of contact. And so you have your two hands. Well, if you bring
it up to your face here and with your eyebrow, actually have a third point
of contact on the eyepiece. So now you're looking
through the eyepiece and not the LCD will that adds a
third point of contact. So you can actually use
both of these in tandem. You can have your
elbows to your side. You're going to
have it up here for a third point of contact. And now you're getting
much steadier footage. So adding that third point of contact really
smooth things out. Another method to
smooth things out. Again, we said arms are kinda
like tripods and space. Well, you can always
rest your arms on an object and that will take the movement
out of that arm. So if you have something
nearby that's at the level, you want it to feel free to
rest your arm on that object. And that'll kind of help smooth things out and you can
get creative with this. It doesn't necessarily have
to be a steady object. It could be a friend, it
could be a friend's shoulder. You can be resting your arm
on your friend's shoulder to just basically take out the
movement of one of your arms. So again, you can kind of combine all these
things together. You probably wouldn't combine
the elbows at the side, but you could rest your arm on an object and then put your
eye against the eyepiece. And now suddenly you have
three points of contact. And you've taken the movement
out of one of your arms. So that's a great way
to stabilize things. And this next one
is actually one of my favorite ones that
I use all the time. And that's actually adding a four points of
contact by taking the neck strap and
putting it around your neck and pulling
it tight right here. And so you have one
hand, two hands. And 3.4 where your camera straps are attached to the camera. So as long as you pull
taught right here. And again, you do the
elbows to the side. You have very smooth footage. Just by pushing pressure on your neck with
the camera strap. What I love about this
method is that it really does smooth things out, but it's also not a big, bulky glide cam or
gimbal or slider. It's not something that
if you're out somewhere, just maybe somewhere
where maybe you shouldn't be or maybe it's questionable
that you're there. Taking footage. You just look like a tourist. When you have the camera strap around your neck
and your shooting, you just have your
camera and the strap. No one's going to
stop me and say, Excuse me, sir, What
are you filming? Because you just look like
anyone with a camera. And so this is a great
technique to get great footage and also be a little bit stealth
about what you're doing.
4. Camera Movement: So for the next part we're
gonna go over camera movement. And I've actually broken it down into two different lessons. One, camera movement
without any walking, and then the other can
remove it with walking. And so first off, we will just go over the ones
that don't require walking. So this is kind of
leaning, lunging, kinda moving the
camera through space without actually
introducing footsteps, because footsteps at a
whole layer of difficulty. And so we'll get to
that in the next one. So the first one of
these is the lunch. And so basically you're spreading your legs
side-to-side or forward and back
and you're doing a lunge with a weight
shift side-to-side. And so to do this, you
spread your legs out and you start with almost all your
weight on one of the legs. And then you just slowly shift your weight
to the other leg. And now this can
be done again in tandem with those different
ways to hold the camera. So you can do this with your
elbows, glutes your side. You can do the lunge with
the camera strap around your neck as well to further
stabilize the movement. And so this will take a little
bit of getting used to. Again, you can do
it side to side or you can do it
forward and back. And because this is
a subtle movement, really you're just moving maybe a foot, a foot and a half. You want to try to do this with an object in your foreground. So it kind of shows off the camera movement
that you're doing. Again for this, don't
move your feet, make sure they're planted and you're just
shifting your weight. You're not stepping for
this next movement is pretty much exclusively
in indoor movement. You can get a towel, a pillow, or even just a t-shirt lying around and put it
under your camera. And from here, now what you
can do is you can just pull on the t-shirt or the towel and suddenly you're mimicking a
slider movement. So again, this is
typically done on the z-axis four and
back on the x-axis, you can be doing
it side-to-side. And what's nice about
this movement too, is if you want to
introduce pans and tilts. Having it like this with your arms on the
shirt or the towel, you can have the ability to
pan and tilt as you're going. And regardless, we're
still taking out all of the y-axis
movement possibilities. So we're still keeping
things very limited here. So again, this is pretty much exclusively indoors or outdoors. You could maybe do it
on a picnic table, but it's a lot easier indoors. Outdoors. And then I said No walking, but we still can do some
moves with movements. So if you think of things
like a skateboard, a bicycle, a
wheelchair, or a car, these are actually
great low budget ways to move the camera further and then
just a couple of feet and do it in
a very smooth way. So with all of these things, I do want to make sure
that you exercise caution, especially working with a car or bicycle or
something like that, there is the possibility
of you hurting yourself. So please, please
be cautious with that when you're doing
those movements. So if you haven't
skateboarder before, you're a little bit
nervous about it, feel free to just stand
on the skateboard with your arms at your side or the camera strap
around your neck at a different layer of
stabilization there. And then have someone
just with your hands on your back and slowly push you through space. And that'll allow you to get some really nice steady
shots using the skateboard. The wheelchair is probably the safest one of these options, but it does kinda confined
to a lower angle. So that is something
to think about. The bicycle, it might
be nice to have someone in front of you
holding the handlebars, pulling and walking backwards
as you sit on the seat, filming off to the side. And then finally in the car, the passenger seat, you're
moving along distance. But with the car, there is some added
bounce to it, right? And so, uh, thing
that I like to do in the car is if you
have a sand bag, you can actually
rest the sand bag on the window and then put the
camera on the sand bag. And what the sand bag does is it actually absorbs
some of that bounce, some of that shock up and down. And it also allows you to
kind of tilt and paying your camera as you're
filling out the window. Those are all great ways to add some movement without
breaking the bank and buying a dolly or buying a jibber or process trailer,
anything like that.
5. Camera Movement with Walking: Okay, so now we're
stepping things up a little bit and
we're talking about a concept that's
actually a little bit difficult and need
some practice to do. And so when we're talking
about walking with a camera handheld and trying to make it not look like
handheld footage. The technique used here
is walking heel to toe. So if by chance you are in marching band in
high school or college, this is what marching band
students do to really keep a steady movement throughout instead of up and down walking. And so basically walking
heel to toe and just walk real slow and keep your
feet pretty close together. So when you walk heel to toe, 1 ft is heel to toe. The next foot comes down, is really just a few inches
in front of the other foot. You're not taking
long strides here. You're trying to keep a slow, consistent movement without
a lot of up and down. So again, this is
a technique that people use on film sets
and it takes practice. It's not something that you can just do overnight and so yeah, so spend a few days with your
camera walking heel to toe, trying to keep out
any y-axis movement. And do that, you know, you'll, you'll figure it out
within a week or so, but it will take a
little bit of practice. So now that we've
gone out there and figured out our
heel toe movement, another camera movement that includes walking
that I like to use, that was created
by this YouTuber who he calls it the cradle. And what you do is you
take your camera strap and you actually put
it under your lens. And now I have a lens that has so much focus, movement,
Zoom movement, that when you do this,
you want to make sure that the strap goes
in a place where it's not touching anything that could it could adjust
a focus or Zoom. But you hold your
camera like this. The strap is under
the lens and what this is doing now we have
three points of contact, so we have the
camera strap here, 12.3, so we have three
points of contact. And technically this
doesn't need walking. You can kinda just like
hover this through space. But it isn't nice
movement walking. And what's nice about it too, is you can actually get
it low to the ground. And so you can get it
right off the ground. Make sure you're
walking heel to toe, but you go right off the ground
and you can get a lot of grass blades and leaves and
bugs and things like that. So this is an interesting
way to hold a camera. Again, this is right
out of the box. You're just using
the camera strap that came with the camera. And this is a great way to further stabilize your footage.
6. Working Out: This is a funny little section, but it might be worth saying
to make sure you work out regularly when you're on a professional film set and you look at the steady cam operator. And steady cam operator
is also always a large person with a lot of muscles because those
cameras are heavy. And if you think about it, when you're holding the camera, the camera shakes because your arms get a
little tired, right? And so the stronger
arms you have, the more stable you'll be
able to hold a camera. So it's definitely worth saying that it's a
good idea to work out. And the great thing is, is you can still
skip leg days so you can just work out
your upper body. Obviously. It's good to work out
your lower body for those lunges are
walking heel to toe. But when it comes
to arm strength, holding the camera, hit the
gym once or twice a week. It's always a good idea.
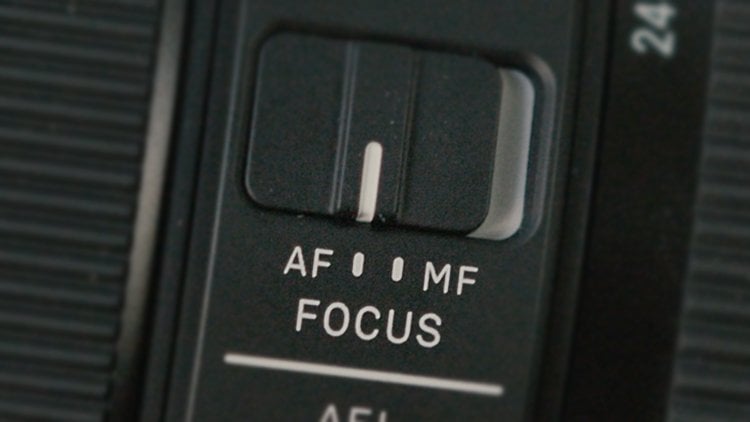
7. Camera Selection: Okay, so now let's dive
into the cameras and lenses that you can use to
further your stabilization. So I love these Sony cameras and there's a lot of other cameras out
there that have this, but there's this
thing called ibis. Ib IS, which is in body
image stabilization. And basically these
cameras have some sort of gyroscopic technology that as the camera slightly
shakes and moves, and your smartphone
probably has this as well. But as the camera
shakes and moves, the sensor itself actually kinda compensate for some
of that movement. And so these ibis cameras do a great job of stabilizing
in the body itself. Sony, you can turn it off, you can have it standard or
you can set it up to active. An active kind of
crops into the image a little bit and does a
great job of stabilizing it. But there are some drawbacks
with active as well. So actually keep
mine on standard and I'll discuss what those
drawbacks are a little later. So you definitely want a camera with in body image
stabilization. Another way to stabilize your camera is to
get a heavy camera. As we talked about earlier, heavier objects
require more force to change and shift and move. And so the heavier the camera, the inherently more
stable it'll be. And then finally
with the camera, if you can get a camera
that has some sort of gyroscopic metadata
that will allow you to further stabilize
your image in post. And so again, these
Sony cameras, these Sony Alpha cameras do have that gyroscopic metadata
that you can use later. So I'll include a list, a complete list of some
great cameras for you guys. But those things to think about, something with in body
image stabilization, a heavier camera
is always great. And then something with
gyroscopic metadata.
8. Lens Selection: So besides cameras, let's
talk about our lenses and what lens choices we can make to create a more stable image. Well, first off,
the wider the lens, the more stable and
image is going to seem. And that's because
when you zoom way in, if you had something like a
focal length of 100.105 here, I'm zoomed way in and I'm
trying to hold it steady, but every little movement is going to be picked
up within that shot. Whereas if I zoom way out, if I have 35 on this lens, it's going to be a wider shot
and it's going to feel more stable even if I'm still moving the camera
or the same amount, those jitters are gonna
be picked up a lot less. And so I recommend for
a nice steady shot. You something 18-35. That's a great focal length. That is a wide shot. It's not super fisheye. That's not going to
distort your image a lot. But it's wide enough
to not pick up those small jitters that you may be making with your hand. And besides the
length of the lens, these lenses also have some of that stabilization that I was talking about that
the camera bodies do. So you can actually
buy lenses that have a stabilization
feature in the lens itself. And so if you have a camera with in body
image stabilization, and you have a lens with some sort of optical
stabilization. Now you're really
adding things on top of each other
and you're getting a great smooth image. So again, that
Cameron lens combo had a camera with stabilization, have a heavy camera, have a camera that has
gyroscopic metadata. Use a wide lens, something 18 to 35, and use a lens with
stabilization.
9. Camera Settings: Okay, so let's talk
about the camera settings that I like to use to give you the most
stable footage possible. Now this first thing is a little controversial because
it goes against what many people have
been taught with some old-school camera theory. But stick with me a little bit. I've seen a lot of research
online to help confirm this, but I actually like to use a higher frame rate when I shoot and I really want
something stabilized. Now I'm not talking
about slow motion. I'm just talking about shooting
in 60 frames per second versus a standard 24 in
the US or 25 elsewhere. And most people like to
follow the 180 degree rule. So if they shoot with
a frame rate of 60, they like to have a shutter of 12125 or something like that. I'm of the belief that only your shutter speed affects how your
image actually looks. And so when I shoot with a, with a frame rate of 60, I like to have a
shutter speed of 50, if that's possible on my camera. Sometimes their cameras
don't allow that. So then I would have a
shutter speed of 60, shooting at 60 phrase what
this allows me to do when I do my post-processing
later and I use these filters or
these softwares, it used the gyroscopic metadata. It has more frames to pull from, so it allows me to create
a more stable image. If you think about
it, a standard frames per second of 24, you only have 24 frames of
information to gather from. However, if I shoot
60 frames per second, That's more than
double the frame. So it has a lot more
information than it can use to further
stabilize my footage. For instance, the whole time you've been
watching these videos, you haven't thought twice about what shutter speed
or what frame rate. I shot this project at. The truth is all the
footage that you've seen of meat in the field doing all this camera
work was actually shot at 60 frames per second. And you probably never
even thought twice about that when you were
watching the footage. And this project is at a frame rate of 30
frames per second. Again, this is
probably something you haven't thought about
and maybe you just assumed it was a typical
24 frames sequence. And again, this is
a unique approach that not too many people do. So if you are shooting a project with other people involved, you might want to
just stick to normal 24 because that's kind
of what's expected. However, if you have
more creative control over the process, if you're, if you're editing it yourself and you're the only one
touching the footage. Maybe just go with the 60
frames per second because it really will allow you to get the smoothest footage possible.
10. Slow Motion: So shooting at a high frame rate will get you smooth footage. Another way to cheat smooth footage is to
shoot in slow motion. So this is actually shooting
at a higher frame rate, but slowing it down, so we get slow motion. And now for this, I do adhere to the
180 degree rule. So if I'm shooting something and I know I'm going
to slow it down. If I'm shooting it in
60 frames per second, I will be using the shutter
of one-twenty or one-to-five. And if some of these
things about shutter speed and all that are a little
too advanced for you. I do teach other courses
on camera basics so you can actually learn kind
of what all that means. So as long as your
shot doesn't contain people or animals or vehicles
or anything like that. If your shot is
completely static images, it's building as landscapes
or anything like that. You can actually
slow things way, way down and no one's
going to notice. Now if you shoot 30 frames
and your sequences at 24, that's only an 80% slow motion. It's still helps and it does make the footage
look natural. And I've actually gotten
away with filming people and slowing
it down to 80%. And it does seem a little off if you know what
you're looking for, but a lot of times people
don't even notice it. I wish more cameras
have the option of shooting 48 frames a second, because that would be a
perfect 50% slow motion. And that would be great. But a lot of these cameras
actually don't do that. Now, 60 frames per
second is probably ideal for any kind of slow motion that
you're going to do, that you're not going to
present as slow motion. And what you need to do when you fill in 60 frames per
second is you have to remember the footage is gonna be slowed
down 40% or whatever. So if you're trying to do your slow subtle camera movements and it's gonna be slow motion. That footage itself
is going to be so, so slow when you're shooting slow motion and you want to
use it to get smooth shots, It's actually a good idea to do your movements a
little bit faster. And I recommend trying
to do your movements at various speeds. So when you get back
and editing, you can actually pick the best one. So just keep that in mind. If you're shooting slow
motion, you want to move faster than otherwise
you'd think. Now we'll get into
post-production and the gyroscopic metadata
stuff a little bit later. But I have seen online
that some softwares actually prefer if your footage had a higher shutter speed, it can capture the image
without the motion blur and better kind of interpolate the footage and give you
artificial slow motion. So if you do know that
you're going to do some sort of artificial
slow motion and post, you want to shoot at a
higher shutter speed. Typically, I don't like to
do this because it does give the image a different
quality than you're used to. But if the circumstance calls for it, go ahead and do that. And finally, a great setting
to choose in your camera is just shoot at the highest
resolution possible. Some of these stabilization techniques will kind of punch in on your image and you don't
want to lose resolution. And so because of that, if you shoot as high as
possible and you only punch in, you know, 8%, 10%. It's not gonna be as noticeable. If you know you're going
to master to 1080. Definitely don't shoot 1080, shoot for k. And so those are some of the
cameras settings I like to think about when trying to get the smoothest
footage possible. Shoot high frames per second. If you can get away with it,
maybe shoot slow motion. Think about shooting
higher shutter speed if you know that's going
to be right for you. And always shoot in
high resolution.
11. The Tripod: So let's go over some
of the basic gear that you might already even own. The first is
obviously the tripod. The tripod is the
most essential piece of film equipment besides
a camera and a lens. So when it comes to a tripod, you put the camera
on the tripod. If you don't touch
it, that is the most stable your shot
can possibly be. It's not moving at
all with the tripod. You also have ways of
panning and tilting. And that's pretty much the
only movement of the tripod. We've cut all three
of the movements in space and there's no
role on a tripod, maybe some of the
more expensive ones, but you're really just talking
about panning or tilting. Now, we don't always have to use the tripod exactly
as it's intended. One of the ways I love using a tripod is if you actually
rotate the base and so that one leg is directly pointed at you and the other
two legs are away. You can shorten the leg
that's close to you. And you can use
the front two legs to kind of pivot the camera. This kind of emulates a
little bit of a jib movement. And you can even tilt
the camera up and down. So with this
movement, what you're doing is you're moving in space on the z-axis
forward and back. You're moving in space up
and down a little bit. You're also tilting
the camera up. So you're using three of the
six methods of movement. And it's a shot that's
designed to show off the power of a person. And it's a great way to
use a super cheap piece of equipment to emulate something that's a bit more expensive. And you can always use
a tripod as a mono pod. And really what you're
doing here is you're giving the camera more weight because you
give them more weight, the shot is going
to be more stable. Again, feel free to combine the monopole approach with these strap around
the neck approach. And now you're giving the
camera more points of contact. Like with many of
these techniques, you can stack one on
top of the other.
12. The Monopod: Another basic piece of
equipment is the mono pod. The pod is a great piece of equipment because it's
super easy to pack. It's super easy
to take with you. And it allows you
to give the cameras some weight to add
points of contact. And because the points of contact are so spread
out from the monopole, one on the camera body and
one on the monocot itself. Because of those points of
contact are spread out, it gives the camera a
more stable approach. And mana pods are versatile. You can use them to crane up, you can use them to
Dolly side-to-side. You can do a lot
with them on a pod.
13. The Shoulder Rig: A lot of filmmakers love
to use the shoulder rig. Now the shoulder rig, what's nice about it
is it still does allow you to have some of
the handheld feel, but it's like a
professional handheld feel. It's not a hand-held field
where everything is super shaky and out-of-focus
and all that stuff. It is kind of a subdued handheld feel
because it's on your shoulder, you're adding a
point of contact, but it will pick up
your walking movements. And so you still wanna
do the heel to toe. But even still as
doing a heel to toe, you're gonna get a little
bit of up and down. And it's a lot more subtle of a camera movement than
just a typical handheld. And it's a great approach.
14. The Battery Grip: This is probably a piece
of equipment you didn't think about when it comes
to image stabilization. But if you get a battery
grip on your camera, it's going to do a lot
to stabilize your image. And that's because you're
adding the grip urine, you're adding the batteries. And so because of all
that additional weight, now suddenly your
camera is more stable, it requires more force to pivot. And so because of that, you're gonna get a
great steady image.
15. The Glidecam: Now let's go into some of
the more professional gear. This gear that maybe you
haven't heard of before, maybe you don't have
experience with, but I want you to know
what gear is out there. And so eventually when
you get to that point, we're going to
purchase some gear. You'll know exactly
what's right for you. The first piece of equipment
here is a little bit more of an old-school piece of equipment and it's called a glide cam. Glide cam was kinda the
poor man's steady cam before Gimbels were introduced. And what a glide cam does
is you properly balanced the camera on top of
this kind of axis. And then there's weight
added to the bottom. And so what that does is it
adds weight to your camera. But also when you hold it, it makes sure that the image
is stabilized as well. So again, this is before
gambles were introduced. I don't see too many people shooting with glide
camps these days, but it's something
to know about. And if you see it at a
garage sale or something like that for cheap, maybe
it's worth pick it up.
16. The Gimbal: So next let's talk
about Gimbels. Gimbels really have
revolutionized things in terms of
image stabilization. Gambles have basically
replaced steady cams on any sort of lower
budget film production. And Gimbels are amazing. They're only a couple
of hundred dollars and they really make you have a professional quality
product and have all the professional camera gear that we're covering
in this class. I do think Gimbels are the
best bang for your buck. If you do a gimbal on top of
some of these other things we've talked about with the
camera image stabilization, that lens image
stabilization, a wide lens. If you do a gamble on top
of these other things, you're going to have
amazing professional video.
17. The Easy Rig: There's nothing
called an easy rig. And an easy rig is
a great piece of equipment that does take
some of the walking, the y, bounce out of your image. And so it's kind of
like this harness, this shoulder strap
thing that has a thing come from
behind and it holds the camera basically on a
string that you're kind of It's like a tripod up
in the air almost. And so because of this easy rig, what it does is when you walk, it takes some of the
shock off with you. And so you get a
lot less of that. Why image balance? And it's also nice, it
distributes the weight kinda more equally among
your upper torso. And so it's a little bit of
an older piece of equipment. It's a little bit
expensive for what it is. I would rather up for the
gimbal over the easy rig, but it is similar to a shoulder rig and
that it allows you to get a handheld look while
still feeling professional.
18. The Slider: Sliders were very
popular piece of equipment back
around 2005, 2010. And that's basically a
mini dolly that just moves two to 4 ft side-to-side
or forward and back. Now you get motorized sliders
and those are pretty nice. And you get sliders
that kind of just operate completely on their own. So it's a good piece of
equipment if you want a moving camera as
a second camera, that you don't even want a man. So if you're doing interviews,
you have multiple cameras. You want to give some movement to one of the other cameras. Feel free to pop it on
a motorized slider.
19. The Steadicam: Now, steady cam is something
that has been around for decades and it is something that takes a
little bit of learning. It is an old school thing, although they have
modernize them now. There are now expensive
steady cams that use some of the gyroscopic technology
that Gimbels have. Kind of combining
the two steady cam usually requires you
to be kind of fit, be strong because it is a lot of weight to your body
and a bigger films, they still use
steady cams because a lot of times the cameras
they're working with are so heavy that it
doesn't make sense to hold the weight
like a gimbal. And so City, Kansas
still in play. But you do see less and less of them on smaller budget stuff.
20. The Dolly: And then pass slider,
we have a dolly. Now there are a few
different types of dollies, ranging from a few
hundred dollars to a few thousand dollars. But dollies are essentially
big carts that you put the camera and tripod on and you can kind of push
along in space. Some of them use track,
some of them don't. This is designed
for a move that's maybe five to 20 ft or
something like that. You could go a little longer, could go a little shorter. But what's nice about a dolly that you don't necessarily
get from a gimbal is that it will be a perfect forward movement or perfect
side-to-side movement. If you work with a gimbal, you might get a little bit of a pan or a tilt or
something like that. And so because the dolly
has a tripod on it as well, you're getting just perfect
movement down one axis. And it does have a
slightly different feel than if you try to do the move with a gamble or
with a steady cam.
21. The Jib: Let's also talk about the jib. Now the job is actually
a specific type of movement and so it does
stabilize the camera, but it's not quite something
that you would switch out. Oh, a gimbal for a
steady cam or or an easy rig for a shoulder
mount or anything like that. The jib is actually
on a long arm. The camera moves through space. So it kind of has, this is great for concerts
and things like that. So it has kind of a swinging, swooping kind of
camera movement. I wanted to include
it here because it does keep things steady. It is essentially a tripod that moves through
air on a single arm. And it does have a
distinct look as well.
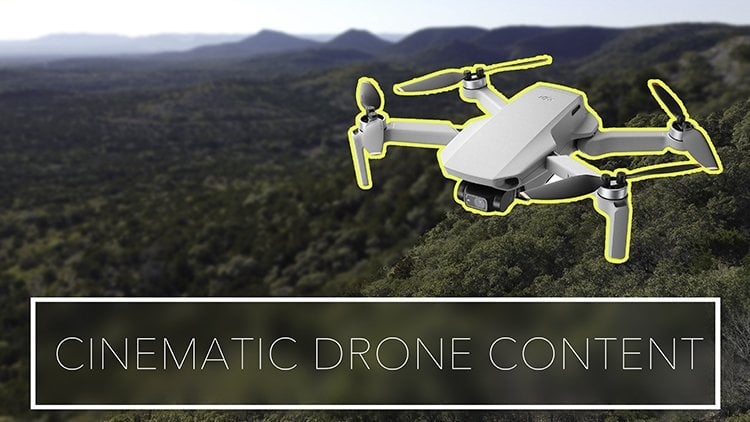
22. The Drone: I know that drones
are their own thing when it comes to cameras, but I figured this
section makes a lot of sense and a camera
stabilization course, that's because drone
footage is so steady. That is a lot to do
with the gyroscopic technology that they use, but also the fact that
they're so high above land and they use
really wide lenses. And we currently live in a
time where the camera's on. Drones are actually getting
really, really good. In fact, the drone
that captured most of this footage is
the DJI mini two, which is currently $450. Knew I'm sure you can buy
one used for 300, 350 bucks. And I will say that while the typical drone shot is
high above land looking down, I do think that not
enough people utilize drones with the camera
low to the ground, moving more similar to a dolly or some sort
of camera vehicle. Some of these newer
clips are shot on the DJI, maverick three. And the cameras so good on that drone that up
close to subjects, it actually looks like
a mid tier camera. And what this allows
you to do is it allows you to create
dynamic shots. Shots that maybe start
as like a medium shot of a subject and then it flies away to some extreme wide shot. So it's a good idea to
get creative with drones. Everyone's seen the typical
travel drone shots. I think it's a great
idea to really vary up your drone shots. And I do teach another
course on drones. If you do have the interest
in learning those, I will say that DJI is
currently the top brand when it comes to drones and the cameras that
are on the drones. But other brands like
sky DO have really, really good obstacle
avoidance systems. Dji is getting better at that. And if the camera quality is
your number one priority, the DJI is definitely
the way you want to go.
23. Sony's Catalyst Browse: Okay, so let's go over our gyroscopic metadata
software options. If we're filling
with a Sony camera, those are gonna be catalyst
browse or catalysts prepare. Now Browse is the
free version and prepare is the paid version with a few more
bells and whistles. But catalysts browse Should
be good enough for us today. So let's go ahead and
open up kettles browse. And on the left here, you'll see all of our folders. In the middle will be our media. So go ahead and navigate to
where you have your files. And then from there you can see this little shaky film icon. So that means that there is gyroscopic metadata on that clip so that can be
used to stabilize. It is worth noting
that the AVC HHS clips require online activation and other formats such as the x, a, b, c, s do not. So if you don't want to
do online activation, make sure you're shooting
in the proper format. So we're going to go
ahead and find the clip that we want to stabilize. We're going to go
to this 830 here. If you have a towel
and a folding table, suddenly you have a small slider that you can kinda take
anywhere with you. Once we've found the clip
that we want to stabilize, Let's go down to adjustments
and then stabilize clip. From here, we see this window. And let's go ahead and we can
go ahead and click Analyze. Then as you noticed, it
punched in a little bit there. Now the stabilization mode, we can have either
auto or manual. And I prefer Otto because as you see as you adjust the
minimum cropping ratio here, we can go back to 100 and
it'll scale out for us. It'll zoom out. There we go. But once it gets to the
certain threshold which you can no longer stabilize
the footage anymore, which on this clip is about 92. If we go below 92, were not zooming in anymore,
which is great. We want to be as
wide as possible with the biggest resolution
we possibly can. Now if we go to manual, it allows us to
overwrite that and suddenly we can zoom way in. But now our
resolution is dropped a ton and we're
degrading our image. So that's why I like auto. I just put it below
the threshold and it keeps it as wide as possible with the
highest resolution that it can still
stabilize, which is great. Now another thing to note
is that you can either stabilize the entire
clip or you can stabilize just a section of the clip by adjusting
your in and out here. Now, personally, I like to
stabilize the entire clip. And that's because
sometimes I like to replace the media
in the project. That's the original
media that's shaky. I like to replace that media with the new stabilized version. So to do that, we need to make sure that the
duration is the same. So it's kind of a
one-for-one replacement and it's not going
to cause any issues. And so because of that, I like to stabilize
the whole thing. It does take a little
bit longer to render, but I don't consider
that a huge downside. So once we get all our
settings where we want it, we're going to click
this icon right here. And we're going to set
a destination folder. And basically I like to create a folder that's where
all my other footage is. Just labeled catalyst prepare
catalysts browse outputs. Then from there, that's
where I saved my file to. Now we have our source
metadata and as you can see, it defaults to same as
source for the format, the size, the frame
rate, the codec, etc. Which is great. We want to just keep it as
same as source for now. And then from there we
can click export and it shows the clip that we've made changes to were
checked and we hit Okay. And now catalysts Browse
is rendering our file. And when it's done, it will spit out a nice
stabilized version of our clip.
24. Replacing Footage in Adobe Premiere: Okay, so we now have our
clip here and Adobe Premier, this is our original clip. It's a little bit shaky, but still not too bad
considering it was just a towel on a folding table. So for this, we're gonna
go ahead and replace our media with the
stabilized version that we've created
in catalyst browse. So we want to right-click
or control-click on our clip and then scroll down to make offline. Now, make offline,
it's very important. Many files remain on disk. I have no idea why
they even give you the option to delete files here. I've seen one too many
horror stories from that, so just make sure media files remain on disk as you do that. Now we are offline or media. So again, we're going to
right-click or control-click, scroll down and right by
where we had make offline, we have link media. Now we're gonna go ahead
and locate our media. And it defaults to the
original clip here. And now I'm going to click on my catalyst prepare outputs, and now we have the new version. Now it's worth noting also
that if you did want to change the filename instead of having two identical filenames. Maybe you want to
add an underscore stabilize to the end or
something like that. Um, if, if the
filename is different, we want to make sure
that we unclick this display only
exact name matches. If we unclick that. And now
suddenly we see everything in the folder and not just the
one with the exact name. I didn't do that, so I don't
need to worry about that. And it auto populated
right there for me. So I'm gonna hit okay. And now we've replaced
the clip with our new stabilized clip using the gyroscopic metadata looks a lot more stable, which is nice. So this works whether
it's the entire clip laid out like this or if
it's just part of the clip. Now, it is worth noting
also that when you replace the media
in this sequence, it's going to replace that same clip throughout
the entire project. So any other instance
of that clip in other sequences will now be
the more stabilized version. If that's not something
you wanna do, then instead of
replacing the media, go ahead and just
import it as normal.
25. Warp Stabilize in Adobe Premiere: Okay, so let's go over the
Warp Stabilizer effect here in Adobe Premiere. Now it's worth saying that the Warp Stabilizer
effect is really good, but there are definitely times
where it fails miserably. So you kinda have to
know which clips you're able to use it on and how to adjust some of the
certain settings. And that's what we're going
to go over right now. So this first clip
I have pulled up in this sample timeline is
shot with a longer lens, something around 100, 110. And it is used with the
active stabilization on, in the Sony body of
the camera itself. So let's just watch this clip real quick and see
how shaky it is. To be honest, the
active stabilization has done a pretty good job. We do notice a little bit of shake because of the
long lens used here. But I do believe
that this is a clip because it is so static. This is a good clip to use
the Warp Stabilizer on. Now, Warp Stabilizer
isn't great on clips with fast pans are
a lot of reframing, a lot of camera movement itself. But when you have something like this, it's pretty stable. It should do the trick. So two effects here
in the bottom left. And you can just search for warp stabilizer and it
will quickly come up. And then we drag and drop
the clip on right here. Now, you'll notice that it takes a little bit to
analyze the frame. And you also, this
is a good time to point out that it's
it's a good idea to go ahead and
adjust the clip from the exact endpoint to out
point that you want to use. So you don't want to be
using the Warp Stabilizer on a full clip and
then adjust it later. Because in Premiere itself, it actually forces you to re-render every time you
adjust the length of the clip. So make sure you have the clip placed in exactly how you want. And you notice that cropped
in a whole lot more, then I thought it would. So let's go ahead and play this version of the
Warp Stabilizer. And as we can see, what's
going on here is that because it used such a long clip, this is 12 s right here. It had to take a lot of
the different frames and it tried to stabilize it, but it punched in way too far. Let's go ahead and real quick, we can just go ahead
and delete this effect. So it wasn't quite doing
what we wanted it to do. And like I said, we
want to use the part of the frame that we
think we'd actually use. If this clip was in
an edit itself and not a standalone clip
like it is right now. I'm gonna go ahead and
just kind of watch it and just kinda give a hypothetical duration of the actual clip. We're watching it now. Let's say that's all I
want of it right there. That's probably
enough time to kinda take in all the
information of the shot. We're looking at
almost 3 s here. So that's definitely closer to the proper runtime than
a twelv second clip. So again, let's drag and drop the Warp
Stabilizer on this. And it'll render it a lot faster because it only has 67
frames to analyze this time. As you can see, it barely
cropped in at all. So let's go ahead and play just this component
of the clip here. And you know what, there's
some slight rotation, which I don't love. This shot itself is really trying to reproduce
a tripod, right? We're not doing any slow moving pans out or tilts or
anything like that. So what I'm gonna do
and warp stabilizer, we actually see that
warp stabilizer has the option here of smooth
motion or no motion. Well, given that this shot, we're just trying to
emulate a tripod. I'm going to click No motion. And since it already
analyzed the frames, anytime I adjust any
of the settings, it does it rather quickly. So now we can watch. And it looks completely static. Which is awesome. Now this image or this
video clip would be a whole lot better
if we had a lot of wind so we can see
the grass moving or some sort of movement in frame because right now it's so still. It just looks like we took a single still image,
which is pretty crazy. So as you can see,
the Warp Stabilizer completely stabilized this
image when we did no motion. Now if you put
warp stabilizer on a clip with a lot
of movement to it, you'll notice a lot of times the Warp Stabilizer kinda gives it a little bit
of a jello field. And this is why Warp
Stabilizer really isn't a silver
bullet of a filter. Here. I'm actually surprised
with how good it did with the lack of the
jello movements. But if you do notice
that your clip has a little bit of a role to it. A little bit of a jello type
of movement where you can do is in the Warp
Stabilizer effect itself, you can set the smoothness, so it defaults to 50. You can drop it down
to something like 15. And then I'll feel a
little bit more natural even though it will have a
little bit more motion to it. So I would definitely play
with the smoothness here. I usually do keep it
to subspace warp. Sometimes I'll change it to
position, scale and rotation. But honestly the one
that I'm finding myself adjusting the
most is the smoothness. And then the difference
between smooth motion and no motion if you're trying
to replicate no motion.
26. Combining Warp Stabilizer with Slow Motion: So now that we know the basics
of the Warp Stabilizer, one important thing to know
also is that you cannot use warp stabilizer and
speed on the same clip. So this timeline right here
is a 30 frame timeline. And I shot this
right here at 60, is with a gimbal
walking upstairs. I thought walking
upstairs would be the ultimate shaky test for us. So I'm gonna go ahead and
slow this down to 50%, since it was shot at 60 frames
with the shoulder of 125. So I'm going to
right-click Speed Duration and drop it down
to a speed of 50. Already, since there's no
people or cars or anything that our eye expects to
move at a certain speed. We realized that this
kinda still-life walk through here is already
a lot steadier, but we want to go ahead and
add warp stabilizer to it. So let's go ahead and take the part of the frame
that we want to use, maybe starting here with the
steady movement and ending. Let's go until we
completely stop right here, right before we completely stop. Okay? So let's say
this whole area, I want to smooth out the way to use both the warp
stabilizer and the speed. And the same effect
is you want to right-click and
you're actually going to nest the sequence. So the best way to do this, you right-click and then go
to nest and you name it, whatever you want to name it. Slow motion, Oklahoma side. Now what you'll notice is it's already nested the sequence and replaced the clip in your
sequence with that nest. This method of
right-clicking and then hitting nest is so much faster than trying to create a new sequence dragging and
dropping the footage into it, changing the sequence
settings and all that. It took me years
before I realized that this right-click nest was an option and it's a
great thing to now, it is important to
note you want to slow motion before you nest, and that's just because
you slow motion first. So you get all the 60 frames spread out over the 30 frames. As you can see, I'm
moving frame by frame and each frame itself is a new image, which
is what we want. So we did the slow motion
first and now we'll put the Warp Stabilizer
on the slow motion. And now let's go ahead and play the clip and
see what we have. That's really not too bad. So again, this is Gamble
moving up the stairs. There's a little bit of
a movement right there. But if we take up the clip
from here and walk through, I mean, that is a
perfectly steady shot. We see no jello in
which is great. We have 3 s of
perfect movement up the stairs. It's great. So again, just to quickly recap
with the Warp Stabilizer, you want to find the
endpoints and out points, the exact duration of the clip
that you're going to use. And if you want to do any sort of gyroscopic
metadata adjustments, make sure you do that before
you add the warp stabilizer. So when he's sort of gyroscopic
metadata adjustments, any sort of speed adjustments, you wanna do all your
adjustments first and then the Warp Stabilizer is
always the last thing added. If it doesn't and if it doesn't quite look or feel
natural and makes sure you adjust the smoothness setting in the effect itself.
27. Stabilizing in Davinci Resolve: Okay, so now let's go
over the stabilization in DaVinci Resolve. I will say from the offset that the stabilizer
individually resolve is better typically than the
warp stabilizer in Adobe. Adobe Premiere,
oftentimes will give you a strange Ge, Eloise, surrealist output that
you often have to adjust a lot of little settings to try and
make it look more natural. However, Da Vinci Resolve
does a lot of that for you. Here in DaVinci Resolve, we have a clip kind
of going through this little overgrown
grass hay stuff outside the house
and it's moving, but it's also kind
of panning in space. So what we wanna do is
open up our inspector here and we scroll
down to stabilization. Now, DaVinci Resolve has three different modes
of stabilization. They have perspective,
similarity and translation, and those are just three
different algorithms that the app tries to use to determine how to
stabilize your footage. Perspective typically
is a little bit better with wider lenses, with pans and tilts. Similarity is typically a little bit better if
you're trying to do a static image and
translation is typically better trying
to do a moving image. Again, those are just
kind of rules of thumb. With every clip I honestly
run through all three just to see which one will look
and feel more natural. Now if you have Camera
Lock checked on here, that's trying to replicate a static tripod shot or a shot that's moving
through one axis. So if you're trying
to do a dolly forward or anything like that, That's also possible to
use with camera lock because my image is kind
of panning and moving. That's probably not
what I'm going to use. And then zoom actually refers
to your field of view. And so if you don't click Zoom, you could get an image with
those black bars that are kinda moving around your image. So I pretty much
always have Zoom on. From there you
have your cropping ratio, smooth and strength. So if I'm going to adjust those, I typically do
those at the end of the process, not
at the beginning. So what I'd like to do starting off is just go through one by one and put the stabilizer on and see what mode
is best for me. With perspective,
we've noticed that now the image has
punched way in. More kind of losing
what this clip wasn't the first place we get a
lot of Horizon adjustments. And so perspective is probably not what we're going
to want to use. So we'll go next to similarity. And now Similarity looks
a whole lot better. We still get a little
bit of Horizon movement, but it's not awful. It's a wider field of
view which is really nice and it's pretty stabilized. So this is a pretty good option. But we're still going to go with translation and see
if that's any better. Now translation
still pretty wide. I'm seeing a little bit
more Horizon wobble than I would like though. It looks like the base
stabilization mode for similarity is
probably our best bet. And now from here we
can adjust some of the more nuanced parameters. I typically keep
cropping ratio as is. And sometimes I'll rise
the smoothness just a hair and lower the strength to make it a little
bit more natural. So this is always gonna
be a dance depending on what clip you have. And it's just a process of adjusting these parameters
with your best mode. And then from there you'll
get the smoothest output. And just a little side note, I do think DaVinci Resolve is the superior
editing software. I typically edit
in Adobe Premiere, even though I can
realize its limitations. I'm just so familiar
and so fast with it. That's where I'm at right now. But if you're starting
out and you're not sure which editing
software you want to use. I definitely recommend
learning and Da Vinci resolve. It has much better color. As you can tell, it has
much better stabilization. And even for bigger projects, if you're working on something with a ton
of footage and you need to automate your dailies
or anything like that. Davinci Resolve,
even though being free it has so much
more bells and whistles and could do a lot of things better than
Adobe Premiere. In my opinion, it takes all the best things
from Premiere, from Final Cut Pro and puts
them into one software. So if you're just starting out, definitely sink your teeth
into DaVinci, Resolve.
28. Gyroflow: So if you're working
with a camera That's not a Sony camera, and you want to use the
gyroscopic metadata, assuming the camera has some, I would recommend the
software gyro flow is a free software that
you can donate to, which I would recommend is a great little software that
does a whole lot for you. And it has a whole lot more camera types that
it is compatible with. The one thing to
know about gyro flow is that the software
can get pretty complicated if you're using a camera with a detachable lens. So if you're using something
with a fixed lens, like a GoPro DJI, instead 360 or
anything like that, should be a pretty simple,
straightforward software. It has the support you need, and it has some of
these have the lens profiling and synchronization
that you need as well. However, if you're
using a camera with detachable lenses such as Sony, a black magic, or read, you're going to have to use
your own lens profiling. And if you don't get that right, it can be a bit complicated. So if you are
shooting on a Sony, I do not recommend gyro flow. I recommend using catalyst
browse or catalysts prepare. But if you're on a
black magic or read, you're going to have to go
through these lens profiling steps that can be a
little bit complicated. And so if that is
your situation, I recommend going to the
homepage and going to docs. From docs go-to
lens calibration. And it has a very
lengthy explanation of how exactly you need to
calibrate your lens. But if you scroll
all the way down, you see they have a
45-minute video tutorial here on the definitive
gyro flow tutorial. This 45-minute guide is really good in-depth
on this software. It tells you exactly how to calibrate those lenses
and everything else you need to know because this
software is intended for more than just your
standard cameras. They also have some flight
controllers run cans, so they have some more
industrial use cases here. And so if that is
your situation, this is probably not
the class for you. But again, if that
is definitely check out this definitive
gyro flow tutorial, it'll go through all the steps. This is what gyro
flow looks like. We'll go ahead and drag and
drop our video into there. Now that we've dragged
and dropped or a video, we see that the lens
profile is not loaded. Results will not look correct. Please load a profile for your camera in our
gyro Flow app here. One thing that's kinda nice, That's not super straightforward
is that you can search your lens profile in
this little tab here. And what's nice is these are user-created profiles and
they have these star ratings. So if you know that
they're any good, you can type in exactly
your lens that you're using and you can see if
there's anything that matched. Now I was using my sigma 24
to 70 on my Sony A7 for, but unfortunately, it looks like the only
ones we have right here, or one at 24 mm,
that's five-stars. We have one at 35,
another one at 24. So I was shooting this at
70 mm with an APS-C crop. That's no one's situation here. So I would have to
go ahead and go through and create my
own lens profile there. But if you're shooting
with something that's already been established
by someone else, if it has five-stars,
That's great. You click on it, you load it in, and you should be good to go. So we wanna go ahead and set up our lens
profile to do that. We want to hit Create
New over here. And now we have the lens
calibrator that opens up. And basically what
happens is you see this little open
calibration target. When you click on that. When you click on
that, you'll get a screen that looks like this. This is the screen that
you want to record using the lens that
you used on the clip. Now if it's a zoom lens, I would recommend trying to
use the same focal length. When you record the screen. That'll just help results. And if you click, how
do I calibrate my lens? It'll take you to a
website page not found. But if we come over here, we can see lens calibration. And it'll show you this video basically where you record
the calibration image. I'm sure you can also use a chess board or checker
board or something like that. It looks like he's kinda
panning the camera around and putting it
in all four corners. And he's placing the camera
at different lengths away. So he's doing what? He's doing one up close. And that just any kind of
fisheye distortion or anything like that will also be
calibrated into it. So take a second and
go ahead and try to emulate this video right here. Now, as you can see,
this software is a pretty in-depth software. You have a lot of
low-pass rotation, gyro bias, you have a
lot of jargon here. Field of view smoothness. So you have a lot going on. So again, the
software can start to feel a little bit overwhelming. But the main things to know are your lens profile and
then your lens profile. Once you set your
smoothing to default, your field of view, you want to adjust
until you have no more black bars
around your image. You're going to
play your image and then you're going to
adjust accordingly. Again, this software works
great with fixed lenses. If you're on a higher end, red or black magic, it's gonna be a little bit more difficult and I
definitely recommend checking out that longer
tutorial put out by gyro flow. But once you get your image
to where you like it, You go ahead down here
and click Export, and it will render the clip. And it also is worth
noting that if you use DaVinci Resolve
or Final Cut Pro, Jericho has plugins
for both though. So that'll make things a
little bit easier for you.
29. A Full Culmination: In this final class,
let's just put together everything
we've learned and figure out how to make the most stable cameras setup possible. So it starts off
with a heavy camera. So these little
Sony Alpha cameras, they are lighter than
ideal for steady footage. So if you had something
like a black magic camera or a Sony fx three, fx seven, f x nine, something like that, something bigger and bulkier that would allow for
steady or footage. So let's grab a big camera. Let's make sure that
camera has some sort of internal body image
stabilization as well. So a big heavy camera
with some sort of stabilization built in already. As far as our lens choice, let's make sure that
we get a wide lens, something 18, 35. And let's make sure
we get something with optical stabilization
in the lens itself. We're not quite done
with our setup yet. Let's go ahead and get
a battery grip for our camera to add
additional weight to it. And then before we
go out and film, Let's make sure that we're working out a few times a week. Get our muscles nice and
big to be able to hold the camera without
fatiguing to easily. Once we get onset, we need to adjust a few
things in our camera. Let's make sure we're shooting
at a high frame rate. I like to shoot at 60. If you're working
with a bigger team, it might be good to go
ahead and just shoot a 24 unless you've already talked
that out with the producer. But a high frame
rate is going to allow for better
stabilization in post. That high frame
rate could also be done in the place
of slow motion. If you don't want to do a
high frame rate and you know, you're shooting
something without a noticeable moving subject, you can shoot slow motion. For some of you,
you might want to shoot it at a higher
shutter speed. That way when you
throw an imposed and do any sort of
stabilization there, the higher frame rate
might be better for that. Now that we've set the
settings exactly how we want to go ahead and pick any
stabilization method. So it could be something
just right out of the box. You can do the elbows to the
side, you can do a lunge. You can actually go
out there and buy some equipment and
different shots will call for different things. Maybe you want a nice pushing, but you don't have
space for a dolly. Maybe a Gimbal would be
better suited for that. So think of the shot
you want to achieve, and think of the best
way to achieve it. And go out and shoot with
that method in mind. Once we go out and get
our footage and we come back and we
download that footage. We wanna go ahead
and run our footage through the gyroscopic
metadata software. This is before we've
actually taken it into our editing software. So we want to smooth
out that footage through the gyroscopic software. For Sony, this is
catalysts browse, or catalysts prepare
once we've exported that stable version through our gyroscopic
metadata software, we finally take that clip and we throw it in our
editing software. And then from there we can
add extra stabilization. In Adobe Premiere, this is with the Warp Stabilizer effect. And for DaVinci Resolve, This is with the stabilizer. You can find it in
the inspector menu. So if you enjoyed this class, I hope you realize
that there are so many techniques out
there that you can actually stack them on
top of each other and create amazing footage
just by using hand-held, just knowing a few camera
tricks, a few settings, some post, and then some
onset tools as well.
 Marshall Rimmer, Filmmaker