Transcripts
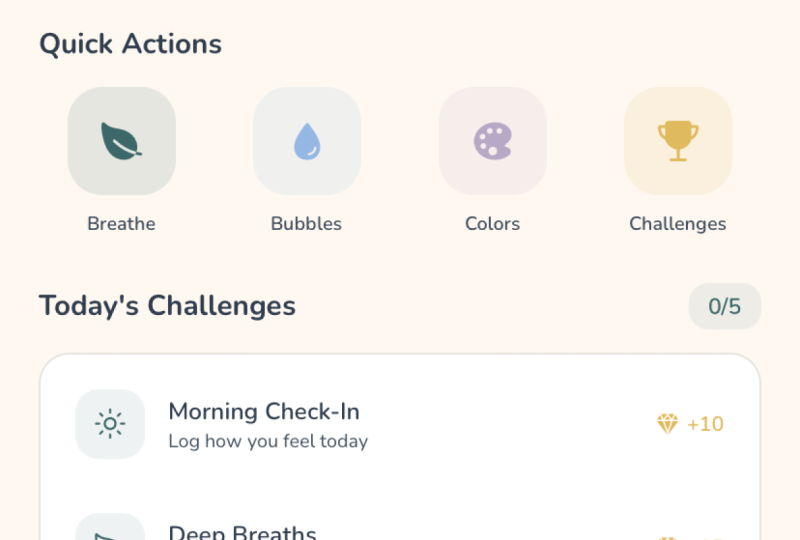
1. Introduction: Holy guys, are you
interested in vibe coding? Are you interested in building apps and software
using generative AI? If the answer is yes, then this course
might be for you. We are going to build
many projects, guys. Firstly, we are going to create product requirement
document using Miro and Microsoft Copilot. Next, we are going to build AI travel planner using
Lovable. Look at this. Next, we are going to build logistic optimization
software using Bolt New. Look at this. Next, we are going to build appointment booking
software using Cloud. Look at this, and
we're going to build the same software
using Github Copilot. Look at this. Very cool. Next, we are going to build data analytics software
using Emergent. So the user will be able
to upload a CSV file, and the system is
going to analyze and visualize the
data automatically. Next, we are going to build property management system
using Base44. Look at this. Next, we are going to build payroll management software
using Firebase Studio. Next, we are going to build waste management
software using plet. It has four main features, scheduling, tracking,
request, and analytics. Look at this. Very cool, right? Then after that, we
are going to build language learning
app using Vzero. It has three main features, interactive vocabulary lessons, daily quiz, and
progress Analytics. Next, we are going to build expense management app
using Rork. Look at this. Then after that, we
are going to build school management system
using Google AI Studio. Next, we are going to build marketing analytics
software using client. Look at this. It has three main features
campaign performance, budget tracker, and customer
segmentation insights. And we are also going to deploy our app on
Netifly. Look at this.
2. Creating Product Requirement Document with Miro & Microsoft Copilot: Holy guys, welcome
back to the course. In this video, we
are going to create product requirement document
using two AI tools. The first one is Miro and the second one is
Microsoft Copilot. Okay, let's get started. Firstly, you will need to
log in, so let's click this. And I'm going to log in
using my Gmail account. As you guys can see, I have successfully logged in
and here is my dashboard. Okay, now, let's click
Create New Project. Okay, now we are going
to utilize AI to create product
requirement document. Let's click this and
let's click Doc. Okay, now we are going
to write the prom, write a comprehensive
product requirement document for AI travel planner software. So that's the project that
we are going to build. That includes three
main features. The first one is AI
itinerary generator. The second feature is cheap
flight and Hotel Finder. And the third fitter is
vacation Budget Tracer. Explained the target user goals, user flow, technical
requirement, data sources, AI functionalities,
database design, and integrations needs
for each fitter. Okay. Now, let's click Generate. Okay, now, AI is generating the product
requirement document. It will take few seconds, maybe five or 10
seconds. Wait guys. Hopefully it doesn't
take too long. Well, it didn't take
too long, guys. It only took a minute
or maybe 2 minutes. Okay, here is the product
requirement document for AI travel planner. So we have executive summary, and let's scroll
down a little bit. We have high level goals
and success metrics. So this is like the KPI key
performance indicators. And we have target
user and personas. We have product features. There are three main features,
AI itinerary generator, cheap flights and hotel finder and vacation budget tracker. Okay, the first feature
is itinerary generator. So we have user flow,
functional requirement, non functional
requirement data sources, AI functionalities, database
designs, and integrations. Okay, here is the second fetter, and let's scroll down, and here is the third fetter,
vacation budget tracer. Okay, very cool. Okay, next, we are going
to try the second AI tool. We are going to use
Microsoft Copilot. Okay, firstly, we
will need to log in. So let's click this, and I'm going to log in using
my Gmail account, but you can also log in using your Microsoft
account or Apple ID. As you guys can see, I have
successfully logged in. Next, I'm going to copy
and paste the prom, so we're going to
use the same prom that we used previously. Okay, here is the prompt
and let's click Generate. Okay, let's scroll on
product requirement document for AI Travel planner SAS. We have the overview, we have goals and objectives. We have target users. So there are three
main features, AI itinerary generator,
chip flights and hotel finder and
vacation budget traker. And here is the user flow on boarding planning executions. We have five AI functionalities, itary agent price aggregator, budget forecaster,
personalization agent, and multi agent debate. And here is the database design. Look at this. And here
is the integrations. There are two parts. The first one is integrations
with external API, and the second part
is integrations with internal services. Next, we have technical
requirements, backend frontend def ups. What else? We have data sources, security and compliance
and future extensions. Okay, very cool. You
can copy and paste this and save this
on your Google Docs. Okay, I think that's it.
That's all you need to
3. Building Travel Planner Website with Lovable: Hello, guys. Welcome
back to the course. In this video, we
are going to build the first software
using Lovable. Okay, let's get started. Firstly, I'm going to log
in using my Gmail account. You can also log in using
your Github account. It is totally up to you. As you guys can see, I have
successfully logged in. And if you are on
the free account, you will get five
credits every day. Okay, let's get started. Firstly, I'm going
to write the prompt. Build AI travel planner SS with three main fetters. The first one is AI
itinerary generator. The second one is cheap
flights and hotels finder. And the third feature is
vacation Budget tracer. Make the user interface
design modernt and colorful. If you have any supporting file, you can attach the file here. You can also import UI
design inspirations from FICMA and you can
set this to public, so everyone can
see your project. But if you don't want other
people to see your project, you can set this to
personal or private. Okay, let's click this. Let's click Generate. And it will take few minutes, maybe two or 3 minutes. So just wait, guys. Hopefully
it doesn't take too long, and I'm so excited
to see the result. Well, it didn't take too long. It only took 2 minutes
or maybe 3 minutes. Okay, here is the
website. Travel AI. Plan your perfect adventure. And let's scroll down. There are three main features, AI itineryGenerator,
budget tracker, and flights and hotels finder. Okay, let's click this T now, and let's enter
the destinations. I'm going to visit
Austin, Texas, and let's enter the
durations two days, and let's click
Generate itinerary. Okay, it will take
a few seconds. Okay, here is the AI
generated itinerary. So here is the
itinerary for day one. And let's scroll down, and here is the
itinerary for day two. Okay, very cool. Let's
try the second feature. Budget tracer. Let's click this, and let's enter
the budget amount. $2,500. So that's
my total budget. And let's add expense. Totals 600, and let's
click at expense. And let's add another expense. Shopping, $570. Let's click at Expense. As you guys can see,
we have a pie chart. It shows the percentage
for its expense. Very cool. And the third feature is
flight and Hotels finder. So the user will be able to
enter the departure city, destination city,
departure date, and click SRT flight. Okay, now let's click this. Here is the code, so
Lovable use typescript. As you guys can see,
the file format is TSX. Okay, now we are going
to publish this website. Click this, click Publish. It will take a few seconds, maybe five or 10 seconds. So just wait guys. Hopefully
it doesn't take too long. Okay, we have successfully
published this website. So here is the link. Let's copy and paste this, and let's open it on the
other tab. Okay, here we go. Okay, here is the website. Okay, I think that's it.
That's all you need to know. I'll see you guys in
the next video. We
4. Building Logistics Optimization Software with Bolt: Hi, guys, welcome
back to the course. In this video, we
are going to build logistic optimization
software using Bolt New. Okay, let's get started. Firstly, I'm going to log
in using my Gmail account, but you can also log in using your Github account. It
is totally up to you. Let's click Continue. Okay, we have
successfully logged in, and now we are going
to write the prom. Build logistics
optimization software with three main fitters. The first one is Rot optimizer. The second fitter is
inventory management. And the third fitter
is Cost Analytics. Make sure the user
will be able to enter Original locations. Destinations. Product types, and
shipment costs. Look, no, let's click Build now. Okay, it will take few
seconds. So just wait, guys. Hopefully, it doesn't
take too long, and I'm so excited
to see the result. Well, it didn't take
too long, guys. It only took 2 minutes or
even less than 2 minutes. Okay, here is the logistic
optimization software. We have three main features, root optimizer, inventory
management, and cost analytics. So let's enter the
original locations. Ostend, let's enter
the destinations. Then let's enter
the product type, furniture, and let's
enter the shipment cost. And let's click Optimize Root. Okay, next, let's click
on inventory management. This is the second fitter, so you can add the product
type, for example, electronics, and let's specify the locations, warehouse B. Let's add quantity, ten, and the unit cost is $35, and the reorder level is eight. And let's click
Add to Inventory. As you guys can
see, this product has been added to the inventory. And let's click on
cost Analytics. Okay, let's add the cost entry. Let's enter the shipment ID. Let's enter the full cost $200. Just a random number, guys. Let's enter the labor cost $100, let's enter the
maintenance cost. And let's click Add Cost entry. Okay, here is the
cost breakdown. We have total spend,
average cost per shipment, total field cost, and total
labor costs. Okay, very cool. And let's click this.
So here is the code. As you guys can see,
you use typescript. And now we are going to
publish this website. So let's click this and
let's click Publish. It will take few seconds, maybe ten or 15 seconds.
So just wait guys. Hopefully, it doesn't
take too long. Okay, it is almost done. Okay, here is the link. So let's copy the link, and let's open it
on the other tab. Okay, here is the website. Logistic Optimizer. Okay, very cool. I
think that's it. That's all you need
to know. I'll see you guys in the next video. Boy,
5. Building Appointment Booking Software with Claude & Github Copilot: Holy guys, welcome
back to the course. In this video, we
are going to build appointment booking software
using two AI tools. The first one is code and the second one is
Github Copilot. Okay, let's get
started with Cloud. Firstly, you will
need to log in. You can log in using
your Gimil account. Okay, next, we are going
to write the prom. Build appointment
booking software. Make sure the user is able to select time, date, at notes. There will be reminder for
upcoming appointments. And after the
appointment is booked, it should be added to the
user calendar sessions. Look, that's my prom. And let's click Generate. Well, it didn't take
too long, guys. It only took 2 minutes or
even less than 2 minutes. So we have four key features. The first one is date
and time selections. The second one is not sections. The third one is
Smart Reminders, and the fourth one
is calendar view. Okay, let's try this. Let's
click Book appointment, and let's enter the
appointment title. Consulting. Let's
select the date. Let's enter the time 2:30
P.M. And let's add the notes. Supply chain Consulting session. And let's click
Book appointment. As you guys can see, this
appointment has been edited here. Okay, very cool. If you want to publish
this software, just click this Publish, and let's click
Publish and copy. It will take few seconds, and here is the link. So let's copy the link. Let's open it on the other
tab. Okay, here we go. Here is the website.
Look at this. As you guys can see, we have upcoming appointment
reminder. Very cool, right? Okay, next, we are going
to try the second AI tool. The name of the tool
is Github Copilot. So firstly, make sure
that you already log into your Github account and
let's click Get Started. And let's click Copilot. And you will be
redirected to this page. Okay, now we are going to
build the same website, so we're going to copy
and paste this prom. And I'm going to add more
instructions to this prompt. Only generate one file. Keep everything inside the file. Next, we are going to select the AI model that
we want to use. There are many options. In this case, I'm going
to select GPT 4.1, but if you want to use
different AI model, it is totally up to you
and let's click Generate. Okay, here we go. It will take few seconds, maybe ten or 20 seconds,
just wait guys. Hopefully, it doesn't take
too long. All right, guys. Finally, the code is ready
and here is the code. Let's copy the code, and I'm going to compile this
code in browser based IDE. The name of the IDE
is one compiler, let's copy and paste the
code and let's click Run. Okay, here we go. Firstly, we are going to select the date. Next, we are going
to select the time. Next, we are going to add
notes, supply chain consulting. And let's click
Book appointment. As you guys can see,
the appointment has been added here
to my calendar. Very cool. Okay, I
think that's it. That's all you need
to know. I'll see you guys in the next video. Bye.
6. Building Data Analytics Software with Emergent: Holigays, welcome
back to the course. In this video, we
are going to build Data Analytics software
using Emergent. Okay, let's get started. Firstly, we are going to log in. I'm going to log in
using my Gmail account. As you guys can see, I
have successfully log in, and here is my dashboard. Okay, next, we are going
to write the prom. Build Data Analytics software Make sure the user
is able to upload CSV file and the system will display data
summary like Mint, mediant, Max and Mint
for each column. Visualize the data
using Br chart or Pychart and the tag missing
values and duplicates. Next, we are going to
select the AI model. There are several
options like Cloud, GPT. In this case, I'm
going to use Cloud, but if you want to use
different AI model, it is totally up to you. Okay, now let's click Generate. Okay, it will take few
minutes. So just wait, guys. Hopefully, it doesn't
take too long, and I'm so excited
to see the result. Well, it didn't take too long. It only took 5 minutes or
even less than 5 minutes. Okay, here is the website, so let's upload the data. So I'm going to
upload a CSV file. In this example, I'm using this Walmart sales
datasets from Google. You can use any
datasets that you want. Okay, let's upload the data. And let's click Opened. Okay, now it is uploading
the data. Okay, here we go. Here is the file information, the file name, amount of
rows, amount of columns, file size, and let's scroll
down as you guys can see, we have summary statistics. So for each column,
we have type. There are two types,
numerical and categorical. We have count, mean, median, min and max. Look at this, and let's
scroll down a little bit. We have data quality. So there is zero missing value, and there is zero duplicate. And down here, we have
data visualizations. We have bor chart
and also Pie chart. Look at this. Very cool, right? You can share your app, just click Share and
you can copy the link. And you can also
view the code guys. Okay, I think that's it.
That's all you need to know. I'll see you guys in
the next video. Bye.
7. Building Property Management System with Base44: Holy guys, welcome
back to the course. In this video, we
are going to build property management
system using Base44. Let's get started. Firstly, we are going to log in, let's click Start
Building and I'm going to log in using
my GML account. As you guys can see, I have
successfully logged in. Okay, now let's
write the prompt. Built property management system with three main features. The first one is property
listing dashboard. The second one is rent
payment tracking. And the third one is
maintenance request system. The app should allow managers to manage property listings. Track tenant payments and handle maintenance
requests efficiently. Okay, so that's my prompt. A very simple prompt. Next, you can select the
style that you want. Just click this
styling Instructions. So there are several options. You can feel free to select
any style that you want. And let's click Generate. Look, now Base44 is
creating the app. It will take a few minutes, maybe two or 3 minutes.
So just wait, guys. Hopefully, it doesn't
take too long, and I'm so excited
to see the result. Well, it didn't take
too long, guys. It only took 3 minutes or
even less than 3 minutes. Okay, here is the website. Here is the Dakbard. You can see the total
properties monthly revenue, pending maintenance
and occupancy rate. And let's scroll down. We have a pie chart.
50% is occupied. 25% is vacant and 1%
is under maintenance. And let's click Properties and you can add property.
Just click this. You can enter the
property address, select the property type, select the status, enter
the amount of bedrooms, amount of bathrooms, enter the
square foot, monthly rent, tenant named, Okay, now
let's click on payment. You can add record payment. You will need to
select the property. Then enter the tenant name, enter the amount,
select the status. And let's click on maintenance. You can add new
maintenance requests. Very cool, right? Okay, now we are going to publish
this website. So just click Publish and
let's click Publish app. It will take a few seconds and
just copy this link, guys. Okay, it's still
loading. And here we go. And Base44 also edit a
user authentication, so the user will need to log in first before accessing the
app. Very cool, right? Let's click this. I'm going to log in using
my Gmail account. And here we go. Okay, I think that's it.
That's all you need to know. I'll see you guys in
the next video. Bye.
8. Building Payroll Management Software with Firebase Studio: Hello, guys. Welcome
back to the course. In this video, we
are going to build payroll management software
using Firebase Studio. Okay, let's get started. Let's click Try Firebase Studio, and you will be
redirected to this page, and you will need to log in. You can log in using
your Gmail account. Okay, next, we are going
to write the prom. Build payroll
management software where users can add employee details including name, hourly wage, total hours worked, bonus tax deductions. The system should automatically
calculate total salary generate payslips and display a summary of all
employee payments. Next, you can select the programming language
that you want to use. There are several options
like GPTent Java, Net flutter, and
still many more. And let's click
prototype with AI. It will take few minutes, maybe two or 3 minutes.
So just wait, guys. Hopefully it doesn't
take too long, and I'm so excited
to see the result. Let's click prototype this app. Well, it didn't take
too long, guys. It only took 2 minutes or
even less than 2 minutes. Okay, here is the website. So we can add employee. Just click this and let's
enter the employee name. I'm going to enter my name, Chris, and my
hourly wage is $25. And I have worked
35 hours this week, and the bonus is $380. And the tax deductions is 6%. Let's click at employee. As you guys can see, my
name has been addited here, and the net salary is $1,179.70. Okay, very cool. And
here is the analytics. In total, we have
four employees, and the total payroll
cost is $14,741.50. And you can also
export this data CSV. Just click this export CSV and you can also filter
the employee by name. I'm going to type my name. Okay, here we go.
Chris, that's my name. If you want to
publish this website, just click this publish. Okay, guys, I think that's it. That's all you need
to know. I'll see you guys in the next video. Bye.
9. Building Waste Management Software with Replit: Holy, guys. Welcome
back to the course. In this video, we
are going to build waste management
software using Replit. Okay, let's get started. Firstly, I'm going to log in, so let's click this LogEnt. You can log in using
your GML account. You can log in using
your Github account. You can log in using
your Twitter account. You can log in using
your Facebook account. You can also log in
using your Apple ID. It is totally up to
you, but in this case, I'm going to log in
using my GML account. Okay, it is still loading. It will take few seconds. As you guys can see, I have
successfully logged in. Okay, now let's write the prom. Built waste management software
with three main features. The first one is waste
collection scheduling. The second fetter is tracking
system for waste volume, type, and recycling rate. And the third fetter is
customer request and complaint. Management. The system should allow
user to schedule pickups. Monitor collection progress and analyze recycling
performance. Next, we are going to select the team, so
let's click this. You can select the color
palettes that you want. I'm going to select Zen Gordent. You can feel free to select any color palette that you want. It is totally up to you, and let's click Start Chat. Okay, it is still loading. It will take a few minutes, maybe two or 3 minutes. So just wait guys. Hopefully it doesn't
take too long, and I'm so excited
to see the result. Well, it didn't take
too long, guys. It only took 3 minutes or
even less than 3 minutes. Okay, here is the daskboard. We can see the statistic here. We have total collections, recycling rate, pending
requests, active routes. And here is the data
visualizations. We have collection trends, waste type distributions,
recent activity, and let's click on scheduling so the client will be able
to schedule a new pickup, and let's click on tracking
so we can track its route. We have four routes A, B C and D, and let's
click REQUEST. So we have request and
complaint sections down here, and we also have Analytics. Look at this. Very cool, right? And if you want to
publish this website, just click this publish. Okay, I think that's it.
That's all you need to know. I'll see you guys in
the next video. Bye.
10. Building Language Learning App with v0: Hello guys. Welcome
back to the course. In this video, we
are going to build Language Learning
app using Pizio. Okay, let's get started. Firstly, I'm going to log in. So let's click this. I'm going to log in using my GML account. Okay, next, we are going
to write the prom. Build Language Learning App with three main features. The first one is interactive
vocabulary listen. The second fetter is
progress tracking, and the third fetter
is daily quiz. Make the UI designed
modernt and colorful. Okay, so that's my prom, a very simple prompt. Next, I'm going to
click Generate Okay, it will take few minutes, maybe two or 3 minutes.
So just wait guys. Hopefully, it doesn't
take too long. Well, it didn't take
too long, guys. It only took 2 minutes or
even less than 2 minutes. Okay, here is the app. Have three main features. The first one is interactive
vocabulary lessons. So this is for Spanish. Let's click Next. And you can click Reveal. So the translations
for Adios is goodbye. Let's click Next again. And let's click Reveal. The translations for Por favor is please. Okay, very cool. And the second feature
is Daily quiz. So you can click Start quiz, and there will be
five questions. It's a multiple choice us. Let's click Next.
Okay, very cool. And the third feature
is progress tracking. So you can track your
learning progress. And if you want to
publish your app, just click this Publish, and let's click Publish
to Productions. It will take few seconds, maybe five or 10 seconds. Then you will get the link guys, and you can copy and
paste that link. Okay, the app has been
published successfully. Let's click this.
Okay, here is the app. Look at this. Very cool. You can also
customize the domain. You can add your own domain. Okay, I think that's it.
That's all you need to know. I'll see you guys
in the next video. Bye.
11. Building Expense Management App with Rork: Holy, guys, welcome
back to the Coors. In this video, we
are going to build Expense Management
app using Rork. Okay, let's get started firstly. I'm going to log Int.
You have two options. You can log in using
your GML account. You can also log in
using your Apple ID. It is totally up to
you, but in this case, I'm going to log in
using my GML account, so let's click
Continue with Google. Okay, I have
successfully logged in. Okay, now we are going
to write the prom. Build expense management app
with three main fitters. The first one is budget planner. The second one is
expense categorizations. The third one is forcep scanner. The app should allow users to set and track their
monthly budgets. Automatically
categorize expenses and upload receipts that AI can scan to extract
transactions details. Include a simple dashboard to
display spending summaries, charts, and remaining
budget balance. Okay, next, you can set
your privacy setting. There are two options
public and private. If you set it to public, anyone can see your project. If you set it to private, you are the only one that
can see your project. Okay, next, we are going
to click Generate. It will take a few minutes, maybe two or 3 minutes.
So just wait, guys. Hopefully, it doesn't
take too long, and I'm so excited
to see the result. Well, it didn't take
too long, guys. It only took 2 minutes or
even less than 2 minutes. Okay, so here is the mobile app. I really love the
user interface. It looks really cool. And let's click this. We are going to add
expense, $35 shopping. So that's the descriptions. And let's select the category, and let's click Add Expense. Okay, now it has been edited, and let's add another expense. $50, movies, and let's
click Entertainment, and let's click at expense. Okay, it has been added here. Additionally, you can also
upload your Recipimage. Just click this and
the system is going to perform OCR or optical
character recognition. So it is going to
extract text and number from the recipimage Okay, now let's click on
the second tab. So this is the
budget allocations, and let's click
on the third tab. So this is the
transactions list. If you want to publish this app, just click this publish. It will take few seconds. Okay, the app has been
published successfully. In addition, you
can also publish the app to Appstore
or Google Play. Just click this. Okay,
guys, I think that's it. That's all you need
to know. I'll see you guys in the next video.
12. Building School Management System with Google AI Studio: Holly guys. Welcome
back to the course. In this video, we
are going to build School management system
using Google AI Studio. Specifically, we are
going to use Gemini. Okay, let's get started. Firstly, you will need to log in using your Gmail account, and let's click Build, and you will be
redirected to this page. Okay, now we are going
to write the prom. Build School management system. With two main fitters. The first one is student
data management. And the second fitter is
tuition payment tracker. The system should
allow administrator to add and manage
student informations. Such as name, grade
attendance while also tracking tuition payments due dates and payment history. Include a simple dashboard to view student
records and summary. Okay, so that's my prom, a very simple prom. And let's click Runt. It will take a few minutes, maybe two or 3 minutes. Just wait, guys, hopefully
it doesn't take too long, and I'm so excited
to see the result. Well, it didn't take too long. It only took 2 minutes or
even less than 2 minutes. Okay, here is the school
management system. Here is the dashboard overview. As you guys can see, we have total students paid
tuition this month, overdue payment and
attendance rate. And down here, we
have student records, and you can add a new student. Let's click this at student I'm going to
enter the student name. I'm going to enter
Chris. That's my name. And let's enter the grade and let's click at Student.
As you guys can see. My name has been added
to the student record. Chris Alka grade three.
Okay, very cool. If you click this, you will
be able to see the code. As you guys can see,
Google AI Studio use Typescript
programming language. And this is the desktop. If you want to see it
from the mobile app, let's click this mobile. So it's going to look like this. Okay, now, let's
return to descopVew. Okay, I think that's it.
That's all you need to know. I'll see you guys in
the next video. Bye.
13. Building Marketing Analytics Software with Cline & Open Router API: Hello, guys. Welcome
back to the course. In this video, we
are going to build marketing analytics
software using client. Okay, let's get started. Firstly, you will need
to install FAS Code. This is the IDE that
we are going to use. Okay, next, let's open FAS code, and we are going to install client extensions.
So let's click this. Let's click extensions,
and let's type in client and you will need to
install these extensions. Client. So let's click this. Let's click Install. Okay, we have successfully
installed Cline, so let's click on this icon. Next, we are going to select the AI model that we
are going to use. So let's click this and
let's click API provider. There are many options like client Open Router,
Google Gemini, Open AI compatible, Anthropic Amazon bedrock,
and still many more. If you don't want to integrate any API key, just click Cline. But in this case, I'm going
to use Open Router API, so let's click this and
let's visit Open Router. For those of you who are not
familiar with Open Router, it is a unified interface
for Large language model. Okay, let's get started. Firstly, you will
need to log in. I'm going to log in
using my Gmail account, but you can also log in
using your Github account. Okay, as you guys can see, I have successfully logged in, and let's click Keys. And you will be
redirected to this page. And let's click Create
API key. And don't worry. You can create APIKey for
completely free guys. And let's name the API key. I'm going to name
it Cline Project. You can name it
wherever you want. It is totally up to you. And let's click Create. And let's copy this API key. And let's go back to Fascde And let's put
your API key right here. Make sure it is correct API key. Next, you can select the AI
model that you want to use. In this case, I'm going
to use Cloud Sonnet 4.5. But feel free to use any
model that you want. It is totally up to you, and let's click AC. Okay, next, we are going
to write the prom. Build a marketing
analytics software. With three main fetters. The first one is campaign
performance Traker. The second feature is
advertising budget Traker And the third fetter is customer
segmentation insights. The software should
allow users to monitor ad performance
across multiple platforms. Track spending versus ROI
or return on investment. And automatically, group customer based on engagement and demographics. Make the UI design
interactive and modern. And let's click Generate. Okay, it will take
a few minutes. As you guys can
see, Klein is able to access my FAS code IDE. It is able to write
code in that file. Look at this. Very cool, right? Okay, so just wait, guys. It will take a few minutes. Hopefully, it doesn't
take too long, and I'm so excited
to see the result. Well, it didn't take
too long, guys. It only took 5 minutes or
even less than 5 minutes. As you guys can see, Klein
has created three files. The first one is dTMLFle. The second one is CSS file, and the third one
is JavaScript file. And those files are stored inside this folder,
Marketing Analytics folder. Okay, now let's click on
this file index at CML, and we're going to open it on the browser.
Okay, here we go. Okay, here is the marketing
analytics software. We have dashboard. We can see the statistics like total campaigns, total ROI, customer segments, total spend, and here is the campaign
performance trend, budget allocations. And it breakdowns the
campaign performance. Look at this. And let's
click on the budget tracker. We have the data
pysalonsTtal budget, total span remaining. We have a chart representing span versus return
on investment trend. And let's click on
customer segmentations. And here we go. We have
eight different segments. Age guys, I think that's it. That's all you need
to know. I'll see you guys in the next video. Bye.
14. Converting UI Design to HTML & CSS Code with Gemini: H guys, welcome
back to the course. In this video, we
are going to convert UI Design image to
frontend code using JNI. Okay, let's get started. In this example, we
are going to convert this login page image
to HTML and CSS code. Okay, firstly, you will need to log in using your GML account, and let's upload the UI
design image to Jim andi. Let's click this upload files. And let's click Open. Next, we are going
to write the prom. Convert this UI design image to frontend code, DML and CSS. And let's click Generate. Okay, now, AI is
generating the code. It will take few seconds, maybe ten or 15 seconds.
So just wait guys. Hopefully it doesn't
take too long. Okay, here is the code. Okay, so it generated two files. The first one is AdTML and
the second one is CSS. However, in this case, I want them to be in one file, so it is going to be
easier for me to compile. Okay, so let's write
another prompt. Put all the adsDML and
CSS code in one file. As you guys can see, Gemini
is regenerating the code. Now all the code
will be in one file, so it is going to be easier
for us to compile the code. To compile the code, we are
going to use one compiler. This is a browser based IDE. You don't need to
download anything. You just need to
open this website, and we are going to copy
and paste the code here, and we are going to
compile the code. Just click this Run and
you will be able to see the user
interface right here. Okay, let's click
this Copy code. And we are going to click Run. Okay, here is the UI. It is not exactly
the same like this, but it is very similar. Look at this. Very cool, right? Sign up to your account, email or username password. Log in very cool. Okay, I think that's it.
That's all you need to know. I'll see you guys in
the next video. Bye.
15. Deploying & Hosting Website on Netifly : Hool guess, welcome
back to the course. In this video, we are going to deploy our app using Netifly. And don't worry, it is
completely free to use. Let's click on Pricing. As you guys can see, Netifly offers a free plan.
Look at this. If you remember in
the previous video, we already built appointment booking software using Cloud. So what we are going to
do next is to click this, and we are going to
download the code, and we're going to
save it as HTML file. And we are going to
deploy it using Netufly. Okay, let's get started. Firstly, I'm going to log Int. You can log in using
your Gmail account. You can log in using
your Github account. You can log in using
your Gitlab account. You can also log in using
your Bitbucket account. In this case, I'm going to log
in using my Gmail account. So let's click Log
In with Google. As you guys can see, I have
successfully logged in, and here is my dashboard. To deploy your app, you have three options. The first option is to import your existing
project from Github. Just click this Import from Git. The second option is to
start from a template, so you can browse the templates. There are many templates. You can use and customize
it however you want. And the third option
is to deploy manually. And that's what we
are going to do. So let's click this
Browse to upload. And I'm going to upload
this project folder, appointment booking
inside this folder. We have Index HTML. So that's this code,
appointment booking code. And let's click Upload. It will take few seconds, maybe five or 10 seconds. Okay, guys, the app has been
published successfully, and here is the link. Here is the URL. So let's click on this link. Okay, now let's test this. Let's click Book appointment and let's enter the
appointment title. Consulting session. Let's enter the date. Let's enter the time 1030, and let's add the nodes. Consulting for cyber security. And let's click
Book appointment. As you guys can see, it has been added to upcoming
appointment sections. Okay, now let's go back
to Netifly dashboard. And this link is
Netifly Link, right? But if you want to use your
own domain, just click this. Buy a new domain, but you will need to buy
the domain, guys. But if you want
everything to be free, just use the Netifly, right? But it is totally up to you. Okay, guys, I think that's it. That's all you need
to know. I'll see you guys in the next video. Bye.
16. Conclusion & Summary: Holi gays, welcome
back to the course. In this video, I'm going to summarize all things that
we've learned in this course, and I'm also going to see
a few tips and tricks on how to improve your
vibe coding skills. Okay, let's get started with the first topic, prom quality. Writing clear and detailed prom is crucial because AI tools rely heavily on
your instructions to generate accurate results. The more specific and
structured your prom is, the closer the output
will match your vision, and it will also reduce
misunderstanding. Okay, let's pick an example. If you remember, we
use Replit to build waste management software,
and here is the prom. Let's rewrite the prom. Build waste management software
with three main fetters. So the very first thing
that you need to do is to tell AI what product
that you want to build. In this case, I want to build
waste management software. Then after that, you will
need to specify what features or functionalities your product needs to have, for example. Waste collection scheduling, tracking system
for waste, volume, type, and recycling rate, and customer requests, and
also complaint management. Make sure your prom is specific. So AI understand what you want. And I also add
additional context here. The system should allow
user to schedule pickups, monitor collection progress, and analyze recycling
performance. So that's very important, guys. Okay, now let's move on
to the second topic. Breaking tasks into small parts. Dividing large project
into smaller parts help AI to focus on
one task at a time. So this leads to more
accurate results and makes debugging or improving
its sessions much easier. So it will isolate
issues quickly, enhance its sections separately, and boost overall accuracy. Okay, let me give
you an example. So we're using the same prom, build waste management software
with three main features, and we break down each
fitter one by one. For example, the first feeder is waste collection scheduling. The focus is on schedule pickup, calendar integrations,
and root optimizations. That's just an example, guys. And the second feature
is tracking system. And the focus is on volume data, waste type, recycling metrics,
and analytics Dskboard. And the third feature
is customer management. The focus is on request
form, complaint, tickets, status updates,
and notifications. So to avoid AI
getting overwhelmed, you need to make sure to
break down big projects into smaller pieces so it is going to be easier for AI to understand. Okay, now, let's move on to the third topic,
regular testing. Testing your app
frequently during development ensures
that each fitter works as expected and prevent small errors
from piling out. Continuous testing
also helps maintain stability as new AI generated
components are edited. Because there are some cases where the fitter used to work, but once you added
new component, but no, it is not
longer working. Maybe it is due to
dependency conflict or there might be other reasons. So it is very important
for you to always check if the fitter is still working
every single iterations. Okay, guys, that's the
end of the course. Thank you so much, and I
wish you all the best. Bye.
 Chris Raharja, Data Scientist & AI Enthusiasts