Transcripts
1. Replit course introduction and welcome: Welcome to this
exciting new course about how to create
your own website without any coding and without
hiring any freelancers. You're going to be able to
create your own website by 100% using artificial
intelligence, and you're going to be able
to have a website within one or 2 hours literally the same day
you get this course, enroll and take this course, click by click line by
line, step by step. I'm going to show
you from A to Z how from absolute zero, get
a working live live, not a test website, a live
website in under 1 hour. Of course, over the long term, you will have to make some edit, so you will have to spend
more time on your website, but you will be able to launch a really nice website really quickly and much cheaper because if you had to
hire a freelancer, it would cost you a couple
of hundred dollars at least and a couple of
weeks at least of waiting. And if they're good,
maybe a few days. But what if you wanted
some revisions, that would take a couple
of days extra revision. This way, every region is
like a couple of minutes, and the entire website
is under 1 hour. So we're going to use
replet which is one of the leading AI no code
software Builders. And because it's
software Builder, this doesn't have
to be limited to only a website with replet that you're going
to learn in this course, you're going to be able
to create mobile apps software AI based
agents that just do work for you and many
other kinds of software. So if you want to
launch some kind of a software as a
service business, apltTday is the way to do it. So welcome to the
course, and let's begin.
2. Vibe Coding Definition: Let's define the
term vibe coding because it might seem
like a silly term like, Hey, the vibes are cool, but this is a tidal wave that's sweeping
the coding world, and it's going to be one of the most important terms
in developing businesses, startups for the
foreseeable future. So where does this
funny term come from? It comes from Andre Carpathi. He is a thought leader
in the AI space. He used to work for OpenAI, which created HAGPT and he tweeted something early on
that read something like. It's where you can
give into the vibes, embrace exponentials, and
forget that code even exists, which really sounds
pretty confusing. This is a smaller part of a larger quote, but
think about it. Give into the vibes of
what you want to make. Forget code exists and forget
that limitations exist, because if you
were traditionally programming and you
were told, Hey, make this feature would have a headache
because you'd be like, Hmm, well, to make this feature, I have to learn this library and this library and this API, and it's going to
take me a couple of days to figure it out. I have to read a bunch of incredibly horrifically
boring documentation, which is a snooze fest. I'm going to take
1 million breaks over eat on snacks
because it's just going to be so boring and it's going to be miserable and stressful for the next two days. I'll get it. I'll make it. But that's my life for the next two days if I have to create a totally new feature. And, of course, those
vibes are not so good or as my daughter
would say, yucky. But the amazing
thing about being an engineer is that you
could make anything. And so here we are going to make AI create
everything for us, so we only have to worry
about what we can dream up because vibe coding is actually
the opposite of coding. It's not coding at all. It's the engineer
instead of coding. Now they're just telling
AI in natural language, in my case, English, what
code and features to create. Like, Hey, make me a website, make me an app, make
me whatever I want. Very importantly, this gives you the ability to prototype
just about anything, not a fully completed product, but prototype in 1 hour and
begin getting feedback on it, begin showing it to potential
clients, your boss. That's unprecedented. If you wanted to launch
a website before, sure, if you're fast, you
can do WordPress, but you could not
make a mobile app, you could not make other
original software. It will take you days and days. The revolution here is
manifold because, yes, it's way faster, meaning it's affordable and
more efficient, but it democratizes web
development because there's no longer a need to hire web
developers or learning to code. No offense to web developers. I used to be a software
engineer myself, but the revolution here is that any of the 7
billion people in the world now can
create businesses and products without big hurdles. Generally speaking, the way
vibe coding works is you have a browser based
development environment where you can tell
it what to do, and it actually makes it easier to collaborate
if you have a team. It also removes
complex configurations that used to be there in software engineering
environments. That was another huge headache. I used to hate that so much
like something wouldn't work, and you would be like,
why is it not working? And it's like some syntax error or somewhere in the
configuration and it would take you half a day to figure
out what it was and just terrible experience that you no longer have to deal with. Of course, there's a
lot more to say about vibe coding because it's AI, it's getting infinitely more complex and sophisticated
day by day. But because this
term is going to be thrown around all the time, from now on, it's going to just balloon in how much it
gets thrown around. It was incredibly important
to define what it is and set the context so that you will understand
whenever it comes up.
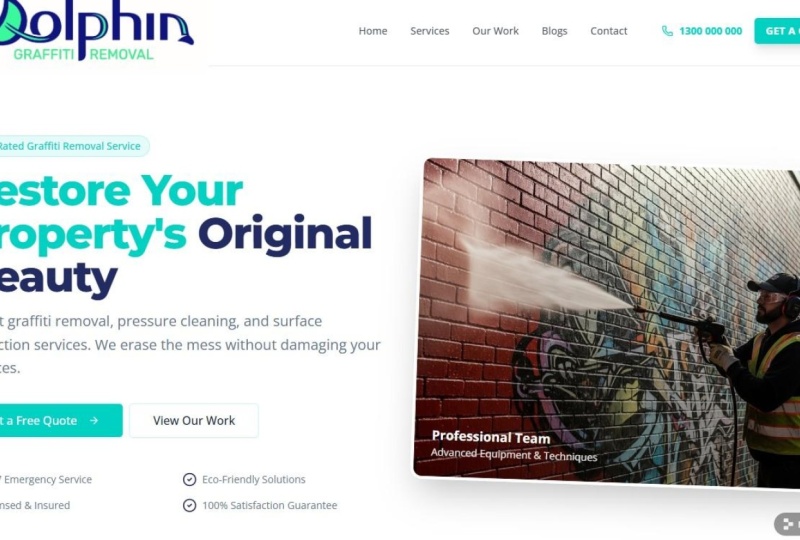
3. First Step Of Using Replit: In this video, let's begin taking the first steps
in using Raplet. So when you come to plet, you might have a screen
like this and it will say, Hey, what do you want to make? And let's say you want to make a basic website for an agency. Let's say you have an
SEO marketing agency, and you want to create
your basic website. So let's do that.
Here's what I'm going to say. This is my prompt. In a little bit,
we're going to go over more formal
prompt engineering, but here's a basic prompt. Create a basic website
with a blog for an SEO marketing
agency that offers content creation and keyword research.
That's the services. It's based in London, UK, and the agency is named. I gave it a funny name SEO Bro. I thought it would
rhyme a little better, SCO bro something like that. You can also give it
some specific things like make sure to create
a services section. You can also give it some
specific instructions like do SU optimization
for the homepage, for the keyword, SEO
keyword research. And I'll click Start Building. It takes a little while
because it has to create all the code
actually from scratch, and before that, it has to
understand what you want. So at first it
processes your query. It often comes up with questions to make sure that
it's on the right track. So here's your SEO
Bureau marketing. Initial version is going to be a professional SO
agency website. Yes, plan approval. So it shows that it did
the initial planning. For later, would you like any of these
additional features, add a blog post
management system? That would be like
mimiing Wordpress because Wordpress allows you to create a blog. So yes, that'd be great. Implement a contact form
with lead capture for sure. That would be amazing. Add a case study and
portfolio section. That would be also amazing. These are things
I didn't actually think of, but these
are great to have. Integrate Google Analytics
and Search Console. No, because to integrate Google Analytics
and Search Console, you may want to do this later because we don't have
this website set up, so there can be no Google
Analytics or search console. It's not a real
website. So for now, we're not going to check this. But if you are creating a real
website for your business, you definitely
want to have this. But for now, just because it's an example and we are not
really going to launch this, we're not going to
have that checked. So with that, let's click
on Approve plan and start. As you can see, it
starts working. And what's really cool is that
it tells you kind of what it's doing on the
left side and on the right side is
actually doing the work. Usually, I would just
let the video run, and then I would cut out the time that I had
to wait and tell you, Ooh, it took 2 minutes
and I had to wait, and I cut that time. But here, it's really curious how it actually
builds the website. Look, it literally just
builds it element by element. ACO bro, you have a
little bit of a logo, you have the title, you have all this kind of stuff. You have the navigation on top. It's still building it out. If I'm going to scroll,
I can't scroll anymore. And then a second later,
I am able to scroll, so it's literally creating it. These are the services
that I told it about SEO keyword research
and content creation. You can have more
services if you want, like ink building or
whatever else for SEO. Really cool. It actually
already wrote some blog posts, the ultimate SEO
guide. It's funny. I'm filming this in 2025, but it created a 2024
article that's silly. Here's the customer reviews which you'd have to plug in
your actual customer reviews. These are fake obviously because there's
no such business. Obviously, data like this is
something you can either ask it to remove or you
can plug in your own, but essentially it's
working on things. While it's still
working on things, you can be curious and see if
you can click on anything. At the moment, you can't really click on stuff. It's
just building it. But it's actually on the left side, showing
you what it's doing. See this visual preview, it's giving you the
visual preview right now. So it's just a
preview. Nothing is clickable until it's done. So now, because you've
seen how it's working, this does take a little while. So I will pause this video and cut it until Raplet is done, and I'll just fast
forward to that moment. Usually, for a site like this, it might take an extra 3
minutes to wait or something. So I'll fast forward this video until those 3 minutes
or so are done, and I'll see you then, and I'll tell you how it
went and I'll show you. In the end, it took
a little longer, maybe five to 10 minutes or so, but we have on the right side, a full fledged website, and we can preview the
website and navigate. For example, if I
click on Services, you see it goes to
the services area, blog, goes to the blog area. I can click on the
individual blog posts, and it actually has
written the blog post. Now, the blog posts
are not great. This is a service not meant
for blog post writing. Although I'm sure if you ask
it to write more elaborate, longer blog post, if you specify it, it will write what you want. Now, there's the About
page and the contact page, and it gives you a
summary of what it did. Created a home page,
the hero section, this is kind of the hero section is this kind of a big image. Services blog preview
testimonials about page contact. There's a blog page with
SUR focused article, individual blog post pages
with proper formatting, contact form for
service selection, professional London based
branding and messaging, and the SU optimization
with meta tag, structured data and
keyboard targeting. It's not only web development but also a little bit
of marketing that it already did because
it did some of the SEO work for this website. And as you can see
in the headline, it's targeting SEO
keyword research, so it optimized
things really well. SEO keyword research,
SEO strategy, it's optimizing for
those keywords. And after you get a result like this, you can
do a few things. You can ask it, Hey,
I don't like that. You see it's kind of
an infinite scroll. Everything is on one page. You can say, I don't
like that. I want every link here to go
to a separate page. You can ask it and it
will rebuild the website, or you might say, I want a different feature. I don't like maybe
Section three, change or if you love the
way it is and you say, oh, I want to launch this. You can launch this,
and you can buy the domain name and get
hosting all through replet. And it will give you relatively competitive
prices relatively, not the best possible prices, but still very reasonable. And I think that would make it attractive is that it's all in one place because
let's say you got a free domain name somewhere. Well, you have to configure the domain name
forwarding and all this. It takes time. And because it takes time, that's money, right? You're spending your
time configuring things that you don't
want to be doing instead of actually building out your website and starting
to build your business. So this saves you time. It doesn't give you the
optimal prices necessarily, but due to the time savings, it does represent
a cost savings, which for me, I would just
do everything on plet. In the next video,
before we get too deep into how to create
websites and everything, let me show you how to do
optimal prompt engineering, so you know exactly how to direct replet so that it
gives you a good results. Because as you can see, if
this took me about 10 minutes, it's a relatively short time, but it's not a second or two, like you maybe used to Cha GPT. So you have to wait
and 10 minutes does take a lot of your
time in your day. So you don't want to
keep re prompting. So I'm going to show you how
to give it ideal prompt so that you get as much Correct, from the very first prompt. So let's do that
in the next video.
4. Finalizing The Replit Prompt For Crypto Website: With this video, let's begin our class project and
use our class project to start creating a great pletPmpt and then I'll be able to walk you through from the prompt, how to create the entire
website and get a domain and get hosting and make
that website go live. And I'm able to do this
because I'm actually working on a side
project at the moment, and that project
actually needs a website because if I gave
you a basic example, like a toy example that
wouldn't go anywhere, then I wouldn't really
get hosting for it. I wouldn't really get
a domain name for it, so it wouldn't be
a full example. But with this, I'm going
to be able to walk you through a complete
full example A to Z, starting from the prompt and
literally walk you through every step so that
you can follow it click by click for whatever
your website needs to be. So here is my project. It's a side project. I'm in the process of launching my own cryptocurrency token. So happens that
cryptocurrency tokens almost always have an
accompanying website. This particular
cryptocurrency token is something that's going to have
utility in the real world, and I'm targeting that
creative community because all my life, I've
been creating things. I've been creating music
as a hobby and a passion. I write poetry on my free time, and I create courses and videos. All I've been doing is create
I've also been an author, so I deeply identify with
the creative community, and I understand how
hard it is for them. For example, if you want
to write a book, well, you might have to go
through a publisher, and that book publishing
business is just broken. They take advantage of writers, and they give the
writers an advance, which is a little
payment upfront, and it helps the writers. But they take so much
of the writer's work. The long and short of it, if
you go through a publisher, before you even
publish your book, you'll owe at least 30% of your lifetime book earnings to your agent and
your publisher, and that's even before
the book is live. So what I on is a way to use cryptocurrency to help creative people
fund their project. And unlike the
publishing industry or many other industries, I want the creators to
be able to take at least 99.5% of all the money
they're able to raise, and the very little extra just
goes to transaction costs. So that's the context
of the project. And actually, that's
the very first thing we have to explain to replet. So here, I'm going to take the template we used in
the previous video and I'm going to edit it
to show you how it's going to look like
for the repletPmpt. So here's the
context that I have. I'm creating a website for a new cryptocurrency I'm launching on the
Solana blockchain. Its ticker symbol will be
SPRK which stands for Spark. The purpose of this token, I should actually tell that. So here I improved it. Is ticker symbol will be
SPRK which tends for Spark. That's just so that
it will kind of understand the branding
ahead of time. The purpose of this
token is to help creative people get
funding for their project, so I need a creative
friendly looking website. That's the context. Now the task, this is
the most important part. Task is a little long. Let's
read it together quickly. Create a bright and
image rich website aimed at creative people to feel at
ease and trust the website. Use copywriting to explain to creators that they
will be able to raise more money and keep
more money than they earn when they raise
through this token. That's a little confusing
in the wording, actually. Also create a section of the
website for the white paper. A white paper is something that cryptocurrencies
usually have. It basically gains
trust by explaining all the details of the
cryptocurrency transparently, like all the toconomics, economics, and all the details. So have a section for that and a section for current
projects that will be funded. I want the website to also be able to promote
projects that get funded through this
website so that donors can find them
on the website. That's the additional benefit of this cryptocurrency
project is that it will have a website
where donors can find a project to donate to. Now the desired result
while writing this, I also thought of a couple of other good things to add.
So let me read them to you. Create a section
for creative people that will explain to
them how they can start and create a section for donors to help them understand
how to get involved. Almost create like a partition. So let me explain
that. Here, I have a little bit more
clarity for the AI. I wrote, create two big
sections on the homepage, one for creators,
one for donors. And below that, have the section showing the projects
currently doing fundraising. So the more detail and the more features
you want to specify, the more likely it's going to actually create
exactly what you want. Now, desired result, some of the desired result will overlap a little
bit with the task. So here's an example.
I want people to subscribe to my
email newsletters. I want people to get onboarded whether
they're creators or donors. I also want people just to
invest in cryptocurrency, just for the investment
opportunity and show the ticker symbol and the
price on the website. I can probably actually just put that last sentence into the
task because those yours. Now the next one is
example of outcome. So what I want to do is find a great current
cryptocurrency website so I can show how
that would look like. So I'm just going to
use the SOL website. So I'll say use the SOL
cryptocurrency example, give it the URL, and I'll say, just make it brighter and
more fun and engaging. Then the tone, obviously
we're not writing, but we'll change that
to copywriting tone. That's the text that's going to be written
on the website. We need it professional,
polite, creator friendly. That's just because for me, I'm speaking to creators.
Here's my prompt. Use a professional, polite, inspiring and creator
friendly tone, so they can see
the big vision of the project and the financial
benefits to themselves. Creativity level, we
can keep it as it was, focus on accuracy instead
of being creative. Audience. This is important because this particular
audience, the artsy world, typically pound for pound are a little bit
not crypto savvy. And many creative
people that I talk to, they have a skeptical
sentiment like, I hate cryptocurrency
or why do I need this? Is this all fake?
Is this a scam? They're very skeptical? Because I admit cryptocurrency can be very boring to learn and because it's
boring and things that aren't known when we
don't understand things, we typically are a little
bit more afraid of it. So understanding that and understanding that this
is the challenge that I'm going to have is to onboard people who are
not early adapters, the audience is, see, potentially skeptical
arts people who are not necessarily
early crypto adapters, so we need them to break
the skepticism barrier. And for the format, actually, the previous prompt looked good. Use clear section headings, make it easy to and use
visuals and graphs when you can and highlight parts that
you think will impress. That's pretty good. So
this gives us most of our first prompt that we
can copy into replet. So now that we have our
prompt in the next video, let's actually put this into replet and let's see
what it comes up with. And after that, we'll be able
to put this website live, get a domain name, all
the next steps as well. I'll see you for some of the next steps in
the next video.
5. Initial Replit Prompt And No Code Website Creation : In this video, let's take the
prompt we made for replet and actually have replet make
the website that we wanted. So in replet there's always this button on the top
left plus Create App. When you click it, it actually gives you a screen
like we already have. When it says app, it
doesn't mean app. It means any software. App is just a term that it uses. So let's paste that prompt into here and let's see
what it's going to create. So I'm literally going to just
copy everything and paste. The only things I'll do is
I'll have minimal edits. Like, for example, the
recommended optional, I'm going to take that
out of the brackets, but I'll give it context. After I pressed Context,
then I pressed Enter, and it gave me a reply, I understand you're launching cryptocurrency
called Spark. Sounds like an exciting venture. Okay. Let me create
a comprehensive plan for your creative site. Then it gives me some things
that it can do later, like integrate Solana wallet. That's just a specific
thing for Solana, at project submission
portal for creatives. Yes, that's great. Implement
community voting system. Maybe we don't need that
yet and then create a tokens taking and Rewards
Dashboard, we do need that. Now I also want to give
it some more background, so I'm just going to paste all the other things in my prompt and just
take things out. All the things in the bracket, I will just take things out. Task would be left, desired result would be left, except the stuff in the bracket. So I'll just quickly edit
all that and press Enter. So once I edited all
this to be clear to AI, I'm going to press Enter here, not this approved
plan and start, but this so that it understands context, more of everything. I have all the elements
of what I wanted to do. Could have pasted it
all in the beginning. That was also fine. I could have pasted the
entire prompt at first. Then as you can see, it
thinks for a little bit, and it gives me the
same kind of a plan. This is what it's going
to do a bright trust focused website on the
spar cryptocurrency that serves creators and donors with a clear
onboarding live ticker, project showcases, newsletters
description, et cetera. Later, integrate the ticker,
implement donor dashboard. That just features for later. For now, I'm going
to say approve plan and start, and I'm
going to wait. As you can see, it's thinking on the bottom here
on the left side, and it's working on the
code on the right side. This is going to take
five to 10 minutes, and I'll fast forward this
video to whenever that's done. And it took about
five to 7 minutes. I wasn't counting, but it created me this website.
It's a version one. You'll never have version one that is exactly
how you wanted it. There are some things
that are not ideal here for me that I'm going
to ask it to change, but it's already quite good. So let's read the summary of what it did. Here's what it did. I built a bright, trust
focused website for the Spark cryptocurrency that
serves creators and donors. It has a modern design and vibrant Solano inspired colors. See, that's from my
example that I gave it. My job is going to be to find
a website that more closely resembles something for
artists because this looks a little bit too Office, 29 to five job, not exactly the vibe that I was going for, so I'll
have to change that. Then it says it has a live
price ticker somewhere here, although I'm not
able to find it. Like, for example, there
is some data here, but it's a little vague, but it has other features like the hero section with a
clear value proposition. See how clear it is. Spark
your creative dreams. Okay, nice. The cryptocurrency designed to fund
creative projects. I would want the content explaining everything
to be in larger font. And these are all things
where you would make a mental note for
yourself and ask replet to make
those edits because this version one is not what
you're going to launch. This is just something
that you look at and ask you to make changes. Compare that as an analogy to
if you hired a freelancer. First of all, it would
take a day, two, three, four, if you hired a
bad freelancer, two weeks. I would have already
cost you $200 for this. Then if you wanted
to make edits, it would take another. One day, two day, three days, and maybe more money, or you might have a
limit of how many edits you might be able to ask of the developer because
they might say, Well, at a certain point,
you have to pay more. Here, you don't
have to pay more. You just have to keep asking
for changes that you want. So in the next video, let's go through this detail by detail and ask it to
improve certain aspects of this website until it's something that we
love that we can be happy with launching so that then we can go on to
the next steps of launching. So let's refine our
website in the next video.
6. The Process Of Working With Replit To Improve What It Made: In this video, I want to show you a little bit
more about how to develop your website
from scratch with plt with absolutely no code. As you saw in the
previous video, plt can create a
very good for draft, but with obvious mistakes. And even though you
can do your best at creating a great prompt, you can almost guarantee
that it will not create the exact thing you
want from the first try. So the very next
step is to give it directions for little
adjustments so that you can get it closer
to what you want. So instead of doing this all on the screen because
it's incredibly tedious, I'm going to just scroll on my prompts here on the left
side to show you what I did. Because if you remember, when I scroll all
the way up, up, up, pa, pa up, look how
much scrolling I had to do. This was actually a pretty
painstaking process. So I'll just kind of skip around here because it
will take forever for me to see how long the
conversation I had with plet was. So what I did is I gave it this big prompt and it gave
me this initial website. By the way, whenever you work on this, it
creates versions. So if there was some
version that you liked, you can roll back
to some version. But I want to show you a preview just to see the
previous version. On the right side, what you see is the current
version that I have. Here, the preview is ready. So I'm going to click
on View preview. It opens the preview in another
tab, and as you can see, even though it's for
creative people, you see this stock image is kind of like for tech startups. It's not really
exactly what I want. And there are some errors
like, this is not readable. This part of the website
is buggy and ugly because how can he make
such an ugly design? There's text here, but
it's obviously chosen in the wrong colors because the colors blend
into each other. Then there's, like, What
is this Mckinen guy doing? Why is this picture? So AI was really bad at choosing appropriate pictures and really for many
of these section, it's a little bit
too early for it. So instead of that, I ended
up having this kind of a more clean design.
At least I think so. The look and feel feels a little bit closer to what creative
people might like. So let's go through
the step by step. So literally I told it
as the first thing. I thought that the images and look and feel
was too corporate. Can you change it to
something more creative? Maybe instead of a stock
image with an office, use something more inspiring
for a Bohemian person. And it did that. I'll load this preview. So this was just instructions
to change this image. So after you get your website, as long as the architecture of the website looks
reasonable to you, what you would then do is go through every little
piece this text, the text on top, then
the text on the bottom, the subtitle, then the image, then this next section,
then this next session. And what you would do is
direct it what to write. It's time consuming, but not nearly as time
consuming as if it would be if you had
to do this with a designer and with a designer it would
also cost more money, and at some point, they might
have to go and work with some other clients or just get tired, and you'd have
to take a break. So this is still easier. So let me show you this preview. So it gave me this kind of a Bohemian paint brushes
thing, but I didn't love it. And actually, I ended up going through a few iterations,
like I'll show you. Here, I told it, not sure. I want to focus on art
specifically, too narrow. Then I said, then it
gave me some options. Chose one of the options. Then they gave me
another preview. I'll show you that one as
well. Basically, a lot of the preview images
just weren't good. So I'll show you the
next preview image. So this was kind
of time consuming. Like, why was this phone here? It doesn't make any
sense for this project. As you can also see, there
is a bug on this button. Launch your project.
Like, What's this button? Why do I
have to mouse over. So all these little things are things that
you should notice. And tell Raplet to fix. So I ended up just doing that. I ended up going through
a few image iterations. I don't want to show
you each iteration of images because it will just make this
video very boring. But at some point, look, I said, Are you experiencing a bug? Like I was telling it, Choose
an illustration, right? See, I said, Use illustration
in the hero image. And then it gave me
not an illustration. I said, Are you
experiencing a bug? So I just went to some
image website and found an image that I like and told going to upload this image. You can use this attach file and I told it, use that image. So the images you may
have to choose for it, which is not a problem, really. That's how I chose that
image that's a hero image. And then I started telling it to change every
part of the website. You see, I told it, Let's make the title text and no subtitle. And then I tried that
and then I decided, Oh, I'm going to
redo my subtitle. So I changed the copywriting. Now it's Spark, the first
cryptocurrency designed to fund creative projects. And then the subtitle
is fund music books, art projects, startup
ideas, online project. Is all I wrote, I just told it to upload it. So it's as though
I'm a developer, but there is no code. So what I want to make you
aware is that it's not like you're going to
press one button and a website comes out
and you're done, but it's more like you're
going to press one button. A website comes out,
then you go through this entire thing and you
might think, choose your path. Like, I want a different
text, and you tell it, or you might want different
words on these buttons. You tell it, and
it will do that. That way, it's almost like
a give and go, give and go, you tell it to make a change, you approve the change or
disapprove the change. Then you go on to the
next part of the website. Then the next part
of the website. And when you're happy
with the homepage, then you go, Okay, for creators, then for
donors, then for projects. And once you let's
take developers, and let's say so
in the next video, let me walk you through a
live demonstration of how to make a couple of
changes and with that, you'll become confident about how to make all the
changes you need on your website so that
we can move on to the next step of actually
taking your website live. So we'll do a short live
demonstration in the next video.
7. Deploying The Replit Website: Once you are ready to
take the next step into launching your website, you don't just launch
your actual website, you launch a test version, and that's in technical
terms called a deployment. So what you would
do is type into the prompt something
like Deploy, which I did, and
replate will give you a potential URL
like Spark Token. You see it gave me
some options before, like Spark fund, Alexi ****. The URL is going
to look like this, your project name
replet dot app. Okay? So in my case, I just wanted to make it easier. So Spark token. I'm going to click
on Deploy now, and it's going to do a little
work to actually deploy the website on this URL so that you can then
go to this URL, test it out, click one button, two button, send it
to your friends. If all the testing passes, then you're ready
for the next step. But very likely what you'll find are some bugs that
you might want to fix and then ask Repl
to fix those bugs. Then you deploy those fixes on that deployment
website again. Once you're happy with
everything, everything is tested. You are going to be
ready for the next step, but this deployment
step is the next step, and it's going to
take a little bit of time to deploy everything. As you can see on
the right side, as I'm talking, it's working. So I'm going to just fast
forward to the moment when it's done working so I
can show you what happened. And the deployment process
took about 5 minutes. We already made
the URL for this. Spark token replet up. So I just went to
that URL directly. And as you can see,
the website is here, if you don't like
something, tell Repl to change it.
I will change. But essentially, we have
our test environment setup, so you can send it
out to friends and family for testing or yourself. You can test, and
we'll go through the next step of launching our
website in the next video.
8. The Steps Needed To Launch Your Website: In this video, I'm going
to outline the next steps in order to actually launch your website
and have it go live. Step one is you have to purchase the domain on a domain
name registrar. Any of them will do like
Codei name chip, whatever. And then we already have step two created the
deployment website. So after that, once you
get your domain name, you have to take the step of connecting your
custom domain name. So whatever domain name you buy from Go Daddy or
whichever other place, you'll need to connect it to replet so that whatever
is shown up on your deployment
website is actually going to show up on your
actual URL, the live URL. After that, replet will configure your SSL
certificate for security, and you will
essentially go live. So in the next video,
let's look at how to get that domain
name and how to set up this confusing
step of adding your DNS records to
point to replet servers. So we'll do that
in the next video.
9. Getting The Domain Name For Your Website: Now let's go through
the process of buying your domain name and
setting it up so that whatever you create
in replet actually renders when you go to your domain name because
the domain name, your brand dot replet dot app, that's not something
that's meant for consumers to be seen or
visitors of your website, that's for your
testing purposes. So we need a real
professional domain name. And of course, you
have multiple options for getting a domain name. Now, just to give
you some background, if you go to, like, a popular domain registrar
and hosting service, like, let's say, Blue Host, you can get a free domain name
and really cheap hosting. You see, like 295 a
month get started. And you see on the left side, one of the things
you get is free domain name for the first year. So you can get a free
domain name with hosting, but this is for WordPress. A replet site is not
a WordPress website. A replet site is going to have slightly more expensive hosting. This is the price you pay for having a custom
website and for being able to avoid hiring
a developer entirely because you're saving a lot of money on hiring a developer, and anytime you need
to make a change, it's a no code approach. You can just make any changes
you want on your own. You never have to look at a
line of code on your own. So you can have this. We're not going to
do this route, okay? I just wanted to make you
aware this is possible. The route we're going to
take is we're going to buy a domain name on a
service like go Daddy. Now, let me tell
you about go Daddy. Go Daddy is a common domain registrar
and a hosting service that can help you with WordPress website hosting or other kinds
of hosting your website. We are not going to
host our website here. I've been a user of Go Daddy
for something like 20 years. Many people don't like Go Daddy. I also don't love go Daddy. I find that it's okay. It's just fine for
buying domain names. It's maybe not the
best place to buy it, but it's just fine in terms of, you're not going
to have headaches, you're not going to
have problems with it. It's not going to be too clunky. But for hosting and
designing your websites, that's where people
get in trouble because many people use the Go Daddy website
builder and totally get stuck with an ugly website
that they can't move off of. So we are not going to create our website with Go
Daddy, obviously, because we're creating a raplet, but we are going to
get a domain name. We're not going to be able
to get a domain name free, but you can get some
deals and discounts. In any case, whenever it's free, it's only free for the
first year anyway. So what you can do on Go Daddy, if you just come to
Go Daddy homepage, you can type in
the URLs you want, like abc.com and see
if it's available. Abc.com is not available. Somebody owns it, and
they will charge you a broker fee of $99
to try to buy it, but it might be a
much higher price. You can get abc.co, but you might not want
ACO as they show here, you can have ABC store social. It might make sense,
but for most people, you need a.com domain name. So we'll stay.com. And obviously, three or four letter domain
names are mostly taken, so you want to have a domain
name that's memorable, easy to write, easy
to spell, catchy, rolls off your tongue, is
brandable, all those things, but also it's free because if
I want a domain name like, my first option is park token. So when I type sparktken.com
into here and I press Enter, it's going to find
Spark token and tell me if it's available.
Yeah, it's available. But you see, it's
a premium domain because Spark and Token
are English words, and token is kind
of a premium type of word because,
obviously, tokens money. It's related to cryptocurrency. There's a lot of demand in it. So $12,000 a year. Should I pay this? No way. You can probably get
it cheaper somehow. But there's an
interesting option that I'm actually honestly not familiar with lease to own, but it's a horrible price. It's still $1,000, so
it's not an option. You should never pay
more than ten or $20 a month for a domain
in these premium, domain names is a rip off
because all you have to do is instead of
saying spark token, you can say SPK sprktken.com, and it will be
available. There it is. Great name available. You can buy it. They
even give you a deal. Now, you may not
be satisfied with SPRKTken it's kind
of an English word, but now it's cryptic
looking to demonstrate the fact that you don't need
to buy premium domains. Let's say you wanted
to have Spark. All you would have
to do is add one more syllable
somewhere like Soul. Soul is the Solana block chain on which this token is
going to be built on. So if I say Spark token, Soul, it's going to be
available for sure. I search, and there you
go. It's available. You don't have to have Soul. You can also say Spark creative. Token, or you might even be able to get away
with Spark Creative. I don't know if that's going to be available, not available. But Spark creative or
creative spark token, that would be nice
and available. So the takeaway here
is that you just need to add one more
syllable in order to make a domain that's
premium into a cheap one. In the future, if your project
takes off and you have millions of dollars and you can spend a few thousand on
the domain name, sure. You can get sparktken.com and then redirect your
current website to SparkTken. You can do that. But for new projects, it's
obviously difficult. So here we have Spark creative
token or Spark Token. I kind of like SPRKTken. We'll stay with a short one, and then I'm going to
proceed to buy it. So I'll click this
Don't Miss Out. So I'll get it for three years. The first year will
be essentially free. You can just get
it for one year. It will be cheaper, but not
so much cheaper, it's fine. Let's say don't miss out.
We'll click this button. I added it to the cart. There are some upsells here. We're going to skip
those upsells. We'll say no thanks. Just
to be sure, view your cart. For the three year duration, it's going to be $43. You see subtotal, $43. Then click Continue to Cart. Then they're going to
upsell you things. You don't need any of the stuff, full domain protection, no. None of the upsells
here continue to cart. It should stay $43. For some reason, it's still added to full domain protection. You make sure you turn that off. There you go. You
can pay with PayPal, and you can complete purchase. Perfect. That domain
name is mine. Now we have to configure the domain name, so
you click Continue. Then they offer you to publish
a Coming Soon website. We don't need that
because right away, we're going to go and
connect it to our replet. So we'll say not now. Then you get taken to your dashboard,
so congratulations. You have purchased
your domain name, and in the next video, we are going to set up and
configure your domain name, after which your
website will be live. So we'll do that
in the next video.
10. Setting Your Website Nameservers: So you go on the left
side under domain, and in the DNS, you need to give it
the right DNS servers. So you get that
information from PLT. Now, in order to get the information you
need from Raplet, you go to the home
dashboard screen of Raplet Under deployment, you'll see the deployment
you've made. You click on that. We'll give you a
little tutorial. Welcome to the workspace. This is where all the magic
happens. Let's look around. Next, this is your
agent that you talk to. On the left side
is where you open all the additional AI tools
and other tools in files. The Run button is to preview your application
that you're creating. And you are down to another no. In this case, we need settings
because under settings, we need to find our name
server or DNS records. It actually explains
to us what to do. You see, get your DNS records, plt will show you
the name servers or specific DNS records. So
that's what we need to find. Under domains, I'm going
to enter a new domain. I'm going to connect the domain, enter my domain names, spark Token, they gave
me these instructions. Next, add the
following records to your domains DNS settings. So type A, host name WW record. So that's where
we're going to add. So under A, we're
going to edit this and we're going to put that
IP address there, save. Then under host name, WW record, that's the host name, we're going to copy that, and we're going to add
that there also. And once we are done, we're going to click on Link Domain, and it's going to say verifying. By the way, let's get back
to the go Daddy screen. So now we're back on Go Daddy. I understand that this part of the process can
be very confusing. So let me explain to you the good practices of
what you should do. If you want your domain
name to render whether people are typing WWW your domain name or just
your domainame.com, want to make sure that
you have here under A, and name one symbol
is at, one is WW. And for both of them, you enter the same IP address that was given to you
by replet right here. I'll show you where. You see
right here, A, WW, that. Should also have the
other version of that, too under this IP address. Then the second line, TXT WW and then this record,
that's also there. You see I have TXT WW and this
record that's also there. That's going to make
sure that whether people go to sprkten.com WW, you see it renders already, or people go to just that domain name without the WWW your
domain name will register. Now, you will notice that
it says HTTPS not ready. This takes about one
to 4 hours to get installed automatically
after you get these settings right. If you have that error message there, don't worry about it. If you have that error
message there 5 hours later, do worry about it, then it's
time for troubleshooting. But in the beginning, it's
not a worrisome issue. Similarly, it's also
not a worrisome issue if your URL does not
immediately render after you set these settings because
these also can take one to 24 hours to propagate
because as you can see here, this is a place where
you can go and check your domain name
servers and you'll see that e hosting company has
them across the world, and somewhere they might take a shorter amount of
time, somewhere longer. You see there's a lot
of green checkmarks, like they registered fine. The red crosses,
that means not yet. This is under wasmdns.net. Enter your URL, and then search
and see, is it all ready? You'll see you'll get
checkmark checkmark checkmark in a couple of them not ready. But within 24 hours,
it should be ready. Again, if it isn't
ready in 24 hours, then this is where
you troubleshoot and contact customer service of Go Daddy and basically see maybe you
mistyped something. Maybe there was an error
in the settings you set. And if there is an error,
it's usually here. You got to really
verify that these are correct these settings
and that they really match the URLs and all the data that's
given to you here. So this is the place to look to check whether
something might have wrong. If there was a little typo, a little inconsistency, that might be a cause
of the problems. But usually, most people get this part of the
process done just fine. Sometimes when you wait, it's a little worrisome. Like, why is it not
rendering, 2 minutes later, why is it not rendering, 2 minutes later,
I'm stressing out. But after some time, usually these things just
resolve on their own. SSL is going to get
installed automatically by replet after your DNS
servers get configured. So it's like waiting after
waiting, after waiting. So take a break, come back. Likely, you'll have positive
and encouraging results. And then, guess what?
You website is live, which is fantastic.
So congratulations.
11. Further Settings And Troubleshooting: One little troubleshooting note. You see under
domains, ultimately, I ended up having one type
of URL that without the WWW, just domain.com, and then the other URL is with
w dot domamdt com. You have to create both of these under your domains so
that whatever people type, whether they just
type sparktken.com or www sparktken.com, if you have both of these, then your website will render
for both of these. But if you don't have
both of these versions, then your website won't
render for both of these, which will look very,
very buggy because a website should render
for both options. The way you do that is
basically under domains. You can always click plus here, Link a domain, and then add yours and just make sure
that whatever it gives you, you see if I click the little Edit icon, whatever this is, you make sure you
have that record in your go daddy or wherever
you bought your domain. So for example, this
A at this IP address, I have that A at the IP address. Then as you can see, I
have AWW, this IP address. That's from the
other domain name. You see AWW that IP address. Same thing with the text value, text at that record, and then textww dot record. So I have text at that record
here and textww dot record. Once you have this, it
should work and then automatically website
should render just fine, and quickly after that, plate should also install
your SSL for HTTPS. So you'll get that requirement
taken care of by default, and your website
should be ready to go. So definitely make sure you
have these settings set, especially in case you wait a few hours and your website is just not rendering the way
you thought it should. The first step to do is
to look carefully at how accurately you
recreated this data, this information
on whichever site you bought your domain name.
 Alex Genadinik