Transcripts
1. Introduction: In this course, we are going to learn how to use Unreal Engine five by designing a realistic game environment from scratch. If you're interested in one of my other courses, you can check out my profile on this website, whether it's blueprints to create your own game without writing a single line of code. Or if you're focused on learning Unreal Engine five in general, you can find a course suited for you. But tell that I released on steam is an example of a game only using blueprints. This is especially useful for artists like me to program a game from start to finish, even though I do not have a programming background, go ahead and check out my profile to see what courses are released so far, my name is Mustafa, and I am the CEO, game director, and designer of Titan foraged entertainment. I've been working in Unreal Engine for the past six years and have recently released farm tail on steam, which is received very positively. I have also spent 1.5 years developing my personal project, bought Kraft, and currently I am directing, designing, and programming my company's new big title, which is an unannounced 3D platformer. This course contains everything you need to get started with Unreal Engine five, including my personal experience over the many years and projects that I've worked on. At the end of this course, you'll be able to confidently create your own optimized game environment from scratch and create cinematic presentations for your portfolio. This course is divided into sections and we'll cover and Unreal Engine 5, overview and navigation, quicksort mega scans and quick salt bridge textures and materials. Level design including asset import placement and adjustment, game optimization, lighting, music, and sound effects. And at the end presentation, I designed this course for anyone who's interested in creating games in Unreal Engine five, or struggles with creating a game that will live up to the current industry standards. I hope you'll enroll and join me in this course. And also remember that I am here all the way throughout the course to help you out. I hope to see you soon.
2. Downloading Unreal Engine 5: In this lesson, we are going to download Unreal Engine five. So to download our rental engine five, you have to download the Epic Games launcher. And to download the Epic Games luxury, you have to go to Epic Games.com. This is the epics websites. And inside of here you can click on this blue button called get Epic Games. And this will download the launcher for you. So if I click it, you can see down here, right now it's downloading, but I already have the launcher. So when you click on it and you get an installer, click on the installer and download the launcher. Now, I've already the launcher installed, so here it is. If I pull it from my other monitor, this is the epic Games launcher and this is what it will look like when you download it. And here you can see a tab called Unreal Engine. So you click on this tab called Unreal Engine. And in here you see something called E5, and this is Unreal Engine five. So clicking on that one. And here you can click on Download early access, and this will download Unreal Engine five. And you can see the button is separate from Unreal Engine four. This is four, and here is five. For clicking here, clicking on Download early access. And once you have downloaded Unreal Engine, it will appear here in your library. So here all of the versions you have downloaded for Unreal Engine, you can see I have 4.24, for example, that I've downloaded previously. So all the version engines that you have downloaded will appear here in the library.
3. Creating the Project: In this lesson, we are going to create the project. So here we are inside of the Epic Games launcher in the library. And I'm going to click on Launch on the Unreal Engine five. Now once the engine has launched, you can see you are going to see this Unreal Engine Project Browser before you enter the engine. And here you have a chance to select a recent project that you are working on. But if you haven't worked in Unreal Engine, this will be empty for you. Can see here these are all my previous projects. And here in games, we can select the template. And you can also see you can make other things than games inside of Unreal Engine, for example, you can make film, movies, you can make architecture and automotive. I'm guessing something with cars. Okay, So for this course we are going to work with games. So clicking on the games tap and sort of here, you can select what template you want to work with for your project. And for example, if you want to work on a first-person game, you can select a first-person template. So this will give you the starter things that you need for a first-person game, for example, it will give you that first-person view, the weapon and so on. For example, if you want to make a puzzle game, you can select the template. If you want to make a third-person game, for example, a survival RPG or whatever. You can select this third person template. So it gives you some sort of a starter of things that you can work with. The camera view, the character, and so on. But I like to start with a blank project when I make my courses because I think this is how you'll learn the best. And from a blank project, you can actually make all of these templates. So you don't have to select one of these templates. You can make any of these templates using the blank project once you know how you do these things. So I like starting with a blank project because we learned the most from doing everything ourself. And we don't really want to start with something that's already made. So I'm going to click on the blank project. And down here to the right, you can select if it should be a blueprint project or a C Plus Plus project. And this is the programming language, blueprint in Unreal Engine five, or just an unreal engine in general, is a visual scripting programming language. And this is very useful because you can actually program that game as an artist. It's not, it's not programming language like you write code. It's actually visual and I'll show you to it later either. At the end of this course, maybe I will make a bonus section, but definitely I'll make it in another course where I explain all of the blueprint. And this is especially useful for artists if you don't have a few don't come from a programming background. You can actually program the whole game yourself. You don't have to be a programmer. And this is actually what we also did with sale. We released on Steam right now we programmed it with blueprint and we didn't write any single code, so you can do it as an artist. Okay, So the target platform is desktop. You can select Mobile if you're making a mobile game. So selecting this top, the quality preset is maximum, and this one, the star consent is probably ticked for you. But I'm going to untick it because I want to start with a fully blank project. Ray tracing is off. And here you can name your project. And for this one, I'm just going to call it big Guinness course. And you'll notice that you can't make any spaces when you make the name and you can't make any special characters. So everything in one go and select where you want to save it. This is the default location and I'm going to click on Create. So this is what it looks like when you open the launcher for the first time. And before we do anything, let's actually click on update here. It's asks you if you want to update the, the project file and I'm going to click on update. And you saw up here that it asks for something. It was some plugins that you had to take a look on. And before I, before I do anything in my project, I like to go up here and edit and plug-ins. And inside of here, go to the bottom and click on Virtual Reality down here. So plugins are things that you can add, enable, and disable in Unreal Engine. And you can get some nice things. For example, the Oculus VR if you're making a virtual reality game. But I like to disable the Oculus VR in virtual reality and also the steam VR. The problem with these, I released my game on Steam, the fontanelle game, and I had Oculus VR and steam VR because I didn't know there were ticked in here. And when I released it on Steam, it kept opening in VR mode for people. Even though fontanelle is not a VR game. And this was very annoying. They kept spamming the forums that the game kept opening in VR mode. And it actually helped when I unchecked the Oculus VR and the steam VR. So I usually untick these if I'm that's making a VR game and then clicking on Restart. Now, now that the engine has restarted, we can go ahead and click on, close on this plugin window. And we're actually ready to go.
4. The Toolbar: In this lesson, we are going to take a look at the toolbar. So here we are inside of the engine and before we start doing the project, I want to explain to you the buttons that you can use. A basic overview of the engine. Very important. So you know what you'll press on what to do and bad practices and so on. And very important to know before I start explaining anything, you don't have to know every single button inside of the engine. It is not important as a beginner that you come in and understand every single thing. Try to understand the basics of the engine. And after that, you can expand on that knowledge with advanced courses. And I will try to explain to you the most important things that you have to know inside of the engine. So let's start at. The toolbar is up here. And here in the toolbar, just like every single software, you have the standard buttons. So clicking on File here you can make a new level. So this is a level we are on currently. You can save the level. You can make open a new project or open a current project, or make a new project and so on. And inside of edit, the most important thing inside of here is the editor preferences. So clicking on that, it will take you to some editor preferences and I believe it at son, my second minor. Here, though in the editor preferences, you can change settings for the editor, so another project itself, but for the editor. For example, you can see if I minimize this, if I click on something inside of here, you can see I have a yellow selection line. And this selection line, I can actually change the color of your viewports selection color can actually change this color to something else. But I don't want to do that. I'm going to click Cancel. And you can see you can change a lot of different settings within the engine. So how you want it to look like. And admittedly, I've never been inside of here. I I likely engine as it is. So I've I haven't had the need to change anything and maybe you don't have either. So I'm going to close the editor preferences again. Instead of edit, there is something called Project Settings, and this is settings for the current project you are working on. For example, inside of here, you can change what it looks like in the thumbnail. And you can also write a description for the project. You can write a company name, you can even write an email. So for example, if you're released the game, people can contact you if they find bugs or anything like that. And you can change the movie. So over here in movies, you can change how the game starts up. So it shows a movie when every time you open a game or open the game. And we have maps and modes, and you can change what, what is the default level that the player should start on. You can do something with inputs, rendering, physics, network if you are playing with multiplier and so on. We are going to work inside of this project settings and do some stuff. So don't worry about it for now. Let's close it down. And the last thing inside of edit is the plugins. I know we already, we've already been inside of here. And here you can enable and disable plugins and you don't really need to use this as a beginner, honestly. And a very cool thing to know is later on, when you want to make a multiplayer game, a steam multiplayer game. It is actually a plug-in that you can download and you can enable inside of here. But Steve multiplayer is not out yet. The time I'm recording this video for Unreal Engine five, it's only available for Unreal Engine 4 right now. So I'm going to close this and the next one is the window. And inside of window you can actually open multiple windows. So this is very useful. For example, you can see this is the viewport. I can see my level. And inside of window if I click here and I go to viewports and Viewport 2. So if I click on this one, it will open a second window of my viewport. And this is very useful for if you have multiple monitors, for example, I can throw this out to my second minor, and on my second monitor I can take a full-screen look of the game. And here I can work inside of the game, change some details. And on my other monitor I can actually see the game in full screen instead of only viewing it inside of here. So this is very useful for when you have multiple monitors and you can open multiple windows of the same thing. For example also you can see here this is the Details panel and clicking on Windows details. And I can open a second Details panel if I click here on details too. And these are the same thing you can see, it shows this same thing and when I click somewhere, it displays the same thing. So you can open multiple window. And maybe even if you don't have multiple monitors, maybe it's, you find it useful somehow. So all of these are the windows that you can open and don't worry about the things down here for now. Inside of tools, we're not going to take a look at anything and sort of build. We are going to work with it later. It's actually building the lighting. So this is what it's called when you when you put lighting inside of your scene, you have to build the lighting so it shows the correct shadows. It has to bake the shadows and show them correctly in your level. So this is what baking is. So we'll skip it for now and come back to it later when we make the lighting. And inside of the help you can see documentation of Unreal Engine. You can also see tutorials that Epic Games has made for this engine. Next in the toolbar down here we have this save button so you can save the current level that you are working on. We have a Create button and this is very important here you can create different elements inside of the engine. So, for example, you can create different, different lights. You can create shapes, you can create cameras for cinematics. You can create visual effects and so on. So there are a lot of things that you can create. During this course, we are going to create multiple things. In the content. You can actually open multiple content browsers. So if I go here and deactivate my camera because I want to see down here, you have a question draw here and don't worry about it for now. I'm going to explain it in the next lessons. So you can see here, if I click on content and content browser one, I'm going to open another one so you can see these are actually the same, just like in window and we opened multiple, multiple windows of the same thing. This is the same thing here and the content, you can open a concert browser down here. And I'll explain to it later what this actually is. And in Blueprints, this is the programming language inside of Unreal Engine. Don't worry about it for now. And cinematics, you can actually create a cinematic. Next we have these very important buttons. We have the editing mode. So right now we are inside of the editing mode. And you can click around in your viewport and you can edit things. Next we have the landscape editing tool. So clicking on this one, you can actually create landscapes and we will do that later as well. So creating a landscape, you can choose the settings for it and then you can create it afterwards. Then we have the foliage tool. And the foliage, foliage is simply just the vegetation, grass, trees, rocks, and so on. And you can actually, when we import grass from mega scans, you can actually drop this grass inside of this tool and you can paint to the grass on top of your landscape. So this is very useful so you don't have to go and put every single grass inside of your inside of your landscape that will take too much time. You can actually use this tool to pain to their grasp on top of the landscape. And it doesn't have to be grass only you can do it with trees, with twigs, with drugs, with stone and so on. Next we have the mesh painting tool, and we are going to use this as well later on. And this is simply if you have ground textures, multiple ground textures, you can actually paint on the ground. So you can paint what it looks like. And you can do it for all the meshes that you have. It doesn't have to be the ground. So it's simply just called mesh painting tool. So every mesh you can actually actually pinned on. So every single 3D model that your model or gives you, or if you model them yourself, you can actually paint on these models. Next we have the fracture tool. Let's skip it for now, but simply it's just for fractures, like if you want to make destruction. And the next and last one is the brush editing tool, which we will skip for now as well. Then we have the play button, and this is useful for when you want to play your game and test it out. And here besides the Play button, we have three dots and clicking on here, you can actually play the game not inside of your viewport, what you can select as a standalone game. If you wanted to open in a, in a game by itself. So it's not attached to the engine. Down here. You can choose how many players you want to play as if you're making a multiplayer game so you can test your game with multiplayer. In here, the button beside it, the platforms. In here you can select what platform you want to cook your project. So for example, when you're finished with your project and you want to send it to your friends and family. You can select what kind of device you want to put out your game for, for example, Windows or for Linux, iOS and so on. The last thing here, the important thing inside of the toolbar is the settings. And here you can actually see you can open the project settings just like we did up in the editor. The same thing and the plug-ins as well. This is the same thing. And the last thing I would say that's important is if you want to hide these buttons in the viewport, you can actually click on Hide viewport UI and you can see these disappear. And if you want to make them appear again, you can click on Hide it viewport UI. So I'm going back to the editing mode inside of this toolbar, and that was it for the toolbar.
5. The Details Panel: In this lesson, we are going to take a look at the details panel. So inside of the project we have something called a details panel. And what the Details panel is, it shows you the details about the items you have inside of your level. So for example, inside of the engine here, if you click on multiple things. So for example, if you click on the mesh, you can see here to the right we have the Details panel. And the Details panel will show you a details about this mesh that you have inside of your level. So you can see what components is consist of. You can also see the name of it. You can even double-click here and you can change the name of it. You can see the location of this floor that we have. You can see the rotation and the scale. And very important to know that you have the x, y, and z-axis here. So if you click on one of them or just slide, so clicking and holding and sliding your mouse, you can see that it's actually changing the location. And you can also write numbers inside of here. So for example, you can write one hundred, one hundred. And maybe I wanted it to be specific, let 50. So just like this and you can edit these things inside of the Details panel. I'm going to click on or just write 000 20, just like the default. And you can actually change the rotation as well. So you can see I can rotate this ground 360 degrees and I'm going to write 0 again. And you can change the scale of it and scale it in different directions. So you can see different details inside of the Details panel of your mesh you can see are off your item and the item you select inside of your level. So any item that is inside of this level here, you can actually view the details of and for example, this, this floor ground here, you can see what the Static Mesh is. So the static mesh is simply just the model the 3D modeler has modeled for you. Or if you have model that yourself, you can see the material, you can see information about the physics. You can, for example here, enable gravity. I could have disabled gravity and if I click play the, the, the ground would fall. And you can see information about the collision as well and so on. So a lot of information that you can edit inside of the Details panel and you can see why this is actually like why this is, this panel is important for us because it contains all the information that we need to edit about the things that we have inside of our level. So for example, if I click on this one, this is called the skylights. Skylights, I have different settings so I can change the intensity of the skylight. I can choose as if it should affect the world or not, or if it should cast shadows or not. And for example, if I click on another thing, and this is the sunlight, also called the directional light. You can see I can again change the intensity of it. I can also change the source angle. I can change the temperature so I can make it look colder or warmer. So I have different settings for each of the thing I click on here and the level that I have. So this is very important. This is the Details panel. And you can actually edit details about the things you have inside of your level. And before we end this lesson, just small tips that I want to have you knowing that exists. You can actually click on anything in here. And if you change a value, so for example, if you change the location to something, so something like this, you can actually look, click on this arrow here. This arrow just resets the def, reset the settings to the default value. So if I click on this arrow, it will come back to the middle. And this is very handy. So for example, if I take this skylight and I increase the intensity and it looks all weird. Maybe you don't remember what the default value was. Maybe you think it was 100, but notes, it's not correct. You can actually click on this arrow and it will get back to the default value. So very important to know that it's there. Secondly, this lock icon. If you click on it, you can see here first before I click on it, right now it's, the lock is open and I can freely change the size of the model in any direction I want. So here for example, the x-axis, I wanted to be the size of 5. The 3 and the DZ axis is too maybe. So if I reset them back to one, so if I click on this arrow here, and I click on the lock, and if I write five here, you can see they all changed to five. So this is scaling uniformly. So this lock means instead of you having to go inside of here and clicking 55, Five, you can actually just click on the lock and just write five-year just quicker. And it will change everything to five.
6. The World Outliner: In this lesson, we're going to talk about the World Outliner. So here we are back inside of our level and inside of here to the right you can see something called a World Outliner. And what the World Outliner is, it's simply showing you what you have inside of your level currently. So you can see here this is the level that we have opened right now. And instead of this level, you can see all of these items are actually inside of our level. So if you click on something here, you can see that it's actually selecting it here as well. So instead of selecting things inside of your level like this, you can open the World Outliner and you can also select them by clicking on them. And you can even click on this one, for example, and hold the Shift button on your keyboard and then clicking on the first one, you can actually select all of them just like that. So this is the World Outliner and you can see what you have inside of your level. You can click on something, you can edit the names of them. You can click on Delete to delete something. And now, right now it's asking you a few actually want to delete this, I'm going to click No. And you can create folders as well. So for example, if you click up here and click on the new folder, or if you click on something and click on new folder, it will actually put that thing I have selected inside of this folder automatically. And I'm going to click Control Z. And this folder, we can actually change the name arm. So for example, I can call this assets and I can put all of my 3D assets inside of here. So right now I only have this floor mesh. So I'm going to click and drag and put it inside of the assets folder. Maybe I want to click here, for example, a skylight and hold control. And I can select the light source as well. And maybe I want to select the fog and the skies fear and less solute their reflections fear as well. And I can just click on this folder. And it will put all of these solutions is out of this folder and I can just call it lighting. So this could be my lighting folder and every lighting that I had inside of my level, I can put inside of this folder. And now you can see it's a lot cleaner. Imagine if you have a huge level, this will be very, very hard to look at. If you have all of the items not sorted or anything, it's very good practice to create folders and put these into inside of folders so you can quickly find them again. And maybe you want to turn off all the lightings. You can just click on this. I can see everything disappeared. And if I click again, everything appears as well. For example, if you want to hide all the assets, you can click on this and you can hide them, and you can click on the eye again to make them appear. So this is a very cool thing. You can try to sort everything you have inside of folders and also giving the names. You can also also create subfolders if you right-click on a folder, and this is simply it for the world outline.
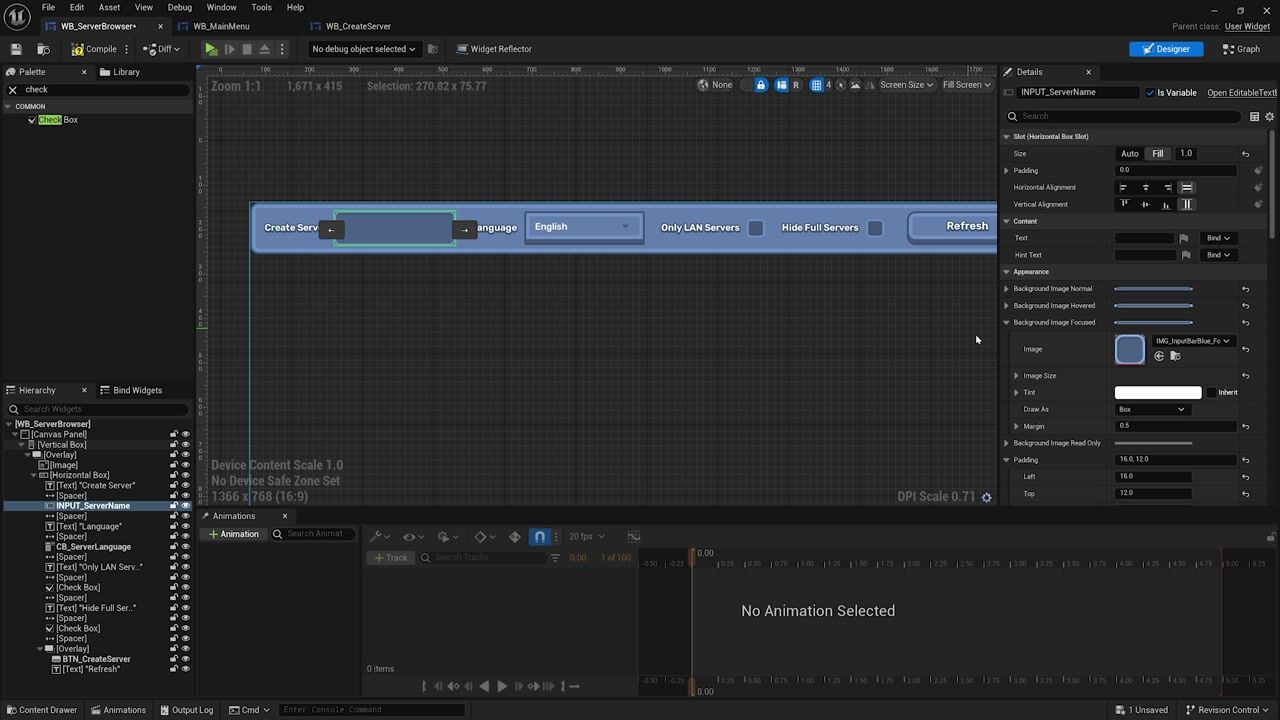
7. The Content Browser: In this lesson, we are going to talk about the content browser. The browser is simply u, where you have your files stored. So for example, if you have characters, if you have music, if you have sound effects and so on, all these files will be inside on the content browser. So if you take a look down here, you can see something called a content drawer. So if you click on it, you can see that you can see some files here and you have some content here. And right now we don't have any files or any content because we haven't imported anything to the project and it's empty. But you can simply see all of your folders here. And when you have music, when you have sound effects, when you have your characters, your weapons, and whatever files you have. All of these files will be down here. And you can actually drag these items, for example, the character. You can drag the character inside of the level here and it will be placed. So this one is called the consent draw. And what the content draw is, it's a temporary content browser. And what that means is, you can see here if you click on the Content drawer and you click on something inside of the viewport, the constant draw will disappear. So I have to click on it again to view things and n phi clicks on something else inside of my level, it disappears again. And this can be very annoying for you, especially also if you follow my course that it will disappear like this all the time. And this is just a temporary content browser, so it will appear all the time. Every time you click on something, it will disappear. To open the content browser, like permanently, you can click on this one called duck in layout. And this will make it so this content browser is actually duct inside of the layout and it will not disappear it anymore. And you can see here, this is now called the Content Browser. And this one is called the constant draw. So this one is, this was the temporary one. And you can click on it again to open it if you want. It's still there. But now you have a content browser. And you can actually move with these panels all around. You can see we can move with them and you can choose where to place them. You can also change the size of them if you want. And if you want, if you decide that you don't want this content browser to appear, maybe you're working on something and you want to see everything. You can actually click on the here, right-click and click on Close. That will close the content browser. And now we are where we began. So you can actually open this content row by clicking on control and space also. So clicking Control Space, you can open the content drawer. And so I want to duck this content browser and my layouts, I'm going to click on duck in layout, I think it will be a lot better to follow the course like this. And inside of this content browser, you can add things by clicking on the Add button over here. And you can see you have a lot of things that you can add and it looks confusing and overwhelming if you're not used to it. And you can also right-click here, over here in this empty field. And this, this makes it the same window appear. So this over here and this over here is the same thing. And I usually just right-click over here. I never use this button. I usually right-click over here. And here you can see you can add different things. For example, if you're working with animations, you can add a lot of different things with animations and you can think of these items as things that controls your level. So for example, animations, you can make aim of sets. So if you're working with a first-person shooter game, you are going to use this. You can make animations for your character. You can. Blueprints is the programming language instead of Unreal Engine. If you are working with physics, there are a lot of things. If you are working with sound effects or music, you have some things you can add. And if you're making a pixel art game, you can some spreading and Talmadge and tile sets and so on. So for now, don't worry about all of these. You're not really going to use them right now. And we're only going to cover a few things that we actually need. And so this is what you can do inside of here. So you can add a lot of things. We can also add new folders. So if you right-click and click on New Folder, you can actually make a new folder and you can, for example, call it music. And here you can put all of your music files. So you can be structured like this. You can make new folders. And I can call this the effects for visual, visual effects. And I can put all of my visual effects inside of here. Another cool thing too, if you'd like to be structured and have a clean project, you can right-click on the folder and set a color. So you can actually give the folder a color. And maybe I want the music want to be green. And I can right-click on my via effects. I can either set it to the same colors that I just chose, r, I can make a new color and maybe make it red instead. So now you can see these two different folders have different colors. Another cool thing inside of the content browser is you can search for things. So you can search for any of the files that you have inside of your game here. So for example, let's say you're making fortnight and you have 100 characters inside of here, imported in the engine. And you want to find a specific character. You can of course, go inside of the characters folder that you made and find the character. But if you want to find it quickly, you can actually just write the name of the character inside of this search content. And you can find that this character. So you can do it with everything. So if you want to find specific music or a specific sound, sound effects or visual effects and so on. So before we end this lesson, let me click on those two files. I click on Delete on my keyboard, and click on Delete because we don't need them for now.
8. Viewport & Navigation: In this lesson, we are going to take a look at the viewport and navigation. So the last thing I want to show you is that the viewport, and I would say this is the most important thing inside of the engine. The viewport is where you can visualize your level so you can see your level inside of this viewport. So right now we have this round, we have a player starts and this, don't, don't worry about it this far. Now, we have some lighting and we have some fog. So very simple things in sort of a level and we can see what our level looks like right now it's almost empty. We have some, some clouds up here and we haves a random ground down here. And before we do anything, I actually want to teach you how to move inside of this, this viewport. So if you hold, right-click on your mouse and you click on W on your keyboard, you can move forward. Clicking on D are moving to the right, clicking on as we will move backwards and clicking on a, you will move to the left. So this is what I use all the time. I usually just hold, right-click on my mouse and click on WD, S, and a. And you can see you can move around objects and you can view anything you want inside of here. And if you're used to playing first-person shooters, this will be very natural for you. And if you haven't played games like that, it will feel maybe a bit awkward to begin with, but don't worry about it, just try to move around and it will feel natural at some point. So this is how I mainly move inside of the viewports. What you can do also, if you hold the right mouse button, you can click on cue to move down. Thank you. You can click on e to move up. So Q, move down, e, move up. And remember to hold the right mouse button. You can also do this by holding the right mouse button and the left mouse button. So holding both buttons and you can move the mouse down and move the mouse up. So this is the same thing. Next, you can zoom in. You can zoom in on specific objects by using the scroll button. So if you have a scroll button on your mouse, you can scroll forward or we can scroll backwards. This zooms in and out. What you usually just can do also is just hold the right mouse button and just move forward and backwards with the W and S. Next we have, if you hold the left mouse button and move your mouse, you can move like this. And I have never used this. I don't know when you will use this, but think I actually used it once on my laptop because I didn't have a mouse when I was in the train. And you can actually, although left mouse button. And actually it's pretty cool to move around like this. But un-PC, I never use it actually. And this is basically it for the movements are very basic stuff. And again, I usually just hold the right mouse button and move with WDS and a and move around like this. Okay, so enough about the movement and this was all that you had to know. And inside of the viewports, you have different buttons. So up here you have this button. If you click on it, you can show the FPS and the FBS is frames per second. So you can see how fast your game is running. And this is pretty cool to look at. And I, I would say that you have to look at it from the beginning of developmental, the end, because it's very dangerous to open this, let's say three months after you develop your game. And you find out that your frames per seconds is actually 50 or 60. And you're in, your game is not running as fast as it should be. So it's a good thing to, this shouldn't be the only indicator to know that your game is slow, but definitely has this open and see how fast your game is running just to see if it's lagging or not. So I'm going to disable the FPS. And inside of area can also change the field of view. So I can see you can decrease it and increase the field of view. Maybe you have a specific game that requires another field of views. And sometimes the doom games or some other games, shooter games, they have some sort of a weird field of view like this. And the default field of view is 90. And another important thing inside of this button is the game view. So here you can actually hide the icons. So clicking on the game view, you can see all of these icons have been hidden. And now you can actually see the game without all of these icons. Sometimes it can be annoying to have all of these icons appear. And you want to view your game without all of these icons. So you can click on this game view to do this. This also has a shortcut, and if you click on G, they will appear again. If you click on G again, they will disappear. So just like this, blinking on G again and again, you can see, you can hide and show them. And I use this a lot to view my game without any icons just to see what it looks like. Next you have the immersive mode. So clicking on the immersive mode will make the viewport in fullscreen. And this had also has a shortcut and it's 11. So clicking on FL1, you can minimize the viewport. Clicking on FL1 again, it can maximize the viewport. And here you can also click on G. So now you can see, you can see your game in a full screen without any icons. So I use this all the time to see my, my level just to see what it looks like without any icons and in full screen. So if I click on F11 again and I click on G to make everything appear as it was before. And the last thing inside of this button is hi. Create high resolution screenshots. And if I click on this, you can actually take a screenshot. If I make this larger, you can make, take a screenshot of what you are looking at currently inside of the viewport. So maybe I want to click on if 11 to make it full screen, click on G. And I want to place my camera somewhere like this. And I can take a screenshot. And this is very well. Use it sometimes for when I need to take very quick screenshots to send to anyone in the Discord, maybe the development team, just to show them something or ask them about something. I can just take a quick screenshot and send it on Discord. Okay, clicking on it for 11 to make it. And that full screen and clicking on GIA to make the icons appear. We have different modes here. So right now we are inside of the perspective mode. We can also change it to something called orthographic views. And the orthographic views is you can view the game from different directions. So here I can view it from the top view so I can see what my game looks like from the top view. And I can view it from the bottom. From the left. You can see now I'm the owner again from the left. And what I usually use this for is, if I go back to my perspective mode, is for example, I want to place this icon directly in the middle of this level. Of course, I can just go in here and write 0, 0, 0 inside of the location. And now it's, it's here in the middle of the level. But maybe I want to place it specifically over here to the right. And it's very hard to use the perspective mode for this because you don't really know specific. Like if you wanted a perfect sensor on this, this one here, for example, it's a lot easier to go into perspective and the orthographic view and looking on the top view. And you can see you can actually put it inside of here, for example, under this fog if you want it to be there. And it can also look at it from the left view. So now you can also place it here. So now it's perfectly here in the middle of this bowl. And if I go back to perspective mode is over here. So this is a lot, a lot better to do when you want to place things like in specific, specific area, then it's good to use the orthographic views. So I'm going back to my perspective mode and decided you have the lit or you have the view modes. Right now we are inside of LET. And this just means we are viewing the level would the lighting that we have. If I click on here and click on unlit, we are now viewing the game without any lighting. So this is what the game looks like right now without any lighting. And you have different views. You have the wireframe, the detail, lighting and so on. So don't worry about it. All of this for now. We also have some optimization that we can do and we will also do this later in the course. So let's skip this for now. I'm going to go back inside of the lead view mode. And here in Show, you can show and hide different things. So for example, this grid that you can see here, I can actually hide this grid if I want to. So click on Show. Working on this grid here. We can now see it's actually hidden the grid. And I can click on Show and click on it again to show it again. Now very important buttons in the viewport, you have the Select button. So this is the select tool. Right now you can select things inside of the view God. Next you have the Move Tool. So clicking on different things, you can actually move them. So if I click on this ground, you can see these pivot points appear. If I click on this green one, you can move in this direction. If I click on the red, you can move in this direction. And if I click on the blue and you can move in this direction. You can also move it in multiple directions if you hold it on the square over here. So I can move it in these two directions on the ground. And the same you can do up here. Okay, Next, you can click on this white, white ball inside of here in the middle. And it can actually move it in all directions. And again, if you wanted to move it in one specific direction, you can click on this pivot point and move it like this. And very important to know, the red pivot point is the x-axis. So you can see this is colored red as well over here. The green one is the y-axis, and the blue one is the z-axis. So x, y, and z. Next we have the rotation tool and clicking on this one, you can rotate items. So here, for example, I can rotate it along the x-axis, along the z-axis and along the y-axis. And if you want to reset it back to normal, again, you can click on these arrows and then it will reset the rotation and location to normal. Next I can click on the scale tool. So this is the scaling tool. And here you can scale it in different directions. And you can also scale it in two directions by holding here in the middle and scaling or this way. And you can scale it uniformly if you click on this, this white square in the middle, and it can skeleton uniformly in all directions. I can again click on this arrow to make a default again. Next we have these snapping tools, and the snapping tools will make your, your item inside of your level snap. So for example, if I click on this ground mesh and right now when I move it to the side, you can see it's kind of lagging or a sexually snapping. And this is very useful for when you want to place things beside each other specifically. So for example, if I have books on a shelf, I want to place the books specifically beside each other. And it's pretty cool to have this snapping feature. But if I want to move my, my ground smoothly, I can actually click on this icon here. So this is the moving snapping. And you can see now I'm actually moving my ground smoothly. If I want to increase the snapping, click on this again to enable it so it's blue. And clicking on this number, you can actually increase the snapping. And now when I move it, you can see it's snapping a lot more than before. Next we have the snapping for the rotation. So same principle. You can click on this rotation tool. And actually I forgot to say it. Select these tools. Instead of going up here and clicking on them, you can actually click on the shortcuts. So clicking on cue to select the select tool, and clicking on w to select the Move Tool, clicking on e to select the rotation tool, and clicking on R on the keyboard to select the scale tool. And this is a lot handy to know because it takes a long time to click on up here to move the item. And then you click up here to rotate it. And then you click up here to move it again and so on. Then it's a lot easier to just click on W to move it, click on E to rotate it, and click on R to scale it. Click on W to move it again and so on. So very good to know these shortcuts and you can also see them if you hold your mouse over them, you can see the shortcuts. Okay, so the rotation snapping over here, if you click on e to enter the rotation tool, you can see if you rotate, it's snapping currently every 10 degrees and this is what it's set to. You can increase the snapping 230 degrees and every time you rotate now is 30 degrees. And if you want to scale it smoothly, you can click on the icon. So it's not blue anymore, and it can rotate smoothly. The last thing, the same principle. If you click R for the scale tool, you can scale it right now it's snapping. And if you click on here, it's not snapping anymore. And it can actually scale it smoothly. And the last thing here is the camera speed. So you can see here when you move around in side of the world, right now this is the current camera speed. And if you click on the camera and increase the speed, may be, let's say you have a huge world and it's an open world, open RPG game. And to move quickly around your world, you want a faster cameras feed, so it doesn't take forever to get to the other side. And if you are working with something very small and you want to look at some details, you can click on this year, decrease the camera speed. And you can see now I'm moving very slowly and I can actually focus on smaller items. So this is very cool to know about the camera speed. And this was all inside of the viewport. And very important, just tried to practice how you move around inside of the viewport. Try to remember the shortcuts for these tools to play around with the snapping. And that was it for the viewport.
9. Creating a New Level: In this lesson, we are going to create a new level. Their will to create a new level. You can do it in two different ways. You can either go up here in file and then press on new level. And then you can select the thing you want to create. So you can choose to create a default level. You can choose to create a level with the time and day. So you start with like some sort of a small templates. You can create all of those from scratch from an empty level. And you have something called VR basics, which is virtual reality basics. Or we can choose to start from an empty level two, don't have any lighting or anything and you have to create everything yourself. Okay, So this is the first way I'm going to press Cancel and show you the other way. The other way is just right-clicking down here inside of the content browser, right-clicking. And then you can click on level. And if you do that, it creates a new level. So what is the difference between these two methods? So by right-clicking just like this and creating a new level, it will create a level and empty level automatically so you don't have, you don't have the option when you click on the new level, you don't have this option of selecting a default level if you wanted to. So this is the difference between these two else. It's all the same. So let's go ahead. And actually it, Let's create everything from scratch so we don't cheat. I think as a beginner, it's better to start from scratch and do everything yourself. So let's right-click here, and let's create a new level. Let's call this level map. I usually call it map. You can, you can call it level and create a name for it. And it's very important to write a prefix for your items that you create, because later on it's very easy to search for these items here in the search content. And also when you're programming your programmer or yourself can find these items are lot quicker if all of your maps have level before the name comes. So this one, I'm going to call Map main because my main MAP. So MAP main. And I'm going to double-click it. And now it's going to say, do you want to save this? I'm going to click Don't Save because right now I haven't closed the project yet since I started this course. So it's going to ask me, do you want to save this level you have been working on? And this was just a random level we were practicing in. So I'm going to click, Don't Save. And here I am inside of my level. So remember to double-click the level before you can enter this level. And inside of this level, Let's actually actually create something because you can see this is an empty level. You don't have anything. And remember, you can go inside of the World Outliner. And inside of here we can see what's inside of your level. And right now we don't have anything. So you can see here, we have a star on this level right Now down here. And this star just means that this is not saved yet and you, you need to save it. So collecting on file, I can click on this Save current level. Or I usually just click on File and Save all just to be sure, or we can click on Control Shift and S. So I'm going to save all and everything saved. And this is not a lighting lesson, the lighting will come later on. So right now let's just create some basic lighting so we can actually see something inside of this level. So I'm going to create lights and directional lights. So this is the sunlight and create lights and skylights. Okay, so we have these two and we can actually go ahead and do Create shapes. Let's create a cube to see that something is actually inside of the level. So this is the cube and you can click on the sunlight. So this is, this is the skylight. I'm going to move it a bit up here. So I can click on my sunlight here, that directional light. And you can click on e to choose the rotation tool. And you can actually rotate the sun and you can see when you rotate it, the sun becomes 0, that it's sliding the top of this cube. And I can take the scale tool. I can scale my cube up here so I can actually see it. And now I'm going to add a sky because you can see everything is black all around. And try to sky. You have to go down here in the Content Browser, in the settings, and you have to show the engine content. So clicking on this, you can go and click on engine content folder here. You can see this, these two folders appear when you show the engine content. And inside of here I am going to write sky. And here in sky, you can just drag and drop this BP sky sphere can actually drag and drop it out here inside of the level. And here you can see we now have a sky and it can actually be the sun. And we see the son height. You can change and put to one so it becomes like a default date. So this is just like creating file new level and creating the default level. This is how you actually create everything and this is basically what you get in the default level. You don't get much more than this. So I think this white color and the bugs is a bit annoying and too bright. So I'm going to actually click on this arrow here, on this material, the white material. We can on this just to see this basic default one, I think it's ever been better. And if I want to center this floor to my level, I can go here, click on the level, go to the Details panel. And in the location going to write zeros 0000. Then I'll show you this. This level is in the center.
10. Post Process Volume: In this lesson, we are going to create a post-process volume. So before we do anything, let me actually go ahead in the settings over here and click on Show engine content. And this will remove the folder series so far removed my camera you can see the show engine content will make these folders appear and disappear. And I'm also going to click on this X to remove the search word. And this way I can see this map again, I'm going to click on File and Save All. Okay, so now to create a post-process volume, we can go ahead and create what, what is a post-process volume? And the post-process volume is simply a volume that you can create to edit the look of the game. So for example, you can imagine it just like in Photoshop. When you take a picture in real life and you put it inside of Photoshop, you can edit the colors of this image. For example, if it's too red, you can make it a bit more blue or cold. And you can add filters just, just like in Snapchat. So you change the color of the picture. And this is the same thing for Unreal Engine and the games in general. You create a post-process volume to change the colors of the game. So maybe you want to make it a bit darker, just like in Dark Souls, For example, you can make it sharp. You can make them more blur, motion blur, for example. You can make it cold and so on. So this is what it post-process volume. So you can change the look of the game when you have lighted the scene and so on. So let's go ahead and create, and you can create the post-process volume either in volumes and you can see here, go down. You can see the one called post-process volume here. And you can also create it. I don't know why it's in two places, but it's also in visual effect. It makes sense because it's visual effect to change the look of the game. And here in the post-process volume. So I'm going to click on it. And here I created my post-process volume. So this post-process volume, you can see in the Details panel you have a lot of things you can edit. You have bloom, for example, exposure. You have something with the camera, the aperture, shutter speed and so on. You have some lens flares, you can do, you have a vignette? So we can see if I take this vignettes and I increase it, and nothing happens right now, and I'll tell you why nothing happens. So this post-process volume right now, you can see it's a box and write notes only working if you are inside of this box. So if I move my camera inside of this box, you can see this applies the vignette. If I move out, it becomes, it becomes slide again. And if you don't know what a vignette is, it's simply this dark, this dark border around, around the edges just to make pictures look more cinematic. Just like that. This is a vineyard. So if I go out of this box, it doesn't work anymore. If I go inside of this box, it works. So this is how we post-process volume works and I'll show you how you can actually affect the whole world instead of only inside of the sparks. Okay, so let me actually click on this arrow to make a default again and unsecured. So this is what a post-process volume is. You can change the, if I go inside of the bugs here and I click on Tempier, you can change the temperature so it can make it look colder. Maybe it's a snowy area, or we can make it warmer. Maybe it's a sunny area, only wanted like that. So I'm going to click on the arrow to go back to default on circuit. And you can play, you can see it was shadows, midtones, highlights. You can do something with film. And we have some global illumination, we have some motion blur. And a lot of things that you can do with this post-process volume that change the look of your game. Okay, So for example, I want to, I want to make my game colder. So if I go here in the white balance and I put the temperature down so it looks more cold. So right now it only works if I go inside of here, you can see it becomes colder. If I go out of it, it becomes normal, like nothing happens. And what is the use of this? For example, if you have a cave, let me take this post-process volume down and you can click on the R to scale it. So using the scale tool, moving it here. And let's say, Let's say this is my map and I'm walking around and inside of here is my dungeon. And once I enter my dungeon it becomes cold. So this is how you can use a post-process volume. And what if you want to use it and the whole game? What if you want to give the game and general look? The way you can do this is actually going down here in the Details panel of the post-process volume. And you can click on infinite extent. And this will make it work on the whole level. It doesn't matter how large this fox is, even if it's the tiniest box ever, it doesn't, it doesn't really matter. And fed to extend makes the post-process volume work on the whole level. And so this is, this is the use of it. If you don't want to, if you don't want to use it and the whole level, this is the use of it. For example, if you have, if you're a specific area with specific lighting, you can create this post-process volume and you can cover this specific area with this volume. And then you can go inside of this specific area and the color of the game changes or the look of the game changes. Okay, so these are two ways that you can use post-process volumes, either locally or globally on the whole level.
11. Camera Exposure: In this lesson, we are going to take a look at the camera exposure. So right now, if you inside of the engine here in our level, the map mean that we have, if you go inside here and you can see if you go close to something, the light becomes very bright. If you go away, you can see the whole thing gets darker. And this is not supposed to happen when you create a game because this will be very annoying and that Blair comes close to something. The thing will become very bright of the blood goes away from it, it will become dark. And this is, this is a good way if you are making movies and cinematics because this is a realistic reaction for the light and the ice, how they adapt to light. But this is not a good way if you're making game. Because imagine if you're walking around, you're looking at the ground. Like everything will become very bright. If you'll look away from the ground, everything will become normal again. And we don't want this effect to happen, and this has something to do with the camera exposure. So to turn this off, this is very simple. You can click on the post-process volume. You can either select here or you can click on the World Outliner and select the post-process volume. And inside the post-process volume we have something called exposure. And clicking on this exposure, here you can see something called minimum brightness and maximum brightness. So clicking, ticking these, both of these and setting those to one. So I'm setting them both to one. And remember that down here, you have to click on infinite extent to make the whole post-process volume work on the whole level. And when I do this, you can see everything becomes a bright. And this has become, because our sun is actually very bright right now. But now it doesn't matter if I go close or away from the item. It's the same light. So it's the same brightness. So if I click on this sunlight before we end this lesson, this was a very short one. I can actually decrease the slide here. And let's decrease it to something like three. You can see now it's, now when we get close to something, get away. The sun is actually or the lighting is not changing and it stays the same. And this is actually what we want.
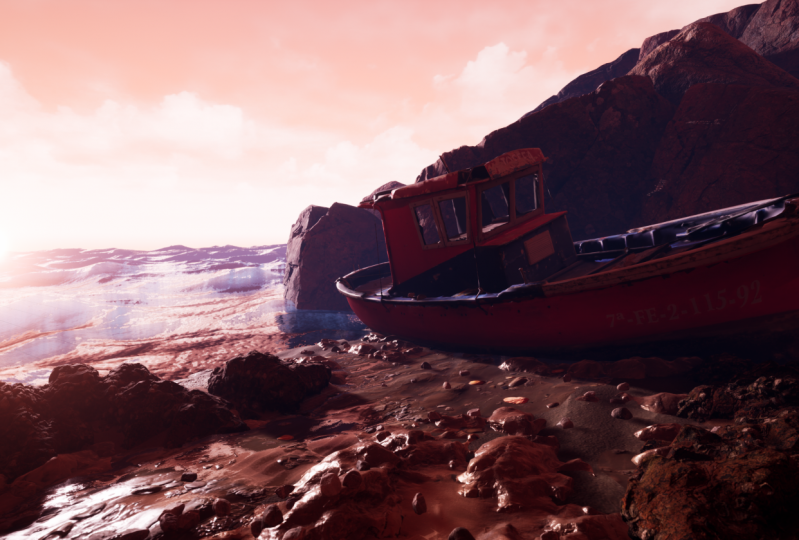
12. Introduction to Quixel Megascans: In this lesson, we are going to talk about Quicksilver mega scans. Now this is very exciting stuff. Quicksilver mega scans as a library that you can use to create hyper-realistic environments. So you can think of the most realistic environments inside of any game that is released right now. I can't really think of anything of my head, but here you can see inside of the pixel.com. Quick, quick. So omega is Kansas made by quicksort and they have partnered up with, with Unreal Engine. So actually all of their library is for free. So this is very, very exciting. The first time I used it, many years ago, it was actually not for free and I had to pay for every asset I had to download. And this was very expensive, though. I didn't make too much of it. I didn't have that much money at the time. So I didn't really utilize it that much. But they partnered up with Unreal Engine, I think two to three years ago. I'm not really sure. And now all of their library is for free if you are using Unreal Engine. So if you are using Unity, you obviously have to pay for it to get their assets. But if we are using Unreal Engine, we can actually use their library for free. So here you can see this is mega scans and they have basically hyper-realistic assets that you can use. And this is both a 3D assets as well as textures, so it doesn't have to be 3D assets. So you can create your own assets. And this is what we also have for the project. You can create your own ground, for example. And you can apply realistic textures that are taken from the real-world. And we can place them inside of games. And this is why they look so realistic. It's because people go out there, the US, there are four key HD camera and they take pictures of mountains, for example, the ground of it. And they, they make it like they work in the computers and they make it into a texture that you can use. Inside of games. For example, you can see this, all of these environments and they are showing you which games or which movies have actually used it. For example, battlefield five have used it, Call of Duty have used it. And American Gods, I believe it's an Amazon series. And you can see a lot of, a lot of films and movies and games have used Mega scans. And this is because it's actually very, very insane that this is out actually. And it's not because I'm paid by them. I wish I were, I would be rich by now. But I think it's very exciting and this is probably the future of gaming. And with Mega scans, the new trailer that is made. You can, I don't know if you have seen this one, the Unreal Engine five feature trailer when it came out. It's actually also made with Mega scans. So this is a good partnership. Ls actually click on these products and browse mega scans so I can actually show you some of the products are some of the scans they have made. And inside of here you can see we have surfaces. So all of these are textures that you can use inside of your level. So for example, if you want some asphalt to your level, you can do this. Or if you want marble or some rocky ground, you can use this as texture for, let's say a wall for example. Whatever you making, you can also get 3D assets. And this is, this is such a lice lifesaver. You can actually use foliage in here as well, for example, grass and flowers and wherever. So this is a pain to make if you're a texture artist, you would know. So this is very, very helpful. And inside of this library there is right now 15500 scans. And this is a very huge library. And this is probably increasing with numbers as you're watching this course. So this is pretty cool and we're going to use this library inside of the project to create some sort of a realistic scene environment.
13. Quixel Bridge Overview: In this lesson, we are going to take a look at pixel bridge. So here we are back inside of the engine and set up a level. And before we do anything, let's actually go ahead and click on the post-process volume. I believe we left it on being a bit cold in the color here. So if you go down and look for color grading and white balance, I'm going to click on this arrow to turn back to normal so it doesn't get 29. And here we can actually make a new folder. So if I hide my camera, so click here on, right-click the content folder and click on New Folder and let's call it maps. Let's actually go here inside of the content folder and drag this level inside of Maps, working on move here. And now let's stay a bit more organized. So also here in the World Outliner what we can do if we want, we can actually click on this hold Control, click on the skylight as well. And I'm going to create a new folder and call it lining. And I'm also going to, this one doesn't matter. We're going to delete it anyway. So I'm going to click on this. And actually the sky one I'm going to put inside of lighting as well. And this one I can create a new folder and I can call it post-process. So now they're sort of followers and it's a bit more organized. Okay, so in this lesson we are going to take a look at Quicksort bridge. And to do this, we can right-click here anywhere and we can click on Adequate soil content. So this button, and this button was not available inside of Unreal Engine 4. This is a new thing inside of Unreal Engine five, so you don't have to go out to Quicksilver.com and download the bridge software. You can actually just click on Add quick soil content inside of here, and it's integrated inside of Unreal Engine five. So when you click on this, you can see this bridge software appears and I can double-click to make it full screen. And this looks so amazing. You can make your game look like this and that's, that's insane. So here inside of Bridge, you can click on this up here, and you can click on sign-in to sign-in. And once you simply use is your epic Games account. So sign-in with your epic Games account, and this is what I'm going to do right now. Now I am logged in inside of quickselect bridge. So you can see here now I'm logged in and sort of the Quicksort bridge. This is just a link between Quicksort, all of these assets that you can get and Unreal Engine. And what this means is you can, you can simply download all of these assets. You can see here it's very easy. You can click on Download and add these assets to the engine just with two clicks, download and then add two to the engine. So it's very easy to add stuff from bridge into the engine so we can use it inside of our level. So in sort of bridge, you can see we have a lot of tabs here. We have Home collections, many human favorites and local. So to begin with, here in home, you can see all of the assets. For example, you can select 3D assets. And you can see here that they have a lot of 3D assets that you can use for your game. For example, books and stairs and a lot of items and tools and fruit and vegetables that you can use. Next, we have the 3D plants, and this is very useful. You can, for example, use their grass to add inside of your level. And remember we talked about the, the painting to all the foliage painting tool in one of the lessons. And here you could add the foliage and painted on top of your landscape. So if I open bridge again, for example, we download grass and we put it inside of the foliage tool and we can actually put all of this grass inside of our Landscape. Next we have surfaces and this is basically ground textures or wall, wall textures. So this is basically just surface textures. This is what surfaces are. And you can see here we have cool things, for example, coal, coal, ash, and some breaks. And we have a lot of a lot of different subcategories for the surfaces. So you have mass that she can use. And just a very big library. Okay, so if I had my camera, so you can actually see over here, we have collections. So instead of collections, they have environments. So we can click on environments and they have some sort of a collection that they have made. So for example, if you want something historic, natural, urban, so for example, I want something natural. So if I click on natural, you can select one of these categories or environments that they have put together. So for example, this is a limestone query. This is how they made their Unreal Engine five promo video, the first video they ever made. So clicking on this, you can see they have all the things they have used inside of this environment. And this is very useful if you want to make something like this. If for, let's say if I wanted to make something with snow, and I could click on this over here. And they will show me all of the assets that I can use to make a snowy environment. And this is pretty cool. You can see you have some frozen lakes. We have. Snow tracks eyes and we have a fresh snow with nothing. And a lot of different things that we can do with the environment. And down here, we have a lot more, for example, tutorial. You can see some tutorials that they made as well. And mega scans, this is Quicksilver that made them. We have the community, they created some stuff as well. And the community creates a lot of cool things. So for example, this lost road, if you want to see how it's created, you can actually see all of these items. The US, they didn't use a lot. You can see a few items. You can actually make a very sick environment. Down here, you have something called metta human. We will skip this for now, but basically this is something that you can use inside of Unreal Engine if you go inside of the Epic Games launcher and search for it. But let's give this for now. We have something called favorites. So basically you can save things to your favorites. So if I go back to home and for example, 3D plants, and let's say I wanted to use this plant over here. So I can click on this heart to favorite it. Let's say I wanted to come back tomorrow and I actually want to find this tomorrow. So I don't have to search in here again. I can actually click on my favorites now that I have put the heart on it. And I can find it now inside of my favorites if I look for it and here it is. So I'm going to click on the heart again to remove it and it's out of local. You have all the assets that you have downloaded and they are stored locally on your computer, okay, So these are the most important things that we covered here. You can also search for items. So if I go to Home and up here in search, I can search for grass and all of the things with grass will appear. So if I click on one of them, you can see here to the right, every single item has a tag. So if I click on this one, it has other tags. These tags will help you search for them. For example, I went grass and I want, I wanted to be a 3D asset. I don't want to I don't want it to be a surface. I want it to be just these 3D assets because I want grass to paint on my environment. So I'm going to write 3D plant because I want the plant to paint. And you can see now I have all the things with the grass tag and the 3D plane. So all of these are the grass, the grass ones that I can use for my, for my project. So this is a very cool way to search for them. And you can always write it a name of a specific thing to search for. And the next thing we want to take a look at is the tab here to the right. So you can see when I click on something, for example, this grass over here, or this foliage over here. You can see I can click on the heart here again to favor the item so I can see it in my favorites and I can also see the tags of it. And some, for some reason this one open, let me minimize it. And you can also see what collection this, this item is put inside of. So for example, if you want something with this style, they actually made a collection called houseplants. And you can click on this collection and it will take you to the house plants. And you can actually use this. And maybe you will need it for your project. So this is done for every asset that you click on here. And if I click on something, this one does not have a collection and this one have related assets. So we can see, if you click on this one and you want something similar to this, you can actually click on these related assets to see where it takes you. The last thing we want to talk about is the quality you want to download them. And so down here, when you click on something, you can select what quality you want to download it in. Either it's low quality, medium, high, or night, which is unreal engines, new thing. And you can click on here, on this, the settings bar and you can create some stuff here, but let's skip this for now. We're actually going to work with this later on. Next, you can download an asset and at the end you can actually add the acid to your project.
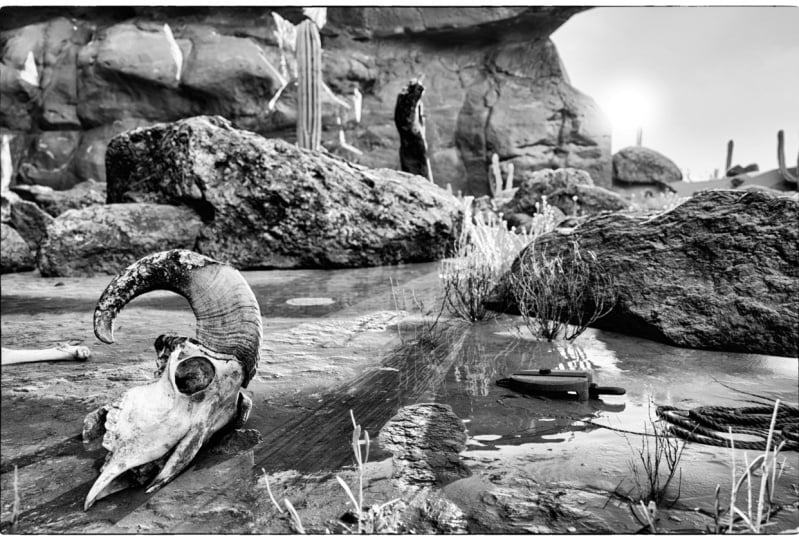
14. Finding Our Assets: In this lesson, we are going to find our assets. So now we are ready to find our assets that we knew we need to use for the level or for the environment we are creating. And to do this, let's go back to quicksort bridge and blood scrap. Right-click anywhere inside of here and click on Add quick salt content. And let's open the bridge software up. And I'm going to double-click to maximize it. And inside of here, what do we want to create? I already have something in mind. So instead of collection, we have something called inside of the environment and in natural scroll down we have something called wasteland. So I want to create a wasteland. So clicking on this, you can see all of these assets that we can use to create a wasteland. And I've already downloaded a lot of them and made them into a favorite. So this video didn't take 30 minutes or 60 minutes, me just going around and finding assets. Basically, this is how I usually go about it. I sometimes go inside of environment and I look, maybe I want some to make something industrial. I then click on this and I see what kind of environments they have for these type of things. For example, historic. I can take a look here and maybe I want to make something with the Wild West so I can click on it. And you can see all of these are from the wild west. This is one way you can search for items. The other way you can do this in is going inside of home and it's out of home, you can basically just search for things. So for example, if you want to make a desert, you can write desert and tried to see what appears when you write that. So you have some, a lot of clothes and stuff and you have some some dried sand, dry stumbled sand. And there are a lot of things that you can use to make a desert. And maybe you want to make a beach. So we can close this and search for beach. And then you can see you now we get something similar to a beach. So for example, I can use the sand to make a beach. So this is how you can search for things. Just try to think for what you're trying to make and try to search for it. Another way is just going inside without searching anything, you can just go inside of, for example, 3D plans. Or actually let's start with surfaces. And I want to maybe make something with a mine. And so I go inside of coal and I can see what they actually have inside of coal and I can use that are asphalt if you are making a road. And inside of here you can actually use one of those to make your road. So I've warned inside of the D, correlations and found the things inside of the wasteland. And I've clicked unfavorite on them. So I can show you the items and you can actually do the same. I have used this metal part. So you can actually hear in home, you can search for metal cots and click Enter and you can see, you can find it here as well. The things I want to use for this environment is this metal part and this dead shrubs, which you can also find, I believe in and deadlines, if not, now, actually here in the canyons of Utah. So you can find it in this collection if you want. Or we can write the tropes and you will find it. We have this wooden wheel that I want to use. We have this characters and those characters. So these two types. And I have this RAM bone, this RAM leg bone I have as well, and this RAM skull. And then I have to horse shoe prints this one and this one. I think these were the only ones inside the engine. A mud footprint and these soil clay and these ones were inside of the waistline collection as well. This soil clay, the soil play and this muddy ground. So I have used these three. I want to use this as ground textures. So you can as well follow with another examples. You don't have to make a wasteland. You can also make a beach if you want, but it's maybe a lot easier to follow along if you're a beginner. And to make a ground, we usually select three different textures so we can mix them together so the ground doesn't just look the same if you just use one texture. So we use these 31 that is fully like fully clean almost. And one with a bit of crabs and the last one with a lot more cracks. So we have three different grounds that we can mix together and so the ground doesn't look the same all the way. Then we have this bleached branch. We have the granite for AAC. And again, all of them you can find inside of the wasteland collection. We have the dry bug chip, the dry root, the tree branch over here. This tree branch. This tree branch. And I'm just showing you all of them just in case you wanted to download the same assets. This wooden sticks and twigs. Then we have this granitic rock, disgrace sandstone. And I've almost just favorited all these sandstones and Rob cyclic find inside of this collection. So this granitic rock, There's granted rock as well. This dead tree root, this tree branch. And again, this muddy ground and the rugs over here. So we're going to use all of these assets.
15. Quality vs. Performance: In this lesson, we are going to talk about quality versus performance. So here we are back inside of rage and I am inside of the favorites where I favorited all of my assets that I need to use for the project. And so let's start downloading the assets and actually import them into the engine. So clicking on the first one, the metal part down here to the right at the bottom, you can select and what quality you want to download the asset in. And it's important to know that the low-quality is a one k texture. So if you don't know what textures are, it's basically that the coloring image of the model here. So it's just like images you take with your camera. But these are called Textures here in the game world. And the low quality is a one k texture. It say one hundred, ten hundred and twenty four by one hundred ten hundred and twenty four pixels. That's the size of the image that we are using to color this model. So a low-quality is a one k texture. And usually in games we use one K textures. We don't use 2k. And the reason is it, every time you go up in its exercise, it will be a lot larger and you will be using a lot of more memory and the game will also be larger. So when you download, for example, I don't know Call of Duty. Call of Duty, the newest one. I don't play Call of Duty, so I don't even remember the name of it. A war zone. And this one, if you downloaded, it's going to, I think it's above 60 gigabytes. So it's a large game. And the reason why it's a large game is because every time you bump up the size of the textures to make everything look better, then you are also going to have a heavier game. And usually you don't need more than one kHz textures for games to make them look good. And this is what it's been using so far. And, and you only use two k textures for something that's very important. Let's say your character, you are going to use 2k or your ground. Maybe your ground is always in the focus or you are going to use it. For example, let's say you're playing Dark Souls and the enemy. Of course you would make it into k textures, the bus, because it's a very important part of your game. So two kHz extras are not used everywhere. It's only used where it makes sense. For example, large objects. If you have a very large cliff, of course you would want it in to K because in one case it would look low resolution compared to your other assets in the game. So you have to think about how large is my model? How important is it? And do I want to make my game a bit more larger memory by bumping up the texture size. Is it worth it here? So you have to balance between quality and how large your game is and how much memory you are using. So of course you don't want to go with eight K textures all the time. So for example, the low-quality here, if you download a model in low-quality, it's going to be a one kHz extra. So 102,400 thousand and 24 pixels in size. The medium is going to be a 2k texture for 2000 by 2000, a high-quality model is going to be a fork texture. So 4000 by 4000 and a night is going to be an 8 K texture. And you should not use eight kJ service all of your game, it will destroy the game. And at some point it will say to you, you have used all of your texture memory. And then you'll be sad at that time that you did this. So remember to think about optimization. Don't just go eight k everything because you want the game to look good, or you want to have everything in for k, that is just insane. Also, a second thing with these quality handles here is it is not only the texture size, it is also the model itself. We have something called a level of detail. You probably know it if you're a modeller. But don't worry about it. We're going to talk about later. But simply, just to explain to simply is the model itself will also look better, the higher-quality you go here. And of course, it will also be a larger size game if you want better looking models, because you are going to use more triangles and this is what makes up the model. So you have to think about a balance here. And for us, it's sufficient to go with medium quality and are found that this is the best ground level to start at. So low quality is sometimes a bit too low. It's actually not looking good. Medium quality is superb to begin with, and we can always download the high-quality one if we, later in the game, we think this is looking bad, and we go in and download the high-quality. So let's start with medium quality. And I said that the medium quality is actually to k textures. And we don't want to use a 2000 by 2000 pixels textures for everything in the game that will be too much. Even for example, if you have very, very small assets inside of your game white, why do you need two kHz extras for those? Because they're not going to be seen anyway that much. And we can actually reduce the texture size and the engine. So even though we are downloading them in 2k, we are going to reduce the texture size. We can reduce it to one K or even 500 pixels by 500 pixels. If you have good Internet, if you have a powerful computer, you can actually go with high quality right now if you want to. And right now non-IT, the new thing inside of Unreal Engine, I wouldn't have gotten with it right now, but it's crashing a lot. So if you tried to download anything in Nice, sometimes it works, sometimes it crashes the project. And I think it's a bit too unstable right now. So I'll make a course later on, a, an advanced game, game environments design. And we can make a more advanced tutorial with advanced sliding and everything. So let's keep this as a beginner level. And if you want, you can go with high-quality right now. But I'm going to go with a medium. This is, this would be enough and if something looks bad, I am going with high-quality. So let's start with media.
16. Importing Assets: In this lesson, we are going to import our assets. Here with medium. If you click on the medium quality, you can click on Download and you can see I've already downloaded it. This is why it's showing me this, this green tick. And you can also see that it's dumb noted up here in this tick, it sticked here. So download it in medium quality. And if you choose another quality, you can see you have to download it again. So it's only downloading the medium quality, Clicking on the medium quality clicking on Download. And you have to do this with all of these models. So clicking on this, clicking on Download, click on that next one, clicking on Download and remember to have them in medium quality. All right, so once you have downloaded everything this and this will take a bit of time to do. And especially if you go with high-quality or maybe you're going with night at the time you're watching this course, it might be working. And it's going to take a lot more time because remember in 98 is eight key textures. So it's going to take a lot more time unless you have very, very quick Internet, which I don't have right now. So Clicking on the medium quality, we can download. And that was it for itself. This is the easy way to do it. And here beside this button, once you have downloaded an asset, you can click on this Add button and it's very easy. So clicking on the metal part, I'm going to click on Add. And then it's going to say, I can't see it. I will try to do it on the next one. You couldn't see it here. So clicking on Add. Then down here you can see successfully exported one assets. And I am going to minimize the bridge. Turn off my camera so you can see. And here you can see it created a mega Scans folder, a 3D assets, and created the metal part. And also I just imported the grass. So 3D plans and the dead shrubs. So the grasses also inside of here. So it created folders itself and it imported all of the assets. So it's very, very easy. So you don't have to do anything yourself. You just have to download it. And you have to, you to click on this Add button. And remember to be on the quality, because if you're on the wrong quality is going to ask you to download it again. So, so let's go ahead and click on add on every single model, and let's go back to the engine. So this is the last model that I need to add. Now I have added all of these models. So I'm going to close Rich. I'm going back inside of the engine. And inside of the engine you can see that all of the assets had been imported. And it's so easy because you can just drag things and you can see when I drag them into the level, they look pretty good. And this is, this is pretty high-quality. And this is, this is with all of the models that you import it. And right now, the lighting also affects how the model looks. Because when you have better lighting, all of models, of course are going to look better. So let's delete those for now. Looking on dose and clicking on Delete. And the next thing we are going to import. So here I've included a ground model for you and you can download it. It's attached to this course. So when you have downloaded this, you can take this grant model and let's actually take a look where we want to import them. So I'm going to make a new folder here and calling IT assets. So this is my own assets, my customer assets. And we're going to double-click here. And actually you can't see it. That's my fault. Here. You can see I made a folder called assets. And inside of this assets folder, I'm going to double-click and I'm going to take this as some ground, drag it in the folder here. I'm going to let go. And inside of here you can see you have some import options. And these import options, you don't have to do much. Can see, you can build it in finite. This is the new thing. And right now we just want to click on this one, create new material, and just do, do not create material. We will make our own. And I don't think we need to do more. Yeah, that was it. So clicking on imports. And now we have this custom ground that we have, and this is just a simple ground that I have built inside of a 3D software. So you can see if I drag it in, this is simply just a plain grounded that we can paint on. And we will use this ground to paint our our ground textures on the one we download it from mega scans. And that was actually it for the import.
17. What is a Texture?: In this lesson, we are going to talk about textures. So before we continue, I think it's a good idea to talk about what textures are, what materials are, and so on. And if you already know, of course you can skip ahead. If you don't know, it's very good information to have before you continue, just so you have a better understanding of what is what. And let's go over here to the mega Scans folder. And inside of 3D assets, let's just find a random asset. So for example, this granite rock I can take and this grant I broke and see if I drag this model. So this light blue line is always the model. So dragging it over to the world, you can see this is actually the Europe that we have. What makes up this rock. And these are actually textures. So you can see here we have three different textures. We have this one, this one, and this one. So we have three textures, and these textures are images that make up the colors of this model. So without anything in this model would just look floods. You can see this is the actual model. This is what it looks like when you're modeler gives it to you without any textures. So this is the model itself, and this is with the texture. So this is what makes it look like a rock, the colors of it. So if I click on the first one, this is the base color and also known as the diffuse map or the albedo. That's, it has three different names and it's just the colors of the stone, so nothing else. No, no other information, just colors of the stone or the rock. And the next one is the normal map. The normal map just makes it like it pushes the detail of the rock outwards. So it gives it more bumpy detail. So if I double-click it and it just looks like this and it's just information to the computer. Which of the parts should be pushed outwards and which of the pulse should not. And just to show you a quick example, you don't have to follow here. You can see if I go close and in the normal spring, I can put it the two you can see it becomes more bumpy. I'll put it to five, becomes more bumpy as well. And if I go back to, if I put it to 0, It's very flat. If I put it to one, then you can see we get that bumpy detail from the shrug. And this is what a normal map is. The last one, it's actually two textures put in one. And you can actually do this in Photoshop. So you can, you can pack textures inside of each other to save up memory. So you don't have two different textures here, but you have both of them inside of here. This is a clever way to optimize texturing. And this texture is consisting of a mental illness, mental illness map. So it tells if you have any metal information. For example, if you had a sword, it would be metallic, Some of it and some of it would be wood, for example. And the other map is a roughness map. And the roughness map just tells us information about the roughness of this model. So I have taken up this example so you can just see more visually what it is. And this is just a random model that I found, and this is the final render. This is what it looks like. And if I click on the base color, this is basically just the color of the, of the gun nest we have the naturalness. It tells the computer which of the part of the model is actually metallic and which is not? And all the white part is metallic and all the black ones are not metallic. So you can see if I go back, this is the word, of course it's not metallic. And here is some roughness information. You can see a lot of detail in the roughness. We have a normal map to show which of the things should be pushed out. We have an ambient occlusion map and this is just telling which part of the model should be shadowed. So you can see all of these shadows. This is ambient occlusion. All of these shadows over here, all over the model. If you did not have this ambient occlusion map, there would be no shadows here. Then we have the specular map and there's not much to see. So all of these different textures put together make this final render and make this final look of the weapon.
18. Texture Properties: In this lesson, we are going to talk about texture properties. Here we are back in the engine and I just want to go inside of a model. So let's go to mega Scans folder. I'm going to hide my camera so you can see here in the mega Scans folder, Let's go and find a random, random model. So this, for example, this, I'm going to see here something very visual so you can see it easily. So for example, this RAM skull. And I can go here and I can place my model, so drag it in, place it inside a little level. So if I double-click on one of the textures, I get this view here and I can make it larger. Okay, So this texture has a lot of properties that you can edit. And up here at the top you can see the size of the model. And remember we downloaded it in medium quality and Wiesel mega scans. And this is the comes to as 2k textures. So these are two gates, xors. And so down here, we have a lot of properties that we can change for this texture. So for example, very important ones are these ones the adjustments which we will need during the creation of the level because sometimes we need to adjust some things. And when you add, you can adjust here is if I just put them side-by-side. And when you, what you can adjust here is, for example, the brightness of this model. So for example, let's say it's too dark or too bright, you can actually adjust it here. So if I put it on 1.5, you can see it becomes a lot brighter. I put it on 0.5, it becomes a lot darker. And this is called to adjust to fit the environment you are designing. So sometimes if you put a model, it's too bright compared to the environment you are designing. Then you want to play with the brightness, tried to put it down and so on. Next we have the saturation which you can change, and this makes it very saturated. The next thing is the RBG curve and the hue and so on. So you can change the colors of the model if you change it here. So this is pretty cool also, sometimes you need, and you don't need to go too crazy. Sometimes maybe you just need a very, very simple. So this is the main look and maybe you just want it to be, let's say 15 instead of this. So just small, small adjustments, or maybe you even just wanted to be five instead of 0. And this goes up to 360. So 355 is going five backwards. So this is just like starting from 0. If you go backwards, this will be 350 fives because 360 is the maximum and it's equals to 0. So just like this, and let me write 0 again as a default. And these are the most important properties for this texture. And later on we are also going to reduce the texture size inside of here. But let's not worry about it for now. And let's save this again. Let's go back and here is the normal map. And again, you can change. A lot of things are low probabilities inside of here, as well as this texture over here, which is consisting of two things that I said before, the metal texture and the roughness texture put together in one sector. And here you can also change some properties for this. And again, you would need this when you are designing the level, you need to adjust the brightness, sometimes you need to adjust the colors and so on.
19. What is a Material?: In this lesson, we are going to talk about materials. So every 3D model inside of the game has a material. And what material is it simply puts all of the textures together. So remember if I go back here in mega Scans folder and I go inside of the RAM skull folder and here's dram skull. And remember it consists of a diffuse map. So this is the colormap of the model, so I double-click it. This is just the color of the model. And next it consists of the normal map, which just gives it this bumpiness and the roughness map and the mental illness map, just giving it information if something is metallic in this model or not. And all of these mature or all of these textures put together, they are put together inside of a material. And this material is then put on top of this model to make this final look. So you can think of the material as it gathers all of these textures together to make this final look of the model. So this is what a material looks like. It's around here. This is, this is a material. So this is the model itself. These are the textures, and this is the material. They're always round. So you can see every time I click on something else, these round ones are the materials. And so we can double-click. If I go to I go to the MS presets and I go inside of this one, the MMS default material, and I double-click it, you can see a graph that opens up and we have all of these materials put together. I'll explain the material graph in the next lesson. But just to take a quick look, you can see we have the ELBO, which is also the base color. We have the metal in this map, we have the roughness map, and then we have the normal map. And you can see the metal illness and the roughness. Remember these were by go back to ram skull. These were packed together as one texture. So if I go back here, you can see the red channel as the metallic information and the green channel has the roughness information. And this is something you can do with Photoshop, for example. You can probably do it with other software as well, but you can pack textures in different channels. You could also have packed something inside of the blue channel. So this is when a material is, it just gathers all of the textures and then outputs it as one final look of the model. And then this, this material is then, you can see here to the right, you can see that this material is then put on top of this model to give it this final look.
20. The Material Graph: In this lesson, we are going to work with the material graph. So let's go over and take a look at the material graph. Let's create our first material and this material that we are going to delete, I just want to show you how these things are created so you have a better understanding of how we got there. So clicking on the content folder, I'm just going to create it out here so I can find it easily and deleted afterwards. Here I am going to right-click and select material. This is how you create a material. And I usually call it M to begin with for material. And let's call it random. You can give it a name. It doesn't matter. I just wanted to show you what it is. Now you can double-click this material to open it up. And when you double-click it, you will get inside of the material graph. And this material graph is where you can see, you can give it an input of what kind of material, what kind of textures you have. So this is the base color texture. This is the metallic textures, specular texture, roughness, normal map, and all of these things. So you give it all of the information of the model, and then it gives it that final lock. It will show you the final look of the model. So let's go over and actually let me minimize this. Let me go inside of the mega Scans folder 3D, and let me just find this RAM, RAM skull again here. And if I minimize this a little bit so I can see you can actually drag a texture on top of this. So if you click on this base color of the RAM skull, you can click and drag and you can drop it inside of the material graph. Okay? Just like this. And don't worry about all of this for now. We don't relate to need working with any of this. So dropping this texture on top of the graph, you can see it created a texture sample. And you can do this as well with all of the other textures. So let me drag in the normal map and the metal ion or some roughness map here. And this normal or this so diffuse map, this base color. You can drag this pin from the RGB. And RGB is red, green, and blue. So it's basically the color information of the texture. You can drag it and drop it inside of the base color because this is the base color. See it changes color here. And the reason why it's cut like this. It's not because we have an IRA and the texture. This is just how it's made for the RAM bone, specifically. Other Rome's call, sorry. And the normal map you can also plug in. So taking this, plugging it into the normal. So now it gives it that bump you look. And the last one is here, this section with which consists of the metal map and the roughness map and mega scans does it that way. Which in the red channel you have the metal map and in the green channel you have the roughness map. So the red channel is our, is our mental maps so we can plug it inside of metallic and the green map or the green channel, we can actually put inside of roughness here. So now we added into the roughness and you can see this is the final look of our map. Now you don't need to fill all of the information here. You just fill whatever you have and it will give it the final look. And you can save this this material. And if I minimize it, and I go back to the folder here, you can see now we have our own material. This material I can then take and drop on top of another one. And you can see we actually got the same look. This RAM score. If I can hit Control Z, you can see it's a bit brighter. And this is because it has some adjustments in the adjustments slider. Like mainly it is it is the same and this is how materials are made.
21. Material Instances: In this lesson, we are going to talk about material instances. Though in the last lesson, we created our own material and let's now take a look at what material instances are. So if you right-click here on this material that you've created, you can click on Create Material instance. And for material incidences, I usually call them MI or material instance. And I just call them the same name as this, this main material that attack. So for example, I could have called it MI, and I could have called it ran Scala. If I were making a real game, I would have done so. And this one can recall random for now. So what is a material instance? If you double-click this material instance now, you'll see your note-taking to that graph that you saw before. You're not taking to the, you're not taken to the material graph are taken to this, this weird-looking thing and you can actually adjust some things here. And this is what a material instances. You can adjust settings without having to go inside of the graph all the time. You can actually do it's through here and also faster. So if I go and set up right now you can see we don't have much that we can adjust on this material instance. And to give it more properties that you can change, we can go back to this, um, random, so if I close everything, so if I go back to this m random, the normal material that we created inside of here, you can actually right-click, for example, this one, this texture sample, and click on Convert to parameter. And now you have to give it a name and we can call it base color. Now if you click on Save, and now it saves, and if I minimize this and I go back to the material instance, we can now see I have now created a parameter that I can change. And this is called, this is called base color because this is what we called it. And this is very cool because now you can see if I, if I put another model, so if I wish this a bit away, and I go to this cactus and I put this character's down. And let's say I, I took this, this run skull here that I made that material instance. And I put it on top of this character's. Of course it's going to look wrong because this is the textures of the RAM skull, not the characters that I have currently. If I double-click on this material instance and I get inside of here, I can actually click on this base color. And now I can change the base color of it. And now I can go back to this characters and I can drop this base color of the characters. I can drop this into this, this base color tab that we made. And you can see now it has the correct base color. But it's still looking a bit wrong because it's not the same normal map and roughness map that we're using. So let's go ahead, go ahead and change this. So going to m random here we are going to convert the rest of them to the perimeter. And calling this normal map, or just, yeah, let's call it normal map is fine. And convertor parameter and I'm going to call it MR. Map for mental illness roughness. That's just a quick name, I'll give it. And now we have a parameter of all of them. So now we can actually go back to the material instance and we can change it here. So we can click on these to change them. And I can drag and drop the this map here and this normal map here. And now you can see this cactus is actually looking correct again. And I can also, if I close this now, and I go back to the content, I can right-click my main material again and create another material instance. And I can call it m. I. Actually, let's, let's change the name of this one. So let's call this one axis. And let me create a new material instance and call it RAM skull. Yeah, Shall we can do this. So if I remove this round skull, it's not removing. So let me change it to something else just like this. And I want to use my own runs coal material. And right now I already have this, this texture is set correctly because remember inside of the main material, this is what we actually used. We used all of these realms call textures. So we don't really need to change anything here. These are the correct textures. And I can drag and drop this on top of here. So you can see from one Masdar material, this is what it's called now, this normal material from a master material, I can create many material instances. So if you have, let's say 10 items here, you don't really need to make 10 materials. You just need one material instance or just one material and create 10 material instances. And you can also add more sliders. So, so now I want to show you the real deal. And if I go to mega scans, if I go inside of the sketches and I click on the material instance that mega scans has made. I double-click and I make it larger. You can see you, we have a lot of controls that we can change for this material and since for the characters, we can change how it looks like. So if I drop, if I delete this for now and I dropped this cactus, I can change the albedo tint. So this is the color of the textures. So if I click on this and I can change the color of it if I want to. So you might see this is actually helpful if we need to do small adjustments to make it fit our environment. I can change the, let's say the maximum roughness for example. You can do this to make it look more wet. So if I put 0, you can see it's actually reduced the camera speed. It's too fast right now you can see it's, it's worth looking right now. Some sort of like it almost looks like glass right now. And this is what roughness does. If you increase the roughness, it will look more flat, just like that, like that. And sometimes you just need to do small adjustments. For example, 1.2. Then you'll give it that minimal detail, it pops out a bit more. And these are all the, these are all the properties that you can edit. And you can see this is a lot quicker to do then going inside of the Muslim material and changing stuff, you can actually just double-click the material instance and work from there. All of these models, they have all of these material instances assigned to them, so they don't have the Muslim material assigned to them. You would create a master material, then you would create a material instance and that material, and since you would drop on top of the model.
22. Adjusting the Texture Compression: In this lesson, we are going to adjust the texture compression. Though sometimes when you import things to Unreal Engine, whether it's something from mega scans or your random assets that you find summer from sharps or customer assets you make yourself. Sometimes when you import the textures, the compression setting will be wrong and we'll take a look at this. Let's firstly delete all of these material and sensors and material that we've created randomly. And let me go over to mega scans, and let's start from the beginning. So I'm going to 3D assets, the first asset that we have. And over here, this texture, if you double-click on it. So remember this is the two textures that are put together, the metal map information and the roughness information. And if you open this one, you can see something called compression settings. And this one is not supposed to be alpha, this one is supposed to be mask. And you can get a lot of weird looking things inside of the engine if you forget to change this. For example, if you pin the ground later on when we paint the ground, the ground will look like very weird. And it's because it's set to alpha and knock mask. So you have to change this to mask. And it's actually supposed to look like this, this very greenish color. And if I take this backup from the previous lesson that I made an example of, the reason why we set it to mask is the metal in this map is a white, black and white information. And the roughness map is also black and white information. And since they are both black and white, you can select mask. Mask is no RGB information. Rgb is red, green, and blue colors. So it's not really a color map, it's just a black and white telling the computer what is metallic and what is the rough and so on. So these are musts and if it, if it had colors, we had to set it to default because this has color information. But since we don't need color information, since they have none, we are going to set it to mask clicking on Save. And we actually have to do this for all of them. So going to characters, you can see it's already green looking. This is probably correct. So if I double-click it, you can see it's already set to mask. So you have to go through all of them. Just check and you can see this one is also wrong, that the tree, so double-clicking on this, I'm going to change it to mask. I'm going to close it. So go ahead and go and look through all of the models and change those to mosque. So now I have went through all of them and I've changed the texture to mask for all of them. So both the surfaces, the decals, the plants and so on. And remember for the decals, if you have not set it to mask, if you still have it on Alpha, if you drag this decals, decals are just images. I'll talk about them later. And these decals will not be visible if they are a set to a mosque. So if there's a to alpha, so remember to set everything to mask so nothing is bugging out for you.
23. Placing the Ground Mesh: In this lesson we are going to place the ground mesh. So let's go ahead and start our scene finally. And now that we have understood the basic things, let's go ahead and work with the scene. And as a first thing, I'm going to click here and delete this base mesh. So this is what is inside of your level. And here I'm going to click on it, click on Delete, so it's empty. And if I click on G to show my icons, so I can see all of my icons. And here in the World Outliner, if you click here, you can see what's inside of your level. And this is what is inside of our level. We have the sky sphere, the directional light, the skylights, and the post-process. And don't worry about the lighting for now. We are going to work with the lighting later on. So right now it's some sort of a basic lighting so we can see our level. And here's to begin with, let's place our ground. So going back inside of the assets folder. And in the assets folder we have this as m ground that we imported. And this one I'm going to drag out to the world and I'm going to place it in the middle of the Worlds. So I'm going to change the location of it, 0, 0 and 0. So now it's directly in the middle of the ground. And I think I'm going to reduce the strength of the Sun for now. So clicking on this icon, this is the directional light. Can also select it from the World Outliner. And I'm going to decrease the intensity to two just so it's not too strong. And now we have our ground in the middle. And in the World Outliner. I can always come in here and click on it, make a new folder and call the assets. And in here I can put all of my 3D assets.
24. Creating a Blend Material: In this lesson, we are going to create the blend material. So what we want to do is we want to paint on top of this mesh here. This is our ground, and we want to paint our ground texture on top of it. And what we have for ground textures. Remember here in mega scans we downloaded three different ground textures. And they'll, they are also called surfaces. So these surfaces here, the muddy ground, the soil clay, and the soil clay here too. So this one is a bit more clean here, and the other one next to it as a bit more cracks, you can see it has cracks. And the last one is a muddy one and it has fewer crabs, but it also has cracks. And I just want to blend these three layers together and so we can paint the ground. And this is what a blend material is. A blend of material is simply a material where you put these three materials together and you can use them to paint on top of the ground. And to do so you have to go inside of Quicksilver bridge. So right-click anywhere and click on Add quick. So content, this will bring up bridge. Remember to login over here, just make sure you are logged in and I'm logged in already. And inside of here, just click on anything. It doesn't matter what you click on. I just want to view this, this panel over here to the right. So let's just save this for now. And here to the right, when you see this panel, just click on anything so we can see this panel. When you see it, you can see this button down here. This is what we want to access. And clicking on this button, it will bring you up to this new window. So I'm going to close Quicksilver bridge for an hour, doesn't matter for now. And I'm going to open my project again. This window. And what we want to do with this window here, down here you can see we can create the material blend. So we can blend these three materials together so we can use them to paint the ground. Firstly, we need to give it a name. So I'm going to call my material BM for blend material. And I'm going to call it ground. Next to you have to select where you want to save this material. It is going to create a folder automatically called blend materials. And this is fine for me, so it doesn't matter. So this is okay. Okay, so very important. Now, you have to select these three different materials and how do you view them all at the same time? You can actually click on this main folder for these surfaces. And if you search for something that contains like a name that contains an all of them. So for example here, all of them are called M. For material instance, MIMO, I am I. So if I go here in the surfaces and search for MI, It's going to search in all of these subfolders for things that are called MI or contains MI in the name. And so I can now see all of the three materials here. And this is why I told you before, it's very important to have prefixes before your, before your actual name. For example, for characters, instead of just writing the name of the character. Maybe you want to write character and then you want to write the name. So you can have a prefix and this prefix you can actually use to search for things just like in this case. So here, very important for creating blend materials. You just have to select all of them. You have to click on the crate blend material. It's that simple. But the thing you should know is the first thing you select in our blend material will be the upper layer. The next thing you'll select who will be the middle layer and the last thing is liked will be that lower layer. So, so, so you have to think about which layer do you want to dominate your mesh, your ground? And this one, I want it, this one is a clean one without any cracks. And I want this one to be the main layer of migrants. So I'm going to click on it first because this will be my upper layer. Next I'm going to click on this one, which has a few up Craig's than this one. So I'm going to hold control and select this as my second one. And then I'm going to select this as my third one. This will be my lower layer. So it actually matters in what order you are selecting these layers. So selecting the first one will be opera, the second one will be in the middle. There last one you select will be and the lower layer. Then I'm going back in my window here in the mega scans. And then I'm going to click on Create blend material. So now I can go ahead and close this. And if I minimize everything here and I go back in my blend materials folder, I click on the X here to remove my search word. I can actually now see my blend material. So if you double-click it and I can minimize and maximize it. You can see I have a lot of settings I can edit. And these are the three layers merged together. So I have this base layer, that middle layer, and the upper and the lower layer.
25. Blend Material Properties: In this lesson, we are going to talk about the blend material properties. So we have a lot of properties that we can edit for the blend material that we just created. And let's go over and double-click on the Blend material that we just created. And here it opens up, just load the material instances. So this is a material instance. And this is our blend material containing these three layers have ground textures that we can paint to it. And we have a lot of adjustments that we can do inside of here. And this is very helpful if we want to, for example, change the color of the ground, make them fit together, and so on. First, for example, we can use this layer adjustment. So if you click on it and if you look here, you get more of sliders that you can work with. And here you can actually do some adjustments to this base layer. So for example, you can change the color of this layer. You can see, you can make it look more muddy, for example. Or you can even change it to something else and make it look more like a stone floor. And let's cancel this. And I'm going to uncheck it. And you can see you have a lot of things that you can edit. You can edit the roughness. So how, what does it look? So you can see when it's raining, for example, if you have a rainy weather, you can make it look like this. And so it looks like the rain hitting on the ground. So we can do this with all of them. So this is the base layer. We can, I'm going to untick it for now. We can also do it with the middle layer and with the top layer. What is cool about this is we can actually also use puddles. Still click on this and clicking this layer. We can actually paint puddles on the ground. And I can show you that later on when we are studying painting the ground. And you can see we have a puddle control here where we can control the liquid opacity, the height of the roughness, and the dark range, how close the shore is to the water and so on. And this is pretty cool and the liquid colors so you can even make it look like blood if you want, like bloody water. And I'm going to untick this photo layer and we have all of these adjustments that we can make. We can also make the tiling. So if, if, for example the tiling of the ground is wrong, we can change it here as well. So these are all the blend material properties that we can work with and we're going to work with it once we are painting the ground.
26. Mesh Painting Tool: In this lesson, we are going to take a look at the mesh printing tool. Though we are ready to paint our ground with our blend material. And let's take a look at the blend or the mesh painting tool. So clicking up here at the top, this is the mesh painting tool that we can use to paint these textures on the ground. So clicking on it, we are now inside of the mesh painting tool. And we can now paint on this grant. But what we need to firstly, we need to apply this blend material to the ground so I can hold this and actually drop it on top of this ground. So now you can see, now this ground is on top of this or this blend materials on top of our ground. And if I press F11 to view it and in full-screen, you can see this is what it looks like. What we want to do is clicking on paint. And here we can, now we can see, we can paint on the ground. You can choose the size of the brush so you can make it larger. It can reduce and increase the strength in which you are painting the other layers and also the fall off from the edge here. So let me try to pin something so very important down here in the paint color, you have to switch them around. So the black color is actually independent color, and the white one is the erase color. Else you are not going to print anything. Next, these channels are what they are packed in. Remember I said that you can pack textures in different, in different channels. So in Photoshop you can pack just like we had here in our example. We had the metallic map packed and the red channel and we had the roughness map packed and the green channel. Here, we actually have packed to these materials into these channels. So if I go back to mega scans just to show you, and I go back to surfaces. So this muddy ground is in one channel. This soil clay is in one channel. This ground here is in another channel. So these three materials are in their own channels here. So if I click on the red one and I have the black color here as my paint color. And you can choose a size, you can choose the strength and the fall off. Let me put it on one right now. And if I begin painting, you can see I'm actually painting this other layer on top of this grant. And if I choose the green layer, I'm now painting the other one. But right now you can see it's not really working. And this is a bug within Unreal Engine five right now. I hope they fix it soon. This is not, this is not happening in Unreal Engine 4. This is working perfectly. But sometimes you have to go out of the paint mode, go inside of the pink mode. And you can see now we can see the vertices again, and you can paint just like this. So switching between nice view modes and you can paint again, it's very annoying right now. You can see now we are appending from the red channel. We are printing this, this type of ground in the green channel. We are appending this. There's ground over here. And if I switch again, see we're appending this ground. And in the blue channel. Actually the blue channel is not a ground that were important here. In the blue channel. They have packed the puddle layer. And I just want to show you before we end this, the puddle there. So right now when I paint, nothing happens even though this brush is working. And this is because we haven't enabled the puddle layer. So if I go inside of my blend material down here and I double-click it. There are here. First at the top here, click on Use puddle layer. So I'm going to use my powder layer. And down here you can adjust the puddle and right now you don't have to adjust anything. We just have to apply the puddle so we can use it. So save. And now you can see, I can now see the puddle layer I just painted. And this is pretty cool because you can create pretty, pretty insane scenes with this. For example, if you have a forest with water, can actually recreate the water. And also if you adjust the size and the strength, it will look more natural. If I paint like this. You can see I can make pretty cool stuff with this. Just like that. And what you can do with this puddle, you can actually change a lot of settings so you can change the color of it. For example, the liquid color. I can make it red. So something, for example, it looks like some blood was dropped on top of this. And I can also adjust if I can, the liquid wave control. So I can control the wave here. And you can increase and decrease this. So for example, the speed can be 0.5 and the normal string 0.5. So you can see now the puddles actually moving. And this is such a great way to create puddles. This is a very easy way. You can change the darkening range. You can see here can actually increase and decrease this option. So how dark it is, how much? Maybe it's concentrated in the middle. I can also change the roughness and there are a lot of settings you can change for this portal. And you can see, you can go crazy with this. You can create pretty cool stuff. I'm going to click on my return to default because we don't really need it right now, the liquids. And I'm going to click on Default and go back to normal. Okay, I'm going to disable the puddle area for now. And what I want to do is let's erase everything and let's actually continue in the next lesson. So I'm going to click on the pink layer. So I have increased the size, the strength, and the falloff. And the pinch color is still black. And I'm going to select everything here and I'm holding Shift so I can actually delete everything. So when you're holding shift, you are actually going to delete. So if you're not holding Shift, you can see I'm now painting. If I hold Shift, I'm actually now deleting.
27. Adjusting the Ground Tiling: In this lesson, we are going to adjust the ground tile. So before we start painting the ground, we obviously have to adjust some things for the ground. Firstly, it is not tiling correctly. You can see right now it's very huge. If I place a character in here, the tiling is just very huge. And secondly, you can see you when we painted different layers here on the ground. These don't really blend well. You can see that these are actually two different layers. Especially if I pin the green one here. You can see these two very visible. And by the way, you can see my brushes actually working now. So Philippines, it's not disappearing. I can paint again if you go inside of the ground and you blend material, and if you click on the US bottle layer and your navel, they use puddle layer. I actually think this will not be deleted anymore. You can see, you know, you can actually paint without the brush getting booked from the last lessons. So now I can actually paint and this seems like it's working. I hope I'm not jinxing it. And let's actually delete everything. So I'm going to select all layers. I am going to prison size, hold, Shift, and just delete everything for now. So right now firstly, let's adjust the, now the brush is actually working. Maybe you have to go inside the blend material and just to keep this enabled the US Baudelaire, I have no idea why this is causing a problem. And now we can paint all the time without the brush booking out. Hopefully, it will work with you as well. Let me know if it's working. Curious. And so this ground you can see it's very blurry. It's because the size is just too large, that tilings too large and we have to adjust it. So the way you can do this is you can double-click on the Blend material and here inside of the tiling. So you have a tiling for, for each layer of the ground. So the base layer, the middle layer, and the top layer. And we have this tiling for the base layer, the styling for the middle layer, and the styling for the top layer. Let's tick all of them, so let's enable them. And I'm going to expand them by clicking on this small arrow here. And now I can adjust my tiling. So what is the correct tiling? So here you can see if I increase this number to, for example, 10. Now it's a lot more correct. You can see it's a lot smaller. If I decrease it, for example, it was one to begin with. If I decrease it to 0.5 and see it tells even further, and then it gets smaller and smaller. So what is the correct tiling? Let's, let us put it, put it back to one. And what I usually do to see the correct tiling, I usually go inside of creates. And here you can create a shape and create a plane. So a very basic plane that we create. And right now if I click G, I can see my icon set script itself down here. So I'm going to go back to the edit mode. You have to exit the mesh painting tool. So go back to the editing mode. Here you can drag up the plane. And this plane, I'm going to place your underground, so I'm going to place it and zeros 0000. And this, this ground mesh, I'm going to move one down so I can actually see my plane without these two clipping together. And I'm going to apply my blend material on top of this plane. And this is the correct, this is the correct plane here, this is what it's supposed to be. So if I click File, click on Create, and here I can add it. Playoffs start. So Player Start is just as spawning the player when you start the game. And I'm going to put a zeros 0000 as well. And if I click on G, I can see my player starts. And let me put it just above the ground like this. So now I can click on play. And you can see I'm playing my game and I don't want to move anything. I don't want to press a W DNS. I just want to click play and don't touch anything. Just move the mouse. And I'm going to move them out and look downwards to see my ground. And click it for 11 to make it full screen. So you can imagine, this is like you're playing the game, you were a character. You're looking down on the ground to see what the ground looks like. So this is what it's supposed to be. And what I like to do here is I like to, you can click alt tab and just tap out of it. Or you can click on if eight. And if it actually exits this, this playing mode, you are still in the plain mode. So if I click a fiddle, a love, and you can see you are still playing the game. You haven't stopped yet. What you're like, exit of the character. You're like a soul who exited out of the character. I'm going to click off 11 and see the ground. And I am going to bring up my snipping tool and clicking on New. I'm going to take a picture of this just like this. So now I have a reference of what the ground is actually supposed to look like, just like this. So here I can now click on Escape to exit the playing mode. I can delete my plane here. And now I can try to tile this ground to match this image here, which is the correct seen. So I'm going to take this player start actually this ground. I'm going to put an 0 again here. I'm at minus 10. And this Blair start right above the ground just like this, it's correct. And now when I click on play, actually let me go back to the mesh painting tool. Let me double-click my blend material and let me try to adjust this tiling. So I'm going to click on Play, going to look on, look down. And here I can adjust my tiling. So if I write 30, for example, on the base layer. So right now we are inside of the base layer tiling. And here I'm going to write, I find it again. Here I'm going to write dirty. And you can see it's changing like this. And I'm going to take my other picture and try to compare and see if you're actually hitting close or if it's too small or too large. And right now I can compare this part here with this part here. And this is too small right now. So I'm going to reduce this to 2020. Going to take a second look and still too small. So maybe 616? Yeah, I think maybe 15 or 14. Like this. I think this is the correct sizing. Yeah. So this is the correct sizing for it. I'm going to close this again. I'm going to close my image here. And now I'm going to change all of my tiling for the middle layer, also 1414, and my top layer to be 14, 14. And now we have the correct tiling for the ground. If I go back, you can see now it's a lot smaller than before. And if I click on play and I click on F 11, I look down, you see this ground actually it looks a lot more realistic than before. And it's looking a lot higher, Roseanne, but it's pretty cool to look at.
28. Adjusting the Ground Textures: In this lesson, we are going to adjust the ground textures. Here we are back inside of the engine and we're ready to go and to adjust the ground textures. And what we want to do here actually is now that we have made the tiling correct. Now we want to change the colors of the ground so the three layers that we have. So I'll show you an example. So here in the mesh painting tool, go inside of here and inside of the paint. Remember that the paint colors should be black, so it's working. And you choose the size of the brush, and you also choose the strength of the brush. And let me just paint with their red channel for now. So if I paint with the red channel here, you can see that this color of this texture is actually different from the main ground that we have. And we want this color to be the same color as the main ground, because we want to make it believable that this is actually the same ground, just two words variation instead. And if you only using one texture, so if we're only using this main ground texture, you can see that it's repeating itself a lot of times and it's actually looking bad if you're making a serious game. So you can see this, this pattern over here that looks like the same one over here, the same one over here, the same one over here. And it just looks bad from a player perspective when you spawn in and you see the ground actually looks the same all over like this. You can see a lot of repetition. It's a lot better if you create these variations with another texture to make it look like the ground is actually the same. And we need them to be the same color. So it's more believable because you see if I go to the green channel now and you can see my, my paint brushes is bombed out again. And to fix it actually I found a better solution maybe if you go to select them pain. So it's working again. And when it's working, you can click on the Blend material and just have it open without anything else you can see if I paint, It's actually not bugging out. I can paint again. And you can see here, this green channel texture here actually looks different from all of them again. So all of the three textures look different. We want them all to be in the same color so we can paint with them and make variation on the ground. And to do so, the easiest way to do it is let me actually first go inside of the blend materials. So double-clicking on the blend material. Here you can enable something called Use middle layer adjustments. So clicking on that, I'm clicking on here to use Tumblr adjustments as well. And when you click this button, you will get more things that you can edit. So if I go down to the middle layer, you can see that I have more values that I can edit. And these values you will not see if you are not going to enable this one up here. So down here we have some controls and I'm going to expand those by clicking on the arrow. I'm going to take them so I can edit the values and I'm going to minimize it so you can see the ground while I do this. So you can see here when I edit the saturation, you can see it's editing the color here as well. So if I reduce the brightness to make it darker, you can see it's going to be darker. And I can also, for example, take out the red color. I can remove the green. And you can see you can actually play with this and make it a whole other look of the ground. You can play with the colors. And we want to play with the colors such that it matches the other grants extra. So I'm going to click on Reset to default value here to return to the default. And we also have the same settings down here in the top layer which we enabled. So I can expand those and enable them as well so I can edit them later. Okay, so for the middle layer, the easiest way to do this is actually going inside of the lid mode. So in the view modes here and down here, you can go down to buffer visualization and then click on base color. And this way you are going to view the true base color of these textures. Because if you are unlinked mode, this is actually not the true base color because all of the scene is getting affected by the lining and as soon as the lighting changes, the look of the ground is going to change as well. So going inside of buffer visualization and base color, you are going to view the correct base color of the ground. So without any lighting or anything else, we want this, this ground here to be the same as this, and this ground here to be the same as this. So everything should look the same color. So I'm going inside of the blend material and you have to try your best to match. So I have another eye looking over here sometimes because I have a full screen of my scene here. I like to view the scene and full screen when I edit it. And what you have to do is just play with the controls. There's nothing wrong or right here. So you can see if you click on the color, you can change the color here. But I usually don't do this because you can see it's actually not working well because if you put it in a full color is just becoming white and dark and whatever. And if you pick the color picker, It's not really helping you as well. So I'm going to click Cancel. And the way you do this as just clicking here and dragging with your mouse so you can change the values and try to, try your best to fit this color. So I'm going to take a look here. I'm, for example, I can see the saturation is a bit off. It needs to be a bit more saturated. You can see if I change the saturation a bit, it actually fits better. Now I'm going to take the brightness a little bit down and maybe this is good. So you can ask them, maybe we have a bit of green in there or maybe a red. The blue channel needs to go down a little bit. Maybe put a two here. Okay, so doesn't have to be very specific. I'm trying my best to try to do this as fast as possible so it doesn't take too long. And just try your best and there's nothing wrong or right here or maybe that is working as well. You can see now the ground is actually looking the same as this one. And if I switch over to the lead mode now, you can actually see if I tried to maximize this. You can see this color is now looking the same as the main ground. And we can do it a little bit better by using a blend. So if you go inside of the blend material again, and on top here, you can see something called base and middle layer blend controls. So you can choose how much you want to blend, the middle layer and the ground layer, the base layer. So this is the blend amount and you can see if you run right 10, for example, you can see it changes a lot. So for example, I want you to write five. And you can see if I write five, it gives that smooth, that smooth blend between those willing to give it four. For now, you can see the blend contrast, you can Just as well. And the follow-up, you can change as well if you want to. I'm going to let it be S1. It's not affecting too much right now. And you can see here with these settings, you can actually make the blends a little bit better between the grounds. Just like this. And it's very obvious right now because we painted a perfect circle with our paintbrush. So of course it's going to look a bit weird. And if I reduce this to one again for actually three hours, I think for might be too much. So just like that. And now you can see it's actually looking good. So we have to make the edits for this one and I'm going to let you do it first. Remember that you have to put the top layer adjustments on. And then you have to scroll down and find the top layer which is here. You have to enable the albedo control and the albedo send. And then try to play around and make this color of fit, this one. But I also have to warn you that when you go inside of the buffer visualization, but base color here. Sometimes when you go bad, luck when the color fits perfectly inside of here, and you go back to Lit mode and it's actually different. And this is because they have different textures, the lighting is different and so on. So it's not always going to work perfect like this. But I already know that it's not going to work perfect. So if you go back to buffer this realization to the base color here, tried to fit it to the same colors here. And let's take it from there. Okay, here I am back. And I spent, I think three minutes off camera to do this. And I actually changed a little bit on the base color. Do I just played around with both of them? So this is my base color if you want, or my middle layer, sorry, that's my middle area with which we did together. I changed the values a little bit just in case if you wanted E-values, they are here. And then I also changed the top layer. So this is what I have for the top layer. I hope it was doable for you. And if not, it's fine. You're getting practice and it's going to be a lot easier once you do this over and over again. And let's, let's do some blending as well. And let me show you if I go back to the old mode, you can see this is actually a lot different than, than the ground. And why is that? And if we go back to the buffer visualization based Scholar, you can see it's actually looking the same. Why is it, why is it so different? And this is because of the texture itself, like how it's receiving lighting and so on. So the base color might look perfect, the same, but everything else is not. So what we can do here to fix this issue, we don't have to go back and do this again. What we can do is we can go inside of the mega Scans folder. And inside of here you can click on the surfaces and the soil clay, PJ d t for t, This is the one I think this is the one here. And if we open it up, yeah, this is the same one. So if we open it up here in the texture, remember there are values we can change. So we can change the brightness, the saturation, and so on. And there isn't really a correct way to do it. You could have done, done it here as well. So I could have just go inside the loop mode now and just change the values until they fit. Or you can go inside of the texture itself, the base color or a texture and do some edits. And I think this is the easiest way for me right now. So inside of here, if I go here, I can put the brightness on first. Let's actually try to pull it up. So this one is going to lag a little bit if you do this. So sometimes I just enter values instead of actually dragging. And I think there's saturation needs to go down to 0.9 to maybe yes. So you can see it actually changed the color a lot. The saturation helped. I think this might be fine. And if we need to change it more, we can actually do so. So let's, let's try to paint something quickly and see, let me save everything here. And let me go back to the paint mode. And let me go to paint. I'm going to take the strength down and the size. The size down a bit. That's fine. Let's paint with the green channel like now, I'm going to open my blend materials so it's not bugging out for some reason like this. And I'm going to paint just like that to see what it looks like. Just clicking around. And I'm going to enable the red channel instead. Okay, just like that. And what we can do actually here is we can tried to blend those. I think the color can change a little bit. So if you go back to the blend material and here up in the top layer, blend controls. Remember we blended the base and middle layer, but we can blend the top layer as well. Now let's take a look at here. Let's zoom it in. And for this one, we can actually write trust rights to three. Yeah, I think three for the blend amount, the blend contrast. Let me see what it looks like. Yeah, So maybe 1.51.4. Let's go with 1 for that follows the same. I'm going to change this one to 1.4 as well. And let's save like this. And let me close it down and actually take a look. So if I fullscreen this now, okay, So the ground looks great now with the adjustment to the both, both the blend material and also the texture. So for the texture, we did those just a few on the values. We get 1.07 here. And we don't, we did for the saturation 0.92. And now the colors are fitting perfectly and we can actually use the brush now to paint our ground texture.
29. Painting the Ground: In this lesson we are going to be in the ground. Alright, so now we have tiled the textures correctly, so the tiling is correct. The colors are also correct. And sometimes like all the boring work, because we have to prepare for what's fun and actually painting on the ground here. So we've finished the boring work. Now we're, we're onto the final work which is actually painting on the ground. And let's go over to the mesh painting tool. And over here I want to click on paint and make the size fall, make this strength fall, choose all the channels here. And I'm going to hold Shift and pain so I can delete everything on my scene just like that. And I'm going again to open my blend material to make this work just like they are, just minimize it. And now we have to paint. So when you paint, you have to choose your size. So there isn't really an answer of how large the brush should be. But I usually just make it fairly small like this. And the strength they're smaller it is the easier you can control it. And what I mean by that, if you make it, for example, like this and you paint, you can see it's looking good, you are painting. But it's actually very harsh. Like the, the edges are very harsh and you can do this better if I click Control Z to redo this or undo, sorry. And I reduce the strength to maybe let's say 0.23 or even further down. You can see I can paint and it's actually looking a lot more smooth. And before we don't, we don't create these, these hard edges just like that. And sometimes I've been like that and sometimes I need to erase something. You can hold Shift and click here, just, just clicking. Sometimes you can make cool effects. You can see we have this cool looking ground. And you don't have to hold Shift and just paint like this and delete everything. You don't have to. You can just sometimes just click here. You can see it gives that very cool effect and it can keep painting. So this is how your pin the ground. You have to do this on all of the ground. And sometimes when you see you create some repetition, you can hold Shift, delete something here, and just keep painting. Okay, so now we have been through this so far and sometimes you have to change now. So going to actually I'm pending with all of the channels, which is not correct. I have to this was the green channel because it is the upper layer. This is fine. We can now paint with our red channel. So now if you paint with our red channel, you can see this is what you'd get. So what you can do is again, just click around paint with this channel as well. And we also want this base layer to be available like visual. And we don't want to cover everything. So sometimes I'll leave some spaces and I'll pick something else. And sometimes I just switch back to the green channel. And I keep painting. I go to some other area. And I paint here. And you can see it does take some time to do this, but if I full-screen now, you can see that the ground is actually looking a lot better before it was like it was repeated. If I look like this, you can see a lot of repetitions here. But if I look like this, or I look here now, you can see that we have eliminated a lot of repetition. And sometimes you can see this one is repeated here. So you can actually go ahead and delete this part here just like that. Just by holding Shift and clicking sometimes and you're eliminating it. And you can see it's actually looking a lot better when we've pinned the ground just like that. And you have to paint all of the ground here. So it's going to take that bit of time and I'm going to skip ahead in the video. I'm just going to use the same method. You can increase and decrease the size of the brush. You can increase it and decrease the strength of your tour. Sometimes I go to 0.24 or 22, for example. And just paint a little quicker. Hold Shift, click like this and so on. You can do that as well. And remember the paint colors should be black. And you can switch between these two channels, the red one and the green one. And later on we will also use the blue one, possibly to make some puddles. But let's be in the ground and I'll be back after that. All right. So here I am back and I spent about 30 minutes just painting around just for fun. And if I maximize the viewport, so you can see this is what I've painted so far. And sometimes when I see something repeated, I will go in and deleted. So I will go in and go to the paintbrush, press on shifts like painting, selecting the channel, pressing and Shift and then just erasing it a little bit. And sometimes, for example, you can see this repetition. Or sometimes it's not really very visible because remember later on you're going to add rocks, you're going to add twigs, you're going to add grass and so on. So a lot of them you will hide. So even though some of them are going to repeat right now, you're not going to see it anyway when you are going to put all of these assets on top of your grant. But it's very good to try to erase as much as repetition as possible. So for example, you can see these three are repeated a lot. And this is coming from the green channel for phi, so like that. And actually I want to reduce the size of material. I just wanted to delete that one just like this. And maybe I can delete this one a little bit like that and it's less repeated. And so this is my ground now. And I'll use that one. I hope you made a one that you are happy with. It just takes some time to make this. And if I was making like a very large game I wanted to release on steam, I would probably not use 30 minutes. I'll probably use at least an hour or two hours trying to make it very good. And the more time you spend on it, of course, it's going to look a lot better. Some people even use a week to do this stuff is they have a large map. And now that we have painted our ground, we can actually go ahead and put all of the other assets. So for example, the rocks and the twigs and so on.
30. Adding Rocks: In this lesson we are going to add drops. All right, now that are terrain or ground is finished, we are going to add some items on top of it. And to start with, we can add some rocks. And to add your strokes, Let's go over to mega Scans folder. And let's find those frogs inside of the 3D assets folder. And in here, Let's see what we have. We have these granite rocks. So for example, this one, you can drag it out and you can see what it looks like. So you can place their robes one-by-one. So for example, going to the next one and drag out and place it somewhere else and the level, sometimes you want some variation so you can click on on e to choose the rotate tool and tried to like rotate it. You can hold Alt and then move it. That will duplicate the item. And you can click you to rotate it. And sometimes you want to scale it down. Sometimes you want to disable and enable the snapping tools depending on what you're trying to achieve and things like that. So we can place the rocks one by one just like that. And so you have to do it on all of the level. Sometimes this is good. You can place them one by one. It's going to be very precise, but you can also do it in a faster way. And let, let us delete these rocks and I will show you. So here in the foliage tool, the foliage tool can be used not only for grass, but actually for anything, any 3D model you can actually use here. So I'm going to find all the rocks. So let's begin from the beginning up here. Let's see our granite actually start with granites. So I'm going to drag this one, disrupt 3D model inside of this foliage tool. So dragging it inside of here. It will actually add this here. And you can see, I can choose a brush size and I can click and actually paints the model for me. So this is the fastest way to add it. And we are going to modify so we don't paint too many rock. So let us click on Control Z. I just wanted to show you. Let's add all of the rocks. So I'm going to the next one dragging it in. So here we go. 3, 4, race, don't we have agree, sandstone we can add as well. And rocks. This one. And that was it. So we have so far 1, 2, 3, 4, 5, 6 rocks. And I can reduce the density because when I paint now, we have a lot of rocks in one place. So you can choose the brush size, but you also can choose how much you want to paint. So the lesser density, you can see repairing a lot of rocks. I click Control Z and it can now see or appending less. We're painting less. And if I increase the density, something insane, you can see we're appending a lot of rocks. So try to adjust the density and the brush, brush size as well. And here with that tool, you can actually paint around the map. What you can also do is click on any of these 3D models. So any of the foliage inside of here, click on one of them. And you can see down here, we actually have some things we can edit. So you can see the mesh year. You can also see the scaling. So down here, if you go down and find the scaling uniformly, and we have this x scale, an x. So it can actually change the minimum and maximum scale. So it randomizes the scale between, for example, 0.81. So sometimes the rock will be smaller than expected or than the original size. Going down to the Z offset, you can also edit how far from the ground Iraq is. So let's say I wrote a higher number. You can see the rock is actually more above the ground than before. So if I write a much higher number, so you can see it more visually. If I click, you can see now this one is floating. So you can actually, sometimes you pin the grass and so on. And they are actually either above the ground or below the ground. And you can actually control this by changing the Z offset to have them correctly placed on the ground. So I'm going to click Control Z. And now without loss, actually start painting. So if I write 0 and the z of Sir, let me see what they look like or we can actually just decrease it to 1515. And again, if you hold Shift and paint, you are going to delete the trucks. Okay? So sometimes you want to paint one specific rock and you can do so by, you can see they have tick marks like that. You can hold, click on one, hold Shift, click on the last one, and click here to disable everything. And you can actually just enabled one of them. So now you can see if I paint, It's actually only this one that I'm painting with. So you can choose what you're going to paint with by ticking the mark here. And if you don't want to paint with it anymore, you can remove the mark and paint with something else. All right, so for now, I actually want to paint with all of them. So I'm going to select all of them. And we're going to increase the brush size slightly. And we're just trying to paint. And sometimes you see we have some rocks overlapping. You can decrease this and you can hold Shift and click here to delete it. And it can try to just keep continuing painting like this on all of your landscape. Alright, so now I've finished adding some rocks randomly. I just went around and clicking sometimes removing those, for example, clicking here, letting that be removing this and so on. Just, just randomly scattered them around. And sometimes what you want to do is you want to place something specific so you can combine this tool with your manual placing. So I can actually go outside of this tool. So I'm going to select mode. And I can actually drag this one out. And I can choose to place it specifically. For example, here I wanted to be here rotating it. I'm placing the side of this one, for example. So you can actually combine the, the foliage tool together with your manual placing. And sometimes you have these repetitions. So this one and this one. And it can actually delete it and you can see, you can't just click on it and clicking ON delete because you can see if you click on it, it selects everything. And this is because it's made with the foliage tool. So I have to go inside of the foolish tool, clicking on Shift and clicking here to delete it. And then I can go back to my my grand year to place them manually so I can drag this one out and I can place this one here instead. And this is fine. Maybe I'll remove this one again and just let it be like this. And this is fine for now. Maybe we have the need to add more rocks later on. Because remember, you don't just do these in steps like this. At the end, when you, when you add, for example, branches or grass, you find out that you actually need one more rock over here and you add more grass to it and so on. So, but mainly the main fundamental or the main section we have filled out. So this is looking fine, fine for now. If sometimes we have too many rocks, we can go in and delete them. Or if we have too few or too many repeating themselves, we can delete them as well. But for now I think this is looking good. So this is the whole level that I have right now. And let's actually go ahead before we add any branches are tweaks. Let's go ahead and add some puddles. We can actually fill some of these empty holes with bubbles.
31. Adding Puddles: In this lesson we're going to add puddle. So at some puddles we have to go back to our blend material, double-clicking that. And here we have an option to use a puddle layer. So clicking on that, enabling the puddle layer, okay, now minimize the blend material. And what I can do inside of here is go to the blue channel. You can increase the brush size if you want. And actually when you paint, can see you're actually painting puddles. So this is packed into the blue channel by like automatically. And you can see it's actually looking, looking very good and it's, it's being integrated nicely into our own scene. I'm going to click on Control Z. And let's reduce the strength and we can adjust the settings later because you can see inside of the blender material at the bottom, you can actually change a lot of settings with the wave and the size and so on. So let's try to paint just a little bit here and there. So this one, I'm going to paint a little faster than then what we did with the ground. So I can add one here and I don't want to overdo it, I just want some small detail. So what I can do is I can also add it over here. We're just setting a small one here. And I will add a last one. I can animate last one over here. And sometimes I've tried to give it an interesting shape. It doesn't have to be bullied around. I think this is too big, so I'm going to click on Control Z or I can hold Shift and actually just delete some of it so you don't have to press control Z. I think something like this and that's lattice fine. So these are the products we added. And we can actually, it has some settings for them. So if I go back to this one and I can click on the Blend material. And inside of here you can see we have some settings, we have some liquid height, height, max. So I try to make it visible for you as best as I can with 11 Enter. Therefore no power roughness. You can also try to play with it. We can write one, I think can reduce it slightly. And a liquid roughness is how harsh it is. So we can see if you're right one, It's almost flat here. And when you decrease it, it becomes more wet out in the sides. So I think the default 0.01 is fine for now. This is the fall off. You can see it falls off. Smoother or more harsh like this. So you can choose the fall off of this, this layer here. I think 0.25, close to 0.3. I think this is fine as it is. It already comes with a nice settings. So try my best to change it. This one we can change so the albedo darkening, actually the liquid color. And let's, let's change that instead. So we can change this one to be more, having more of a red color. So you can see it fits a bit more with our scene. So let's click on it and maybe we can edit this way instead. So give me that orangey look that will fit a lot more with our seen. Something like this, just a small, small effect. And you can also change the albedo darkening color, something like this. The darkening orange you can, you can change as well. So you can see this is the, how dark it is. And let's keep it as default. This is actually looking fine. The follow-up is fine as well. Now, we can add some waves to it, so we can add some wave controls. And you can click on this one, click on Enable the wave controls so we can actually make the puddle moving so it's not fully static. So here you can add some speed and some strength. So it can see here if you're at one, the speed is very, very fast, but you can't see it because you haven't added some strength. So if you add some strength, you can see it's actually going insane. So we can add, we can reduce the speed to 0.50.5 to see what it looks like. This is still too fast, 0.01, then it's moving like this. This is looking good so we can reduce the normal string. The normal is how bumpy it looks. So if you write 0 is Flat, Earth, one to 10, 20, you can see it's getting rough like that. So maybe one or o. So I've changed the settings to wave scale by 1.2 and this P to 0.02, the normal strain is 0.3. And you can see here if I look from the top, it's almost not visible. So I just wanted to slide slide effects so you can see it's moving here on the sides. And if I look down this way, you can see it more visually. So you can see it's actually moving. And this is what you need to do in level design or in game design in general, or environment design. You just need these small details. You don't have to make this 10 and make it go crazy. And now it's visual and whatever, it's going to look bad. So even if you set it E15 or on three, it's going to look like plastic. And I think these dots are some error inside of Unreal Engine right now from the sun. Maybe we can fix it later when we're working with the sun. But it's coming from the lighting. But you can see here if I look at it like this, it's going to look plasticky. So imagine if you have a cinematic camera and you're going like this. This is looking like this is too much energy, is going to look like plastic. So running zero-point three, it's going to look a lot better. And it's almost not noticeable if you look from up here, but that is fine. We just want a very, very small detail. And I think this was it for the, for the puzzle. We don't really need a lot more. And I tried to go for the opacity again and see if we need less or more and actually reduce this to 0.2. And let's close this. Let's save everything. Let's take a look. So this is the bottom level we have. And this is looking nice. And actual look of this as well. You can see it's reacting with the sun and the poles are looking great so far.
32. Adding Branches: In this lesson we are going to add branches. So just like before, like we added the Iraq's, we are going to add the branches. And I'm going a bit faster through this because now we know how to do it. And before we start, I actually want to show you a trick because when you close the engine and open it again, you will start in an empty map. And every time you have to go inside of your maps here and double-click the main map to enter it. What you can do instead of opening it all the time, you can actually go to Edit and then project settings. Inside of here we have something called maps and modes. Here you can actually edit the editors Startup Map. So I can actually select the Map main, I know can put it here as a madman as well for the game Default Map. And now when I close the engine and open it, it's actually going to start inside of this map instead of an empty level. So I'm going to click Save and let's start putting down the branches. So just like before we have to go inside of the foliage editing tool. And you can see we have added the rocks from previously. I'm going inside of my scans 3D assets, and I'm going to find all of my branches. So this one, the leeched branch. And if you are seeing the icons like this, sometimes when you click around and you see it like bricks like this, and you double-click one of them. Like it. When you're done, click one of them, you see them. This is a very small model. This is why you can't see it clearly. You can see, you know, you can actually see it. And the others are like this. And sometimes I find it annoying because I actually want to see the model here. So if I double-click, you can see it's here. And if I close it, you can see now you can see it. Sometimes it's annoying. I can actually right-click the content folder and I can click on validate assets in folder and click on Yes. And once the assets had been validated, you can close this down now and you can see you now you can actually view all of the meshes. So that happens to you. You know what to do now. So let's add all of the branches. I'm going to drag out the model, putting it inside of year. And the d'etre as well. The dry bug chips I'll skip for now this one dry roots we need as well. So dragging these branches in as well. And the wooden sticks will wait till later. And this one for layer. So now we have all the branches that we actually need. And you can see you when your paint now, these will appear. Right now they are appearing a bit above the ground. So let's actually go and edit that. So if you click on one of them, and it's a bit annoying that this bar is so small. But let's go down here and find, let's actually select all of them. Let's do the same thing for all of them. So I'm going to click on the first one, hold control, and you can click on all the other ones. You want to edit. Those seven items selected. And now I can make them minimum size to 0.81. So when I paint, the size will vary from 0.8 to one. So not all of them will have the same size. This will create some variation for you. So if I paint now you can see they're a bit above the ground. I want them to be lower. So remember you have to edit the Z offset to make them go lower in the ground. So maybe minus 15 this time we want them to go down. So clicking and painting can see now that are actually beneath the ground. I think minus five is more reasonable and can try minus 2. Minus two is still a bit above the ground. You can see sometimes it's actually good. Or this one, for example, you don't actually need to put it beneath the ground. So let me click on Control Z, and I'm going to click on, let me go four minus six. And what I can do for this one specifically, and this one over here, we don't want it to be that much beneath the ground. So I'm going to click on that one specifically and actually arrived 0 dura. So now this one is correct and the other one's looked better as well. And if we see something that's, that doesn't make sense, I can get out of the editing mode and I can click on those to see how much they are beneath the ground. And this one could be fixed a little bit. So let's go to the foliage editing tool. And this one, I could raise it a little bit, they're dry roots, so I'm going to write 000 instead. And let me see where it is. This one. And this one is a bit better like this. Okay, so now we are ready to paint the, the root or the branches here. And just like before, you have to set the brush size and the pinching density. You choose that and try to paint. And every time you overlap thumb rocks, for example, you can go ahead and, and hold Shift and delete them and try again. And just, just the same method as the rocks. And now I've added some branches all around. So I've just gone ahead and painted some random branches just like this. And after that you can just hold shift and delete. So this is what I've come up with right now. And I'm not sure if it's too many or not, but it looks like some sort of waste lands or some sort of environment that nothing grows here and so on. So I think it looks great and it will actually look better with the lighting as well. Which means you sometimes, I think this is a bit above the ground, might be a little bit. And maybe we can fix this by clicking on the editing mode here, clicking on the branches. And I can try to disable the grid snapping here. And I can drag it a little bit down. Like this. It might help a little bit on, on the look of it. And I just want to look around and see if everything is fine. And I've also added some to the puzzle here. So in the puddles of edit, some of the branches and I think it gives that pretty cool effect with it. And so this is the level output down and I've just added some, some random branches all around. And sometimes there are too many. You can delete the ones that are inside of the the row. So this one was called lighting totally inside of the rock. I would have deleted it. This one is actually called lighting solid me go ahead and delete it into foliage tool hold shift. And it decrease the brush size and I can delete it. And I think this is good for now. So now let's actually go ahead and add some twigs all around.
33. Adding Twigs: In this lesson, we are going to add tweaks. Alright, so now we have added some of the branches. So let's go ahead and add the tweaks and the twigs are inside of the mega scans and here in wooden sticks and twigs. And I'm not sure if we had more. We had some DR. bark chip, but maybe this is now if we need that, actually, I am possibly it. Let's not worry about that for now. Let's add the twigs and see how it looks with that. So I'm going to select all of them, going to drag them inside of here. And I'm going to disable the branches from earlier. I'm going to uncheck those just like that and only the two weeks are selected. So if I paint, you can now see we have a lot of tweaks that we can paint just like this. And I'm just looking at their beneath the ground or above the ground. Yeah. Let's stick with that. And want to see you it look like if, if it's too large, Let's make this size 1.5 here. And I'm going to keep it to one. I don't want it less than one. So sometimes they are a bit larger than, than the ordinary size and this is good. So now we can actually paint with the tweaks. So just like the branches and the rocks, Let's go ahead and pin the two. It's alright, so I actually just spend one minute at max to add those, those tweaks. So quickly I just increase the brush size to 250, the density to 0.001. And then I just paint all around and just actually just run down just like this and could take only 30 seconds. So I've just added those those tweaks here to the ground. And it gets, gives a nice feeling that the scene is not too empty. Because if we only use the branches and the rugs, it kinda seems a little bit empty. So it's nice having these tweaks all around. And also especially if you're creating a forest environment. When you find references on Google, you can see a lot of a lot of twigs and stuff like small stuff like that all around the forest floor. So it gives that nice, nice feeling selfie. You look at that as seen here. You can see it's actually looking nicely though. Let's go ahead and add the cactus.
34. Adding Cacti: In this lesson we are going to add tech type. Okay, so now it's time to add something with vegetation like grass, cactuses or cacti and so on. So let's actually start with that. So characters over here, we downloaded two of them. So this one, we have downloaded as well as this one. And let me see if they are in the inside of the ground. They might need to be a little bit down in the z of offset. And I think, I don't know if I want to make this cactus larger. And I might want to make it a little bit larger. So let's go ahead just like before, click on them, adding them to the foliage tool. And let me make this bigger. I'm going to deselect all of the tweaks that I have. And this one or both of them, I will select both of them. And the Z offset, I'll write two minus two. So a little bit beneath the ground. Just like this, this is good. And for the minimum and maximum size, I want to make it different because this one, maybe I want it to be a lot bigger. And so I think this one, the minimum is one and the maximum is 1.5. This one, the minimum is 0.7 and the maximum is one. So a bit different, a little bit of difference between these two, but you can see they're looking nicely now. I might make this larger one, I'm little bit smaller. So I'm going to click on it and the maximum size is 0.850.6 is the lowest. This is the lowest one. So you can see they have different sizes and it looks nice. Some of them are large, some of them are not. And I think this is good. So now just like before, we have to adjust the brush size and the painting density. And you can see if you just paint around writing these random cacti all around. And we don't need too many of them. Right now I'm thinking maybe I need to delete a bit more of these branches. So now I'm going to try to paint these cacti all around and I don't really need many of them. Alright, so now I have reduced a bit of the amount of the branches and twigs I thought there was, but too many. So I deleted a lot of them. And now it's looking a lot better. So again, if you want to add a character's manually, you can combine this foolish tool together with just manually placing. So maybe you want a character's here specifically. So you'll go out of the foolish tool and you'll go inside of the characters and manually drag it out here into the scene, rotating It's however you want. Try to drag it a little bit down to put it in the ground. And maybe you once one specifically here. And you can choose the size of it. And let's place one here. And I'm actually going to delete this one so that we don't have too many years in the area. So I'm going to select this one and hold Shift and deleted. Okay, so now we have detectors and this is the full view of the environment currently. So what's missing right now is actually to add the grass into their environment because it gives it a lot of life once we have the grass down. So let's go ahead and add the grass.
35. Adding Grass: In this lesson we are going to address. All right, let's go now and add some grass. So I will go here and find the grass. And it's actually inside of a for minimize the 3D assets. It's inside of 3D plants and this is the one I imported previously. And you might have imported the same one, the dead shrub. And we can actually add all of this grass. So let's go over to the foliage tool and let me drag in all of this grass. And you don't have to add all of them, but that's actually up to you loved me, just add all of them and see if they're all good or not. Before I do this, let me disable all of these tweaks just like this. So everything is disabled. And I'm going to drag in the foliage here. So now this is all of the grass. And when I paint, it's going to compile shaders. If I move my camera a little bit, you can see that it's compiling the shader down here. And now you can see if I make the screen in bit larger, this is actually the grass and this is looking amazing. This is higher, higher resolution. And in a bit we can actually add animations to it as well. So it's moving and not too static and unrealistic looking. And you can see we also have a problem with the grass. So if I go close to this and you can see if I move the camera further away, it's going to change the look of the grass you can see it's actually changing. And this has something to do with level of detail. And we're going to, to work with this later on when we are working with optimization, we're actually going to make it look a little bit better because we don't want it to change like this, but don't worry about it for now. What we will, we'll work with it like this for now. And I'm seeing that my game is lagging hearing when I'm recording in OBS. And it's going to smooth for me out on a wide slugging inside of the software. Okay, anyways, let's select all of the grass. And just like before, so light to the size of the brush and you can paint the grass all over. And you can see here. Now it gives a lot of, a lot of life to the scene. And sometimes you can actually reduce the brush size and increase the painting density. And maybe sometimes you want a lot of grass in a specific area and you can do so. Alright, so now I've finished painting the grass. So here it is. And you can see it's actually looking great when we look closer. Sometimes I actually reduce the brush size just to paint specific grass around a specific area. For example, here you can add one like this, just beside the characters to make it look better. And just more detail. And if it overlaps the Iraq, it could be look good like this, but I think it's clipping a little bit. So I'm going to hold Shift and deleted and just try to add some grass all around until it looks good. So something like this. And now have all of this grass and you can see it's actually looking a bit weird because when we move closer you can see the grass actually changing the look of it. Every time we move away and move closer. And we're going to fix this later. So don't worry about it for now. And you can see it's actually looking weird because if we are on the top view and we move around, the grass is moving around with us, like it's trying to face us all the time. So if I move around like this, it's trying to face us. And this is, this is something to do with the level of detail because or low performance computers, this is good. But for us, we can change how far away this effect will take place because right now it's way too close and we can see the grass is changing and it's not looking good. We want everything to look like this. And let's do a Slater inside of the performance section. So we will work with level of details to improve the performance of the game. And as I promised before, we are going to add some went to the grass. So now we have finished painting the grass and let's add some wind. So if you go inside of the mega Scans folder and back to your desk disrupt folder. So the grass here. And if you double-click on the material instance, so this is the material, and click on that one. And remember it's this one, not this one. And this one is called billboard. And this is the low-quality for local, local computers. And this, this doesn't matter right now. Let's go inside of this one, which is not called billboard. So double-clicking on this one. And this material instance comes up. And here we can actually enable the grass wind. So here at the bottom, click on Enable grass wind and also take this one as well. And when he ticket you can see you have some shaders compiling and you also have some, some things you can edit. For example, the wind, intensity, the speed, and so on. And you can see here right out of the gates, the UN does actually laying and it's looking nice. So this is playing and we might actually just let it be like this. But if you want to edit some settings, you can click on the wind intensity and you can of course, but it up and you can see it's more intense now. And the zero-point 50 was the default. And you can also change the speed if you want to. And I think right now it's looking good like the speed is, is perfect for what we need. And this is very easy. You just have to take those two and you have some wind to your grass.
36. Adding Props: In this lesson, we are going to add props. Let's go out of the foliage tool for now. And instead of them mega scans in the 3D assets, we have something with the, with the RAM skull and bones. We also have the metal part and we also have the find. It's the wooden wheel over here. So we have some prompts that we can add to the scene to make it look better. And let's go ahead and do this. So firstly, I can add some RAM skull and around bone. So here the RAM skull, I can actually drag it out. And here you can make a pretty cool scene. You can ask some of these details. And maybe you want to add a ram bone side of it, maybe the leg bone, just like this. And when you add things like this, you can see you sometimes these graphs are overlapping and this is what I mean by that. You can do all of these things in just one step. Now when you, when you add props and things like that, maybe you have the need to remove some grass, remove some rocks and so on. So now when we place the items that we have, the props, we have to go back and remove the, the grass, for example, in this case, I can go inside of the foliage tool. Let me just select everything and enable it. You have to enable it, to delete it. So you have to enable it. And I'm going to reduce the brush size to 20 and holding Shift and just clicking on the grass to remove it just like this. And I can accept the foliage tool again. And I can try to set up the scene just like this. And adding the props might take a little bit more time than all of the other things, depending on how much you want to make out of the leucine. Again, the more time you spend inside of your scene, the more like the better it's going to look. So I'm just going around it just like this now, putting down some rooms coal around bone. And you also remember how the wheel over here that you can place around. Sometimes you can place it around Iraq. So for example, you can rotate it just like this. And you can try to move it close to the rock like this above the ground. I don't know. You can you can just try it. You can do whatever you want. Whatever you imagine this could look like. So you can rotate it. And just like this, something like this. And you can set it up and try to put some prompts all around the SR also have the metal part that you can play around. So this one, we can pull this around as well with the lead. It can either be on the heart here, so it's closed, or you can drag it out and push it down and place it on top of the ground that is up to you. So try to place the the probes all around your scene. Okay, Now I'm finished. I've been spending some time painting the the branches. I was removing something. I was painting some grass hours, putting in some of the items here, the prompts that we're adding. And sometimes when I add props, I remove grass around it, for example. And you can see what I've done with the props. I've just put them here just like I showed you. So putting them around, going over here, for example, putting a run bone here and going over here and just dropping the wooden wheel that we had. And yeah, just just going around filling the environment. It does take some time if you want a very good-looking environment, just putting random things around. And sometimes you can make a very, very good-looking scene. And here you can see the, the metal part. And this one, I've made this beneath the ground. So if I go back to the Select tool, so basically what I've done before, it was like this. It goes like this before and I've just rotated it and put it here, is done the ground and I just just moved it slightly. So this hole this hole is filled with dirt, so it looks like it's beneath the ground. If I click Control Z and go back. And I've just added this red bone again, just rotating it, moving it around, trying to put it here on top of this and so on. So when Control D going back to normal. And so this is what I've done so far and just putting down the wheels, pulling down and the bones running down the the lid and the skull. Remember you can rotate things to make them look different so they don't have to be like this all of them. You can also rotate them 90 degrees and also make that look a bit different than than all of them. And I've also rotated this this metal part and put it here beneath the ground. So it looks like it's here beneath the ground by the by this puddle. And yeah, so this was it for the prompts. Just tried to put things around. There's no no right or wrong. Just tried to make your own scene and see what you come up with.
37. Applying Decals: In this lesson we are going to add decals. All right, so the final thing we need to add to the environment are decals. And so we can go inside of the mega scans and inside of the folder called decals. And here we downloaded some decals. And what decals are there? Simply just images. That's what decals, decals are, simply just images. And these images are used to break up repetition. So for example, if you have a wall or if you have a floor that is repetitive, you can add decals, do it to remove repetitiveness. Decals can also be used to tell a story. So for example, an image of graffiti or blood on the wall and so on. So here in the decals folder, we have imported three things. So a horseshoe. And as she will let me go to the content folder and click Validate assets and folders so you can see all of the icons. I can closer to go back to the cow. So now you can see them. So I have a horseshoe and if I drag it, oops, and of the Son and the folder, if I drag this decal over here, so this is the De Kao, the image. By dragging it here to the environment. I can get it inside of the environment. And remember that this texture, specifically, this one, if you double-click it, remember that you had to set it to mask. If you have, if it is still an Alpha, it is not going to show for you. So remember to set this texture to mask. And so you drag it out. And these are decals. So simply just images that you can place on the environment to tell a story or to break up repetition on the floor or the wall or items and so on. So I'm going to import these and you can see what they look like. I'm just dragging them in. So these are the two different horse shoe and this one is the footprint to the footprint that we can use. And right now you can see there are very large, so we need to reduce the size. And also these ones, they have this one specifically or maybe both of them, they have different terrain, so we might not be able to use them. Because even though we change the color of this one to be the same as this one, the type of ground is different, so it's going to look a bit weird. So I think we might skip those who might delete them and import something else. So let me delete those horseshoes. But we can definitely use this one. This is a mighty footprint and this fits the environment we are creating. So let's work with this default for now. So the mud footprint can take it out and then let's reduce the size. So would this lock open? If this lock is locked like this and you write something, you can see that these are changed as well. But if you open this lock, I can actually change every one of them individually. So specifically for this decals, you can see they have a box. And if this box, if you move it, if it's too far away from the ground, it's not going to show for you. So you have this bugs have to be underground like this for it to show. If it's away from the ground, you can see the opacity kinda disappears as the box goes away from the ground. So make sure the debugs is underground to show this or on the wall. If it's a wall. And if it's along, remember to rotate it 90 degrees so it's against the wall. And you can move this DKL all around and you can even put it on items. You can see this is, this is pretty cool. You can download or import blood decals and I think we will do so. Important blood decals and you can actually put it on items. So you can see I can't click on this decal has her hard for me. So how do you move it if you'll put G to view all of these icons. So remember you can click G to hide icons and G again to show them. And this dichloride now this icon is below the ground, and that's why I can't see what's. So click on the icon and then you can move it. Or again, you can find it inside of the World Outliner. You can find it inside of here. So this decay, we can move. And let's move it down on the ground. And let's reduce the silence. See if the sizes okay, so I'm going to click F 11. And now I'm just imagining a human walking around. And you can just imagine how large this footprint will be comforted all of the other items inside of the environment. So I think I think this is a good size, but we need to reduce the width. I think it's too wide right now. So I'm going here, click under dq, L and the Y, this is the word maybe 30. So maybe 38. 3038 or 28 here. Let's make it 28. Yeah, so this footprint is, is a good size now I think. And the next thing we want to do is change the color of it because right now it's standing out. We need we need it to be the same color as the ground to make it believable. So what you can do in this case, you can click on the base color texture, double-click on that. Remember it had properties that we can edit. And inside of here by just bringing them beside each other like this. And I go down to the brightness. Right now, it is too bright, so it needs to, needs to be less brights. And the next thing we want to do is I actually want to saturated more so it needs more saturation. Right now it's, you can see this ground, the main ground is more saturated than this one. So something like this and I think this is good so you can play around with the brightness and see what is too much and water's too dark. And 1.1 is fine. I think this is good. And you can see now we have integrated this footprint inside of our environment. And I might just increase the saturation a little bit. I think it's a bit of so 1.1 and then maybe 1.13 slightly. And now it's looking better now. So now we have this footprint integrated in the grant. So now we can hold Alt and drag here so it can duplicate it. And I'm going to going to duplicate it and it's like someone is walking here. So you have to make it realistic compared to how far apart they are. And I think something like this would be fine. So here's someone is walking. And you can see here, we have a problem. This item or this bone here is getting affected by this Dekalb and it's not supposed to happen because it doesn't look good. And so what we can do here, if I click it for 11, or you can do here, if I click on this bone, I can actually up here in the search details, I can search for a decal. And you can see there's an option in the rendering part called receives the decals. I can uncheck this and then the detail will not affect this bone. So no decals will now affect this bone. And this is pretty cool because now you can see it's not getting affected and this DKL is going beneath the item now without, without affecting it. So this is how you do it. And now I can just select those two and just copy pasting like this. So I'm going to copy paste a couple of times. And I think actually before I do this, I'm going to take those and move them here. And I just want to make a pretty cool scene where we have footprints here and then we have some blood here. So we're going to import some blood instead of the horse shoes that we have. So moving them close to here, just like that. And then you can simply just keep copy pasting, so like this and just drag them out and try your best to, to align them. All right, so now I have placed the last ones and you can see I've added then copy pasted the decals here. And the cool thing about decals, they don't cost much in performance and memory, so there are very cool to use. And whenever you can use them, you can do so to tell a story, for example, blood and whatever. If you're making a first-person shooter or a horror game or whatever you're making. So you can see here I've added these footprints. They walk all the way up to this one. And now here we can actually add some blood cell. What we want to do is let's actually hold Control. Select both of them. I'm going to click, right-click and you can delete, or you can simply just click Delete on the keyboard. Click on Delete. I'm going to delete them because we're not using them. So we can right-click here and add quicksort content. So let's go ahead and import some blood instead of these horseshoes. And remember that you have to login up here if you're not signed in. So I'm going to click Sign In. Okay, now that I'm saying, then I'm going to maximize this window and I'm going to go inside of decals. So inside of it because you can see all of the things you can do with decals. You can put graffiti if you want. You can put blood, you can put maximal tree vegetation and something on the street, like the lines and so on. So you can see that you have endless possibilities with vehicles and they're pretty cool to use. So I'm going inside of the blood here and I'm going to add some sort of blood to the scene. We have some bloodstain here. And we can add two types of logs. So we can add this one, for example, a bloodstain. You can download it in medium quality. And we might even be okay to download it in low. I don't think we needed in the medium, but let's, let's do it. We can always reduce the texture size in the performance section. So I'm going to click on Download here. And I'm also clicking on, let's see this bloodstain and this one. So we can download this one instead. I'm going to download this one and clicking on Download. Okay, now they are finished downloading and I can click on Add, just like this. And I can click on this one and click on Add. And sorry that you couldn't see it because of the camera, but I simply just download it and clicked on an ad for medium quality. And let's go ahead and minimize the bridge. Now you can see we have the bloodstains and these textures. If you double-click on them, you can see there are set to mask and they are set correctly. So it is random sometimes, sometimes they get imported in a wrong way, but right now it's looking correct. So let's drag out the bloodstain. So I'm going to drag out this this Dekalb County. You can see it's huge. So I'm going to click on this lock and just make it once he possibly, and we can put it here. Remember to rotate it. Else's, it's not going to show correctly. And you can see this box needs to be on top of the item, and I think it's still very huge. So maybe 10 here. And we can try to move this box to make it show on the rope here, just like that. So you can see now there's blood and it's looking more interesting. And we can do the same with the bloodstain here so we can drag it out, make the size ten, rotate it 90 degrees and then rotate it this way. It may be 50 degrees. Just move it up and add it to the item here. Just like that. So maybe we want to increase this one. So instead of 10, we can write 15 or 12, 13, 12. I think 12 is fine. Okay, so now we have the blood here and we have some footprints. So now people can wonder what happened here. And you can even duplicate this blood. Maybe we can add it here as well. You can add it down here. I don't know if it's going to look good and there's the serum bone. But we can try to add it like this. Yeah, this is looking cool. And sometimes you want to see if there are too many structures and it's going to look weird. But I think, I don't think this will be seen too much. This is fine. And this is looking great. So now you can see we have added some some life to the scene and you can even add the blood down here. That is. Okay. So making it 20 or 10 again, I think it was 10. Let's see if it's actually looking good down here. I'll let this one be for now. So this is looking cool and you can wonder what happened, someone who opt up here and there is a blood here. And where are the footsteps? How did he leave? Who knows? Okay. So this is the, this is the scene and these are decals. So there are basically just images that you can put on the ground and they break up the scene. They, they make a cool story. You can use them for horror games or you can use them if you're making a street, you can put these whites, white lines on the street to separate the road. And you can see here we have a small bug here. So I'm going to click on this one. And again search for Di Cao. Remove this received the cowl and this is not working anymore. All right, so this is everything about the cowl. You can go crazy with it. You can download whatever the hell you want. You can download graffiti and put up, put it on top of here if you want to. And the possibilities are endless.
38. Creating a Landscape: In this lesson, we are going to create a landscape. Okay, now that we have finished the scene, like the 11, finished completely because we need to create a landscape. But we have finished this area around here that, that is the most important area for us. So we created the decals, the items, the props, the Eros and vegetation, grass, and everything that we needed to add. And you can, of course go crazy, either will then another environment or you can download more props, you can download more grass, more rubs, and so on. So It's all up to you what you want to create. So now let's actually add a landscape. I could make it very cheap and just go into mega scans and download cliffs and just put them around over here and end of story. But I think just to create a landscape so you can learn creating landscapes. So if I click on F 11 to minimize this viewports, and here we have the landscape tool up here. So clicking on this one, this will create a landscape. So clicking on it, you can see that this green grid appears and this shows you the landscape before you created. And here to the left you can see the landscape. You can choose the location of the landscape. So you can see you can a cubed where the landscape should be. So pyrite 0, it's in the same level as this ground here. And the next thing you have to choose is the section size. So you can see this section size. You can choose to reduce. And the squares here, you can see these very thick green lines. These are the sections. So the larger they are here, the larger these the squares will be. And you have to know that this will affect performance. The smaller they are, the more performance they will need. But on the other side, you are going to have a better time sculpting the environment if there is no quotes are smaller because you have more room in these sections, they will translate better when you, when you paint the environment and when you stop to the environments. And when they are higher, they are going to be more low-quality when you are a sculpting. So you have to give it a balance. So it will cost more if you put these quotes the lowest possible. And for this case, we don't really need the landscape so much because the only thing we're interested in is this environment, our own environment and everything around it will just be, they're just like for cosmetics, we just want it to be there so it's not an empty space out there. And I'm going to increase the quads to maybe hertz one. Yeah, let's, let's increase it 231. And then you can choose the sections here. I'm going to let it be 2.111 times one. And down here you can change the number of components. So when you increase it, you can see that now the landscape is huge. And remember, the more you create of the landscape, the more performance you will use. So great, only what you need. You can create them and deleted later. Here in the select tool inside of the the landscape tool. Some, but for now I know that I don't need that much, so I'm going to reduce it to ten and maybe we can try to delete some of it If we don't really need it. And I think maybe Ada actually, I'm going to create eight here. So eight components, 1 times 1 sections and 31 by 31 quartz. And here's the overall resolution. It, it changes with the components, so you don't really need to change that. And it's going to tell you that the total components are 64. And you can go ahead and create the world. Before you do it. You can actually also add a material to it if you want. So I can go ahead and find can also do it after. You don't have to do it now, but I just wanted to show you so you can go inside of the surfaces and you have to find your main ground. So maybe I want this as my main ground, the surface soil clay that we used here. And it can actually drag and drop this on top of this landscape and you can click on Create. So now it created this landscape. And if I just quit this landscape tool and I go down here, you can see this is our landscape that it created. And right now it's clipping through this ground that we have our own ground. So I'm going to lower its and you can either drag it down like this. I just want to drag it minus 5. You can see it's and it would be the ground now. And maybe you can just make it minus two. That is fine as well. And then we can sculpt it so it fits. But you can see now, now we don't have, we don't have an NC space out here. We have a landscape. And this is how a credit landscapes. And you can always come here to the right and change the material that we just added. You can replace it with another material and you can see the ground changes. So let's draw this back in.
39. Sculpting the Landscape: In this lesson, we are going to sculpt the landscape. And inside of here, you can click on the landscape. You can go in and sort of the landscape tool. And inside of the landscape tool you can see you can actually sculpt now. Right now you have chosen the Sculpt Tool and you can choose the brush size so I can reduce it. You can also choose the strength just like when we painted the ground here. And also the follow-up of how hard this brush is. They can see if I sculpt now, it's very hard. And if I increase this fall off, it's sculpting more smooth. So we don't really need to make something crazy for this environment of what this landscape, what we need to do is just, we can just sculpt here. We just want to sculpt it like high here. So we don't really see what's out there because right now when you stand here as a character and you look out, It's, it's empty out here. Now what I want to do is just sculpt it up. So it's looking like this and just all around so you can't see out in nothingness out here. So I'm going just to sculpt around. And again, you can go ahead and choose what size of brush it is. But right now, I just want this normal brush and you can choose the size of the brush, the ball off, and how strong it is. Thus, more strong it is, the faster it will sculpt like this. And if you want, for example, we can see here, sometimes they are very pointy like this and you don't want it like this sometimes. So what you can do here, you can choose the smooth tool. So you can choose the smooth tool and you can reduce the strength so it's not smoothing too much. And if I click if 11, so you can see, I can click on here. And there's actually smooths it. You can see it now. And the strength is actually too strong right now. And I can go around and smooth this. So after you have sculpted, You can actually go around and smooth like this. So it's not too pointy and low poly lookings. And you can also flatten. So if you make a mistake or maybe you don't like this, that you have sculpted. You can click on the flooding tool and again, you can change this drawing and all other things like that. And what you can do with a flattened tool is, for example, wherever you click is the main ground. So if I click up here and I click like this, you can see it flattened. It flattens it from this height that I started with. So you can see now it's flat like this. And if you want, you can, if you want to flood this down, you have to start from this level. So clicking on here. Now you can drag it out up here. So now you can see it's it's now flooding everything to be the same level as where you started the brush. Now, now you can see this is flat, just like before. And if you want something to be up here and you can start with the height from here. So you can click here and you can drag and you can see now it's flooding it this way. So you can see, you can make political landscape with this. All right, so what I want to do is simply, and again, just try to click around. It's simply the same. The same tools or different tools but the same techniques. So clicking on this rammed, you can click one place, you can click another place. And you can try to lift it up and click Create RAM. And you can see, if I go back to the sculpture, you can see that it created around for me. All right, so enough about that. I'm going back inside of the Sculpt Tool and I'm going to change the strength a little bit the brush size, and I'm just going to sculpt around here, around the environment so we have something to look at. So now I have finished sculpting the landscape I just copied just like before. And at the end you can choose the smoothing tool and just smoothing everything out. If it's 2.2, it can smooth it out. And this is what it looks like. So very, very basic. And if you are sometimes sculpting on your own environment here, you can take the flattened tool and I can press here, and you can flatten this area a little bit. So it's not overlapping your own environment. So for example, let's see here, I could go with a flattened tool and just flatten it a bit here, just like that. And you can do that all around your own your own area here in the middle. Okay, So this is what we have so far, so very basic, and this is what we want. We just want to hide this nothingness out here. And what you actually can do before we add some things here, we can click on the environment and then go back to the landscape tool. And inside of here you can click up on the Manage, up here. And here in the Manage you have this Select tool. So now you can actually select the environment here and what you can do that. So right now, I'm going to delete all of these because remember, the more we have of the environment, the more performance we are going to use. And if we're not using this environment out here at all, why would you need to keep it? So I'm going to select all of it and I'm actually going to delete it. So selecting those and just be careful you don't delete her own sculpted environment. So this fits perfectly. Maybe this one is going to cause a problem. Now this one is, it might be okay, so I'm going to select it. We might be fine. So I have selected everything now. And now you can click on this delete tool and just click here out here. And now you are deleting everything you have selected. So now out here, when I go back to my select mode and I full screen. So this is what it looks like and it looks like a whole environment. And of course, if you're making a large game, you would obviously not delete all of this. But then again, you would have to model a lot larger environment and you can see how much like how it can take a lot of your time if if all of this you made all of this, you had to do it like times 3, 4, 5, whatever map you are making. And you can see how this is actually a full-time job in many companies. And this is looking great so far. So this is the environment that we have and this is all around it. So now we can't see the nothingness out here and we can try to make cinematics in here. So before we do all of that, we have to do some lighting and so on. So let us advance to actually adding some stuff out up here. So it's not looking to MC.
40. Adding Assets to Landscape: In this lesson, we are going to add assets to the landscape. All right, so now we are almost finished with our scene. And the last thing we want to do actually is adding some assets here all around the landscape. Because right now, when we send in here and when we want to make cinematics, it will look very weird that this area out here is empty. So let's actually add something to it. And firstly, I'm going to delete one of those. I don't know why we have two here. So I'm going to delete this one. And let's have some assets up here. So clicking on if the Levin, going back to the foliage tool, this one, we obviously will do a lot quicker because this is just the background. We don't really care too much about it compared to what we had here. And let us enabled some grass. So you, you choose what you want to add first. I'm just going to add some grass. And the grass is up here. So I'm going to click on this one hold Shift and clicking on the last one here. Clicking on enable, it will enable all of them. And I'm going to increase and decrease the brush size just like this. And also you can paint the density maybe 0.07. Let's see what it looks like. Actually let me decrease it. So 0.05 might have been better. Something like this. And what we want to do just quickly, F11 here, we just want to and I don't want to paint on my owned environment. I already have done so. So what I want to do is just paint out here, paint all around. And we can always clean up some things if something's looking a bit weird. So something like that. So if you're standing down here and you're looking out there now, you can see there's a lot more stuff. And again, we're going to fix the grass later right now you can see it's very dark and if we come closer, it looks a lot better. And this is so this has something to do with level of detail of the grass and we will do that in the performance section. So don't worry about it for now. Now we have some grass here and there are some empty holes here, and it's okay, we can fill them with something else. So I'm going to click F 11 and disable all of the grass. We can click on these two, so enabled those to the cacti. And I'm going to click of 11. And we can pin them somewhere where it makes sense. So the density should probably be lower. Yeah, I think that the density is still too much zero-point 000, 001, and maybe 500. And the burst size. And you just want to pin them quickly. It doesn't really matter too much out here. And again, the more time you spend on your environment, obviously it's going to look a lot better. So we are going to disable those. I'm going to enable the, the roots. I think that these two, and let's see, where are the others are this one as well. And this one down here enable those. And right now you can obviously see I'm doing it fairly quickly just so I don't make the video for another hour. And I just wanted some sort of just the background. So when we make a cinematic, it doesn't look weird that nothing is out there. So now it's looking, looking good. And now we have the branches and the two weeks we don't really need that. That's just small detail. We might need some rocks. So I'm going to select the rocks, enable those. And I'm going to put down the dense painting density. So that's sweet so much. Maybe to yes, I'm going to add some rocks. Okay. So that's all that we needed to add. And I'm going to select everything now. Just enable them. And I just want to go ahead and delete something if we need to delete it. So I'm going to reduce the brush size to 40, just like that. And I'm just looking around and seeing if I need to delete something. And I just clean up like this, if something is looking way too weird, I'm going to delete it. So maybe we don't really need a cactus out here and see what we can delete. Everything is looking fine so far. And I'm not too worried if it's looking a bit weird, but if it's looking to word like this, this here clipping, I'm going to delete it. Okay, so now I have cleaned up a little bit some of the things that are clipping. I would delete them and just going back and forth like this. So now you know how to add some stuff. I don't want to spend too much time here to make the video too long. So this is basically it. And now we can actually see the environment. And when we take a photo or something, this out here is not to empty. So we can actually do actually have some content out here. And if you think something is missing grass, for example, you can go ahead and paint some grass out there. And yeah, those basic lead for the landscape.
41. Finalizing the Environment: In this lesson we are going to finalize the environment. All right, So now we are finished with our scene. This is what we have so far. And here when you finalize your environment, I want you to take an overall look up on your environment and see if there's something you want to change. For example, if there is an asset that is clipping, just like this one, for example, these are clipping. I'm going ahead and deleting one of them. So here, just like that. And I just want you to take a look like this and see if summaries look, something's looking weird or, or something is placed in a wrong way, or something has a, a wrong color. So for example, this RAM bone, I think it's looking way to whites compared to, for example, this RAM skull. It has some sort of a, a dirt on it and it's looking more brownish then this white RAM skull around bone. So I think if I reduce my cameras speed, it's way too high. So I want to reduce this, this whiteness here. So the way you do this is you can either find the RAM bone here and in the files, or you can click on it. That's the faster way. And clicking on this magnifying glass, and this is the Browse button. And this will lead you directly to the file over here. So I'm going to reduce the brightness. Remember we can go inside of the base color texture and adjust that. And over here, I'm going to look at it in just like that. And here we can play around with this. So for example, the brightness we can, we can lower to 0.80.7. And we counsel give it a hue if you want to. I want to see what it looks like. So 355. So it's giving it more of a reddish tint. So maybe if I reduce the brightness a little bit more, something like this, and we made it a little bit more red. We don't have to make it too much. I think. So it's 355. So if I maximize this and I think this looks a lot better with the environment. I think before it was way too bright and would reduce the brightness. And now it can take a look and also have to do it for this one as well. So I'm going to click on it. Click on the magnifying glass, click on the texture. And just like this, 1.63550. So let's try that out here, or 0.6355. Now we can see it changed color and I think this, it's a lot better with the environment. So we can take a look around and see if, if something else is looking weird. But I think everything is looking good. And I just want you to take a look at your overall scene and see the colors. Is everything fitting perfectly? Do you need to play something else somewhere and so on.
42. Level Of Detail: In this lesson, we're going to take a look at level of detail. All right, so now we are finished with our scene. And what we need to do is actually optimize the scene. So is it a game ready now? No, it is not. We have to optimize it obviously. And if you're making a cinematic, obviously don't really need to optimize it like we're doing right now. But if you wish to make a game, you have to optimize Elsa player will be lagging and there'll be very frustrated. Okay, so the first thing is level of detail. And I've taken an example here so you can see what level of detail is. So at first, imagine the modeler has modeled this rabbit here. So the models are counted in triangles. This is how they are built up. Their build up. This one is 70000 and triangles. And as you walk further away from the model and the game, it will become lower resolution. So it will become, it will be drawn in lower triangles. And this is done because this is how games are optimized. When you walked further away from our model, you don't really need to render it in full quality because you are so far away, you don't even realize it's actually getting lower-quality like this. So this is something that is done in games to optimize games. And so they don't like because imagine if you're playing Counter-Strike and something else, for example, a bottle or something, a random prop on the ground. If you walk further away from it, why does it need to render all the details of it when you can't even see it anyway clearly. So when you walk further away, the model is going to be drawn in lower triangles. And this is actually what's happening with the grass. So if I go and sort of the game, and you can see this grass here, for example, if you take a look, when I get closer, it actually changes and the wind is here. And if I go further away, you can see it's suddenly changes. And this is because drawing in lower triangles. Now, this is a level of detail. And the problem here, this is happening way too close now I can actually see there the change and this is not what is supposed to happen in games, is supposed to make it so subtle that the player are actually not, not noticing that the level of detail there. So maybe this crest should only change when I am way back here. So maybe if I'm way back here, the grass over there should change. So it it needs to be way far away is so far away that I'm actually not noticing that it's changing. So right now it's way too close and we're going to change this. And this is for all models. So some of them is already good and some of them not. So if I fly away from this rock here, it's going to change. And I think it's actually changing right now, but I can't see it because it's running on like it's changing very subtly. I can't I can't figure out what is changing and this is how it's supposed to be. So if I click on a random model, so if I click on the mega Scans folder, and for example, this cactus here. So I'm going to double-click this characters. And so you can see here now UNCLOS, I'm going to reduce the camera speed. And right now up here you can see the amount of triangles and vertices that are drawn to the screen. So this is Naaman of triangles. And if I walk further away, you can see it's reducing. 50. Walk further away again, it's reducing again and keeps reducing until it is in the lowest possible state that it is in. Okay, so this is the level of detail, this is how it's done. And it needs to be done in such a way that I'm actually not noticing. So the player should not notice that it's changing. Okay, So this model is perfect and this is what we have to do with the grass. So the only main problem we have right now is the grass. And if you're making a game like this, this is obviously a course and you don't have to do it for all the models. Unless you of course have to. If you're making a game, you have to go through every single model, your input. So if this was, if this was a serious game, I would go inside of here, adjust the level of detail. So going, go inside it here. Just the level of detail going inside of here. I just DO level of detail and so on. So you have to do it for every single model that you import. And this might take some time. And it's very important that you do it because then your game will be very optimized. And you don't see like a lot of weird changes on your models. But the big problem right now I have is the grass, this is the main problem. So going here too, let me see. You can find the grass and sort of 3D plants, that shrub, and here's the grass. So if I click on the first one, you can see right now it's looking like this. And if I reduce my camera speed by walkaway, you can see the triangles are reduced from around 300 to four. And this is pretty cool that it can do that what it's doing, it way too close. So what you want to do here, firstly, if you're making a cinematic scene and you don't really care about the level of detail. You can go ahead and up here, select the type of Elodie. So right now for this grass, you can see a low d 0. This is this main Elodie. And if I go to a low D1, you can see it decreases in triangles. So this is the second level of detail. And it's just like this one. This one is a low d 0, this is 1, 2, and 3. So here we have 1, 2, and three. This three is the lowest one would only four here. And we can fix this by either deleting an LOD. So selecting, for example, a low D3, we don't really want this one, and we can click on Remove LOD. Secondly, if you want this allowed you to be there, you can go ahead and select the load 0. And here you can select how far away from the screen this LOD needs to be rendered. So right now when I go away, you can see it quickly changes. Right now it's not changing because I have a load is selected. So if I select a load here, auto, you can see it changes rather quickly. So when I'm here it's already on Hello D3. And you can change this by going to Elodie 0. And here you can minimize, decrease this number. So for example, if I write 0.5, now if I go to Auto, see it's still there. So if I, this is still a load is 0, so we actually don't have to go in here. So a load is 0, I can decrease it even further. And now you can see, now I'm actually over here before it changes. So the more we decrease this number, so 0.05. Now you can see it's still around him, the high-quality. Now, if I go further away, it's going to render their locality here. So before the low quality was rendered here, now it's actually rendering over here. And you can keep decreasing this number until you are satisfied. So when your character is, for example, this far away, then you want the grass to change to the very low quality. And in this case, for this scene, I think we are going to delete their low D3. So you can either change this kinda alluded three and change the amount of like length, how far you have to be away before it changes. Or you can just delete it. So I'm going to delete a low D3 for now. I'm going to click on Hello D3 and clicking on removal OD, click on Yes. And now it's looking like this. So if I click on auto here, this is what it is. And I still have it to 0.05. So let's actually tested because when you change the value heel here on LOD 0, it's going to change it automatically as well for 12. So let's actually go to, if I minimize this here, Let's go and let's go to the next one. This one, for example, I'm going to click on a low D three, remove LOD. Just like that. I'm going to load the auto. And now I can see what it looks like. And I think it might look fine if we just do that. So let's actually do that and I'll see you what it looks like. So I'm going into the next one, and I'm going to click on the three and remove the yellow D. Alright, so now I'm only missing these two Last models. So I'm going to load the three removal OD, and I've just done that for all of them now. This is the last one removal OD. And just like that, so I'm going to click on File and Save also save everything. And now you can see by the crystals and I go further away. Can see it's not changing like before and it's actually not looking bad, annoying just like before. And now it's looking good actually, we don't really need to change the size. You can actually change the distance for this one, you can see it's kind of sliding when you're moving. So I'm going to take a look at which one is causing this problem. So it might be this one causing the problem. So if I double-click this, and here I can view the melodious and you can see it's sliding on. I'm viewing the other ladies. And for this one I might just not delete the melodious, but decrease this one to 0.05. And you can see what it looks like. So it's actually changing what are up here. And that is fine. You can, of course increase the size. So right now it's looking good and we go, we go further away looking fine. So this is how you change the LOD. And again, if you're making a game and it's very serious, you have to go in every single model and adjust the radius because the more you can optimize the game that way, like you'd draw less triangles from, from models that better, it will be.
43. Texture Size: In this lesson we are going to take a look at exercise. All right, so now that we have fixed the melodious, let's go over and take a look at exercise. And remember we imported the model. So if I go back to Quicksilver bridge, remember when you clicked on a model, you went inside of here and you actually downloaded each of these models with medium quality. Of course, if you followed the course may be you have downloaded them in the highest quality and in the medium quality, they come into K textures. And what do I mean by 2k textures? So now you know what textures are. So these are textures, and if you double-click one of them, one of the textures doesn't matter what you double-click. You can see up here that the texture is 2k, so 2048 by 2048 pixels. And this is how large the image is. And the larger the image is, the more or the larger the game will be. So for example, if you download World of Warcraft and the game is 60 gigabytes, this is what's causing it also. So if your texture is in higher resolution, for example, apex or, or tolerant or whatever you're playing, the game is going to be a lot larger than this. This is because the texture is, is in higher resolution. And this is not only the cause, but it is one of the big reasons why the game is as such, a high size. Okay, so the thing we want is we want to reduce this texture because sometimes for these rocks, it might be okay to have such a large, large sector, but for small things like this one, for example, why would you need to create textures through maybe your character is standing up here and you're not noticing a difference if your texture is in lower size. And this is something that you have, you have to optimize as well. You have to reduce the texture size where it makes sense. So usually for a larger models or four more important models, you need larger exercises. And for small models you need to reduce them. So let's start, for example, from the first one or just an obvious one, for example, let's take a look at this wheel. So if I scroll down and find this wheel, this one here, and I double-click this texture here. And I can minimize it. Take a look here, and I can make this larger. So you can see. So up here we have something called Elodie bias and you learned that LOD means level of detail. And this is for the textures. So you can see if I write one, you can see here the important exercises. Okay, but now the displayed and max in-game size is one key. So now we actually reduced the texture. And if I write to, you can see now it's 512 by 512. Pyrite three. It's going to reduce even further. And you can see how this, how you can optimize this. So now you can see it's a lot blurred so you don't want to go too low. So this is a balance between, between optimization and how fast your game is running, and a balance between how good your game is looking. So right now, I would say this is looking bad. So we have to put up the yellow Ds. And at 0, this is the max quality. If you put it to one, this is the half of the max. You can't really notice a difference. So even at one K is looking so good. They're running too now. It's looking a little bit blurry, but almost not known as noticeable. But for me if I had to go with something, I would have gone with one. So one K texture. And this is the usual size for games. Usually we use one K textures for mostly everything, unless they are very small, like this model here, then we don't use one k, we use less. So this is looking good. So now I want to close it and you have to do this for these as well. So the normal map needs to be one as well. And this texture has to be one as well. So now the textures are actually optimized for this one. So I can go ahead and save. And the next thing we can optimize, for example, these wings here, if you go to wooden twigs and sticks here, you notice that all of these tweaks only have these textures. So it's not like every single two-week has its own texture. All of them are actually packed inside of here and this saves our time. And it says our lives. Imagine if you had to go or each sector. So I'm going to open these three textures. I'm going to test the LOD. So if I read one, 23, now in our i3, I now notice that it's blurry. But if I write two and write 0, I don't notice a big difference. So if I'm standing here and I'm looking at it, and if it's 0 and right to, I don't really notice a difference. So this is good to use for 512 by 512 pixels, so it doesn't have to be wonky. It can even be less. So writing to here and writing to in the normal map, and Writing 2 here in this texture as well. And I'm going to click Save. So this is what you actually have to do for all of the model when you're making a game, you have to go, for example, for the next one, you have to take a look at it. You have to change the texture Elodie virus and you have to see when is it becoming too blurry for me. So right now this is too blurry and it's probably a one k texture. Yeah, so one key is, is what's fitting for this one. So then you have to go to the normal map, right one and this section here, right one. And you have to do this for every single model inside of the game that you have to optimize the texture sizes.
44. Optimization Viewmodes: In this lesson, we are going to take a look at optimization view modes. All right, so now we can optimize it again even further. And to do so, you can go inside of the legs here, click on this and you can see the view modes. And you have something called optimization view modes. And inside of here, you want at least to check all of these view modes. And the first one is the lighting complexity. And this tells you how complex your lighting is. And right now we haven't worked with lighting yet, so we don't really have much. The only thing we have for lighting right now is our directional light, which is the sunlight. And we have the skylight. So this is the only lighting that we have. And right now you can see the color is blue, which is very optimized. So you can see there's a scale here. This is very small. I don't know if you can see it, but there's a scale here from good to bad and to extremely bad. And right now, we have very, very good optimization. Blue is really good. And then it gets to even lighter blue and then green and then orange and red. And then it goes purple and white. And that is very bad. So right now, blue is the lowest that you can get, which is very, very good. So the lighting complexity is fine and we haven't worked with lighting yet, so we don't really have much. Then you have something called light map density. And this one, you can optimize both. We will do that in the next lesson, so let's skip that for now. The next thing is the state is stationary light overlap and we don't really have any stationary lights. So it's going to look like this and nothing is wrong. And then we have the shader complexity. And by the way, if you see something red, orange, red, purple, or white, you should be worried. Other than that, it's all good. Here, the complexity, this is looking good. So this is the shader, this is our ground. And you can see here, if it's red, it is bad. But naturally, a little tiny red line. When I say read, I mean, all of your assets are red. So just because something is right down here doesn't really matter. And you can see when you point your, your mouse, it actually shows you in the scale where you are right now. And everything is down here. Everything is optimized and it's looking good. So that is a shader complexity. And the shader complexity and quotes, these are mixed together and they get red as far as you get further away. So don't worry about it. It's not because everything's red. When you get closer, it gets less red. And you can see here, the thing that is taking the most memory, our foliage and foliage will cost a lot. So be careful with foliage. You don't spam it all around your game, so don't fill all of the environment with foliage. You can see how much grass is actually taking compared to this. So this, this branch here, so this is actually more costly than this one. And I can go back to summarization, humerus and shader, shader and quotes. So generally it looks fine. And for me, that was me. I would probably play around with the level of detail. So when I get further away, it gets better. But at some point you can't really do much more about it. You can see it is actually green and it's because we get further away that it looks like them. But if I have this in my game, I wouldn't be worried right now. It doesn't really matter that this area is red. And you can see the closer you come to an item, the less red it will be. And it will be more red when you get further away. So I wouldn't be too worried about it. But you should know that if your Modeller does a bad job modelling the models, they will become more red. So here you can also take a look at the models. How many triangles I told you before that the models are made of triangles. And if you have too many triangles in one spot, it will show you a red. So for example, this one has a lot of triangle. You can see here it has a lot of triangles. But I wouldn't be worried when I look at this right now. Let's go over to the quad overdraw. And here you can keep an eye on the quad overdraw. And everything is looking fine. Everything's blue and green and nothing to worry about. So this is what I love about mega scans. All the assets are so, so optimized. So you don't really have to worry about them. I mean, this is, this is looking insane and it's not even taking that much memory. So this is pretty good. So we have checked all of the optimization view modes and you have to check all of them. Just make sure to check them. And it's very important to know that you don't have to only check them at the end of development. You also have to check them from the start after a week, even make it every Sunday. You have to check all of these. Because at some point, when you take a look at here and everything is red and you don't know what to do and your game is destroyed. You have paid money maybe for something that you can't use anyway. So keep an eye on the optimization view modes, and let's go over to the next lesson and actually take a look at the light map density which we can optimize.
45. Lightmap Density: In this lesson, we are going to adjust the light mad density. Alright, so here we are going to adjust the light map density and it is how good the model will receive that light maps or how large the light map is, just like a texture here. These are called normal maps or diffuse map. Each model has a light map, so it just tells the computer how good this model receives the lighting and how good the shadows will be. So if you have something that has a very low light map resolution, it will show a very low quality shadow. So you want to balance it between performance and quality. So if I take a look at this branch over here, you can see it's red. And this is because the light map resolution is too high right now. And we can reduce it further to optimize it. And you can see here the ground, this ground floor is blue, and this is because the light map resolution is too low and we need to make it higher. And remember, blue in the engine means very low. Just like when we watched all of the other of the other optimization view much you can see the light of complexity is blue and this is good for us. We don't have complex lighting. And in the light map, the blue is good. But generally when you have too much blue, the shadows from the sun, which will hit this blue area, will translate into low resolution shadows. And we don't really want that for the game. So we want to increase this laura light map resolution until it becomes somewhat green. But we actually don't want, wanted to be orangey or red and this will be too high. And remember, a light map resolution that is too high. It will take more memory and we'll take more of your, of your player says FPS. So let's go ahead and go inside of the optimization view mode like map density. And let's go ahead and adjust the light map densities. So for example, let's start with this one. Click on the RAM skull, and then click on this magnifying glass to browse to it quickly. And then here you can double-click on the model, double-clicking it. It will bring up this viewer here. And inside of here, you can actually search in the details. You can search for light map. And you can see something called light MAP, minimum light map resolution, and live map resolution. So you have to change these for it to take effect. So I will minimize it. I want to view it so you have to click on something else. Else it will be pinkish. So I'm going to click on this one so I can view the true color here. And I'm going to reduce the light mapper resolution. And for example, I can write 32. And you see it became green. If I write 16. It's also looking good. If I write eight, it will be way low resolution. Remember, we don't want it to be very blue, we want it to be somewhat green or close to green. This is also good. You don't have to make it to green like this. This will receive, call, this receive shadows just as well. So I will change the minimum light map resolution to 12 as well. So it makes sense. And now this is optimized. And remember when you set these numbers, if you're not used to the texture sizes, you start usually with four. And then you write eight and the neurites 16, so you multiply it by two all the time. So the next resolution, if you want it to go up, it just search it too. If you want to go up again, it's 64, is to 128, and so on. So you keep, you keep increasing just like that. And that is how you make resolutions. So for this one, if I write eight, it is way low. All right, 16. Well, I write 16 just like this. It's looking good. Okay, So 16 and 12, I made a mistake here. So 16 is looking good. And the next one, I'm going to close it and it wants to apply it to the level of details and I'm going to click on yes, do that. So now this is what it looks like. Now we can optimize this one here. So click on the magnifying glass to find it. I'm going to double-click on the model. And I'm going to take a look here, search for light map density. And for this one, let's write eight. It's looking good. Let's write boar that's looking at that. So let's go with eight and the light map resolution. And this is the size of the map. Just like that. And eight is very low, so this is very optimized and it's not going to affect anything. All right, So you can do that with all of your models. So go ahead and click on all of your models. So here you can click on this rock and you can see you control the selected because this is made with the foolish tool. But don't worry, just go ahead and find it here. You have to go through each of your models. So you actually have to go through each of the modal you imports. And remember to do that because the shadows will actually look bad and sometimes you use more memory than, than what you need. And clicking on this floor, this is a very blue. Let's change that. I'm going to click on this magnifying glass to find it quickly. Double-click the ground. This is the grander we imported. And here for this ground, if you search for a light mass density, if I can write just like that, we have to increase it. So 128, still very blue to a 156 spillover, somewhat blue, 512. This might be too high. So I would go firstly with a 165 before I do anything else. So I think this is this is actually looking good and I would go with this if it was a, again Alice creating. So something like this and just keep increasing and decreasing until every one of them is either green or just very light, like a very light transition between blue and green. They don't have to look like this. All of them. I would rather have them looking like a little bit bluish into green. Just like that, that would be, that would receive shadows just as good as, as green. You don't really need that much of a resolution. All right, so now what you have to do, what's left for you is just go ahead and optimization. You modes and the light map density. Go through all of the models if you want to. It's okay if you don't want to, because this is a course. If you want to make it on your own project instead, but tried to practice, for example, for this model. And specifically you can find it here and try to search for it. And let me see which one it is. It's this one. I can double-click it. And here, search for a light map resolution. Tried to reduce this one because it's way too high. 32, 16, 8, eight is too low. So I would go 16, changing this to 16 and click on Save. And now this one is optimized as well. Alright, so the last thing before we end this, if you want to increase the light map resolution for the the landscape, this is a landscape that we created. You have to click on it. And here you can see if you go down in the Details panel, you can see something called Static lighting resolution. So I'm going to increase this, increase it to five. You can see it increases their resolution. And I will increase it even further. And maybe 10 would be the fine number for this. Remember every time you increase it, It's going also to increase the render time when you build a lighting and so on.
46. Limiting the FPS Usage: In this lesson, we're going to limit the FBS usage. All right, so the last thing we have to do is limit the FPS usage. And this is the last optimization we can do for now. And let's go over to the edit and project settings. And the reason why you need to limit the FPS usage is because if you make the others like the players go with unlimited at PS, they could go for 600 FPS if their computer is very good. And this is going to burn their, their graphic cards so hard because it's going to scream out of their computers. So going here and searching for smooth, and you can see something called smooth frame rate. And you have to take this smooth frame rate and you can set a minimum and maximum frame rate. And I released farm tail on Steam with without smooth frame rate and actually ran with 400, 500, 600 FPS for people. And their usage in their graphic cards were, I think 90 percent if you look at the, at the task managers. So they were very frustrated that the game was so bad optimized, and it was actually good optimized. But the reason why it runs so fast is because I didn't even limit the FPS and I have to remember every time that I have to limit this. So putting a max FPS, and it depends on the game you're making. Sometimes you don't need more than 60 FPS for our game. If you're making a shooter, obviously you need a minimum of maybe 150 and a minimum of, let's say 30 FPS. So something like this and you can close it down. So now you have limited the FPS. And you can show the FPS by the way, if you click up here and clicking on show FPS, and right now it's limited. So right now it's, it's lower than what it is because I am recalling and it's going to show lower. Also, it's limited inside of the viewport. So I have to click on here and play as a standalone game. This will show me a more correct FPS because it is kept inside of the viewport. So right now I have opened the game inside of a standalone game, but I still have to show the FPS through the console and run know we have limited the FPS to 150. And it can see your game here in a standalone, standalone game. And it's looking amazing.
47. Light Types: In this lesson, we are going to take a look at the light types. All right, Welcome back everyone to a new section another day and let's talk about lighting today. All right, so in this lesson, let's talk about the lighting types. So now we need to light our scene even though it looks good, but it will look even better if we have the correct lighting. So let's go ahead and click on Create up here. And up here you can see something called Lights. And here are all the lights that you can find. And right now you can see we already added some light at the beginning of this course. And if I go to the World Outliner, we already added a directional light, a skylight. So this is everything that we have right now. So the directional light is usually you need it in every game. This is the sunlight. So directional light equals sunlight. The point light is simply just a bulb. So if I click on it and by the way, you can click on them and create them and see what happens. And if I click G to view my icons, you can see this is actually a bulb light. So this fits for indoors environment. It does not fit but for outdoors environment. Environments because you don't really have a bulb unless you have a lantern, of course outside or a lamp. What you can see here, this is a bulb and this can actually also be used if you have a fireplace. So you can make if flickering lights. And this could be used like this as well. So you can see it pretty cool. And here to the right you can increase and decrease in intensity. And how far this slide is that going to affect the environment. So you have some, some things that you can, that you can play with over here, the radius, and you can see how much it fills the shadows here. The source radius. You can see if it's like this. And if I increase the source radius, it fills those shadows over here. So this is the point light. So I'm going back to the create and lights. And I'm going to create a spotlight. And just like the name says, it's a spotlight. If I drag it up and I rotate it 90 degrees so it's facing the ground. You can see it's, it's kinda a spotlight. So if I increase the intensity so you can see what's happening. You can see if I click G and this is what it's looking like. So it's looking like a spotlight. And again, it can be used for indoors environments. And just like before, you have some things you can edit, for example, how, how far it's going to affect the world. And the inner cone, this is like the, the softness of the light. And the outer cone, this is the otoconia can see you can make very sharp lighting and so on. So this is the spotlights. Next we have the red light. And if you have been to a football stadium, this is, it's like a square of light. So if I put it behind an item here, you can see it's just like a square of light that is being cast. And if I rotate it, you can see what it looks like. And this slide obviously can be used to, for example, in a football stadium, you have those square e lights that you can put it on. Or you can actually in some cases, if you're making a cinematic, you can put it behind characters because then you give them some depth and it looks cool. So this is a direct light. And then we have this skylights. And if I click on it, we actually already have a spotlight. So I'm going to delete it. And the skylight is just the light of this guy. So the directional light will bounce off some lighting and the sky. Because even though we have the directional light, the skylight here, realistically, this rock also has light up here because the light from the sun thumbs down underground and then it bounces up to this rock so we have some skylight as well, then it will fill this in. Alright, so these are the type of lights and we don't really have more lights. The other things we can call lights is post-processing, post-process volumes, but we will work with that later. They're not really lights. We have some post-processing, for example, we can add fog, we can add the post-presence volume, which all of those things affect how the lighting looks. But these are the types of lights that we have in Unreal Engine.
48. Initial Lighting Setup: In this lesson, we are going to set up the lighting. Alright, so before you start applying the scene, Let's do some initial stuff before we can do it. So over in the World Outliner, I'm actually going to click on the skylight and the direction of light and clicking on deletes. So everything is empty. And I'm also going to delete this guy sphere. So I'm going to delete all the lighting. I'll keep the folder because I can use it later. And by the way, all of these things you can actually put inside of folders. So I'm going to select all of these. So you can see if it's a brick icon over here. It's actually a 3D model. If it's this paper looking icon, this is our decals that we used. So I'm going to select all of these and make new folder called decals. And I'm going to select all of my 3D models. So if I had my camera can see I have more down here. And I'm going to drag them inside of the assets folder. And I'm going to minimize this so it's a bit more clean it. So this one, the landscape I can just, I can just let it be here. All right, so the post-processing, let's actually delete the post-processing as well. Let's make our own. Now everything is dark because you can't see anything. If we go into unlit mode, you can see this as our scene in the unlit without any lighting. And before we do anything, let's go over and click on Create, visual effects and post-process volume. And remember you disabled the exposure previously, you have to do it again. So if you remember how to do it, go ahead and do it without me. And now I'm going to show you how to disable the exposure. So here, clicking on this exposure and going to this one called minimum and maximum brightness and putting those to one. So now we will not get affected by any exposure when we're lighting the map. So down here, remember you have to click on infinite extent else it will not work on your whole map or the whole world. So clicking on that, now it is set up correctly. Next we are clicking on the image effects and clicking on the vignette. The vignette is simply that sometimes when you go in Photoshop and you put that black corners all around your photo to make it look more cinematic or HD, or wherever. That is. This is what vignette is. So this is the black outlined border around your pictures that you have sometimes I think in Snapchat filters as well. So I'm going to put it as 0 because we don't want to get affected by it. And even though it's disabled like this. So if I go back to default and it's disabled just like this, it is actually applying 0.4 to your, to your game. So if you don't want any vignette to again, maybe we're making a shooter and people think it's annoying if you have a black border all around, you can click on it and click on 0. And if you want bloom or not, that's up to you. For now. I can actually click on the bloom and let's set it to 0 as well. So now we don't have any bloom and there isn't much more we can do. So this is all we had to do to set up the lighting. So now we are not getting affected by all of these visual effects. And I want to create the lighting first. And after you create the lighting, you will go inside of the post-process volume and edit these things. So if you wish to add a vignette and if you wish to add bloom, do that at the end after you have lead in the scene.
49. Adding a Sky: In this lesson we are going to add a state. Alright, so now we're going to add a sky. And I told you that you had to go and sort of create and lights. But here we actually don't have a Skype. This is a skylight and not as sky. So to add a sky, it's actually not up here. The sky is a blueprint. And blueprints, remember, are the coding, coding language inside of Unreal Engine. So to find this guy, you have to click on settings down here, just make sure that you can see. So clicking on Settings down here, and inside of here you can click on Show engine content. This will make these two folders appear. So this is the engine content and clicking on the engine content folder. And here you can search for a sky. And now we can see this blueprint called Sky sphere. This one you can drag out into the world. And you can see up here, now we actually have a sky that we can look at. And this guy, you can actually edit some settings. So you can edit the sun brightness, you can edit the sun height. So you can see you can make it into a nighttime or you can make it into a datetime. If you put the sun height to one other things you can edit for this sky, you can edit the loud speech. So if you look up again, notice that it's moving slightly. If you increase the speed to five, for example, you can see this guy is moving a lot faster. So maybe I want to put this one on three so it's moving a little bit. And then you can increase or decrease the Cloud opacity. So you can see you can make a whole other look of your scene depending on what, what kind of scene you want. So maybe the 0.7 on the Cloud capacity was fine. Now when I'm finished adding the sky, I can actually go back to the settings and click on Show engine content again to hide these two folders. And just like this,
50. Adding a Directional Light: In this lesson, we're going to add a directional light. Alright, so now let's add the direction of light, which is also the sunlight. So let's go ahead and click on Create and lights and add a directional light. Now we have some lighting inside of the scene now, and I can increase my camera speed just slightly. And for this, if you can click on G to view the icons, you can see this icon of the scale of the directional light. And what you can do here, if you click E to rotate, you can rotate the sun. Now it tried to rotate it so that your shadows look good. This is what you're trying to do when you create the sunlight or the directional light, you're trying to rotate it so that your shadows actually look interesting. So here I'm trying just to rotate it a little bit. Maybe just like this. This is looking interesting and something like this. Maybe I want to overlap this wheel a little bit and try to think about what kind of senior crap but trying to create and also depending on how high the sun is in the sky. So I think something like this will be nice for me. So I'll keep it just like this. And we don't really worry about increasing or decreasing the intensity and so on. You will work with that later once we have all of the elements put together. So for example, we have the, we have the skylight, we have the fog and all of these things.
51. Adding a Sky Light: In this lesson, we are going to add the skylight. Alright, now that we have added the directional light, Let's go ahead and click on Create lights and the skylight. So now we have the skylight and you can see as soon as I added the skylight, these very dark shadows actually become not so dark and we can actually see what's beneath here. So if I click Control Z, you can see this is completely dark now. And if I click on Edit and redo create actor, you can see the skylights added. It's actually becoming a lot brighter than before. And this is actually what you have to do. You have to balance the directional light and the skylight. So for the directional light, you choose the level of darkness, for the shadows. And with a skylight, you choose how much you brighten up these shadows. But again, let's not worry about all of these things for now. Let's just let it be like this and let's add the fog before we actually come in here and edit things.
52. Lightmass Importance Volume: In this lesson we're going to add a lightness importance volume. So now we have to add a light mass importance of volume. And what that is, it's a volume that tells the game where we need the lighting. So if we go here up inside of a creates and in volumes, you can see something called light mass importance volume. And if you click on it, you can see this box is being created. So this box, you have to encompass the map where you need the lighting. And because this light mass importance volume, it's simply tells the game where you actually need the lighting. So you have to encompass, encompass all of the map that you need. So here we have the bugs. We can increase the X, Y, and Z over here. And you can also select what kind of shape you want. So right now the box is fine for our case. And we want to increase the x so it covers the map and it doesn't have to be 100 specific. So doesn't need to be 100% specific. So something like this. And then we need to increase the wire like this. And now we need to increase the disease so encompasses here, so I'm going to increase the camera speed. I can look at it here. And this is looking good and maybe I'll launch increased a little bit more just like this. So now we're telling the game that the lighting that we need, that we're going to build is actually needed inside of this area.
53. Adding Fog: In this lesson we're going to add fog. All right, so now let's add some fog to the scene before we edit any of the directional light and the skylight. So let's go ahead and click on Create. And the fog is a visual effect. So going inside of visual effects and clicking on exponential height fog. So this is the fact that we have, you can see it's very, very, as a very slight effect. And here to the right, you can increase the density of the fog. You can also increase and decrease the falloff. And you can also decrease and increase the opacity of the fog. You can increase and decrease the starting Starting distance and also the cutoff distance, like from the background. Okay, so these are the settings you can edit for it. And for this one, I'm going to firstly edit the color. So I'm going to look here on my other monitor, I have a bigger screen of this viewport. So you can, what you want to do is just slide this fog and it's up to you what kind of feel you want to go for the game. This obviously gives it a big field for the game. So choose wisely regarding what kind of fields you want for the game. So do you want something that looks cold? Do you want something that looks warm? And so on. So I'm going to just swipe it on some random color. And after that, when I find a good color here, when I'm just looking at this right now. And when I find a good color here, I am going to stop. And then I am actually going to slide these ones instead. So I'm trying to see you what kind of color I want. So maybe something like this, very, very slight like that. So I have a fog that is slightly dusty looking and clicking on Okay. So here under fog density I can actually increase it. You can see you when you try to slide the maximum, you can come up to 0.05. But if you write something, you can actually come higher than that. So I'm going to click zero-point one instead. And you can see now we have a lot of more fog. And then in the fall off, I'm going to, I'm going to write 0.25 year. And the opacity, let it just be one that is fine for now. In the start distance, I'm going to make it somewhere around here. So you can see this is the distance in words, the fog starts and if you go too crazy, you can see it makes that linear line which doesn't look good. I think 200 is a good number for the starting distance. And the fall of distance. You can see this guy goes weird if we go out with this. So I think I'll stay down here. Alright, so this is the fog that we have now and you can see it gives it a total different feeling for the, for the game. And the next thing we want to add is go ahead and create and click on visual effects. And here you want to add an atmospheric fog. And here you can see it changes the color in the atmosphere. So if I click on World Outliner and I click on this eye to hide the atmospheric fog you can see are up in the sky that it actually changes the color. So I had this atmospheric fog enabled, and I don't want it to affect this much. So I'm going to click on the color down here, over here. And I am going to reduce this year. So you can see you when I reduce it to black, all of the effect is gone. So I want to increase it to somewhere around here just to give it that small effect that the fog is actually all around the place. So now when I disable and enable it, you can see it gives that slide effect. So now we have added the fog.
54. Adjusting the Lighting: In this lesson, we are going to adjust the lighting. Okay, so now that we have all the elements added for the game, now we can actually adjust the lighting. So let's start with the sunlight. So the directional light, I'm going to go to the World Outliner. And here I'm actually clicking on the skylights to the directional light disguise fear. And those we want to put inside of lighting. And then I'm going to select the post-process, the light mass volume, atmospheric fog and the exponential high fog. And I'm just putting them inside of post-processing. And the formula is basically a visual effect and not post-processing. But I, it's fine for now. Let's stayed in there. So for the lighting, Let's adjust the directional light. So if I click on the directional light, so now you have to decide on the intensity for this directional light. So you see here you have something called intensity. And you can up and down the slider. And you can see how you get this very different field depending on how much Sonya really have on the scene. And here it's just about the feeling. So you have to think, what time of the day is this and how much sun do I want it inside of my scene? So right now, my son is like coming from up there and you can see the shadows are long. So maybe it is a sunset or sunrise. So you have to decide what kind of feel you want. And I'm trying to look here at my environment and adjusting this value. So for this environment, I think I'm going with three and intensity. Can look. You can see here it's, the sun is there, but it's not too bright, like it's in the middle of the day. And so I'm choosing three in the intensity. Then down here you can change the temperature. You can see you can make it warm or cold. But actually I don't want to change it here. I might want to change this one in the post-processing. So for now, I'm just going with the default and unchecking the use temperature. So this is the sun, the direction live now and we don't really need to do more here. The next thing we want to adjust is the skylight. So clicking on the skylight. And here we actually want to adjust how dark these shadows are because if they are too dark and too harsh, and again, it's not going to look good. So you have to adjust the skylight. And the way you do this is actually inside of the intensity scale. So if you write to, you can see the shadows become, become more soft. Sure, I35, you can see it's very soft now. So we don't want them to be very soft. We want something that looks good. So right now it's very harsh. If you write to you can also see in the puddle that it's actually changing the color of the sky. And actually, before we do this, let's make it more realistic. So if you click on this arrow down here, here, inside of the light here. So click on that arrow, you can see something called lower hemisphere. And what lower hemisphere is, is actually what's hitting down here beneath the items. So clicking on the lower hemisphere and you can see if you change the color to something else. You can see these are changed to the red and the one we actually chose over here. So the lower hemisphere is actually the lighting that's hitting these items from beneath. And these need to be a realistic because right now our ground, if I click Cancel, you can see it's set to black right now. But our grams is not black, are ground is this color. So we have just like this color instead. And remember to choose the true base color. You have to go inside of wit, and then you have to go inside of buffer visualization and base color. So now you are truly viewing the true base color of the ground. And now we can click on the lower hemisphere, click on the color picker here, and then pick the color of the ground or click on it and click Okay. Now you'll have to go back to the skylights just like this. And now it is correct. So going back to the live mode, you have to click on, if you go down, click on recapture. And this will capture the whole scene. Now it is the collect color. And if you go up and now you can try to, to view down here, but right now it's not too visible, but now the color is actually this one. So it's more correct. The ground is this color and it's not fully black. So now we actually have the realistic color that we need. So remember to change this else it will be fully black. It is okay. But generally, if you want a moral better looking scene, you have to change this to the color of the ground edits that this guy is casting on the items. You know, all of these very small details they make up the realistic look of the game. So now you can see here when I look at this, it's totally black and this is not looking good from a game's perspective. So I want this to be, to be visible. So going, looking at this one right now, I am taking the intensity scale up to 23. So now you can see, you can actually view down here. So I think I'm going with 2.5. So you can see here and I can see a little bit here. So if I write one, this was the default. It's very harsh and it's not really good-looking. And fire are 2.5. You can see that now the shadows are actually more bright. And I can see what's going on in these very, very dark areas and here as well. All right, so now you can change the light Carl color of the skylights so it's not fully fully white. So I'm going to click on it. And just like before, tried to select a good color here. And right now I'm just looking at here. And let's reduce this. So right now it's white. I just want to give it a slight effect here. So a little bit of this, this warm effect, dusty effect. So just like this. And now we have the skylight adjusted and the directional light adjusted. So now you can see when I look at things, they're not too dark, so fire inside of the shadows. They're actually not that dark that I can't see anything and this is how it's supposed to be. So now I want you to take a last look at the scene. So just come up here, take a look at the scene, take look at the fog and also just the lighting in general, their shadows. Is this what you are trying to aim for? Do you want to click on the, the directional light and then clicking on rotate. So if I find the icon here, so do you want to rotate the sun again and try to adjust it and put it in a better place or something like that. So right now, I'm happy with what we have so far. And the next thing we want to do is actually adjust the post-process volume and give it another field.
55. Adjusting the Post Process Volume: In this lesson, we're going to adjust the post-process volume. Okay, so the last thing we need to do for the sliding, we actually need to adjust the post-process volume. So even though you have, you are done with the directional light and the skylight, the post-process volume will completely change the look of your game. So clicking on the World Outliner, I believe already added that post-process volume over here. So clicking on the post-process volume. So this is the post-process volume. And we could start with the bloom and so on. But actually I want to start with the colors. So going inside the white balance here, the white balance here, you can take the temperature and the tint to see if you lower the temperature, it gets colder. If you put the temperature of it gets warmer. And the look I want to go for is I want to make it a little bit cold here. And when I make it a little bit cold, maybe 5500. I want to put that reddish tint up. So just slightly, maybe 0.01 or 0.1, actually zero-point one. And try and show just that feel a little bit. So if I, if I uncheck this, you can see it has a very different look before. And this is after. So maybe I want to reduce the 10 to 0.08, just like this, just a very slight effect. So now it's not that annoying reddish color just like before. So I like this, this look for the environmental lot more. Now we have adjusted the white balance, so now we have the temperature correct. The next thing you can do is actually add the bloom. So here are the bloom. You can see if you increase and decrease the balloon, this is very gloomy, so it gives that dreamy look to the environment. And I actually want 0.8. So I want this very slight effect. So this is 0, this is 0.8. So very, very slight effect. Next, we can actually add a vignette, but let's wait with the vignette. I actually want to take a look at the colors down here. So I usually always take the saturation and try to saturate the game. So maybe it looks better if it's a bit more saturated than it is currently. So this is one. So I'm going with the 1.1 saturation. So this is a bit more saturated then it's, it is, so the default is one and the one we chose is 1.1. So slightly bit more saturated. You can play with the contrast. I think it's fine. You, the gammas find is that you can see the gammas actually decreasing the lighting. And I'm just putting a known one. We don't really need gamma. You can also play with the gain. If you're, if you're seen as too dark. And I am going to put 11. And remember when I said too dark, sometimes you actually just have to adjust your skylight and your directional light. Remember we made the shadows here lighter by increasing the intensity of the skylight. So sometimes you don't really need to increase the gain to make those shadows pop more like making brighter. You have to increase the skylight. But sometimes you just want to have a more light scene like overall look, then you can increase it again. But right now I think we will just go with one for now. I want to change the vignette. So clicking on the image effects and then playing with the vignette. So you can see on anchor increase this effect. You can see it, it gives it that that cinematic look. It gives it that black border around the viewport. And I don't want something too crazy, so I want a very slight effect. So 0.3 might be a good number. So this is 0.30. Just like this. And I think I'll go with that. So now you have changed everything that you need to change inside of the post-process volume. You can see we have other things just like chromatic aberration. So chromatic aberration you probably have seen before. So you can see here that intensity, if I increase it, it becomes this, this weird color and sometimes they use it in cinematics. And actually you can use it if you want to make a cinematic. Obviously, you have to be careful to use this inside of games. This will make people sick, but sometimes in cinematically increases just very slightly. For example, 0.2. So that very slight effect, and it gives it that cinematic effect. But I think it's fine that we go with this one. So writing 0 and just unchecking dose. And this was what the post-process volume.
56. Static vs. Stationary vs. Movable: In this lesson, we're going to take a look at the lighting mobility. Okay, so here we are back in the project and I just want to explain to you the mobility of the lighting. And now you're thinking, what did the mobility? And mobility is actually this one over here. And this is very important that you know that. So now we have made our lighting and every lighting that you click Add. If I go inside of lining here, if you click at any lighting, you can see that it has some sort of mobility here. And what mobility is, if you put a light to static, this will save you the performance. So the movable has the heaviest performance and the static has the best performance. So best performance, you have to set it to static. But the problem is static is just like the name says, it, static light. So if you have a character running around, let's say you have this sunlight set of static and you have a character running around inside of the environment. The shadows of this character will not display. And this is because static lights will pre-baked the shadows. So it will already have baked the shadows, saved it in the memory of the computer. And that is it. The shadow is static, it's not going to move at all in the game. So for example, if you have a lamb, a street lamp, and you want to cast shadows from the character when they run under it. You don't need to set to static because static lights will prebaked all the shadows. So for example, you have some items that the character will never go close to. Our nothing's going to move in that area. Then you will want to set it to static. Stationary is what you want to set it to if you want the shadows to display. So for example, I would set my lamb, my street lime, to a stationary light. Because when the character runs under it, it will display the dynamic shadows that from the character. So every, everything that is dynamic inside of the game. And you want to display the shadows of this dynamic item or dynamic character or whatever is moving. You want to put it to stationary. So what is movable? Movable then? Movable is when you want to move the actual light inside of the game. So movable will also display the shadows for your character, for example, dynamic items. But the difference between the stationary and movable is that movable lights you can actually move during the game. So for example, if you have a sunlight, so the sun, there's a sunset and sunrise, the sun is going to move and then you have to set the lighting to movable else you are not able to move the light inside of the game. So if you want to move the actual light, you have to click on movable. Else you can't really move it inside of the game. If you only wanted the light in one spot and it should display shadows from dynamic items, for example, the character. Then you have to set it to stationary, then you don't really need to set it to movable if you are not going to move that actual light. So remember, movable is the heaviest one on performance. So whenever you can, you need to set the lights are static. This is the best thing you can do. There are times, for example, a lamppost on the street. You have to set it to stationary because else it's not going to show the character shadows if this is what you wish to do and if you have a sunrise. So I'd be a knight system in the game. You have to set it to movable. Else you can't really move this on during the game.
57. Building the Lighting: In this lesson we're going to build the line. All right, so now that we are finished with the lighting, we have to build the lighting. And what does building mean? Building just simply means that when you have placed your lighting inside of your map or inside of your game, you have to click build for it to bake the shadows correctly because all the lights you see here cast shadows and so on. I want to make sure that all the shadows are correct and this is why you build in the game. So here, up here you can see something called Build. And I'm going to click on Build all levels. Then it's going to show me something starting up. Swarm connection. Sounds like something from StarCraft. And then it's going to do something down here. So we're going to build a lighting. And then it's going to tell you how much of the lighting is being built. Sometimes it can take time. So if you imagine, if you have heavy lights, if you have a lot of lights, you can imagine this is going to take a lot of time. So this is when you beg the lighting, the shadows will be displayed correctly. And it might take longer than you expect because we have all of these grass and all of this grass is animated. So it has to build that data for all of these things. And we have a lot of grass inside of here. And right now our me go back here, our directional light and our skylight is both set to stationary. And this is correct because we have those grass and they are moving. So we actually need to display moving shadows during the game. If we had them set to static, both of them, these will not, the shadows will not be animated on the ground. So this is a good thing. And the only thing we had, we have right now is the directional light and the skylight. Now you shouldn't be aware that if you have a static slide, you have to build the light all the time you change this light. So imagine if you create a, let's say, a point light. And if I bring it over here, Let's say you have this point light and you have set it to static. Then you have to click on Build the lighting. And when you build a lighting, it will also build the shadows for this static light. So it all builds static shadows. Let's say you did that and you then move the sliding again. Then you have to actually go in and click on Build the lighting again. Because remember this is a static light and the shadows are static. So if you move this, you have to rebuild the lighting. But if you have a stationary light or a movable light, you don't have to rebuild because the shadow data is following the light. So if you build ones, then you're all good. And this is actually useful for when you're building your game the first time. So when I go inside up here and I'm building my level, I always set my sunlight, even though maybe you want it to be static. I usually set it to stationary to begin with, because then I only have to build it once when I build my level. And then I don't have to worry about building again and again because if you drag out an asset from here and let's say you went into omega scans into assets and you dragged out an asset. And beside this static light, you have to rebuild the lighting because you have to build a static shadows, shadow for this mesh here. But if you have said it's a stationary, this is what I always do when I build a new level. I always set it to stationary so I don't have to rebuild all the time.
58. BONUS: Insight on Boardcraft Lighting: In this lesson, we're going to take a look at block sliding. So here we are inside of BAD craft. This is a personal project that I've been working in. And I just want to show you the lighting inside of here so you can actually see it's actually the same thing you have to do. So this is a bit of a different setting. This is an endorsed environments and this is actually the main menu. So this is just a 3D environment for the main menu. And if I click Play, you can see that it's, it's a bit animated. The bottle collapse comes up here. It gets blurred and you can see all of these UI stuff. So if I click on stop, you can see here we have different lights. And if I go up here inside of the lighting, I can click on lighting and you can see we have some diamonds light and the diamonds are all of these diamonds that I have all around here. So you can see it's these lightings. They are lighting these diamonds. And if I click on the I here to hide them and show them, I can't do that because remember, these are actually set to static lights. I don't have characters or anything moving inside of my main menu. So I don't really need to set them to stationary. So I'm going to set everything up. I have set everything to static lighting because this is best on performance and I don't really need a stationary light. So you can see here when I hide and show them that nothing is happening. And this is because the shadows are already pre-built, also the lighting. So if I have to change something inside of here, I have to go in and build the lighting again, just like we did inside of Unreal Engine 5. And this is Unreal Engine 4. By the way, this is when Unreal Engine five was not released yet. Here you can see we have a yellow dot up here. This means it's not a static light. This is a stationary light. And I can hide it and show it because it's a stationary light and you can see it's over here. It's hiding and showing their Diamond Light. And the reason why this is stationary and not static is because I want, I'll click Play. You can see this book is moving. And I want this book to show shadows from the sliding. So we have something moving here, and I want to show the shadows of this one. So this is why I set it to two is stationary. And I have more lighting. I had the atmospheric fog. I have a good sky. So good sky is another type of sky and I can show you. So good sky is this free acid here? I believe it's free right now. I can't really, I can't really see permanent. Yeah, I believe it's free. So this, this sky here is free and it's better than the ordinary sky that we use. You can download this one to the project. And this one is actually broke free and it contains a lot more presets that you can use. So I have used this good sky inside of here. And what I use it for is just, just this guy out here. I don't know if you can see it on your screen, on your end. But there are some stars like blinking out in the open in the background. And I used it for that. And if I go back to lighting, we have the head the sky, we have the candle over here. So right now I think it's disabled. I can't really see the candlelight. I think there's something with the, with the VFX. And then I have the exponential height fog. So you can see the fog makes a big difference here. This is, this is what the fog is doing. So it's adding this bit of atmosphere. And then we have this Lenten. So this is the lighting for the Lenten. Then we have the Lenten back. So I'm actually using some sort of a it's actually a fake lighting. It's, it's here, the lightings here and it's pushing out in the open. So it's here in the foreground and you can see it's giving that fill light for it. So over here. And then we have the sunlight here, and the sunlight is set to static because I don't really need to move with the sunlight. I just wanted there. They don't have the portal light which is beneath the bottle. Then we have a flickering light which is beneath the portal as well. I don't know if you can see it. And then we have the skylights, then we have the reflection sphere. So this is basically all the lighting for bought Kraft. And you can see you can create an amazing scene just trying to create soft lighting and not too harsh. And also I have a post-process volume where I if I click on it, if you are interested in seeing it, you can see I edited the white balance. So previously it was looking like this. And then I put a temperature on it and then I put a tint. So you can see this is the difference. This is before and this is after. And then I ended global, I increased the saturation. So it was one. But I made it and you can see it's very desaturated, so I made it too 1.16 to make it fit. I increase the gamma so it's not too dark, and I also increase the gain a little bit. Then I played with the shadows and with some color grading out here. And just like we did for our project, I used a light mass importance volume to encompass this level that we are in. So I put this box around this level so we actually encompass the area where we need the lighting.
59. Importing Sound Assets: In this lesson, we're going to import the sound assets. Okay, so it's time to add some sound to our scene. And firstly, let's go ahead and make a new folder. So I'm going to make a new folder and I'm going to call it, you can call it audio, for example. I'm going to call the audio. And I have uploaded on the website some course materials for you. So together with the ground, you'll see some sound effects. So we have a bird sound effect and we have some slight breeze from the wind. And we have some music that we can add. So just very simple sound effects and it gives us something to work with. So I'm going to select all of these and I'm going to drag them inside of the audio folder down here. And I'm going to let go and it's going to import all of the sums.
60. Creating Sound Cues: In this lesson, we are going to create some cubes. Okay, so before we can use the sounds that we import it, we have to create something called a sound cue. And to create a sound cue, you can right-click and inside of sound you can see something called sound cue. So this is one way to do it. So do it a bit faster. When you already have the sounds down here, you can actually right-click one of them. So for example, this slight breeze, and you can right-click it and click on Create q. So two methods of creating them. So clicking on Create q, and I'm going to call it as c for some q, and just calling it slide briefs. So now I have a sound cue. And if you double-click the sound cue, you can see you are inside of another graph. And this is the graph where you can see the sound. So this is the sound effect. And it is, if I hold all to include here, it unplugs. So if you make it from scratch, so if I had to create it like this, greater sound and sound cue and I call something and I'll go in here. It will be empty initially. So when you right-click something and click on create queue, it automatically adds this sound. But if you had to do it manually, you had to go inside of the news and you created, and you have to drag this sound inside of here and it creates this for you. So I just want to show you how to make it manually as well. So I'm going to delete this one and go back to the slide breeze. We are going to connect it here. This is the output. So this is the final sound that you hear over here. So it can click on play and you can hear this slight breeze. I'm not sure if you can hear it right now. It's very subtle. Maybe we need another good sound instead. So what do we want to do is we want to create everything into a sound cue. So let's click on this bird here. Right-click, great. Q. I'm going to call it x1 cubed bird, just like that. So I'm going to double-click this sum q bird. And you can see it's already added this bird, rook one. The effects or effects. And what we want to do, I have three different sound cues. So this one are different. Three audio files. I have this one, this one, and this one. So three different sounds from the bird. So we don't always hear the same one and it just repeated and getting annoying. So we have three different ones. And I want these three ones inside of the Sun. Q, because I don't want to play the same sound every time. So I'm going to double-click the sound cue. I'm going to minimize it a little bit. And then I'm going to drag in the Byrd rule 2 and bird rook three. So now we have these ones. And what we want to do next is create a random node. So you can see here to the right you have some notes so that you can select from. You can also find those notes by right-clicking. And you can see them all here. Now we're not going to try all of them right now. This is not, I think I will make a sound course later on, but right now we are going to focus on the basics. So now we want to play a random sound here. And this, there is something called the random here so it can drag it out. Or you could have right-clicked then search for random like this. And it can just click on it. So this random node, you can actually plug in these ones inside of the random node. And we need a third pin here. So we can click on the plus and we can plug in the last one here. And this output is now the final output. So every time I click Play now, it's going to play a random sound of this bird. And this is what we want. However, if you wanted to play even more different sounds, you can add something called a modulator. So I can drag it out, right? Modulator. And this is especially useful. For example, if you're making a first-person shooter and you have an AK-47, for example, or a pistol or whatever. And every time you shoot, you want the shot to be slightly different, so it's not that same shot every time. This is where you use a modulator because then you can, you can make a variation between the maximum pitch and the minimum pitch. So you can see if I just exaggerate it and so you can hear it clearly. You can see it's sounding and suddenly insane. But you can see if you make a very slight change to it, something like this. You're even getting more random sounds from these three. But right now, let's not do it. We already have three different sound effects. We don't have one only. It's useful for when you only have one and you can actually use a module later. But this is cool for now, and this is the sound we have. I'm going to close it down. And the last one we need is this music. So I'm going to right-click it and create a queue and call it s. See music. So now we have this music and this music. I find it on YouTube if you search for this, and it's some royalty-free, copyright-free music. And I think we could use it for this scene. So this, we could play this whenever you start playing the game. If you want to reduce the volume of the sound. So you can click on this. And here you can see a volume multiplier. So for example, sometimes you think the bird sound is too loud. You can click on it and you can click right here, 0.6, for example, instead of 0.75. So now we have reduced the volume. And now they are played in a lower sound.
61. Adding Sound to the Environment: In this lesson, we're going to add the sound to the environment. Okay, so now we are adding the sound cues that you created to the environment. And this is very easy. So you just have to click and drag and then you have to let go. And you can see you have this icon of the sound. And this is how you do so dragon the slight breeze and drag in the music. So now I have all three sounds inside of your environment. Now if you click Play, you can hear the music. You could hear the rook. Maybe I want, I want to reduce the volume of the music. I don't want it to be that loud, so I'm going to double-click and then write zero-point, maybe four. And the next thing you heard, the rook sound is actually only played once at the beginning. So if you click play C, We're only him the rook once. And that is a problem. We want to hear it all the time and not all the time, like being annoying, but maybe it delays and every five seconds or whatever. So clicking on the bird here. Now, we have to make something called a loop. And this is going to loop the sound. So if you connect it now unclick on play q. You can hear that the sound is being played all the time and this is getting annoying. So we have to delete as well. So dragging out of fear, I can ride delay and plugging this into here instead. So now we have a delayed before we look. And I'm going to put this delay right now in just two seconds so you can hear, it's actually working. So clicking on play q then is going to delay by 2 seconds, and then we're going to play again. So maybe we want to delay by five seconds, up to 20 seconds. So very random. It chooses what number it is. So it's very random. And this is what we want. And you can actually, for the looping, you can actually choose how many times you want to look at here. If you don't want to look at in indefinitely. But we want to look at indefinitely, so that is fine. So now it's working and maybe the breeze I can increase the sound. I'm not sure if I'm hearing it. So 1.1. And I don't want to make it annoying for you in the course as well. For now you can hear the music. And then very soon, yeah, you, you can hear the sound as well. So this is working now. And I can actually reduce the music even further, so maybe 0. So I just want a very slight background music. So this is how you add sound to the environment. And this will be very cool once we add the camera and we maybe make a cinematic shots. And you can use it for either a main menu or you can showcase it with some cinematic shots. So we're going to work on the presentation next.
62. Adding a Camera: In this lesson, we are going to add a camera. Okay, so now it's time to present our work. So this is what we have done so far and by the way, great job for making it so far. It's not that easy to make it that far if you're a beginner. So really, really well done. And I mean that, so let's try to present our work, what we have done so far. And now we want to create a camera. So there are two ways to create a camera. One way is to click on Create up here, and then going to cinematic and creating a sign camera actor. Now, when you're making a game right now, we're making some sort of a cinematic shot and then we are creating assign camera actor. However, if you are only making a normal shot in a game, then you actually want to go inside of all classes. And inside of here you can see something called camera. So a camera is what we use in the game. So this is a normal camera. We don't use a cinematic camera unless you're really intended to making cinematics. So right now we want to present the work. So we are going to create a sign camera actor. So this is a cinematic camera actor. And you can see it's actually all already looking good. The other way you can do it is, for example, let's say you wanted to make a shot here. For example, you wanted, you wanted this A-frame specifically that we are in right now. Then you can click on this button up here in the viewport. And then inside of here you can see something called Create camera here. And you can select either a normal camera if you're making this for a game or a game camera. And if you want to, in this case make as cinematic shot, we want to present our work. You can click on Assign actor and you can see it creates a camera. Right here. Where were you were looking? Okay, so let's delete this one. We already made this one over here. And if I click it here, I'm going to move this camera and let's actually adjust the settings later. Let's just place the camera. And I want to take a shot of this one here specifically right now. So I'm going to move it, I'm going to rotate it a little bit, just 10 degrees down. So it's facing the ground a little bit. And I'm going to move it slightly over here. And we need to adjust the settings first because when we adjust these settings, the width and so on, we'll move. So it doesn't really make sense to, to put in like the framing shot right now because we're going to edit the settings.
63. Adjusting the Camera Settings: In this lesson, we are going to adjust the camera settings. All right, so now let's adjust the camera settings for this cinematic actor, this cinematic camera. So clicking on this camera you can see we have a lot of settings. We can click on edit. And by the way, a cool trick to see through the camera, you can right-click the camera and you can click on pilot. So now you are actually inside of the camera. And if I click on love in, you can see this is the camera now. And it also tells you that up here it says pilot active, cinematic actor one. So right now you are inside of this camera. When I move this camera, if I move back and forth, you are actually moving the camera. So if I click eject, this is the ejector button. You can see the camera has moved to over here where I actually move the camera. So you have to be careful if you don't want to move the camera. And let's see your frame this shot and you don't really want to move the camera anymore. You can right-click the camera, go inside of transform. And inside of here you can click on Lock, actor movement. And you can do that with anything. This way. When you try to move it, you can't really move it by mistake. So this is a pretty cool way to make sure you don't move it if you already have put the shot. And also if I right-click and pilot to this camera actor, if I move around with AW as Andy, I can't move around because this is locked now. And if you want to move it again, you can right-click Transform and click on the lock actor movement again. So now let's play with the settings and set the frame. So here in the settings I'm going to change their camera type to DSLR. So just like a canon or a Nikon camera, you have a real life a digital camera. So clicking on this one, so you can see the width suddenly became a lot wider. And with this one, I usually use the 85 millimeter lens. Just imagine this just like in real life, you have lenses on the camera. This is a 85 millimeter lens, and I liked it because it creates such a nice depth of field. So I'm going to select it and you can see it creates that. And I'm going to move it a little bit. And right now you can see it's very blurry. And if I right-click and pilots, so we can actually see here the reason for his blurry. We haven't focused this SR. So the thing I want you to do now is actually changed this aperture so you can see when you change it, it is focusing now. But before you do this, you have to select what you want to focus. So going down here it into focus settings. So clicking on that, you have to set where the focus is. And you have to take this to visualize where we were actually focusing. Because then it, It's getting guesswork if you're not clicking on this. So clicking on it. And I can change the size. And you can see, I can see this weird purplish thing. And this is just showing me where I am focusing right now. Maybe I want to focus to here. And you can untick this now. Now you know this is focusing around here. You can untick this now. And now when I go down here and change my aperture now, you can see it is blurring everything except for this area that I actually focused. And this is actually what we want. But now let's actually move the camera. I want to make a better of shots here. So let me move it a little back. And maybe something like this. Maybe I want sometimes if I want to make it move in a specific area, I can click on the camera. And instead of moving with my w a DNS, I can actually just move it here, click here, move it down like this. So tried, tried to frame the shot however you want it. So let's say I wanted something like this. I'm going to click on this here. And I'm going to use the manual focus distance. So I'm going to put it over here and I'm checking that again. So maybe something like this. So let's say 2.5 approximately. And what you can do now is you can actually just tried to set up the scene. So you can actually take a screenshot of this and I'll show you how to take a screenshot in the next lesson. But you can see now, now you're focusing on this item specifically. And if you want to, you can drag out an item. For example, this runs goal, and you can place it in the scene just to make an ICE chart. So rotating hinge here and clicking on this one here, moving it and maybe you want to place it here. So now you can see, you can actually make pretty cool shots with this.
64. Taking a Screenshot: In this lesson, we're going to take a screenshot. Alright, so now we have this frame here and we want to take a screenshot of what we have right now. So just take a screenshot. This is very simple. Clicking on this button up here in the viewport. So if I minimize, you can see it's actually living words clicking up here. You can click on high resolution screenshot. And now if I make it larger, you can see you can take a screenshot and the screenshot size multiplier. And to make it a good screenshot, I usually click off 11 to maximize the viewport. And then I can click on, take screenshots. And then it takes me to this document and here is my picture. So this is actually what I took a picture of, and this looks pretty cool. And you can actually take this to Photoshop if you want you to color grade or whatever you want to, so or add effects in Photoshop. This is pretty cool. So this is a 10 ADP screenshot. If you want a even larger screenshot, you can set the multipliers, the two, and take a screenshot. I never use it. I think two is the maximum abused. Be careful you don't put it up here. It's going to crash the engine because this size is huge. So this one, I think it's a two key, a screenshot now I can't remember, but even the one is actually pretty cool. So one key, it's extra or NADP screenshot. So this is how you take a screenshot. And if I get out of this camera and I can actually just duplicate it. If you hold Alt and you move it here, you duplicate the camera. And if I have piloted this temporary camera, I just wanted to show you so we can move around with this camera and it's pretty trippy. Sorry if you're getting sick and he can see you can make really cool shots with this one. And again, try to click on this debug. Here, you can see where you're focusing if you change the length, just like that. And maybe you want to focus over here in the distance and then uncheck it. And then you can try to reduce and increase the current aperture. And you can see now the foreground is blurred, but the background is showing. And it's pretty cool that we've created this background is quickly on the landscape because then the background itself is not empty and you actually have something to look at in the background.
65. Making the Camera Work on Play: In this lesson, we are going to make the camera work on plate. Now it right now, our problem is when we click on Play, you can see that we start here and we're actually not viewing things through the camera. And maybe you want to click on Play and it will actually want to view the game through this camera. So maybe you're making a main menu and you want this camera to be there on the cinematic camera. And to do this, firstly, let's delete this place dot because we don't really want the player to start here. So if you have this in your level, so clicking on the leaf for this one. The next thing, if you click Play now, you can see you're just starting out here with nothing now. But we want to start by looking through this camera and the way you do this. Now, this is not a blueprint course, but I will make it very simple. Clicking on blueprint. This is the visual programming language in Unreal Engine and this is very useful for artists. It's so easy to use and you can actually program your own game using this language. And you can make any game farm tail I made, which I released on steam, is purely made on Blueprints was 0 code. So you can make very powerful game with this. So clicking on blueprints and opening the Level Blueprint. So coding anything inside of this level that we have, you can see we have an event here called Begin Play. So you can, you can try to select this by just selecting like this, click on Delete, so we don't need that. So right now we have this event called begin play. So what happens when you click on play? This is just what it means when you click on play. What do you want me to do Here? I want something. If you right-click here in this graph, you see you have a lot of things you can add and a war about it. We don't care about these things. We just want to search sets. You target with Blend and you can't see it. So you have to remove this set context sensitive. So said View target with blend, It's actually here, said View target with blend. This is what you need. This is a function that you need to clicking on it. And you can connect these two execution pins. So now there is a flow in the code. And what target do you want to set it to? The targeted that on camera. So we want to set the view target, the camera. So clicking on this camera so I can take it down. I can view this camera, I can click on it. So I have it selected. And over here, when I have this selected, I can actually right-click this graph. And if I click on context sensitive again, so remember to do that, then you can actually see a reference to this camera. So I'm going to click on it. And now I have this camera, so I actually want to plug it in inside of my new view target. I want to set it to this camera. So now I can click on compile. And now you see it needs a target. And the target is our player controller. So if you drove out of this target, you can write player. And when you write player, you can see a function called get player controller. And that is it. That is all you needed. So very, very simple. And you can just move them around however you want and organize them. Just like this. We can compile, save, and that is everything that we had to do. So if I close this down now and I click on Play, you can see it's actually playing through this camera now. So set view target with blend, sets it to this camera you are selecting. So now you can see, very cool. We have our scene shot here and you can make multiple scenes shots if you want to. And with blueprint, It's pretty cool. You can actually change through cameras when you learn how to program with blueprints. So you can maybe every three seconds you want to switch between cameras and you can actually make a main menu. So if you go ahead and make buttons and so on, I will actually make an advanced course for beginners, beginners to advanced. So you can get better at creating menus and you can create it for your games. So that was it for the screenshot.
66. What Now?: So congratulations for making it this far. This is pretty cool that you have made all of this now. And I hope you've learned a lot through the course. And if you need something changed in the course, you're, of course, welcome to tell me and I'm more than happy to change it. I want this course to be as best as possible. And not only because I wanted it to be as best as possible, I want you to learn the most out of this course. This is my, my main goal though. Now when you have learned all of this, I would suggest that you can continue with learning blueprints. So this is the visual programming language in Unreal Engine. And if you're an artist, if you're not a, if you don't have a programming background, you can code all of your game using blueprints. So it is not like code like C plus plus or C Sharp. If you have seen those, you can Google it if you haven't. It is a visual programming language that you can use to program the game visually without writing a single line of code. And it's pretty cool. You can make main menus. You can actually program the game. You can have a character walking and so on. And I've also made a course for blueprints. You're welcome to check that out if you want to. And I'll keep creating courses as I go here. And by the time you were watching this, maybe I have a lot of crosses out. But right now I have a blueprint course and this course, and I'm going to produce more courses and hopefully you'll enjoy all of them.
 Pixel Helmet, Game Developer & Publisher