Transcripts
1. Intro v1: I, Jared with
Backwoods animation. And this is the ultimate
character rig in after effects. I've taken all my years of experience in creating
character rigs to cram into this one jam
pack tutorial just for you. This is a comprehensive hands on learning experience
where I simply walk you through each step that
it takes to create your own fully
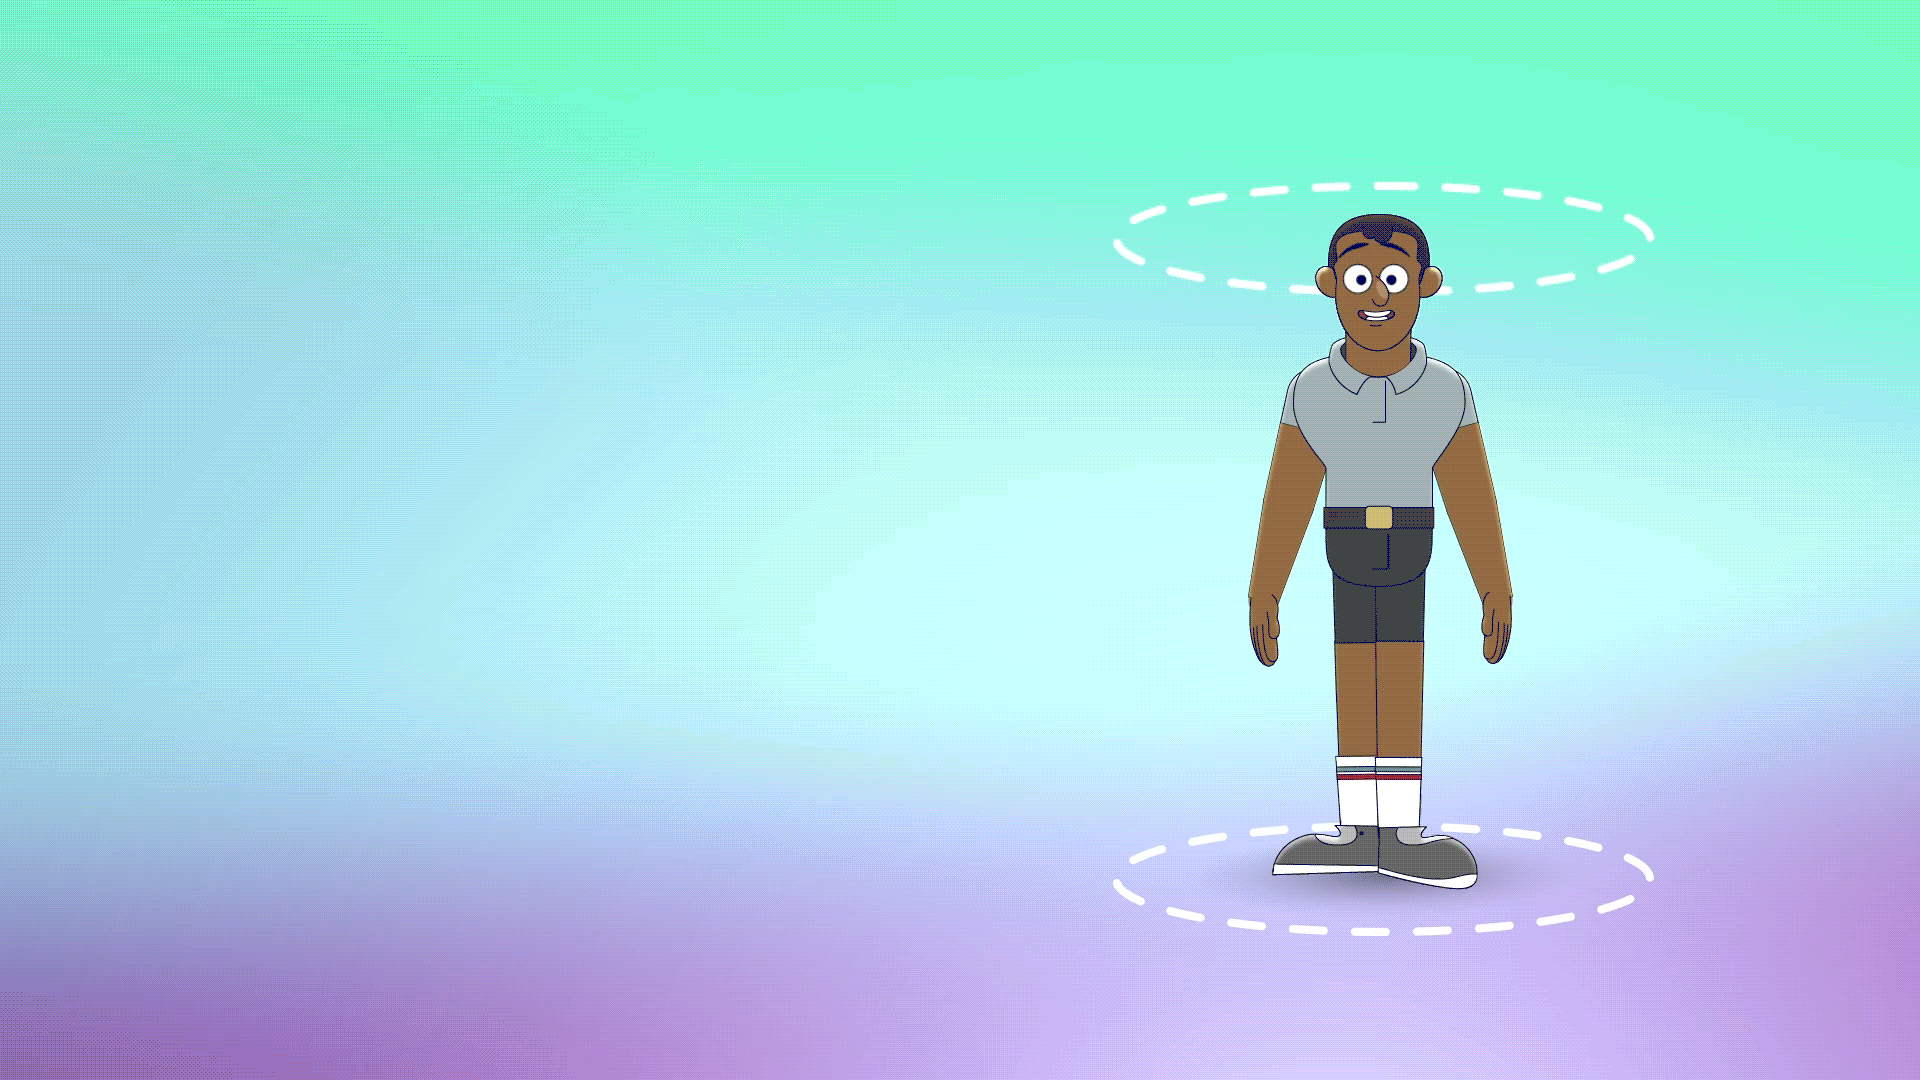
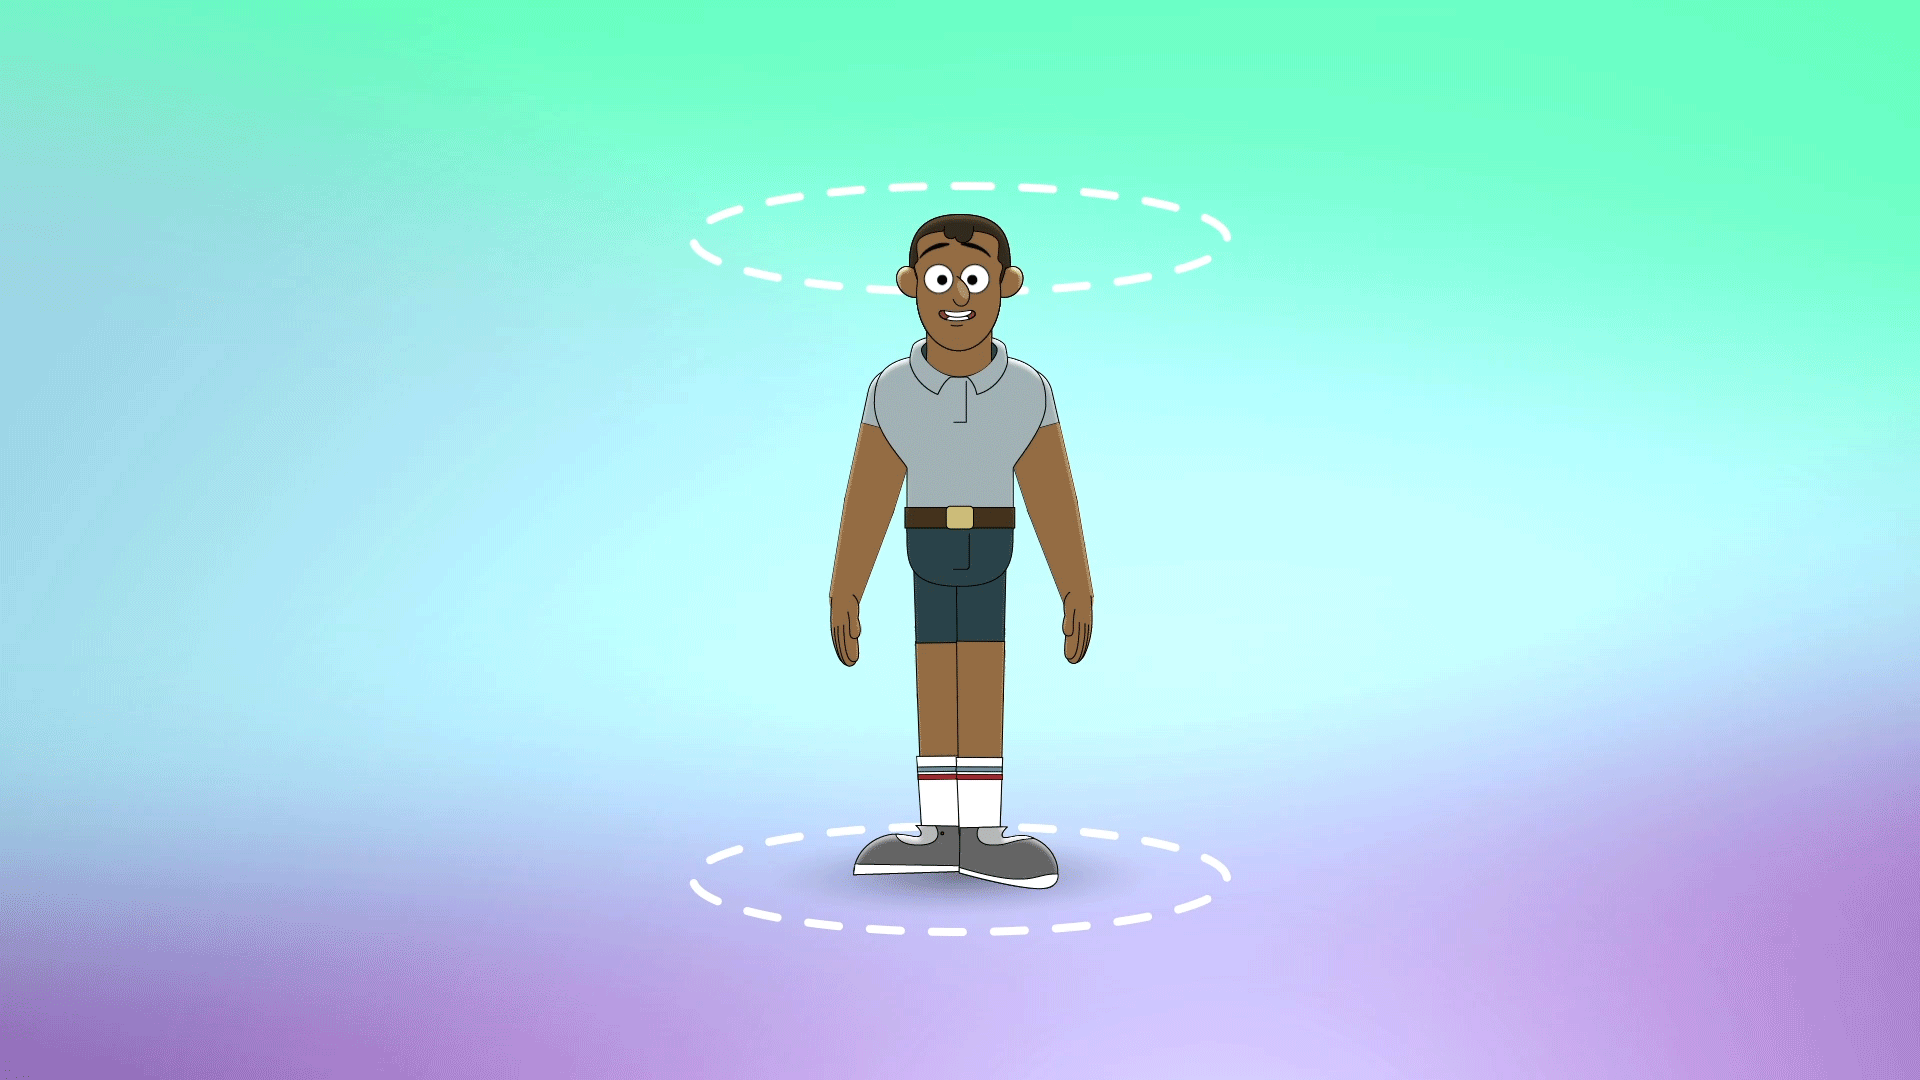
functional rig that can rotate 360 degrees. So you can animate in any angle. If you've ever worked on
your own character rig or how to use somebody else's, you understand the challenges
that come into a character when you have to turn them
sideways or to the back. This course is a
must if you have ever worked or plan on
working character rig. The tools that you will need
are Adobe After Effects, Adobe Illustrator,
and I use Duk bastle, but you can use a
newer version as well. Some optional plug ins are joysticks and
sliders, and limber. Joysticks and sliders is
going to give you some of that facial animation
that I think is crucial, but it's not necessary. You can get by without it. And limber is just a way
of creating limbs that I find to be the most fluid
form of creating limbs. I hope this course offers you everything you're looking
for in a character rig. And I thank you for coming
on this journey with me as we create the
ultimate character rig.
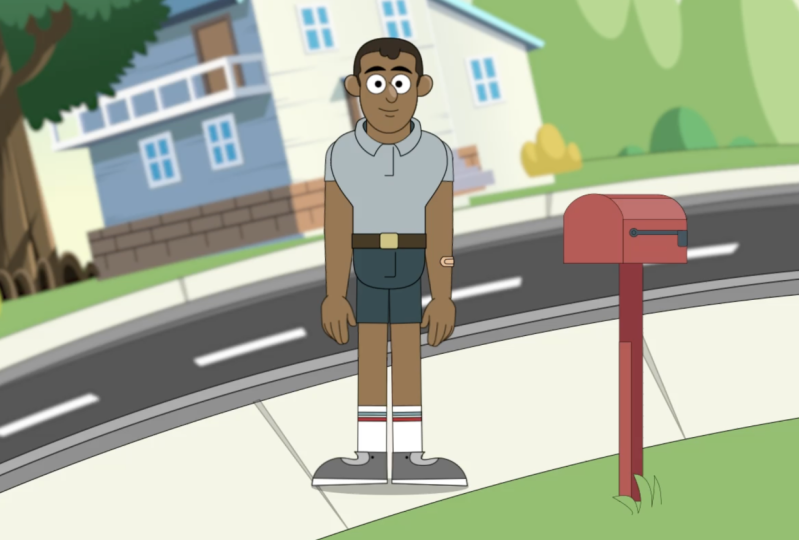
2. Step 01 - Character Design: I've cheated already and
I drew my character. This is an old character
that I've already drawn. Lucky for you, I'm
going to redraw it. You'll probably do some
preliminary sketches before you can get. Anyway, that's on you to figure out what your
character is going to look like. So let's look at what I did
and then we'll get into it. Let's have a quick look
at my character sketches. I just wanted to walk you
through what I've started with. This is the first
character I did. I really hated him. He does not look good. Nothing about him
cries character. But I knew I wanted
to be a postman. This is a postal worker. I wanted him to be maybe
like a more defined chin, and I just wanted to get an idea of what his body
would look like. I gave him some
stronger features, don't mind my fingernail,
but at the end of the day, when I finished it, he
looks a little bit too much like a cherub here out. Then I wanted to
soften his features. He ended up looking
a little too young. I didn't want to be a child. Then redid this version and I came up with a way better
concept from here. I wanted to see what he would look like with
a full body pick. When I did this sketch, it's like super clunky, Not a fan of the
silhouettes at all, all in all his body anatomy. Just wasn't diving. Then I wanted to simplify that. Then I came up with
this guy all in all, that's who we're going to do, that's the guy I'm
going to sketch. All this being said, never
settle on your first sketch. Always experiment and see where you come up with and you'll end up someplace way better
than where you started. Let's get into it. I'm
gonna draw this guy. Let me just go
ahead and jump into getting the head turns, and then we can
move on from there. I'll start with my circle. Draw in our little
perspective lines. And then from here we're
going to draw on the chin. The chin is going to move from the center over a little bit. It's going to wrap around. I'm not going to draw
the facial features. No, no eyes draw ear because I'm going
to use all of these. The eyes, the nose in the mouth, and I'm just going to be
moving them over to that head. If I draw all that stuff here, it's just going to
clutter up my drawing, which I do not need. We're just going to
just what we have. Does that make sense? What I'm
just talking I'm rambling. All right, let's go ahead
and we'll draw this over. It's got a very short hair or low hair line, I should say. Cool, Let me ink that one in. Hopefully this table
will cooperate. I'll probably pull
this out just a little bit so that the ear
has a place to land. All right, that looks good. Now let's move on to
the, this is a 34. Let's look over to,
now we're going to do a side profile from here we'll have
an eyebrow ridge. This chin is going
to be a lot more flat because it
has moved forward. The ear is actually going
to come forward too. And then the hairline will
move behind the head. Okay, that looks good. So let's go ahead
and ink this in. Draw this hair, it comes
around down behind the head. There we go. Front three quarter
right profile. Now we are all set, we can move it into Illustrator and we can start to have
fun. Let's do it.
3. Step 02 - Illustrator: There's no easy way to do this Designing this character
took about 2 hours. You don't want to
sit through 2 hours, nobody wants to watch 2 hours of somebody tracing a sketch. What I'm going to do is
fast forward this footage. You can watch the whole
thing from beginning to end and I'll
just talk over it. I have an overview section to where I'm going to walk you through everything
that I designed, all the different layers and all the different parts
of the character. That's a separate video. But if you want to watch my
process to where I actually outline every single shape,
you can watch it here. I'll just talk over.
Let's get into it. When you open up Illustrator, what you're going to do
is make a composition of 1920 by 1080. You just need one artboard. Next, you're going to
place the drawings that you have and you're going to put them inside
the artboard and start designing your character. I like to use simple shapes. I start with circles
for the face. This way you can keep
perfect symmetry when you are designing
your character. For the ears, I leave them open so that the bottom section, when it comes in
front of the face, it has a nice flow to it, there's no harsh lines. Then you're going to
also be layering each of your components or your body layers In
a separate layer, you're going to have a
nose layer, ear layer, a layer for the eyes, a layer for the pupils, and a layer for the face. I'm adding a chin
just below the nose. You're going to
create a chin layer that follows the
shape of the face. This way, we can actually
have our characters jaw compress and
stretch when they talk. Using the sketches that I have, it was very helpful to get the head transitions for the rotation. It was
nice to have that. And I suggest that maybe you do those sketches just in case. Now for the neck, I make the neck a little
longer than I need to. It comes down into the chest. And the reason for that is
we're going to mask out the neck using a mask tool or shape
layer in after effects. This way it will look
like it's going inside of the collar and it's going to
make a really cool effect. Again, using simple shapes, I can create that symmetry
for our character. Don't worry about this part, I was just trying to see if
my original drawing matched. Working on that front
pose is very important because this is the starting
point for your character. We're going to jump off of this particular pose and start
doing our body rotation. It's very important to
make sure that you have good symmetry from
left to right. Now we're going to start
to work on a left turn. This is a torso left. It's just rotating a little bit. As your character
rotates, their shoulders, which are the widest
part of your body, will start to come in because
of the perspective switch. Now make sure you also create enough space for your
arm as it rotates. Something that happens a lot is that as the
character rotates, you think, oh, it's just
getting smaller in a way. It is getting smaller
as they rotate. It's compressing, but you also
have to make sure you have enough space for your shoulder because your arm does
not get smaller, it still stays the same size. Just make sure you have a really wide berth on your collar. I just made different layers
for each one of the torsos. I have five different
torsos to create my turn. Now making the arm, I'm just using simple
circles because these are going to be the
points that we rotate from. The shoulder has a circle, the elbow has a circle, and the wrist has a circle. And make sure that each your upper arm
and your lower arm, they have the same pivot
point for the elbow. That's going to be
very important. Once you have designed it, you can copy those layers, paste them into a new layer. So there's going to
be a left upper arm, a left lower arm, and a left wrist,
right upper arm, right lower arm,
and a right wrist. You do the same
thing for the legs. There's going to be
a left upper leg, left lower leg, left foot, and then same with the right. Just have fun with your designs. Make sure your shapes
are appealing. You want to make sure that
you have enough space for just things to
function properly. These are cartoons. Don't
make things too small. You want to have them
exaggerated just a tad, so that it reads Well, I'm just laying
out the legs here. What are some things to note? Now I'm going to create hands. The way that I do my hands is I create all of my hand
shapes on one layer. You can make as many
hand shapes as you like. The more hand shapes you have, the more ability you have to actually act
with your character. Because the hands
are so expressive, they tell a lot of
emotion and they can tell a lot about how that
character is feeling. And the point is that they're
trying to get across. Having expressive
hands is really great. If you have a hand sheet with
just different hand shapes, feel free to use those. Bring them in and then
you can trace those. I was just going off my head. I have a problem to where I
don't ever use reference. I just think of something
and then I start to fiddle with it
until it looks right. The problem is I end up
fiddling for way too long. You can tell right
here with his fist, I had no idea what I
was doing was like, why doesn't this look
right Eventually I got it. But using reference
is key I suggested, don't make my mistakes
use reference. Essentially, I only
made eight hand shapes. Technically it's only
four hand shapes, but it was a front and
back version of both. I might go back in
later and create a bunch more dynamic poses just to really get the point across of what my character
is thinking. But these are the general basic
hand shapes that we have. It was an open hand, closed
fist, something else? Yeah, this will get me by. If your character only has
one hand shape or two, like a front and the
back, that's fine too. Do as many as you'd like. If you notice as the hand rotates
from the palm position, the hand is really wide. But if you do it like this
more of your razor's edge, the hand gets super narrow. And that's because
we have a wrist with two bones in
it that rotate. What I realized is my wrists
were just way too big. I went back to my
character's arm and I scaled the wrist down
just a little bit, so that the hand would
fit in both directions. No matter what rig you've
made or how many you've done. It's always a learning curve. There's this experimental
process where you have to figure out what it is
that needs to happen. There's always going to be
problems that you figure out that was one of them. The next thing that
I'm doing here is I'm creating rotation
points on my layers. Using the circles that I
created for the shoulders, the elbows in the wrist, I'm just scaling them down
to the perfect center. And then I'm making them
like a bright color so that I can really see it. The reason we're doing this is so that when we
import our layers, we know the exact point on that layer that will rotate
perfectly around that circle. That's going to
be super helpful. Later on, I just put
those circles directly onto the layer of the
elbow or the lower arm. Now right here, same as the
hand, all in one layer. What I'm doing is I'm creating
a rotation for the feet. Because the end goal is
that we want to create a character that can
spin 360 degrees. Well, the feet need
to spin with it. I'm creating just about
every possible position that would need to be rotated. I have a left version, a three quarter
version, front version, and then a three quarter
version the opposite way, and a three quarter
version backward, And then a heel version, which is what I'm working
on right here. Once you get all those
different versions, what is it? Six
different versions. That should be enough
to get the body or the foot rotation. Now, that was the end
of the design portion. Again, I was sped up. I know
it was maybe hard to follow, but if you had a little trouble understanding what I was
doing in this section, watch the next video. The next video is the overview. I made some changes to the actual character design
and some of the layers. I'll walk you through exactly what I did
and I'll go layer by layer to explain to you
how to set your character up. And we can go from there, check out the next video, and then we'll continue on.
4. Character Overview: Now I'm going to
do an overview of our character design
in Adobe Illustrator. This is going to give you
a good idea of exactly how the layers need to be
labeled and positioned. You can move forward into the after effects version
where we make our rig. Let's take a look at this. A
few changes that you might notice is that I changed
the color of his shirt. I added a few highlights
to the ears and the nose, and a little shadow to the neck. Now let's work our way
from the top down. Nose is, like I said before, it's on its own separate layer. All the different parts of the body need to be on
their own separate layer. When making a nose, I like to choose either a left
or right profile that just transitions to the
next head state a lot better as we do
our head rotations. If you have a nose
that is dead center, it makes it very challenging
to take that nose and position it to
a three quarter and then to like a side profile. It's best to visualize your nose already at a
turned angle to start with. Next we have the eyeballs on their own layer and then
the pupils on top of that. It's important that the
pupils are separated. Otherwise, your character will not be able to look around, they will not see
any danger coming. Next we have the, let's
look at these ears. My ears, I like to start
here at the crest, spiral around down to the ear
lobe, and I leave it open. I don't close off that gap, because as the head turns and the ears come
in front of the head, it makes a nice, seamless transition from the
ear to the face. This little piece right here. The sideburn is critical. It's important because this adds a nice transition from
the ear up into the hair. This can be as long as you want, you can even cover the ear, or you can even shorten
it just a little bit. But it's nice and
important actually to have a little bit of the hair coming
down in front of the ear. That just helps with
the head rotation. And then it makes
the layers look better when they interact
with each other. All right, next
we have the neck. Now you'll notice the neck actually comes down
below the collar. That's important because
in after effects when we create our body rig, we're going to mask
out the bottom of this neck so that it looks like it's going
inside of the collar, it's going to make a
really cool effect. Just make sure that your
neck is long enough. Also, make sure it's tall enough that as the head
rotates left and right, you don't see the top of the
neck from behind the head. I think it's important
to point out I don't have any eyebrows and
I don't have a mouth. That's because in after
effects we're going to make those using joysticks
and sliders. We're going to create some
really expressive eyebrows. Then we're also going
to be able to create some really organic
mouth shapes that move and transition
between seamlessly. That's the way I like doing it creates the best
result, in my opinion. If for some reason you
don't have joysticks and sliders or you don't
want to do that method, you could simply
make some eyebrows here and then just have some up and down
movement to them as we import them
into after effects. It will work just fine, but it's just going
to make a very simplistic version of eyebrows. Then you can do the same thing
with mouth shapes as well. If you decide that you don't want to use joysticks
and sliders, you can make a bunch of
different mouth shapes here on this character, just like we're going
to do with the hands. You can transitions through
those mouth shapes. It's really up to you. But what I'm going to do is make that stuff in after effects. I actually think it's important
to point out this too. Character has bangs or hair that comes down
in front of the face. You can create a new layer, I don't know why
that's all caps here. You can whatever shape
your bangs would be, then we'll import that
into after effects. You can move that around. Now, just keep in mind that
depending on how you make it, it can complicate things in such that if the
head goes forward, it might break through
the top of the head. Or if it goes up at my break
through the top of the hair. You just have to make
sure that when you set up your rotations that your bangs move accordingly
to the position of the head. But if you have that, go ahead and make a layer for it here. And then I can show you how important and animate
that later on. Another thing that I did, I originally had a new
layer for each torso, but what I realized is I have space here in my composition or my artboard to where
I could put all of my layers for my body
rotation on one layer. That's what I did. I just spaced it out evenly, that there's no overlap, there's no close touching. You want good space between each body because
we are going to transition this layer from
one image to the next. We need to have
space to move it. I was just thinking that
this would actually make importing files a lot easier because we're
just importing one file that has all
the body rotation in, as opposed to five files
that we have to navigate. Feel free to do that. It's
a new experiment for me. I'm not sure how
it's going to turn out, but I think it's
going to be great. Let's move on to the limbs. I'll turn off my torso. Like I said before, your limbs have to be rotating
on a perfect circle. It's probably not
as important for something like the shoulder
or maybe even the wrist. You want to be pretty
close to center for those, but the place that
rotates dead center, and it has to be dead
center, is the elbow. If your elbow does not have
a perfect center anchor, it's just going to get so wonky. When that arm comes
up and bends, you're going to start to see
the elbow break through. The fore arm is
going to rotate on an off angle and it's
not going to be good. The way to do that is
you see I've added these little red dots at the dead center
point of my joint. The way that I do that, because I made everything from a circle, all you do is copy that circle
and then scale it down. Dead center, holding
shift and alt. Once you get it there,
make it a nice, fun, bright color
and you're good. You do the same thing
with the elbow. Just scale it down and
make one for the wrist. Then go through and do that
for all of your limbs. Left side, right side. Same with the legs, they all
need that joint pivot point. Those pivot points
are going to be on the layer that
they're specified with. The shoulder joint will
go to the upper arm, elbow joint will go to the fore arm and then the
wrist joint will be on. The hand hip joint will be on the upper leg knee
joint will be on the lower leg ankle joint
will be on the foot. Speaking of feet, let's
look at what we got. Because we're doing a full 360
rotation of our character. We need feet that
match that rotation. We have to have
some spinning feet starting with this as
like a jumping point. I have a full side profile of a foot, That's what
I've started with. Then I move into a
three quarter version. This is an interesting topic. Some people, when they
design their characters, they have a ground plane. And you don't want your
character's feet to break through the ground plane thing needs
to stay flat, that's fine. Or to give a little bit of
depth to your rotation. You can break that ground plane to give almost like a
foreshortening effect. That's what I did here. I'm not entirely sure if it's
the smart or right move, but it just felt
right. So I did it. We've got a three
quarter turn here. We have a front foot, that's the toe facing us. Then we have a three quarter
view on the opposite side. This one is a three
quarter view of the back. We're starting to see the heel. And then finally we
have a heel view. All of these feet shapes are on the same layer and
we're going to cycle through them as
the character turns. I'll show you that, we'll
get into that later. A very similar system is
what we're going to do. For the hands, I only
did eight hands. I would suggest doing
as many as you can. It's really up to you on
complex and how many you do. It just seems to
me that hands are the most expressive part aside from the face on your body. You emote a lot of character
through your hands. The more hand poses you have, the more emotion you can
get out of a character. That's why I say more is better. I only have, technically it's only four hands it back version, one front version,
they're both the same. Maybe I'll go through and
make some more later on, but right now this is what
I got just because of time. That's as far as
I'm going to get. This is our character. Hopefully your
character design looks, or your layout looks
very similar to this. It's important that you follow these layers in these
steps almost to a T because it's going
to make it easier for you when we go into after
effects and start to rig it. Let's get into that section
right now and have some fun.
5. Step 03 - Body Rig: In this part of the tutorial, now we're going to get
into some rigging. This is the fun part. We're
going to start off by rigging the torso and then we'll work our
way out from there. Let's get into
rigging the torso. Once you've opened
after effects, what you're going to do is we're going to import our files. Go file, import file. Then you're going to go and find the illustrator file where
your character was designed. When you have it selected, come down here to
import as composition. This is going to do is it's
going to import all of our layers separately so we don't have to do it one by one. And it now what it did was it created a composition for us based on our
illustrator size. It brought in all of
our different layers. I'm going to go inside of
character one composition. If you hit control
K on the keyboard, it'll bring up your
composition settings. And you should notice that
the frame rate should be at 29.97 That's typically what I animate at roughly 29.97 Some people animate at 12, others animate at 24. My preference has always been 29.97 Your duration doesn't
need to be very long. You could probably just
drop it down to 1 minute. But what you should
also notice is that the width and height is 1920 by 1080. That's
what we're going for. What I'm going to do is
I'm going to find all of the different layers that
are associated to the torso. For me, that is the torso, That is the neck. I also added a bag, that's another thing
you might notice, it's different in my original
sketch to bag with them. I put it in there. Once you
have those three selected, do control shift C, that's going to bring up a new composition that
you're going to create. You can label this one
torso and then hit Enter. Now we're going to
go inside the torso. The first thing we can do, we don't need all of this
size to our composition. Right down here, there's a little square and it's
called region of interest. When you select it and
you also select a layer, we'll select the torso. We can drag a little
box around our torso. You don't want to
make it too tight around the torso
that you're making, but we're just
trying to trim off some of that size because
we don't need it. Once you have a nice little box like this around your torso, what you can do is go
composition composition, then crop comp to
region of interest. I was thinking I got
ahead of myself. You don't need to
select any layers. We were just in the composition. Okay, now we have a smaller
composition, This is perfect. Now you select your torso
and we're going to mask out our torso because we have so many different torsos
associated with this one layer. We need to define the one that we're going to be
using right here. In this front layer, I'm going to draw
a mask around it. Actually, solo it out
so we can see it. We're going to draw
a mask around it. You can keep it tight. Then what we're going to
do is we're going to key the mask path and then hold
shift P on the keyboard. Then we're going to hit, we're
going to key our position. Now we can hit you
while torso is selected and these
are our key frames. What we're going to
do now, this is cool, because this is where
we create our rotation. We're going to work on
that layer by layer. Let's turn on our action safe. I want to make sure that the
torso is in fact centered. Mine is just a little bit off. I'm just going to
move it over now. The next thing we can
do is hit page down. We're going to hit Y on keyboard
and we are going to pan. Over to our next torso. And to make sure that
these are in alignment, meaning that they don't
jump back and forth, but they actually
spin on themselves. You can do page up
and page down just to make sure your alignment
is pretty good. It doesn't have to be
absolutely perfect, but you want it to
be pretty close. Now I'll do page down again
and we'll just move it over. And we're going to continue
this until we get to the end. Then this is my final one. Look at that, those
hind quarters then. Because the front and the
back are the same shape, you can make sure that
they are in alignment. One thing we need to
do, and I got ahead of myself, is wick. It looks at the slider or the joystick in a
beginning and end. The middle state is
where it defaults to. This is where it
puts that joystick. Because it puts it a
default in the middle. You want the middle to be
the front of your character. In order for the front of your character to be in the middle, that means that our
first frame has to actually be the
back of the character as we transition
on our timeline. This way it would go to the center or the front of our character goes
from back to center. What we have to do that was a long winded explanation is we have to put
our center here. Then now it rotates
and we have to turn our character
to the other side. Now it's confusing but
just follow with me. So what we're going to do
is I'm going to go back one hold control, I'm sorry. But we do need to
save it. I'm sorry. Alts shift desk on A do
I know after effects, I don't know. Hold shift X. And we're going to
key it the middle. Now our scale is keyed. Then we're going to hit Page up to a section where we
don't have any key frames. And we're going to put
this three quarter turn here but facing the
opposite direction. What we have to do
is we now have to scale it to the negative. And I'm going to position it back to
the middle and hit Y. Now we can put our
three quarter view in the opposite direction. You see what's happening now. I hope that made sense. All we're doing is scaling. We scaled it to the negative. And now we're going to go backwards from here
to the beginning. Now keep it on y. And we're going to
continue this transition till we get to the
back of our character. By the end of it, it will be a seamless transition
from the back of the character to the
front of the character and then back to the
back of the character. Let's just make sure
these backs line up. All right, that looks good. Then we can just move
this over one key frame. Now if we go to the
beginning of our character, and then to the last keyframe. And hit When we play it, it should do a perfect circle. Boom, doesn't
awesome. All right, we did it, now we have
our character spinning. But there's one thing
we have to add. We need a neck. I'm
going to hit you. Keep those open.
I'm going to go to the middle key frame and I'm
going to turn my neck on. I'm actually not
going to animate the position of the neck at all. I'm going to keep it
here. Spinning in the body will just
spin around the neck. But what we do
need is that mask. Remember how we
talked about a mask? I'm going to get my pen tool. I'm going to start to create a mask at the bottom
of my collar. This is going to mask out
the bottom of the neck. What I can do is I select the
neck, hit toggle switches. Then right here there's
something called track Matt. If you select this one
and hit the shape layer, you'll see it masked
out the neck, but it's in the
opposite direction. That's simple to fix. You just come right
over here and we're going to invert the mask. Now we have a mask on it. Just make sure it
all lines up nicely. You get a nice, you can see the stroke on
it and everything. One thing that's
going to happen with the neck is you
have limitations. For me, I have a
caller, at some point, the neck is going to run into the collar and you're
going to see that split, it's going to intersect with the collar and it's
just not going to work. There are limitations. Let's hit Y on the keyboard
with neck selected. And what we're
going to do is find this anchor point and
we're going to put it right down here where we think the neck is
going to start to rotate. You don't want it too high
because the neck going to do a full spin in the middle. You want it down
low, so the neck rotates around the sternum. You can see I have
neck movement, but I have limitations. That's because my
collar is so high. If I didn't have
a collar at all, then this would
work a lot better. But my collar limits me from
moving my head too much. I could probably pull
this in a little bit. That might help. Let's see. Not really. That's okay. Typically, my neck
doesn't move a lot when my characters are
interacting or talking. So what we're going to do is
we are going to key frame this shape in your shape
layer or your mask. I'm going to rename it, we'll call it neck mask. What we'll do is we'll go
into the contents, the shape, and we're going to key the path as we page up and page
down on the keyboard. The body is going
to rotate and we can move these shape
layers back into position. For my collar, I have
to bump this one up and this one out. We'll pull this one in. I'll probably just pull this
out too. Yeah, that's fine. Let's hit page down
one more time. Make sure that it is
staying in line with our shape of our neck.
The shape of our collar. I'll just pull this
one all the way down that we're going to tackle
something different here. Because the neck
cannot be in front. You could change the shape
layer to mask that out. But I'm going to do something
a little more simple now. We have to go back to
the other direction, key frame, this shape, pull this out, and then one
more and then we'll be done. All right, so the neck
mask is finished. What we have to do at this point is we're going to duplicate the neck and then
we are going to put neck two below the torso
and then neck one. We're going to hold
shift or just man, I'm having the worst trouble
with these shortcuts, Okay. And then as soon as the
torso turns, see the back. We're going to turn
the opacity off. We'll key it 100 and then
we'll turn it off here. You see how it
switches like that. I'm going to move forward, we'll key it here just
before it turns off. We'll go forward one and
then we'll turn it off. Neck two in the back, opacity stays on all the time. Neck layer in the front is only on when the front of
the chest is visible. Now we have this beautiful thing spinning around the neck. Next thing I want to
do is we're going to create a new null object. I'm going to hit y
on the keyboard and just center out that anchor
point to the middle. Then I'm going to push it just
to the bottom of my torso. What I'm going to do is call
this squash in stretch. Then I'm going to create
one more null object. I'm going to put the anchor
point to the middle. And I'm going to put that right at where my neck is going to spin or not spin but rotate. And then I'm going to
call this neck rotate. And then I'm going
to attach my neck to it so that as this spins,
the neck will spin. Then I'm going to take, now, I'm going to take the
torso to rig my bag later. That's another headache that I don't want to get
into right now. But I'm going to take
torso bag and neck rotate, and I'm going to attach
it to squash and stretch. On squash and stretch, I'm going to come
right to the middle. I'm going to key
the scale at 100. And I'm going to come all
the way to the beginning. And this is where I'm going
to stretch out my character. I don't want to
stretch too much. Let's see if, maybe, let's
try 95 in and then 110. Okay, that feels good. And then let's go
to the end frame and we're going to reverse it. So we'll go 110 down to,
I don't know, maybe 90. We forgot to, I'm sorry, you have to attach the mask also to your squash and stretch. Okay, so this probably looks pretty funky right now
and you're wondering like, okay, so you've got
all this stuff, but you know what? Another thing that we have to do is we have to create control points for our shoulders to
rotate with the body. The body is spinning. But we
want to automate a system to where the arms stay in
line with the shoulders. What we're going to do is
two more null objects. I'm going to center
out the anchor points. I'm going to call
this one left arm. I'll duplicate it and
call this one right arm. Just so that these are not like getting in
the way too much, I'm going to scale them
down a little bit. Right arm is what
is it on this side, and then left arm
is on this side. I'm going to key the positions. Hit P on the keyboard, keys. I'm going to move this
scale for a second because actually I'm
just going to delete it. We'll come back to that. I think I jumped the gun a little bit. As it rotates to what
is it to his left. I need this shoulder
to come over. We'll do four and this
one will come back. Maybe we'll do four and
we're just going to continue this process each, so moving backward and the
other one moving forward. This is a big jump actually. That one's going to
come way over here. This one's going to
come way back here. Which makes me wonder,
now that's good. Then there's a big jump. Then we move to the back. Now the thing about the back, the shoulders should be in the same position as they are
when they're in the front. What we have to do is
not the same position, opposite positions, but in the spatial position.
If that makes sense. Right arm will actually
be where left arm was. So we can copy that
and put it here. The right arm will be
where left arm was. Then we'll copy that.
Put that there. Now we have these null objects
that rotate perfectly. Now we have to go back to
the opposite direction. What we'll do is we will
continue our trajectory. We do four movements, or however many it takes you, I'm not sure how big
your character is, or how small they are. Then we have a big jump, big jump, big jump. Then finally, back to where
they started. Perfect. Now we have these null objects that are rotating with the body. It's beautiful, This is
where it gets tricky. We have to separate
these dimensions. We have the null objects
traveling on an X plane, but the way the processes
the information, it has to separate
the X from the Y. We need to separate
our dimensions, so that moves
independently of the Y. Select our positions. Then what we're going to do is right click and we're
going to separate dimensions on our Y positions. We're going to delete those. We still have the
movement in the X. What has to happen now is
right here in the middle. We're going to key
our Y position right here where
we're going to scale. We have to move our shoulders up to match the stretch that
we're trying to achieve. That as we stretch the body up, the shoulders which
our arms are connected to move up with the
body as it stretches, what we're going to do is we're going to move this upward. I'm not entirely sure. This is going to be a little
trial and error to figure out how high it needs to go
and how low it needs to go. 14144. It looks pretty
good. Let's do that here. Now it goes up and it comes all the way down because
we are squashing the body. Remember at zero
in our timeline is stretched all the way to the end of our time
line, which is squashed. Now we're going to go in
the opposite direction. We'll squish it down. 184. Let's try that.
That looks good. 184 up and down movement
in our shoulders, we have left and right
movement in our shoulders. This is the most
complicated part, Very difficult to
think in that mindset of separating dimensions. I hope you get it. Watch this over and over if it
doesn't make any sense. But finally, what
we need to do is, well, one, we need to take
all of our key frames. Actually we need to
do our squash and stretch again, Right
here in the middle, we'll do zero, 100% We'll come all the way to the
beginning of the time line, timeline, 95 to 110, and then we come to
the end, 9110290. That looks pretty good.
Let's look at, oh, see our shoulders move up, they come down to the middle. And then the squash, Is this a good visual
reference for you? So the shoulders
come up and down with the body Squashing
and stretching. When we connect everything
together and it's rigged, it should make more sense. Is there anything
else we need to do? The same thing
with the the legs, but thankfully we don't have
to worry about the up and down because the body is only squashing and stretching
from the hips. The legs are not going
to go up and down. I'm going to go ahead and I'm going to add
a left hip and a right hip. And I'm going to do the
same transition thing as I did for the shoulders. Now I finished the hips. I have a pair of hips that
rotate around the body, as well as a pair of shoulders that rotate around the body. Next thing we need to do is we're going to select
all the key frames. Right click, we're going to
do toggle key frame hold. With the exception of one thing, squash and stretch does not
need to be toggle held. You can control click to turn it off so that it is a smooth up and down transition. The other thing we're
going to need to do is all of our layers, they need to have a
beginning key frame and an end key frame in order
for the connection to work. If you come to zero on
our timeline anywhere, there is not a key frame. Make sure you put
one in. There we go. Now come to the end
of our time line. And then make sure
you put a keyframe wherever there is not one. Also, make sure that those
key frames that you just added have a toggle.
Hold on them. Okay. Now, another thing
I forgot to mention, make sure that your
rasterized layers is turned on on all of your Adobe
Illustrator files. Okay, coming into
character, one composition, what you're going
to need to do is possibly you'll need
to locate your body. Mine is way out of whack. And that's because I did not do a great job aligning my
character to the center. I'm just going to reposition it back to its original
resting state. That looks pretty good to me. Okay. Now that that is done, what we're going to do is de
select all of your layers. You're going to come
over into **** Basel. When you open it up
there's going to be an option called
inside of rigging, it's called links
and constraints. Go ahead, click on that. Then down below is
something called connector. To the right of
connector is a circle. Click on that circle and
what we're going to do is create a two slider control. Click on that and
it's going to make one like magic, boom. This is what's
going to control or power our body rotation. Right now it does nothing because nothing is
connected to it. With it selected, make sure you select the red circle,
the two de slider. Come back into your
torso position and we're going to select
all of our key frames, with the exception of
squash and stretch hold, shift to deselect and
anything with a Y position. This goes for our arms. De select the Y position for your left arm and the Y
position for your right arm. Those three things need
to be deselected again. Y position for right arm, Y position for left
arm and squash and stretch with everything
else selected. Come back into, actually you
don't need to come back. We're going to come
over to **** Basil. Right here is an option called Connect to Properties, and we're going to click that. When you click it, it's going to connect all of these
key frames we made. And connect them to our
slider or our joystick. Now when we rotate it, look at that, it does the magic. The next thing we need
to do is now select all the key frames that we
didn't before, Y position. For the shoulders and
squash, and stretch. Coming back to **** Basile, there's an option here
under Access right now. It's selected at X,
we're going to go to Y. Click that and then
connect the properties. Now when we come back, our joystick should
be working perfectly. We have up and down squash and stretch and a body rotation. Look at that. We did it
part one, Step one done. We have our body
rotating and squashing, and stretching with all
the control points. We need to get started. Now we're going to go on
and work for the head. We're going to
connect the head up the same way we did the body. We're going to connect
that to the body and make the rig even more
fun. Let's get into that.
6. Step 04 - Head Rig: Step four, we're going to be
creating a head rotation. As we have a joystick that
moves left and right. The head will follow and transition all the
way to the back. There's going to
be two different versions of the head rotation. There's going to be the key
or like the set position. Then there's going to be a
joysticks and sliders version, which is the subtle ***** and head rotation that you
can use for acting. Let's get into it
and get started. Back in our character
composition, I had created something
just to use as a template. I have a head rotation here
that I'm going to use to see and make sure that I
set up closely to this. Each one of these is
just the same layers within my original AI file. Let's get started. The first
thing that I want to do is select all of the layers that
are associated to the head. We have bangs all the
way down to chin. I'm going to go ahead
and make sure that rasterized layers is turned on the next hole control shift. And it's going to create
a new composition. I'm going to call this one Head. Going into your
head composition. It is too big. I'm going to
scale it down just so it's easier to work with here. We're going to crop the
region of interest. We're going to put it
just around our head. That looks pretty
good. Then we go composition crop comp
to region of interest. Now we have a front
profile of our head. All of our layers
are still there, You just can't see them. If I do chin, you can
see the switch out. Chin actually needs to be above. There we go. Next thing I'm going to
do, select all my layers. One more time, control shift C, I'm going to call
this one head front. Now what we're going to
do is we're going to nest a bunch of compositions
inside of our head comp. And each one of those
new compositions is going to be a
different version of the rotation starting off. This is going to be our
first one, the head front. Let's go inside. What I want to do is select our head
layer, which is this one. I'm going to mask
out this shape here. I'm going to do the same
thing for the chin. I have a rotated version of
my bangs just off center. That means that I too have
to mask out the bangs. Now my character,
the final character probably won't have bangs. But just for those of
you who have bang, for your character,
I'm going to show you how to set all
that stuff up. That is it. The next
thing I'm going to do is our character has eyes. Select everything
associated with the eyes, that's the people in the eyes. Hit control shift, we're
going to call it now. We have a set of eyes that we will rig up later
at a different point. For now, I'm just going to get them set up as a composition. Now, with our head
front created, we're going to go
ahead and start to create our other positions. I'm going to duplicate the head. I'm going to call this one.
Head left, three quarter. I'm going to drop it on top, then I'm going to go inside
and we're I'm sorry. Sorry. I had my mind
wouldn't blink. No, this is not work. What the heck have I done? Okay. There you go. Oh, did I just copy the head or
No, I did the head front. Right. I am confused. I'm going to delete
D three quarter. Going ahead, we have head front. Must have duplicated that one. I'm going to duplicate
head front. There we go. And I'm going to change
it to head left 34. Thanks for bearing
with me on that one. All right, now I'm
going to drop it down on top and then go inside. I'm going to start
with the, I'm going to select this head layer, hit Y on my keyboard, and I'm going to slide it over using the original chin as. A reference point, I'm going to push the head out
just a little bit, because as the head rotates, it comes off the
neck a little bit. Now let's do the same
thing to the chin. Find the right version. Move it over. The nose
will come over this way. The eyes will move
over this way. Now for the ears,
it's a tricky one. You can have one ear here. Just move it forward and
that should be fine. And you can see, I need to lower my like side brow
region. Let's see. May move that in, save it. Does that clean it
up? Yeah. Okay. As that ear comes forward, you technically don't really
need an ear on this side. But if you really want
one, what I would suggest doing is maybe
scaling it down just a little bit and then
moving it in just a hair. Another thing you can do
is if you want your eyes to parallax with each other, as the head rotates, one eye will come in front
of the other one. What you could do here
is duplicate the eyes and you'll have a mask, one eye and a mask
around the other. Then you can just pinch
them together just ever so slightly that might give you a better effect for what
you're trying to go for. It's really up to you. Perfonal preference,
personal preference. All in all, that's looking good. Last thing we need
to do is change the bangs it y on the keyboard, I have my rotation view of the, more of a profile view of the bangs. And we'll
put that here. Cool head left,
three quarters done. Now I'm going to duplicate that, drop it into our
head composition. And I'm going to rename
this one head profile. Let's go inside of this one. We do not need both eyes, so I will delete one,
the head layer again. This will come forward as well. We'll bump it over
here and let's change the chin to match. Then the eyes and the nose. We'll come to the
front of the face. We can delete that back here. Let's pull this ear over. The bangs might get
tricky here. Let's see. Yeah, they break out
of the head a bit. We might need a third version of the bangs just to wrap
that part around. I do have a third
version. Let me see. I might want to do something like this. Maybe it's save
then on the bangs. Let's go ahead and find that
new version. Put it here. Cool. I love it. Okay, now we're
going to start to do our turns to get to the back, let's go ahead and
duplicate left profile. I'm going to call this
left, maybe 34 back. I'll come back into
my head composition. Put it on top. Let's go inside. I think I can leave
everything as it is. I don't need to change too much. I do want to put the eyes behind the head.
I'll move them over. Put the nose behind the head. Move that back a bit. Bang.
I probably won't need. And I'll put the hair on top. Next we'll put the ears on top. And I'm just going
to move it over and scale it down a bit. Maybe we'll try 70. That looks pretty
good. Okay. All in all that feels pretty good. We have the left in the back. Everything on this head
might start to move from the profile back a little
bit because we're moving the head in a circle. So maybe I'll push it
back just to touch. Here we go. Then
we're going to final, we're going to end
it with head back. I'm going to
duplicate head front, and I'm going to rename it back. I'll put that here on top, and we'll go inside And things we don't need,
Don't need bangs. Don't need nose,
don't need eyes. We do need ears. Hair is going to come to the top and
boom. That's simple. This is the back of
our head, not too bad. Now we have a full
rotation of our head. I can see that there's a
bit of a jump here between the profile head and the
back three quarter maybe. What I'll do is I'll
come here and keep moving this three
quarter back until yeah, it's a little bit more clean. With that transition,
that looks pretty good. Okay. Now you're probably wondering, we have a full rotation
from the front to the back going
along the left side, but now we need the right side. What we have to do is we cannot just copy all of
these compositions. Duplicate them, and then
scale them to the other side. Because of the way
joysticks insiders works, if we did that, everything on our
copied frames that were scaled negative
would work inverse. If I move my joystick this way, the head
would go that way. That's not what we're
trying to achieve. We have to make
new compositions, but we can utilize the
ones we've already made. Starting with left
three quarter, I'm going to duplicate it. I call it right three quarter. I can drop that on top. Actually, I drop it to
the bottom. Go inside. Then here what we
can do is we can create a new null object. We're going to attach everything in this layer
to the null object. Hit scale here, we
can put it negative. The only thing that
we're going to have to counter as of right
now is the eyes. Unfortunately, these
eyes have to be scaled in the opposite direction.
We can delete the null. We no longer need it,
but as you can see, the have been scaled
to the negative side. What we want to do is scale
them back to positive 100. We'll just move them like, okay, now we have eyes that are not backwards
because that's important too. When we go and put joysticks
and sliders to our pupils, we wanted to follow
the joystick. And if this was
negative, it would go the opposite direction of
where we put our joystick. Cool, we fix that. Now we need he left profile.
We'll duplicate it. We're going to call this one, you guessed it,
Head right profile. And I didn't even get it right. There we go. Right profile. I'll put right profile
at the bottom Again, let's do null, null, object. Add everything to it,
scale it negative. And our eye needs to
go, we can delete that. No object needs to be facing
the opposite direction. We'll just put it back
to where we found it. In fact, we might want this eye instead because that is his left eye and he is
facing to the right, so the left eye
would be showing. Next we are going to do what have we got?
Three quarter back. Duplicate it. We
are going to call this one head right
three quarterback. We're going to drop it
into our head composition. Come inside and we're
going to do null object, just like the other
ones and attach it. Once it's attached, we scale it negative, we can delete that. The e has to scale to the opposite direction,
back to 100. Again, it's probably, probably, it is this I that
needs to be here. And we'll just put it
back into position. Coming back into the head. The last thing we have to
do is duplicate head back. It's a nice little
head sandwich. It starts with head back. Goes through all the turns, and then it ends in head back. The reason for that is
because we are going to be, we're going to be
changing opacities. Remember how I said
when we did the torso? It starts on the back, goes to the front, and
then ends on the back. We're doing the same
thing with the head. I'm going to hit
on the keyboard. We're going to key
the opacity at 100. For this, go down one
frame and turn it to zero. Next, I'll select these and we'll do toggle
key frame hold. I think there was eight
in this whole transition, so I'm going to key
that zero as well. Next what I'm going to do
is copy these keyframes. Come to my three quarter
back, paste them, and this has to
be moved forward, one actually, as
that is still off. Okay? On the off then this one. Okay, I'm confusing you
guys because I'm confused. This one needs to
be off. Here we go. It's going to be off until
it goes to this key frame. Then it comes on and
then it can turn off and it should
be off there too. Cool, Now we're starting
to get somewhere. I'm going to copy
these keyframes, and this will really be the set that we
use the whole way. Hit V, hit on the keyboard, and we're going to move
this over just one. Then we're going to
paste those key frames. Hit on the keyboard. We're going to move this
over offset just one. Then we're going to paste those key frames,
offset just one. Paste key frames,
it offset just one. We are going to paste those
key frames offset just one. We are going to paste
these key frames. It looks like this is not
going to be my ending. Let's just see where my
ending is going to be. Where do I end up? Is it here? Let's copy these.
Let's paste. Get ten. Now we have a head rotation. Which one's going off? This
one needs to be on here. Oh, come on, you. I got to move all
these over just one. So now it's going
to go bump, bump. I think I can leave that. Does that work? I don't know. Maybe we have a head
rotation. Look at that. And we have a key frame.
So it starts on the back, it starts to rotate around, comes all the way around, and then back to the other side. There it is. In case you
don't quite understand it, let's look at
everything we've got. Let's fix these up a bit. We have almost everything off except for the
last key frame. Then as we move forward, last keyframe goes off, and then this one comes on, then this one goes off, and this one comes
on and so forth the way up until we
get back to zero. I think we can do that. We'll move these over to nine. There we go. Okay. Now that this is set up, it's looking really good. We have all of the states of our head in perfect rotation. Now what we're going to do is
go back into our character. One, I'm going to reposition
the head while I'm here, I might as well turn on my proportionate grid and notice that I am not
centered at all. That's just because I did a poor job making sure
that layers were centered. All I have to do is
select everything. We haven't really
rigged anything yet. That's the plus, I'm just going
to move it to the center, center out my character,
so everything is nice. And even the next thing we're going to do is we're
going to rig up the head. Now we have everything set
up, it's looking good. I'm going to hit
Y on the keyboard and move my anchor point
of my head to right around where my mouth will
go with the head selected. We are now going to
come into Du Basel, hit our links and
constraints option. Then what we're going
to do is come to the connector option
and hit the circle. Next, we're going to hit
the create slider control. Then it's going to create one. It's already automatically
going to call it head because our
head was selected. That is perfect. That
is what we want. Now we are going to select the red circle,
the head control. If you don't have these options or these values already set, and let's say that these
numbers are graded out. What you can do is select your head circle
for your slider, and then just select this Eyedropper tool
and then click that, That's going to load
all the properties of that slider control. Next what we're going
to do is go back into our head composition and we're going to select all of our key frames on the opacity. Let me come back to basil. Instead of connecting
to properties. We're going to connect
to opacities when we select that, everything
should work. Let's find out when I move this. Look at that. But
what did you believe? That I have them
going the wrong way. Okay, I figured out
what the problem was. Your key frames need to be
going the opposite direction. The head needs to rotate from this direction to
the other direction. It doesn't really
make sense to me. For whatever reason,
that's what we got to do. So that's what we're
going to do. I'm going to switch all the layers around. Head front stays in the middle, everything else around
it, we'll switch. Then these need to
be switched as well. Then we'll do head back
up here and there. Now we have head front
and then it goes three profile back back. Then he left 34 profile back. Now change our pasities. They need to be going in
the opposite direction. What we're going to do is
starting with this bottom, I guess we'll start from the top because it's easiest to see. This one will be off, then at this point it will be here, starting on the other side, and we'll keep it on to there. There's no easy way to do this. Maybe we'll go backwards. Then this one will turn
here and then turn off. Then we'll just move
these key frames all around until they
make a nice sequence. Essentially, we just need to reverse literally
everything, okay? This one starting will be on, the bottom back head is
then it will turn off, Then this key frame
will turn on, and then it will turn off. So what's happening? So I've got on and off. I feel like something
is not right. How are these all off? Okay, there we go. But this
doesn't feel right either. Okay, so bottom off. And then these opacities
sequence through appropriately. Now that we have this done, let's go ahead select all of our key frames and then we're going to
connect it to opacities. Now with their fingers crossed. There it is, We did it. Oh my gosh. Okay, that's
looking really good. Now that we have a head that rotates and we have a body that rotates that's
looking real good, we have accomplished
what we set out to do, which is get the head to
rotate appropriately. There's still a
couple things that we need to do to set this up. We're going to tackle those in our next tutorials
in this Torial. We're going to go ahead
and start setting up our facial features. We're going to tackle
things like the eyebrows, the mouth, and the eye
movements in the blinks. Check out the next one.
Let's get into it.
7. Step 05 - Face Rig: Now we're going to get started
out on rigging the face. We're going to do things
like eyebrow movements, blinks, pupil movements,
and the mouth. Let's get started on that. All coming into our
head composition. This is where we are going
to start adding some things. Let's jump into head front. I'm really just
working my way through the compositions until I get to the eyes once I
come inside the eyes. Going to tackle this from the easiest problem to
the hardest problem. Right now, our easiest problem is getting the pupils to move. If you do not have
joysticks and sliders, which I highly suggest you get, there are some ways around this, you could create a
new null object. Just put it in the center. Okay, Some of my eyeballs
are not in the center. I'm not going to worry
about that right now. Put it in between the eyes. What you could do is just attach the eyes to this no object and you can move them
around like that. Something else you
might see as they break through the
pupil right there. A way around that in a way that we're
going to actually do this is toggle our switches
down here at the bottom. We are going to use the
eye layer as a track map. Then you switch it here. Don't switch, we just
turn back on our eyes. Thankfully, this new
version of after effects, you don't need multiple
layers to create mats. That was such a headache before. I don't know why, they never
thought of the solution. But now we have eyes that are being masked by a
layer that's already there, genes, that's one way to do it. And you can see when the eyes break through
to the other side, they're still there a way
around that would have to be creating two sets of eyes
and two sets of pupils, which we're going to do anyway. Once you have one, you're going to designate that I to the other
left or right. We'll mask this one out, and then we'll mask
the other one out. Now we have two eyes, one on the left and
one on the right. The same being said
for the pupils, we need to mask one
pupil to the left. Let me re center this. I'm going to turn
off these mats. All right, grab
your masking tool. We'll do one on the left side of the head and then one on
the right side of the head. Now the right side
and the right side. These two go together, then these two will go together. This pupil need to be masked out by this E. And then we'll
turn that pupil back on. This pupil needs to be
masked out by this eye, and we'll turn that eye back on. Now when we move the eyes, they will only be visible. The pupils will only be
visible the eye that they are associated with, cool. Now that we have our eyes set up so that the pupils can move and not break out of that shape, and this is where joysticks
and sliders comes in. We can actually separate
the eyes so that they move more consistently the way
that the eyes rotate. That being said, I'm not using
the null object version. I'm going to select my pupils, hit P on the keyboard and I'm going to
key their position. Now, joysticks and sliders, you can only have a series
of five key frames. Those five key frames
are all you have to play with with a left or right
up and down movement. At the starting frame, we have to have a neutral pose. This is your center pose
going down one key frame, this will be them
looking to their left. So I'm going to move it till the pupil just touches
the edge of the eye. I'll do the same
with the other one. Now going down one key frame, I'm going to move the
pupils to the other side. They are just touching
the edge of the pupil. Now on this next key frame, this is going to be
them looking up. I'm going to just recenter these and then I'm
going to move them up. Just the pupils
and move them up. Then finally move them down. Cool, now we have pupils
moving, everything looks good. Let's go and select those key
frames. All five of them. You must have five key frames. What we're going
to do is come into our joysticks and
sliders options. We're going to click
this little box to create a new joystick, and I'm going to call it eyes. Automatically. It
puts this giant thing right in front of
our viewing area. I'm just going to tone down
the opacity. Let's see. Oh yeah, that's what I'm
talking about, eyes that work. Cool. Now that we have that,
let's move on to the blink. For the blink, I'm going
to create a shape layer. It's going to be a rectangle that comes just below the eye. I do want to make sure that
it comes below the eye. I don't want it kissing
the edge of it because that might show up at some point, we don't
want to ever see it. Then I'm going to add one point
stroke, then holding Alt. I'm going to move an
upper eyelid above. These are my eyelids. I'm going to rename it lids. Now I'm going to select
one of the eyes. This is the white
part of the eyes. I'm going to duplicate it, but I'm just going
to bring it up above the eyelids and remove the mask. With that being
done, I'm going to select my eyelids and I'm
going to do a track mat of the eyes that I just put above the head coming inside
of each rectangle. I'm going to do the transform
and select position. Go inside rectangle,
transform position. Now with the transform of each rectangle
keyed with a position, you can hit you on the keyboard. And we're going to go
forward one frame. Hit page down. At this point we're just going to
bring the eyelid up from the bottom and then down from the top just
until they overlap. That is our blink. If you don't have
joysticks and sliders, you can always
animate these blinks, just like you would
have to do it manually in this section. But because I am using
joysticks and sliders, and maybe you are too. What we're going to
do is we're going to create a slider for the select these key
frames, go into sliders, we're going to call this
now with our blink slider, we can animate that
blank look at that. This is looking pretty good. But I want to take it
a little bit further. What we can do is
with our eye mask, remember this is the
one that the eyelids are being cropped out
with for the circle. What I want to do is come to
effect Matt simple choker. And we're going to push it
in the opposite direction. What this is going to
do is it's going to expand our eyelids outward. And this is going to give us that nice line under the eye. As our character
starts to blink, it gives us an eyelid, which is really cool. If we come back into character, obviously you can see his
eyelids should not be green. What I like to do, we
don't need to Never mind. Scratch that. Go to character for this. Then pick the color of
your character's skin. Then going back into the eyes, you can select the eyelids
and change the color. Now our character has
matching eyelids. And they have this
cool effect where the eyelids have a stroke tube that expand beyond the eyes. Now if you come into
the three quarter view, look at that. Everything is connected because we are using the same
eye composition. Now that's working,
it's looking good. The next thing we need to do, let's take this eye blink
and put it in the middle. And I want to try something. This is something I've done
with other characters. I want to open up the effects
in the slider control, and I want to attach the
slider to the scale. Did it work? Maybe I
have to amplify it. Let's see if we come in here, maybe go times 100, okay? Maybe that's not how I did it. I hate it when I do things and then I forget how
I actually did it. Times maybe negative
100, something changed. Let's try negative one. All right. Never mind. That did not work. Just going to just forget I did. That battery is
running low. Okay. So now we have this blink, but we need to get that
blink into our parent comp, which is our character. So what I want to do is here, come back into
eyes, go to parent. Yeah. Yeah. Okay. So put it
no, there's got to be a way. Can we put it here?
Oh, character one, did that do it now, why didn't you work
eyes, the parent. All right, let's try
this again. Scratch. All right. So now
what we have to do is we have to actually take this blink control and bring it over to the character
one composition. Now we're going to
have to be going through quite a few series of compositions to get there. Here's our blink.
I'm actually also, while I'm here I'm going
to bring over the eyes. I'm going to try a method.
Let me see if this works. If I come here to
joysticks and then I go into my parent
comp is character one, I want to see if I can transfer, with my eyes selected. I want to see if I can
transfer that to the parent. Yep. Let's see if it worked. Character one. Nice. That's
an easy way to do that. Let's make sure
it does function. Cool. The eyes are functioning. This just saves me
a step of going from the eyes to the head, to the head comp and
then into my character. That works great. Now back to the Bs. For some reason the blinks
don't work that way. Not sure why sliders doesn't
function the same way. Unfortunately, we just have
to keep going until we get into we can turn that one off. Now let's go into
our head comp now. Let's just parent this one into our parent comp and then
we can turn it off. Now, it should be here.
Here's our blink. We'll just move that around. Let's make sure
it's still set up. Functions. Nice. Cool. Okay, now we have blinks, we have eye movements. The next thing we need to
set up is our eyebrows. We want to get some
eyebrows at work. We need to think about this. If I put eyebrows on this layer, will they work well when I move into
different head views, eyebrows should work well here. It's here that I don't think that they're going
to work very good. Let's just try it. I want
to see if it does work. We're going to create
one shape layer. This is going to be our eyebrow
shape layer right here. I'm going to create a shape. This will just be like a neutral eyebrow position
for my character. This one does not need a fill. And the stroke can be as big
as your eyebrows need to be. I'm going to put a
little taper on it. We'll come into shape
and we'll go stroke. And let's check out our tapers. Start length, maybe we'll put at zero and then end length. Maybe we'll do the same,
maybe not quite as much. Then we can play around with some of
these settings till we get a nice look to our eyebrow. It looks pretty good to me. What I'm going to
do is I'm going to duplicate this eyebrow, and I'm just going to trans scale it to the negative side. Now we have eyebrows that are
on both sides of our eyes. The next thing we
need to do is we're going to create a mask. This is what's going
to cover up the eyes, as the eyebrows move
up and down over. If we have a character
with a really evil look to them, this will fix it. The way we're going
to do this is I'll start with a point here. Over and then up we're going to create
this forehead look. Then right here, I'm going to click at the corner of my
eyebrow and I'm going to match pretty closely the
curvature of my eyebrow. There we go. Maybe we
can pull this one out. Okay, this one does
not need a stroke. In fact, we need to
make this our same skin color as our character. Next what we can do is pull this to the bottom so the
eyebrows are on top of it. Then we're going
to keep our paths for all three of these. Hit you on the keyboard and move these to the
first key frame. This is going to be
our neutral pose. We're going to move
forward one key frame. This will be when the
joystick goes to the left, you can come up with
your own expression. Typically what I
do is I do like a, I don't know what
you would call this, really intrigue almost or maybe
what would you call that? Intrigue? Perplex. I don't know. Either way, it's a good look. Now we move this mask layer
to follow the eyebrows. At any point that
your eyebrows move, this mask layer
needs to move to. We'll do it just looks good. Now I'm going to reset. All of my poses. So I'll come back to
joysticks and hit Origin. It's going to put all
the key frames from the beginning into this point on the timeline
where I'm at now. Now for my next position, this will be going to the left. In that direction, I'm
going to do a sad look. This will be eyebrows curving
inward and coming down. You can really push it
because you don't have to do the full extent of the
pose that you've created. You can find a
variation that works. Make sure the corners of these eyebrows follow the
shape of your eyebrow. There we go and we'll
do origin again. We're going to move the eyebrows upward just a little bit. A lot of this is going to depend on your character and what
you can get away with. I have a feeling this
might be too high. Let's just check that pushes the boundaries
of what I can do. I think I'll keep
that. Let's come back into the eyes now. We have to move all of
these pieces back to match. And that's it. I'm sorry. That's
not it. We have one more now. We're
going to do anger. Let's just go back to origin. We're going to select
these key frames. Move these key frames
and move them. You can this one quite a bit. You can exaggerate it because we don't to use all the
anger that we create, it's better to have more ability and more flexibility
than you need, then be limited by the amount of expressions
that you can convey. We're going to, there we
go, now that's all we need. Now we are five key frames, total of 15 keyframes. We're going to
select them, we're going to create a new
joystick and slider, and I'm going to call
this one eyebrows. Now what I'm going to
do is scale this down, change the opacity so I
can see what we're doing. Let's just see how it moves. There we go. You can be sad, then
you can be angry, and you can be confused, happy. Now that I'm
thinking about this, I think I might want to separate the eyebrows
from the mask. Let me call this one eyebrows. I'm going to duplicate it. I'm going to call this
one eyebrow mask. I'm going to move the
eyebrow mask just down here on my eyebrows. What I can do is just turn
off or delete shape three. That's that big mask part. Now all I have our eyebrows. Then on the eyebrow mask, what I can do is delete the
two eyebrows that we created. Then using this eyes, we can create a mask. We have where is
it eyebrow mask, which is going to be
masked out by layer eight. Now when we move our eyebrows, that all we see is the shape as it gets
covered by the eyes, as it goes over the eyes. Next what I want
to do is come back into character
one, or I'm sorry, let's go into head and
we're going to make sure that character one is selected at our
joysticks and sliders. Remember this is the trick. This is the way that we
get around having to go from this up to this comp, to this comp, to this up, and then into our
character comp. We're going to jump
over all of them. What we're going to do is
with eyebrows selected. We're going to make
sure and don't do the dropdown because
that character one will probably disappear. We're just going to hit to
parent, can I not selected? Let's select eyebrows. And then to parent, there we go. Now I can turn this off, we can come into character
one. Here they are. Is that it Lets the eyes, here it is, here's my eyebrows. Let's see if they
work. Yes, they do. He's looking so good. All right, while I'm
thinking about it, let's go through our head
rotations and just make sure our eyes are looking okay. And it worked
beautifully on this one. It works okay there
and then back. Okay, that works, and so forth. I'm really pleased with
how that turned out. Aside from this tiny little dot, I don't know what's going on. All right. We'll
figure that out later.
8. Step 06 - Mouth Rig: Now we're going to get
started on the mouth. Using joysticks and sliders, we're going to create
different mouth shapes that we can control with one
joystick seamlessly, and it'll give a very nice
organic flow to the mouth. Let's jump into it and
see what we create. I have already sketched out
some mouth shapes that I want to use with
joysticks and sliders. You can only have
five mouth shapes, which does limit us. Not all the mouth shapes
technically need, but we can get pretty close
Using this technique, it gets a good, seamless transition
from shape to shape. What you sacrifice
in mouth shapes you gain in fluidity. I prefer it. I think that it's
a good solution. The first shape that we use
is a natural resting shape. If your character is happy, they're going to have a
happy open mouth shape. This is a, a generic shape in between
you start off with this, then we're going to
move into the shape. Obviously this
will be for sounds like maybe even a
confused or shock shape, like oh my gosh, what's happening next
is going to be more of like an sounds. Then finally will be our shape. This will be our smile. If
your character has a smile, this is where you put it. If your character is
grumpy, perturbed, or just negative disposition to the world and
they don't smile, this could be just
a straight line. It doesn't have to be a smile. It could be just
a straight line. Then finally we're going
to go into a or a shapes. This could be also
expression of shock, horror, fear, but with the mouth shapes, for words, this is a sound. If you don't want to look
so shocking and scared, you can tone back on that. We're going to take
these five mouth shapes and we are going to create our joysticks
and slider mouth rig. Let's get started. I'm going to copy this and I'm going
to move into head front. I'm just going to use this as a template for the shapes
I would like to create. Also, mouth size is
very important as well. You don't want your mouth too big because then
it's going to cause problems with the rig as we go from different head spaces. You don't want it too small? I don't know. Well,
maybe you do. It's really up to you. I would say you can go
smaller but don't go bigger just because it's going to get complicated
or maybe not. Let's see, is that good? I think I'm Gale mine back to
the original size. Yeah, that looks good. Maybe
down just a little bit. All right. First
thing we got to do, there's really going to be about three parts to the mouth. There's going to be the back
of the mouth, the teeth. Then there's going
to be the lips. I use a stroke, obviously, for my mouth shapes. If yours doesn't have a stroke, then maybe you just
need two mouth shapes. The back of the
mouth and the teeth. But let's get started here. In the middle, I'm going to pull out curve around and then
come right to the bottom. We're just trying to make the
smoothest shape possible. We want this to be very bean
like big old jelly bean. And thankfully, with the mouth, because it's an organic shape, it doesn't have to necessarily
be perfectly mirrored. You can get away with pretty
good and not perfect. I'm going to go ahead and put
a one point stroke on this. I'm going to call this lips. Then I'm going to duplicate it. I call it mouth. Mouth will go below the lips and then we're going to
fill it with something more of like a mouth
color like that. I'm going to turn it off
for a second so I can see my teeth coming above the lips. You want to start your
teeth trajectory, then I want some nice
smooth edged teeth. Again, your teeth design
will probably be different. Have fun with it. Feel free
to explore different options. You could do just a straight
up around twink like I did, or you could add actual
individual teeth. It really depends on
what your preference is. You could add something
like this to your shape, But I'm just going
to keep it simple. When you have your
top teeth done, the next thing we're going
to do is now you can either make new bottom teeth or
you could just duplicate, duplicate the teeth
that you do have. Bring the anchor point down and then just rotate
it into position. And that's what I'm going to do. Bottom teeth are
actually probably going to be a
little bit smaller. What I'll do is having
a hard time here, pull these in, flatten it a bit, and then pull these in. Then I'll reposition it. Okay, So now we have
the teeth done. I'm going to call them teeth. Teeth. There we go. The teeth will go
behind the lips. Now we can turn
our mouth back on. What we're going to do is
we're going to take our teeth, hit toggle switch modes, and we're going to
mask out our teeth with our mouth layer on. The teeth come over here to the track mat and we're
going to go select mouth. Then we get to turn
mouth back on. Then you can see we now have teeth that are masked out
by the shape of our mouth. We're ready to go. One last thing that
we have to do is we are going to take
the mouth shape, come into the contents, shape one and
expand to the path. Then open up your lips.
Do the same thing. Open up to the path
we're going to pick. Whip the mouth shape
to the lip shape. There we go. While we're here on
this first key frame, we can go ahead and key
the path of the lips. Now what's going to happen
is anytime we move the lips, the mouth shape will
follow with it. They are parented
together, our teeth shape. The only thing that we need
to key is the bottom teeth. Make sure your bottom teeth
go below your top teeth. I'm going to call
this bottom teeth just so I know we're
going to key position. Let's go to position key. And then we can hit
you on the keyboard. Same with the lips hit
you on the keyboard. Let's bring our time line in. There we go. We have
our first key frame. Now we're going to page
down to our next shape. Let's move this over. What
we're going to do is we are going to pull the
lip shape way in. We actually want to pull
it down below the teeth. I do not want the teeth exposed. We're clearly just using the
sketches as a reference. We're not trying to copy them exactly just as a reference. Here we go. Remember, those
top teeth never move. Don't ever touch your top teeth because they are
attached to your skull. Your skull doesn't
squash and stretch. The only thing that moves,
it's your bottom jaw. And your bottom teeth are
connected to your bottom jaw. They're the only thing
that's going to move. All right. This is
looking pretty good. I like to make shape. You can make your shape a
perfect circle if you'd like. I tend to like to make mine. What do you call that
shape? Like a beat of water sitting on a
table or something. That's too big. Let's
keep making it smaller. I really want to tighten it up. All right, that looks better. Now we have these two shapes. If I page up and down between
them, that's looking good. We might even be able to, let me just make sure
that this is center on my teeth, looks pretty good. We might want to pull the
bottom teeth down just a hair because as you do
that ooze shape, it extends the jaw bit. There we go. Actually, while
I'm thinking about it, one other thing we
have to do is create that little bottom lip
shape on the lips. We're going to just
create this lip and then we're going
to key that too. We'll open up the contents
and key the path. Then it'll change it
here to tighten up around the lip. Go. All right, next shape
that we have is this G or this shape. I'm just going to
move it to the side so I can see what I'm doing. If you select your
shape layer like lips, you can come over here and
joysticks and slider and hit origin and it'll put your right
back to where he started. That's very helpful for getting your mouth shapes closer to what you're aiming
for in this one. Remember the top
teeth don't move. We're going to pull
the bottom teeth. We get this teeth clenched, then we're going to
move around the lips so that they have this
opposite shape. Instead of going up
for like a smile, we're going to come down, maybe expose some more of
those top teeth. All right, that
looks good enough. It's not quite like the sketch, but you get the idea. Keep pulling that one up
that what I want. All right? And then this little guys
up here, kind of tiny. All right? That
looks pretty good. Next shape, we have a smile. Teeth again will come up, so we can probably
key the position. Smile. The smile is a little tricky, we want it to be in the
middle of the mouth. These two will come together
and this will turn upward. If you hold control
alt on on a curve, a bezier curve, you can break the connection to
get two handles. You could do a full mouth smile, if that's what you're going for. I'm going to go for
a little bit of like a crooked smile that
goes to one side. I think it just adds a
little bit more character. Also, if the control Alt
click doesn't work for you, you can always come up here
to the convert vertex tool. I don't need to tell you this, I'm sure you already know, but that does the same job. Okay, so we have our smile. Looking pretty good. Let's move this
little bottom shape, this little curve here
on the crest of the lip. It's challenging. I'm not sure how I
want to tackle that yet. How do I want to do that? I wonder maybe I put
it on the mouth. I'll come back to that. Okay,
and then our last shape, we're going to come over here
and this is going to be a, I can't believe this
tutorial is taking so long, that kind of panic horror. Here we go. Top teeth, don't move bottom teeth. I'm going to keep
them there for now. We'll see exactly how far
down we want to put them. I think I'll lower
that a little bit. We want the corners of the
mouth to really drop down. A lot of the weight and expression is going to
be at the bottom of your teeth, not at the top. If it's too high, it's
going to be like, oh, you don't want that. It's going to be a horse
trying to eat a carrot, or you want to keep it down curl in this
bottom section. Let's change this up
a bit. There we go. Now let's lower these teeth like that right there.
That looks good. I like that, so there's not
a lot of teeth exposed. I had too much
teeth in my sketch. Look at that. All these
shapes are amazing. All right, let's turn this off. Cool. Now we have a total of five key frames
that's important. You have to have a keyframe
on every single mouth shape. If you have something
that doesn't change, like your teeth
position don't change, so you go, oh, I'm
just going to take these key frames out because
there's nothing happening. You have to have key frames, so make sure you have a
keyframe on every single shape. Once these are all done, before we rig it up, I'm going to select them and I'm going to copy these
because these are going to go into our other head shapes and it just makes it
easier once it's rigged. Now that I have
my layers copied, what I can do is
select the key frames. Come over to joysticks and sliders in this
little square here. On joysticks, we're
going to create a new controller called
mouth bot being botta, Boom. Let's see how it goes. Here we go. This is
our neutral pose, this is our smile. Oh my gosh. It's so good. Then this is our 000. Okay, then you'll
notice in between, we can create some
unique shapes. This is more like a smirk, just the way that
they blend together. It creates different. This could be like an, even though there's only five shapes, the blending of the five shapes actually creates four
more different shapes. Here in the corners. It's truly cool and you can get
creative with it and learn different things. Let's see how it looks
on our character. A, Yes, I think looks great. What do you think Character? Oh yeah, I like it. That's what I'm
talking about. Cool. Now what we get to
do is we're going to take these shape layers that were already copied and we're going to put
them into the other heads. Now for some reason,
if you didn't copy them or it doesn't transfer, here's what you do, you select your mouth controller,
come over here. This is our separate,
what's called unbind. We're going to
unbind these layers. If you click it, what it's going to do is
put your keyframes back onto your shape layers and then the controller
does nothing. Now you can select these, copy them, and then
we'll paste them. Then also, once you're ready
to bind them back together, just select your key
frames and hit this link. This is going to bind them
back to your controller, but just make sure you have the right controller selected. They are now bound to
the mouth controller. Let's go through
and I'm going to add these mouth shapes to
the rest of the heads. All right, I'm back now
that I've put all of my mouth shapes into their
corresponding heads, the way that you're going
to rig all of these things together is we're going to
go back into our head front, which is the original one
we set the rig up in. When you select your mouth, what we're going to do is
we're going to do our, here's how we do the hack. For the joystick, we're
going to go into into head one which is the comp
that has all of our heads. We're going to find
the parent comp which is character one. That's where we want
our final resting place for our joystick to be. We're going to select it here. Going back into head front
where our mouth controller is. We're going to not do
the toggle down on this parent because we're going to leave it loaded and we're going to
select the parent. Now this is going to
jump over our head comp and into our character. One comp. Let's see if
it works. And it does. With that being done, now
what we're going to do is come into our head front. We're going to copy our
joystick and slider. And we're going to paste
it inside of here. Once we have it pasted, now we can select our key
frames and we're going to bind everything to this metal
object or this joystick. We're going to do the same
thing for the other heads. Let's move on in, Paste it. You to expose our key frames. We're going to go
ahead and bind it up. Hit you on the keyboard to
expose these key frames. Then we're going to
paste our joystick in. Then we are going to
bind them to the mouth. Let's do the same thing here. We'll paste our joystick, expose our key frames by selecting these layers
and hitting you. Then we will bind
them to the joystick. All right, now we have all of our head shapes with
the mouth as we rotate, this mouth or this head, the mouth shape should
rotate with it. All right, that looks great. And each one will be moving
the same as the others. Now if you do that
crooked smile like I did, you might want to rotate the mouth in the other direction as it goes to this
side of the face. We might want to scale. Let's go ahead and see if we
can just scale it like this. If we scale, transfer it to the other side,
that should work. And we'll do the same
thing to head profile. We'll attach these to the mouth. Hit scale and we'll go in
the opposite direction. All right, that should be
everything for our mouth. Now we have all our
mouths connected. The joysticks and sliders is working perfectly for
the mouth shapes. And we have them in all of the heads. It's
all looking great. We have one more step
to do now for the head. That is create the
subtle movements using joysticks and sliders to create the acting that
we're going to need. In this next step,
we're going to go through all the heads
and we're going to set up the different head rotations that we'll need.
Let's get into it.
9. Step 07 - Limbs: Now we're going to start
working on our limbs. We're going to rig up
our arms and our legs. Yeah, I'm going to show you
two methods to doing that. One of those methods is using
limber, which I suggest. But let's jump into it
and see what we got. If we come into our character, you can see I'm starting to
clean up some of my controls, my joysticks and sliders. If we find our, let's see where we are. Let's do, maybe
we'll grab these. I'll just duplicate them
and pull them over. The easiest way to do
this is using ****. If you've never
used duck before, it's a free program and
it's extremely powerful. But it does have
its limitations. Let me show you how
to set this up. This is the easiest version
of rigging the limb. If you grab the upper arm, which is this part here, hit y on the keyboard
and we're going to move our anchor point right to this. Do you want to get as
close as possible? Once you have that anchor
point in position, we're going to move
on to the forearm, which is this arm portion here. Hit Y on the keyboard, make sure everything is in
position right in the middle. If you're not sure, you
could always do this to rotate and see how it looks. If it breaks here, it will
break when you rig it. If it rotates and looks
good, you're good to go. Finally, we are going to
set up an anchor point for the wrist right here on
our dot, there we go. Coming into it, you're going to go into the
rigging options and hit the hand control with
your hand selected. We're going to create
this little circle with a cross or plus sign. Then you can leave
where it's at. I'm going to move it down
just for the sake of ease. Next we're going to parent
things to their parents. Left hand will go
to the lower arm, and lower arm will
go to the upper arm. Once you have everything
parented to the layer above it, you're good to go and you have to select
them in this order. Follow along. You select
it with left hand, lower, left upper arm. And then finally your
control which is left hand. Now. You can move over to
Wick right in the middle. We're going to click I. Yeah, the links and constraints. Then down here at the
very top, auto rig. Click at once, you can turn off this
line and you're done. You've created a lamb
Slim functions perfectly. There's nothing wrong
with it, per se. You can move it around,
everything looks good. The only things are it breaks
when you pull it apart. If you want to switch sides, for your elbow to bend
the opposite direction, there's only one switch and
it's hoggles on and off. Those are my only complaints. If you're going to switch
the direction of the arm, you have to make sure
it's basically open. And then you can
click it and now open the opposite direction it works, but it's not my favorite. Another option, I'm
going to delete this. Let's grab this limb and
I'm going to do it again. Another option is using limber. In order to use limb, we have to create a limb. If you come over here, select and taper, we can just click. You can call it what you need. I'll call this right. It's going to create
a new limb for you. Now one thing you
could do actually, is just simply use the
limb that they provided. If your arm is simple enough, all you'd have to do is Match the arm as closely as possible to your existing arm. You can turn off the shape
and then line everything up. You'll be good to go. Then that's it. It's
literally that simple. Then you would set up
your sizes to match. There you go. It
could be that simple. There's a few things
you can do to fix to make it match your
limb a little bit better. One, you can select
the skin color, actually that's the skin color. Then you can select
the shirt color, and then you can change these
things around to match. There you go. Finally, if you need to
come into your limb, we're going to find
the objects we need. Proximal upper, what
we can do is add. We're going to come
to this option here. We're going to add a stroke.
We'll make it black, then we'll make it one
point instead of two. Then we can copy that stroke and then add it to other
things like the distal upper. Then we'll come into the
lower group and add it to proximal, proximal lower. What we'll need to do
is switch these around. The upper group will go
below the lower group. Next, we need to take off or increase that,
the lower split. What else do we need to
do? We need to get rid of that circle. On the lower group, there should be a, I guess
it's not going to work. I guess what we'll do instead
is add a trim path to this. Then we'll have to take
away the stroke here in the elbow that looks good. And now it bends and
functions properly. That's another way we can just mimic what we already
created an illustrator. And the reason that
that is beneficial to you is because of
a couple options. One, you can stretch it, it shouldn't break, but maybe we can fix
that a little bit. This trim path is functioning
a little weird for me, but it has some
good stretch to it. You can go pretty far
without breaking it. Number two is if we want to switch the elbow
to the opposite direction. This is what I love the
most here in dynamics. You can switch the
clockwise and you can bend it smoothly
to the other side. That is crucial, especially
when you want to get smooth fluid movement
in your animation. I love it. I've spent so many, countless hours animating
characters with wick that only had an elbow
that popped left and right. I've spent so much
time trying to find ways to hide that so
you can't see it now, you don't have to
worry about it. That's another option. This is one that I will probably use. Another option is coming back to our limbs. What you're going
to want to do is the left upper arm
and left lower arm. If you right click and we'll create shapes
from layer vectors. Now we have two shape layers made from our AI files, which is really cool. You can use that at any point. If you import something from Illustrator and you create
those shape layers, no matter what it is,
it's going to put different layers
of all the things that you've made in illustrator. Now as shape layers
in after effects, you can key those, you can animate them,
which is really cool. But what we're going to
do is we're going to take these shape layers from our Illustrator files
and then we're going to attach them to the limb that we just created in limber. The best way to do this is to
turn off your limber limb. And we're going to move our, we're going to
move our joints to match our points right here. Why is that in trouble? I just want you to
stick in the middle. Come up. That might
be close enough. Is this one close enough? All right, let's say
that's close enough. The thing that's
going to matter the most is when you
look at the limb. This is just an outline of
the limb that's created. And you can see that
the circle of it, it's not in the center of the pivot point on the
limbs that we created. We need to adjust this. What we're going to
do to adjust it is simply make the upper
arm a little bit longer. Let's try one oh five. Then the lower arm a
little bit smaller, since we went five on the upper, we'll go five for the lower. What that's doing, it's increasing the upper length root and shrinking the lower length. It's trying to move
that center point right over that dot.
Let's see if we did it. That definitely looks better. I think that might be good
enough. Let's find out. We'll turn this back on. Then what we can do now is you select your limb and
your other limb. Then we're going to
select the limber limb. We come over here
to rig and pose, and when we click it, it's
going to ask us a few things. It has these layers already predetermined
within the program. The script is really cool, so that we can take
our upper art layer. Look, our upper arm
is already selected. It already knows our lower
arm is already selected. We are set up
perfectly when we hit. Okay, going to take those shape layers and
put them onto our limb. Now what we can do is we can
proximal and distal lower, and then we'll turn off
upper and proximal upper. Now these are our shape layers. This is the exact arm that
we had made. It bends great. You can see we didn't quite get that center point perfect. It would take some toggling, niggling to get it right. But it has all of
the same attributes. We can now switch
clockwise rotate. It has, this one has full
stretch because there's no trim paths on it. The only issue is you can see it stretches out my
shoulder like crazy. If I'm going to pull
any stretch into it, it would just be a little bit. But because my arm
is simple enough, I'm not going to go
with this solution and I'm not going to go
with the Du solution. I'm going straight up
making my own limb. I'm just going to delete these
back to the original limb that I had and call it. This was a very long
winded explanation, I apologize, but
hopefully now you get it. Hopefully you find a solution
that works best for you. With that being said,
I'm going to take this arm and I'm going to match it to the positions
of my original arm. I can go ahead and
turn these off so that when I move this around, I can hopefully just put it
right where it needs to be. We're going to move this
back below the torso, and that looks pretty good. All right, so I have
a functioning arm now that seems to work. All right. Now what I can do, and this is another cool part of limber. As I can select my arm, I can come over here
and just duplicate. And then I'm going
to name this one. Left arm, just like that. It copies it super easy. Then I'll just move
it over to match. I'll pull this stuff down. I actually don't need
to pull my controllers down because these guys, I like to keep all my controls
up top. Let's have a look. See at this, I just want to make
sure everything is in perfect alignment. And it looks like it
is now that I have my limbs created and I'm
happy with the way they look. What I'm going to do is I
am simply just going to delete all of that stuff. Left hand, left
hand, right hand. Okay. So all of my
stuff is on that one was what was that
like A shoulder. Okay. So let's get rid
of these arms and hands. So now that that
stuffs all made, where's this arm? Get
out of here. Arm. Okay. Now I'm going to go ahead
and do the same thing for the legs. All right? I have all the limbs
rigged up and ready to go. Everything is now functioning
just the way it should. These are all looking good. One thing that you can do, let me explain this real quick. Let's say for instance, I have these socks
on my character. You might have a
question of, well, how do I get socks onto this limb if there's no
option to add those colors? The way that I've added
these socks is very simple. If you have anything that you would like to
add to your limb, let's say it's like a band aid. Okay, What you can do as you can take any shape
layer that you've created, you can attach it to your limb. All you do is find what
you want or design it in a position that's going to transition well
into your limb. And then you find the limb
that you want to use. I'm going to use this right leg and I'll select my band aid. And then you can select and pose and then attach it to
the part of the limb. In this case, it's
going to be the lower, and all you do is hit. Okay. Now what happens is
this band aid is now stuck to the body.
Pretty cool, huh? I did it the same way for the socks in case
you're wondering, now that we have the limbs
rigged up ready to go, we're going to start
working on the hands and the feet all in. All this process should
be fairly simple. What I'm going to
do, I'm going to get these limbs back
to a neutral pose. Just going to line
them back up together. Okay, And then I'm going to select my hands and I'm going to create
a new composition. And I will call this left hand. It's actually the right
hand, but that's okay. Then just for reference,
what I'm going to do is I'm going to create a point here in the
middle of my composition. This is going to be my wrist. This is really to get an idea of where the
hand is going to be going. If this is my wrist that
the hand rotates around, I want it to look
something like that. Now what we can do
is we can scale the composition size
down quite a bit. We're going to go
here to the region of interest and we're
going to mask out just around the hand you
want to make sure you have enough room that if your hand does
something crazy, it's not going to break
out of the composition. Now that we have that done, what we're going to do
is mask just this hand. Okay, What we're going to do is key the position
of the mask path. An old shift hit. And we're going to
key that position and hit you on the keyboard. That's going to bring
up our key frames. Now if we go page down, we can now scroll to
our next hand pose. You just want to
make sure that it is right on that wrist. Nicely. Okay. Now hit the page down again. And we're just going to do
this over and over until we have all of our hands lined
up perfectly looking great. We're going to move
over to this side now. Then we'll come back. The more hands you have, the more keyframes you're
going to need. Finally, this is the end. When you get to the end of your key frames that
you're going to need, hit N on the keyboard and
then we can go ahead and trim right click And we're going to trim
comp to work area. Now we have all these
guys transitioning. The next thing we want to do
is select our key frames. Right click, and we're going to toggle hold those key frames. Now coming back
into character one, we're going to take
this right hand and we'll move it
above the right arm. We can move it out,
we're going to put our rotation point right here. And it really doesn't
matter actually, because we're going to be
putting the hand attached, rotate it down, and we're
going to put it right here in alignment
with this controller. Next we're going to attach it to the right wrist,
which is this one. Now when we move
our hand, our arm, we have a wrist that's
attached to it. For some reason it
doesn't let you rotate. I don't know why hit R on the keyboard to bring
up the wrist rotation. And then all click to take off whatever
was hindering that. Now we can rotate and we have
a hand, let's turn it off. Just make sure our pivot points
and everything look good. That looks pretty good. What
we can do is just turn off this template shape.
Don't need it anymore. Let's see how it functions. That works pretty good. If you page down, you'll see all of the different
hand shapes. I might be able to move the
hand out just a little bit. Let's go and rotate. Okay, so these are all
looking pretty good. I need, you can see on my arm, we'll take away this
line and also add a stroke around the
outside of that wrist. But before I do that, let's
just set up this simple rig. The way to set it
up is very simple. So what we're going to do
is come to our hand right click and we're going to
go time enable time remap. And it's going to
push us all the way to the end of our time line, which is exactly what we want. Then right here on
our risk control, what I want to add is we're going to go to
expression controls and we're going to
add a slider control. Add that there. Then
I'm going to call this hand shapes, okay? The next thing we need to do
is expand that effect down hand shapes so
that the slider is visible down here
on the right hand. Make sure that your time remap is visible and
we're going to pick whip all the way up to our
hand shapes slider control. Now whenever we toggle
the position here, it's going to change the value of the hand and
switch the shapes. But before we do that, these values are way too big and it's just
going to go to zero. And we're going to miss
what the hand does. What we have to do is right
click and we're going to edit the values starting at zero. We're going to want to
go up to something like, I don't even know, maybe 0.5 We can start there
and see how it goes. Now we're going to slide it up. Okay, there we go. Now we are transitioning
through our hands. And it stops right
here, was about 26. We'll go back to edit
value and we'll do 0.26 And that is the entirety
of all of my hand shapes. There we go. Now this one is
functioning beautifully. The cool thing is now we can
just duplicate this hand. Then we are going to put it
over here onto this wrist. And we're going to scale it
in the opposite direction. Now we're going to
do a negative scale. Here we go, then our rotations. Let's see if we can zero, we want to go to 90. Here we go. We are just going to attach
this to our left wrist. Now this one is going
to go to left wrist. On left wrist, we are
going to need to add, here's my left wrist. Here we go. We're going to need to
add a slider control. I will call this one
hand shape shapes. I'm also going to just
edit the value because I already know 0.26 is where we need to be next. I'm going to expand the effects until I find my
hand shape slider. Then on this new hand, I'm going to find my time remap, then I'm going to pick whip, this time remap to my left hand. Now when I use the slider, everything changes in
the opposite hand. We're using the two
hands or the same hand. It's just a negative value, we just connect it to
a different slider. It's a really great option. Now we're going to do the
same thing for the feet. Who? All right. Cool.
That looks great. What I can do now is trim the composition
of the work area. Select your key frames and
right click toggle key frames. Another thing we haven't
done yet is we are going to this composition. Now we'll go back
into character one, put this foot on top of our leg. Where's our legs? T's
bring these down. There we go. Then we're going to attach this to
this will be the right leg. I have what? Right leg? Wrist. It's not what it should be called but
that's what it is right now. I'm going to move, there we go. Then we're going to do
time enable that time. I'm not sure where that time
remap is going to go yet. We'll have to figure
out how to set up. I think of that I want it
to connect to this body. As the body rotates, maybe the feet and the legs
will start to spin with it. That will probably be
the easiest option. It doesn't give us
the most control, but it's the easiest
option just to connect it to the body rotate instead
of having a body rotate. And then the left and
right foot rotate so that we're controlling three. I don't know, or maybe we just
do. Maybe what we can do. This is going to be tricky. So now, all right, let me switch this
foot to left leg. No, that's not it. There we go. All right, so now we've got
these legs all connected. Everything is
looking pretty good. I'm just going to
add a slider control just like I did for the wrists. This way we can spin
the feet individually. So I'll add a slider control. We'll call this
foot shape maybe. And then we'll come
down to our foot. Which foot did I have
that? Yeah, this one. That's two. We'll expand time
remap and we'll find this. We're going to rename this one. It should not be called
right, like wrist, ankle, we'll call this
one that shoulder, we'll call it a hip. For this hip. All right, with this ankle open, we're going to find the
effects and go to foot shape, we're going to pick
whip our time, remap up to this foot shape. Then we're going to
have to set our values. This one is a little bit
bigger than the last one. Let's try like 0.3 and
see how that does. Now when I slide this, it
will come all the way around. We were close, Let's try 0.26 value point to six. That looks pretty good.
Now I'll just find the proper foot
shape for this one. I'm going to copy that. I'm going to paste it onto here. And then I'm going to
grab the other foot. Time remap. Let's just
connect everything up. We've got foot shape,
pick whip slider. Then I'll move it back to
the position it was in. Just by zeroing out
this. There we go. Now we have a character with feet and a character
with hands and legs. There we go. Now our
limbs are all set up. We have hands that function
and feet that function. The next thing we're going to work on is we're going to now connect our limbs to
our body rotation. That's going to be a fun one, that way we're going to
actually start to see our character take shape with
the movements he's making. Let's get into that.
10. Step 08 - Head Rotation: Now our next step is to actually
rig up all the heads so that they can move using
joysticks and sliders. We're going to
have to go through each head individually
and set up the different positions
that we want the head to be moving in when we attach them
to the joystick and slider. Let's get into that and set it up starting here at head front. What I'm going to do is we're going
to start position. We're going to select all the
things that are going to be moving and we're going to
add key frames to them. Let's attach the lips in
the teeth to the mouth hit. Then we'll open up positions
for all of our other layers. We're going to key the position
on the first key frame. Then we're going to page
down to the next key frame. Key frame one is our
neutral key Frame two is going to be moving
the joystick to the left, to the right, to the right. Which means we want the
head to turn to the left. As it goes this way,
the head will turn. Starting with the
mouth, we'll go over maybe three clicks. We'll move our bangs over,
nose will come over, eyes will come over, head
and chin will move over. Maybe one click. We don't
want to go too far. Hair will actually go
the opposite direction. And ears, we'll move
over one, let's see. Okay, there we go. We want the
ears to be above the hair. Okay, that looks all right. Let's see if we can push
that just a little bit more. Okay, so it looks okay. This ear here needs to be
doing something different. So I think what I'm going to do is I'm going to
duplicate the ears. I'm going to mask out
one side from the other because this ear
is sticking out too far. And we actually want to go back. There we go. That
looks a lot better. Now we have some good movement toggling to the
character's left. Now we need to move the
character to the right. I can select, I'm going
to move these up. I can select all my layers. We should be able to
get back to our origin. There we go. Now I'm going to move everything
to the opposite side. I think that one was
four moves over. I think Bangs, four
moves over as well. No, this is where it gets a little tricky and we have to
sacrifice some things. Unfortunately, with
joysticks and sliders, we can't change or flip
the position of the nose. You could do that
using something called a switch template, but those are just
so confusing to use. They end up creating
these little throw away files that aren't technically
used in the composition, but they're used as like
a script on the back end. If you end up deleting
any unused files, those go with it,
and then you end up losing your
ability to switch. For these purposes, we're just going to have a
nose that stays in one direction but moves into
a position that it probably, and we'll see how that works. I think it's going
to be just fine. All right, let's keep
moving the stuff around. How many was it? Just one. Okay, We'll move chin
over one head over one. Here, Going to push this
one behind the head. And this one will come forward one and hair will go back one. All right, there we go. We have a head that's
looking back and forth. Now we need a head
that's going to go up. So we can select all our
layers again. Go to origin. Let's move, Mouth up. Maybe two bangs. Nose, eyes to do chin. One head, one ears will come down and then hair
will come down. Let's see if that
looks pretty good, Obviously, you can see the bangs are not quite where
they need to be. Let's go do that. Yeah, that works. Now, maybe I'll move the eyes back down
just a little bit. And then move the mouth
up just a little bit. Where's mouth? Okay,
that looks good. The way that this
function, things in the back of the
head will tilt, Things in the front of
the head will tilt up. It's doing this as
the head moves. This is an exaggeration. Our ears don't really
move that much because they're pretty
much at the pivot point, but this just gives the illusion that the head is going up. You could also add some
scale to these things. If you decide that you want your eyes to squish in
like they're being rotated, you could do that as well. You just have to make sure you anchor points are at the exact center of
where your object is. I try not to mess with the
scales if I don't have to. Adds a step that I just
don't want to deal with. Okay, so now we have our, let's do our down position. So we'll select our
layers, do origin. And then let's push everything.
Starting with the mouth. We'll do two clicks. Bangs. We could try
to see what happens. Nose will come down.
Let's move mouth up, one, we've got nose, eyes. We'll do one click down. Head, one click down. Ears will now go upward. We'll do one click,
and hair will go up. This might have been a
little bit too exaggerated, but let's just see. Okay, how does that look? I want to say maybe
the head in the chin. I need to come up a bit. Okay. Maybe mouth can come up as well. Let's push the mouth
up just a little bit. The mouth is already
pretty high. Let's see. I'm going
to say that's good. Now we have one of our heads set up that what we can do is the same thing
we did for the mouth. So what I want to
do is I'm going to take all of my keyframes, select them, and we're going to come to joysticks
and sliders. And click that square to
create a new joystick. We're going to name
this one Head Rotate. Let's have a look. See and
how it rotates. Does it work? When I move this way,
the head goes there. It goes that way. You know what? This works, great. Look
at that. Oh my gosh. Awesome. We have a
head. It's rotating. Next thing I want
to do is come into my head composition and remember going to do
our little hack where we jump some compositions. I'm going to select
my character one. I'm going to go back
into head front. Then we're just going to move our joystick over a composition and into our character ones. We're going to go
to parent, boom. Next thing that I'm going
to do is I'm going to copy my joystick and slider that's inside
of my head front. Then I'm going to move it into each and every one of
my head compositions. And I'm going to set up
all the movements for those and then connect
them to this joystick. I'm going to run through that. I don't think you
need to watch this. It's all intuitive. Just like I made
the first head do, It feels right for
your character. Then when I'm done with that, we'll go through and we'll
connect everything together. All right, stay tuned. All right, we have all of
our key frames set up now. We have to attach everything to be controlled by the one
joystick and slider. Let's go into our character. One, grab our head, rotate. That actually might not
be what we needed to do. Let's just go through
here. That's right. We're going to go through
each individual composition for our heads and we're just going to select all
of our key frames, making sure we have a keyframe
for every single position. And then we are just
going to attach, working our way through, make sure that
everything is connected. We're just going to
do this real quick. I don't know about you,
but I found this to be a very tedious process. But now we're done. We get to see the magic happen. Once we have connected
everything up, we've still got a
few more heads. Then we are going to go
into our composition. Let me explain this
to you real quick. What I did for the head profile, where the head is completely
turned to the side. I have a left and a right to, but as the joist goes up, I want the head to look up as it goes up and look
down as it goes down. I just created this null object and I put the rotation
of it right about toward the back of the neck would be attached all my layers to it. As it goes up, I
have it rotate up. And then as it goes
down, it rotates down. That'll give a cool effect. Now let's go into here. That's our head rotate.
Let's see if it's connected. Does it work? That one works, there it
is, See how it rotates. But it also has this left
to right movement as well. I'll tell you what I want
to do. I just want to show you what we did and
how cool it is. What I'm going to
do is solo these and then we have a
where should head back. Go Maybe over here, Profile. All right, so although it took
a lot of work to get here, I think it was worth it because this is going to
give us something so unique. It's going to give a
character that's just so in depth in versatile. Now check this out. We have heads that move. It's a little slow
because they're all here. But look at that. Pretty cool, huh? All right, now we have our heads that
have been connected. Joysticks and sliders working for every one of our head comps. Next thing we have to
do is do our limbs. Let's get into our limbs and
create some arms and legs, and we're getting
close to the end. All right, let's jump into.
11. Step 09 - Connect limbs: Now it's time to attach
our limbs to our body. As the body rotates and we
use our joystick to turn, the limbs will move
with the body. We're going to do the
arms and the legs. Let's get into it. The first thing that
we're going to need to do is here in our main
character composition, we're going to create
a few null objects. I'll start with the shoulders, just so we can keep it easy. I'm going to name this
one left shoulder, and then I'll
duplicate it and name this one right shoulder. These are going to
be burner controls. These are controls that we
are only using for labels. We don't actually have to
worry about where they are. The next thing we're
going to do is hit P on the keyboard to
open up the positions. When you have them open,
select both positions, right click, and then
separate dimensions. Find your torso tab, then we're going to pull
it up right to here. This little section in between our main composition and
just above our time line. This is going to bring up both of our compositions
so that we can actually look at the
controls in each, and we're going to connect
them from one to the other. Looking at, we're going to find our right arm
and our left arm, and then hit P on the keyboard and it's going
to bring up our positions. These have key frames in. One thing that you might
need to do is select your Y positions on both of these and make
sure that they are not toggle key frame
hold or toggle holds. You can just control click them and then take them
back to normal key frames. The next thing you're
going to do is here in your character comp. We'll start with
this one by one. We'll start with
the right shoulder. Select your position, Pick whip to the
right arm position. Then get your Y position. And pick whip to the Y position. And do the same thing for the
left arm to the left arm. What ends up happening? You can pull it back down. What ends up happening is
your controllers are now parented to the position of the controllers
within your torso comp, but it throws them
way out of whack. If we were to have
attached our arms to those before we parented our
controllers to the controllers, our arms would have jumped and there'd be no way
to get them back. But now that the
controllers have jumped, all we simply have to do is attach our shoulders to
these new controllers. We're going to take
the right shoulder and we'll attach it
to the right arm. Yeah, right shoulder. Then we'll find
the left shoulder and attach it to the left. So we can even turn those off and
put them all the way to the bottom
and lock them up. We don't ever have to touch
those or look at them again. Let's see what happens if we select our torso
control and move it. Let's see what
happens. Look at that, shoulders move
with it perfectly. Next thing we're going to
want to do is because we want our wrists to follow
along with our arms. We're going to attach
our left wrist to left shoulder and right
wrist to right shoulder. Now the arm will move
perfectly with the body. Next thing we have
to do is as the, as the body turns to his left, the right arm will come
in front of the body. We're going to have
to actually key up some opacities to the arm. What we're going to do is we'll
serve with the right arm. We're going to serve with the right arm in the right hand. Where's our right
hand? There it is. These two, I'm going to
select them both duplicate. And then I'm going
to move this set above the torso and
the head as well. Now we have an arm
that's in front of the body. I'm going to hit T. On this one to bring
up the opacity. Now we have to think about this controller
in a certain way. If the controller here is the
neutral pose for the body, that means if we come all
the way to this direction, the controller would be here. Which means that our
arm would be off. We wouldn't see the
transparency at all. We're going to keep the
opacity there to zero. Then I'll come here to
our middle section, which means that our
controller here in the middle, neutral pose, the arm
would still be off. It would be behind the body, so I'm going to key it at zero. But then our next transition, which is this one right here, we want our arm to be visible. I'm going to go page down one into our next
key frame over. And I'm going to turn
it all the way up. This arm is going to be visible
all the way until we get, we have 12, then this last one, it's going to turn off again. Then right here at eight or
whatever years might be, we're have a key frame
with zero opacity. If we select these key frames, right click, toggle, hold. The next thing
that we have to do is select your body slider. We're going to come into Duck Basel or whatever
your Duc might be. Then we are going to use
this property tool to make sure properties here are the
ones from our body rotate. The next thing we do is we'll
select these key frames again and then we'll
connect to properties. Hopefully now as I rotate
this torso, there we go, Our arm transparencies
work great. Then we're going to have to
do that to the next arm. But before we do that, I'm going to hit on the hand and I'm just going to
parent or pick, whip the opacity of the hand
to the opacity of the arm. Now, I don't have to do
key frames or anything, it will automatically follow along with what
the arm is doing. Let's do this to the other arm. We'll have our right hand
come down to our left arm. That should actually be changed. Well, I'm here. I'm
going to do that. I'll just call this left hand. Now we're not confused. I'm going to duplicate
these and I'm going to pull them
up above the body. Now I'll hit on our left arm, we'll just follow along. This one is basically going to have the reverse of this one. As the controller is all
the way to the left, the arm will still be at zero. But as it comes up to
the next key frame, it will jump up to
100% visibility, all the way till we get to the middle frame where
it will turn back off. Then it will stay off
all the way through. Let's see, did that properly. So we'll select these. Right click, toggle, hold. Let's see what happens. I'm going to connect these two. Hopefully everything
should still be loaded from the last one. I'm just going to
connect the properties. Let's start spinning things
around and see how it works. All right, arm comes on, stays on to here, and
then it goes off. Perfect. All right,
look at that. That's simple. Now all we have
to do is hit on the hand, pick, whip the opacity
to the opacity. The next thing is
you're going to notice as the arm
comes in front, depending on the
style that you have, you might be okay with having this line come
across the shoulder. I am I want that gone. I'm not a fan of it, only
here on the front of the arm. What I'm going to
do is we are going to slow it so we can
see what we're doing. We're going to go in
here and we are going to trim paths on the
shoulder so we do not see. Called proximal upper. And what we're going to
do is with it selected, we'll click this little arrow to the side and we're going
to add a trim path. Let's see here. Possibly. Yeah.
Actually we'll do the start transition and
we'll go like, okay. Typically, I think
that it's okay to have a little bit of a higher
back side to the arm, but the front side,
I like lower. Let's see how that looks. There we go. I like that. As it transitions through, it will stay a small sleeve. Then here you can see the back side of the shoulder
breaks through a bit. Not necessarily what I want possibly a way
around that is maybe these arms could be
a little too high. Let's see if we take left
and right shoulders, move it down in the
touch that's too far. Maybe as we rotate our
body, that looks good. I actually want to see
also as the arm moves, how does this shoulder move? Perfect. Stays just
behind the collar. That's exactly what you want. This one feels a little funny. It feels like maybe the
arm is too far forward. If your arm is not tracking along with the body,
exactly how you would like. The way to fix that is we'll
have to go into the torso. You find the key frames
we are working on. The left arm, which would be, I think this keyframe here, you start, that was the wrong
arm. Let's try this one. You start moving your arm around until it gets to be
in the perfect position. I think that's pretty good. I like that one. Looks pretty good to me too. Let's see here as
it rotates forward. Okay, you can still see
the arm a little bit from the backside if it's really an issue,
something you could do. This kev opacity of these limbs. Again, it gets a little tricky because then you
have to think about, okay, when are these guys
switching on and off? In reality, it should be opposite of whatever
this one was. Where is it? If this one is off here, this
one would be on. If this one is off there,
this one would be on. Then if it goes on there, then this one would
go off off there. This one should be on. I have no idea if
that's going to work. Well, let's try it. Right click, toggle, hold and
connect properties. Let's just see what happens. Okay, It looks like
the arm went off, but let's see if it comes
back on when I go to here. Okay, and it goes back on. Let's just follow through
and see what happens. There we go, and it stays on. Okay, So that's a way around it. And then all you have
to do is hit T on this hand and then parent it. So hopefully that made sense. It gets tricky. I know I'm all in all I'm quite pleased with the way
that these are functioning. Again, if they're not quite
lining up perfectly for you, you'll have to go
into the torso, find your right and left
arm shoulder positions, and start to tweak those. Start to tweak them
just to get it perfect. Let me look at the other arm
just to see how it lines up. I'd like that if you
look at the right arm, you can see it lines up pretty nicely to the
back of the body. I'd like the left
arm to do the same. That means I may have
to move it back. If we come into torso, we select the left arm. I have to keep in mind that my controller has moved
in this direction, which means that
on the time line, I have to move forward
in this direction. If this is my neutral pose, this will be one over. I just want to push this back. Maybe two, That's good. I feel like it might break
through a little bit. Tap it forward just to touch
maybe a little bit more. Okay, let's try that.
And I'm going to, or I'm going to do a trim
path on this arm as well. We'll go contents
I'll find my limb. It's going to be
the upper group. And what did I say?
Proximal upper. Let's add a trim path. Let's go ahead, let me slow it so I can
see what I'm doing. Here we go bottom
being about a boom. Remember how I said, I like
the back to be a little higher than the front
right here offset. You can tweak it. What I'll do is I'll
keep tweaking it till, oh my gosh my mouse. That's good. Leave
it. Don't touch it. Okay, let's have a look. Oh, that looks great. Let's move forward
one more. Let's see. Again, I think that's too far. So if I come into the torso, if this is where I was before, I've moved forward
one transition state. I'm going to move this one
back now and move it back. One more click. Okay, Let's see how that animates, okay? It looks pretty
good. Looks great. I think right here, the
shoulder feels a little low. It would just probably take a little animation to fix that. But I think if the arm
ever came up like that, I'd like it to be a
little bit higher. Okay, that looks good enough. Now we have to do
the same thing. I haven't done that. We have to do the same
thing to the legs. Let's go ahead and create
two burner controls. So we're going to go
layer new null object. I'll call this one left hip. I'll duplicate it and
name this one right hip. Hitting P on the keyboard. We're going to select
the positions, right click and
separate dimensions. I'm going to pull
my torso tab up, then I will find my
left and right hip. That's right, we don't need
to separate dimensions, we're just right click,
unselect dimensions. Right hip, right hip, left hip. We'll pick whip to left hip. We'll pull our torso
tab back down. These two will turn off, we'll pull down and we'll
forget about them forever. Goodbye old friends. What we're going to do
now is find our hips. I have right hip, which will go to right hip, then I will find left hip
which will go to left hip. Now I'm going to parent
my ankle to the hips. Left ankle goes to left hip, right ankle goes to right hip. This just seems
to be the easiest solution we'll find out. Let's see what happens
when we rotate. Okay, oh perfect,
that looks so good. Now, the hips come way
too far on that side. I'm assuming they'll come way
too far on this side too, I'm not sure why that
happened, but we'll fix that. In the torso, what we need to do is we need to do
opacities for the legs, just like we did
for the arm as they transition in front of the body. Let's go ahead and
do that. Now I'm going to find one of my legs. We can just do this
in whatever order we like. It doesn't
really matter. Let's start with left leg, arm just straight up left leg. Then we're going to go ahead and do this the same exact way. I'm sorry, find those,
Duplicate them, and then bring them
up above the body, but below the arms. Now, right here at this neutral pose,
we'll turn them off. Key it now for this leg, remember as the body turns, or as the joystick
goes to the left, which would be backwards
on our time line, it's going to become visible. I'll turn this up to 100. And it will stay 100 up until it gets to this
first key frame. Then it will be turned
off the same here. It will stay off all
the way throughout. Then it'll key that. Then I can select
these key frames. Right click, toggle,
key frame hold. Then I'm going to, it looks
like I'm no longer selected. So make sure you select what
you're trying to connect to. You can do this eyedropper
to get the values loaded and then we can re select our opacities and we'll
connect them to properties. I'm going to go ahead and
put the foot here just so I can really see what's happening. Now let's rotate
this guy this way. Beautiful, beautiful, beautiful,
beautiful. And then off. And then it, well, we got to do the other legs. So let's go ahead and
do the other leg. Now, where's my legs? Here we go. Let's go ahead and push this
back to the center. We'll grab our legs. Duplicate, We'll
pull it up here. This one will be the opposite. Well, we know here in the
middle it's going to be off. We know that for effect, key it. Then as this one goes,
I'm on the foot. Let's go. All right, I know the leg, it's going to be off key as it goes to the right.
It's going to turn on. We'll come here forward
one, turn it up, then it'll stay on
up until it gets to the last keyframe.
We'll turn it off. This one will stay off all the way through. Then
we will key that. Select right click
keyframe hold. Then I'm going to
connect to properties. Now I can just take
my foot opacity and parent it to
the leg opacity. Now let's see if it works. Leg comes on, looks beautiful, then it comes back
and looks beautiful. All right, now that we're in this and I'm looking
at these legs, I have no idea why it
came out that far. Let's go ahead and see if we
can fix problems that we're having here at zero.
Where's that key frame? Yeah, that's the same key frame. Or maybe not. Yeah,
I'm confused. Okay. So basically what we're going to do is
we're just going to move this in and
see what we can do. That's just bizarre that that
happened. One more click. One more click in. Scrunch in on those butt cheeks. Okay, that looks better. Now let's move it
to the other side. Actually, before I go there, these key frames right
here also need to come in. I'll do maybe two clicks. Two clicks, let's see. Okay, that looks better now
we'll move to the other side. We'll go all the way over here. Come back into torso. These guys I think I
did four clicks in. Then we'll go four clicks in and then also come forward
one frame and I'll do, what was it two clicks
in or something? Let's just see. Okay,
those look good. Let's come over to this guy
that looks pretty good too. All right. We now have a body and limbs that
rotate beautifully. One thing that I would
like to have happen, this might just be its own separate tutorial trying
to figure it out, is I'd like for these feet to automatically
rotate with the body. But you know what,
I think it might be good to keep it
separate this way if we're ever having him walk
or do some separate pose, you have the flexibility to change those feet independently. Let's just keep it like that. We want to keep the flexibility. That's a good idea. All right, this is looking good. There is one more thing
I would like to do, actually, before we do that, we have to jump into the head, because this head is not
connected to the body. What we're going to
do is go into torso. Okay, here's our neck. What I would like to do
is get the rotation of this neck to attach to
the position of our head. As our head moves, the neck will rotate
to align with it. Let's find the head. Here it is. We're going to
come to Duke Basil and we're going to
click on this hand. Next we're going to find
this rotation controller because our head was selected it properly names it is head, which is very useful. The next thing we're going
to do is we're going to open up position, we're going to take torso, move it up in here and then we are come back into
character one. Then we're going to pick
whip the rotation of the neck to the
position of the head. Then things are
going to get wonky. Our neck is going to drop. It's going to get all crazy. But that's not all
we have to do. We'll fix that in just a second. But what we really need to do is the rotation of the neck. We have to get the speed right. What we're going to
do is we're going to open up our rotation expression. We're going to come
into this little bit of script here, Hit Enter, then we're going to do
shift eight to get a times, and we'll do 0.6 Let's
see how that does. Depending on your character, you might need to either
adjust that value up or down. Next what we're going
to do is we're going to select both of our neck layers, the front and the back. Then we're just going
to rotate them back up. Let's put them straight on into the middle.
Looking straight up. Now let's pull this
down and see what we did as we move our head. We haven't connected
our head to it. Okay. Now find your head and we are going to parent it
to our head control. Now when we move our head, we have a neck that moves
beautifully with it. Oh, that was perfect. Awesome. Just like that. We have rigged up our neck to
our head just so you know, there are some ways
that it can break if you pull the head off of the
neck, it doesn't stretch. I think that's really the
only way that it breaks. Obviously for me my neck breaks through the collar
which isn't great. Possible my neck
is not moving fast enough or I've just
pulled it down too far. Let me see if I can speed that
neck up just a little bit. Let's go back into torso and in order to
make it go faster, you go up on the value. Instead of 0.6 I'm going to try 0.8 That's going to
throw my neck all crazy. Before I rotate it back, I want to make sure that my
head is perfectly aligned, align it, come back
to the middle, then I'm going to just
zero out the rotation. It doesn't feel centered to me because it's not all right. I'm going to call that center. Okay, let's go back into torso, rotate back up and
cross our fingers. Let's see how it moves. Yeah, I think it moves. Okay, let's try the other side. I mean, that looks good enough. I'm just going to say
that's good enough. Okay, cool. So now we
have our neck rigged. What are some of the other
things that we want to do? I think I'm going to
call it quits for now. We'll clean up some of the
stuff in the next tutorial. As the body rotates, maybe what we'll do is we'll
trim paths on this leg so that we don't see that, we don't see the
top portion of it. We don't want to see
this little cap. I don't want to see it.
Maybe I'll do it now. Let's just go ahead,
come in here. This is going to be
the upper group. Is it proximal
upper? Yes, it is. We're going to add
trim path just like we did with the arm and
let's see what we can do. Oh, that is not what I want, let's see if we move
it above my shape. All right. So it's trimming my shape path,
maybe if I put it. All right, so that's it for
the connecting of the limbs. That's it for connecting
the limbs to the body. We have a body that
rotates in the limbs, move along with it. In the next tutorial, what we're going to do is we're going to go
ahead and clean up some of the mistakes that
we have within the rig. And we're going to do
some other things to the head so that as
it rotates backwards, the head will go behind the neck and we'll
have to figure out a solution for the layering
of the head, neck and hair. We'll clean all that up, then we'll keep
going from there. We're going to fine
tune it and tweak it. Let's get into that.
12. Step 10 - Clean up: Now we're going to
clean up our character. I'm going to go through
and any mistakes or small defects
that are happening. I'm just going to fix
them and clean them up. Now if your rig is
perfect, beautiful, and exactly how you want it, skip this. You don't
need to watch. But odds are if you followed me, you're going to
have some mistakes. Let's get into it and
clean up what we've done. I'm going to start from the
head and work my way down. Let's just look at
functionality just to make sure everything is flowing properly. Let's have a look, why can I
not grab this head rotate? All right. As the head rotates, that's all looking good. Transitions all look
good, in my opinion. Something that you're
probably going to want to do that I think I fixed, but I didn't mention it. When you go inside of your head and you start to get into the areas where you've masked
out the eyes, just make sure that your
mask is high enough to cover or to expand out past
your eyebrows this way. When the eyebrows move,
obviously they're not getting masks and
you don't see them. Just make sure that
those are high enough. Now, as far as the blink goes, as this comes down
and that looks good, I want to see something
with the eyebrows. I want to make sure that yeah, you see with the eyebrows, there's a little bit of coming
through that you can see. What I want to do is go
inside my eye composition. I think what I'm
going to have to do is duplicate the eye layer. We're going to have layer eight right now is masking out both the eye lids
and the eyebrow. But what we have to do is
I'm going to duplicate the eyes then instead of having both of
them on the same one, I'm going to put the eyebrow
mask to my new eye layer. This way what I can
do is I can now expand my eyebrow mask
to make it bigger. We won't see that
line coming through, which is from the eye lid. We're just going to expand
it outward until it covers up that eyelid now
should fix the problem. Just move it around until
you find one that works for you and everything else should
be functioning perfectly. I'll just zero out this blink. Another thing you can do with
the eyes is if you want, you can add a little
squash and stretch to the eyes just to give a
little more character. As the character blinks, I have this null object in here which actually has
the slider control on it. What I can do is select
all of my layers, just attach them to the blink. Then here on scale, what I'm going to do, let's see, I'll scale it here at 100. Then I'll come forward one frame and then I'll
squash this around. It doesn't have to be much. Maybe something
like that. Is that one Ones like maybe we'll go 95, maybe we'll do 90.12 Okay. Then you can select these. Let's go into
joysticks and sliders. Come to sliders, we're going
to attach it to the blink. Let's go ahead and lock it up. Now, when we come to have
our character blink, the eyes will squash down. They will open. That gives just a little bit of squash and stretch to make it feel a little bit
more squishy, right? You can exaggerate that as much or as little
as you'd like. Another thing, let's
see what we can do if I create a null object to
open up position. Then I move the eyes over here and then come into
my character comp. I'm going to find my
null P on the keyboard. Then I'm going to
parent or pick whip the position of that
new null to the blink. Now remember that's a burner
control here in the eyes. That control I just made is
now shot way off screen. But what I can do is, how
do I want to do this? I can attach eyelids to
this new null object. Now when I come to character, I can move this
and it's going to move my eyelids so that I can get more expression
out of my character. Just having a blink is nice
and that works pretty good. That doesn't give
you the ability to the eyelids up to make
them look really happy or to move them down
to make them look a little bit more sleepy, droopy, whatever it is. This is just a little bit
more flexibility to add into your character.
That's pretty cool. Let's see how the squash
and stretch works. Does still work?
Yes, it does cool. What else do we want to do? We have this mouth that's
looking really great. Another thing we can
do is as we cycle with our character left and right, if we come into this we can tweak the mouth a bit. You can also obviously change the mouth shape if you would like to give it more
of that three quarter. This is just a simple solution. I didn't really want to move
things around too much. Something you could do is
maybe move the teeth back a little bit to make it look like we're seeing more
of the inside of the mouth That could possibly give you more
of a three quarter look. Coming to this one, maybe what we could do is scale the mouth inward a
little bit like that, and then also move
the teeth back. That seems to look pretty cool. If you want to do
something like that, I think that's a good
solution as opposed to making a new mouth set for every head. Just go ahead and tweak
the one that you have. See, this one
actually broke out. That's not what you want scale. Let me see what I scaled
the other one at a 91. Let's scale it down
to nine, negative 90. Then we'll move it back
just a little bit. Here we go, and then
we'll grab the teeth. We move these back,
that should be it. Now as our characters
head moves around, it has a nice little
perspective shift on the teeth, which is cool, adds a little
bit more depth to it. Let's move down to the neck. I just want to make sure
everything is flowing properly. I think I'm going
to change the speed of my neck a little bit more. I think it's too fast. Let's come here,
maybe I'll try seven. See how that does
rotate my neck up. I'm not really sure why the
position of the neck is moving. Yeah, I don't know. All right, let's come in
and see how this works. Sure, that's good. Okay, I like that. Next, let's look
at our shoulders. See how they function
as the body rotates. That goes forward, comes around, and then back to zero. Now, all in all, it looks good. I think that this solder
moves out a little too far. Let me see what we can
do for our shoulders. That is his right
shoulder, right arm. And that's on this
key frame right here. Maybe I'll move it in one move. There we go. That
looks good to me. Let's move this back to center. I've given this a
lot of thought and there's no easy way to do this. Getting this head to
transition behind the neck, but also maintain the hair being in front of the
neck is a challenge. Unfortunately, there's
no easy solution. But I'm going to try to make
this as simple as possible, follow along, and let's get into it right above the torso. I'm going to duplicate a head layer and
move it up in front. I'm just going to rename this. Now that doesn't really do anything other than
rename the head layer. What we have to do is
come to this head layer, duplicate it, then we
can rename this one. Now holding Alt,
I'm going to drag this right over the hair
layer right on top. Now we'll switch out
for the new head. That being said, we
need to think about which head layers are going
to go in front of the hair. Now, the front of the face, it doesn't need, we don't
need the front of the face. We don't need the three quarter and we don't need the profile. I'm going to delete
all of those. The only three layers
that we actually need are the rear three quarter, the back of the head, and then the other rear
three quarter. I'm going to everything
in the middle that all we're left with is
this back three quarter, be a head back, head
right, three quarter, head left three quarter
and head back again, Starting with a head back. What I'm going to do is find
head back and I'm going to duplicate it and I'm going
to rename it hair back. Then selecting the head back
in my new hair composition, I'm going to click hair back and I'm going to replace them
by dropping it on top. Then I can go inside
and all I have to do is solo out the layers I need, which are the hair in the ears. You could even delete the
other layers if you need to. Going back into hair,
let's do head right, three quarter, let's find
head right three quarter. We're going to duplicate it. We're going to rename it
Hair right three quarter. Now I'm going to click,
drag and replace. When I come in here,
all I need are the ears and the hair. Everything else can
be muted or deleted. The last one we need is head left three
Quarterback, find it. Duplicate it, rename it, we'll call it hair Alt, Click, drag and replace. Now going inside, all we need again are the
ears and the hair. Everything else can go. Bye bye. I should mention though, keep all of your joysticks
and sliders control. Do not delete those
because those are still going to be powering
the head to rotate. Coming back into our character. One comp, I'm going to close. Some of these guys just
have too much. Step open. Here we are now you
can see what happens. The hair now covers up
the neck, all we see. The face on the other side of the neck and the hair on
the front side of the neck. Let's see what happens
when we move it and there we go again. Sorry, There's no
simple solution. That's really the easiest
thing that I can think of. Let's just double check
and make sure it works. Yes. The neck moves with
it smoothly behind it. There we go. We that
fixes the head problem. Another thing I want to do
is let's go into the torso. Before we go into
the torso, I want to show you what the problem is. Whenever I move my
torso up and down, everything squashes
and stretches nicely. The only thing that
doesn't is the head. I would like for the
head to move up and down with the torso as well. Maybe not a whole lot, but enough to see some movement. I want the head to be
moving a little bit. At least what I'm going to do is I'm
going to come in here, we'll do layer new null object. I will rename this one,
maybe he movement. I'm really just going
to eyeball this. Hit. Remember right here in the
middle is our neutral pose. All the way to the left
at zero is our pose. Maybe I'll do 23. Maybe I'll do four clicks. They'll come down to
the last key frame and we'll do maybe
four clicks down. Coming back into
this composition, if we were to simply
attach the position of the head rotation to
this, that wouldn't work. What I'm going to do is
we're going to create another burner null object. I'll call this one
head movement as well, just so we know. We'll open up the position
for this one move our torso and then
we will attach the position of character
one head movement to the position of our
torso head movement. Now when we come back
into character one, if we attach our head to the head movement is going
to mess up our neck. But I just want to see
if the head moves. Let's have a look now. It doesn't. Why is that? That's why. Oh my gosh. The reason that didn't
work is because we have to attach this movement
to our torso movement. With that selected, come
in and do it, Basil. We're going to
select the property here of this control
and go back into torso. Now we can connect it. It's been a long day now
with it connected, let's see, does it move? It's been a long day. I'm
going to cut all this out, call it head movement. So now that we have
that creative, what we're going to do is
select our torso control, make sure that the
properties are selected, and we'll come back
into the torso and select our key frames. Now instead of moving
on the X axis, which is not what we want, we want to move on the Y axis, select the y value, and then connect properties. Now coming back into
our character one, we can now parent our
head to head movement. That's going to mess up our
neck just a little bit. That is okay. I just
want to make sure that our head moves when
our torso moves. Now with our burn
of control made, we're going to move
torso up here. What we want to do inside of
character one is we want to parent our position to our
position within the torso, head movement position
in character one, parent head movement
position in torso. Now that they're connected, what we can do is go into
torso, find your key frames. Character one, make sure that your torso movement is selected. For this one, we are going to
be controlling the Y axis. We're not going to
be using the X axis, just the Y because we want
the up and down movement. Make sure the properties
are selected as well. Switch it back to Y.
Then here in torso, which you can do is
select your key frames and connect the properties. Now let's come back
to character one. What we can do is select our head and we are
going to parent it to the head movement. Now these guys are connected, it's going to throw your neck out of alignment,
but that's okay. I just want to make sure that the head is
moving with the torso, there it goes. It is moving now. That looks great. Perfect. All right, so what I'm going to do is go back in the torso, select your neck layers, We're just going to rotate
them back up again. Honestly, I have no clue why the neck keeps
moving back and forth. Is it makes no sense to me? I think maybe this squash and stretch might
be doing something, but I have no clue. Anyway, get your neck
back into position. Rotate it to be straight up. Let's look at our character. Let's make sure everything's
functioning properly. We have stretch,
we have a squash. The neck moves with the head, The head rotates
behind the neck. Beautiful. The last thing we need to
do is find your torso, select it, hit Y on the keyboard and we're going to
move the anchor point to right around where
the belly button is. For me it's going
to be right around where the belt buckle is. I think that should be good. Coming back into do it, click the hand and we're going
to create a control. I just want to attach the body. So you're going to
attach your torso, you're going to attach
a few other things. We'll attach the torso, we'll attach these hips
and the shoulders up to your torso. Oh, no. Now what we're going to
do is it's going to get a little hectic, but bear with me, what we're going to do is select our hips and we're going to
them from their controls. Hit none to remove at all. Now what we're going to do
is with the torso selected, we're going to come
up to Duke Basel. Click click the hand to Create Controls and we're going to click on
this guy right here. Now what we want to
do is take our torso. Is it just one? Yes, we can parent that to
the torso control. We also want to parent our. Let's do one more
thing. We're going to remove head movement from this. It's going to throw the neck
out of whack once again. And we're going to parent
head movement to torso. Now you can put head
back to head movement. And the reason we did that was because whenever you parent a control that has constraints in a
different composition, it's going to move
it somewhere else. When it moves it somewhere else, if your neck or your
head is attached to it, it's going to throw
your head over there with it and you'll never
be able to get it back. You have to disconnect those connections
and then you can reconnect them once
they're configured. Let me show you another example. And our hips currently, they don't have any controls, they don't have any parents. But when we come up here and
parent them to the torso, they're going to jump
somewhere else, somewhere new. When that happens,
if your shoulders and hips are connected to them, they're going to follow along and it's going to throw
everything out of whack. But now that we are done, what we can do is
we'll go left to left, right shoulder to right, left hip. You left hip. Oh, I'm sorry. Right hip and
then left hip to left hip. We'll fix that neck in a second, but I just want to make
sure that everything moves. Oh my God. Okay, it works. But what we have to do,
and this is the bummer, is we have to
disconnect our ankles. Unfortunately, the ankles
are following along, and that's not what we want. Now we have some movement here. The only problem is that
when we rotate our torso, the feet will not be
moving with it all in, all at the end of the day. That's not such a bad thing. It's not perfect,
it's not great. It just is what it is. You have to go through and
animate those separately. Let's go into the torso. Fix our neck once again. Sure enough, it's off center
for whatever God forsaken reason. There we go. We have a torso that
we can now rotate, give our character some
bending, bend, bend. One thing that we
might want to also do is disconnect the hands
from the shoulders. Doing this is going to
give us some more ability to animate our torso
separate from our hands. Let's say your character,
put their hands on a desk or they're holding a lawn mower or
whatever it might be. You can move the body
and the hands are going to stay put Again, you lose some of your ability to maintain that transition
with the body rotation. But honestly, that's
probably better because when you start animating a
character and you realize that you have to have their hands
planted for some reason, there's no way in the world
that you're going to be able to counter animate
your character turning. If I have my character here looking at something and
all of a sudden someone walks in and I want
them to turn and look. They can do that now. Whereas before they
would have done this and their hands would have slid off the desk again, you can automate certain things, but at the end of the day, they are not going
to be beneficial in the long run. Let's
just leave it at that. That way we can have some
mobility in the body to do things like bending
and rotating. That's going to be
more beneficial in the long run than having your hands connected.
All right guys. All in all, I believe that
the clean up is done. Last thing, I'm going to quickly remove this band
aid from his leg. He does not need
it. That's fine. The other leg, you do
not need a band aid. All right. Cool. All in all, I'm happy with this, we were able to accomplish all
of our clean up goals. Fixing the head,
attaching it to the body. What else do we do? That
was a different one. All right guys. That
was the clean up. Stay tuned for the next one
and the next editorial. I have a little
surprise for you. Let's get into it.
13. Bonus - Hips: All right, so I have a
little bonus pop quiz, special extra credit
tutorial for you. Now, at first I wasn't going to do this because I thought it would overcomplicate
things and I wanted to keep
things super simple. But after getting through it, I believe you guys can handle it. What we're going to do is we're going to create some hips. I'm going to create
a little control to make the hips rotate
back and forth. And I think it's going
to give us a lot of extra flexibility in our character and just make our character shine
that much more. Let's get into it.
The first thing that we have to do is going back into our
illustrator file. You can see we have a
character with a torso. And that's it, for
simplicity's sake, that's what I was going for. But now that we're here, let's go ahead and
we're going to name a new layer right
above the torso, and we'll call it hips. For me, this is a fix, super simple solution because I have this belt which
dissects my body perfectly. I can create some
really good hips. If you do not have this, let's say that you
didn't have a belt, you look something like this. Then what you would do is do the whole process
that I'm doing now. But instead of having
the hips on top, you're going to
have your hips on bottom below your shirt. Okay. Does that
make sense for me? Because my belt dissects everything. I'm just
going to keep it. You know what? Never mind. What I'm going to do is I was thinking that the
belt would rotate it. I don't think that's accurate. I'm going to select my hips
below the belt. All of them. Every single one,
even the butt crack. I'm going to copy it
and then delete it. Now on my hips layer, I'm going to hit control. Then I can move it
below the torso. Now I have separated hips, and this is perfect. This
is going to work great. Now what you can do is save this file and then it's
going to update your after effects and
we're going to lose the lower half of our
body for our character. Sorry buddy, you no
longer have a crotch. Then real simple,
all we have to do, it's not that complicated. Go into torso, we are going to duplicate the torso layer and we can move
this one behind it. Then we're going to
find our layers here. And we're going to
file, import file, find our character
one Adobe file. We're going to go until
we find our hips. Once you find hips, okay and
import now with torso two, seed and hip selected. We're going to a click and we're going to drag right on top, just like that,
our hips are back. If you come into the character, everything is going to functions the same way it did before, except we now have two layers. In order to get these
hips to rotate, what we're going to do
is create a null object. We're going to put it down here where the hips will rotate. And I just want to put
the hips onto this. And I want to see how
the rotation will work. Okay? You can see it breaks through. And this just means that
we will only be able to get a certain amount of
movement to the character. So we can only go so
far until it breaks. Let me just try something else. If I was to put the
hips above the torso, then if I was to select my belt, copy it, then delete it. When I put it here, then
obviously I would need to fix this so it's
below the belt. You have to remember the
way that rotations work best is when they rotate
around a perfect circle. If I could get a
perfect circle right here around my torso. Let's see what happens
when I turn the hips on. Yeah, it works. You can see
it breaks through right here. Which should be simple enough just to move the
hip over a little bit. Then if I turn this
off and move it over, okay, all of that is
lining up nicely. So let's see what happens when I merge these layers together. Okay, so this one and this one, we'll just flatten out. And I got to push
everything behind. Let's go and do the same thing. Push everything
behind the collar. Push it all behind the collars. Never mind this collar
needs to go behind. Okay, And then merge. Push it behind that far. All right, now we have this
nice circle to rotate around. Let's look at our hips, make sure everything
is lined up. We just want to
cover up the torso that's under there, finally. There we go. All right,
let's save that. Now let's see what happens
inside of torso if I take this like so now when I rotate my hips,
let's see what happens. All right, it breaks through
props to lower this. Yeah, that's a better solution. The problem is the point where the circle
is supposed to be, it's just not working out. What I need to do
is select these and go maybe just one click up. If this is where it rotates,
right here at the buckle, that's where you want your widest point of
your circle to be. That means for me,
if I select all of this and just do
shift up one, move, shift up one, shift up one, and shift one, save, Hopefully it should work
a little bit better. Let's look. Okay. Yeah, that works a
little bit better. You can see it breaks into
the torso a little bit, but all in all, we're
not trying to get like super jiggy with it. We don't need too much.
Just a little bit. Goes a long way Now with
that working out great, I'm going to call
this hip rotate. Then what I have to do is take our hips here and attach
it to the hip rotate. Now whenever I rotate this, the hips will move with it. Let's go ahead, come
back into character. They jump out of the screen. What do we need to do? We need to select our hips
from anything. We'll go hip. Remember this is left hip, right hip. We're
going to go none. Then we're going
to take these hips and put them to hip rotate. Next thing we need to do
is create a controller that can actually rotate
the hips separately. What I'm going to
do is hit scale. I'm going to scale this
one up, never mind. Let's come back into our icon and I'm going
to make this one bigger. Not 300, no way. Maybe I'll leave it at
100, then I'm going to I'll just do this. Rotate one, I'll click that, it's going
to put it right on top. What we can do is change
the color because this is confusing that. Let's go green. Then we can just parent
it to the torso. Whenever the torso moves, this control will move with it. Next thing we have
to do is let's try. Let's see if the
rotations stay the same. So if I move character up here, I'm going to rename this one. See hips. I'm going to open up the
rotation inside this torso. If I can put the rotation of this to the rotation of that, let's just see what happens. I really hope this. Oh,
thank God it works. All right. Finally
what we have to do now is come back to our hips. Left hip will come all
the way down to left hip. Right will come all the
way down to right hip. Now, when we rotate our
hips, nothing happens. Why didn't that work? These are moving, where's my hips get out here? Okay, here they are. Oh, it's because they're
attached to torso. This is probably
going to mess up. Well, let's see what happens. Let's attach it to hips. I hope nothing happened. Let's see what happens
when we rotate. Yes, Oh yes. Oh yes. We got the hips.
We got the hips. Okay, It looks a little funky. But, you know, depending on what we need to animate
and how we need to animate, this might just, again, we're not going for some
crazy hip movements, we just want some subtlety. I want to have the ability
to do that if I need to. Let's just make sure all of
our controls are working. Let's see what happens
when we do this. Okay? Yep, we go. I don't know what you're
going to need it for, that's for you to decide, but
now we have a hip rotation. I think that's it guys. This is really the
last thing I wanted to do was add the hips here. Now that we have it, I really can't think of
anything else to do. What you can do is
continue to define and redefine and make
new hand shapes, maybe new foot shapes,
whatever it might be. Or if you're done, go
animate and have fun. Thanks for watching guys.
It's been a lot of fun.
14. Call To Action: All right, now it's time
for actionable steps. We must appease the
skillshare gods and give you guys
something to do. Creating a rig is
not enough and now you have to actually apply
the skills you learned. What we're going to do
is create this rig to spin in 360 degrees. That was the goal of
this whole tutorial, was to give you a
functional rig, but it needed to
rotate 360 degrees. We're going to see how you did. We're going to animate it
and we're going to put it to the test.
Let's get into it. The first thing that we
have to do is we need to actually reset up some
of our character. We had taken the ankles and
the wrists, deselected them. They're not parented
to anything, we have to re parent
them to those hips. The ankles will go to
their corresponding hip. Left ankle, left hip, right ankle, right hip. It looks like my wrists
are already connected. Obviously, the reason for that is when we rotate our character, we want those limbs
to move with it. Now that those are
connected back up, you could do that
without connecting it. You would just have to animate
the feet and the hands. This way is just simple. Just for the sake of this course, we're
going to connect them. Now what we can do is we'll move our body joystick all
the way to the left. We'll key the position. Let's go forward. I don't
know, what do you think? Should we try 15? This
might be too long. Let's just try it. And
then I'm going to move it all the way to
the other side. Now when it rotates, I have to set something back up. When you guys weren't
watching, I tried something. I'm not a big fan
of how it turned out. Let me show you what I did. Instead of having the shoulders locked in position using
the toggle hold keyframe, I broke the toggle hold just to see if I could
get some rotation. It works. You can see here it in some instances
it might be okay, but the torso seems to be transitioning before
the shoulders are in place. It gets that nice movement
in the shoulders, but the torso, the alignment
is just not working. If I was to play around
with it a little more, I might be able to
find the sweet spot. But I'm just going to go back, I'm going to toggle hold my hip movements and then I'm going to
go back and toggle hold my exposition position. Not exposition. Okay,
those are back to normal for that detour. Let's get back on track. So I'm going to push this
all the way to the left, and then it will rotate beautifully to this
direction, back to the back. Let's just see what happens. I don't want full
screen, half resolution. Okay, So it comes around
and then starts over. Does that feel too fast? To be honest, I don't remember
what the last one was. Let's try it. 1 second, It might have been 1 second. Let's see how this spins. There it is, that looks better. Now, there's a little hold here. I think that's because there's like a little
bit too much slop here on this side. I'm going to move this
over right before it's about to jump into
the transition. And then I'm going to go
back one key frame now that clean up my spin so that there's not
a hold on the back. There we go. That feels better. Okay, now let's go ahead and do the same
thing to the head. I'm going to move it
over just before it transitions to the
next direction. There it is. And I'll go back. Hit P on the keyboard
key that frame, and then I'm going to move
it all the way to the right. Now, let's watch. All right, that's looking good. Now there's one more
thing I want to do to really clean it up and this is where it gets a
little bit tricky. The head is rotating
in this direction. What I'm going to do is
I'm going to key frame, maybe with an offset
here. Key that position. I'm going to come forward
right before it switches. That's only one frame for me. I'm going to leave that.
Let's try this now. I'm going to go forward,
right before it switches. Okay, there's where it switches. Now I'm going to
move this joystick. It's going the wrong
way. I'm sorry, guys. Okay, I'll move it on this side. When we're right here, the
joystick will be on this side. And we want the
head to look like it's rotating towards us. We'll move it that
way when we animate. We'll go forward to here.
We'll move it over. Then we'll do page down
to the next key frame. Let's select the key
frames we've made. We're going to copy
and paste them. Now as we move down, it's going to look like that
head is moving perfect. Now let's copy and paste
those. We'll paste it. It's right when the
head transitions. You put a key frame and then you move forward to right
before it transitions, and you put a keyframe, and that's where your
animation happens. Does that make sense? The head transitions Right here
I have a key frame, then the animation
of that joystick is going to happen up
until it transitions. Transitions here I'm going
to paste my animation again. Hopefully you can see
what's happening. All it's doing is adding just a slight subtle
movement to make it look like the head is
tracking in 360 degrees. There we go. It's very subtle. It's not going to give a
perfect rotation, but it's helping to
sell the effect. That's all we're doing is
trying to sell the effect. All right, here you can see it jumps before my key
frame is finished, I'm going to move this
keyframe over and then I'm going to paste
my new animation. There we go. We can paste
this one moves the other way. Now what I'm going to do
is move the key frame to the other side of the
controller, the joystick. And then as it moves
forward on the timeline, I'll have this
joystick move back the opposite direction,
it reverses here. Then we transition. I'm going to copy the key
frames I just made, and I'm going to paste them. And let's see. All right,
let's see how that looks. Now we dude, that head looks so good
rotating like that. You see the joystick
just going okay. So far, so good. The next thing we can do, you don't have to, you can
leave the arms down like that. But what I do is
in order to give them that pose look
like it's spinning, I'm going to move my arms out. Then you key the position. Key the other position as
it gets here to the middle. Now you want to pull the arms, you want to animate them, out the opposite direction. I pull this one out. You want to make sure the hands are relatively in the same spot, front to back as it turns. Let's see how they line up. It looks like the back position, they're a little
bit farther out. Let's push it out. Maybe one frame that looks good. Then right here,
back at the end. We're going to paste
our key frames. Now let's watch that,
see how it does. Okay, there's a bend in there that we
definitely don't want. I want these arms
to be straight. Let's see if maybe hitting
nine does anything. No. All right. I think what we need to
do is add a dip to it. We're going to pull this down. There we go. I'm going to
redirect this one back down. Remember we're using the convert vertex tools
to do the drop down. Get that little arrowhead. That should be good. Let's do the same thing to the other one. All we do is select this
first little anchor point. That's weird, come on. All right, maybe we need
to grab the other side. Let's grab this side. All right, that works, okay, and once you've broken
the connection, you can just hit V
on the keyboard. Pull it down. And I'm just
going to remove this one. I'll collapse that
back into itself. All right, let's
see if that helps. Yeah, I guess that works. It looks like he's maybe
flapping his arms a bit. I'm not sure. Maybe
I'll take the E's off. Just go back to
normal key frames. I think that looks a
little bit better. Okay, next thing
we're going to do is we're going to change
the hand positions. We'll rotate these
hands outward a bit. I'm going to key frame
this hand position because that's a good one we need under the same
thing on this side. Then hit you on your layer to expand the key
frames we've made. Then I'll move this way. As it rotates back
this direction, I think right here at
the jump, actually, I'm going to do the palm of
the hand on this back hand, I can see like the hand rotates. I'm just going to move forward. Is that the one I use?
Do I have a better one? I don't think I
have a better one. That one's pretty good, but
it's maybe a little too open. Let's let's try that one. Sure, That looks good. Okay. We didn't keep the rotation hold shift and hit R on both of them. Right here in the middle,
we'll the rotation. And then at the end, we'll rotate our hands
back out to match. Then with this one selected, all we can do is we'll copy, oh yeah, let's copy our rotation
to the first key frame. Make sure we do that. Now let's work on the transition
of this hand. What I want to do is
have these hand sliders. I want them to have
a toggle hold. It's not transitioning to different hand shapes
as it animates the right here where
it transitions, we're going to copy and paste that hand shape.
This one is done. Now let's work on the
other hand to get the hand shapes
working properly. This one I'll move to
there, it's looking good. We'll make sure that we
select all of our key frames. We're going to right
click and toggle hold. This is good. And then
it's going to transition. Maybe I'll have a
transition right there. Boom. So I'll move this
one forward. Nice. Where am I going to? Should I do it here? Let's
see how that looks. Wait a second.
Hmm, that's weird. Why is it transitioning? You shouldn't be doing that. Something strange is
happening. All right. I've just got a copying
paste that didn't work. I'm confused. Okay,
is this one wrong? Okay, so now we have
the hands set up. Another thing I can see is
I think it dips too far. So I'm going to ease
up on that little dip. We'll see how that does. All right, now let's
watch this rotation. All right, not too bad. Next thing we have to do is now we have to
animate the feet. So we don't have to worry about animating the
position of the feet. All we have to do is animate
the rotation of the foot. Think, starting off here in the middle, everything
looks good. I think I might try
this 1 ft at a time. I'm going to work
on the left foot. As this foot moves, I'll straighten that
out. There we go. I'm just going to
move forward to each transition of the body. And we'll see if we
can get this to look, right, there we go. And this will be maybe
the back of the foot. And then here will be the three quarterback, three
quarterback quarterback. Okay. Then we'll paste it there. Move forward to our
next transition, which is right there. I think this should be
a forward facing foot. There we go. Oh nice. That actually
transitioned for me, so I'm just going
to key that frame. I like that. It's like
doing all the work for me. I didn't change it. Nice. And then I'll move
this one here and what we can do is grab
all our key frames. Right click, toggle, hold. That one should be done. Oh, that looks so good. Okay, now let's do the same
thing to the next foot. We'll start here in the middle, I'm going to key the slider
frame thing, whatever. I'm going to move forward and start to animate this rotation. And I'm just going to keep going like I did on the last one. I can see using this as a reference where my
transitions are going to be, so that I can just jump
to that key frame. Move the foot into
position, oops, wrong foot. I'll jump here to 25, rotate it should I
do a three quarter. I guess this 13 quarter, I should one be straight. Should we put it here? Yeah, I want to pro would be straight. All right. And then I'm going
to come back to the front. I'll copy this keyframe here and then we'll
move forward one and this should go fote's the back foot. The next transition would be maybe sideways, three quarter. Let me see. Oh yeah,
there is a three quarter. All right, now this
one will be front. Then we're going to hit here and be back to where we start. So let's select
these right click. We'll toggle that hold
now let's watch it. Oh, that's looking great. All right, and
that's it. That is how I animate that rotation. Hopefully yours looks very
similar to this love. In the next thing
that we can do, because we actually have to create something
that we can share, and watch, and view, and
have everyone else love it. We're going to go
ahead and create a new composition.
Right down here. You can click this guy, It's going to bring
this up and we're going to call this whatever you want. I'm going to share
like subscribe. Then we can do, I can't remember anymore but is it 3 seconds? Does Instagram require 3
seconds or something like that? I can't remember. We're just
going to make it 3 seconds. I'm going to do it 1920 by 1080. That have to do a
scaled version, or a square version,
or a vertical version, We can use this one. But if you ever have to do a 16 by nine version and
you don't have it, this is a nice way to start. Okay, so now that we have
our composition set up, I'm going to bring my character
one which is rotating. I'm going to bring it into here. The problem is we only have
1 second what we can do. Before I get too deep into this, I'm going to go to 1 second. I'm going to all of my key frames go to 1
second. Now they do. Next thing I want to do
is hold Alt and click. I'm going to start
here just to make sure that what I'm doing
works on this one. We're going to type
this little expression called Loop Out. We're going to put it
there if you want, you can copy that
little code then. I'm just going to.
Yeah, it still works. Cool. Now what we're going to do is anywhere
we have key frames, we're going to hold
Alt, going to click. We're going to
come to the end of this little script and then hit Enter and then we
can paste our loop out. We'll do that for all
of our key frames. What this is going to do,
if you don't know already, is it's literally just going to loop all the animation
that we did for eternity. Which is helpful so that this one doesn't
have a key frame. Let's keep that now.
Let's try it again. Now when we go back
into our composition, that is a three second
long composition, the animation will continue for the entirety of that timeline. I accidentally got rid of that. All right, now
let's go back into our share subscribe play and make sure that it loops perfectly all the way through. Oh, I can see something's off. His head is shaken. Okay.
The feet look good, the body and the
hands look good. But that head is
not looking right. Let's come back to our
joysticks sliders, which is this one. Let's see, Maybe it's because I don't have a keyframe
here in the beginning. Yeah, that's probably
the problem. Okay. So I didn't
have a key frame, but now I've added it. Let's make sure we'll just
watch it one more time. Here we go. There it is. Okay. Now what we can do is we can make a nice pretty background. I'm going to use a shape
layer. Just make a rectangle. Pick a color that either matches
our character very well, contrasts our
character very well. Usually a nice,
solid, bright color, not too saturated, but nice and bright usually
works the best. Sure who doesn't look green. Another thing is right here, you want to make sure your
character is rasterized. We click that, it's going to slow down your program heavily. If you want to scale and move and adjust your
character here, I would turn that off, then I
would scale your character. And once your
character is exactly how you want them, then
you can turn that on. Another thing we can
do is right click. What we're going to maybe add
is not a glow but a light. We'll add a light,
we'll do inner shadow. Come on down into the
settings of inner shadow. We'll change this to white. Then we're going
to change multiply or the blending mode to overlay. Then here we can change
this light around. This is the distance
of the light, this is the angle of the light. I like to do 90 a lot of the times, but it's
really up to you. If you have a defined
light source, then you're good, then
the size is really just the fade of the light. For a cartoony style, you can put it down to zero. I'll put this distance
down to ten maybe, because it's Halloween time, or whenever you're
watching this, you could be watching
this at Valentine's Day. Why would I say that?
I don't know. Okay. We can make some
cool colors too. Let's see. Maybe not saturate color, just play around with it. Whatever works.
Whatever you like. Whatever fits your needs.
I don't like that. I'm going to go back
to white overlay. All right? I'm going to say
that looks good. I love it. One other thing you can
do to your character because we can
make a nice circle by holding control shift. We're going to click here at ph. We're going to do
radial gradient. We're going to pull
this little guy out and we're going to change
the adjustment settings. All right, for color, I'm going to make it white. White on both ends. Here in the middle, the
opacity will go to 100. And then at the end, the
opacity will be zero. Now when we click it
and we put it behind our character looks
like it's flowing. Another thing we
can do just to make it match our background
a little bit better, we can do an overlay. That's it's going to take
the background color and it's going to make our color
look like it's on top of it. That's why it warmed it up. We can also do ad, which is going to
really brighten it up. All these things are
doing is they're taking it from being just
like a white circle, and they're making the colors
interact with each other. This one might be good because it gets that
nice warm glow. The only problem is, it might
be a little bit too much. I'm going to change the opacity. Let's see what 60 looks like. I think we'll try
70, 75. All right? We can also increase
it if you'd like. Maybe with it being bigger, I'll try 60 again. All
right? I like that. Now let's hit play.
Let's watch what we got. All right, everything's
looking good. Head rotation, solid body
rotation, solid feet rotation. So got a background done Now all we have to do
is export this file. I'm going to go
ahead and make sure gradient rasterized
layers are on. One last thing I do need to do, I know for a fact
they're not selected. Make sure that everything
is continually rasterized. If it's not rasterized here, it's not going to
just automatically rasterize in your
next composition. Let's go into my
share, like subscribe. Now what we get to do is
here in your project files, we're going to find the composition that
we want to render. Select it, there's
two ways to do it. You can go composition
Add to render Q, then you can get your
settings, I do 264. You leave everything as is, and then you specify where
you would like it to go. Then you just hit Render
and it will do its thing. The only issue with that is when you're rendering
project and after effects, it locks up your program. You cannot use after effects, which is a bummer if you
have extra work to do. Another option is you find your composition
you want to render. Go to composition,
add to media encoder. Media encoder does
all the same work that after effects
does to render, but it does it in a
separate program. Which is very helpful because
then you no longer have to worry about your program being locked up for rendering. Sometimes renders can take
long hours or even days. I've had some long
renders before. Then here you can find
the codec that you need. Again, I do H 264. I always like to do match
source, medium bit rate. What that's going
to do is it's going to really compress the file. You're not going to lose
quality or clarity, but you're going to get a
much smaller file size. Then we can go and find
a nice place to save it. And then you hit Render. With that, your render will come out and it will look beautiful. And then you can share, you can tell your friends
about it and you can make skill share very happy
when this is done. I'm not going to make
you sit through it, but thanks for watching this
guys and onto the next part.
15. ThankYou: Congratulations, You did it. You finished the tutorial. You made it this far. Trust me, it was no easy task. I am beyond exhausted. This rig was a beast. It really was the ultimate rig. We laughed together,
we cried together. I feel like I lost some hair and went gray in the process. This was a challenge
even for me, and I've done this
rig many times. I just want to thank you from
the bottom of my heart for taking the time to
watch this video. It's because of your support, people like me and
others that create these videos that is progressing
the animation industry. I believe your ability to make a rig like this and
go out and create your own content is only making the animation
industry better. I want to thank you for your progress and thank you
for your support and effort. Now, you might have some
questions about the rig. Feel free to ask me anything and I'll try
my best to answer that. If you were even able to take one little piece of advice or technique from this
and throw the rest of it away, that
would make me happy. I just want to see you guys
take something out of this, turn it into
something incredible. And I can't wait to see
what you guys have created. So feel free to
share, like comment, ask questions, and I look forward to making
more tutorials with you. Thanks for watching, guys.
 Jared Freitag, Animation Supervisor